
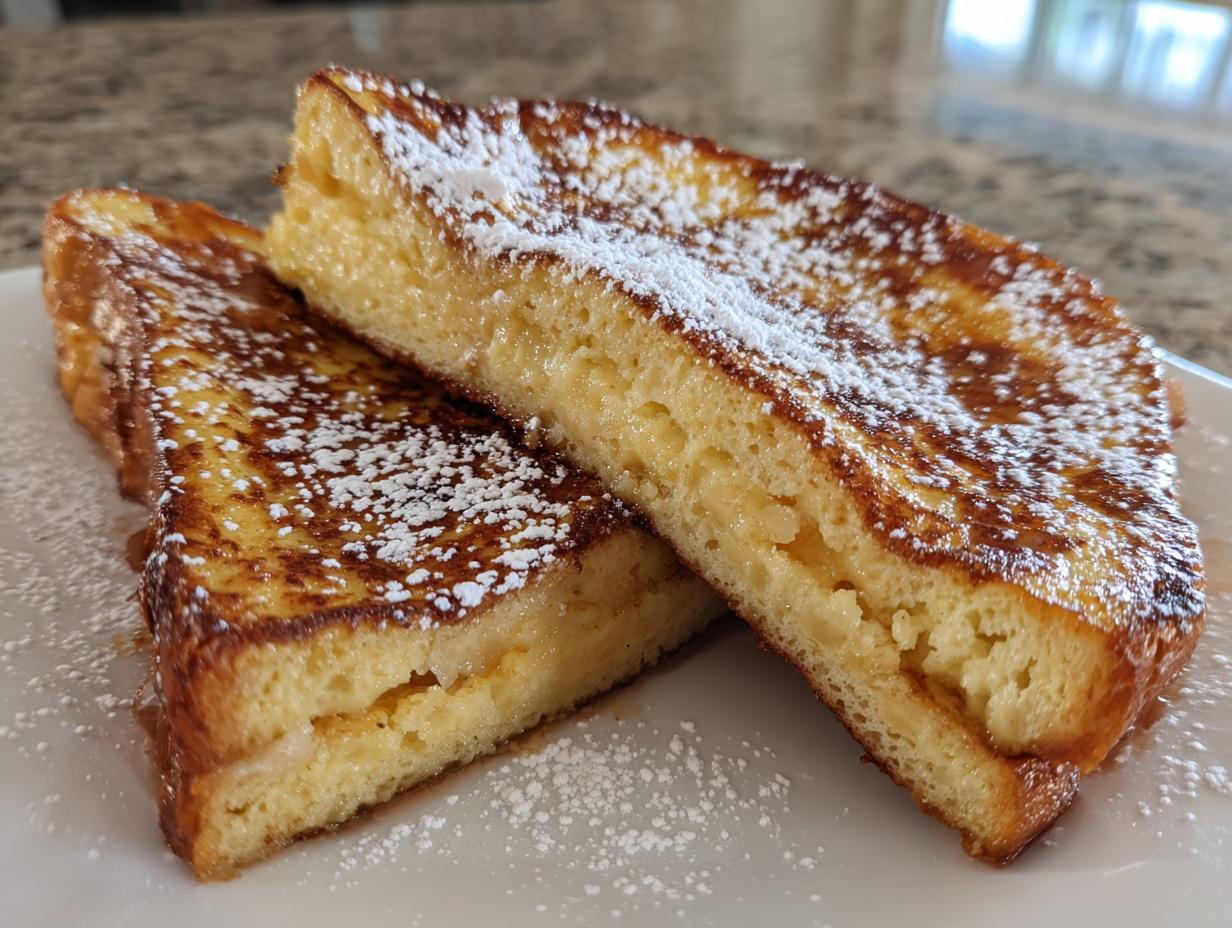
There’s nothing quite like the smell of a perfect breakfast filling the house, is there? I remember standing in Grandma Daisy’s kitchen, watching her flip those golden-brown slices. She made the kind of morning meal that stopped everything else outside the door. That’s what this recipe is about: the truly Ultimate Classic French Toast, hitting that magical sweet spot where the edges are wonderfully crisp and the center melts like custard in your mouth.
Forget soggy, sad bread! This isn’t your average quick-fix breakfast. My goal here is to give you the texture Grandma nailed every time. We are going deep into technique so you can conquer the world of homemade french toast this weekend. Trust me, once you master this batter ratio, you’ll never go back.
- Why This Classic French Toast Recipe is the Best
- Ingredients for Ultimate French Toast
- How to Make Easy Stovetop French Toast
- Tips for Success with Your French Toast
- Bread Choices for Elevated French Toast
- Serving Suggestions for Weekend Brunch Ideas
- Storage and Reheating Instructions for French Toast
- Frequently Asked Questions About Making French Toast
- Nutritional Estimates for This French Toast Recipe
- Share Your Perfect French Toast Experience
Why This Classic French Toast Recipe is the Best
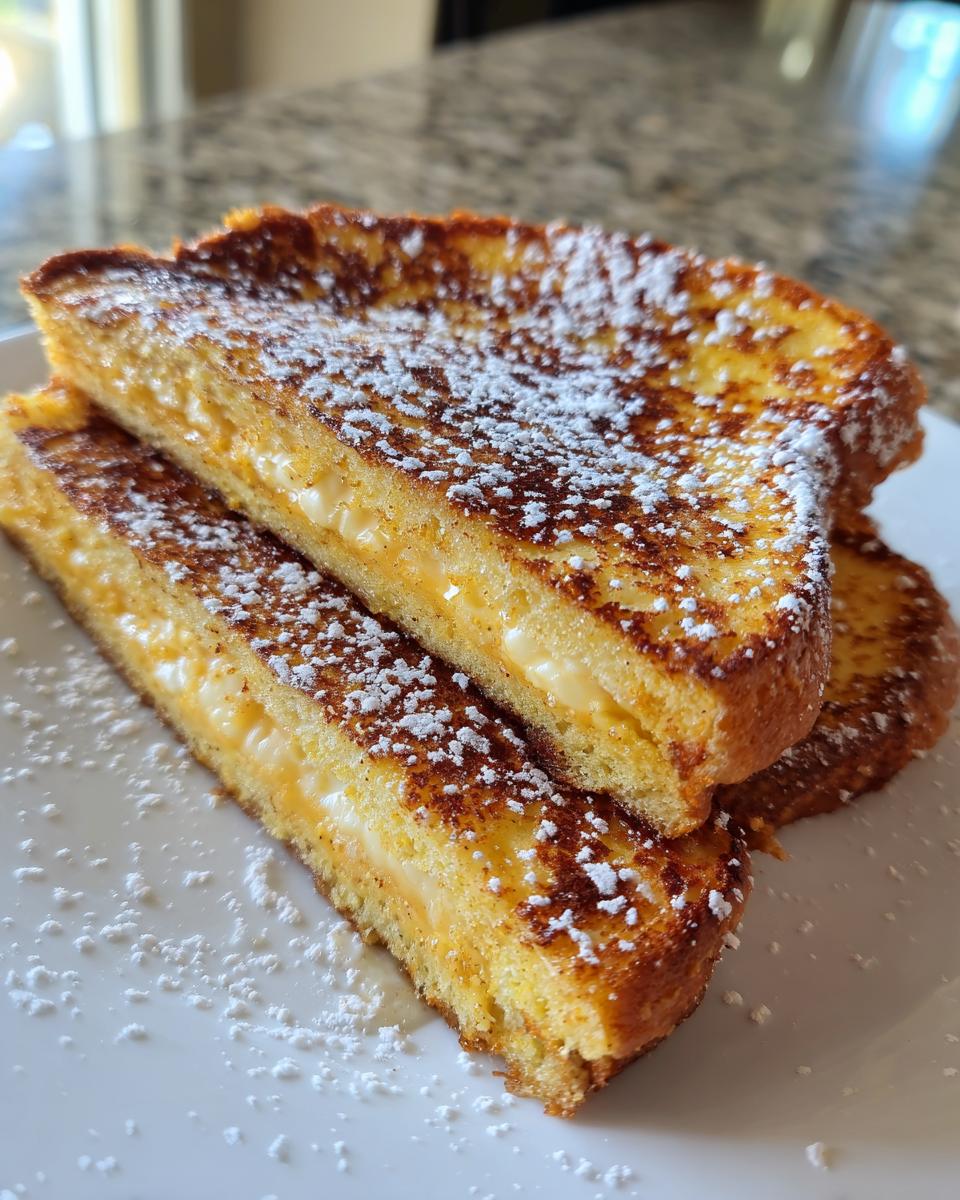
So many recipes get this wrong! They promise the moon but deliver a soggy mess, right? My biggest goal when taking down Grandma Daisy’s original method was keeping the integrity of the toast. We aren’t just making breakfast; we are aiming for the ultimate texture combination. This recipe guarantees Fluffy French Toast on the inside, without fail.
The key difference here is what happens when that custard hits the hot pan. We focus heavily on achieving those gorgeous, slightly shatteringly Crispy French Toast Edges that frame the soft center so beautifully. My grandmother used to say that good food has contrast! If you’re hungry for a proper brunch experience that feels both nostalgic and professional, this is your winner. Check out some other healthy breakfast ideas if you need a lighter option later!
Achieving the Custardy French Toast Center
That soft, melt-in-your-mouth interior is all about the liquid ratio. If you use just plain milk, it soaks through too fast, and you end up with warm bread pudding—not good! We add heavy cream because it slows down absorption and adds richness. That’s how you get the dreamy Custardy French Toast Center.
The rule of thumb is essential: dip fast. You only soak each side for about 15 to 20 seconds. Just long enough for the bread to drink up the egg and cream, but not long enough to start weeping at the edges. Slow and steady wins the race here!
Techniques for Perfect Caramelized French Toast
If you want that stunning, slightly shiny, buttery crust, you have to treat the cooking surface right. We always use real butter—don’t skimp here. But the real magic trick comes from the notes section of the original recipe card: a tiny sprinkle of granulated sugar directly onto the buttered griddle just before the bread lands.
This contact creates a quick flash of sugar that browns instantly, giving you that signature, addictive crunch. It’s the secret to truly Caramelized French Toast that shines, making every slice look irresistible on the plate. It’s so satisfying, much like the techniques explored in this great recipe as well!
Ingredients for Ultimate French Toast
Alright, let’s talk supplies! The success of amazing French toast really does start right here. I broke this list down so you can see exactly what needs to be waiting on your counter before you even start mixing. Remember, quality ingredients make a huge difference, especially the bread!
Here’s what you need to gather for a perfect batch:
- The Bread: 8 slices thick-cut bread (I’m pleading with you, try Brioche or Challah if you can find it! They hold up so much better.)
- The Custard Base: 4 large eggs
- For Richness: 1 cup whole milk AND 1/4 cup heavy cream (Don’t skip the cream, seriously!)
- Flavor Boosters: 1 teaspoon vanilla extract, 1/2 teaspoon ground cinnamon, and just a tiny pinch of ground nutmeg (it wakes everything up!)
- To Balance: A small pinch of salt (this prevents it from tasting flat)
- For Cooking: 2 tablespoons unsalted butter, divided (We need fat for that golden color!)
- Optional Goodies: Powdered sugar for dusting, and of course, your favorite maple syrup or fresh berries for serving.
Keep all these measured and ready to go near the stove. It makes the process so much smoother, trust me. When everything is set, you can move straight into making that beautiful batter!
How to Make Easy Stovetop French Toast
Now we get to the fun part! Making truly wonderful Easy Stovetop French Toast doesn’t mean you have to spend hours in the kitchen; it’s all about managing the heat and the soak time correctly. You’ll see how quickly this comes together. Once your custard—or batter—is mixed, you need to move with purpose to get that perfect crust and fluffy interior. We’re focusing on simple, yet masterful, stovetop cooking here.
If you’re looking for a completely hands-off approach for next time, check out my guide on sheet pan pancakes, but for this classic style, the griddle is where the action is!
Mixing the Best French Toast Batter
First things first: the custard needs to be completely uniform. Grab a shallow dish—way easier for dipping than a deep bowl! Whisk those eggs, milk, cream, spice blend, and vanilla until everything is totally combined. You don’t want any streaks of plain egg white floating around. We are aiming for a perfectly smooth, pale yellow liquid—that’s how you know you’ve achieved the structural foundation for the Best French Toast Batter.
Soaking Technique for Perfect French Toast
This step separates the good from the great! Remember how I said we add cream to slow absorption? Now we put it to work. Take your thick slice of bread and dip it in. Flip it quickly. My rule is 15 to 20 seconds total—maybe 10 seconds per side, maximum. If you let it sit there until it feels totally waterlogged, you are guaranteed a mushy center. We just want surface absorption for that future custardy center!
Griddling for Golden Brown French Toast
Heat management is everything. Get your skillet or griddle to medium heat, add the butter, and let it melt until it’s foamy. Too low, and the bread just steams and gets tough. Too hot, and you burn the outside before the inside sets. Lay your soaked slices down gently, ensuring they aren’t touching—give them room to breathe and crisp up!
Cook them for about 3 to 4 minutes on that first side. Look for that deep gold color, where the edges start to look slightly darker and crunchy. Flip carefully and cook the second side until you have perfectly Golden Brown French Toast all over. If your bread is browning too fast, just dial the heat down a tiny bit and keep going. Get more tips on achieving perfection from this great resource!
Tips for Success with Your French Toast
I always say the notes on the recipe card are where the real secrets hide, and that’s absolutely true for this French Toast!
First, if you can manage it, don’t use perfectly fresh bread. Day-old or slightly stale bread is your best friend—it’s thirsty! It soaks up that great custard mixture without melting into a soupy mess, which is crucial for great texture.
And remember that trick for those amazing, crunchy bits? If you want that true caramelized crust, sprinkle just a *tiny* bit of white sugar right onto the melted butter on the hot griddle just before you place the soaked bread down. Wow, the smell alone is worth it! This is a great hack for those of us looking for quick weeknight treats, too, even if it feels indulgent right now.
Finally, if you’re making this for a big weekend brunch and feeding a crowd, don’t just stack them! Keep the finished slices warm in a single layer on a baking sheet placed inside a low oven (around 200°F). That way, everyone gets perfectly hot, crispy-edged toast. Check out the definitive guide over at Bite Season for even more expert motivation!
Bread Choices for Elevated French Toast
We talked a little about bread back in the ingredients list, but I need to spend a minute emphasizing this because it’s non-negotiable for truly excellent French Toast. You can press the batter ratio perfectly, but if you use boring, thin white bread, you’re going to end up disappointed.
For this recipe to truly shine—to get that satisfying structural integrity for the Thick Cut French Toast experience—you need sturdy bread. That’s why I always push for Brioche or Challah if you can get your hands on it. These breads are rich in fat and eggs already, meaning the finished product is automatically more decadent.
The thickness is the secret weapon here. Thick slices let the outside get golden and crispy while the middle has plenty of surface area to absorb the custard and become genuinely soft and creamy. Think of it as building a magnificent, sturdy sandwich that melts in your mouth!
Using Slightly Stale Bread
This might sound backward, but please try not to use bread straight out of the bag. Bread that’s a day or two old—slightly stale—is porous and thirsty! It grabs onto that luxurious egg and cream mixture without collapsing under the weight of the liquid. It’s this perfect balance of dry structure meeting wet custard that locks in the fluffiness when it hits the heat.
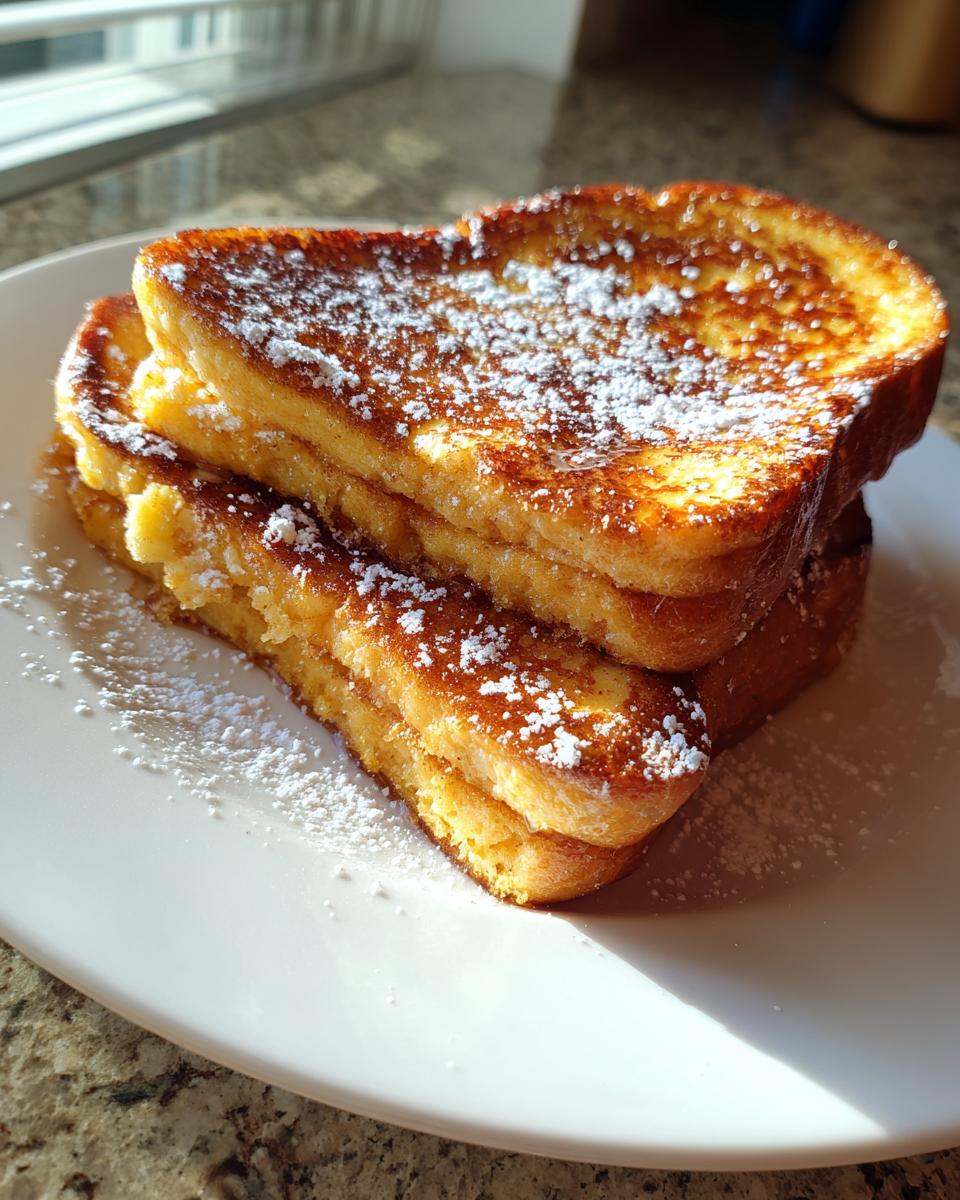
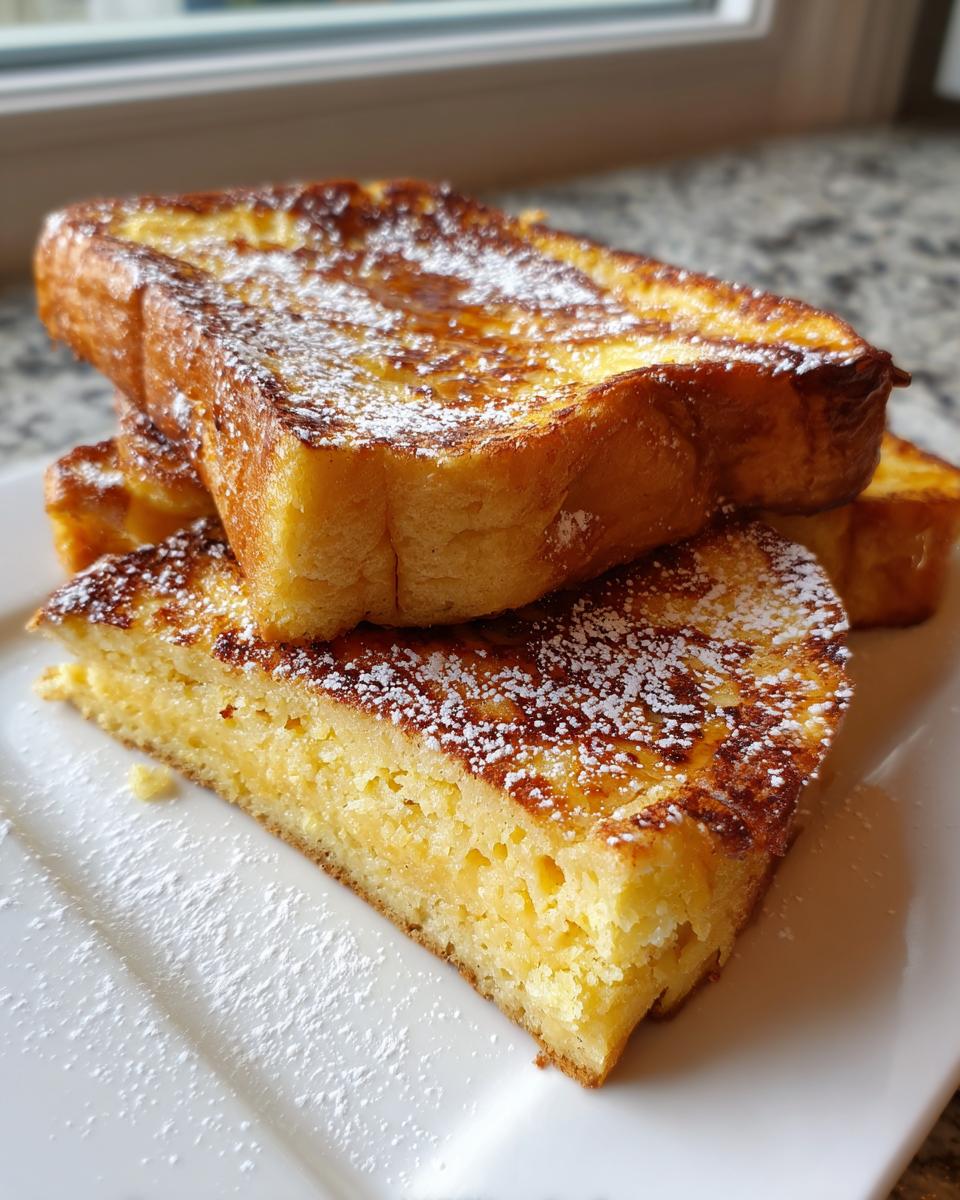
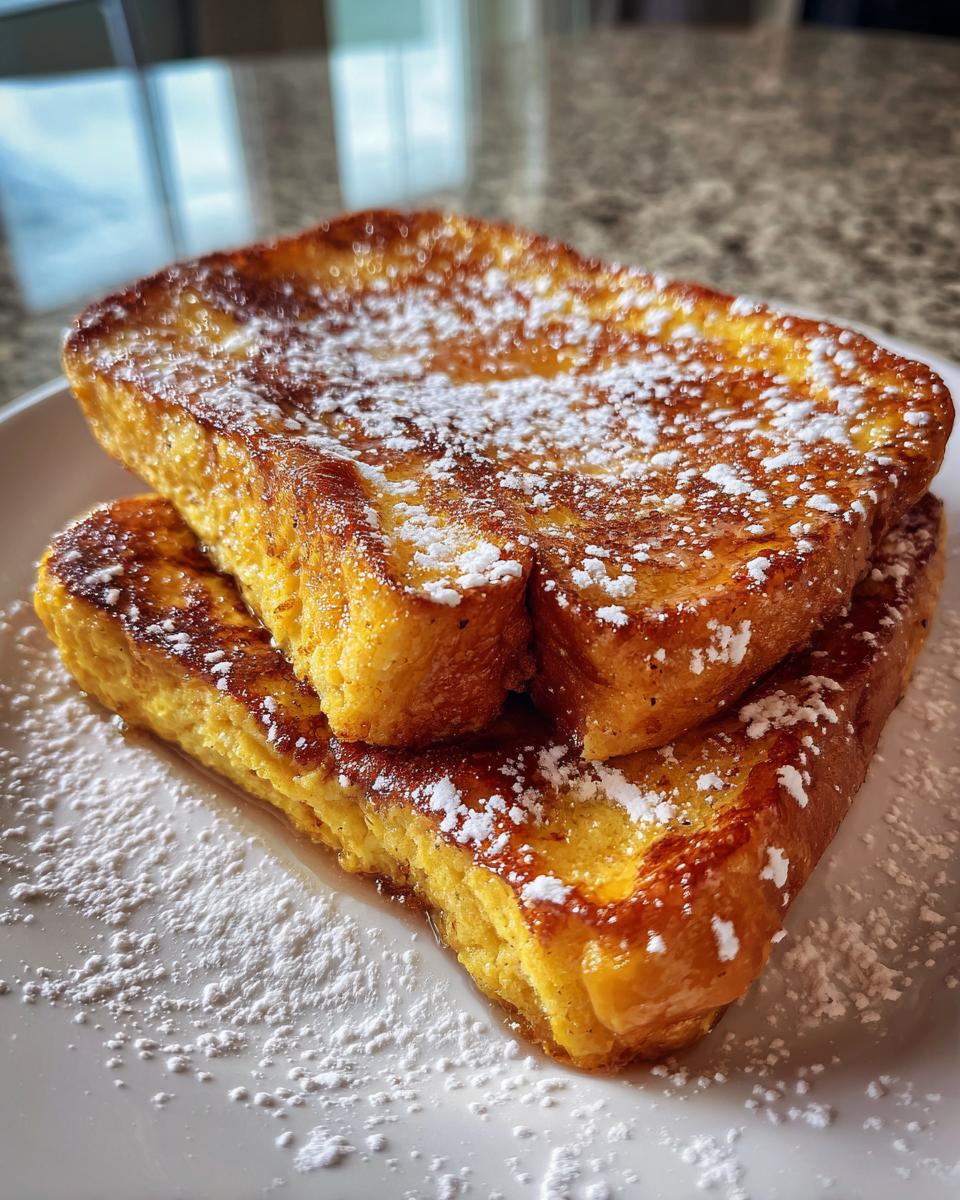
Serving Suggestions for Weekend Brunch Ideas
Okay, your French toast is cooked perfectly—golden, crispy edges, custardy middle. Now what? This is where you turn a great breakfast into a legendary Weekend Brunch Idea! Presentation matters, especially when you’ve worked hard on the cooking technique. I like to keep things simple but impactful.
The absolute must-have topping, in my book, is a heavy dusting of powdered sugar. It looks elegant and catches the light beautifully. Then, a fresh pitcher of real maple syrup, warmed just slightly. The warmth helps the syrup melt beautifully into the crevices.
For those extra touches that scream Indulgent Breakfast Treats, always add some fresh color. I usually whip up a quick bowl of mixed berries—strawberries, blueberries, maybe some raspberries if they are in season. The slight tartness cuts through the richness of the cream and butter in the bread perfectly. If you’re feeling really fancy, sometimes I’ll mix a little whipped cream cheese with a touch of maple syrup for a creamy dollop, similar to a quick ricotta toast idea you might find over here!
Remember, this is a moment to slow down, so don’t rush serving. Arrange those slices nicely on a big platter and let your family or friends admire your work before they dig in!
Storage and Reheating Instructions for French Toast
Even the best French toast sometimes brings too much goodness—or maybe the family just wants seconds the next day! Don’t let leftovers go to waste. This is one of those wonderful Family Breakfast Favorites that reheats surprisingly well if you handle it right.
The key word here is MOISTURE. Microwaves are the enemy of texture; they turn perfectly crisp edges into rubbery sponges. So, toss out that idea immediately!
Storing Leftovers Safely
When you have cooled leftovers, place them in a sturdy, airtight container. It’s a good idea to put a paper towel at the bottom of the container first. This little bit of paper helps catch any condensation that might form overnight, which keeps the bottom slices from getting prematurely soggy.
If you need to stack them, place a small square of parchment or wax paper between each slice. This stops them from sticking together in one giant, delicious block. You can pop these leftovers right into the fridge for about three to four days.
Reheating for Crispy French Toast Edges
To bring those glorious edges back to life, the oven is your best friend. Preheat your oven to 350°F (about 175°C). Lay the slices out in a single layer on a baking sheet lined with foil or parchment paper. Don’t overlap them!
Pop them in for about 8 to 10 minutes. This gentle, dry heat warms the interior (bringing back that custardy feel) while simultaneously drying out the surface just enough to restore that satisfying, subtle crispness around the edges. They usually come out tasting nearly as good as fresh!
Quick Fixes for a Single Serving
If you just have one slice that needs eating *right now*, you can use a toaster oven or a dry skillet. Heat the skillet over medium-low heat—no extra butter needed unless they look pale—and toast each side for just a minute or two until warm and slightly firm again. It’s much faster than the oven, though maybe not quite as evenly perfect.
Frequently Asked Questions About Making French Toast
I get so many wonderful messages asking about tweaking things, and that’s fantastic! It means you’re experimenting, and that’s exactly what cooking is all about. Here are the questions I hear most often when folks are trying to master their own French Toast game. If you have more questions, don’t hesitate to reach out to me on the contact page!
Can I use regular sandwich bread for french toast?
You absolutely can! Life happens, and sometimes you just need breakfast fast. However, if you can swing it, always aim for thick-cut bread, like Brioche or Challah, or at least bread that’s a day old. Regular thin sandwich bread will soak up that rich custard almost instantly, which is why people often end up with mushy results. If you only have thin slices, watch your dipping time like a hawk—maybe only 5 seconds per side! Trust me, the extra sturdiness of a thicker slice is what delivers that wonderfully Fluffy French Toast interior we are aiming for.
What is the best way to make french toast for a crowd?
Stove-top cooking is lovely for a small family, but trying to keep up with demand for a crowd can ruin your energy for the day! For French Toast for a Crowd, definitely use the oven warming trick I mentioned in the tips section. Cook the first few batches, put them on a baking sheet in a 200°F oven, and they stay beautifully hot and fresh while you work the rest. Since this recipe focuses on the stovetop, if you want a method where you cook it all at once, you might want to look into a dedicated Baked French Toast Recipe next time you have a huge brunch planned!
Can I add vanilla or other spices to my french toast batter?
Oh, please do! You have to customize it to your taste. Vanilla is almost mandatory for me; it just brightens up the eggs. Cinnamon is a classic addition, and that’s in our ultimate recipe! But if you *really* want to deepen the flavor profile—and this is a small trick I picked up—a tiny grating of nutmeg makes a huge difference. It works with the cinnamon to give you that cozy, warm flavor that makes people ask, “What is your secret? This is the best Cinnamon French Toast I’ve ever had!”
Nutritional Estimates for This French Toast Recipe
Now, I know some of you are tracking macros and keeping tabs on what goes into the morning fuel, and some of you just want to skip ahead to the syrup! Either way, I always like to provide an estimate for transparency. Keep in mind, this is just a general guide based on the recipe listed above, particularly using whole milk and standard brioche.
If you swap out whole milk for skim, or use sourdough instead of brioche, those numbers are definitely going to shift. Treat this as a helpful baseline rather than a medical promise, okay?
Here is what you can generally expect per serving (which equals 2 slices of this glorious treat):
- Serving Size: 2 slices
- Calories: 350
- Sugar: 18g
- Sodium: 320mg
- Fat: 16g
- Saturated Fat: 8g
- Unsaturated Fat: 8g
- Trans Fat: 0.5g
- Carbohydrates: 38g
- Fiber: 2g
- Protein: 14g
- Cholesterol: 180mg
If you’re interested in how we handle your information and data privacy while you’re browsing my kitchen secrets, you can read through my Privacy Policy. Enjoy your indulgence, and don’t worry too much about the numbers—breakfast this good deserves to be savored!
Share Your Perfect French Toast Experience
Well, that’s it! We’ve gone from soggy sadness to golden, custardy glory. I truly hope you’ve found the secrets here to elevate your morning routine. Now that you’ve made the Ultimate Classic French Toast, I would absolutely love to hear about it!
Don’t keep all that deliciousness to yourself! Please take a moment to leave a rating for this recipe—I aim for five stars, and I’m so proud of how this turned out, I think you will too!
When you comment below, tell me everything! Did you manage to get that perfect sugar caramelization on the edges? What topping did you choose? Were you a maple syrup purist, or did you go wild with whipped cream and berries?
This recipe is a legacy in my kitchen, and I want it to be a treasured piece of kitchen wisdom in yours too. Knowing that you and your family are enjoying these moments around the table makes all the testing and teaching worthwhile. I always love reading your adventures! If you want to know more about my journey bringing Daisy’s Recipes to life, you can check out my About page.
Happy cooking, and enjoy that perfect breakfast!
PrintThe Ultimate Classic French Toast: Crispy Edges and Custardy Center

Follow this simple recipe to create the best French toast, featuring perfectly golden, crispy edges and a soft, rich, custardy center. This classic breakfast is ideal for weekend brunch or a special weekday treat.
- Prep Time: 10 min
- Cook Time: 15 min
- Total Time: 25 min
- Yield: 4 servings 1x
- Category: Breakfast
- Method: Stovetop Griddling
- Cuisine: American
- Diet: Vegetarian
Ingredients
- 8 slices thick-cut bread (Brioche or Challah recommended)
- 4 large eggs
- 1 cup whole milk
- 1/4 cup heavy cream
- 1 teaspoon vanilla extract
- 1/2 teaspoon ground cinnamon
- 1/8 teaspoon ground nutmeg
- Pinch of salt
- 2 tablespoons unsalted butter, for cooking
- Optional: Powdered sugar, maple syrup, fresh berries for serving
Instructions
- Prepare the custard mixture: In a shallow dish, whisk together the eggs, milk, heavy cream, vanilla extract, cinnamon, nutmeg, and salt until fully combined.
- Heat a large griddle or non-stick skillet over medium heat. Add half of the butter and let it melt until foamy.
- Dip each slice of bread fully into the custard mixture. Let each side soak for about 15 to 20 seconds. For thicker bread, you may soak slightly longer, but avoid letting the bread become completely saturated and soggy.
- Place the soaked bread onto the hot griddle, ensuring slices do not touch.
- Cook for 3 to 4 minutes per side until the French toast is golden brown and the edges begin to caramelize slightly. Adjust heat as needed to prevent burning while allowing the center to cook through.
- Transfer cooked French toast to a serving plate. Repeat the process with the remaining butter and bread slices.
- Serve immediately dusted with powdered sugar and your choice of maple syrup or fresh fruit.
Notes
- Using slightly stale or day-old bread helps the slices absorb the custard without falling apart, leading to a better texture.
- For an indulgent, caramelized crust, sprinkle a tiny amount of granulated sugar directly onto the buttered griddle just before placing the soaked bread down.
- This recipe works well for feeding a crowd; keep finished slices warm in a single layer on a baking sheet in a 200°F oven while you finish the rest.
Nutrition
- Serving Size: 2 slices
- Calories: 350
- Sugar: 18g
- Sodium: 320mg
- Fat: 16g
- Saturated Fat: 8g
- Unsaturated Fat: 8g
- Trans Fat: 0.5g
- Carbohydrates: 38g
- Fiber: 2g
- Protein: 14g
- Cholesterol: 180mg