
Oh, the sheer magic of chocolate meeting peanut butter! Honestly, if you ask me what the perfect indulgence is, it has to be that sweet and salty combination baked into something rich and chewy. I remember when I first started trying to recapture that feeling of home baking again, after getting caught up in city life. I wanted something simple, comforting, but intensely satisfying. That’s how I landed on perfecting these peanut butter swirl brownies.
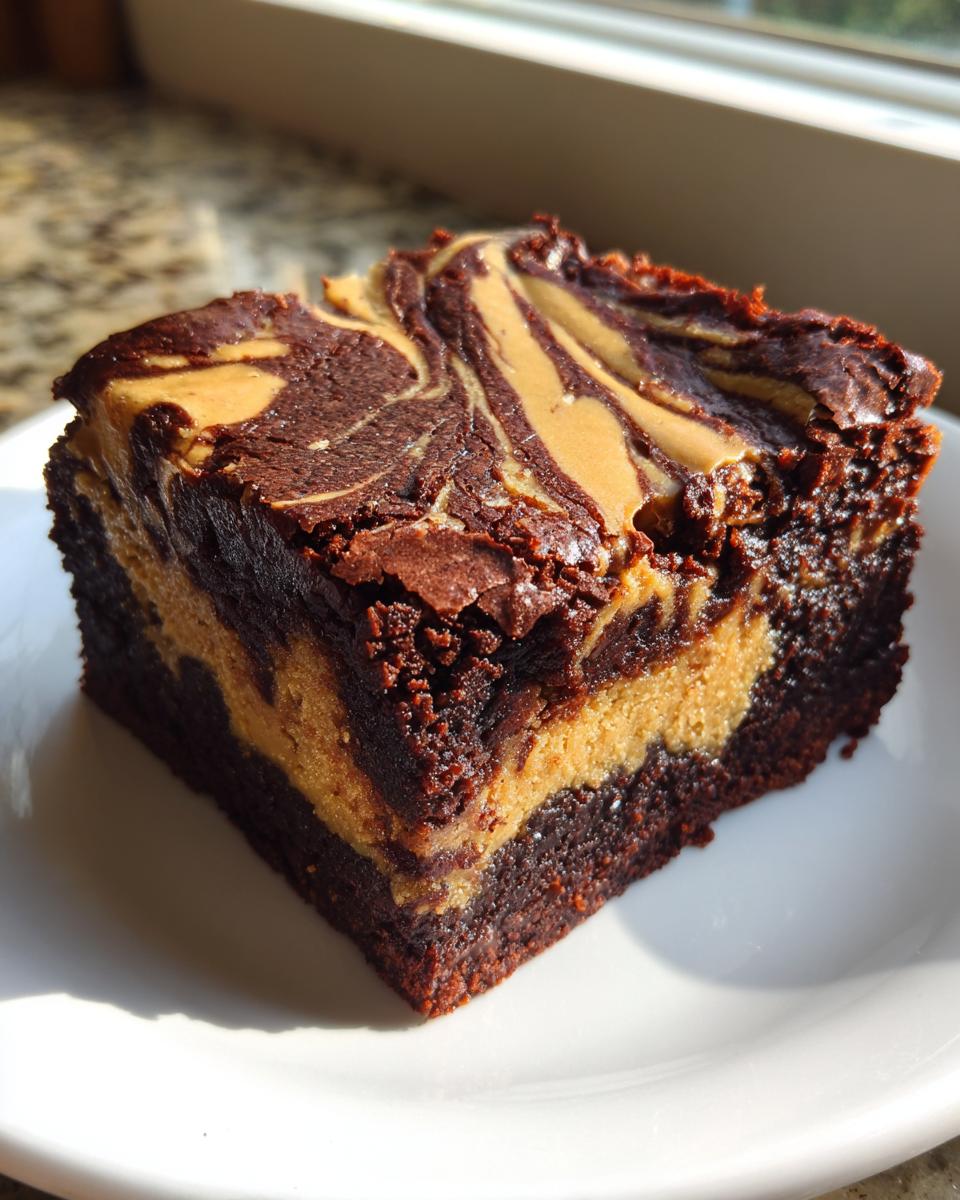
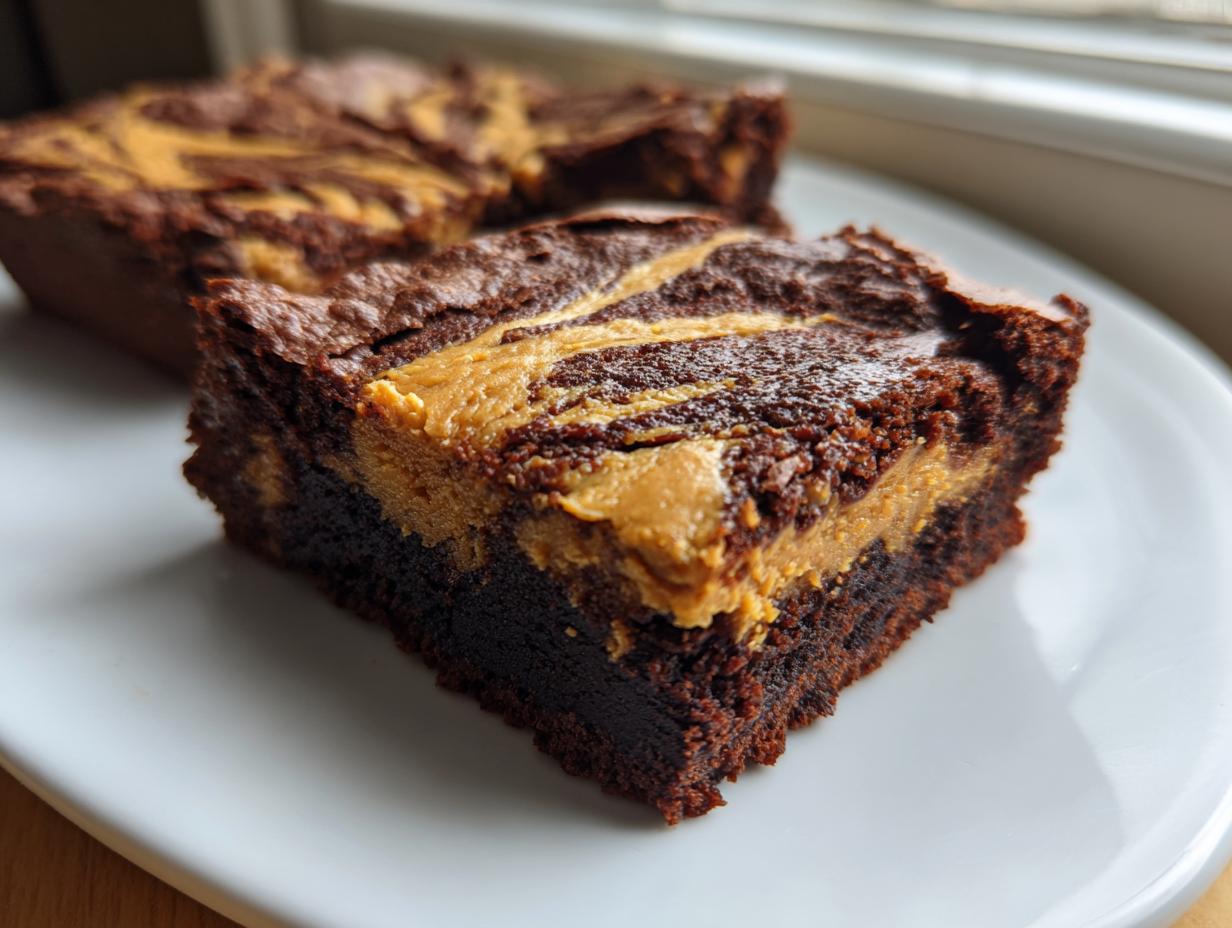
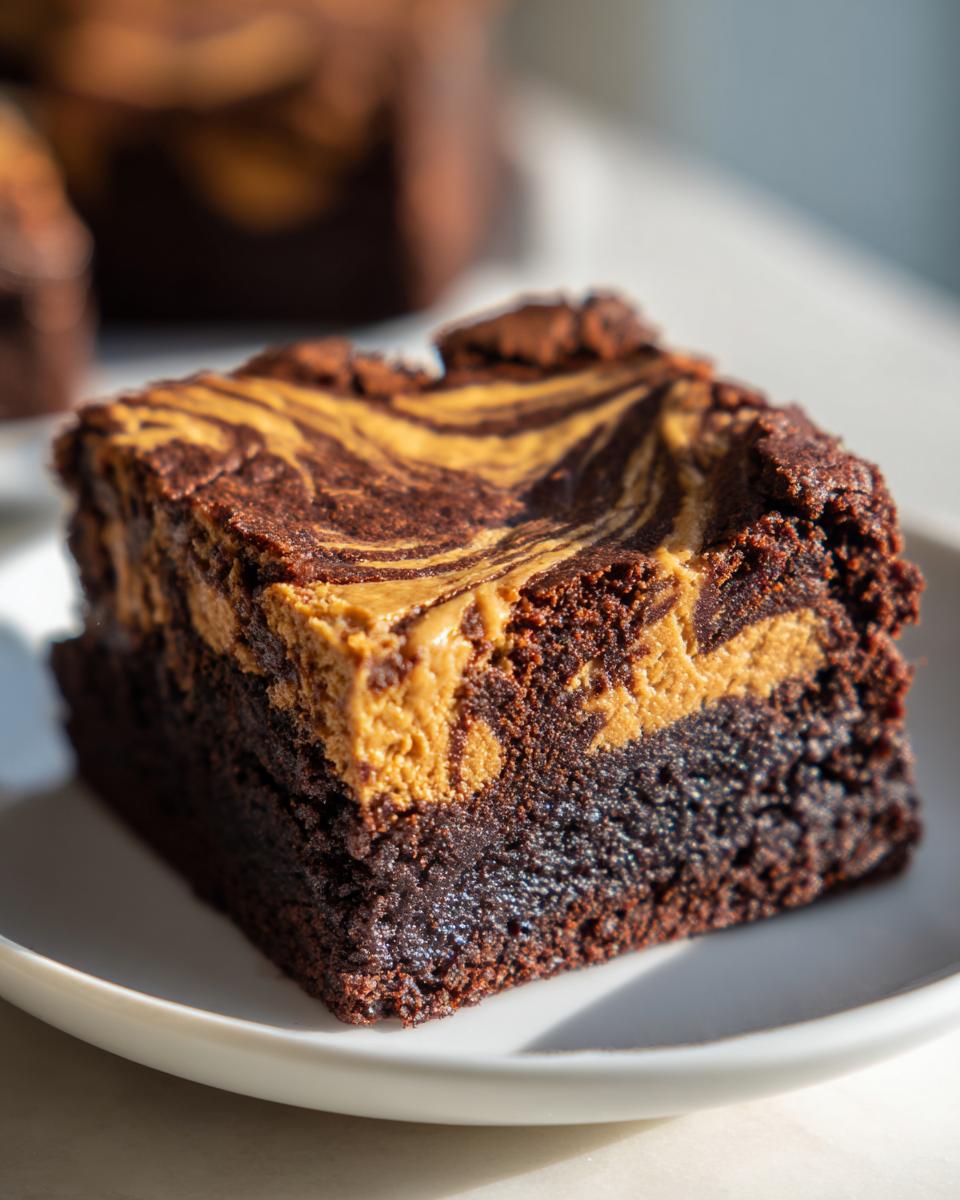
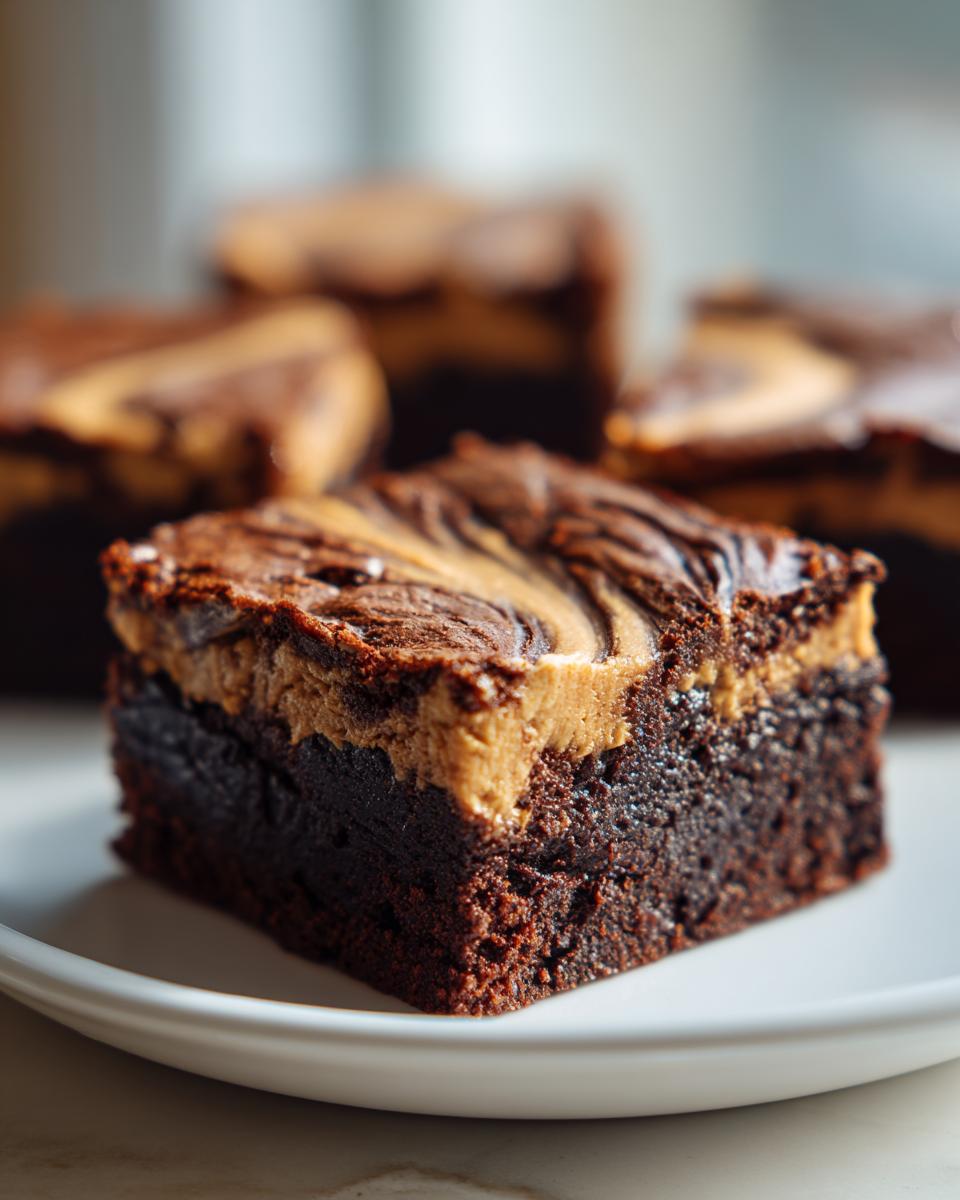
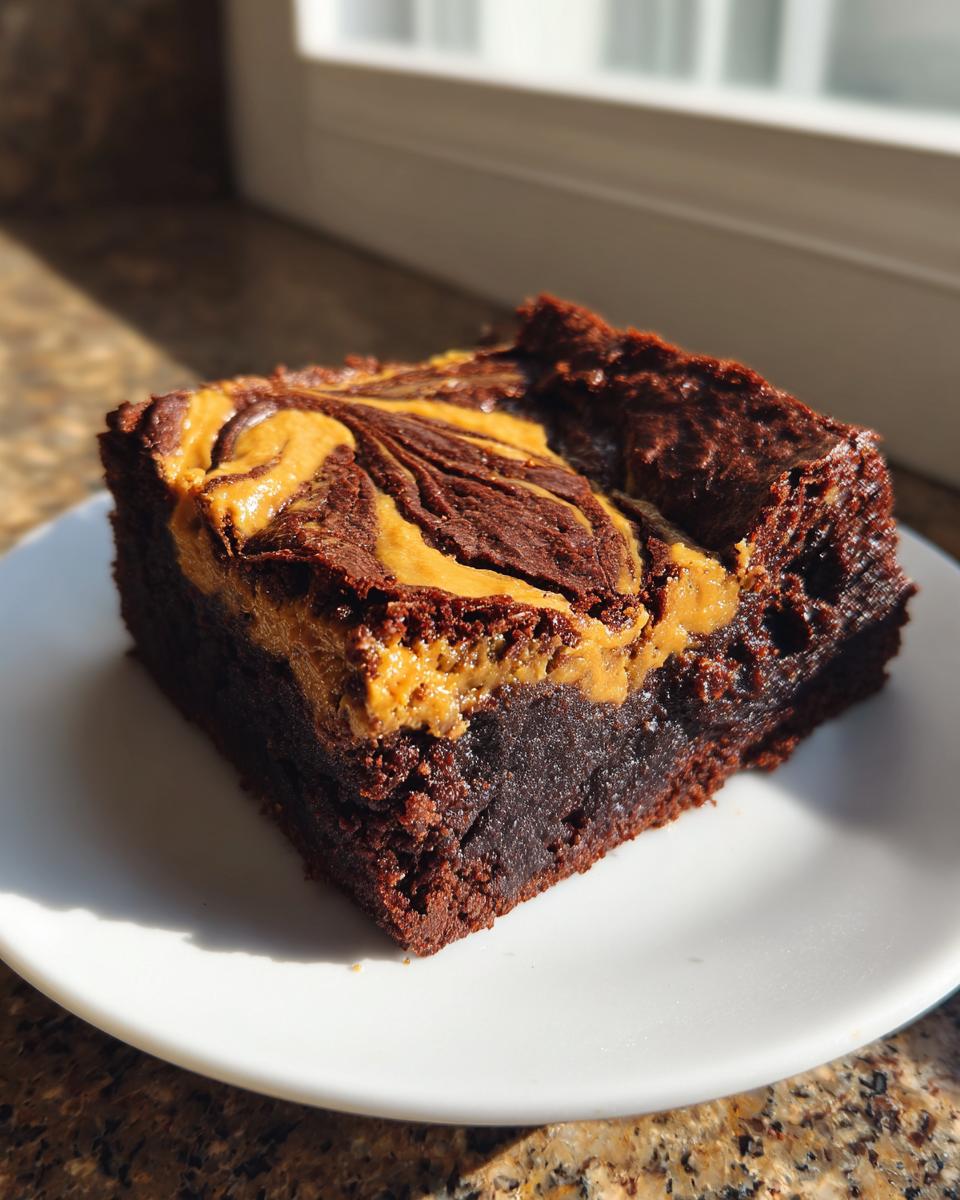
These aren’t those cakey things, trust me. We are aiming for that deeply fudgy texture, where the center is practically melted, draped with a thick, creamy ribbon of peanut butter swirling through the dark chocolate richness. If you want even more insight into how I nail that fudgy center (and get that amazing crackly top!), you can read my specific tips on fudgy brownies with shiny crackly tops. This recipe is honesty in dessert form, bringing back that pure joy of baking Daisy taught me, right in my own little kitchen nowadays.
- Why These are the Best **Peanut Butter Swirl Brownies** (E-E-A-T Focus)
- Ingredients for **Peanut Butter Swirl Brownies**
- Step-by-Step Guide to Making **Fudgy Swirl Brownies**
- Tips for Perfect **Peanut Butter Swirl Brownies** Every Time
- Storage and Making Ahead for Your **Swirled Chocolate Treats**
- Serving Suggestions for These **Decadent Brownies**
- Frequently Asked Questions About **Peanut Butter Swirl Brownies**
- Nutritional Estimate for Your **Chocolate Peanut Butter Dessert**
- Share Your **Ultimate Peanut Butter Brownies** Creations
Why These are the Best **Peanut Butter Swirl Brownies** (E-E-A-T Focus)
There are brownies, and then there are these peanut butter swirl brownies. Seriously, I don’t mess around when it comes to texture. These disappear faster than anything I bake, and it’s because they hit that sweet spot: ridiculously fudgy chocolate base with a generous, luscious peanut butter ribbon on top. They look fancy, but truly, they are one of the easiest things you’ll whip up all week!
When I compare recipes, I always look at what makes them special, and I’ve detailed what sets ours apart:
Achieving True Fudgy Brownie Texture
It all comes down to structure, honey. We use slightly less flour than a typical cake recipe and a higher fat-to-flour ratio. That means the structure stays dense and gooey, not crumbly. Plus, we pull them out when the toothpick still has wet crumbs—that’s the secret to that melt-in-your-mouth center. If you want to see the fudge magic close up, check out my recipe for easy 3-ingredient chocolate fudge—it’s the same principle!
The Perfect Creamy Swirl in Your **Peanut Butter Brownies**
The peanut butter layer isn’t just for looks, obviously! I slightly warm the peanut butter before adding it in spoonfuls. This makes it spreadable, so when you swirl it, you get those beautiful ribbons without tearing up the batter underneath. It creates a fantastic sweet and salty contrast in every one of these gooey peanut butter bars.
Ingredients for **Peanut Butter Swirl Brownies**
Okay, gathering supplies is always my favorite part because it means the magic is about to happen! For these peanut butter swirl brownies, you’ll notice we keep the base really simple—no weird specialty chocolate needed, just pure flavor. Everything needs to be portioned out before you start melting that butter, trust me.
- 1/2 cup (115g) unsalted butter
- 1 cup (200g) granulated sugar
- 2 large eggs
- 1 teaspoon vanilla extract
- 1/3 cup (40g) unsweetened cocoa powder
- 1/2 cup (65g) all-purpose flour
- 1/4 teaspoon salt
- 1/4 teaspoon baking powder
- 1/2 cup (120g) creamy peanut butter (for that swirl!)
If you’re wondering about the peanut butter, use the creamy kind that’s usually hanging out on the counter, not the natural drippy kind. It holds its shape better for swirling! I have a great recipe for brittle if you’re craving that crunch later, though: peanut brittle recipe perfect snap.
Step-by-Step Guide to Making **Fudgy Swirl Brownies**
This is where the fun really starts! The beauty of these fudgy swirl brownies is that they come together so fast—I often have them in the oven in under 20 minutes. Just follow the order, and don’t rush the cooling part, or you’ll end up with brownie soup!
Preparing the Chocolate Brownie Base
First things first: get that oven heat going to 350°F (175°C) and prep that 8×8 pan with parchment so the edges stick up like little handles. That makes lifting them out so much easier later on! Melt your butter gently, then whisk in the sugar, eggs, and vanilla. Don’t whisk too hard, we don’t need mountains of air here—we want fudgy!
Next, gently bring together your cocoa, flour, salt, and baking powder in a separate bowl. Add the dry stuff to the wet stuff in stages, mixing until you JUST see the flour disappear. My Grandma Daisy always used to say, “Stop mixing when you think you should keep going.” Over-mixing is the enemy of fudgy, so be gentle!
Creating the Creamy Peanut Butter Layer and Marbling
Once half the batter is in the pan, it’s time for the star! I take the peanut butter and microwave it for about 15-20 seconds, just so it’s easy to spoon out. Dollop that creamy goodness right over the chocolate base. Then, pour the rest of your chocolate batter on top of that.
Now for the artistic bit! Take a butter knife or a skewer and gently cut through the layers to create those gorgeous ribbon patterns—that’s how you get those gorgeous marbled brownies. Don’t blend it all together; just a few gentle figure-eight motions on the surface are perfect. Then, pop them in the oven!
When they look mostly done, test them in the center. If the toothpick comes out with moist, sticky crumbs attached (not wet batter!), pull them out immediately. Seriously, pull them out! They set up as they cool, which secures that gooey center. If you need a creamy pairing later, I’ve got the recipe for easy chocolate mousse that goes wonderfully on top.
Tips for Perfect **Peanut Butter Swirl Brownies** Every Time
I get asked all the time how I manage to get that perfect crackly top on my brownies instead of a dull, matte finish. I honestly think achieving that classic look is half the battle with these peanut butter swirl brownies! It’s all about how you handle the sugar and butter mixture, but I have a couple of other tricks up my sleeve to make sure these turn out bakery-worthy every single time.
The Secret to a Glossy Crust
The biggest game-changer for that signature glossy crust isn’t magic; it’s temperature and technique. After you whisk in the sugar with the melted butter and eggs, you need to beat that mixture vigorously for a full minute or two until it’s smooth and slightly warmer. This dissolves the sugar crystals just enough so they rise to the top during baking, creating that beautiful shiny, crackly shell.
Ingredient Substitutions for Your **Peanut Butter Brownies**
When it comes to the peanut butter itself, processed, shelf-stable creamy peanut butter is my go-to because it has stabilizers that help it hold that swirl against the batter. If you use natural peanut butter—you know, the kind you have to stir—it might become a little too oily or runny when baked, and your swirl might disappear like a ghost!
Also, if you want that chocolate flavor to absolutely sing, swap out regular cocoa powder for dark or Dutch-processed cocoa. It deepens the color and gives you a much more intense chocolate payoff. I love doing that when I’m making a batch for me, not just for company! If you want to balance that richness later, I’ve got a graham cracker toffee recipe that makes a wonderful crunchy topping addition.
Storage and Making Ahead for Your **Swirled Chocolate Treats**
This is the hardest part, honestly: waiting for them to cool! If you try slicing these warm, gooey beauties, they just turn into a glorious, yet messy, puddle of chocolate and peanut butter. You absolutely need to let these swirled chocolate treats cool completely in the pan—we’re talking at least two hours, maybe even chill them briefly. This resting period lets that fudgy magic set properly, making clean squares possible.
Once they are cool, store them in an airtight container at room temperature. They stay incredibly fresh for about four days! I often bake a batch early for parties now, which is why I rely on making things ahead. If you’re looking for other make-ahead goodies, you have to check out my recipe for oreo balls, the classic no-bake truffle recipe.
Serving Suggestions for These **Decadent Brownies**
These decadent brownies are pretty perfect just sitting on a plate, but why stop at perfect when we can go for spectacular? Seriously, these pair well with nearly anything, but I have my favorites.
If you’re serving them slightly warm—maybe after a quick 10-second zap in the microwave—a scoop of good vanilla bean ice cream is non-negotiable. The contrast between the warm, fudgy chocolate and the cold cream is just heaven. They are also incredible alongside a strong cup of black coffee for that perfect sweet-and-bitter balance. If you need a lighter topping, a tiny dollop of my ultimate fluffy vanilla buttercream works wonders too!
Frequently Asked Questions About **Peanut Butter Swirl Brownies**
I always get the same questions when this recipe first hits my blog, and that’s totally fine! It just means everyone wants the absolute best results when they make these peanut butter swirl brownies. Here are the things I hear most often about baking these sweet and salty bars.
Can I use crunchy peanut butter in this **Easy Brownie Recipe**?
You absolutely *can*, but you need to know what you’re signing up for! If you use crunchy peanut butter, the texture of that swirl will change instantly. Instead of that creamy, dreamy ribbon you see in the pictures, you’re going to get little pockets of crunchiness distributed throughout. For the truest swirl look, I stick to creamy, but if you love the texture of the chunks, go for it! It still tastes amazing, it just won’t marble quite as smoothly.
How long do I need to cool the **Gooey Peanut Butter Bars** before slicing?
This is the make-or-break moment, truly. If you slice these too soon, you get a hot, melty mess—and sure, that’s delicious, but it won’t look like those perfect squares everyone loves. Honestly, you need to let them sit on the counter for at least two hours. If you can push it to three, even better! If I’m in a major hurry, I slide the whole pan into the fridge for about 45 minutes after it’s cooled on the counter for an hour. That chill time helps everything firm up so you get clean, gorgeous cuts every single time.
Can I freeze leftover **peanut butter swirl brownies**?
Yes, you totally can freeze them! Brownies freeze really well, which is great for bake sales or just having a stash for emergency chocolate attacks. You must let them cool completely first, like totally room temperature. Then, wrap each square tightly in plastic wrap—don’t skip this step!—and pop those wrapped squares into a heavy-duty freezer bag or airtight container. Frozen, they keep well for up to three months. When you want one, just pull a piece out and let it thaw on the counter for about an hour, or zap it for 15 seconds in the microwave if you want it warm and gooey again. Speaking of easy fixes, if you need a quick cool-down treat, check out my easy no-bake Oreo ice cream cake!
Nutritional Estimate for Your **Chocolate Peanut Butter Dessert**
Now, I know we aren’t baking these for health reasons, but it’s always smart to have an idea of what you’re digging into! Keep in mind that these numbers are just estimates based on the recipe ingredient list and standard conversions. If you use a different brand of peanut butter or sugar, things might shift a little.
- Serving Size: 1 square
- Calories: 280
- Sugar: 25g
- Fat: 17g
- Protein: 4g
We keep things simple here, so these estimates are pretty straightforward. If you want something savory next, my easy black bean chili is always a winner!
Share Your **Ultimate Peanut Butter Brownies** Creations
Honestly, baking is always better when shared, right? This is about more than just following instructions; it’s about continuing that wonderful tradition of bringing people together with simple, incredible food.
I truly hope you give these ultimate peanut butter brownies a try this week. When you do, I desperately want to hear about it! Did they get that perfect fudgy center? Did the swirl look like a beautiful little abstract painting? Tell me everything!
Drop me a note down in the comments below, tell me how many you managed not to eat straight over the sink, and please, please leave your star rating! It helps other home bakers find this little piece of comfort heaven.
If you snap a picture of your batch—those gorgeous, sweet-and-salty squares—tag me on social media! Seeing them sitting on your counters, waiting to be shared, is the absolute best part of this whole journey for me. It shows me that Daisy’s legacy of simple, loving food is still going strong.
And hey, if you’re looking for another easy crowd-pleaser for your next gathering—maybe something a little savory to balance all that chocolate—you really should try my classic deviled eggs recipe with creamy filling. Happy baking, friends!
P.S. If you want to see how another wonderful baker tackles similar swirls, check out these peanut butter swirl brownies recipe for inspiration!
PrintFudgy Peanut Butter Swirl Brownies

Make rich, fudgy brownies with a creamy peanut butter ribbon on top. This easy recipe delivers decadent chocolate and peanut butter flavor in every slice.
- Prep Time: 15 min
- Cook Time: 30 min
- Total Time: 45 min
- Yield: 16 servings 1x
- Category: Dessert
- Method: Baking
- Cuisine: American
- Diet: Vegetarian
Ingredients
- 1/2 cup (115g) unsalted butter
- 1 cup (200g) granulated sugar
- 2 large eggs
- 1 teaspoon vanilla extract
- 1/3 cup (40g) unsweetened cocoa powder
- 1/2 cup (65g) all-purpose flour
- 1/4 teaspoon salt
- 1/4 teaspoon baking powder
- 1/2 cup (120g) creamy peanut butter (for swirl)
Instructions
- Preheat your oven to 350°F (175°C). Grease and line an 8×8 inch baking pan with parchment paper, leaving an overhang for easy removal.
- In a medium saucepan, melt the butter over low heat. Remove from heat and stir in the granulated sugar until combined.
- Whisk in the eggs one at a time until incorporated. Stir in the vanilla extract.
- In a separate bowl, whisk together the cocoa powder, flour, salt, and baking powder.
- Gradually add the dry ingredients to the wet ingredients, mixing until just combined. Do not overmix the batter.
- Spread half of the brownie batter evenly into the prepared pan.
- Warm the 1/2 cup of creamy peanut butter slightly so it is easier to spread. Drop spoonfuls of the peanut butter over the batter layer.
- Spread the remaining brownie batter over the peanut butter layer.
- Use a knife or skewer to gently swirl the peanut butter layer into the chocolate batter to create a marbled effect.
- Bake for 25 to 30 minutes, or until a toothpick inserted near the edge comes out with moist crumbs attached. The center should still look slightly underdone for a fudgy texture.
- Let the brownies cool completely in the pan on a wire rack before cutting into squares.
Notes
- For the best fudgy texture, avoid baking longer than necessary. The brownies will set more as they cool.
- If you want an even richer flavor, use dark cocoa powder in the brownie batter.
- These brownies keep well stored in an airtight container at room temperature for up to four days.
Nutrition
- Serving Size: 1 square
- Calories: 280
- Sugar: 25g
- Sodium: 150mg
- Fat: 17g
- Saturated Fat: 7g
- Unsaturated Fat: 10g
- Trans Fat: 0g
- Carbohydrates: 30g
- Fiber: 1g
- Protein: 4g
- Cholesterol: 50mg