
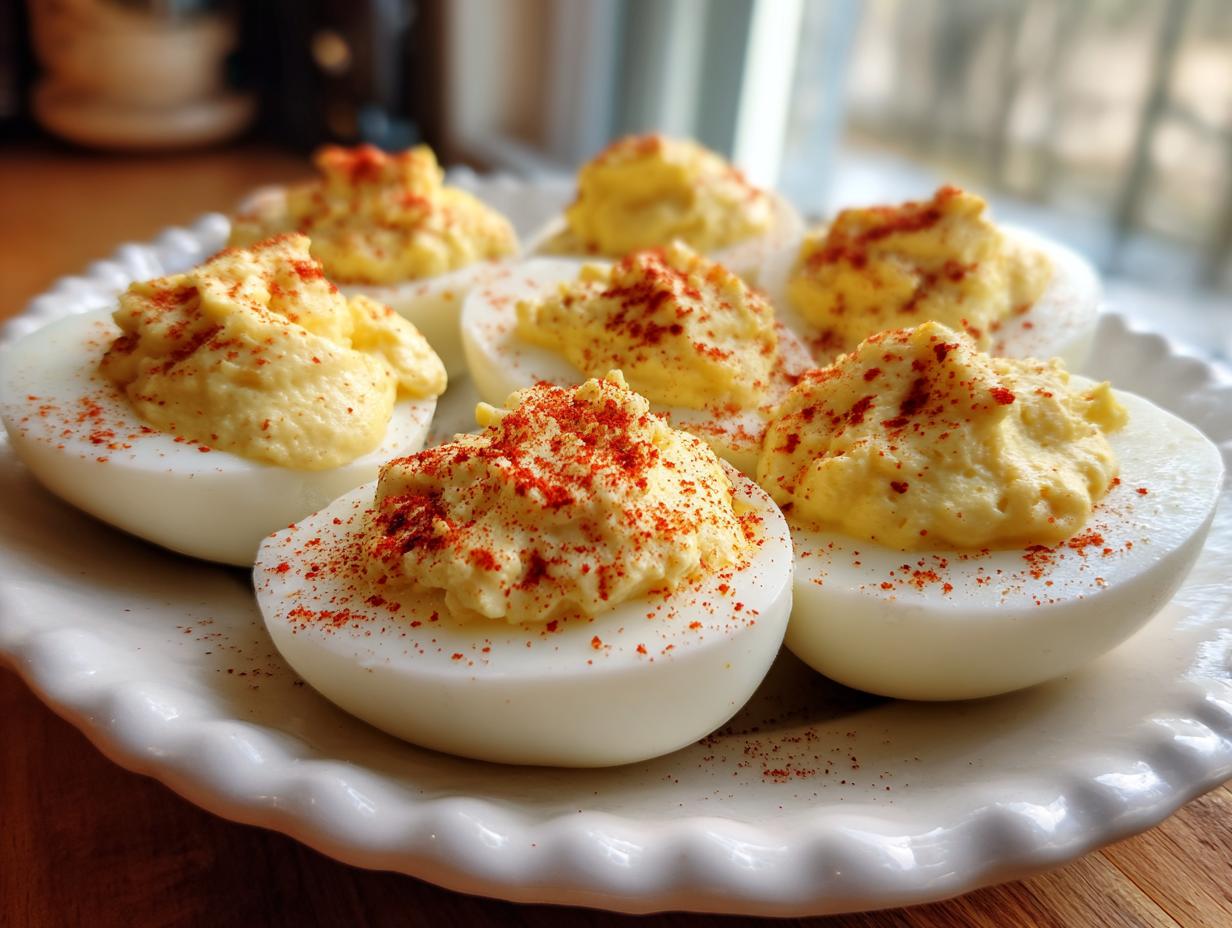
There’s nothing quite like seeing a platter of perfectly piped deviled eggs show up at a gathering. It just signals comfort, doesn’t it? For me, bringing these classic deviled eggs back into my modern kitchen was a huge part of reclaiming my connection to Grandma Daisy. I used to think they were just simple appetizers, but Daisy knew the secret to making them truly unforgettable: they had to be impossibly creamy and never turn that sad, greenish-gray color. Trust me, after trying dozens of versions when I first started cooking again, I finally nailed down her foolproof method. This is the ultimate, go-to recipe that always disappears first. I even got a great tip on achieving that perfect texture from a fellow home cook when I was first troubleshooting this recipe, making creamy deviled eggs that everyone requests.
- Why This Recipe Delivers the Best Classic Deviled Eggs
- Gathering Ingredients for Classic Deviled Eggs
- How to Make Perfect Deviled Eggs Step-by-Step
- Garnishing Your Classic Deviled Eggs with Paprika
- Tips for Making Classic Deviled Eggs Ahead of Time
- Serving Suggestions for Crowd Pleasing Appetizers
- Storage and Keeping Your Classic Deviled Eggs Fresh
- Frequently Asked Questions About Classic Deviled Eggs
- Understanding the Nutrition in This **Simple Party Snack**
Why This Recipe Delivers the Best Classic Deviled Eggs
I know you’ve seen recipes promising ‘the best,’ but honestly, my method cuts straight to the chase: maximum creaminess with zero fuss. When you follow these steps, you get that nostalgic, perfect appetizer every single time. It’s all about technique, not loads of fancy ingredients. I love looking back at my grandmother’s notes on this; she always said if you skip the important parts, you end up with something closer to basic egg salad, which, while tasty, isn’t what we aim for here when making classic deviled eggs.
Here is why this process works so well:
- We achieve unbelievably smooth texture because we mash the yolks totally smooth before we even look at the mayo. That is my secret for the creamy deviled eggs filling.
- We skip straight to the ice bath, which is essential for stopping the cooking reaction that causes those unattractive grey rings around the yolk.
- The seasonings are simple and traditional—you don’t need to overcomplicate a classic!
Achieving That Perfectly Creamy Deviled Eggs Filling
This is where most people rush, and that’s a mistake! You need to take a fork and mash those yolks until they are dust—seriously, no lumps should survive. Once you have that fine powder, *then* you add your mayo and mustard. If you try mixing the wet ingredients into chunky yolks, you’re just asking for thin, watery filling. Keeping the process separated ensures we get the rich, velvety texture that makes these classic deviled eggs so beloved.
Foolproof Hard-Boiling for Easy Hard Boiled Eggs Technique
Don’t waste time trying to peel eggs that won’t cooperate! The trick to making these for beginners is the transition from hot to cold. Once those 12 minutes are up—and you have to set a timer!—you plunge those eggs right into an ice bath. This immediate temperature shock makes the egg shrink just slightly away from the shell membrane. They peel like magic after about 10 minutes in the ice water, making the whole process breezy. That’s the beauty of an easy hard boiled eggs technique!
Gathering Ingredients for Classic Deviled Eggs
Okay, let’s talk about what you need. Since these are classic deviled eggs, we’re keeping the ingredient list short and sweet—no crazy additions needed! You absolutely must use large eggs because they give you a better surface area for filling. The real workhorse here is the mayonnaise; use the good stuff you actually like the taste of because it defines the entire creamy deviled eggs filling. Also, for that necessary zip, you’re using Dijon mustard and either white vinegar or, my personal favorite, pickle juice for a boost of tang.
Optional Add-ins for Tangy Deviled Eggs
While sticking to tradition is wonderful, sometimes you want a little extra something. If you want to amp up the flavor for your tangy deviled eggs, I always have some options open. A tiny dash of your favorite hot sauce right into the yolk mixture is fantastic if you like a little kick. Otherwise, save the green stuff for the top! A sprinkle of fresh chives or some finely chopped dill after the paprika adds a brightness that looks gorgeous without changing the core flavor profile too much.
How to Make Perfect Deviled Eggs Step-by-Step
Alright, here’s the part where we turn those hard-boiled ovals into **crowd pleasing appetizers**! My goal here is to walk you through the process so you don’t get any of those awful green rings around the yolk, and you end up with the creamiest texture imaginable. Honestly, the success of your classic deviled eggs hinges on two specific moments: the cooking time and the mashing technique. Follow my steps here, and you’ll be shocked how simple this really is!
The Art of Peeling and Halving Eggs
Once those eggs are shocked in the ice water—and please, don’t skip that step, it’s vital for avoiding the green ring—it’s time to peel. The cold water has done all the hard work for you! Crack the shell all over gently, then peel under a thin stream of running cool water. The water helps lubricate the membrane, and bam! You’re peeling them like a seasoned pro. For **deviled eggs for beginners**, this is a game-changer. Once peeled, just slice them straight down the middle lengthwise. Carefully scoop out all those pretty yellow yolks into your designated bowl. See? That’s why the ice bath makes such an easy deviled eggs recipe!
Mixing the Ultimate Creamy Deviled Eggs Filling
This is the moment of truth for achieving the perfect consistency. Before you even think about adding the mayo or mustard, take that fork and mash those yolks until they look like beautiful, bright yellow sand. I mean it—get all the lumps worked out! If you add the wet ingredients while there are still chunks, you’ll end up wrestling with a lumpy mess that never gets that luxurious, silky texture we’re after. Once they are completely uniform, you can gently fold in the mayonnaise and seasonings. You want to mix until it’s homogenous and smooth, not whipped into oblivion. Keep folding until you’ve got that amazing, rich filling. If you’re looking for even more incredible texture blending tips, check out my approach on blending ingredients smoothly; the principle is the same here!
Finally, we get to transferring that gorgeous filling back into the egg whites. If you’re feeling fancy, use a nice star piping tip—it makes these **classic deviled eggs** look like they came from a deli case! If you’re short on time, just use two little spoons to carefully mound the mixture back in. Don’t forget that little dusting of paprika we talk about next, but honestly, that smooth filling is the biggest part of the magic. We want these to be the absolute best version of this classic appetizer, and taking an extra minute to mash those yolks pays off huge. Remember that trick for super easy peeling I mentioned? You can find more details on that quick and tasty appetizer hack online!
Garnishing Your Classic Deviled Eggs with Paprika
We’ve done the hard work of making the creamiest filling, now we make them look like they belong on a magazine cover! The presentation is what elevates these from just plain eggs to a real showstopper, even though they’re still just a simple party snack. For me, paprika is non-negotiable; it’s the finishing touch on every batch of my classic deviled eggs with paprika. I like to use a very fine mesh shaker—never just dump it on! You want a light, even dusting that gives you that pretty rusty color contrast against the pale yellow filling.
If you take the time to pipe the filling (which I totally recommend, because who doesn’t love those pretty peaks?), the paprika really settles beautifully into the crevices. If you’re just spooning them in, take an extra second to smooth the top with the back of a small spoon. It helps the spice adhere nicely! If you need some ideas for other cookie shapes to share at your next event, check out how I make my favorite pinwheel cookies. And for more on how beautiful these eggs can look, you have to see what my friends are doing over at Classic Deviled Eggs with Paprika for inspiration!
Tips for Making Classic Deviled Eggs Ahead of Time
Trying to juggle everything on party day is enough to make anyone sweat, right? That’s why I love having these as a reliable make ahead appetizer. You’ve got two main options, and both save you precious time.
My preferred method, which I recommend if you are serving within 24 hours, is to make the entire filling and store it in the fridge. Keep that creamy deviled eggs filling sealed tight in an airtight container. When you’re ready to serve, just scoop it back into the whites. If you leave it out longer than a day, the mayo can start to weep a little, and we want that filling to hold its shape!
If you need to get everything done even earlier, you can fill the eggs, cover the whole platter tightly with plastic wrap, and place them in the fridge. But here’s a little trick: before you cover them, press a piece of plastic wrap directly onto the surface of the filling in each cup. This prevents that plasticky film from forming on top of your beautiful mound. It’s so much better than rushing around, trying to boil and mix when guests are already at the door! When I need extra richness in my spreads, I often whip up a batch of whipped honey butter, but for these eggs, simplicity really keeps them tasting fresh. For more inspiration on making this recipe ahead, I always check out the advice from The Best Classic Deviled Eggs.
Serving Suggestions for Crowd Pleasing Appetizers
These **classic deviled eggs** are so versatile, they truly fit into any gathering you can dream up! They are the ultimate **crowd pleasing appetizers**, whether you’re serving them inside at a holiday dinner or packed up for a summer picnic. When I’m planning a big spread, I always try to balance out the richness of the egg yolks with something fresh or tangy on the side.

For a holiday table, pair them next to something green, like a bright vinaigrette salad or maybe even my recipe for an easy blue cheese dip, just to give people something sharp to cut through the creaminess. For outdoor events, they are the star! Make sure you check out my list of the best picnic appetizers, too, because deviled eggs are mandatory for any good blanket spread. They look elegant, they taste incredible, and they require zero utensils—which is the best kind of party food, in my opinion!
Storage and Keeping Your Classic Deviled Eggs Fresh
Okay, let’s talk about keeping these beauties fresh beyond the party! Since we are dealing with fresh eggs and mayonnaise, keeping them chilled is super important for safety and texture. When properly stored, these classic deviled eggs actually hold up really well. I always recommend serving them the same day you fill them if you can, but they definitely last well if refrigerated.
Make sure you cover the platter tightly with plastic wrap—and remember that trick about pressing the wrap right onto the surface of the filling? Do that! It keeps the air out and locks in that amazing creamy deviled eggs filling. If you leave them uncovered, they’ll start to dry out quickly. They should be fine in the fridge for up to two days, but honestly, they never last that long at my house. They are just too tempting!
Frequently Asked Questions About Classic Deviled Eggs
I know everyone has their own way of doing things when it comes to staples like these, so let me clear up a few things I get asked all the time about getting these classic deviled eggs just right. Don’t worry if you’ve had struggles before; mastering the texture is easier than you think once you know the tricks!
What is the secret to Southern style deviled eggs?
That’s a great question! Southern recipes often lean into a bit more sweetness or tang than the super basic versions you find elsewhere. Grandma Daisy often got requests to add a teaspoon of sugar or use sweet pickle relish instead of plain vinegar. While this recipe sticks to the core classic build—mayo, mustard, vinegar—I think the richness of the good quality mayo and that dash of Dijon mustard gives it that satisfying, flavorful depth that people associate with true Southern style deviled eggs without getting too sweet.
Can I use pickle juice instead of vinegar for a quick appetizer idea?
Oh, absolutely! If you’re looking for a fantastic flavor boost and an even better quick appetizer idea, swap the white vinegar for pickle juice, 100%. It adds that necessary acid element but also brings a hint of dill and spice from the brine, which complements the yolks beautifully. It’s one of the simplest ways to enhance the flavor of your creamy deviled eggs filling without adding any extra steps or ingredients, besides what you already have in the fridge!
If you have more time for planning meals in general, you might enjoy looking over some of my standard weeknight dinner ideas to keep things simple during the busy week, too!
Understanding the Nutrition in This **Simple Party Snack**
I always try to give a general idea of what goes into these amazing little bites, even though they’re meant to disappear fast! Since these **classic deviled eggs** are mostly protein and healthy fats, they make a satisfying **simple party snack**. Remember, these numbers are just estimates—they totally depend on what brand of mayonnaise you grab! For general reference, two halves of these eggs clock in around 90 calories. If you want to dive deeper into lighter eating, sometimes I share my tips for weeknight healthy lunch ideas!
PrintThe Best Classic Creamy Deviled Eggs Recipe

Make the ultimate crowd-pleasing appetizer with this straightforward recipe for traditional deviled eggs. You get perfectly smooth, tangy filling every time.
- Prep Time: 20 min
- Cook Time: 15 min
- Total Time: 45 min
- Yield: 24 halves 1x
- Category: Appetizer
- Method: Boiling and Mixing
- Cuisine: American
- Diet: Vegetarian
Ingredients
- 12 large eggs
- 1/2 cup mayonnaise
- 2 teaspoons Dijon mustard
- 1 teaspoon white vinegar or pickle juice
- 1/4 teaspoon salt
- 1/8 teaspoon black pepper
- Paprika, for garnish
- Optional: 1 tablespoon chopped fresh chives, for garnish
Instructions
- Place the eggs in a saucepan and cover them completely with cold water. Bring the water to a rolling boil over high heat.
- Once boiling, immediately remove the pan from the heat, cover it, and let the eggs stand for exactly 12 minutes.
- Drain the hot water and immediately cover the eggs with ice water to stop the cooking process. Let them cool completely, about 10 minutes.
- Peel the cooled eggs. Slice each egg in half lengthwise. Gently scoop the yolks into a medium bowl. Place the egg white halves on a serving platter.
- Mash the yolks thoroughly with a fork until no lumps remain. This step is key for a smooth filling.
- Add the mayonnaise, Dijon mustard, vinegar (or pickle juice), salt, and pepper to the mashed yolks. Mix well until the filling is completely smooth and creamy. Taste and adjust seasoning if needed.
- Spoon or pipe the yolk mixture back into the hollows of the egg white halves. For a professional look, use a piping bag fitted with a star tip.
- Garnish each deviled egg half with a light sprinkle of paprika. If using, add a few chopped chives.
- Chill the deviled eggs for at least 30 minutes before serving for best flavor and texture.
Notes
- To prevent green rings around the yolk, make sure you cool the eggs rapidly in ice water immediately after boiling.
- For an extra tangy flavor, use pickle juice instead of plain white vinegar in the filling.
- You can make the filling up to one day ahead and store it covered in the refrigerator. Fill the egg whites just before serving.
Nutrition
- Serving Size: 2 halves
- Calories: 90
- Sugar: 0.5
- Sodium: 120
- Fat: 8
- Saturated Fat: 2.5
- Unsaturated Fat: 5.5
- Trans Fat: 0
- Carbohydrates: 0.5
- Fiber: 0
- Protein: 3
- Cholesterol: 100