
There’s just something unbeatable about a dessert that screams fun the moment it hits the table, right? Something bright, something wobbly, something that just makes everyone smile. That’s exactly what my Grandma Daisy always aimed for with her easy, crowd-pleasing classics. I needed a recipe like that when I first moved back to cooking seriously in my little city apartment—a recipe that brought back that sense of simple joy.
That’s why I’m sharing my absolute favorite, the quintessential potluck hero: the jello poke cake. Trust me when I say this version is the easiest, most unbelievably moist jello poke cake, and we’re using a simple box mix to get that perfect base. It’s pure nostalgia, totally fuss-free, and genuinely incredible. If you’re looking for more sweet inspirations, you can check out all my delicious dessert recipes here.
- Why This Easy Poke Cake Recipe Delivers Moist Texture
- Gathering Ingredients for Your Jello Poke Cake
- Step-by-Step Instructions for the Best Poke Cake Recipe
- Tips for Success with Your Simple Gelatin Cake
- Ingredient Notes and Substitutions for Your Jello Poke Cake Recipe
- Serving Suggestions for These Party Cakes
- Storage and Reheating Instructions for Moist Jello Cake
- Frequently Asked Questions About Making a Jello Poke Cake
- Sharing Your Colorful Dessert Experience
Why This Easy Poke Cake Recipe Delivers Moist Texture
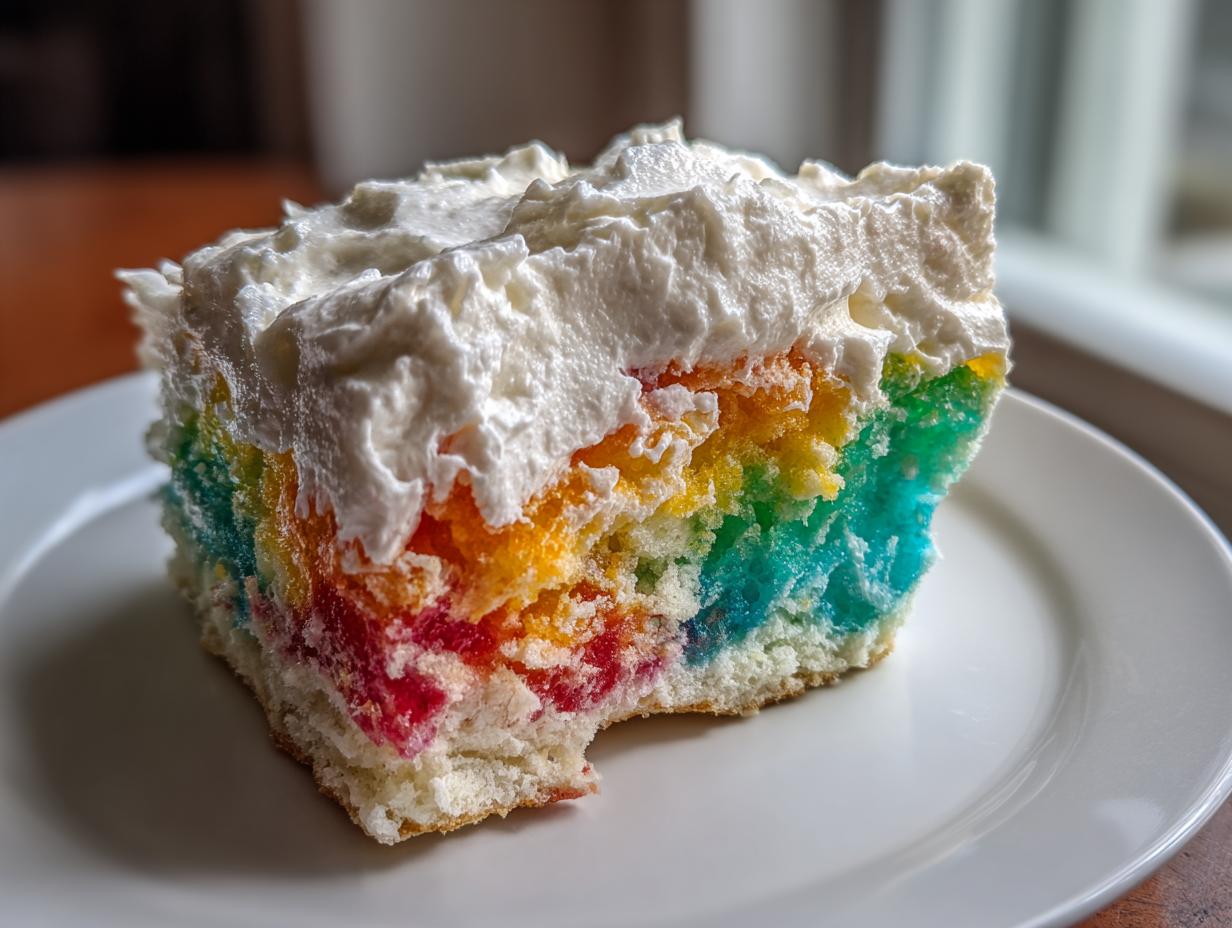
Everyone asks me how I get this cake so incredibly moist. It’s not magic, though it certainly tastes like it! The secret ingredient isn’t even in the box mix; it’s the bath we give the cake after baking. This simple jello poke cake turns an ordinary white cake into a true moist jello cake because we are letting the gelatin soak deep into every little space we create.
We aren’t doing anything complicated here. This is that straightforward, highly rewarding baking that makes an easy poke cake a legend at any gathering.
The Secret to a Perfect Jello Soaked Cake
Timing is everything, friends. You MUST poke the holes while the cake is still warm right out of the oven. That heat helps the warm liquid gelatin mixture sink down deep instead of just sitting on top. Be gentle but thorough with your poking tool! Then, pour that lovely, colorful liquid slowly and evenly over the whole surface. It’s all about that absorption!
Gathering Ingredients for Your Jello Poke Cake
Getting ready for this is so quick, which is why I love having this recipe on hand for last-minute plans. Seriously, you probably have most of this stuff in your pantry right now! We’re keeping it super simple, relying on good old-fashioned box mix magic to build the base structure for this incredible jello poke cake.
Here is exactly what you’ll need to pull this colorful dessert together:
- One box white cake mix, plus the ingredients it calls for (usually eggs, oil, and water).
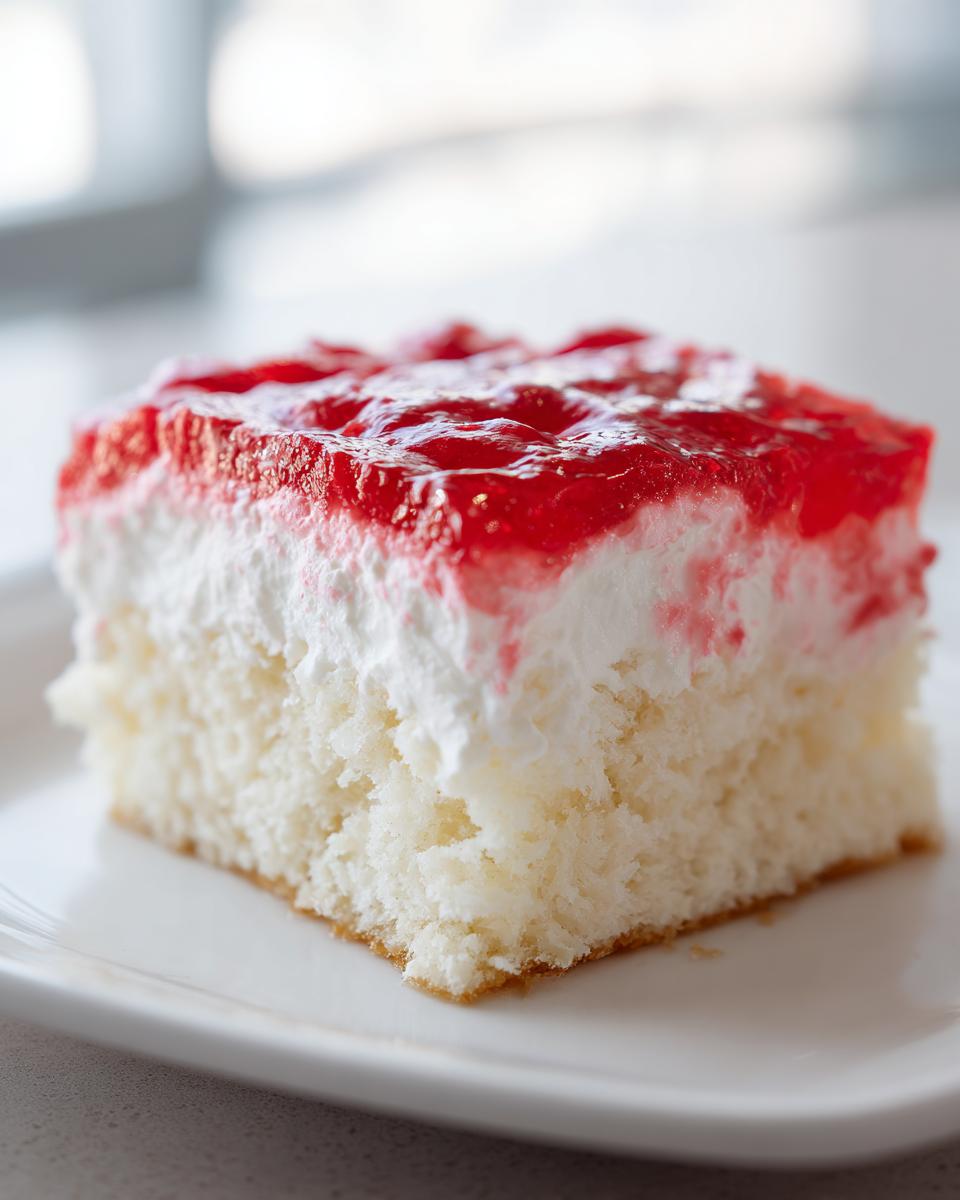
- One standard 3-ounce package of flavored gelatin—Strawberry is my usual go-to!
- One cup of boiling water, meaning really hot water right off the boil.
- One cup of cold water.
- One standard 8-ounce container of thawed whipped topping, like Cool Whip.
Step-by-Step Instructions for the Best Poke Cake Recipe
Okay, here is where the fun really starts! This entire recipe is built around a very simple series of actions, but the timing matters so much for achieving that signature **jello poke cake** moisture. We’re using a standard white cake mix baked in a 9×13 pan—nothing fancy required. Just follow these steps exactly, and you’ll have a showstopper dessert ready for your next get-together.
Once everything is mixed and baked, we start working quickly! If you are interested in simplifying other baked goods, check out my tips on quick baking with cake mix cookie bars.
Baking and Poking the Warm Cake
First things first: bake your white cake mix according to those package directions, usually in a 9×13 inch pan. You want to pull it out right when it’s done. Don’t wait! While the cake is still pleasantly warm, grab a wooden spoon handle or a large, sturdy fork. Now, poke holes all over the top surface. I try to space them about one inch apart—we want enough holes so that the gelatin finds its way into the crumb, but we don’t want to shred the whole thing apart!
Preparing and Pouring the Gelatin Mixture
Next, we tackle the liquid. In a separate bowl, you need to dissolve your package of flavored gelatin completely in one full cup of boiling water. Seriously, stir it until you can no longer see any granules; this is important for a smooth set. Once it’s totally dissolved, stir in one cup of cold water. Now, take this liquid and slowly, patiently, pour it evenly over the entire surface of that warm, poked cake. Let it cover every inch!
Chilling and Applying the Cool Whip Topped Cake Layer
This next step requires patience, but don’t skip it! You must refrigerate the entire cake for a minimum of three to four hours. This time allows the liquid gelatin to completely set up inside the cake structure. Once it’s firm and chilled, you can grab your thawed whipped topping. Spread that snowy layer of Cool Whip topped cake frosting evenly across the top. Slice it up, and enjoy your incredibly colorful, moist dessert!
Tips for Success with Your Simple Gelatin Cake
Making this jello poke cake feels like cheating because it’s so easy, but a few tricks will elevate it from good to absolutely unforgettable. Since this is such a universal favorite—whether you call it a **simple gelatin cake** or just a bright treat—knowing the variations is key. If you’re feeling ambitious, or heading into the holidays, you absolutely have to try using this recipe as a base for something festive. You can find some other great holiday baking ideas here, like my Christmas sprinkle cookies.
Creating a Festive Christmas Jello Cake Variation
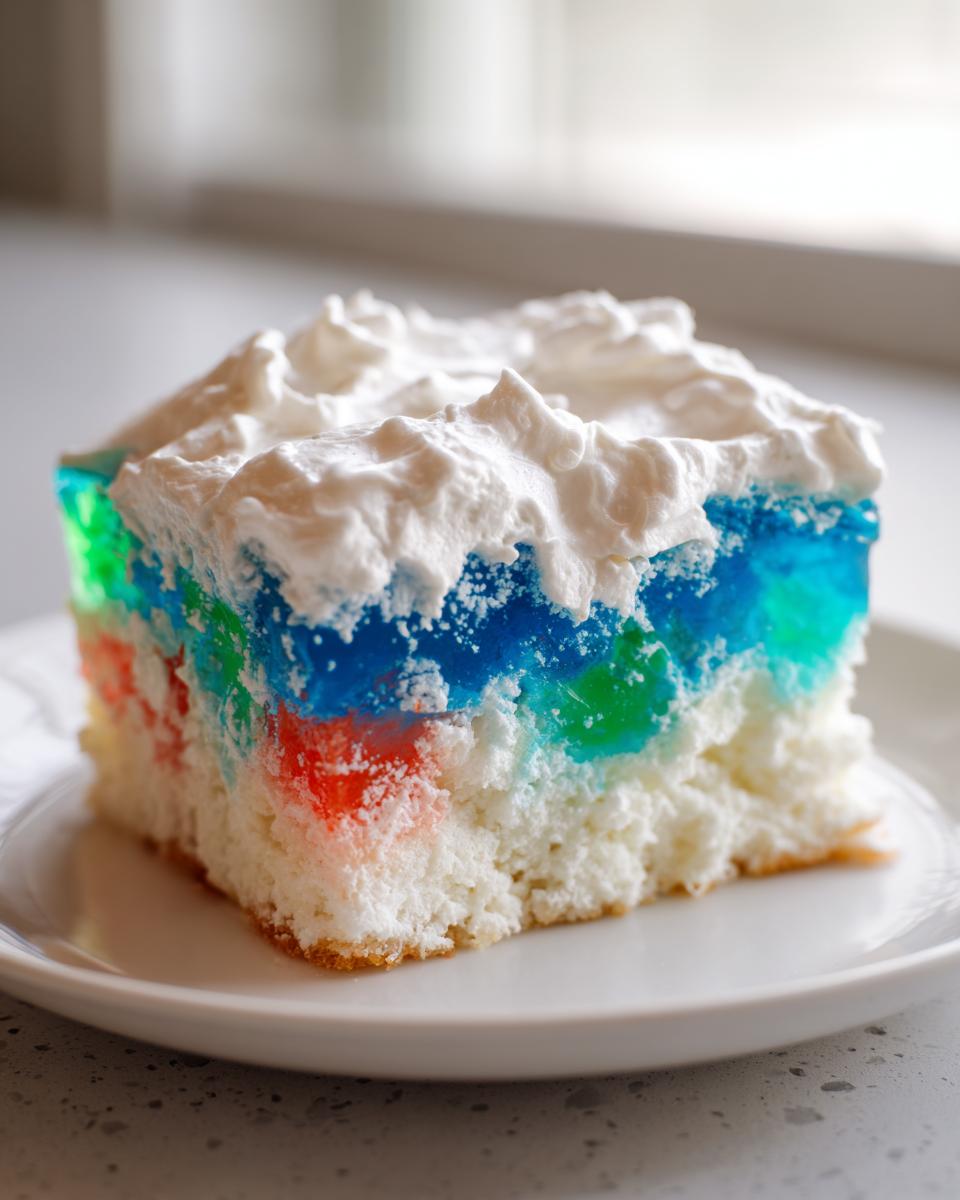
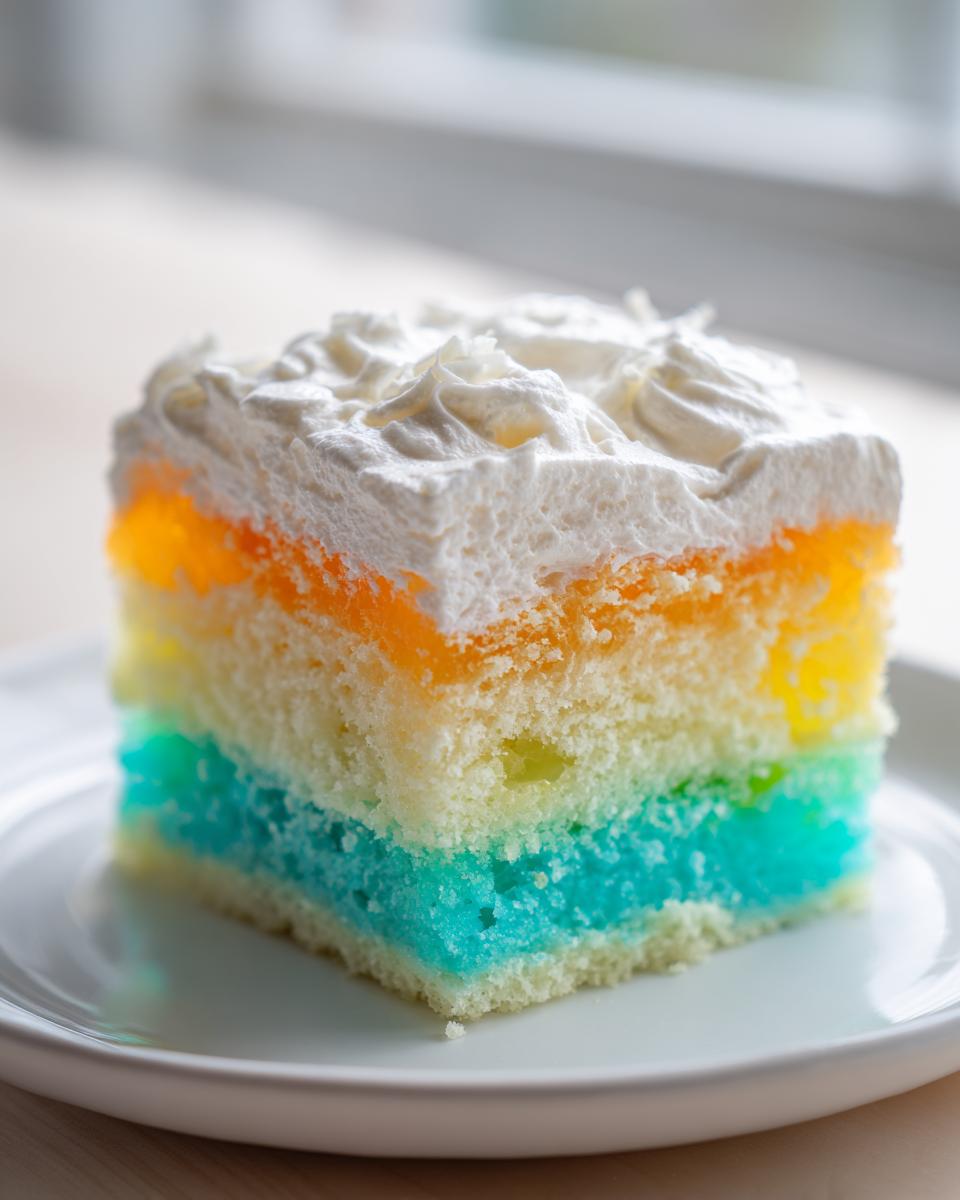
For that stunning holiday look, forget mixing all the colors together! For a proper Christmas Jello Cake, you prepare one color—say, the red strawberry—and pour it over the warm cake. You chill that until it’s *mostly* set, maybe about an hour. Then, you quickly prepare your second color, like lime green, and gently pour that second liquid right on top of the first layer. Chilling it completely afterward gives you those bold, unmistakable festive stripes. It just steals the show every time!
Ingredient Notes and Substitutions for Your Jello Poke Cake Recipe
One of the best things about this recipe is how much wiggle room there is once you master the pokes and the soak! While I adore the classic whipped topping because it’s so sturdy and light, I know some folks prefer making things from scratch. Absolutely go for it!
If you’re whipping your own cream, know that homemade whipped cream is richer, which gives you a different, slightly heavier texture on top than the standard topping. Both are delicious, though, so it’s just a matter of preference for your jello poke cake.
Also, don’t feel locked into strawberry or lime! This is the perfect template for any summer party food treat. Heard someone raving about a grape version? Make it! Want to try a tropical mix with pineapple Jello? Go for it! Since the base flavor is simple white cake, the gelatin is really doing all the heavy lifting for the overall flavor profile here.
Serving Suggestions for These Party Cakes
Because this jello poke cake is so light and brilliantly sweet, it’s the ultimate addition to any **potluck dessert spread. It needs flavors around it that are light too, you know?
I love serving it slightly chilled, maybe with a few fresh raspberries or blueberries sprinkled right over the top of the Cool Whip layer for a little pop of contrasting color and fresh texture. Honestly though, this cake is fantastic with just a hot cup of coffee after dinner. If you need a great drink pairing for your gathering, you have to try my recipe for a festive punch!
- Check out my festive brunch punch—it cuts the simple sweetness perfectly!
It’s incredibly satisfying all by itself, though!
Storage and Reheating Instructions for Moist Jello Cake
Because this jello poke cake has that amazing moisture boost from the gelatin and that light, fluffy topping, storage is super important. For safety and texture, this is strictly a refrigerated jello dessert. Cover the pan tightly with plastic wrap—just make sure the wrap doesn’t touch the whipped topping layer, or you’ll ruin the pretty finish!
It stays fantastic in the fridge for about three or four days. Now, if you were thinking about reheating it? Please don’t! The heat will melt that wonderful gelatin and deflate your topping completely. Keep it cool, keep it covered, and enjoy that cold, jiggly goodness.
Frequently Asked Questions About Making a Jello Poke Cake
I know you might have a few lingering questions after reading about this simple treat. It’s only natural! When you’re making a family favorite like this jello poke cake, you want to make sure every step is perfect, especially if you’re planning it for a big crowd. This is seriously one of the best quick dessert ideas out there, so let’s tackle those last hurdles!
Can I use chocolate cake mix instead of white cake mix?
Oh, you *can* try, honey, but I really advise against it for your first time making this! The whole point here is making a vibrant, **colorful dessert**. Chocolate cake is dark, and when you pour that bright red or green liquid gelatin over it, honestly? It just turns into a muddy brown mess inside. Stick to white or yellow cake mix for that beautiful, jewel-toned soak we all love!
How far ahead of time can I make this dessert?
This is where the cooling time really comes into play. You need that minimum of 3 to 4 hours for the Jello to set perfectly firm. I usually aim to assemble and poke the cake the morning before a party, leaving it covered in the fridge. If you make it more than 24 hours ahead, the cake layer sometimes starts to get a bit too saturated and lose its structure, so Jello poke cake recipe success really means making it the day before you serve it.
What if I don’t have Cool Whip for the topping?
Don’t panic! As I mentioned before, you can absolutely swap that out for freshly made whipped cream. You’ll need heavy cream, a little powdered sugar, and some vanilla. Whip it until stiff peaks form, and then spread it on the cake right before serving. It makes a richer topping, which I love for a fancier dinner, but the topping loses its firmness faster than the frozen kind, so keep that in mind for the road trip to the potluck!
What are the best Jello flavors for a simple gelatin cake?
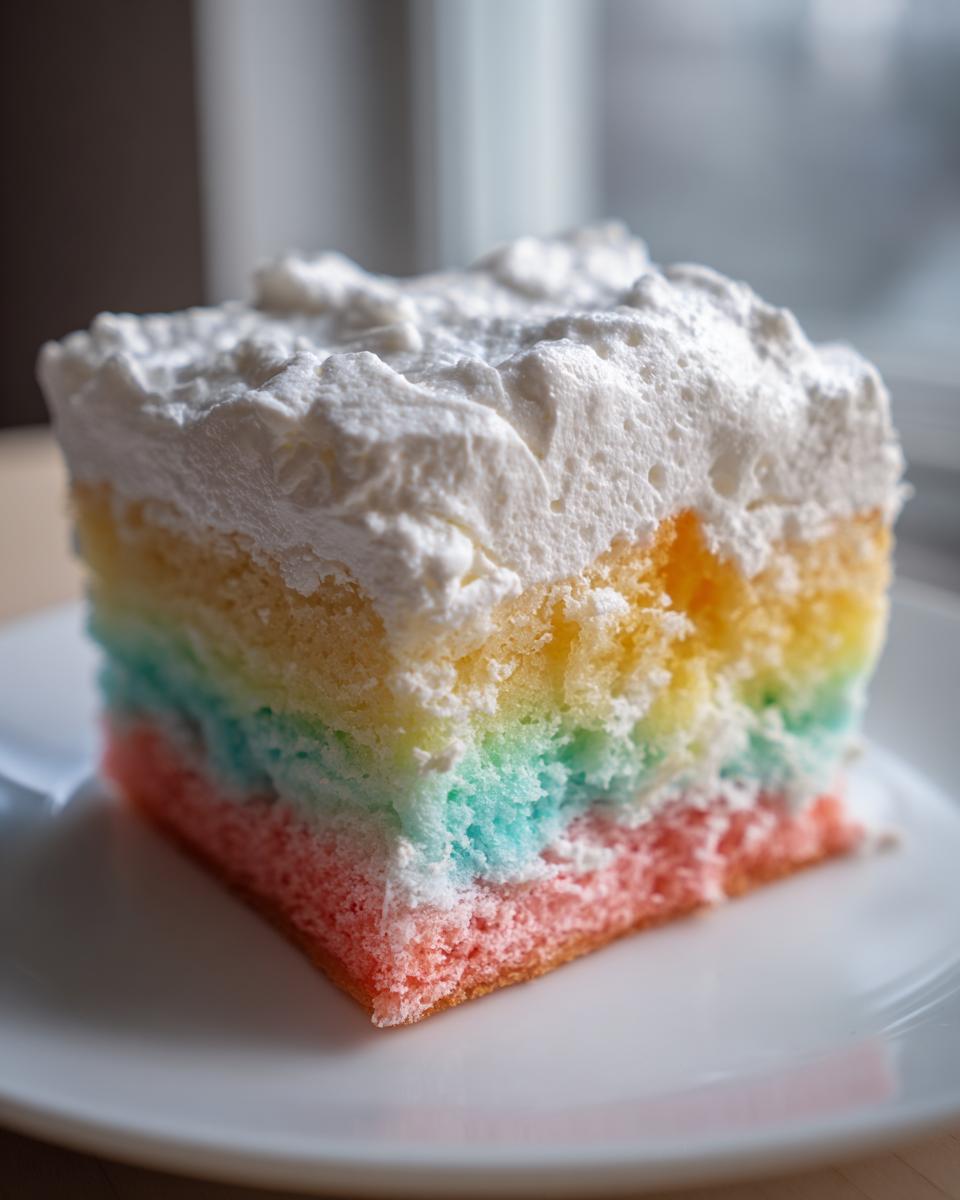
Honestly, pick what you love! Strawberry is universally loved, especially for summer parties. But if you want something really fun, try making a rainbow cake using layers of cherry, lemon, lime, and blue raspberry. It becomes the ultimate **sweet treat jello** centerpiece. For weekly baking, I usually stick to what’s on sale, but for holidays, I follow the red/green rules!
If you are trying to figure out dinner plans before dessert, check out my go-to weeknight dinner ideas!
Sharing Your Colorful Dessert Experience
Well, that’s it! You’ve made the easiest, most colorful contribution to any party table—your beautiful jello poke cake is ready.
Now, I absolutely want to hear about it! Did you stick with the classic flavor, or did you try that fun Strawberry Poke Cake variation? Please leave me a rating below and tell me what everyone thought. If you snapped a picture, share it! You can always reach out to me directly through my contact page too—I can’t wait to see your amazing Jello-soaked treats!
- If you need anything else, feel free to reach out directly to me here.
Easy Moist Jello Poke Cake Recipe

Make this easy Jello poke cake for a moist, colorful dessert perfect for parties or potlucks. It uses a box mix and simple steps for a crowd-pleasing sweet treat.
- Prep Time: 15 min
- Cook Time: 35 min
- Total Time: 4 hours 50 min
- Yield: 12 servings 1x
- Category: Dessert
- Method: Baking and Chilling
- Cuisine: American
- Diet: Vegetarian
Ingredients
- 1 box white cake mix
- Ingredients required for cake mix preparation (usually eggs, oil, water)
- 1 package (3 oz) flavored gelatin (like Strawberry or Lime Jello)
- 1 cup boiling water
- 1 cup cold water
- 1 container (8 oz) frozen whipped topping, thawed (Cool Whip)
Instructions
- Prepare the white cake mix according to package directions. Pour the batter into a 9×13 inch baking pan.
- Bake the cake as directed on the box. Remove the cake from the oven when done.
- While the cake is still warm, use the handle of a wooden spoon or a large fork to poke holes all over the top surface of the cake. Space the holes about one inch apart.
- In a separate bowl, dissolve the flavored gelatin completely in the boiling water. Stir for two minutes.
- Stir in the cold water.
- Carefully and slowly pour the liquid gelatin mixture evenly over the entire surface of the warm cake, allowing the liquid to soak into the poked holes.
- Refrigerate the cake for at least 3 to 4 hours, or until the gelatin is fully set.
- Once the cake is chilled and set, spread the thawed whipped topping evenly over the top layer.
- Slice and serve this colorful dessert immediately.
Notes
- For a festive Christmas Jello Cake, use red and green Jello layers, preparing one color, chilling until set, then pouring the second color on top.
- You can substitute the whipped topping with homemade whipped cream for a richer flavor.
- This recipe works well with any flavor of Jello you prefer for a summer party food treat.
Nutrition
- Serving Size: 1 slice
- Calories: 280
- Sugar: 35
- Sodium: 250
- Fat: 10
- Saturated Fat: 4
- Unsaturated Fat: 6
- Trans Fat: 0
- Carbohydrates: 45
- Fiber: 1
- Protein: 3
- Cholesterol: 25