
There’s something about French pastry that just feels like pure elegance, isn’t there? It looks complicated, like it belongs behind a glass case in a Parisian bakery, but I promise you, the classic apple tart—the Tarte aux Pommes—can absolutely live on your kitchen counter.
When I first came back to baking after years away, I needed recipes that felt special but didn’t demand perfection. This recipe is the result of that rediscovery. We are using simple techniques and top-quality apples to make an elegant apple dessert that consistently avoids the dreaded soggy bottom. Trust me, I’ve figured out the tricks so you don’t have to lose any sleep over it. This is the simple, buttery crust tart that reminds me daily why I started cooking again in the first place. If you love this spirit of elegant simplicity, you should definitely check out the tips I shared for my apple pie cheesecake recipe.
- Why This Easy Apple Tart Recipe Works for Home Cooks
- Gathering Ingredients for Your Classic Apple Tart
- Step-by-Step Guide to Making the Best Apple Tart Recipe
- Tips for the Most Elegant Apple Dessert
- Variations on the Classic Apple Tart
- Storage and Reheating Instructions for Your Homemade Apple Tart
- Serving Suggestions for This Simple Apple Tart Dessert
- Frequently Asked Questions About Making Apple Tart
- Nutritional Estimates for Your Apple Tart
- Share Your Apple Tart Success
Why This Easy Apple Tart Recipe Works for Home Cooks
I get it. French pastry has a reputation for being fussy, but this recipe proves you can have the absolute best apple tart recipe without spending all day stressing. My goal is always to simplify classics so you get an elegant result with minimal fuss. If you’re looking for more straightforward, quality treats, you should look through my collection of delicious dessert recipes.
Here is why this simple apple tart dessert shines:
- It relies on high-quality, accessible ingredients, meaning less scrambling at the store.
- The technique is straightforward—we are ditching complicated dough rolling for an easy base.
- It delivers that impressive, restaurant-quality look with very little actual baking skill required.
Achieving the Perfect Buttery Crust Tart
If you are short on time, which is most of the time for me these days, we are using store-bought puff pastry. Don’t let anyone tell you that compromises quality! It bakes up incredibly flaky and buttery, giving you that wonderful crust texture right away. It’s the key to making this an easy apple tart!
The Secret to a Non-Soggy Apple Tart
This right here is where we earn our stripes in expertise. The number one complaint folks have about homemade apple tarts is a wet, soggy bottom crust. It happens when the apples release all their water in the oven! My step-by-step calls for tossing your sliced apples with the flour and sugar right before arranging them. That tiny bit of flour absorbs the extra liquid released during baking, locking out moisture and keeping your crust beautifully crisp.
Gathering Ingredients for Your Classic Apple Tart
Okay, now that we have our game plan, let’s talk ingredients. A wonderful apple tart—even an easy one—always starts with quality components! You don’t need much, which is another reason I love this dessert so much for weeknights. When you’re stocking up, try to remember that simple food means every ingredient really shines through. If you’re looking for other simple additions to your baking list, check out my favorite dip recipe over here here!
Here is what you need to pull together for this beautiful, rustic apple tart:
- One sheet of store-bought puff pastry (or if you are feeling ambitious, your own homemade shortcrust pastry!).
- 4 large baking apples—make sure they are peeled, cored, and thinly sliced (about 1/8 inch thickness is perfect).
- 1/4 cup granulated sugar.
- 2 tablespoons unsalted butter, melted smooth.
- 1 tablespoon all-purpose flour—remember this is for the crust insurance!
- 1 large egg, beaten up well for the egg wash.
- 1 tablespoon apricot jam or a clear glaze if you want that super shiny bakery look.
Ingredient Notes and Apple Substitutions for Your Apple Tart
When choosing apples, I always lean toward something with a bit of tartness that holds its shape while baking. Granny Smith is the classic choice, but I adore using Honeycrisp because they are so crisp when you slice them. They keep that structure beautifully. Stay away from the really soft, mealy types—they just turn mushy, and we want tender, not mushy, in our ideal apple tart.
If the idea of apricot jam on top sounds too sweet, don’t stress! I sometimes skip it entirely, or I’ll melt a teaspoon of butter with a tiny drizzle of honey and brush that over the warm apples instead. It still gives you a lovely sheen without adding too much extra fructose to your already sweet dessert.
Step-by-Step Guide to Making the Best Apple Tart Recipe
Alright, let’s get baking! I always tell people that the secret to making the Best Apple Tart Recipe isn’t some fancy ingredient; it’s just following the steps in the *right* order. We want our oven hot and ready, so start preheating that beauty to 400°F (200°C) while you work. If you’re using the puff pastry from the fridge, take it out now so it can relax a bit while you prep everything else. If you need some inspiration for savory meals while you wait, hop over and check out my easy baked ranch chicken!
Preparing the Apples and Setting Up for Your Apple Tart
This is the step that saves your crust, so pay attention! As soon as you peel, core, and thinly slice your apples, toss them immediately in a bowl with that sugar and the tablespoon of flour. Don’t skip that flour; it’s absorbing all the liquid these apples are desperate to release. You want them coated nicely. Once they are sugared, line a baking sheet with parchment paper—this is easier than wrestling with a tart dish, especially if you are making a free-form, rustic apple tart!
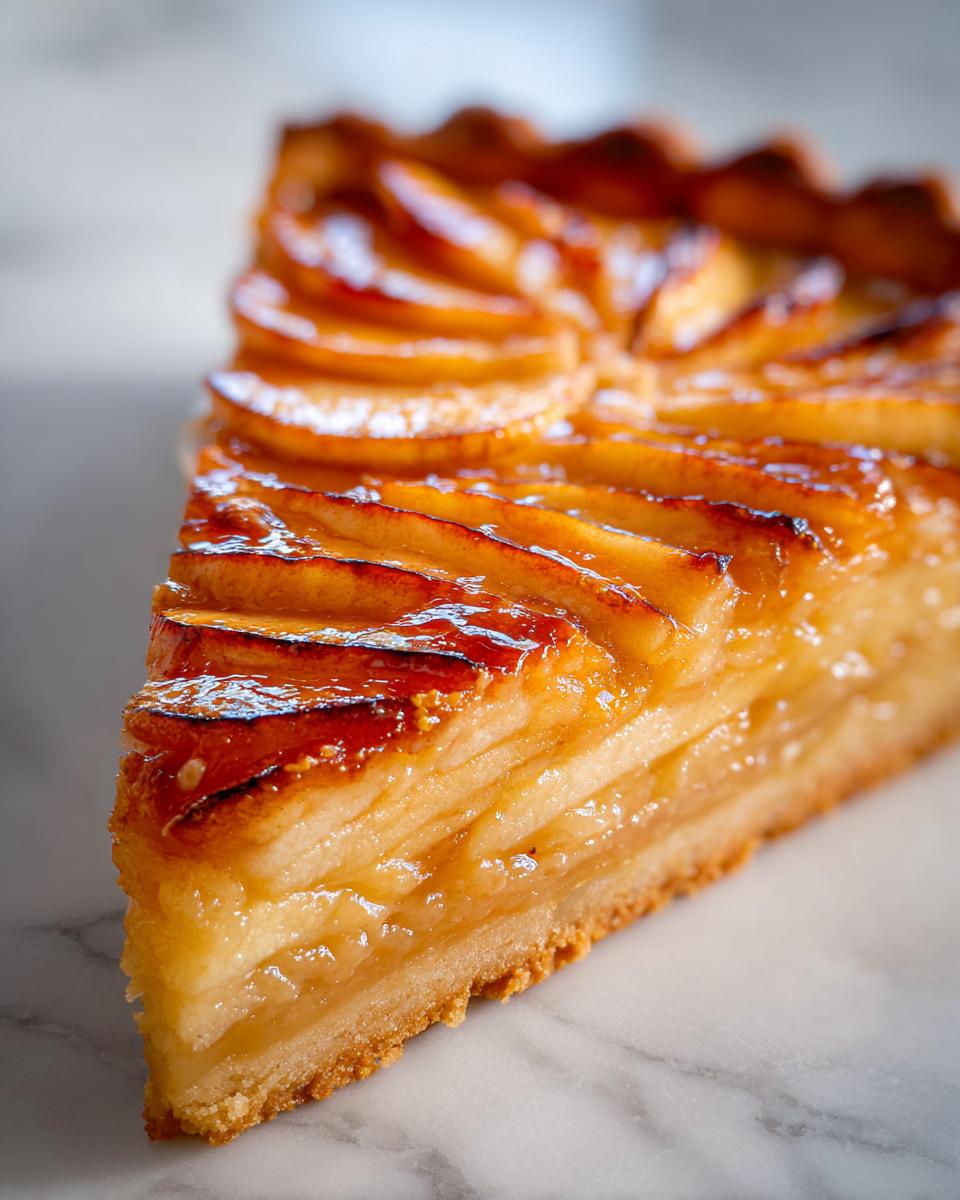
Assembling and Decorating the Rustic Apple Tart
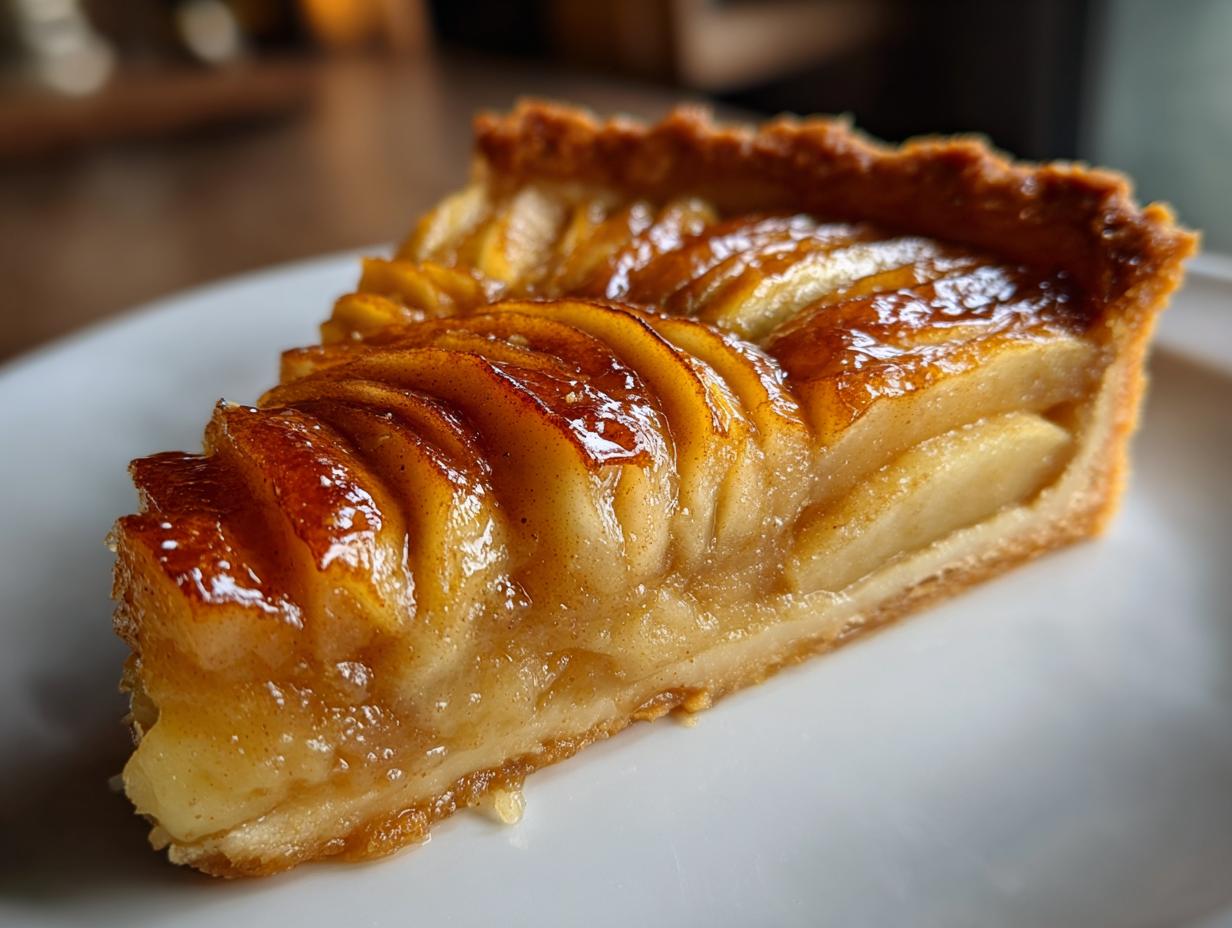
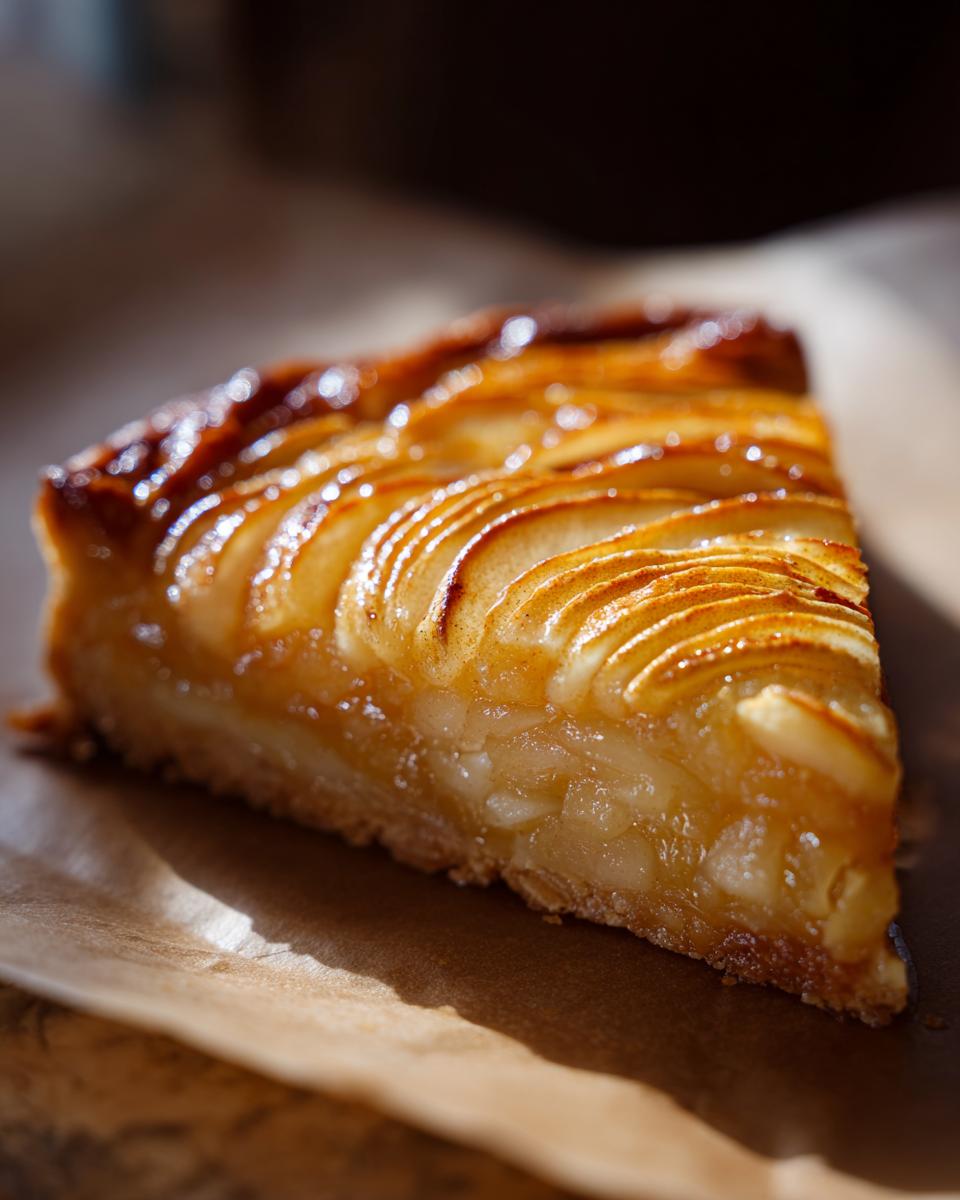
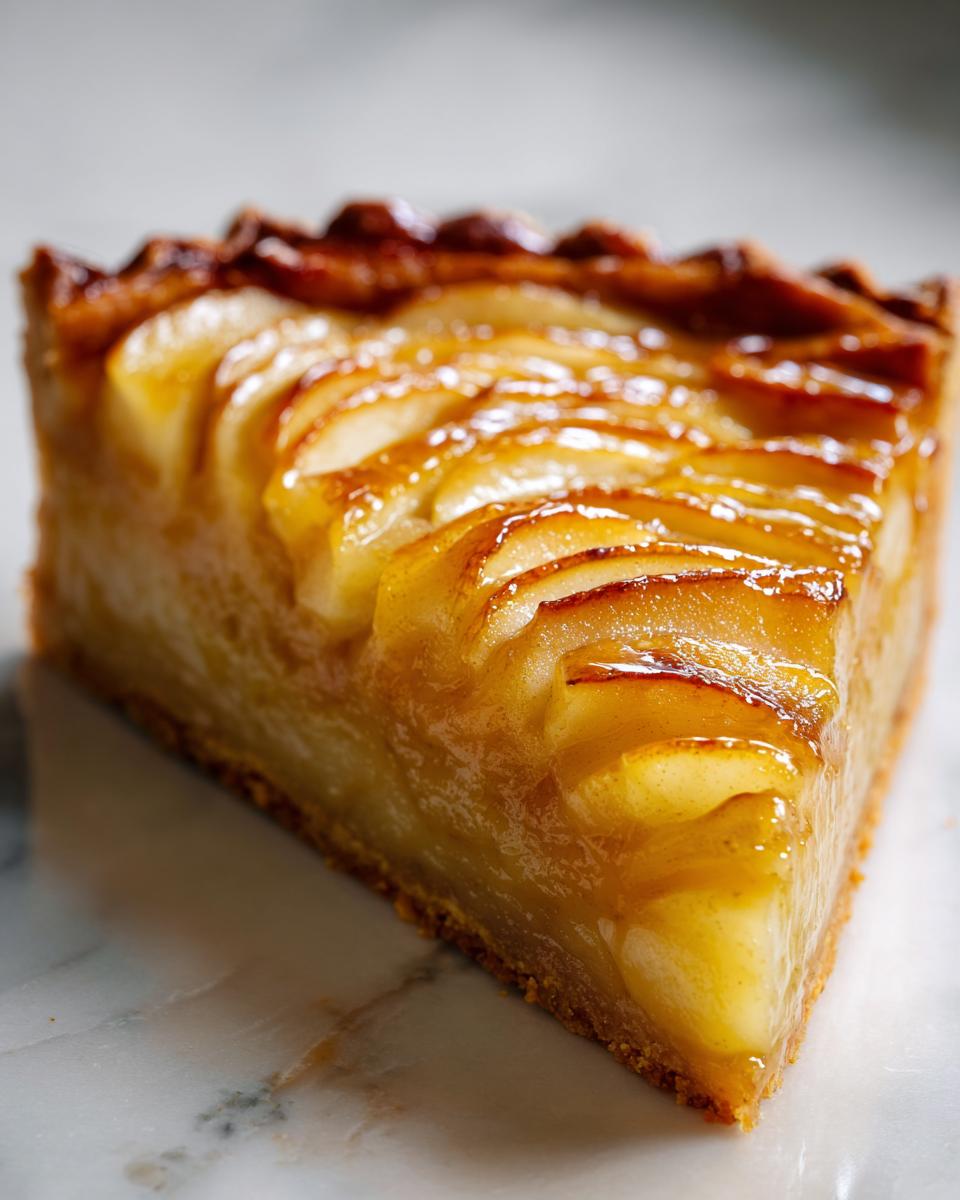
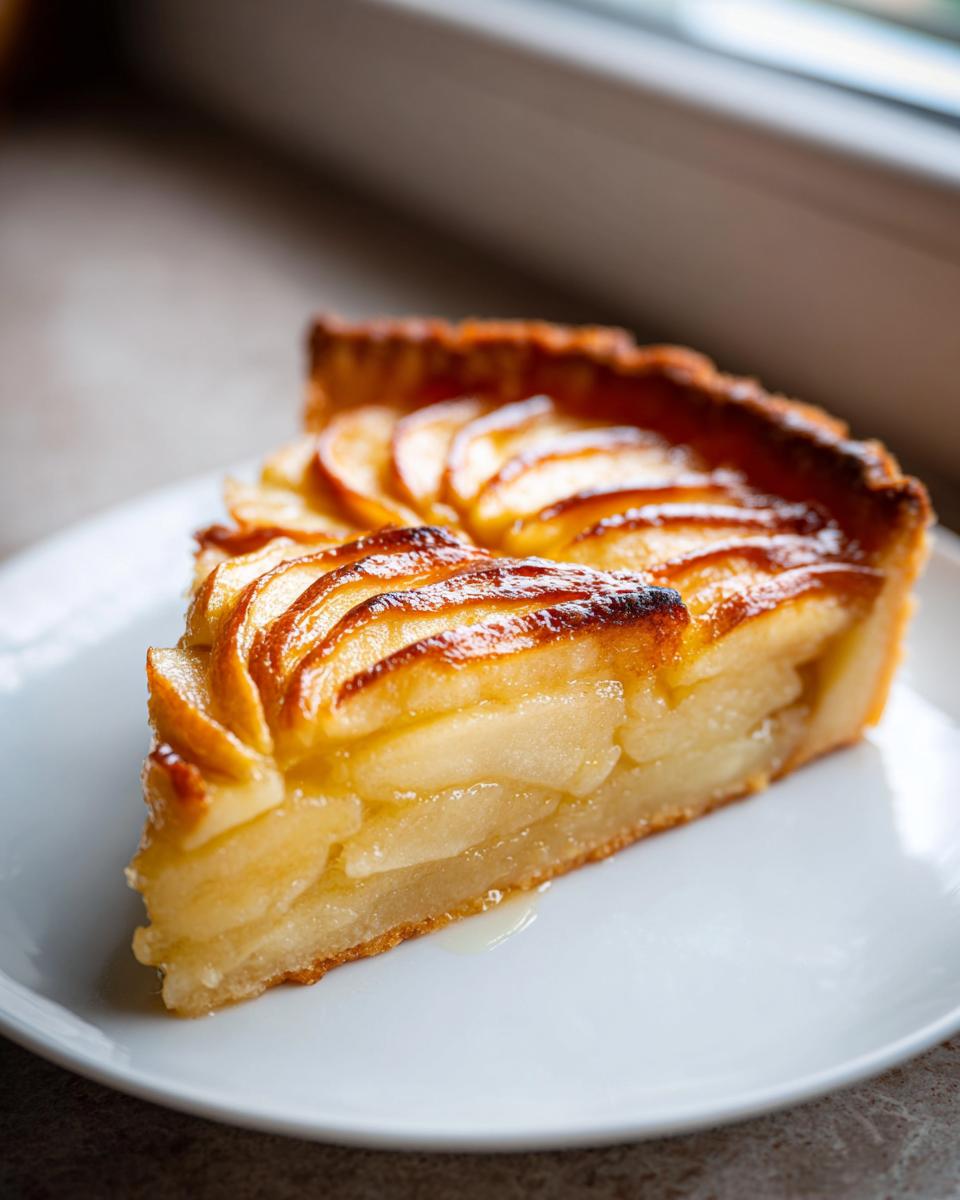
Now for the fun part: laying out your fruit! Unroll your cold pastry sheet onto that parchment paper. If you are using a round tart pan, fit it in now. If you’re keeping it rustic on the baking sheet like I often do, just score a border about an inch in from the edge—this creates a nice lifted rim for your apples. Then, arrange those gorgeous slices neatly inside. Overlap them slightly, maybe in a spiral or a fancy rose pattern if you have the patience, but honestly, just covering the base completely works wonders for a stunning dessert.
Baking and Glazing the Finished Apple Tart
Time to put some color on the crust! Brush that egg wash only on the pastry border; you don’t want egg washing your apples! Then drizzle that melted butter right over the arranged apples. Pop it into that hot oven for about 30 to 35 minutes. You’re looking for a deeply golden, crisp-looking crust. Once it’s out, wait just a minute, then brush on that warmed apricot jam if you want that beautiful, shiny finish that makes everyone think you’re a master of classic Tarte aux Pommes. Let it cool just enough to set up before slicing!
Tips for the Most Elegant Apple Dessert
A huge part of enjoying baking, especially when making something elegant like a French apple tart, is the presentation. Even if you used store-bought pastry, we are going to make this look like you spent three days on it! If you want to step up the spice game—and I highly recommend you do—try adding just a tiny pinch of cardamom along with your cinnamon before baking. It adds this subtle, warm background note that is just dreamy.
For that beautiful, tight rose pattern you often see, slice your apples ultra-thin—almost translucent. Then, after tossing them with the sugar, you just layer them over each other in a tight, overlapping circle, starting from the outside edge and working your way into the middle. It takes maybe five extra minutes, but wow, the payoff is huge!
If you love deep cinnamon spice, you should absolutely check out my favorite way to get that warming flavor into doughs when I make my cinnamon roll recipe; a little of that technique applies here too!
If you need inspiration for your next holiday bake, take a peek over at Mandy’s take on the French apple tart—she always has such lovely presentation ideas!
Variations on the Classic Apple Tart
One of the best parts about having a solid foundation, like this easy apple tart recipe, is how simple it is to pivot when you have unexpected guests or just a craving for something a little different. You don’t need a whole new recipe; you just need a slight nudge!
If you want to lean into that warm, cozy fall feeling, my favorite adjustment is turning this into a proper Cinnamon Spiced Apple Tart. Before shaking the apples with the sugar and flour, add about 3/4 teaspoon of ground cinnamon and a tiny pinch of nutmeg right into that mixture. It deepens the flavor profile so beautifully. I use this exact trick when I make the filling for my applesauce cookies too!
For those who love a deeper, richer flavor reminiscent of a toffee, consider making a quick Caramelized Apple Tart. Instead of just layering raw apples, try cooking them down first. Just slowly sauté half your apple slices in the melted butter until they start to soften and slightly brown before you arrange them on the pastry. You can also find some amazing inspiration for that richer flavor profile over at Fast Comfort Food.
Don’t forget that every little tweak keeps things interesting and lets you personalize your very own signature dessert!
Storage and Reheating Instructions for Your Homemade Apple Tart
So, what do you do when you have leftovers of this amazing apple tart? This is where we have to be a little protective of that beautiful, crisp crust we worked so hard for!
Honestly, if you made this earlier in the day and know you’ll finish it before evening, leaving it at cool room temperature, well-covered, is usually best. The fridge is the enemy of a flaky crust because the moisture creeps in, making things soft. However, if you need to keep it for two or maybe three days, covering it tightly and putting it in the fridge is functional.
When you’re ready for a slice later, try letting it come to room temperature for about 30 minutes first. If you really want to revive that crust, a couple of minutes in a toaster oven (not the microwave!) will crisp it right back up.
Serving Suggestions for This Simple Apple Tart Dessert
Part of the joy in baking something elegant like a French apple tart is knowing exactly how to present it when it hits the table. For this dessert, simple accompaniments are always the best way to elevate the flavor without overpowering the tender apples.
If you’re aiming for that classic, comforting feel, you truly can’t go wrong with a scoop of really good vanilla ice cream melting over the warm slice. It’s perfect for those of you just starting out with pastry—it’s hard to mess up vanilla ice cream!
But if you want to lean into the French influence, go ahead and serve it with a dollop of crème fraîche or even some good, lightly sweetened whipped cream. The slight tang cuts right through the sweetness of the fruit and butter, and it’s just divine. If you ever need a creamy base for savory dishes, I have a great homemade Alfredo sauce recipe that uses a similar richness concept!
Frequently Asked Questions About Making Apple Tart
I figured you might have a few lingering questions, especially when tackling something that seems so fancy but is actually designed to be approachable! I’ve gathered the questions folks ask the most when they are getting ready to bake their very first, or maybe their best, apple tart.
Can I use pie dough instead of puff pastry for this apple tart?
Yes, absolutely! If you prefer a proper shortcrust pastry—that melt-in-your-mouth crumbly texture—you can totally swap it out for the puff pastry. Just know that the texture will change. Puff pastry gives you those vertical layers and all that lift, making it super flaky. A traditional pie dough or shortcrust pastry will give you a denser, more cookie-like base. Either way, you’ll still end up with a gorgeous Apple Tart with Flaky Crust; it’s just a different kind of flakiness! If you’re planning your week, this tart is definitely faster than trying to whip up those weeknight dinner ideas I sometimes share!
How do I make this a Quick Puff Pastry Apple Tart?
The good news is that this recipe is already designed to be a Quick Puff Pastry Apple Tart! That’s why I specify using store-bought puff pastry. As long as you buy the pre-rolled sheets—which you can find in almost any freezer aisle now—the prep time drops dramatically. You literally just thaw it, score it, arrange the fruit, and bake! It’s the definition of a No Fuss Apple Tart. If you’re looking for other ways to speed up dessert making, I have a few secrets shared over at my contact page.
What makes this recipe authentic to a French Apple Tart Recipe (Tarte Aux Pommes Authentic)?
That’s a great question, as the term gets thrown around a lot! A truly authentic Tarte aux Pommes, the way they make it in France, is defined by its simplicity and focus on the fruit. It doesn’t usually have heavy custard, nuts, or tons of added cream filling that you see in Americanized versions. Our recipe keeps the crust thin and buttery, and the apples are arranged neatly right on top. It’s elegant because of its restraint. We score that border and arrange the apples nicely, echoing that classic look. For more classic inspiration, you can see how Mandy approaches her beautiful bakes here: Rustic French Apple Tart.
Nutritional Estimates for Your Apple Tart
Now, I know most of us aren’t chasing spreadsheets when we are baking something this lovely, but I always like to give you a general idea of what’s in a slice of this apple tart. These numbers are just estimates based on the ingredients listed, and they can swing depending on whether you picked Granny Smith or Honeycrisp apples, or what brand of puff pastry you splurge on! So, take these as a guideline, not a strict law. If you want some healthier ideas to start your day, I have some great healthy breakfast ideas!
Per serving, you’re looking at roughly:
- Calories: 320
- Fat: 18g
- Carbohydrates: 38g
- Sugar: 22g
- Protein: 4g
Remember, baking is about joy, not metrics! Enjoy every buttery, flaky bite.
Share Your Apple Tart Success
I truly hope you’ve enjoyed pulling this elegant dessert together. The kitchen smells heavenly when one of these apple tarts is cooling, doesn’t it?
If you made this easy apple tart, please do me a huge favor: head down to the comments below and give it a star rating! I love seeing what you all think. And if you posted a gorgeous picture to Instagram or Facebook, tag me so I can see your handiwork! I always love hearing how you personalized your bake. If you have questions about the next recipe you want to try, you can always reach me directly via my contact page!
PrintEasy Classic French Apple Tart (Tarte aux Pommes)

Make this simple French Apple Tart using a buttery crust and tender apples. This recipe focuses on achieving a crisp bottom for a delicious, elegant dessert.
- Prep Time: 20 min
- Cook Time: 35 min
- Total Time: 55 min
- Yield: 6 servings 1x
- Category: Dessert
- Method: Baking
- Cuisine: French
- Diet: Vegetarian
Ingredients
- 1 sheet store-bought puff pastry (or homemade shortcrust pastry)
- 4 large baking apples (like Honeycrisp or Granny Smith)
- 1/4 cup granulated sugar
- 2 tablespoons unsalted butter, melted
- 1 tablespoon all-purpose flour
- 1 large egg, beaten (for egg wash)
- 1 tablespoon apricot jam or glaze (optional, for shine)
Instructions
- If using puff pastry, let it thaw according to package directions. Preheat your oven to 400°F (200°C). Line a baking sheet with parchment paper.
- Prepare the apples: Peel, core, and thinly slice the apples. In a medium bowl, gently toss the apple slices with the granulated sugar and flour. This helps absorb moisture and prevents a soggy bottom.
- Prepare the crust: Unroll the pastry sheet onto the prepared baking sheet. If you are using a round tart pan, fit the pastry into the pan, trimming the edges. If using a baking sheet, score a 1-inch border around the edge of the pastry; do not cut all the way through.
- Arrange the apples: Layer the sugared apple slices neatly over the pastry inside the scored border, overlapping them slightly in a decorative pattern, like a rose or concentric circles.
- Brush the pastry border with the beaten egg wash. Drizzle the melted butter evenly over the apples.
- Bake for 30 to 35 minutes, or until the crust is golden brown and the apples are tender.
- If using glaze: While the tart is still warm, gently heat the apricot jam with a teaspoon of water until liquid. Brush this mixture lightly over the warm apples for a glossy finish.
- Let the tart cool slightly on the baking sheet before slicing and serving.
Notes
- To prevent a soggy bottom, ensure your apples are tossed well with the flour and sugar mixture to draw out excess liquid before baking.
- For a richer flavor, substitute half the granulated sugar with light brown sugar.
- Serve this elegant apple dessert warm with vanilla ice cream or fresh whipped cream.
Nutrition
- Serving Size: 1 slice
- Calories: 320
- Sugar: 22
- Sodium: 150
- Fat: 18
- Saturated Fat: 10
- Unsaturated Fat: 8
- Trans Fat: 0
- Carbohydrates: 38
- Fiber: 3
- Protein: 4
- Cholesterol: 45