
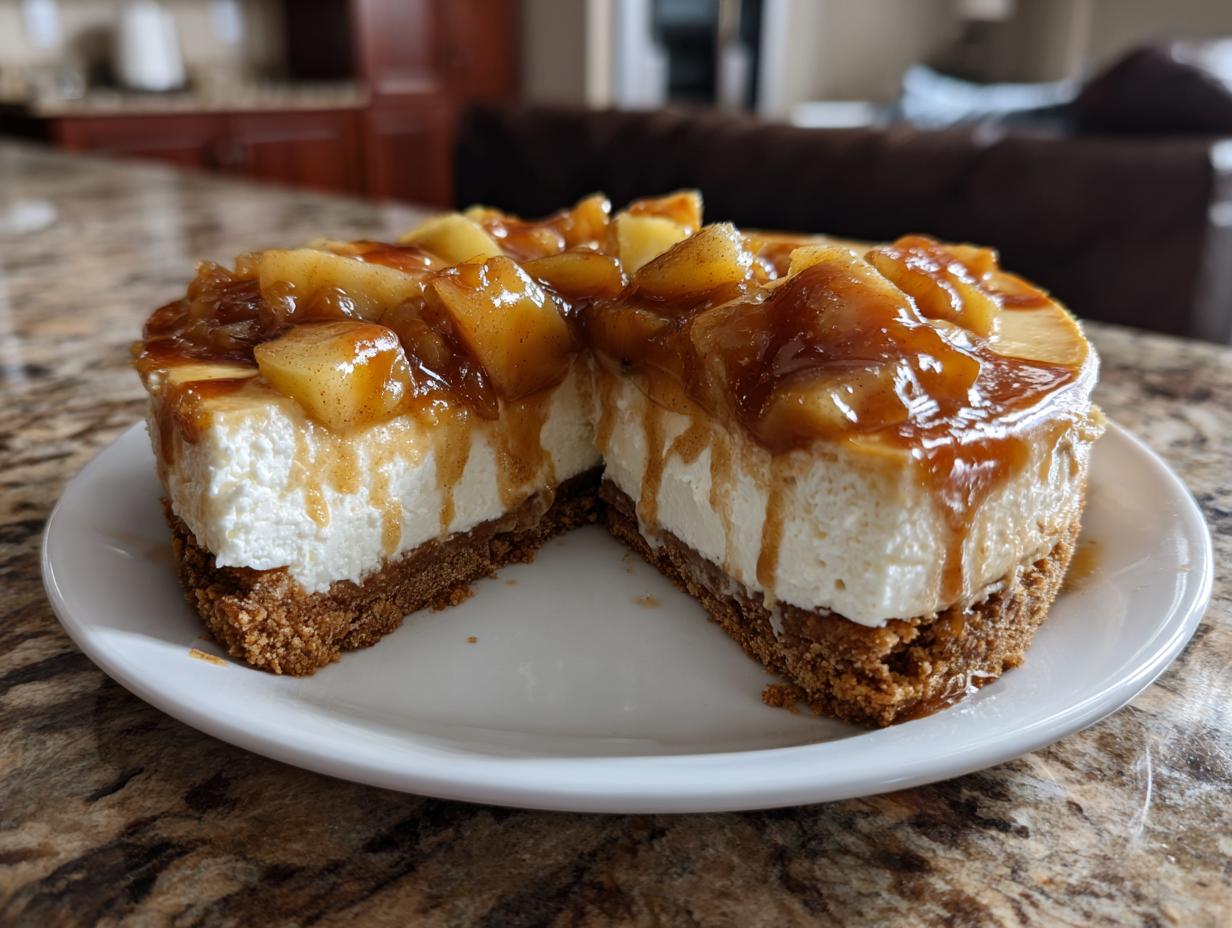
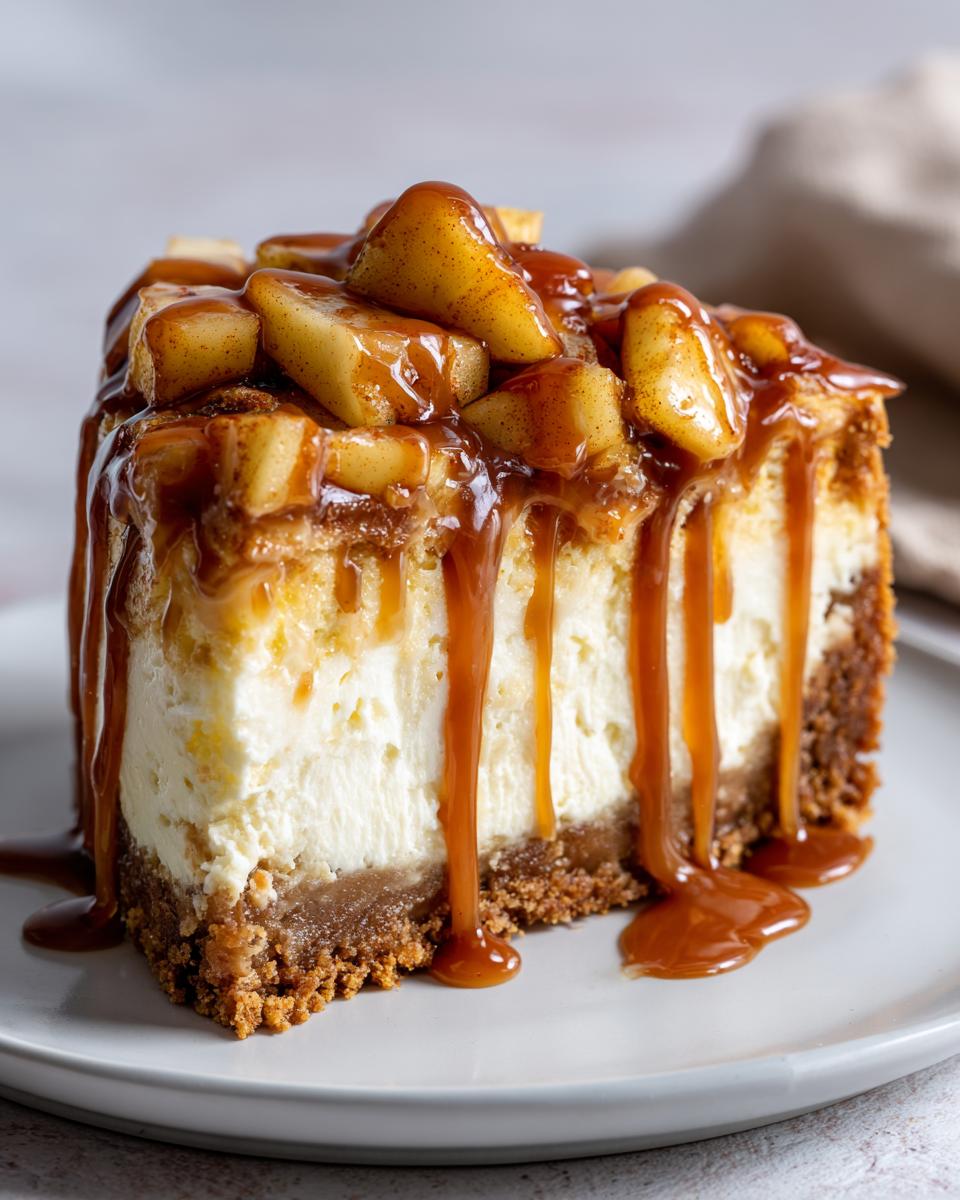
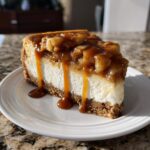
If you’ve ever stood staring at the bakery case, paralyzed because you simply can’t choose between a slice of warm, spiced apple pie and rich, cool cheesecake, I have your answer. We’re blending the two best ideas into one breathtaking marriage: the apple pie cheesecake. This is not just any dessert; this is my signature Baked Apple Pie Cheesecake with Salted Caramel Drizzle. Coming back to baking simplicity from my busy city life, I needed recipes that delivered maximum comfort with honest technique. This dessert is the result—a creamy, spiced masterpiece that feels like coming home.
- Why This Baked apple pie cheesecake Recipe Stands Out (E-E-A-T Focus)
- Gathering Ingredients for Your apple pie cheesecake
- Step-by-Step Instructions for the Baked apple pie cheesecake
- Tips for the Best apple pie cheesecake Results
- Variations: Customizing Your apple pie cheesecake
- Serving and Storing Your apple pie cheesecake
- Frequently Asked Questions about apple pie cheesecake
- Nutritional Estimates for This apple pie cheesecake
- Share Your apple pie cheesecake Creations
Why This Baked apple pie cheesecake Recipe Stands Out (E-E-A-T Focus)
When you’re bringing something special to a gathering, you deserve confidence! This recipe isn’t just throwing apples on top of a standard cheesecake; it’s a true fusion built on techniques my grandmother taught me about structure and flavor layering. We’re achieving that perfect middle ground—rich and satisfying, yet beautifully smooth. We’ve tested this countless times to find the absolute best apple cheesecake balance between tartness and sweetness. It truly elevates any holiday table or cozy fall evening. This is cooking rooted in experience; you can learn more about our philosophy here.
- The textural harmony between the crisp graham crust and the velvety filling is unmatched.
- The homemade cinnamon apple topping tastes miles better than anything store-bought.
- It looks incredibly impressive without demanding hours of fussy decoration.
Key Components of a Perfect apple pie cheesecake
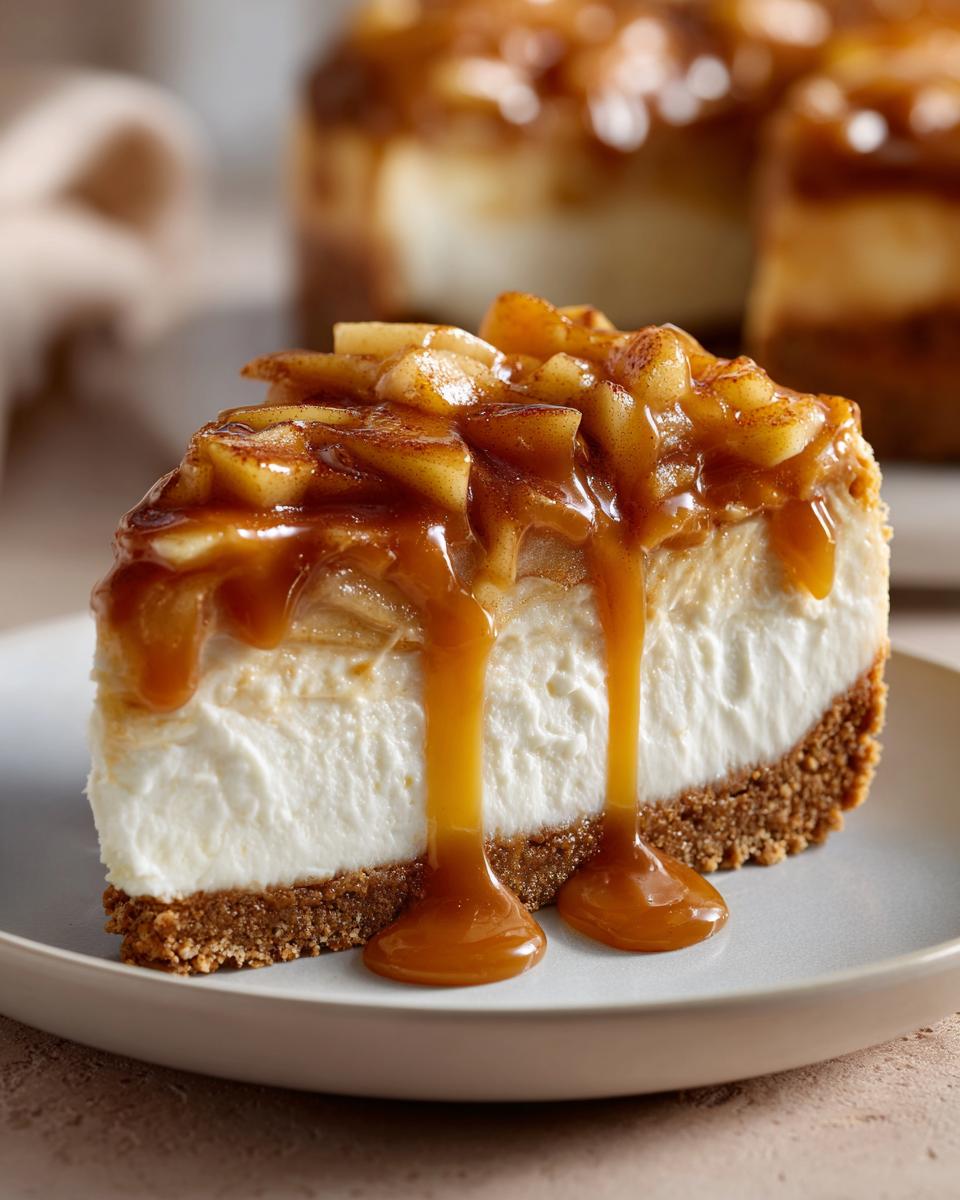
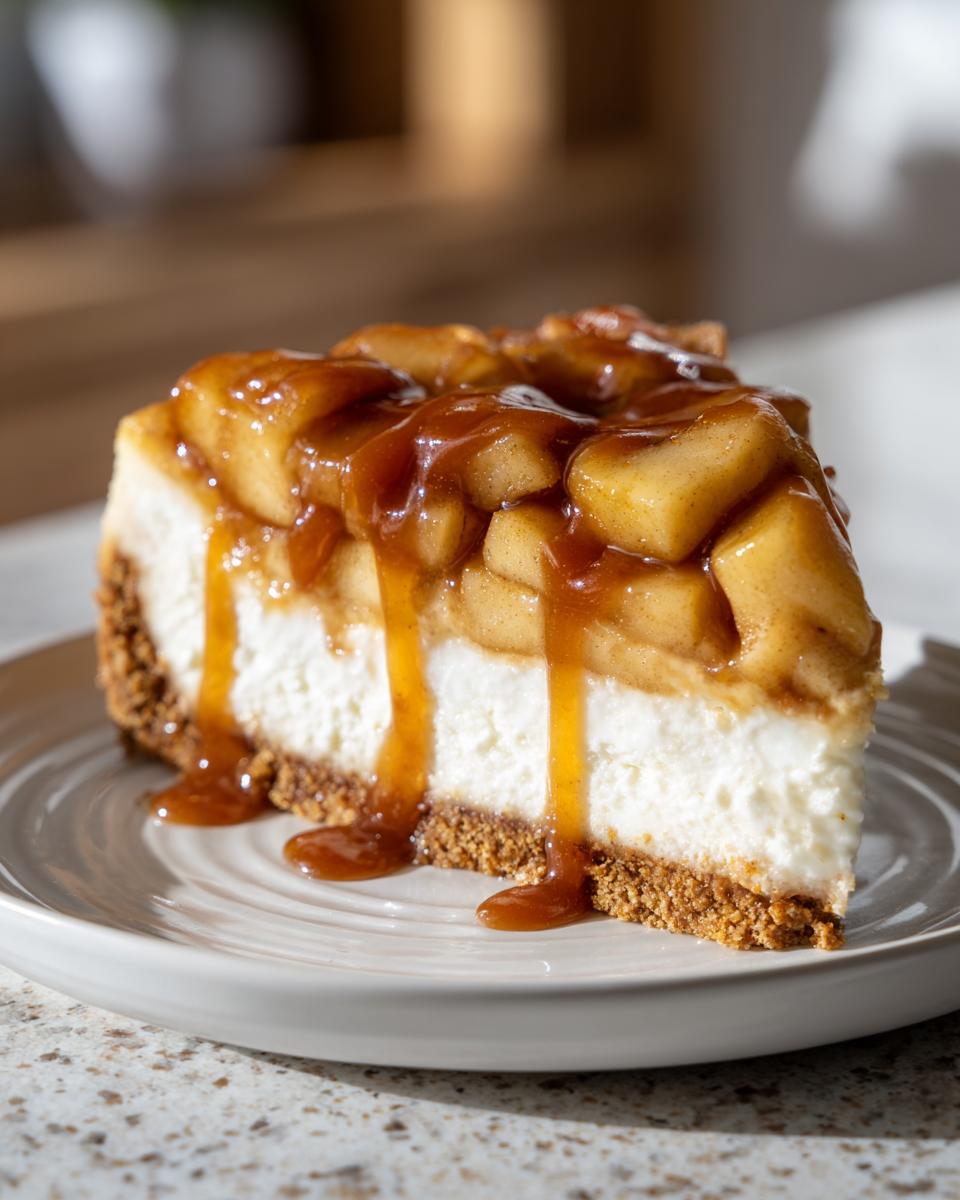
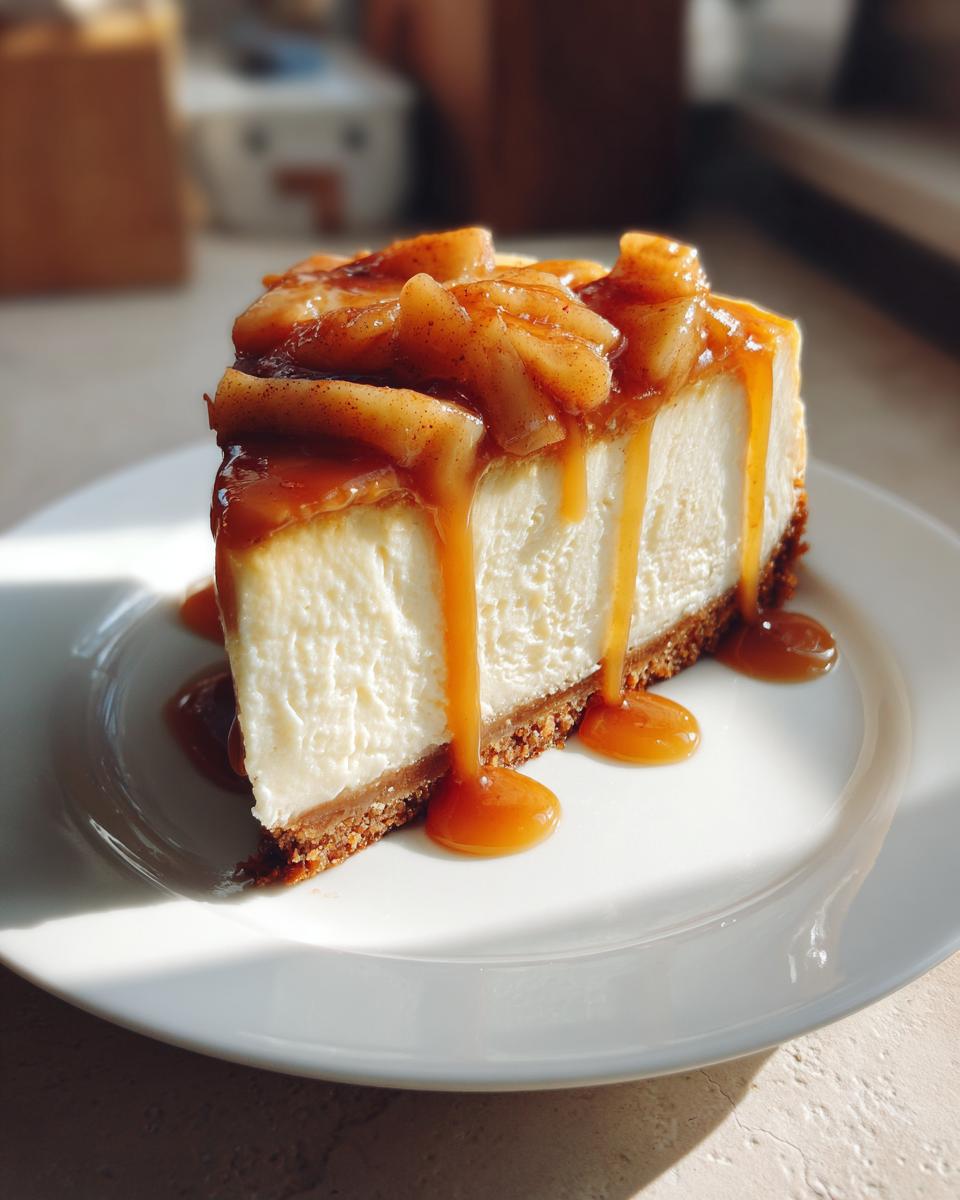
You’ve got three main acts here: the crunchy graham cracker crust, the luscious baked body, and the chunky spiced apple blanket. To get that famous, ultra-smooth result—what I call a creamy apple cheesecake—that water bath is non-negotiable. It keeps the oven gentle and steamy, preventing harsh heat from toughening the filling around the edges. Trust me, it’s the secret weapon for a perfect, crack-free surface.
Gathering Ingredients for Your apple pie cheesecake
Alright, let’s chat about what you need to pull off this sensational apple pie cheesecake. Remember, quality matters here, especially when it comes to the base! A good graham cracker crust dessert needs the right foundation. I insist on using full-fat, high-quality cream cheese because it melts into the silkiest texture imaginable. Don’t skimp here—it makes the world of difference, I promise!
For the Graham Cracker Crust
- 1 1/2 cups graham cracker crumbs (use a food processor or crush them up really finely!)
- 1/4 cup granulated sugar
- 6 tablespoons unsalted butter, melted
For the Creamy Cheesecake Filling
- 3 (8 ounce) packages cream cheese, softened completely—and I mean fully softened, leave it out for hours!
- 1 1/2 cups granulated sugar
- 1 teaspoon vanilla extract
- 1/4 teaspoon salt
- 3 large eggs
For the Cinnamon Apple Topping and Drizzle
- 2 cups sliced apples (Granny Smith or Honeycrisp work beautifully because they keep their shape)
- 1/4 cup packed brown sugar
- 1 teaspoon ground cinnamon
- 1 tablespoon cornstarch mixed with 1/4 cup water (this is our thickening slurry!)
- 1/2 cup salted caramel sauce
Step-by-Step Instructions for the Baked apple pie cheesecake
Okay, this is where the magic really happens, but remember what Grandma taught me: baking with love means taking your time! We’re mixing up a fantastic dessert, so don’t rush those steps, especially the cooling. We’re starting with an oven set to 350°F (175°C), and we’ll need a good 6 hours minimum, preferably overnight, of chilling time after all is said and done. Don’t you dare check on it too soon once it’s done baking; patience is the key to a truly gourmet apple dessert!
Preparing the Crust and Pan
First things first, get that 9-inch springform pan ready. You absolutely must wrap the outside tightly with heavy-duty aluminum foil—I usually do two layers, going high up the sides. This is for our water bath later, and trust me, if water sneaks in, you’ll cry. In a small bowl, mix your graham cracker crumbs and the 1/4 cup of sugar you set aside. Pour in the melted butter and smash it all together with the back of a spoon until it looks like wet sand. Press this mixture firmly and evenly into the bottom of your foil-wrapped pan. Pop that base into the oven for just 10 minutes to set it, then pull it out and let it cool down a touch while you make the filling.
Making the Creamy Cheesecake Filling
Grab your largest mixing bowl! You want your cream cheese room temperature for this, remember? Beat the cream cheese on its own until it’s perfectly smooth—no lumps allowed! Only then do you add the 1 1/2 cups of sugar, vanilla, and salt. Mix that until it’s just combined. Now, this is essential: add your three eggs in one at a time. I mean it—one yolk breaks, mix on low speed until just gone, then add the next. If you beat too hard after the eggs go in, you incorporate air, and air equals cracks later. We want smooth sailing here!
Cooking the Spiced Apple Topping
While the crust is cooling, let’s tackle those apples! Grab a medium saucepan—no need to use the mixer for this part. Toss your sliced apples, the brown sugar, cinnamon, and the cornstarch/water slurry right into the pan. Cook this over medium heat, stirring it around happily for about 8 to 10 minutes. You’ll know it’s ready when the sauce around the apples starts looking glossy and thickens up nicely. Pull it off the heat and let it cool down for about 10 minutes before you even think about putting it on the batter. Hot apples melt cheesecake batter, and we don’t want that melting!
Assembly, Water Bath, and Baking
Pour that beautiful, smooth cheesecake batter right on top of your set crust. Take your slightly cooled spiced apples and spoon them gently and evenly over the top of the batter. You can leave them layered, or take a toothpick and do a quick, gentle swirl if you feel artistic! Now, carefully place your foil-wrapped cheesecake pan inside a much larger roasting pan. Slowly pour hot water into the roasting pan until it comes about halfway up the sides of your springform pan. Slide the whole setup into your preheated 350°F (175°C) oven. Bake this treasure for 60 to 75 minutes. The edges should look firm, but if you give the center a tiny, gentle nudge, it should still have a little wobble. That slight jiggle means it’s done!
Cooling and Chilling for the Best apple pie cheesecake
This next part takes real willpower! Once that baking time is up, turn the oven completely off. Don’t pull the cheesecake out! Just crack the oven door open slightly—you can wedge a wooden spoon in there to keep it ajar. Let the cake sit in that warm, steamy environment for a full hour. This slow cool-down is the secret to avoiding those dreadful cracks in your homemade baked cheesecake. After the hour, pull it out of the water bath, remove the foil, and let it cool completely on a wire rack on the counter. Once it’s just warm, cover it loosely and move it to the fridge for at least 6 hours, but truly, overnight is always best for the ultimate apple pie cheesecake flavor development.
Tips for the Best apple pie cheesecake Results
I know that making a stunning cheesecake can feel intimidating, but honestly, it’s all about nailing a few key technical rules, just like Grandma taught me back in the day. If you follow these tips, you’ll get a flawless slice every time you make this homemade baked cheesecake. We aren’t just succeeding here; we’re creating perfection through simple, time-tested methods. It’s amazing how much difference attention to temperature makes! If you’re looking for bread inspiration after this sweet treat, check out my guide on sourdough sandwich bread.
Ingredient Temperature and Mixing Secrets
I’ve said it once, but I’ll say it again until everyone learns: your cream cheese and eggs must be fully softened and at room temperature. If they are even slightly cold, they won’t blend smoothly, and you end up fighting lumps! Once you add those eggs, slow way down on the mixer. We are combining, not aerating. Overmixing after the eggs are in is the number one cause of cracks, so mix just until you see everything disappear into the batter.
Mastering the Water Bath Technique
Don’t skip wrapping that pan in foil—seriously! The water bath isn’t just some fancy trick; it’s crucial. It creates a perfect humid environment inside your oven. This steam cooks the filling slowly and evenly, which is exactly what you need for that silky, gourmet apple dessert mouthfeel. If the heat is too dry or too direct, the outside cooks too fast and shrinks away from the middle, creating cracks. The bath keeps everything happily hydrated and smooth as velvet.
Variations: Customizing Your apple pie cheesecake
Now that you have the classic down, it’s time to play! This recipe is such a wonderful canvas for fun dessert mashup recipes. We want you to make this your own favorite thing, so don’t feel tied down to just layers of apple. If you’re like me and crave that extra bit of texture, we can easily turn this into a show-stopping Apple Crisp Cheesecake just by adding a few pantry staples to the topping. Baking should always be fun, right? It’s amazing how small tweaks, like substituting different fruit bases such as the ones in my applesauce cookies soft cinnamon browned butter guide, can yield totally different results while keeping that creamy cheesecake core intact.
Creating a Salted Caramel apple pie cheesecake
Oh, this is truly decadent! To make it extra special, take about half your prepared salted caramel sauce and swirl it gently into the cheesecake batter *before* you layer on the spiced apples. Don’t mix it too much—you want those beautiful ribbons of caramel running through the white cream cheese. Then, after the whole thing is chilled and ready to serve, drizzle the remaining sauce generously right over the top. It balances the tartness of the apples perfectly.
Making Mini Cheesecakes Apple Pie
Who doesn’t love an individual treat? If you want to make these into Mini Cheesecakes Apple Pie for easier serving at parties, it’s super simple! Just line a standard 12-cup muffin tin with paper liners and fill them with your crust mixture and batter as directed. The baking time drops down drastically! You’ll bake these small ones at the same temperature, but they’ll likely be done in about 20 to 25 minutes. Keep an eye on them toward the 20-minute mark!
Serving and Storing Your apple pie cheesecake
This amazing apple pie cheesecake tastes even better the next day, so don’t feel pressured to eat it all right away! Seriously, that overnight chill time lets all those spiced apple, caramel, and cream cheese flavors really get to know each other. When you’re ready to present this beauty—perfect for any of your holiday cheesecake ideas—let it sit on the counter for about 30 minutes before slicing. This takes the chill off just enough to get those clean slices. If you happen to have any leftovers, cover the cake loosely with plastic wrap and keep it tucked away in the fridge. It stays wonderfully fresh for nearly five days! If you’re looking for another fantastic centerpiece dessert, you should really look at my recipe for bread pudding with bourbon sauce.
Frequently Asked Questions about apple pie cheesecake
I know sometimes you just need a quick answer before you dive into the mixing bowl, so here are the questions I always get about turning this into the ultimate apple pie cheesecake. Baking can seem precise, but mostly, it’s about anticipating small problems before they happen! If you’re looking for something super fast, I have some easy no-bake mini cheesecake bites recipes too, but for this gorgeous layered dessert, a little patience goes a long way.
Can I make this a No Bake apple pie cheesecake?
You definitely can find recipes out there for a no bake apple cheesecake, but this specific recipe is designed to be baked! A no-bake version uses different stabilizers, usually gelatin or stabilized whipped topping, to set the structure. You will get a much lighter, almost mousse-like texture instead of the dense, creamy structure you find in this baked recipe. If you want the richness of a proper cheesecake, stick to baking this one!
What are the best apples for the Cinnamon Apple Topping?
My absolute favorite, and the one I use every time for that authentic feel, is Granny Smith. They are firm and tart, which means they stand up beautifully to the cooking process without turning into complete mush. They maintain their shape for that chunky topping consistency, and their tartness perfectly cuts through the richness of the cheesecake base. If you want something a little sweeter but still firm, try Honeycrisp as an alternative for your Cinnamon Apple Topping.
How do I prevent my apple pie cheesecake from cracking?
Ah, the dreaded crack! Look, this goes back to my E-E-A-T focus on technique. The two biggest things that save you are the water bath and the slow cool-down. Make sure your water bath is ready to go, keeping that moisture high in the oven. After it’s baked, turn the oven off, crack that door slightly, and leave it inside for an hour. This gradual temperature drop is the key defense against cracking in your homemade baked cheesecake. Don’t rush it!
Nutritional Estimates for This apple pie cheesecake
Now, I promise you, this is pure indulgence, so don’t look too closely at these numbers if you’re counting macros! This is just a rough idea based on the ingredients, and remember, exactly what you use—especially the brand of caramel or amount of butter—will change things. For one slice of this amazing marriage of cheesecake and pie, you’re looking at an estimated 450 calories. Enjoy every bite because this is a perfect example of true comfort food that’s worth every moment!
If you’re interested in seeing how my easy homemade soft naan bread recipe stacks up for a weeknight meal, you can find those details on that post!
Share Your apple pie cheesecake Creations
I really hope you loved making this apple pie cheesecake as much as I love sharing it with you! Honestly, seeing your creations is the best part of running Daisy’s Recipes. It tells me that the warmth from Grandma’s kitchen is spreading out into yours, which is exactly what I want.
Did you try swirling in that caramel, or did you go for the crisp topping variation? I’d truly love to hear how it turned out for you. Please leave a comment below! Tell me about your experience—did you find the water bath technique as helpful as I do? And if you snapped a picture of your gorgeous, layered dessert, send it over or tag us!
If you need to get in touch about recipe substitutions or just want to say hello, you can always reach out to us here: Contact Us.
PrintBaked Apple Pie Cheesecake with Salted Caramel Drizzle
Combine the creamy texture of cheesecake with the spiced apple filling of a classic pie. This recipe features a graham cracker crust, a rich cheesecake layer, and a homemade cinnamon apple topping, finished with a salted caramel drizzle.
- Prep Time: 30 min
- Cook Time: 75 min
- Total Time: 115 min
- Yield: 12 servings 1x
- Category: Dessert
- Method: Baking
- Cuisine: American
- Diet: Vegetarian
Ingredients
- 1 1/2 cups graham cracker crumbs
- 1/4 cup granulated sugar (for crust)
- 6 tablespoons unsalted butter, melted
- 3 (8 ounce) packages cream cheese, softened
- 1 1/2 cups granulated sugar (for filling)
- 1 teaspoon vanilla extract
- 1/4 teaspoon salt
- 3 large eggs
- 2 cups sliced apples (such as Granny Smith or Honeycrisp)
- 1/4 cup packed brown sugar
- 1 teaspoon ground cinnamon
- 1 tablespoon cornstarch
- 1/4 cup water
- 1/2 cup salted caramel sauce (for topping)
Instructions
- Preheat your oven to 350°F (175°C). Wrap the outside of a 9-inch springform pan with heavy-duty aluminum foil to prevent water seepage during the water bath.
- Prepare the crust: Mix graham cracker crumbs, 1/4 cup sugar, and melted butter. Press the mixture firmly into the bottom of the prepared springform pan. Bake for 10 minutes. Set aside to cool slightly.
- Prepare the cheesecake filling: In a large bowl, beat the softened cream cheese until smooth. Gradually add 1 1/2 cups sugar, vanilla extract, and salt. Beat until just combined. Add eggs one at a time, mixing on low speed after each addition until incorporated. Do not overmix.
- Pour the cheesecake batter over the cooled crust.
- Prepare the spiced apples: In a medium saucepan, combine the sliced apples, brown sugar, cinnamon, cornstarch, and water. Cook over medium heat, stirring often, until the apples soften slightly and the sauce thickens, about 8 to 10 minutes. Let the apple mixture cool for 10 minutes.
- Spoon the cooled apple mixture evenly over the cheesecake batter. You can swirl some of the apples into the batter if desired.
- Create a water bath: Place the foil-wrapped springform pan inside a larger roasting pan. Carefully pour hot water into the roasting pan until it reaches halfway up the sides of the springform pan.
- Bake for 60 to 75 minutes, or until the edges are set but the center still has a slight jiggle.
- Turn off the oven, crack the door open, and allow the cheesecake to cool slowly in the water bath for 1 hour. This prevents cracking.
- Remove the cheesecake from the water bath, remove the foil, and let it cool completely on a wire rack. Once cool, cover and chill in the refrigerator for at least 6 hours, or preferably overnight.
- Before serving, drizzle generously with salted caramel sauce.
Notes
- For a crisp topping, mix 1/4 cup flour, 1/4 cup brown sugar, 1/4 cup rolled oats, and 2 tablespoons cold butter until crumbly. Sprinkle this over the apples before baking for an Apple Crisp Cheesecake variation.
- If you skip the water bath, cool the cheesecake gradually in the turned-off oven to reduce the risk of cracking.
- Use full-fat cream cheese for the creamiest texture in your homemade baked cheesecake.
Nutrition
- Serving Size: 1 slice
- Calories: 450
- Sugar: 38
- Sodium: 250
- Fat: 28
- Saturated Fat: 17
- Unsaturated Fat: 11
- Trans Fat: 0
- Carbohydrates: 45
- Fiber: 1
- Protein: 7
- Cholesterol: 110