
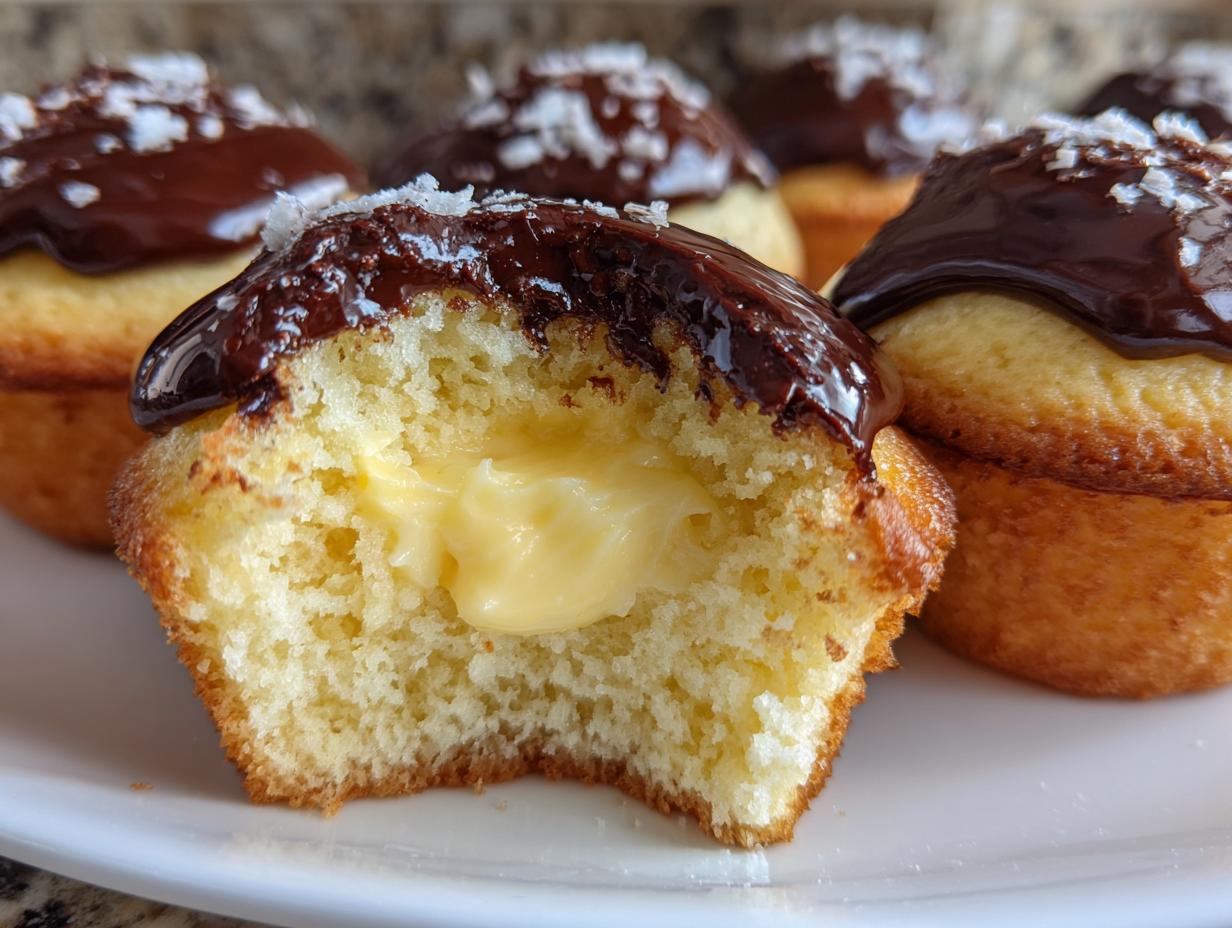
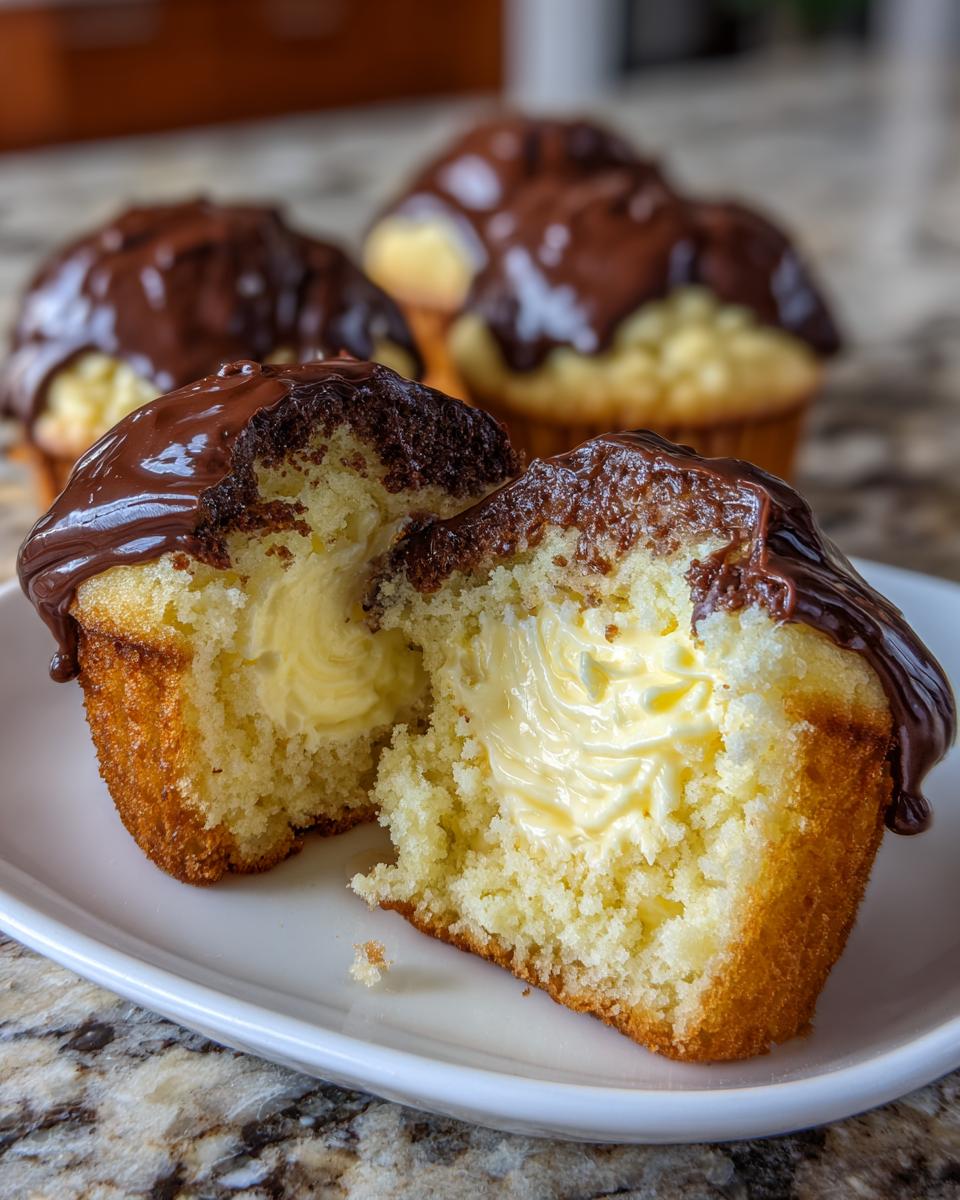
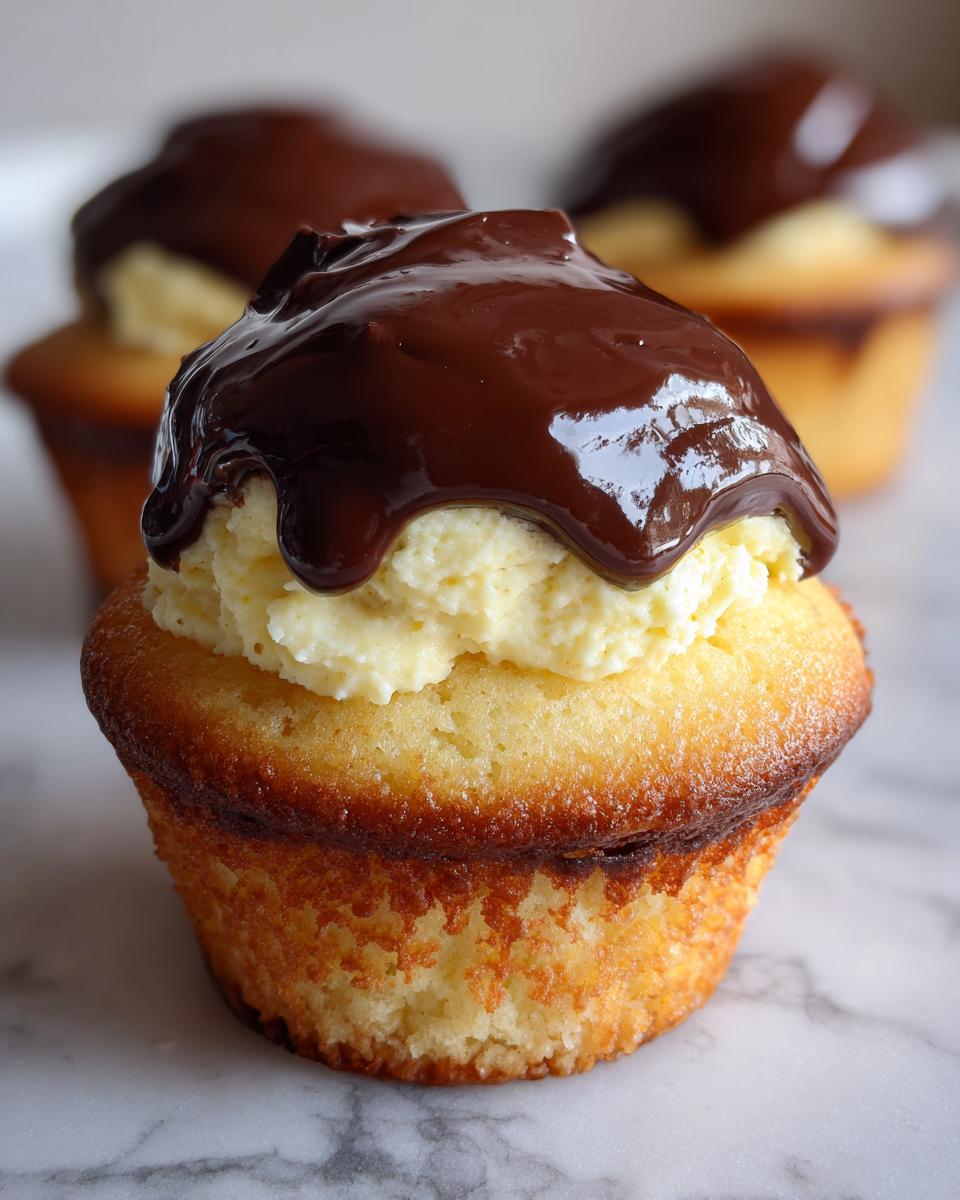
You know, sometimes that huge, perfect slice of Boston Cream Pie just feels like too much commitment, right? So, I figured out how to shrink that gorgeous, classic treat down into the perfect handheld size: boston cream pie cupcakes! These babies are the real deal—think fluffy vanilla cake, a thick layer of creamy homemade custard, and that shiny, dark chocolate shell on top. It brings me right back to my Grandma Daisy’s kitchen. She always taught me that the best food is the simplest food, made with care. Recreating this decadent dessert from scratch reminds me that even when life gets busy and city-paced, taking the time to bake something truly wonderful is how we keep that feeling of home alive. If you love this concept, you might want to check out my Boston Cream Pie Cookies recipe too!
- Why You Will Bake These boston cream pie cupcakes
- Essential Equipment for Perfect Cupcakes
- Ingredients for vanilla cupcakes with custard filling, chocolate topping: Cake, Custard, and Ganache
- Step-by-Step Instructions to Bake boston cream pie cupcakes
- Tips for Success with boston cream pie cupcakes
- Ingredient Notes and Substitutions for these Cupcakes
- Storing and Reheating Your boston cream pie cupcakes
- Frequently Asked Questions about boston cream pie cupcakes
- Share Your Homemade boston cream pie cupcakes
Why You Will Bake These boston cream pie cupcakes
Listen, I get it—baking from scratch can feel intimidating, especially when you’re aiming for something as iconic as Boston Cream Pie. But I promise you, these just nail that nostalgic flavor profile without the drama of a full-sized pie. They are so worth the little bit of extra love!
- They nail that perfect texture contrast: You get the soft, fluffy vanilla cake base yielding immediately to the cool, silky vanilla custard filling. It’s pure heaven!
- They are honestly Easy Boston Cream Cupcakes to decorate. Forget crimping edges or fussing with perfectly smooth layers; you just core, fill, and drizzle. So much easier!
- Portion control is built-in! These are the ultimate Bite Sized Boston Cream Pie treat. People take one, they’re happy, and you don’t have leftovers turning soggy the next day.
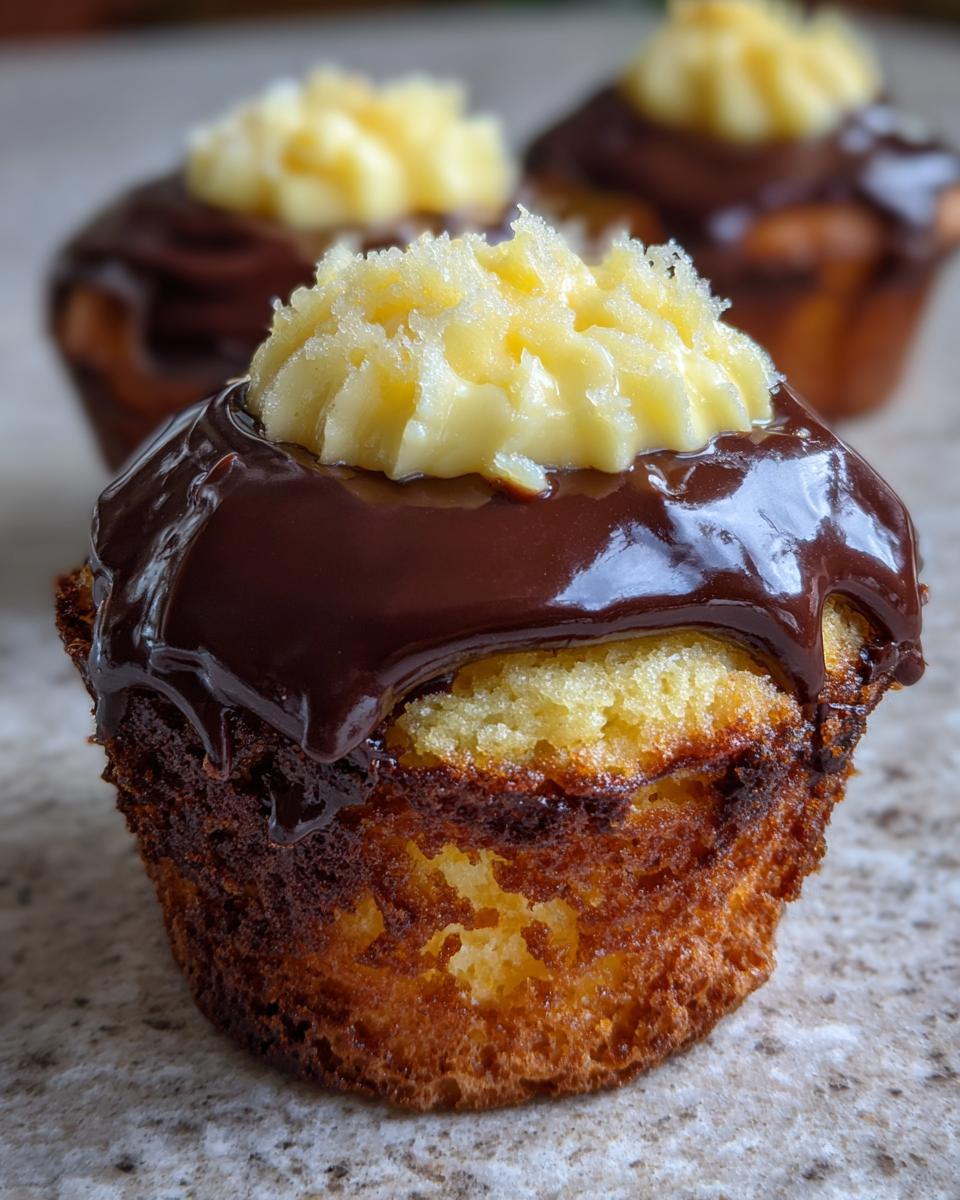
- That chocolate topping sets up to a beautiful, bakery-style shine. It looks incredibly decadent, but you make the ganache in about five minutes flat. You’ll feel like a professional baker, trust me.
- They freeze well too, which is great if you need a Quick Dessert Recipe ready for an impromptu gathering. We always have extras on hand once I make a batch.
If you found yourself here looking for a no-fuss, high-reward dessert, you’ve hit the jackpot. If you love this kind of creamy, layered concept, you should definitely check out my recipe for a No-Bake Eclair Cake; it uses a similar commitment to creamy fillings!
Essential Equipment for Perfect Cupcakes
You don’t need a huge professional kitchen setup to make these, but having the right tools really makes the process smoother, especially when you are working with three different components: cake, custard, and ganache. I learned this the hard way when I first tried to stuff pudding into a cupcake using just a spoon—it was a disaster!
For these chocolate ganache topped cupcakes, you’ll absolutely need these items to keep your process neat and efficient, aiming for that bakery style look:
- A standard 12-cup muffin tin with paper liners. Don’t try to skip the liners; you want these to lift out cleanly once they’re filled and topped.
- A small saucepan. You need this for heating the milk for the pastry cream and then again for warming the cream for the ganache.
- A good quality whisk for the custard. Tempering eggs means constant motion, so a sturdy whisk is your best friend here to prevent scrambling!
- A piping bag fitted with a large round tip, or even just a sturdy Ziploc bag with one corner snipped off if you’re in a pinch. Trying to spoon the filling into the cored-out centers is messy, and you won’t get that perfect amount of creamy filling without a piping bag.
- Since we are making a homemade custard, you need at least two medium-to-large heatproof bowls—one for tempering the egg yolks and sugar, and another shallow bowl to chill the finished pastry cream so that plastic wrap can sit directly on top.
If you’re looking to practice your decorating skills further, check out my Vanilla Buttercream Frosting Recipe; a piping bag makes all the difference!
Ingredients for vanilla cupcakes with custard filling, chocolate topping: Cake, Custard, and Ganache
Okay, this is where we gather our troops! Since we are making these Decadent Cupcake Recipes completely from scratch, we need three distinct sets of ingredients. Don’t panic just looking at the list; each component is super straightforward, but you must follow the instructions for the quality of the ingredients. I highly recommend laying everything out before you start mixing dough; it makes the whole process feel so much calmer.
For the absolute best payoff in flavor and texture, I always suggest using ingredients at their specified state—especially the butter needing to be softened for the cake! If you’re interested in other recipes that focus on simple, smooth fillings like this custard, you should absolutely look at my Classic Custard Pie Recipe.
For the Fluffy Vanilla Cupcakes
These cupcakes need to be sturdy enough to hold the filling but still light and fluffy—the perfect vehicle for that custard!
- 1 1/2 cups all-purpose flour
- 1 1/2 teaspoons baking powder
- 1/4 teaspoon salt
- 1/2 cup unsalted butter, softened to room temperature
- 1 cup granulated sugar
- 2 large eggs
- 1 teaspoon vanilla extract
- 1/2 cup milk (regular 2% is perfect here)
For the Homemade Pastry Cream Filling
This is the heart of our Pastry Cream Filled Cupcakes! Do not skimp on the milk here; we want richness, so only use whole milk for the creamiest texture.
- 1 1/2 cups whole milk
- 1/2 cup granulated sugar
- 3 large egg yolks
- 3 tablespoons cornstarch (this is our main thickener!)
- 1 teaspoon vanilla extract
For the Chocolate Ganache Topping
We want this topping glossy, rich, and decadent, so quality chocolate really matters here. I always grab semi-sweet chocolate that’s finely chopped so it melts fast and smooth.
- 4 ounces semi-sweet chocolate, finely chopped
- 1/2 cup heavy cream
- 1 tablespoon unsalted butter (this is my secret for ultimate glossiness!)
If you need quick inspiration for another simple, rich topping, my Easy Chocolate Mousse is always a crowd-pleaser!
Step-by-Step Instructions to Bake boston cream pie cupcakes
This is the part where the magic really happens! Because we are building three distinct layers here—cake, filling, and topping—the key is organization. We want everything cooled and stable before we put it all together. We’re aiming for that perfect, slightly messy (in a good way!) bakery style cupcake finish. If you follow along closely, especially during the custard phase, you’ll see just how easy it is to make this classic dessert in its smaller $\text{bite sized Boston cream pie}$ form. I have a detailed from scratch cupcake recipe guide if you are new to creaming, but let’s walk through this specific process together!
Baking the Vanilla Cupcake Base
First things first: get that oven preheated to 350°F (175°C). I never trust the temperature gauge without setting it early—it’s one of Grandma Daisy’s first rules! Line your 12-cup muffin tin with those nice paper liners.
In one bowl, whisk together your dry stuff: the flour, baking powder, and salt. Set that bowl aside.
Now for the creaming! In a larger bowl, beat that softened butter and the granulated sugar together until you get that famously light and fluffy texture—it should look pale yellow. Beat in the eggs one at a time, making sure each one is fully incorporated before adding the next, followed by the vanilla. Remember, you are creating air pockets here that give your cake lift!
Once combined, you need to alternate adding the dry ingredients mixture and the milk. Start and end with the dry ingredients. I usually do thirds of the dry, then halves of the milk, then the rest of the dry. This prevents the batter from deflating. Mix *just* until you don’t see streaks of white flour anymore. Seriously, do not overmix, or you’ll end up with something closer to a rubber bouncy ball than a fluffy cake!
Fill those liners about two-thirds full. They bake fast, usually around 18 to 20 minutes. Test it with a toothpick; when it comes out clean, pull them immediately and let them cool in the pan for exactly 5 minutes before moving them to a wire rack to cool completely. They must be totally cool before we introduce the filling!
Creating the Pastry Cream Filling (Custard)
This is the part that always looks scary, but I promise tempering is simple once you understand the goal: gently warming the yolks without cooking them into scrambled bits! This custard has to be silky smooth for the Boston Cream Cupcakes Recipe to really sing.
Start by heating the whole milk in saucepan over medium heat until it starts getting those tiny bubbles around the edge—just shy of a boil. While that warms, whisk your egg yolks, sugar, and cornstarch together in a separate bowl. Whisk it hard until it’s pale ribbons and smooth. No lumps allowed!
Here’s the critical step: tempering! Slowly drizzle about half of that hot milk into the yolk mixture while—and this is critical—you whisk the yolks constantly. You’re gently raising the yolk temperature. Once that’s mixed, pour that warm yolk mixture *back* into the saucepan with the rest of the milk. Return it to medium heat.
Whisk the mixture continuously! It will look thin, and then suddenly, BAM! It thickens right up. Once it bubbles gently, let it boil, stirring constantly, for a full 60 seconds. That minute cooks out the raw cornstarch flavor. Pull it off the heat, whisk in the vanilla, and pour that glorious pastry cream into a shallow bowl. Press plastic wrap *directly* onto the surface—no air gaps allowed, or you’ll get that sad yellow skin! Chill this for at least 2 hours, or preferably overnight. You want it firm!
Assembling and Filling your boston cream pie cupcakes
The cakes are cool, the custard is firm—time to bring them together! Use a small knife or an apple corer (which is cleaner, honestly) to cut a small cone out of the center of each cupcake. Don’t go all the way to the bottom; leave a little base so the filling doesn’t leak out the bottom—this is key for keeping the presentation tight. You can save those little cake plugs to snack on while you finish up!
Transfer that chilled pastry cream into your piping bag fitted with a large round tip. Gently pipe the cream into the hollowed-out center of each cupcake until it’s generously filled. If you removed the plug, you can gently nestle it back on top. This creates a beautiful, flat surface ready for the chocolate topping. If you are looking for more guidance on handling fillings, check out my insights at Middle East Sector; they have great visuals on presentation!
Finishing with Chocolate Ganache Topping
This ganache is so simple; it feels like cheating. Chop your semi-sweet chocolate finely and put it in a heatproof bowl. Heat your heavy cream on the stove until it just starts to simmer.
Pour that hot cream right over the chocolate. Do not touch it for five full minutes! That resting time lets the heat do the melting work evenly. After five minutes, drop in that tablespoon of butter for shine, and then gently whisk until everything comes together into a smooth, glorious, dark pool of chocolate.
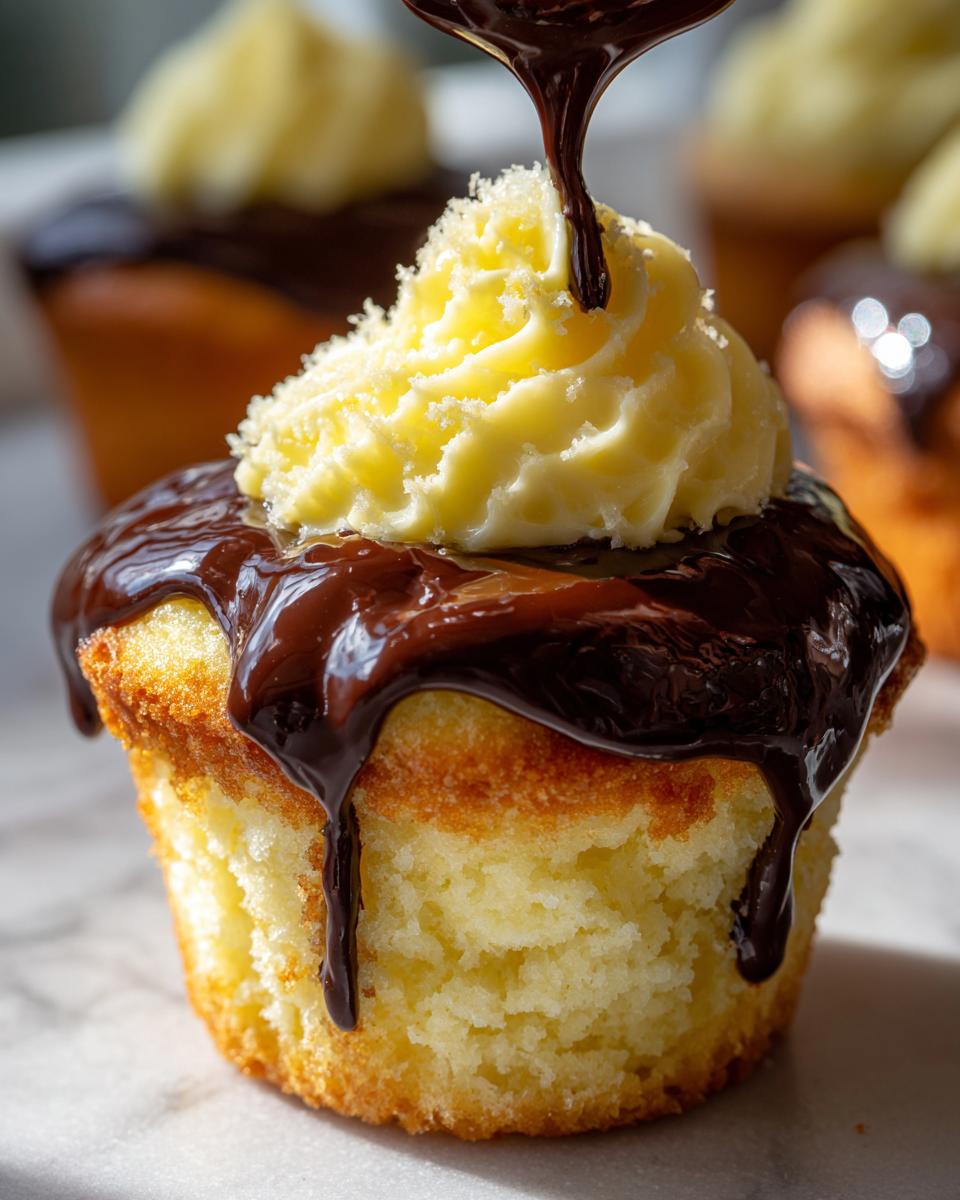
Don’t rush this next part! Let the ganache cool slightly at room temperature for maybe 10 to 15 minutes. It needs to be thick enough so it drapes beautifully over the filling but doesn’t just run off the sides like water. Once it’s cooled just enough, spoon about a tablespoon over the top of each filled cupcake. Let these beauties sit out on the counter until that chocolate topping is set before you try to move them. That’s how you get these perfect Chocolate Ganache Topped Cupcakes!
Tips for Success with boston cream pie cupcakes
Even with the recipe laid out perfectly, sometimes these complex desserts throw a little curveball. I know they do in my kitchen! My goal here is to save you the headache I went through learning these little tricks. When I first tried to make the pastry cream without tempering properly, I ended up with a lumpy, soupy mess that tasted like sweet scrambled eggs. I almost scrapped the whole batch! But I salvaged it by straining it aggressively through a fine-mesh sieve—it took forever, but it rescued the texture.
Here are the non-negotiables I’ve learned to guarantee that bakery-quality result every single time you make these boston cream pie cupcakes:
- Chill Your Custard Completely: This is the most important tip. If your pastry cream (custard) is even slightly warm when you start hollowing out the cakes or piping it in, it will melt into the cake crumb. You want that custard firm enough to hold its shape and give a proper layer of creaminess. Make it the day before if you can!
- Temper Slowly and Steadily: When you are adding the hot milk to the yolks, if you pour it too fast, you shock those yolks, and they’ll curdle instantly. Remember, we are aiming for smoothness, not speed. Go slow, whisk like you mean it, and you’ll never end up with lumpy filling again.
- Don’t Rush the Ganache Cool Down: It’s tempting to pour that glossy chocolate right over your freshly filled cupcakes, but honestly, wait until it’s just slightly cooled—thick enough to coat the spoon heavily. If it’s too hot, it melts right through the custard layer and down the sides. If you’re looking for other ideas involving luxurious toppings, you should look at my Soft Chewy Caramels recipe—the cooling process for those is just as crucial!
- Use Quality Chocolate: Since the chocolate topping is so minimal, the flavor relies entirely on the quality of your chocolate source. If you use waxy chocolate chips, your ganache will be dull and waxy. Use real baking bars or discs for that perfectly smooth, glossy finish. It makes such a difference for these decadent cupcake recipes.
Success with these means mastering those three components separately. If you’ve ever struggled creating soft buns, I have some great tips on patience there too, which applies here perfectly: Best Soft Gooey Cinnamon Buns Recipe. And if you want to see another fantastic recipe that features a rich chocolate glaze, take a peek at what Cooking with Lalyta is doing over at Cooking with Lalyta!
Ingredient Notes and Substitutions for these Cupcakes
Part of Daisy’s philosophy was always using what you have, but for some elements in this recipe, substitution means sacrificing that classic bakery feel. When you’re making something meant to mimic an iconic dessert, you have to be a little strict about the core ingredients, but I have definitely found shortcuts for when life gets hectic.
If you are looking for ways to simplify sauces or bases in other types of cooking, I have a fantastic recipe for Homemade Alfredo Sauce that always starts with the best quality dairy, which reminds me of sticking to whole milk here!
Substituting the Homemade Pastry Cream
I truly believe this homemade custard is what elevates these from just ‘vanilla cupcakes with chocolate’ to actual Boston Cream Cupcakes Recipe status. The flavor of the eggs and slow cooking is just irreplaceable.
However, if you are truly short on time—maybe you need these Bakery Style Cupcakes at Home in under two hours—you can use a high-quality vanilla instant pudding mix. Just prepare the pudding according to the package directions. The trade-off? It won’t be quite as rich or hold its shape quite as firmly as the true pastry cream, but it works in a pinch! Just make sure it’s chilled completely before you try to inject it into the cakes.
The Importance of Your Chocolate Choice
For this topping, we need a dark, slightly bittersweet note to cut through the sweetness of the cake and the creamy filling. Please, please use good chocolate! This is where you should think about quality over cost.
I specify semi-sweet, but if you prefer things slightly less sweet, you can use bittersweet chocolate, chopped very finely. The absolute worst thing you can do is use standard grocery store chocolate chips for the ganache. Chips contain stabilizers so they hold that “chip” shape when baking, which means they often melt into a dull, grainy mess when turned into a ganache. Use real baking bars or discs for that perfectly smooth, glossy finish. Trust me when I say a small splurge here makes all the difference in achieving that classic Boston Cream Pie look.
Milk Matters for Creamy Texture
Notice how I specified whole milk for the pastry cream? That difference is huge, especially when thickening with just cornstarch and egg yolks. Lower fat milk just doesn’t provide the richness needed to stand up to the cake. If you try to use skim milk, the resulting filling can be thin and watery, which means your beautiful work hollowing out the centers will be wasted as the filling leaks out!
If you want to keep these closer to Classic American Desserts by sticking to the most traditional components, using whole milk isn’t really negotiable for that perfect richness and texture.
Storing and Reheating Your boston cream pie cupcakes
Now, this is the part that separates the *easy* from the *complicated* when dealing with homemade fillings. Because we used real dairy pastry cream, these are definitely not something you want to leave sitting on the counter overnight, even with that lovely chocolate top layer. Grandma Daisy always said, “If it’s got custard, it needs to be chilled right away.” It’s all about keeping that filling safe and firm!
If you’re planning ahead, which I highly recommend for making these boston cream pie cupcakes less stressful on party day, you need an airtight container and fridge space. Place them gently in a single layer or use cupcake carriers if you have one. They stay wonderfully fresh for about 3 to 4 days in the refrigerator. Any longer than that, and the cake starts to dry out slightly, despite the moisture from the filling.
When it comes time to serve them, don’t just pull them straight from the fridge! That’s another secret Daisy taught me. Those cold cupcakes are wonderful for a hot day, but the cake will be a bit dense, and the chocolate ganache might feel too hard. Pull them out about 30 minutes before you plan to serve them. Letting them sit on the counter at room temperature allows the vanilla cake underneath to soften back up beautifully and gives the ganache that perfect, slight chewiness.
Because these have so much dairy, reheating them in the microwave is just a disaster waiting to happen—the custard will get runny, and the cake will turn rubbery fast. Trust me, skip the microwave! The minimal cooling time is worth it for that perfect texture contrast. If you’ve ever made a really complicated fudge that needs careful setting time, like my Easy Rocky Road Fudge Recipe, you’ll understand why patience in the cooling phase is everything for these cupcakes too.
Frequently Asked Questions about boston cream pie cupcakes
I know you’ve got questions! When you’re dealing with three separate components like this, things can feel a little hazy. I’ve collected the main things people always ask me about when they’re trying to nail these beauties at home. Most bakeries struggle to get the ratios right, but since we are making these from scratch, you’re ahead of the game!
Can I make the custard (pastry cream) filling ahead of time?
Oh, yes, please do! This is one of my favorite tricks for making these boston cream pie cupcakes less stressful on a busy day. The pastry cream needs a minimum of two hours in the fridge to set up properly so it’s firm enough to pipe into the cakes. If you make it the day before—which is what I do—it firms up even more beautifully. Just make sure you press that plastic wrap right on top; otherwise, you’ll have to whisk a thick skin off the top before you can use it!
What is the best way to core the cupcakes for filling?
I used to use a small pairing knife, but honestly, it created crumbs everywhere and I always ended up cutting too deep. Now, I swear by an apple corer. You want to gently press the corer down into the center of the cool cupcake, twisting just enough to remove the cake plug, leaving about a half-inch base so the custard doesn’t leak out the bottom. It leaves a perfect, neat little hole that’s ready for piping. If you’re looking for other recipes that require zero mess, check out my cake mix cookie bars; those are pure simplicity!
Are these considered bakery style cupcakes at home?
Absolutely! When people search for bakery style cupcakes at home, they are usually looking for that professional finish: a high dome, a moist crumb, and a distinct feature like a filling or beautiful topping. Because we are making a layered dessert from scratch—not just frosting the top—these definitely fall into that higher tier of baking. The glossy ganache over the piped-in custard gives the exact look you see in professional pastry shops. If you follow the steps exactly, especially regarding the ganache cooling time, you’ll get that perfect presentation.
My ganache looks grainy, what happened?
This usually happens for two reasons, and trust me, I’ve seen it happen! First, if you used chocolate chips instead of real chopped baking bars, the stabilizers can cause graininess. Second, if you tried to stir the ganache before it rested for those five minutes, or if you added liquid that wasn’t warm enough, the fat and the cocoa solids can separate prematurely. If this happens, you can sometimes save it by very gently whisking in another tiny splash—maybe a teaspoon—of warm heavy cream until it smooths out. For emergency appetizers, I sometimes have to pivot to something quick like my Easy Baked Ranch Chicken!
If you’re looking for other great dessert ideas that are proven winners, take a look at this great resource from Recipe Culture on Boston Cream Pie Cupcakes!
Share Your Homemade boston cream pie cupcakes
Now that you’ve gone through all the steps—from creaming the butter to tempering those tricky yolks—I simply cannot wait to see your results! Baking is such a shared joy, and I truly live for seeing the creations that come out of your kitchens. This whole process of shrinking down classic desserts like this is what Grandma Daisy was all about: making moments special and accessible.
If you followed along carefully, especially with the homemade pastry cream and the proper cooling time for the ganache, I hope you found these boston cream pie cupcakes just as satisfying as I do. If they worked their magic for your family gathering or dessert night, please do me a huge favor!
- Rate the Recipe! A quick rating at the top of the page helps other home bakers who are a little nervous about tackling a 3-part recipe feel more confident diving in. Five stars if they brought a smile to your face!
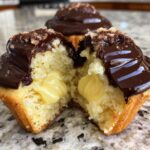
- Tag Me on Socials! Seriously, I want to see the glossy chocolate tops and the rich filling peeking out when you cut one open. Snap a picture and tag me on Instagram or wherever you share your baking victories. It truly makes my day to see my Grandma’s legacy thriving in new kitchens across the country.
Remember the effort involved in making things truly from scratch. If you enjoyed this feeling of accomplishment, you must try my Zucchini Banana Bread Recipe next time you need a moist, easy bake. Happy baking, friends!
PrintBoston Cream Pie Cupcakes with Homemade Custard Filling
Bake bite-sized Boston Cream Pie Cupcakes featuring fluffy vanilla cake, creamy pastry cream filling, and a rich chocolate ganache topping. This is a bakery style cupcake recipe made from scratch.
- Prep Time: 45 min
- Cook Time: 20 min
- Total Time: 65 min
- Yield: 12 servings 1x
- Category: Dessert
- Method: Baking
- Cuisine: American
- Diet: Vegetarian
Ingredients
- For the Vanilla Cupcakes:
- 1 1/2 cups all-purpose flour
- 1 1/2 teaspoons baking powder
- 1/4 teaspoon salt
- 1/2 cup unsalted butter, softened
- 1 cup granulated sugar
- 2 large eggs
- 1 teaspoon vanilla extract
- 1/2 cup milk
- For the Pastry Cream Filling:
- 1 1/2 cups whole milk
- 1/2 cup granulated sugar
- 3 large egg yolks
- 3 tablespoons cornstarch
- 1 teaspoon vanilla extract
- For the Chocolate Ganache Topping:
- 4 ounces semi-sweet chocolate, finely chopped
- 1/2 cup heavy cream
- 1 tablespoon unsalted butter
Instructions
- Prepare the Cupcakes: Preheat your oven to 350°F (175°C). Line a 12-cup muffin tin with paper liners.
- Whisk together the flour, baking powder, and salt in a medium bowl. Set aside.
- In a large bowl, cream the softened butter and sugar together until light and fluffy. Beat in the eggs one at a time, then stir in the vanilla extract.
- Gradually add the dry ingredients to the wet ingredients, alternating with the milk, beginning and ending with the dry mixture. Mix until just combined. Do not overmix.
- Fill the cupcake liners about two-thirds full. Bake for 18 to 20 minutes, or until a toothpick inserted into the center comes out clean. Let the cupcakes cool completely in the pan for 5 minutes before transferring them to a wire rack to cool fully.
- Make the Pastry Cream Filling: Heat the milk in a small saucepan over medium heat until it just begins to simmer around the edges. Do not boil.
- While the milk heats, whisk the sugar, egg yolks, and cornstarch together in a separate bowl until smooth and pale.
- Slowly pour about half of the hot milk into the yolk mixture while whisking constantly to temper the eggs.
- Pour the tempered egg mixture back into the saucepan with the remaining milk. Cook over medium heat, whisking constantly, until the mixture thickens significantly and comes to a gentle boil. Boil for 1 minute, still whisking.
- Remove from heat and stir in the vanilla extract. Pour the pastry cream into a shallow bowl, press plastic wrap directly onto the surface to prevent a skin from forming, and chill in the refrigerator for at least 2 hours until cold and firm.
- Assemble the Filling: Once the cupcakes are cool, use an apple corer or small knife to cut a cone-shaped piece out of the center of each cupcake, leaving the bottom intact.
- Transfer the chilled pastry cream to a piping bag fitted with a large round tip. Fill the hollowed-out center of each cupcake generously with the pastry cream. Replace the removed cake piece on top if desired, or leave it open for the ganache.
- Prepare the Chocolate Ganache Topping: Place the chopped chocolate in a heatproof bowl.
- Heat the heavy cream in a small saucepan until it simmers. Pour the hot cream over the chocolate. Let it sit undisturbed for 5 minutes.
- Add the butter and whisk gently until the mixture is smooth and glossy. Let the ganache cool slightly until it is thick enough to coat the back of a spoon, about 10 to 15 minutes at room temperature.
- Top the filled cupcakes with a spoonful of the chocolate ganache. Allow the ganache to set before serving your decadent cupcake recipes.
Notes
- For the best texture, make the pastry cream a day ahead so it chills completely.
- If you want a quicker filling, you can substitute the homemade pastry cream with a high-quality vanilla instant pudding mix prepared according to package directions.
- Use good quality semi-sweet chocolate for the best flavor in your chocolate ganache topped cupcakes.
Nutrition
- Serving Size: 1 cupcake
- Calories: 380
- Sugar: 35
- Sodium: 180
- Fat: 20
- Saturated Fat: 12
- Unsaturated Fat: 8
- Trans Fat: 0.5
- Carbohydrates: 48
- Fiber: 2
- Protein: 5
- Cholesterol: 110