
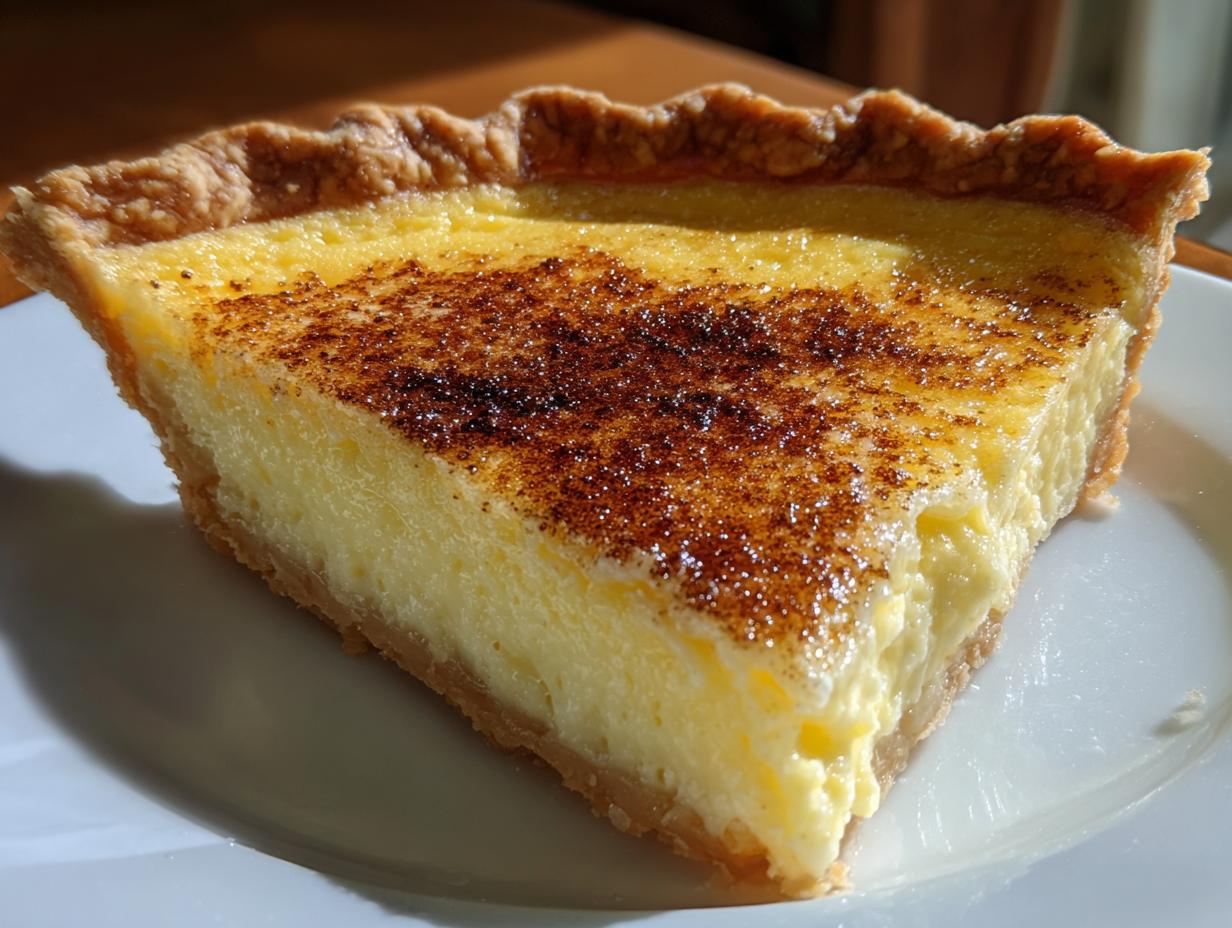
When the air gets crisp or family starts knocking on the door, you just need a dessert that feels like a hug, right? Forget all those fussy things with layers and fillings that collapse. What we really crave is pure, simple tradition. That’s why I rely on my Grandma Daisy’s approach: honest food made with patience. And nothing screams comfort quite like a perfect custard pie. Trust me, this **Classic Smooth Egg Custard Pie with Buttery Flaky Crust** is the gold standard. It uses just a handful of ingredients to create something spectacular. If you’re looking for that nostalgic flavor that makes everyone ask for the recipe, you’ve found it. You can read a little more about where this comfort food philosophy comes from over on our About Page if you’re curious!
- Why This Classic Custard Pie Recipe Works So Well
- Ingredients for Your Old Fashioned Egg Custard Pie
- Step-by-Step Instructions for the Easy Homemade Custard Pie
- Tips for Baking the Best Custard Pie From Scratch Baked Pie
- Variations on the Traditional Custard Dessert
- Serving Suggestions for Your Holiday Custard Pie Desserts
- Storage and Reheating Instructions for Leftover Custard Pie
- Frequently Asked Questions About Making Custard Pie
- Estimated Nutritional Data for This Custard Pie
- Share Your Family Favorite Pie Experience
Why This Classic Custard Pie Recipe Works So Well
Seriously, sometimes baking gets too complicated, doesn’t it? This recipe cuts all that noise out. What makes this work so reliably, year after year, is that it harks back to Grandma Daisy’s original belief: simple ingredients done right make the best results. This isn’t a fancy culinary school project; it’s a genuine Family Favorite Pie that delivers every time. It’s one of those beautifully Simple Dessert Recipes that proves you don’t need much fuss!
Here’s why folks keep coming back to this old-fashioned version:
- It bakes up quickly compared to deep-dish pies.
- It relies on pantry staples—you probably have everything you need right now!
- The texture is absolutely reliable when you follow the cooling steps.
Achieving the Creamy Vanilla Custard Pie Texture
When people talk about their custard disasters, it’s usually because they whipped too much air in! We are aiming for decadent, not airy, understand? The whole point of the Smooth Custard Filling Secrets is gentle mixing. You want to whisk the eggs just enough until they are barely broken up, then introduce the milk softly. Over-beating creates bubbles, and bubbles equal cracks and a grainy mouthfeel later on. We want a totally silky smooth custard that melts when it hits your tongue. Don’t rush that final cooling, either; patience here is key to that perfect creaminess.
The Secret to a Buttery Flaky Pie Crust
Now, since we are using an unbaked crust in this version—hello, **Quick Custard Pie Prep**!—the biggest thing is making sure whatever you use is actually good quality. If you’re using store-bought, look for one that explicitly mentions butter in the ingredients list. Margarine crusts just don’t cut it when paired with such a delicate filling. If you decide to make your own **Buttery Flaky Pie Crust**, make sure that butter is ice cold. That contrast between the cold, tender crust and the warm, smooth filling is what makes the whole experience feel cozy and homemade.
Ingredients for Your Old Fashioned Egg Custard Pie
Gathering your supplies is the easiest part of making an Old Fashioned Egg Custard Pie, I promise! Remember, we aren’t making anything complicated here, but every measurement has to be right for that classic, comforting flavor. I always lay everything out first so I can just grab and go when the oven is preheating. Clarity builds trust, right? I learned from Daisy that paying attention to the details, like using accurate measurements, is half the battle won!
For this perfect baked custard, you’ll need the items that make up the foundation of any great **Classic Custard Pie Recipe**: the shell and the liquid heart of the pie.
Crust and Filling Components for the Custard Pie
Let’s start with the outside wrapper, shall we? You absolutely need one unbaked 9-inch pie crust. Make sure it’s good—something that already looks like it’ll be flaky and buttery when it comes out of the oven! For the beautiful filling that makes this pie shine, you’ll grab three large eggs. Don’t mess with medium or jumbo, stick to large! Then comes the sweetness: we’re using half a cup of granulated sugar. For the liquid base, you need exactly two and two-thirds cups of whole milk. Whole milk gives the richest texture, so don’t reach for skim; we want that richness!
Finally, don’t forget the aromatic touch! You need one teaspoon of pure vanilla extract for that lovely flavor, and the real star for the topping—a quarter teaspoon of ground nutmeg. That nutmeg sprinkled right on top before it bakes is what gives it that authentic, welcoming aroma. Isn’t it funny how just a pinch of spice lifts the whole thing?
Step-by-Step Instructions for the Easy Homemade Custard Pie
Alright, let’s get down to business! Baking this requires focus, especially when we get to the filling—but it’s so worth it for that stunning, Easy Homemade Custard Pie result. Grab your oven mitts because we’re jumping straight in. First things first: get your oven warmed up to 350 degrees Fahrenheit. No peeking allowed! While it’s heating, get your unbaked 9-inch pie crust nestled perfectly into your pie plate. Make sure it’s settled in nicely, ready to cradle that creamy filling.
When you’re ready to mix, head over to a medium bowl. Remember, we are making the ultimate Creamy Vanilla Custard Pie, and that means being gentle! You’ll whisk those three large eggs, but stop as soon as they are lightly broken up. Seriously, don’t beat them into a foam! Then, toss in your half-cup of sugar and whisk just enough to get them acquainted. If you want tips on where to find great pie tins, check out this site for inspiration.
Mixing the Smooth Custard Filling
This is where the magic happens, and where you can ruin it if you rush! Once the eggs and sugar look sleepy and combined, start adding your milk—the two and two-thirds cups—gradually while whisking steadily but slowly. You want that milk to integrate smoothly without forcing air bubbles in. Once the milk is in, add your teaspoon of vanilla extract and give it one last gentle stir. That’s it! No crazy mixing from here on out. Pour this beautiful, liquid base right into your waiting crust.
Baking and Setting the Perfect Custard Pie
Now, take that quarter teaspoon of ground nutmeg and sprinkle it evenly right over the surface. It’s traditional, and it smells heavenly while baking! Slide that pie into your preheated 350°F oven. It’ll need about 45 to 55 minutes. How do you know it’s done? Don’t just rely on sight! Insert a thin knife near the center. If it comes out clean, you’re practically there. The center might still jiggle a tiny bit—that loose jiggle is what guarantees a silky texture later. The most important part, which so many people skip, is the cool down! It has to cool completely on a wire rack before you even think about slicing it. Seriously, chill it in the fridge for at least two hours. This allows the custard to fully set up into that smooth heaven we love. If you have any questions while you’re baking, feel free to reach out to us!

Tips for Baking the Best Custard Pie From Scratch Baked Pie
Even though this is one of those wonderfully easy Comfort Food Pies, there are definitely a couple of things I always watch out for when I bake this From Scratch Baked Pie. It all comes down to managing the internal temperature gently. If you notice those beautiful, flaky edges of your crust starting to get too dark—and I mean *too* dark—before the center is done, don’t panic! Just grab some aluminum foil and make little strips to drape loosely over the edges. It shields the crust so the filling has time to bake without burning the rim. You can find an example of what a perfectly balanced pie looks like right here, which always helps me gauge my bake!
The second biggest tip is about the setting process. Remember what I told you about that slight jiggle? Perfect! But once you pull it out, resist the urge to poke it or move it too quickly. You have to let it sit on that wire rack until it’s barely warm to the touch, ideally for at least an hour before it goes into the fridge. That slow cooling is what locks in the smoothness and prevents that dreaded cracking that ruins the presentation.
Variations on the Traditional Custard Dessert
While I absolutely adore this Classic Custard Pie Recipe just the way Daisy wrote it down, sometimes you want to tweak things slightly, right? It’s fun to play around, as long as you keep the core creamy structure intact. We are talking about simple additions here—nothing that requires a whole new recipe, just little boosts of flavor!
If you want to lean into that rich, deeper flavor profile reminiscent of a Southern Style Custard Pie, you have a couple of great options for the liquid. Instead of using the full two-and-two-thirds cups of regular whole milk, try swapping out about a cup of it for evaporated milk. Wow, does that add body and richness! It makes the custard feel even more substantial without changing the texture too much. Just mix it in gently where the regular milk goes.
For something zesty and bright, which is wonderful after a heavy meal, take a small half-teaspoon of fresh lemon zest and stir it in along with the vanilla extract. It cuts through the richness beautifully. If you love spice, you can totally double down on the nutmeg, or even add just a tiny pinch of ground cinnamon to the milk mixture before you bake. Just be gentle—a little goes a long way!
If you happen to be looking for something totally unique but still custard-based, I saw a wild Coconut Magic custard pie recipe where the filling actually separates into three layers as it bakes—it looks like magic! You can check out that delicious variation over on this site if you’re feeling adventurous later. But for staying true to tradition, stick to those simple spice and milk swaps!
Serving Suggestions for Your Holiday Custard Pie Desserts
The best part about pulling that perfectly set, slightly wobbly custard pie out of the fridge is figuring out how to serve it! This pie is so versatile, which is why it’s a true Holiday Custard Pie Desserts staple. It doesn’t demand a million fussy garnishes, but a little something extra always makes it feel special when company is over. I usually make a big batch of softly sweetened whipped cream—nothing from a pressurized can, please, it just doesn’t have the right texture!
How you serve it really depends on the mood of the meal. When we have a heavy dinner—you know, the full turkey and stuffing affair—I find the pie is best served slightly chilled, maybe straight from the refrigerator after it’s had plenty of time to firm up. It’s clean, cool, and cuts through all that richness from the main course.
But if you’re having it on a quiet Sunday afternoon, I prefer to let it sit on the counter for about 30 minutes before slicing. It warms up just enough so the custard has that lovely, tender mouthfeel, rather than being completely cold and dense. Remember, we want it to melt, not stand firm!
For toppings, you can’t go wrong with that fresh whipped cream dolloped right on top of each slice. If you want to add a little brightness next to that creamy vanilla, I love serving it with a small side of fresh raspberries or thinly sliced strawberries. The tartness is just a wonderful contrast to the sweet egg custard. And if you’re like me and slightly obsessed with nutmeg, I always keep a jar of fresh ground nutmeg handy. A tiny dusting right over the top of the cream, just before serving, adds that last whisper of warmth. It’s simple elegance! If you’re looking for other warming holiday flavors, you can get inspired by some of the spices used in treats like the ones found over here.
Storage and Reheating Instructions for Leftover Custard Pie
The fantastic news is that this **custard pie** is one of those brilliant desserts that actually gets better overnight! Since we went through the trouble of making sure that filling is perfectly smooth and set, the absolute last thing we want to do is mess up that gorgeous texture by reheating it wrong. Honestly, you shouldn’t need to reheat it at all!
Once the pie has cooled completely after baking—and I mean *completely* cooled, which takes hours—wrap it up well. I use plastic wrap, but make sure it’s not touching the surface of the custard if you can help it, or it might stick. If you don’t have a good pie carrier, just cover the top loosely. You must store the finished pie in the refrigerator. It will keep beautifully for about three to four days, which means you get to enjoy the fruits of your labor all week long!
Now, about reheating: If you try to put a slice of this creamy vanilla custard pie into the microwave or the oven to warm it up, you are playing a dangerous game! Heating the egg-and-milk filling too quickly will cause the proteins to seize up, and bam! You’ll end up with a slightly rubbery or watery filling rather than that divinely smooth texture we worked so hard for. Save yourself the grief.
My suggestion? Just pull the slice out of the fridge about 30 to 45 minutes before you plan to eat it. Letting it sit on the counter just lets it come up to room temperature, which is the perfect temperature for this kind of pie. That slight warming eases the custard up just enough to be silky smooth on your tongue without compromising the set. Trust me on this one—chilled or slightly warmer than chilled is the way to go for your leftovers. Don’t try to make it piping hot!
Frequently Asked Questions About Making Custard Pie
I figured some of you might have a few quick questions bubbling up about how to handle this traditional dessert. Baking a perfect custard pie really comes down to managing milk and heat, but once you know the tricks, it’s so simple! Here are the common things I hear people worry about when they tackle their first custard pie, or when they’re trying to nail that perfect, comforting slice every time.
Why did my custard pie crack after baking?
Oh, the dreaded crack! It happens to the best of us, even when we think we’ve got the Smooth Custard Filling Secrets down pat. Nine times out of ten, cracking happens for two main reasons, and they both relate to heat shock. First, if you bake it too long, the edges get overdone while the center is still baking, and when the proteins tighten up too much, they pull apart. Second, if you pull that hot pie straight from the 350-degree oven and put it on a cold granite countertop, the rapid temperature shift makes the whole thing seize up and crack! Remember what I said: slow cooling on the counter first, then into the fridge. That gradual transition is your best defense against cracks for this **Creamy Vanilla Custard Pie**.
Can I make this custard pie ahead of time?
Yes, you absolutely can! In fact, I highly recommend it, especially if you are planning for **Holiday Custard Pie Desserts**. This **Classic Custard Pie Recipe** firms up beautifully in the cold. But here’s the crucial bit: you must wait until it is fully cooled on the counter before chilling it. Trying to chill a warm pie traps moisture and can make the bottom crust soggy. If you bake it the day before your gathering and let it cool completely, then cover and refrigerate it overnight, it will slice like a dream the next day. That long, slow chill is what guarantees that silky texture we are aiming for!
If you ever need to double-check our privacy guidelines while you’re looking through recipes, you can always find that information here. But back to the pie!
I often get asked if the prep time is truly that fast. Since we use an unbaked crust, the hands-on time for mixing the filling is maybe 10 minutes! That’s why this ranks so high on my list of Simple Dessert Recipes for busy weeks.
Estimated Nutritional Data for This Custard Pie
Okay, let’s talk numbers for a second. Grandma Daisy was always more concerned with how happy everyone was eating the pie than measuring calories, but I know you folks like to have a sense of what’s in this wonderful custard pie! Since we are using a standard unbaked crust and whole milk, these figures are estimates, so please keep that in mind. You know how crust preparation—whether homemade or store-bought—can really change the final count!
This information is based on serving 8 people from that whole 9-inch pie. It’s surprisingly reasonable for a classic dessert, which makes it perfect for those cozy, comforting celebrations. Remember, this is just guidance, not a hard and fast rule for enjoying a slice of heaven!
- Serving Size: 1 slice
- Calories: 280
- Sugar: 22g (Yep, that’s where the joy comes from!)
- Fat: 14g
- Saturated Fat: 6g
- Carbohydrates: 28g
- Protein: 9g
- Cholesterol: 110mg
See? It holds its own as a traditional dessert! It’s got good staying power too, thanks to that protein. This is solid, honest food, just like Grandma taught me. No weird fillers, just quality ingredients making a wonderful Creamy Vanilla Custard Pie slice.
Share Your Family Favorite Pie Experience
Whew! We made it through the bake, the chill, and the nutrition talk! Now comes my favorite part, which is hearing from you. This whole site, Daisy’s Recipes, is built on the idea that food connects us to our memories and to each other, right? So, when you make this beautiful **custard pie**, I want to know how it fits into *your* family right now.
Did this **Classic Custard Pie Recipe** bring back memories of your own grandmother, or did you create a brand new tradition? Was it the centerpiece of your Thanksgiving table this year, or maybe just a Tuesday night treat because you needed something simple and comforting?
Please, please, please leave a rating below! Your experience tells me that this recipe is standing the test of time, just like Daisy’s old kitchen stove used to. Knowing that my simple directions helped you create something delicious and homey is honestly the greatest reward.
If you have a funny story about your baking adventure—maybe your nutmeg sprinkled unevenly, or someone tried to sneak a taste before it was chilled—share it in the comments! Let’s keep that feeling of warmth and connection going strong in every kitchen. Happy baking, friend, and thank you for keeping these honest, homemade traditions alive!
PrintClassic Smooth Egg Custard Pie with Buttery Flaky Crust

Make this easy, old-fashioned egg custard pie for a comforting dessert. This recipe delivers a creamy vanilla filling baked in a buttery, flaky crust, perfect for holidays or family gatherings.
- Prep Time: 15 min
- Cook Time: 50 min
- Total Time: 1 hour 5 minutes
- Yield: 8 servings 1x
- Category: Dessert
- Method: Baking
- Cuisine: American
- Diet: Vegetarian
Ingredients
- 1 unbaked 9-inch pie crust (buttery and flaky)
- 3 large eggs
- 1/2 cup granulated sugar
- 2 2/3 cups whole milk
- 1 teaspoon pure vanilla extract
- 1/4 teaspoon ground nutmeg (for topping)
Instructions
- Preheat your oven to 350 degrees Fahrenheit. Place your unbaked pie crust into a 9-inch pie plate.
- In a medium bowl, whisk the eggs lightly. Do not overbeat the eggs.
- Add the sugar to the eggs and whisk until just combined.
- Gradually whisk in the milk and vanilla extract until the mixture is smooth.
- Pour the custard filling carefully into the unbaked pie crust.
- Sprinkle the top evenly with ground nutmeg.
- Bake for 45 to 55 minutes, or until a knife inserted near the center comes out clean. The center should be mostly set but may still jiggle slightly.
- Cool the pie completely on a wire rack before slicing. This allows the custard to set fully for a smooth texture.
- Chill the pie for at least 2 hours before serving for the best creamy results.
Notes
- To achieve a smooth custard filling, avoid incorporating too much air when mixing the eggs and milk.
- If the crust edges start to brown too quickly during baking, cover them loosely with aluminum foil strips.
- This pie is excellent served slightly chilled or at room temperature.
Nutrition
- Serving Size: 1 slice
- Calories: 280
- Sugar: 22g
- Sodium: 150mg
- Fat: 14g
- Saturated Fat: 6g
- Unsaturated Fat: 8g
- Trans Fat: 0.5g
- Carbohydrates: 28g
- Fiber: 1g
- Protein: 9g
- Cholesterol: 110mg