

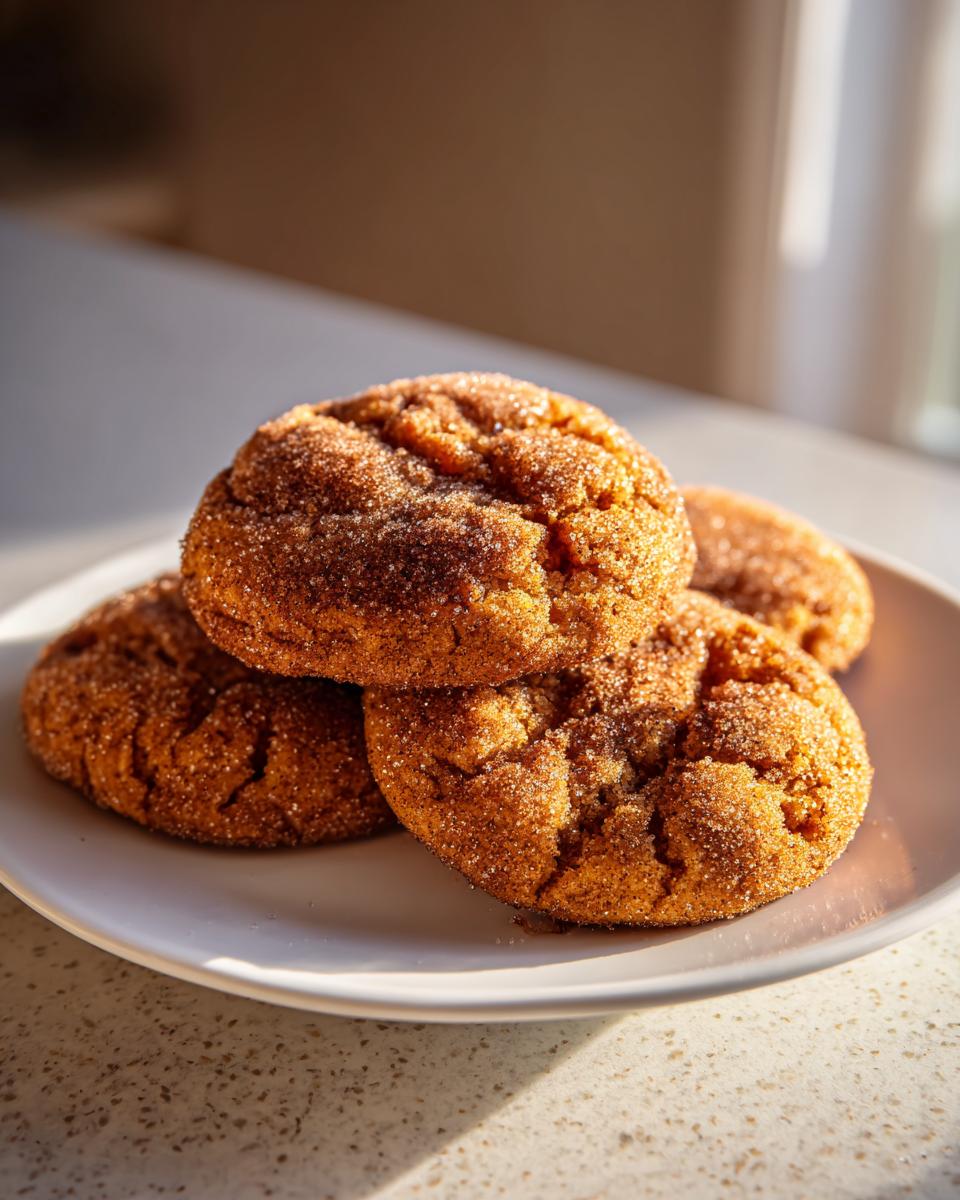
Oh, you guys, fall is officially here, and you know what that means! It’s time to ditch the summer fruit and get down to serious cookie business. I’m talking about the king of autumn treats: pumpkin snickerdoodles. But listen to me closely—if you’ve ever had a pumpkin cookie turn out dry or, worse, annoyingly cakey, you need this recipe.
This isn’t just another quick autumn baking idea; this is the recipe I perfected after pulling out Grandma Daisy’s original notes. She taught me patience, but I’ve adapted this for those of us juggling work and life. We are going to achieve that highly sought-after, melt-in-your-mouth, perfectly chewy texture that keeps these spiced pumpkin cookies soft for days. Trust me, these are the best soft, chewy cookies you’ll make all season!

- Why These Are the Best Chewy pumpkin snickerdoodles You Will Bake
- Gathering Ingredients for Your pumpkin snickerdoodles Recipe
- Step-by-Step Guide to Making Soft pumpkin snickerdoodles
- Tips for Mastering Your pumpkin snickerdoodles Baking Session
- Serving Suggestions for Cozy Fall Treats
- Storage and Keeping pumpkin snickerdoodles Fresh
- Frequently Asked Questions About pumpkin snickerdoodles
- Understanding the Nutrition of Homemade pumpkin snickerdoodles
- Share Your Favorite Fall Cookie Recipes
Why These Are the Best Chewy pumpkin snickerdoodles You Will Bake
We’ve all been burned by pumpkin cookies that puff up like little cakes, haven’t we? Ugh, it’s the worst! That’s why I’m obsessed with the method here. These pumpkin snickerdoodles are designed with chewiness as the absolute priority. You won’t find any dry, crumbly bits here!
- They are irresistibly soft right out of the oven.
- They keep that gorgeous, substantial chew for days.
- We get that signature snickerdoodle tang, warmed up with pumpkin spice!
The secret behind keeping these from puffing up starts right at the beginning with that melted butter. It’s a game-changer for dense cookies. Check out my tips on no-spread sugar cookies for similar tips on structure, but for these, we leverage the fat just a bit differently!
Achieving That Perfect Soft pumpkin snickerdoodles Texture
If you want soft pumpkin snickerdoodles, stop creaming softened butter. For these, we use melted butter. When butter is melted, it reduces the amount of air incorporated during the mixing stage. Less air means less lift in the oven, which means you get that dense, satisfying chew instead of a cakey rise.
Another huge pointer: once the flour goes in, grab your spoon instead of your mixer! You are just gently combining everything until you see no more streaks. Overmixing after the flour is added means you develop gluten, and gluten is the enemy of a soft cookie. It makes them tough, or worse, cakey. We want gooey centers, not spongy edges!
Gathering Ingredients for Your pumpkin snickerdoodles Recipe
Okay, let’s talk stuff. You can’t get the perfect cookie without the right players in your bowl, right? This list is straightforward, and I’ve made sure everything is measured exactly how Grandma Daisy would have wanted—precise, but not fussy. You’ll notice we aren’t skimping on the pumpkin or the spices needed to make these the ultimate fall cookie recipes.
Here’s what you need for about two dozen of these beauties:
- 1 cup (2 sticks) unsalted butter, melted
- 1 1/2 cups packed light brown sugar
- 1/2 cup granulated sugar, plus more for rolling
- 1 large egg
- 1 teaspoon vanilla extract
- 1/2 cup pumpkin puree (not pumpkin pie filling)
- 2 3/4 cups all-purpose flour
- 2 teaspoons cream of tartar
- 1 teaspoon baking soda
- 1/2 teaspoon salt
- 1 1/2 teaspoons ground cinnamon
- 1 teaspoon ground ginger
- 1/2 teaspoon ground nutmeg
- 1/4 teaspoon ground cloves
- For Rolling: 1/4 cup granulated sugar mixed with 2 tablespoons ground cinnamon
Ingredient Notes and Spice Balance for pumpkin snickerdoodles
The most important thing you need to see on this list is that little note next to the pumpkin puree: 1/2 cup pumpkin puree (not pumpkin pie filling). If you use pie filling, you’re bringing in sweeteners and extra spices, and that messes with the delicate balance we need for chewiness. We want the pure flavor of the squash here for our pumpkin puree cookies.
Now for the spices. The blend I listed gives you that classic warm hug—cinnamon dominance with just enough ginger, nutmeg, and clove to remind you of Thanksgiving. But if you’re like me and really love that sharp ginger note, feel free to bump the ginger up by another 1/4 teaspoon! If the cloves are too strong for your liking, pull them back to just 1/8 teaspoon. It’s your kitchen! But please, use both the cream of tartar and baking soda exactly as written; they work together with the pumpkin to control the spread and texture.
Step-by-Step Guide to Making Soft pumpkin snickerdoodles
Alright, deep breath! Now that we have our ingredients standing by, let’s get these beautiful pumpkin spice cookies mixed up. Believe me, this whole process is surprisingly fast—definitely qualifying as one of those Easy Pumpkin Desserts you can whip up when the craving hits.
First things first: make sure your oven is set to 350°F (175°C)! We need it waiting patiently for us.
Mixing the Dough for Chewy pumpkin snickerdoodles
We always start with the dry stuff first. In one medium bowl, you’re going to whisk together all your dry elements—the flour, the cream of tartar (so important!), baking soda, salt, and all those gorgeous spices we talked about. Just give that a good swift whisk until everything looks uniform. Put that bowl aside for a minute.
Now, grab your big bowl for the wet ingredients. Whisk that melted butter, brown sugar, and the smaller portion of granulated sugar until they look smooth and glossy. Then, beat in your egg and vanilla. Finally, mix in that pumpkin puree until you have one cohesive, deeply orange liquid mixture. This is where the flavor starts building!
Here’s the critical part for that perfect chew: we add the dry mix to the wet mix, but we do it slowly. Mix on the lowest speed your machine can handle, or take your time by hand. You only want to mix until you see *just* the last few streaks of flour disappear. Seriously, stop mixing right there! Overmixing the flour after the pumpkin is in is the number one reason people end up with cakey cookies. We want that dough to feel slightly loose, almost under-mixed, because we are stopping gluten development dead in its tracks for maximum softness!
Coating and Baking Your Spiced pumpkin cookies
While your dough is resting for just a moment, set up your rolling station. Grab that shallow dish and put your cinnamon-sugar coating in there. We’re aiming for total coverage on these spiced pumpkin cookies.
Use a cookie scoop—I love using about 1.5 tablespoons of dough per cookie. Roll that ball gently but firmly in the cinnamon sugar until it’s completely coated. Don’t hang around! The more time the dough sits out, the softer it gets. Place the coated dough balls about two inches apart on your parchment-lined sheets. Don’t press them down; let them do their thing in the oven.
Bake them for 10 to 12 minutes at 350°F. You need to watch closely here for those telltale signs of doneness required for No Cakey pumpkin Cookies: the edges should look slightly set, maybe just starting to barely brown, but the very center should still look beautifully soft and perhaps a little puffed. If they pass the eye test, pull them out! They continue to cook on the hot sheet for a good five minutes—this is key to getting that wonderful final texture. Then move them carefully to a rack to finish cooling.
Tips for Mastering Your pumpkin snickerdoodles Baking Session
Even when you follow every single step perfectly, sometimes baking throws us a curveball! That’s where a little troubleshooting comes in handy. Since we are dealing with pumpkin puree here—which brings a lot of liquid—we sometimes have to step in right at the end to ensure these amazing pumpkin snickerdoodles turn out chewy and not too flat. This little bit of extra know-how is what separates a good cookie from a showstopper.
I’ve learned a few tricks over the years recreating Grandma Daisy’s legacy for modern kitchens. Remember, the goal is that perfect texture we talked about, the one that keeps them soft for days!
Troubleshooting Common pumpkin snickerdoodles Issues
What if your dough, after mixing, just feels a little too soft or sticky, maybe even too wet to comfortably roll? This can happen if your pumpkin puree was extra watery that day. Don’t panic and don’t give up on that beautiful soft and chewy cookie dream!
If your dough is proving difficult to handle, even though we used melted butter (which usually means no chill time needed), you can absolutely pop the bowl into the fridge for just 20 or 30 minutes. Chilling dough firms up the fats just enough to make rolling those spheres much neater. Once they are chilled slightly and coated in sugar, they bake up beautifully.
Another thing to watch for is spreading too much. We hate seeing big, thin, greasy circles when we want a thick, bakery-style cookie. If you find your cookies are spreading out too much straight away, it usually means your baking sheet isn’t cold enough, or your oven isn’t quite up to temperature when they go in. Make sure you give the oven a full 15 minutes to heat up properly before you even think about sliding those trays in. A cold sheet straight from the counter into a hot oven helps slow that initial spread down, keeping your chewy pumpkin cookies nice and plump throughout the bake!
Serving Suggestions for Cozy Fall Treats
Honestly, the best part about baking something this wonderful is figuring out how to serve it! These pumpkin snickerdoodles aren’t just cookies; they are an experience, perfect for leaning into all that amazing autumn baking energy.
They are absolutely divine when they are still slightly warm—that cinnamon sugar coating is soft, and the center is just about gooey enough. Seriously, grab a mug of something hot. My favorite pairing when I’m enjoying these fall cookie recipes is a strong black coffee or, if the afternoon is chilly, some homemade hot apple cider. The spice in the cookie just sings next to those drinks.
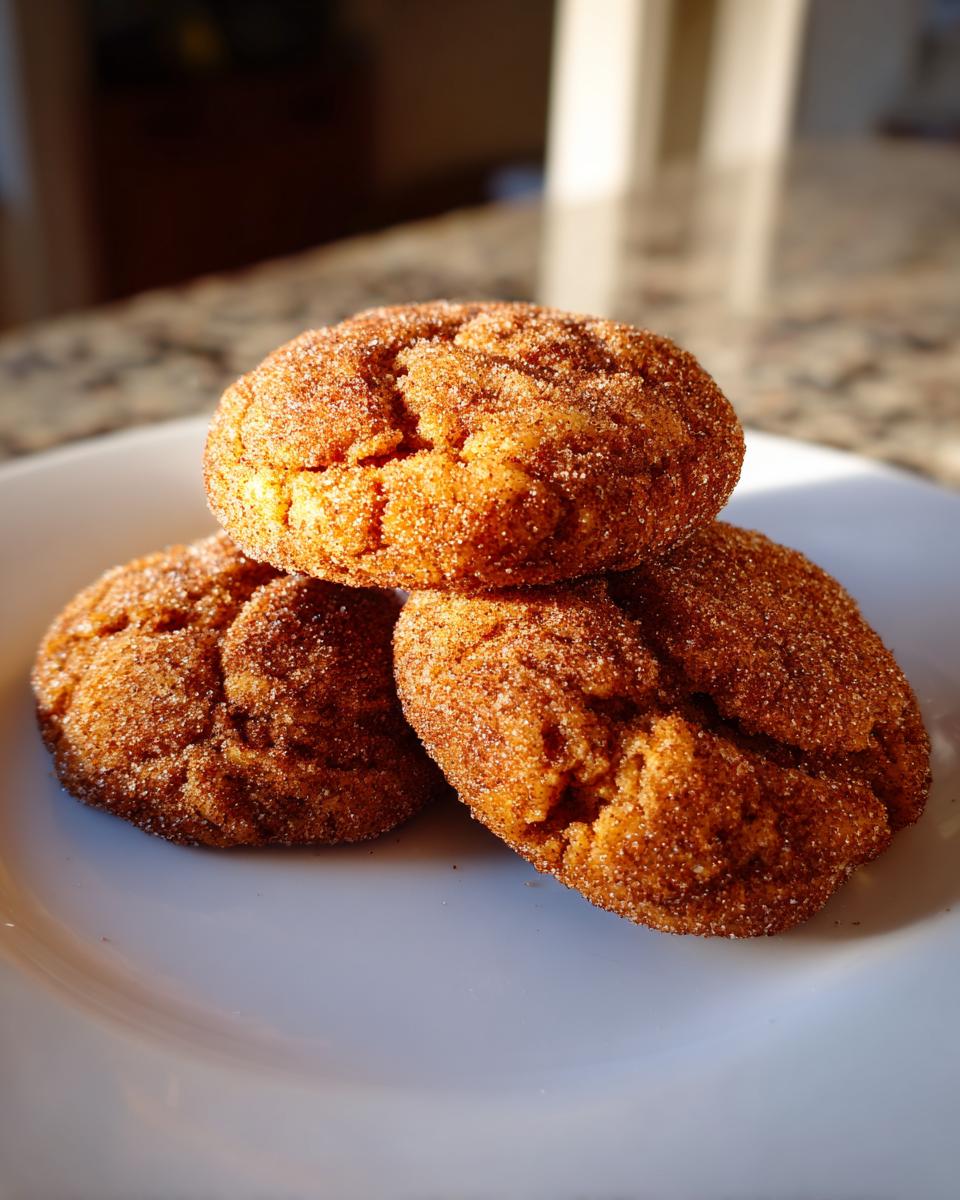
These cookies are also naturals for getting onto your holiday cookie baking trays! Because they are so much more flavorful than a standard sugar cookie, they stand up beautifully next to chocolate cookies or shortbreads. They look gorgeous piled high in a basket, especially once they’ve cooled completely and have that lovely crinkled top.
And if you’re looking for the ultimate cozy night? Make a batch, wrap them up in aluminum foil, and place them near, but not too near, a fireplace or heater for about five minutes. Don’t microwave them unless you love a soft, fast-eat cookie! Warming them gently just awakens all those beautiful spices like ginger and clove, making your whole house smell incredible. This is what autumn baking ideas are all about—sharing warmth and simple joy!
Storage and Keeping pumpkin snickerdoodles Fresh
Okay, we’ve made the perfect batch of pumpkin snickerdoodles—they are chewy, soft, and smell like heaven. Now, the last thing we want is for them to turn into hard little discs by tomorrow, right? We worked too hard for those beautifully soft pumpkin snickerdoodles to go stale fast!
The good news is that because we used melted butter and pumpkin puree, these cookies naturally stay softer than a standard butter cookie. However, to really lock in that chewiness for days, storage is everything. My rule of thumb is to always let them cool—and I mean *completely* cool—before you put them away. Trying to store them while they are still warm traps moisture inside the container, which can lead to sogginess instead of chewiness.
For keeping them fresh for up to five days, you want an airtight container. Stack them, but here’s a little trick Daisy taught me: put a slice of soft white bread in the bottom of the container with the cookies. The bread will get hard, but it sacrifices its moisture to keep the cookies soft! Replace the bread if it gets rock hard.
If you are baking these for the holidays way ahead of time, freezing is your secret weapon. You can absolutely freeze these! Once cooled, line them on a baking sheet and flash freeze them for about an hour until solid. Then, transfer them into a heavy-duty freezer bag, squeezing out as much air as you can. They keep beautifully for about three months!
When you’re ready to eat them again, let them thaw overnight on the counter in the bag. If you’re impatient (I get it!), you can warm a couple up on a microwave-safe plate for about 10 seconds. It brings those spices right back to life! Enjoy your stash of gooey pumpkin cookies all season long!
Frequently Asked Questions About pumpkin snickerdoodles
I know you might have a few lingering questions swirling around, especially when you’re trying to nail that perfect texture. It’s hard enough making a standard snickerdoodle, let alone one with pumpkin! I tried to cover everything in the guide above, but here are a few common things people ask me about making sure these are the ultimate Chewy Pumpkin Cookies.
Can I substitute the cream of tartar in my pumpkin snickerdoodles?
That’s a fantastic question! The cream of tartar is kind of the unsung hero in a standard snickerdoodle. It gives you that little bit of signature sharp tang that balances the sugar, plus it helps stabilize the cookie so it doesn’t spread too much, keeping it nice and thick—which is essential for Soft Pumpkin Snickerdoodles!
If you’re totally out, you can try replacing the two teaspoons of cream of tartar with one teaspoon of lemon juice mixed with 1/2 teaspoon of baking soda. You’d mix the lemon juice with your wet ingredients instead of adding the cream of tartar to the dry mix. I have to warn you though, the flavor profile will shift slightly. You get an acid tang from lemon instead of the specific earthy tang from the tartar. It works in a pinch, but if you really want that classic taste, try to keep the cream of tartar on hand for your next batch of pumpkin snickerdoodles!
How do I make these pumpkin snickerdoodles extra gooey?
You nailed it! ‘Gooey’ is what we are aiming for, not dry! The absolute secret here is baking them slightly less than you think you should. Remember in the instructions when I said the centers should still look slightly soft right when you take them out? That is when they are most prone to being gooey.
Don’t trust the timer alone; trust your eyes. If you pull them when the edges look set but the center still looks a bit underdone—almost like wet sand—you’ve hit the sweet spot. As soon as you move them onto that cooling rack, the residual heat finishes cooking them gently. By the time they are fully cooled, they’ll have firmed up just enough to be structurally sound, but they’ll still pack that incredible, soft, gooey center that makes you hoard the whole batch!
Also, don’t forget the storage tip! Storing them properly in an airtight container completely prevents the moisture from escaping, locking in that perfect chewiness we worked so hard to achieve for these pumpkin spice cookies.
Understanding the Nutrition of Homemade pumpkin snickerdoodles
Because we make these treats with real ingredients—pumpkin puree, brown sugar, and butter—we know exactly what’s going into them, unlike those mystery store-bought cookies. I ran the numbers on the standard recipe yields, and I wanted to share what you can expect for one of these beautiful, chewy bites.
This information is so helpful, especially if you’re planning out a big holiday menu. Remember, this is just an estimate compiled based on the ingredients listed, so the final count might shift a little depending on how much cinnamon sugar you decide to pile on. Think of it as a helpful guide, not a strict law!
Here’s the breakdown per cookie (assuming 24 cookies total):
- Serving Size: 1 cookie
- Calories: 190
- Sugar: 18g
- Sodium: 110mg
- Fat: 9g
- Saturated Fat: 5g
- Unsaturated Fat: 4g
- Trans Fat: 0g
- Carbohydrates: 26g
- Fiber: 1g
- Protein: 2g
- Cholesterol: 30mg
I always feel better about enjoying a treat when I know it’s loaded with real flavor—like that nice hit of cinnamon and ginger—and that we’ve kept the trans fats at zero! It’s worth every single calorie, especially when they are as soft as these pumpkin snickerdoodles are.
Just a quick word of caution, as Grandma Daisy would insist: these nutrition facts are our best guess, based on standard grocery store items. If you used a lighter sugar or your pumpkin puree was thinner, those numbers could nudge up or down. They are homemade, after all! The most important thing is that we are enjoying these wonderful Fall Cookie Recipes responsibly and happily.
Share Your Favorite Fall Cookie Recipes
And that’s it! You now have the secrets to making the most unbelievably soft and chewy pumpkin snickerdoodles. I poured everything I know from Grandma Daisy’s legacy into making sure you avoid the dreaded cakey texture. Now the kitchen—and the sharing—is all yours!
I truly hope these become a staple on your table for years to come. When you make your first batch, please come back and leave a comment below. I’m dying to know how the melted butter method worked for your oven, and whether you achieved that perfect center chewiness!
If you loved these Autumn Baking Ideas, give the recipe a star rating at the top of the page—it really helps other home cooks find the best treats!
If you snap a picture of your cinnamon-sugar dusted cookies, tag me on social media! Seeing your finished batches of Fall Cookie Recipes makes my whole week. Happy, cozy baking, friends. Don’t forget to check out my easy chicken marsala recipe next when you’re ready for dinner!
PrintChewy Pumpkin Snickerdoodles: The Perfect Soft Fall Cookie
Make soft, chewy pumpkin snickerdoodles that avoid a cakey texture. These cookies combine classic snickerdoodle tang with warm pumpkin spice and are rolled in cinnamon sugar for a delightful autumn treat.
- Prep Time: 20 min
- Cook Time: 12 min
- Total Time: 32 min
- Yield: About 24 cookies 1x
- Category: Dessert
- Method: Baking
- Cuisine: American
- Diet: Vegetarian
Ingredients
- 1 cup (2 sticks) unsalted butter, melted
- 1 1/2 cups packed light brown sugar
- 1/2 cup granulated sugar, plus more for rolling
- 1 large egg
- 1 teaspoon vanilla extract
- 1/2 cup pumpkin puree (not pumpkin pie filling)
- 2 3/4 cups all-purpose flour
- 2 teaspoons cream of tartar
- 1 teaspoon baking soda
- 1/2 teaspoon salt
- 1 1/2 teaspoons ground cinnamon
- 1 teaspoon ground ginger
- 1/2 teaspoon ground nutmeg
- 1/4 teaspoon ground cloves
- For Rolling: 1/4 cup granulated sugar mixed with 2 tablespoons ground cinnamon
Instructions
- Whisk together the flour, cream of tartar, baking soda, salt, cinnamon, ginger, nutmeg, and cloves in a medium bowl. Set aside.
- In a large bowl, whisk the melted butter, brown sugar, and 1/2 cup granulated sugar until smooth.
- Beat in the egg and vanilla extract until combined. Mix in the pumpkin puree until fully incorporated.
- Gradually add the dry ingredients to the wet ingredients, mixing on low speed until just combined. Do not overmix.
- Place the 1/4 cup sugar and 2 tablespoons cinnamon mixture in a shallow dish.
- Scoop the dough into balls, about 1.5 tablespoons each. Roll each ball thoroughly in the cinnamon sugar mixture, coating completely.
- Place the coated dough balls 2 inches apart on baking sheets lined with parchment paper.
- Bake at 350°F (175°C) for 10 to 12 minutes. The edges should look set, but the centers should still look slightly soft. This prevents dryness.
- Let the cookies cool on the baking sheet for 5 minutes before transferring them to a wire rack to cool completely. They will firm up as they cool, keeping them chewy.
Notes
- Using melted butter helps create a denser, chewier cookie structure, avoiding the cakey texture common in pumpkin cookies.
- Do not flatten the dough balls before rolling; the slight puff during baking contributes to the soft center.
- For the best flavor, use pure pumpkin puree, not the pre-spiced pie filling.
- Store cookies in an airtight container to maintain softness for several days.
Nutrition
- Serving Size: 1 cookie
- Calories: 190
- Sugar: 18g
- Sodium: 110mg
- Fat: 9g
- Saturated Fat: 5g
- Unsaturated Fat: 4g
- Trans Fat: 0g
- Carbohydrates: 26g
- Fiber: 1g
- Protein: 2g
- Cholesterol: 30mg