
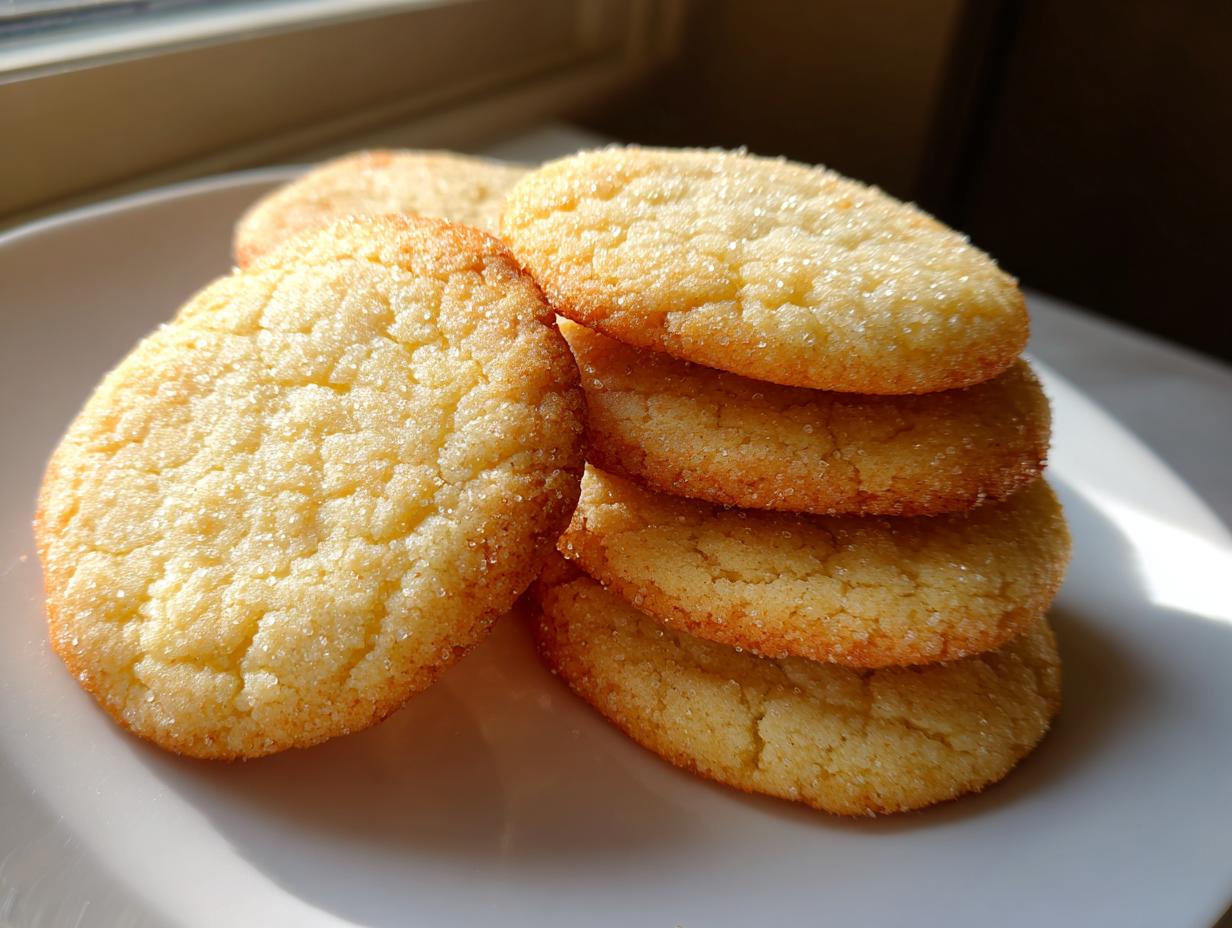
Oh, the heartbreak! You spend all that time rolling out perfect little stars and trees, only to watch them melt into sad, buttery puddles the second they hit the hot oven. It’s the biggest frustration in holiday baking, isn’t it? Well, trust me when I say that frustration ends right here. I’m finally sharing what I call The Ultimate Soft, No-Spread Cut-Out Sugar Cookie Recipe for Decorating. This isn’t some fancy, complicated thing I found online; this is pure gold from my Grandmother Daisy’s kitchen. She knew how to make food that brought people together, and her baking was always reliable. This recipe stays true to her simple, honest methods, ensuring your cookies are beautifully buttery, wonderfully soft, and hold their shape perfectly—every single time you bake them.
- Why This is The Best Sugar Cookies Recipe for Decorating
- Gathering Ingredients for Perfect Cut Out Sugar Cookies
- Step-by-Step Guide to Making Foolproof Sugar Cookies That Hold Shape
- Tips for Success with Your Homemade Sugar Cookie Recipe
- Cookie Decorating Ideas for Your Perfect Sugar Cookie Canvas
- Storage and Reheating Instructions for Soft Sugar Cookies
- Troubleshooting Common Sugar Cookie Issues
- Frequently Asked Questions About This Sugar Cookie Recipe
- Nutritional Estimation for Your Buttery Sugar Cookies
Why This is The Best Sugar Cookies Recipe for Decorating
I know you’ve probably tried a dozen recipes promising the world, but this one simply delivers. My grandmother, Daisy, never wasted time on cookies that needed tons of finagling. What makes these the best sugar cookies recipe? They tackle the big three problems head-on. They are delightfully soft, but don’t let that fool you—they have the structure needed for decorating.
- They are truly no spread sugar cookies because of the chilling process we use. It’s non-negotiable, trust me!
- The flavor is pure, rich, and buttery sugar cookies perfection; no weird aftertaste here.
- It’s an easy sugar cookies method that doesn’t require specialized equipment.
When you’re ready to finish them up, remember that the right icing makes all the difference. You’ll want a sturdy topping, so be sure to check out my secrets for the best icing for sugar cookies once these come out of the oven.
Gathering Ingredients for Perfect Cut Out Sugar Cookies
Before we even think about turning on the mixer, we have to get our supplies ready. Daisy always told me that gathering everything first—what cooks call *mise en place*—is half the battle won. It keeps you calm, and honestly, it keeps you from forgetting that crucial teaspoon of salt!
This recipe uses super simple pantry staples, but their condition matters a lot if you want great results. Pay close attention to the state of the butter; it can’t be straight from the fridge, but it definitely can’t be melted into liquid, or your dough will spread like crazy.
Essential Ingredients for Your Sugar Cookie Dough
- 2 3/4 cups all-purpose flour
- 1 teaspoon baking powder
- 1/2 teaspoon salt
- 1 cup (2 sticks) unsalted butter, softened
- 1 1/2 cups granulated sugar
- 1 large egg
- 1 teaspoon vanilla extract
- 1/2 teaspoon almond extract (optional, for bakery style flavor)
Ingredient Notes and Substitutions for Soft Sugar Cookies
When I first started recreating this recipe, I tried swapping out the butter for shortening to see if it would make it even easier to handle. Big mistake! Shortening makes a good cookie, but it won’t give you that deep, rich, buttery flavor we are after here. Keep the butter, just make sure it’s soft enough to leave an indentation when you press it gently.
The almond extract is totally optional, but trust me, if you want that hint of something special that makes people ask, “What exactly is in this?”, that’s where it comes in. It elevates the simple vanilla base perfectly. Once these beauties are baked, you’ll need a good topping, so keep that icing recipe handy!
Step-by-Step Guide to Making Foolproof Sugar Cookies That Hold Shape
Now we get down to the fun part—the actual making! Follow these steps exactly, especially the chilling time, and you will see why this is how you get those beautiful, crisp-edged cut out sugar cookies that look like they came right from a high-end bakery. It’s about technique, not fighting the ingredients.
Mixing the Dough for Bakery Style Sugar Cookies
First things first, we need to dry things out a bit before adding moisture. Whisk those dry ingredients—flour, baking powder, and salt—together in a bowl. Set that aside. In your big mixer bowl, you’re going to cream the butter and sugar. This is important! You want this mixture truly light and fluffy, like pale yellow clouds. That takes a good three minutes on medium speed. After that, drop in the egg and then the flavor extracts. Keep the speed low when adding the flour mixture so you don’t create a flour cloud that attacks your kitchen!
When the dry stuff goes in, only mix until it just comes together. Seriously, stop as soon as you don’t see white streaks anymore. Overmixing develops gluten, and gluten means tough cookies, not the soft treats we’re aiming for.
The Critical Chilling Step for Roll Out Sugar Cookies
This next part is the secret to avoiding those melted blobs. Divide your dough into two flat disks. Wrap each one up tight in plastic wrap. They have to chill for a minimum of two hours, but honestly? If you can let them go overnight, do it! I remember when I was rushing one year for a bake sale, I only chilled them for 45 minutes. Big mistake! They spread flat almost instantly. The cold fat (the butter) freezes up, preventing it from melting too fast in the oven. This is what gives you those gorgeous roll out sugar cookies that maintain their sharp edges.
Rolling, Cutting, and Baking Your Sugar Cookie Shapes
When you’re ready to bake, preheat that oven to 375 degrees F, and have your sheets ready with parchment paper—we hate cookies sticking! Take one disk out and let it warm up just enough so you can roll it without tearing, aim for about 1/4-inch thick. Use those cutters and place the shapes evenly on the sheet.
Hot tip: If your kitchen is already warm, pop the *cut* cookies back in the fridge for ten minutes before they go into the oven. It’s one more insurance policy against spreading! Bake them until the edges are just starting to look set and maybe just barely golden. If you wait until they look fully cooked, they will be hard! For perfectly soft cookies, pull them just before you think they are ready.
Tips for Success with Your Homemade Sugar Cookie Recipe
Honestly, even with the best recipe, baking is an art, and a few small tricks can make the difference between a good cookie and the best sugar cookies recipe you’ve ever made. My focus, following Grandma Daisy’s lead, has always been on the final texture. If you want a thicker, satisfying, bakery style sugar cookie, this is a really easy adjustment.
When rolling out the dough, don’t skimp! Roll it out to a full 3/8-inch thickness instead of the standard 1/4-inch. Since the dough is chilled so well, it can handle the thickness, but you’ll need to add just a minute or two to the bake time. That extra depth keeps the center incredibly soft while the outside sets up just right.
Also, keep them cool! If you’re rolling out batches, put the sheets in the fridge while the first batch bakes. Every second they stay cold before hitting the heat prevents them from turning into flat, hard discs. That little bit of effort guarantees success for your homemade cookie recipe.
Cookie Decorating Ideas for Your Perfect Sugar Cookie Canvas
Okay, now that we have these gorgeous, perfectly shaped buttery sugar cookies—the kind that don’t puff up or spread out—you have the absolute best canvas for decorating! This is where the fun really starts, especially if you are making holiday sugar cookies.
Because we chilled the dough so thoroughly, your little shapes will be sharp enough to handle even the finest details in your icing work. Whether you love flooding royal icing for that smooth, clean look or prefer using a simple buttercream stencil, these cookies hold up beautifully. They are sturdy enough to stack and transport but still give you that perfect soft bite when someone finally eats them.
Go ahead and use your favorite colors and sprinkles! And when you’re ready to tackle the topping, make sure you have the perfect consistency for icing. I wrote down everything I know about getting royal icing just right to dry hard so your decorations last, right here: check that post before you start.
Storage and Reheating Instructions for Soft Sugar Cookies
Once these amazing treats are baked, iced, or just perfectly plain, the next concern is keeping them soft! We worked so hard to make sure our cut out sugar cookies weren’t hard little rocks, so let’s keep that texture intact. Daisy always stored her baked goods in tins, but I’ve found a few modern tricks work even better for maximum freshness.
The key is air exclusion. If you’ve iced them, make sure the icing is 100% set before you even think about stacking them. If you stack wet icing, you’re asking for a colorful mess! Once they are decorated and dry, layer them between sheets of parchment paper inside a sturdy, airtight container. This prevents them from crushing each other and keeps moisture locked in.
For undecorated cookies, they are pretty robust. They should stay delightfully soft and fresh for about a week at room temperature when stored properly in that airtight container. If you made a huge batch for the holidays, freezing is your best friend! Wrap the cookie dough after chilling, before cutting, or even the baked (un-iced) cookies tightly in plastic wrap, then toss them into a freezer-safe bag. They keep beautifully for up to three months this way. Thaw them overnight on the counter, and they taste like they just came out of the oven!
Troubleshooting Common Sugar Cookie Issues
Even with the very best recipe, sometimes our cookies decide to have a little personality and don’t look exactly like the picture. Don’t panic! This is where we stop blaming the recipe and start troubleshooting like seasoned bakers. I’ve made every mistake in the book with these roll out sugar cookies over the years, so I know exactly what’s causing those little hiccups.
If your cookies are puffing up dramatically in the center or getting puffy and cakey instead of staying flat and perfect for decorating, there are usually two culprits. First, check your baking powder measurement—was it level or slightly heaped? Too much leavener causes that puff. Second, and this is the bigger one: you might have overmixed the dough after adding the flour. That develops the gluten too much, leading to puffs that crack.
Now, what if you pulled them out and they are already hard as a rock? That usually means they baked too long, or you didn’t quite get the chilling right. For the softest outcome, you want to bake them until they *just* look done, not until they are deeply golden. Pull them five minutes early rather than five minutes late if you are aiming for that melt-in-your-mouth texture. Remember, they keep cooking slightly on the hot pan after you remove them from the oven—that’s what the 5-minute cooling rest is for!
And for the ultimate fail-safe, if you are struggling with any recipe, try rolling your dough out between two sheets of parchment paper. This keeps the dough incredibly cold and prevents it from sticking to the counter, which reduces the temptation to add extra flour. Adding too much flour is the number one way to end up with a truly hard, crumbly cookie, so resist the urge to dust endlessly!
Frequently Asked Questions About This Sugar Cookie Recipe
I get so many messages after people make these, and I love hearing how well the shapes held up! But naturally, people have questions when they try a new recipe, especially when it’s meant to be the absolute best sugar cookies recipe they use for holiday cookie recipes. Here are the things I get asked about the most.
Can I skip chilling the dough? I’m in a huge hurry!
Oh, honey, please don’t! I know you want those results now, but chilling is what transforms these from spreading messes into perfect cut out sugar cookies. Skipping the chill time guarantees your shapes will run together in the oven. Don’t fight the science; just wrap it up and walk away for at least two hours. If you need them faster, you can pop the wrapped disks into the freezer for about 30 to 40 minutes, but two hours in the fridge is ideal.
Can I make these into soft, pillowy Lofthouse style cookies instead?
That’s a great question! This dough is formulated to be firm enough to hold detail, so it naturally leans toward a slightly firmer, buttery sugar cookie that pairs well with royal icing. To get closer to the super soft, cake-like texture of Lofthouse style cookies, you would need a richer, wetter dough base, usually achieved by increasing the liquid/fat ratio and using more baking powder. This recipe is engineered specifically for clean lines, not pillowy softness, but they are still wonderfully tender!
How can I make these cookies chewier instead of just soft?
If you prefer a bit more chew, you can absolutely tweak this! To encourage a chewier result, substitute about half of the granulated sugar with light brown sugar—just make sure it’s packed well when measuring for the best flavor! Also, try reducing the bake time by about 60 seconds. Pull them out when they look slightly underdone in the center. They’ll firm up as they cool. If you love chewy recipes, you absolutely must check out my favorite recipe for soft and chewy peanut butter blossoms!
Do I have to use almond extract?
Nope, you don’t have to, but I highly recommend it if you want that true bakery style sugar cookie flavor! Just the vanilla is lovely and classic, but that tiny hint of almond completely wakes up the butteriness and makes people wonder what secret ingredient you added.
Nutritional Estimation for Your Buttery Sugar Cookies
I always like to include this, though I’m certainly no nutritionist! Grandma Daisy focused on making food that fed the soul, and calories were never a thing we worried about back then. But in my modern kitchen, I know it’s helpful to have a general idea of what’s in these delicious treats.
This breakdown is just an estimate, mind you! It assumes standard ingredient measurements and no fancy substitutions. If you add extra icing, that’s going to bump up the sugar and calories considerably, so take this as a baseline for the cookie itself.
- Serving Size: 1 cookie
- Calories: 165
- Sugar: 14g
- Sodium: 110mg
- Fat: 9g
- Saturated Fat: 5g
- Unsaturated Fat: 4g
- Trans Fat: 0g
- Carbohydrates: 20g
- Fiber: 0g
- Protein: 2g
- Cholesterol: 30mg
See? Wonderful, uncomplicated ingredients making a perfect, simple sweet treat. Keep them covered tightly, and make sure you enjoy them with a big glass of milk!
PrintThe Ultimate Soft, No-Spread Cut-Out Sugar Cookie Recipe for Decorating
You need a foolproof recipe for buttery sugar cookies that hold their shape perfectly when cut and baked. This guide gives you the best sugar cookies recipe for easy holiday baking and decorating.
- Prep Time: 30 min
- Cook Time: 10 min
- Total Time: 160 min
- Yield: 24 cookies 1x
- Category: Dessert
- Method: Chilling and Baking
- Cuisine: American
- Diet: Vegetarian
Ingredients
- 2 3/4 cups all-purpose flour
- 1 teaspoon baking powder
- 1/2 teaspoon salt
- 1 cup (2 sticks) unsalted butter, softened
- 1 1/2 cups granulated sugar
- 1 large egg
- 1 teaspoon vanilla extract
- 1/2 teaspoon almond extract (optional, for bakery style flavor)
Instructions
- In a medium bowl, whisk together the flour, baking powder, and salt. Set this dry mixture aside.
- In a large bowl, use an electric mixer to beat the softened butter and granulated sugar together until the mixture is light and fluffy, about 3 minutes. This step incorporates air for a soft texture.
- Beat in the egg until fully combined. Mix in the vanilla extract and almond extract, if using.
- Gradually add the dry ingredient mixture to the wet ingredients, mixing on low speed until just combined. Do not overmix the dough.
- Divide the dough in half, flatten each half into a disk, wrap tightly in plastic wrap, and chill in the refrigerator for at least 2 hours, or up to 2 days. Chilling is key for no spread sugar cookies.
- Preheat your oven to 375 degrees Fahrenheit. Line baking sheets with parchment paper.
- Remove one disk of dough from the refrigerator. Let it sit for 5 to 10 minutes to soften slightly. On a lightly floured surface, roll the dough out to 1/4-inch thickness.
- Use cookie cutters to cut out shapes. Place the cut-out sugar cookies onto the prepared baking sheets, leaving about 1 inch between them.
- Bake for 8 to 10 minutes, or until the edges are just set and lightly golden. For soft sugar cookies, err on the side of underbaking slightly.
- Let the cookies cool on the baking sheet for 5 minutes before transferring them to a wire rack to cool completely before you attempt any cookie decorating ideas.
Notes
- For the best results when rolling out, chill the rolled-out dough on the baking sheet for 10 minutes before baking. This helps the cut-out sugar cookies maintain their shape.
- If you want a thicker, bakery style sugar cookie, roll the dough to 3/8-inch thickness and increase the baking time by 1 to 2 minutes.
- Use high-quality vanilla extract for the best classic vanilla sugar cookies flavor.
Nutrition
- Serving Size: 1 cookie
- Calories: 165
- Sugar: 14g
- Sodium: 110mg
- Fat: 9g
- Saturated Fat: 5g
- Unsaturated Fat: 4g
- Trans Fat: 0g
- Carbohydrates: 20g
- Fiber: 0g
- Protein: 2g
- Cholesterol: 30mg