
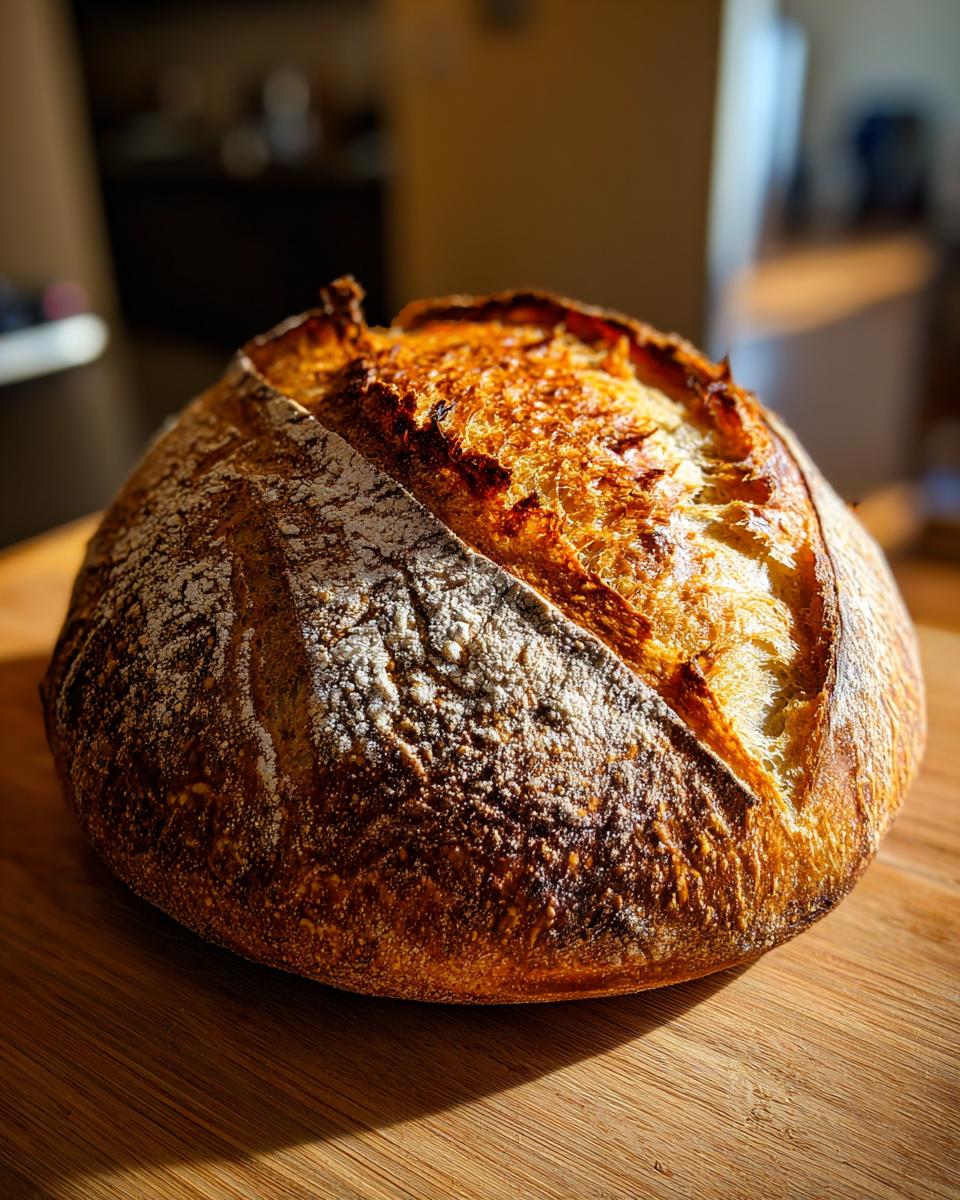
There is honestly nothing better than pulling a loaf of bread from the oven and hearing that first tiny *crackle* as it cools down. That crisp, crackling sound means you’ve done it right! My grandmother, Daisy, always said the crust was the song of the bread, and I remember watching her hands shape dough that would become the most incredible crusty bread you could imagine. It took me years of practice in my city kitchen to truly master her techniques, but I finally cracked the code for getting that professional, deeply browned, shattering exterior right here at home.
This recipe for Artisan Hearth Bread is my absolute guarantee—if you follow these steps, especially regarding heat and steam, you will have the crispiest, most satisfying exterior on your homemade artisan bread. It’s more than just baking; it’s keeping Daisy’s spirit alive every time I preheat my oven. If you love this technique, make sure you check out how to make sourdough starter from scratch next!
- Why This is the Best Crusty Bread Recipe for a Crispy Exterior
- Ingredients Needed for Your Homemade Artisan Bread
- Essential Equipment for Perfect Crusty Bread Baking at Home
- Step-by-Step Instructions: Making Crusty Bread Dough
- Shaping and Scoring Your Hearth Bread Recipe
- Baking Bread High Heat: Mastering Steam for Crusty Bread
- Troubleshooting Common Crust Issues
- Serving Suggestions for Rustic European Loaves
- Storage and Reheating for Maximum Crust Retention
Why This is the Best Crusty Bread Recipe for a Crispy Exterior
When you’re chasing that perfect, shatteringly crisp exterior, every little detail matters. This isn’t just any loaf; it’s engineered for maximum crunch. Forget pale, soft loaves! This best crusty bread recipe relies on three things working together perfectly: wet dough, scorching heat, and lots and lots of steam. That’s what separates good bread from truly amazing bread recipes with crispy exterior.
- The secret sauce is the 75% hydration—it handles like a dream once developed, but it starts out super floppy!
- We bake this loaf scorching hot, using a preheated vessel to shock the dough instantly.
- Steam is non-negotiable; it keeps the crust soft long enough for the loaf to expand before hardening it into a shell.
If you want to try something wildly different later on, check out my easy 3-ingredient beer bread recipe.
The Role of High Hydration in Achieving Crusty Bread
Hydration level is huge here. Our recipe calls for 75% water, which feels way too wet when you first mix it up. Trust me on this: that extra water turns into steam inside the oven. That steam is the protective shield that keeps the outside from setting too quickly. It allows the bread to puff up spectacularly—that’s called oven spring! Once the bread hits its peak size, that steam escapes, and the hot, dry air of the oven takes over to turn that damp surface into a beautiful, thin, crispy shell. It’s the wetness that yields the crispness later on, funny enough!
Ingredients Needed for Your Homemade Artisan Bread
For this recipe, the ingredients are simple—which means every single one counts! Quality is everything, especially when it comes to the flour. You absolutely must use good, strong bread flour here; it can handle being this wet without falling apart. I cannot stress enough how important accurate measuring is when you’re working this high in hydration. Trust me, getting the water amount exactly right makes all the difference between a workable dough and soup!
- 500g bread flour (Go for something high-protein if you can find it!)
- 375g water (that’s the high hydration magic!)
- 10g fine sea salt
- 2g instant dry yeast
- Extra flour for dusting
When you check out my easy homemade soft naan bread skillet recipe later, you’ll see how small ingredient changes can transform things, but for this artisan loaf, stick precisely to these ratios.
Essential Equipment for Perfect Crusty Bread Baking at Home
Okay, so now we get down to business on how to bake crusty bread at home. Because this dough is so wet and we need such intense heat, you can’t just toss it on a cookie sheet and hope for the best. You need gear that holds heat like a furnace! The absolute must-haves are something to bake on—like a baking stone or steel—and definitely something to trap that crucial steam inside the oven temporarily.
My biggest tip, regardless of what you use, is preheating. You need to give your Dutch oven or stone at least 45 full minutes inside the oven while it climbs to 500°F. If the surface isn’t screaming hot, you’ll lose all your oven spring instantly!
Dutch Oven Bread Secrets vs. Baking Stones for Crust
The main debate among bakers is between a Dutch oven and a baking stone, and honestly, for the absolute best results in a home oven, the Dutch oven wins. The sealed lid traps the dough’s evaporating moisture, creating perfect, humid steam that keeps the crust flexible so the bread can bloom beautifully. These dutch oven bread secrets allow you to get that thick, chewy-yet-crispy shell without messing around with pans of boiling water. A stone is great, but you have to actively generate steam separately, which can be trickier.
If you’re interested in pushing your oven heat to the max and trying other things, check out my recipe for ultimate easy homemade pizza dough recipe!
Step-by-Step Instructions: Making Crusty Bread Dough
Okay, grab your biggest bowl, because this dough is going to feel more like sticky batter than actual bread dough at first! Remember, we are aiming for that super light interior because of this wetness. Start by just mixing the flour, water, salt, and yeast until you see no dry patches left. That’s it—no heavy kneading here! Cover it up and let it rest for 30 minutes. This part is called the autolyse, and it lets the flour start drinking the water all on its own. I’m telling you, it does half the work for you!
Next, we build strength gently. We’re doing four sets of stretch and folds, spaced 30 minutes apart. This is how we get the structure needed for your final crusty bread without beating the dough into submission. If you want to see these techniques applied to something sweeter, check out my recipe for sourdough french toast crispy custardy recipe!
Building Structure with Stretch and Folds
For the stretch and folds, you need wet hands—really wet! Scoop under one edge of the dough, lift it up high until it starts to tear slightly, and then fold that lifted edge right over the middle of the mass. Give your bowl a quarter turn and repeat this three more times until you’ve done all four sides. This builds the gluten network necessary for great oven spring. Because this is a *high hydration bread baking* recipe, using wet hands stops the dough from sticking to you rather than mixing into itself. After the fourth set, let it rest for a full hour.
The Importance of Long, Cold Proofing for Crusty Bread
This is where the flavor really comes alive, even with commercial yeast. Once that final hour is up, you’ll gently shape it into a round loaf—a boule—and pop it into a well-floured basket or bowl, seam-side up. Now, the magic happens slowly in the fridge for 12 to 18 hours. That long, cold time lets all those complex flavors develop, which is the same slow benefit you get from traditional *sourdough crust techniques*. Plus, cold dough is just so much easier to handle when you go to score it later!
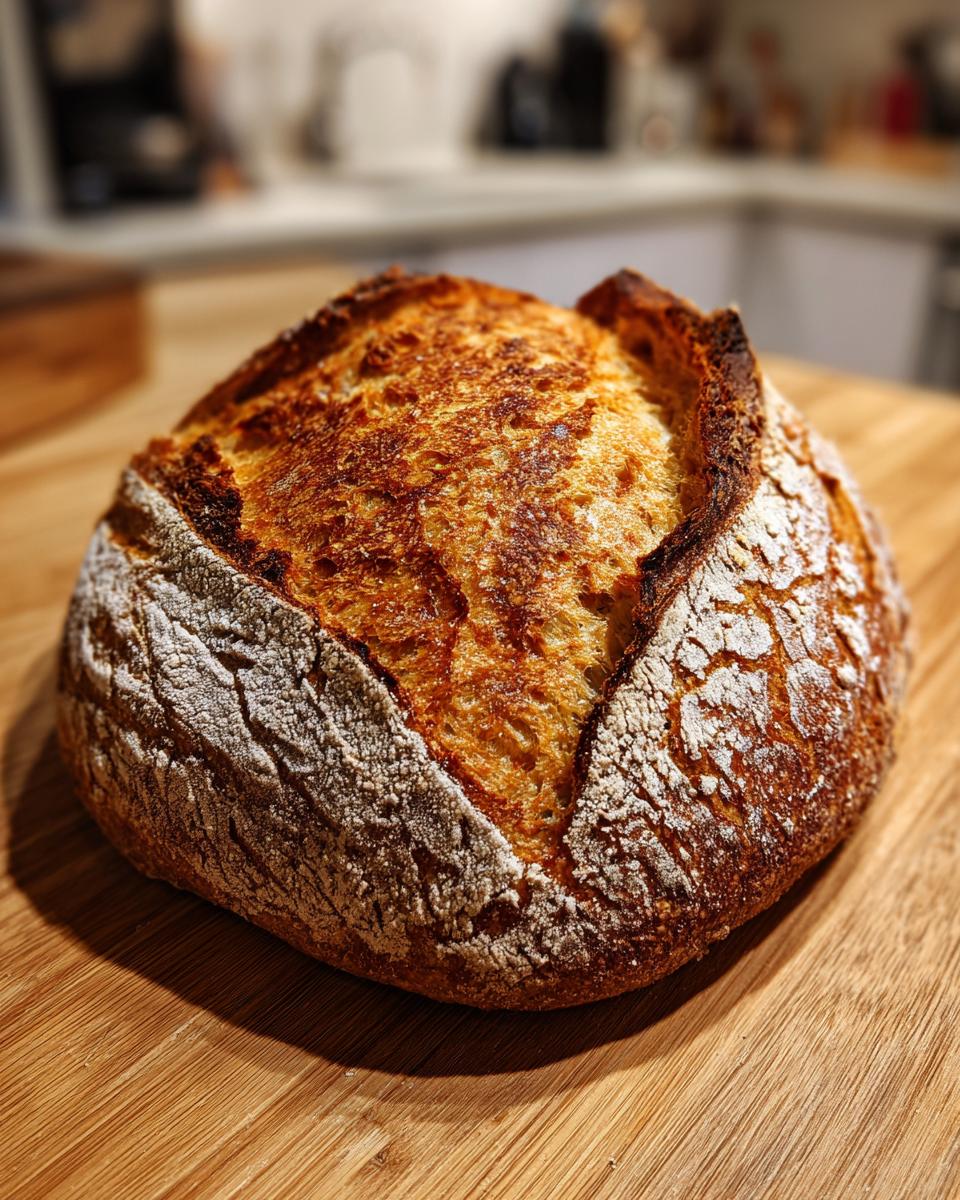
Shaping and Scoring Your Hearth Bread Recipe
Alright, the dough has bulked up and chilled nicely, so now it’s time to shape your loaf. Remember, this dough is wetter than standard bread dough, so you need to handle it quickly and lightly. We want to build tension on the outside without knocking all those beautiful gas bubbles out from the inside. Gently turn the dough onto a lightly floured surface, and pull the edges toward the center a few times, flipping it over so the seam is on the bottom, creating a nice tight ball—a boule. This surface tension is what pushes the loaf upward in the oven!
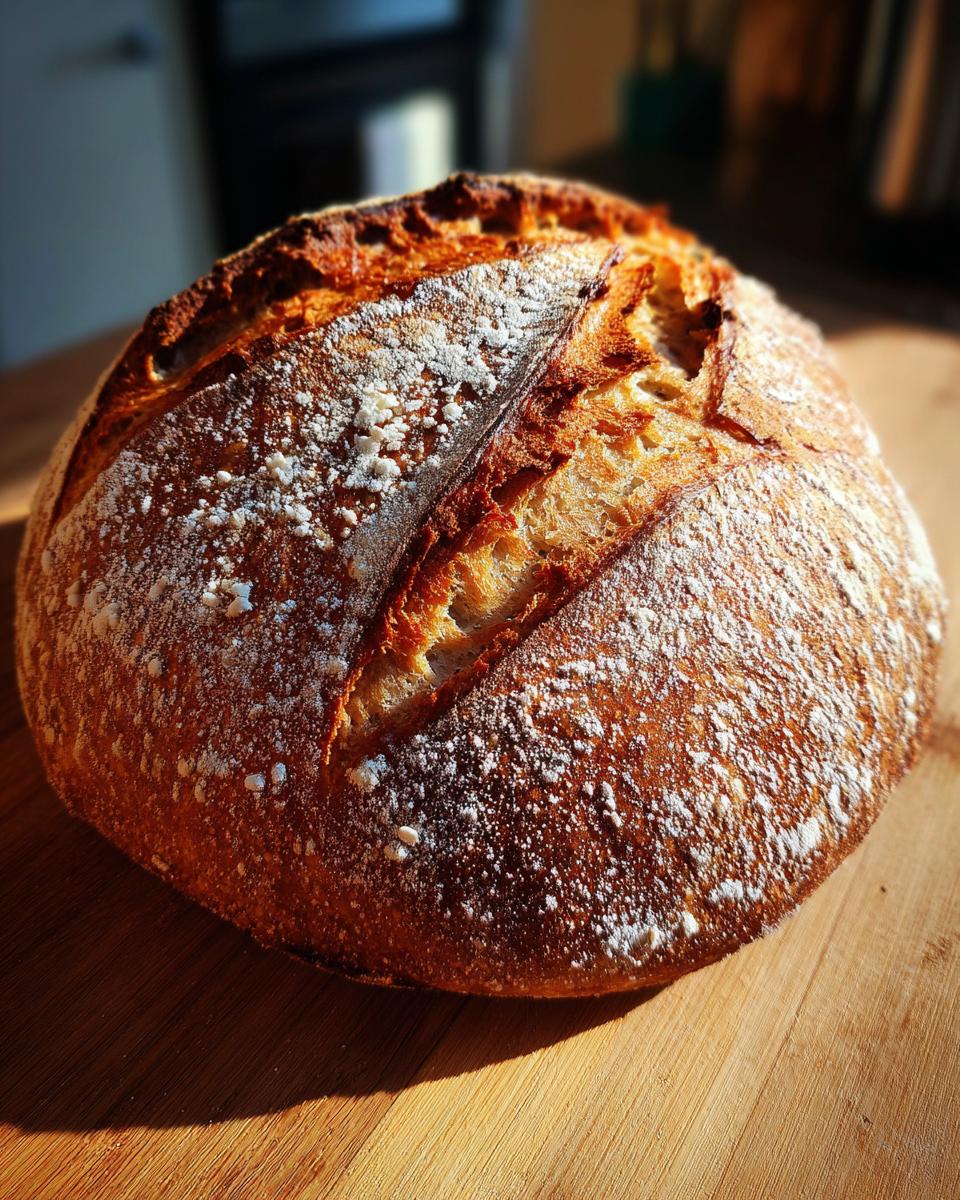
Right before it goes into the heat, you have to score it. Scoring is about control. Think of it like giving the dough a designated weak spot so it can burst open exactly where you want it to. Use a very sharp razor blade—I mean *really* sharp, like the single-edge blades that are perfect for cutting tomatoes. Make one deep, confident slash right across the top center of your dough. This deep cut is essential for a great oven spring and for that beautiful raised edge we call the ‘ear’ on our hearth bread recipe. A good score guarantees a fantastic burst in the oven, ready for that crackling finish!
If you need extra tips on how to manage the shape of longer loaves, check out my guide on baguette shaping and baking. It might give you ideas for your next attempt!
Baking Bread High Heat: Mastering Steam for Crusty Bread
This is it, folks! This step is where we go from good dough to that amazing, loud, crusty bread you’ve been dreaming of. To get the best results for your crackling bread crust, you need heat, and I mean serious heat. You absolutely must preheat your oven to 500°F with that Dutch oven sitting inside for a full 45 minutes—no cheating! That container needs to be radiating heat as soon as the dough lands in it.
When you transfer your scored dough into the hot pot (using parchment paper as a sling is the safest way to go), put the lid on immediately and bake covered for 20 minutes. Keeping that lid on makes our own steam environment! If you don’t have a Dutch oven, you need to master making steam for bread in oven the old-fashioned way: place a shallow metal pan on the bottom rack while preheating, and *carefully* pour one cup of boiling water into that pan right after you load the bread. It’s nerve-wracking, but it works!
Once that initial covered time is up, drop the temperature down to 450°F, and take the lid off. This is a very important part of baking bread high heat—we want the crust to develop color and dry out properly now.
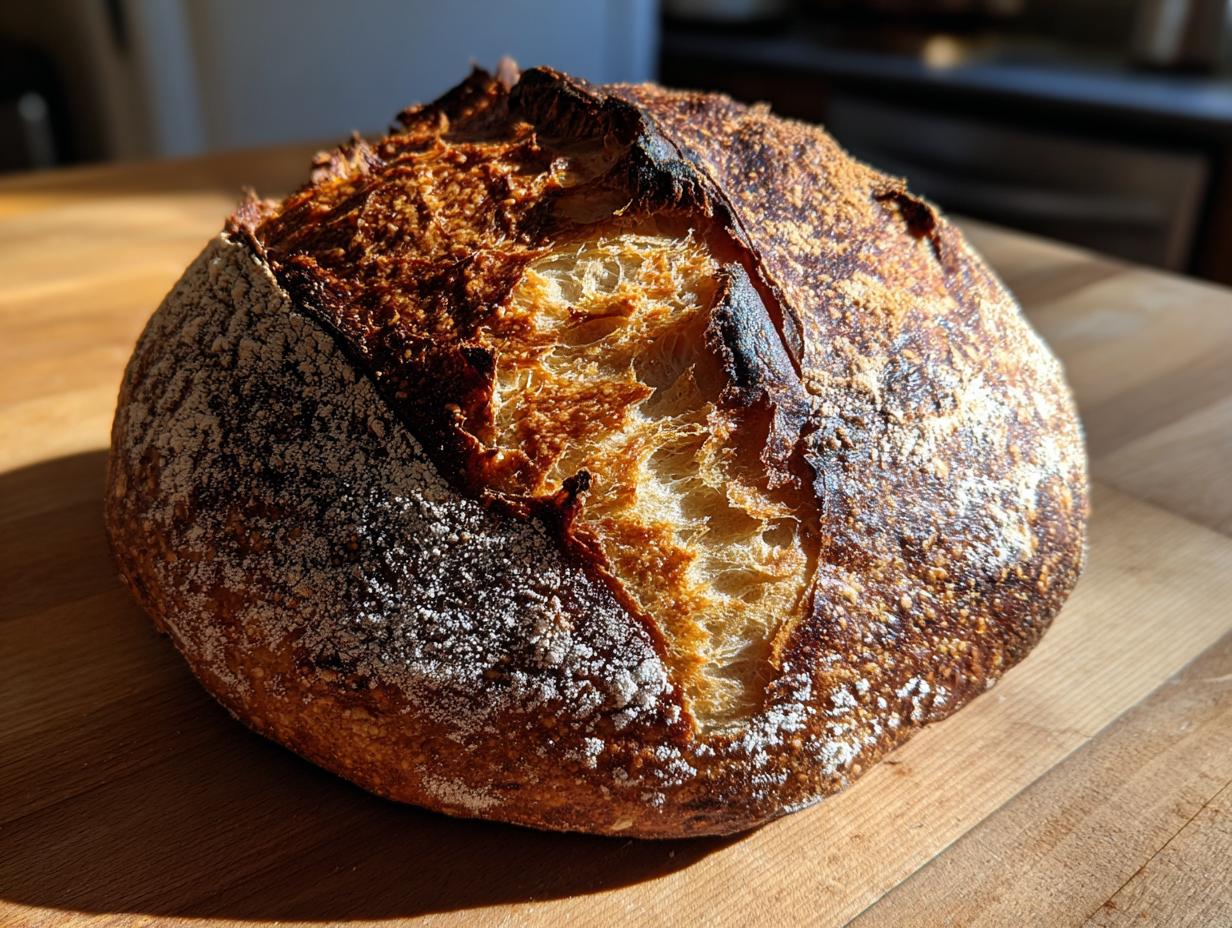
The Final Bake: Achieving the Crackling Bread Crust
When you take that lid off, you’ll see the loaf has sprung up beautifully. Now we bake for another 20 to 25 minutes until the color is what I call ‘mahogany’—deep, rich brown. Don’t stop pulling it out because it looks too dark! That deep color *is* the flavor and the crunch. Once it’s out, remember this final tip: the crust sets as it cools. You are going to hear that bread singing and cracking for ages on the rack. It’s the best sound in the world, I promise. To get more ideas on using high heat, take a peek at my guide on the easy no-bake mini cheesecake bites—wait, no, that’s not right! Stick to the bread! (Oops, too excited!) Just let it cool completely!
Troubleshooting Common Crust Issues
Sometimes, even with the perfect recipe, you pull out a loaf and the crust is just… soft. Don’t freak out! Even I have those moments, especially when I rush the process. The number one reason for a soft crust on what should be glorious crusty bread is almost always steam related. If you didn’t preheat your vessel long enough, or if you lifted the Dutch oven lid too soon, the crust essentially steamed itself soft instead of baking hard.
Another common mistake is pulling the bread out of the oven just because the top looks golden. We need that deep, dark, mahogany color for maximum shatter! If you pull it when it’s light tan, the crust hasn’t fully dried out and caramelized.
Also, where you cool your bread matters. If you set a hot loaf immediately on a flat counter, the steam gets trapped underneath, making that one side soggy. Always use a wire rack! If you ever want to see a completely different way to use up leftover dough, check out my recipe for sourdough discard banana muffins when you’re done baking bread for the week.
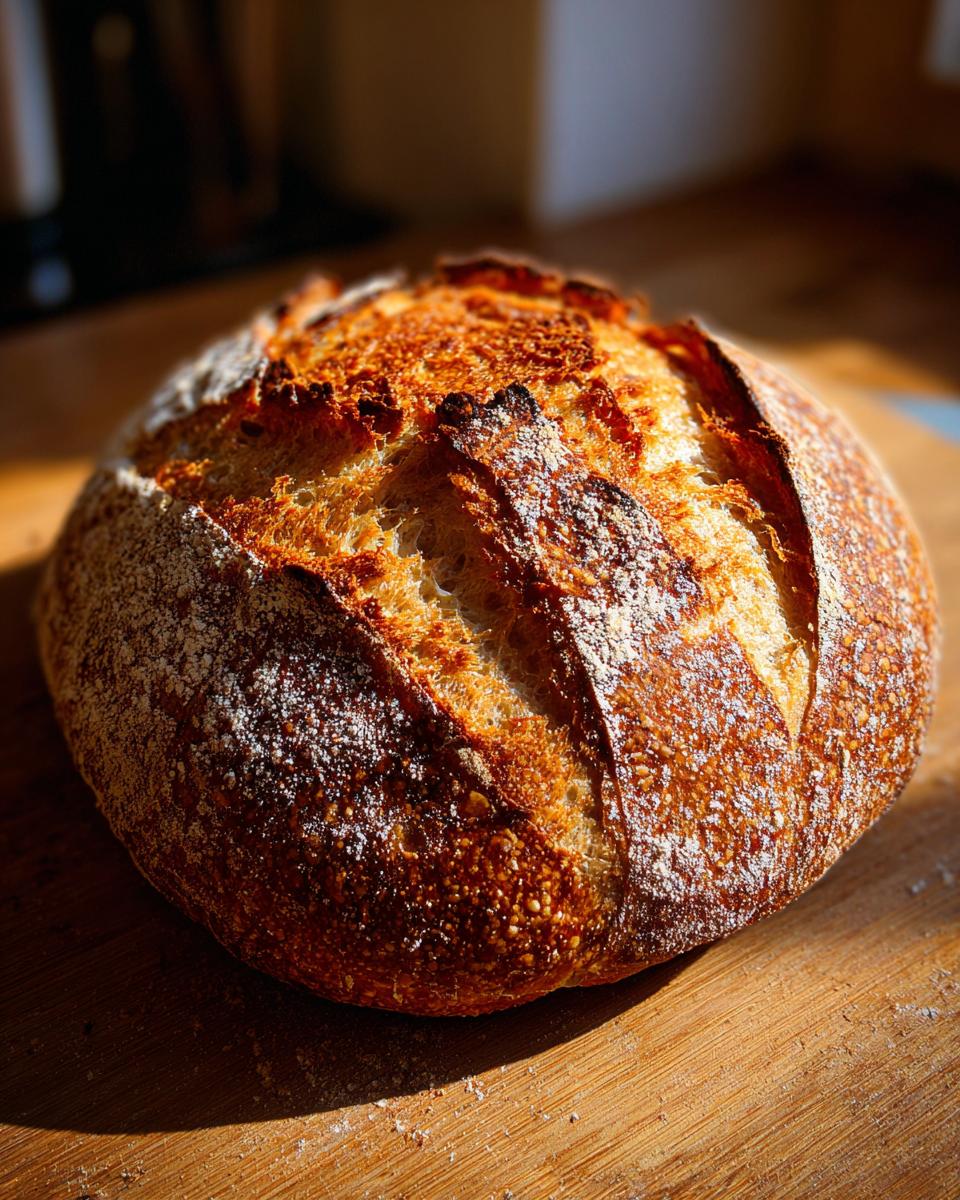
Serving Suggestions for Rustic European Loaves
Congratulations! You’ve earned the right to tear into this beautiful loaf. Because this crusty bread has such a complex, slightly sour, wheat-forward flavor from the long proofing, you don’t need to hide it under heavy toppings. Seriously, the best thing you can do is slice it thick while it’s still warm (don’t cut it all at once, though!) and spread on some really good quality, slightly salted butter that softens right into the crumb.
Drizzling it with fruity olive oil is another classic move. But if you want to make a meal out of it, this loaf is the perfect sturdy companion for dipping. It absolutely soaks up broth. I highly recommend whipping up my French onion soup easy rich recipe; there’s nothing better than topping that molten cheese with a thick slice of this handmade loaf!
Storage and Reheating for Maximum Crust Retention
I know, it’s a rough moment when you wake up the next day and that amazing crunch has softened a bit. That’s just the nature of steam leaving the bread, but we can fight back! First, promise me you won’t wrap this loaf tight in plastic wrap. Plastic traps moisture, and moisture is the enemy of a crisp crust! Store your beautiful crusty bread at room temperature in a simple paper bag or bread box. That lets the loaf breathe while protecting it.
If your crust has gone soft by morning, don’t despair! The best fix happens in the oven. Just cut the loaf into thick slices (or leave it whole if you prefer) and mist the exterior *lightly* with water, or just splash a tiny bit on top. Pop it back into a 350°F oven for about 5 to 8 minutes. That burst of dry heat will re-crisp that exterior instantly. It tastes almost freshly baked!
If you need some amazing topping ideas for your reheated loaf, you have to try my guide on caramelized onions ultimate guide.
PrintArtisan Hearth Bread with a Crackling Crust
Bake a rustic, homemade artisan bread featuring a thick, crisp exterior using high heat and steam techniques.
- Prep Time: 20 min
- Cook Time: 45 min
- Total Time: 13 hours 5 min
- Yield: 1 loaf 1x
- Category: Baking
- Method: Baking
- Cuisine: European
- Diet: Vegetarian
Ingredients
- 500g bread flour
- 375g water (about 75% hydration)
- 10g fine sea salt
- 2g instant dry yeast
- Extra flour for dusting
Instructions
- Mix the flour, water, yeast, and salt in a large bowl until just combined. The dough will be wet.
- Cover the bowl and let it rest for 30 minutes (autolyse).
- Perform four sets of stretch and folds every 30 minutes to build strength in the dough.
- After the final fold, let the dough rest for 1 hour at room temperature.
- Gently shape the dough into a round loaf (boule) on a lightly floured surface.
- Place the shaped dough seam-side up in a floured proofing basket or bowl. Cover and cold proof in the refrigerator for 12 to 18 hours.
- Preheat your oven to 500 degrees Fahrenheit (260 Celsius) with a Dutch oven inside for at least 45 minutes.
- Carefully remove the hot Dutch oven. Gently turn the dough out onto parchment paper. Score the top surface deeply with a sharp blade.
- Using the parchment paper as a sling, carefully lower the dough into the hot Dutch oven. Place the lid on.
- Bake covered for 20 minutes at 500 degrees Fahrenheit.
- Reduce the oven temperature to 450 degrees Fahrenheit (232 Celsius). Remove the lid and continue baking for another 20 to 25 minutes until the crust is deep brown and crackling.
- Remove the bread from the oven and cool completely on a wire rack before slicing to set the crust.
Notes
- For the best crackling bread crust, use a baking stone or steel if you do not have a Dutch oven, and place a shallow pan on the bottom rack to create steam by pouring one cup of boiling water into it immediately after loading the bread.
- High hydration bread baking requires careful handling; use wet hands when performing stretch and folds.
- A very dark crust indicates proper caramelization and flavor development. Do not pull the bread out early if the crust seems pale.
Nutrition
- Serving Size: 1 slice
- Calories: 250
- Sugar: 1
- Sodium: 300
- Fat: 1
- Saturated Fat: 0
- Unsaturated Fat: 1
- Trans Fat: 0
- Carbohydrates: 55
- Fiber: 3
- Protein: 10
- Cholesterol: 0