

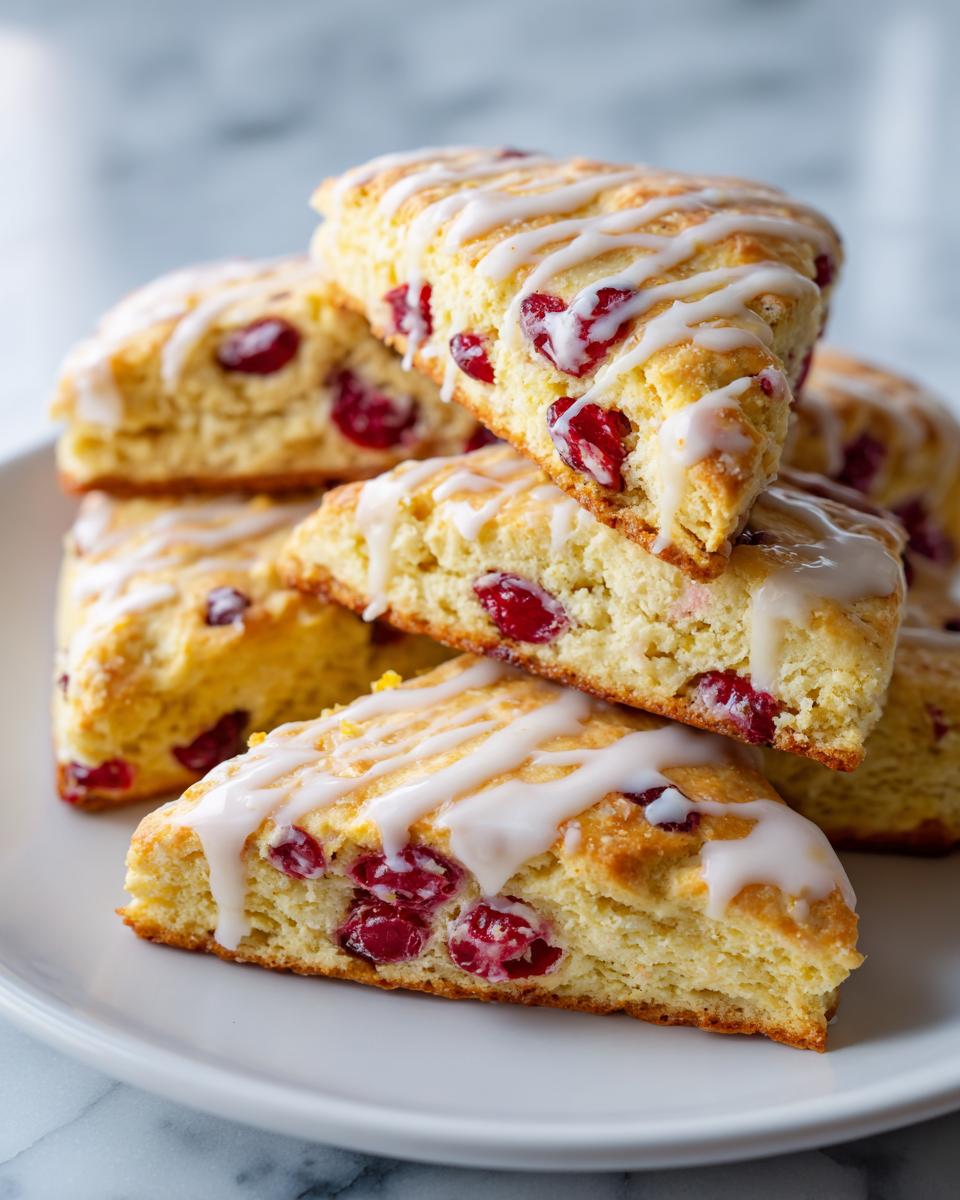
There is just something so comforting about pulling a fresh batch of cranberry orange scones out of the oven, isn’t there? It smells like cozy mornings spent lingering over coffee. I know my own pace slowed down drastically when I started reclaiming my grandmother Daisy’s simple approach to cooking, and these scones are the perfect example of her legacy. Forget those dry, crumbly things you sometimes get. We’re talking about bakery-style quality here—buttery, tender, and bursting with bright orange zest—that you can whip up unbelievably fast. Trust me when I say this is truly the best cranberry scones recipe to master for quick breakfast scones or your next holiday gathering.
- Why These Are the Best Cranberry Scones Recipe You Will Ever Make
- Ingredients for Perfect Cranberry Scones with Citrus Glaze
- How to Make Bakery Style Scones at Home: Step-by-Step Instructions
- Tips for Success Making Perfect Cranberry Scones
- Serving Suggestions for Your Cranberry Orange Scones Recipe
- Storage and Reheating Instructions for Homemade Scones
- Frequently Asked Questions About Cranberry Scones
- Estimated Nutritional Data for Cranberry Scones
- Share Your Experience with These Cranberry Scones
Why These Are the Best Cranberry Scones Recipe You Will Ever Make
Honestly, you’re going to wonder why you ever bought scones from a coffee shop again. These cranberry orange scones are ready in about 33 minutes total! That includes baking time, which is just wild for something this good. The texture we achieve here is exactly what Daisy always strove for: those impossibly buttery tender scones that melt right in your mouth. They look impressive, they taste like you worked all morning, but nope—they’re truly designed for your busy life. Get ready for the easiest, most flavorful quick breakfast scones you’ve ever mixed up.
Achieving Flaky Scones Technique Secrets
The secret to getting that amazing lift and those beautiful layers isn’t complicated, I promise! It all comes down to temperature. We treat this recipe like a shortcut scone recipe but we never cut corners on the fat. You *have* to keep your butter freezing cold and cut it into the flour until it barely looks like anything other than coarse crumbs with some pea-sized butter chunks still visible. Those tiny bits of cold butter melt in the oven and create little pockets of steam. That steam is what lifts the dough and gives you that gorgeous, flaky layer every time. That’s the whole key to mastering flaky scones technique at home!
Ingredients for Perfect Cranberry Scones with Citrus Glaze
Gathering your ingredients is half the battle won, especially when we are aiming for those perfect cranberry scones. For this recipe, the mantra is COLD—keep everything cold! Warm ingredients will melt the butter and ruin the flaky structure we worked so hard to protect in the previous step. I’ve listed everything out below, but remember, the orange zest is non-negotiable for that signature bright pop that makes these so festive.
For the Scones:
- 2 1/2 cups all-purpose flour
- 1/2 cup granulated sugar
- 1 tablespoon baking powder
- 1/2 teaspoon salt
- 1/2 cup (1 stick) cold unsalted butter, cut into small pieces
- 1 cup fresh or frozen cranberries
- Zest of 1 large orange
- 1/2 cup heavy cream, plus more for brushing
- 1 large egg
- 1 teaspoon vanilla extract
For the Glaze:
- 1 cup powdered sugar
- 1 tablespoon fresh orange juice
Ingredient Notes and Substitutions for Cranberry Orange Scones Recipe
Okay, let’s talk modifications because I know you might be missing an ingredient! If you don’t have any fresh oranges on hand, go right ahead and use a lemon! A wonderful lemon cranberry scones variation works just as beautifully with the tartness. Speaking of cranberries, if you grab frozen ones (which are totally fine!), don’t even bother thawing them. Just toss them in straight from the freezer, seriously. Another quick thought: if you’re craving that sweet-and-salty richness, you can easily swap out half of those wonderful cranberries for white chocolate chips to make divine white chocolate cranberry scones. Just remember, the colder the mix-ins, the better your final result!
How to Make Bakery Style Scones at Home: Step-by-Step Instructions
Alright, let’s get down to the actual baking part! This method for our cranberry scones is so straightforward, you’ll be shocked at the results. First thing: get that oven preheating to 400 degrees F, and line a baking sheet with parchment paper—that’s just smart baking, whether you’re making scones or biscuits.
- Get your dry stuff whisked together in a big bowl: flour, sugar, baking powder, and salt. This is just to make sure the leavening is spread out nicely.
- Now, the cold butter! Grab a pastry blender, or just use your fingertips—I prefer my hands, I can feel it better—and work that cold butter right into those dry ingredients until it looks like coarse crumbs. Don’t panic if you see some pea-sized butter spots; honestly, those are your friends!
- Gently stir in your chopped cranberries and that bright orange zest. They should look happily scattered throughout the flour mixture.
- In a small cup, whisk your wet things: heavy cream, one egg, and the vanilla extract.
- Pour all the wet into the big bowl of dry ingredients. Use a fork to mix it *just* until everything comes together. I mean it—stop mixing when it looks shaggy. Don’t try to make it smooth!
- Dump that shaggy mess onto a lightly floured counter. Gently pat it together—knead maybe three or four times max—until it holds a shape. Pat it down into a thick circle about 3/4-inch thick.
- Slice that circle into 8 wedges, like a pizza pie. Space them out slightly on your prepared sheet.
- Brush the tops with a little extra heavy cream for color. Pop them into the hot oven and bake for 15 to 18 minutes. They should be golden brown at the edges. Let them chill out on the pan for five minutes before moving them to a rack to cool completely before glazing.
The Secret to Tender Cranberry Scones: Mixing Technique
If you take one thing away from this whole process, let it be this: **DO NOT OVERMIX**. Seriously! When you add the wet ingredients to the dry, you are just waking up the gluten in the flour. As soon as you start stirring too much, you develop that gluten, and suddenly your beautiful, flaky scones turn into tough little hockey pucks. We need those little pockets of cold butter left intact (that’s Step 3) so they can burst into steam and create those layers. Mixing until just combined is the heart of excellent flaky scones technique.
Glazing Your Festive Scones Holiday Baking
The glaze is the crowning jewel on our festive scones holiday baking checklist! Whisk your powdered sugar with the orange juice until it’s smooth. Now, this is crucial: the scones must be totally cool, or the glaze just melts right off and disappears. If it seems too thick to drizzle, add a tiny drop more juice. If it looks thin and watery, add a shake more sugar. You want that beautiful, bright citrus glaze to set up nicely on top!
Tips for Success Making Perfect Cranberry Scones
When I first started trying to recreate Daisy’s baking magic in my tiny city apartment, I had a few spectacular failures, trust me! These little tips are what I learned the hard way, and they are the key to flawless cranberry scones every single time. Don’t let the ease of this recipe fool you; butter temperature is everything.
First up: if your dough starts feeling soft or sticky while you’re mixing, put the whole bowl in the freezer for ten minutes. Seriously! Cold dough gives you flaky scones; warm dough gives you a tough biscuit blob.
Then, watch your oven temperature. Scones need high heat initially—400 degrees F is perfect—to get that great spring before they dry out. If your oven runs cool, your scones won’t puff up nicely.
Finally, remember that kneading rule: you are just tucking the dough together, not developing bread structure. Three gentle pats on the counter, and that’s it. Minimal handling equals maximum tenderness in your buttery tender scones!
Serving Suggestions for Your Cranberry Orange Scones Recipe
Now that you’ve made these stunning cranberry orange scones, you get the best part: deciding how to eat them! Because they have that lovely bright citrus kick from the glaze, they seriously pair well with just about anything cozy. They aren’t just for Christmas morning, but they are definitely show-stoppers at any scones for christmas brunch gathering!
For a morning treat, you can’t beat them beside a strong, hot cup of coffee. The slight bitterness of the coffee cuts through the richness of the butter and the sweetness of the glaze perfectly. If you’re having them later in the day, they are amazing alongside a cup of black tea—maybe even a fancy Earl Grey if you are feeling fancy!
If you want to make a real spread out of it, serve these cranberry scones warm—just a quick 10 seconds in the microwave if they are completely cool—and offer a few simple toppings. A little smear of high-quality salted butter is always welcome, or even a small bowl of clotted cream if you want to treat yourselves. But honestly, with that sweet citrus glaze already on top, they are practically perfect all on their own!
Storage and Reheating Instructions for Homemade Scones
I know that with a recipe this good—seriously, these cranberry scones disappear fast—you might still wonder about leftovers. Daisy was a firm believer that nothing good should ever go to waste, so we have definite strategies for keeping these bakery style scones at home tasting fresh!
If you made the lemon cranberry scones or the cranberry orange ones and haven’t glazed them yet, you’re in luck! Store your cooled, unglazed scones in an airtight container at room temperature. They usually stay perfectly fine for about two days. If you need them to last longer than that, pop them into a zip-top bag and freeze them. They freeze beautifully, honestly!
Now, if you already drizzled that gorgeous sweet citrus glaze on top, you need a little more caution. The glaze tends to weep or get sticky if it sits too long in a humid environment. For glazed scones, it’s better to store them in a container on the counter for just one day. If you have more than that, wrap them tightly in plastic wrap and keep them in the fridge. They will last about four days that way.
The reheating part is key to getting that fresh-from-the-oven tenderness back! If they are room temperature or slightly chilled, just pop one on a baking sheet at about 325 degrees F for about five to seven minutes. That little bit of warmth reactivates the butter, bringing back that wonderful flaky texture we worked so hard to develop. If you are reheating a frozen scone, just let it thaw on the counter for an hour first, then warm it up as described. Don’t put a rock-hard frozen scone right into the oven, or you’ll end up with overly dry edges!
Frequently Asked Questions About Cranberry Scones
I get so many questions coming through about these cranberry scones, which totally makes sense! When you find a recipe that nails that perfect bakery texture, you want to make sure you get it right every time, especially when you’re mixing up a batch for a special occasion like a holiday breakfast. I’ve pulled together the common sticking points I hear about from readers just setting out to master scones from scratch.
Can I make these cranberry scones ahead of time?
Yes, you absolutely can, and I often do this around Christmas to space things out! You have two great options. If you make the dough for your cranberry orange scones recipe, stop right before you cut them into wedges. Wrap the whole disk tightly in plastic wrap and stick it in the fridge for up to 24 hours. When you are ready to bake, just cut and bake as directed! If you baked them already, see my storage tips above—they are best baked the day of, but still good for a day or two stored properly.
What is the secret to buttery tender scones?
If you want that melt-in-your-mouth feeling, it boils down to two things Daisy always preached: cold fat and minimal love. The absolute secret to buttery tender scones is making sure that butter is ice cold when you cut it into the dry ingredients. You want those little cold butter pieces to survive the mixing process so they can create steam pockets while baking. Second, once the wet ingredients go in, stop mixing! Overmixing develops gluten, and gluten makes things tough, like bread. We want cake-like tenderness, not chewiness. Keep the handling gentle!
Do you want to know something I learned while perfecting my easy homemade scones? If you’re making a batch with something rich, like those White Chocolate Cranberry Scones variation, chilling the entire tray of cut scones for 15 minutes *after* you shape them but *before* they go in the oven makes a huge difference in how high they puff up!
Estimated Nutritional Data for Cranberry Scones
Now, I always tell people that when you’re baking with butter and sugar, we aren’t aiming for diet food here, are we? These cranberry scones are an indulgence! They are perfect for a special brunch or a holiday treat, and knowing the rough numbers can help you plan the rest of your day.
Please remember that these values are just estimates based on the standard ingredients listed in the recipe. If you use a different brand of flour or decided to add white chocolate chips instead of some cranberries, the numbers will shift around a little bit!
Here is the general breakdown for one individual scone:
- Serving Size: 1 scone
- Calories: About 350
- Fat: 18 grams (11g are saturated, so that’s all that lovely butter!)
- Carbohydrates: 44 grams
- Sugar: 22 grams (Thank that sweet citrus glaze!)
- Protein: 5 grams
- Cholesterol: 65 milligrams
- Sodium: Roughly 180mg
It’s a lovely, balanced treat considering how rich they taste. Enjoy these festive scones guilt-free, knowing you made them with real butter and fresh zest right in your own kitchen!
Share Your Experience with These Cranberry Scones
Baking is always better when it’s shared, and I truly hope making these cranberry orange scones brought a little bit of that simple, comforting joy back into your kitchen, just like it did for me reclaiming Daisy’s recipes. That’s what this whole place is about—keeping that warmth alive!
I would absolutely love for you to tell me how they turned out! Did you stick with the bright orange zest, or did you try my suggestion for the white chocolate cranberry scones variation? Drop a comment below and rate this recipe! Hearing from you helps me know that the legacy of simple, honest baking is continuing on.
If you snapped a picture of your flaky, glazed beauties, please tag us on social media! Seeing those photos reminds me of those busy Midwest mornings and keeps the spirit of Grandma Daisy’s kitchen alive right here. If you want to learn more about the philosophy behind keeping these traditional recipes vibrant and easy for modern living, you can always check out the About Page. Happy baking, everyone—I can’t wait to hear about your success with these amazing cranberry scones!
PrintEasy Cranberry Orange Scones with Sweet Citrus Glaze

Make bakery-style cranberry orange scones at home. This simple recipe yields flaky, buttery scones bursting with festive flavor, topped with a bright citrus glaze.
- Prep Time: 15 min
- Cook Time: 18 min
- Total Time: 33 min
- Yield: 8 servings 1x
- Category: Breakfast
- Method: Baking
- Cuisine: American
- Diet: Vegetarian
Ingredients
- 2 1/2 cups all-purpose flour
- 1/2 cup granulated sugar
- 1 tablespoon baking powder
- 1/2 teaspoon salt
- 1/2 cup (1 stick) cold unsalted butter, cut into small pieces
- 1 cup fresh or frozen cranberries
- Zest of 1 large orange
- 1/2 cup heavy cream, plus more for brushing
- 1 large egg
- 1 teaspoon vanilla extract
- For the Glaze: 1 cup powdered sugar
- 1 tablespoon fresh orange juice
Instructions
- Preheat your oven to 400 degrees F. Line a baking sheet with parchment paper.
- In a large bowl, whisk together the flour, granulated sugar, baking powder, and salt.
- Cut the cold butter into the dry ingredients using a pastry blender or your fingertips until the mixture resembles coarse crumbs with some pea-sized pieces of butter remaining.
- Stir in the cranberries and orange zest until they distribute evenly.
- In a separate small bowl, whisk together the heavy cream, egg, and vanilla extract.
- Pour the wet ingredients into the dry ingredients. Mix gently with a fork until just combined. Do not overmix; the dough will be shaggy.
- Turn the dough out onto a lightly floured surface. Gently knead 3 or 4 times until it comes together. Pat the dough into a 3/4-inch thick circle.
- Cut the circle into 8 equal wedges, like a pizza. Place the wedges onto the prepared baking sheet, leaving about 1 inch between them.
- Brush the tops lightly with a little extra heavy cream.
- Bake for 15 to 18 minutes, or until the edges are lightly golden brown. Let the scones cool on the baking sheet for 5 minutes before moving them to a wire rack to cool completely.
- While the scones cool, prepare the glaze. Whisk the powdered sugar and orange juice together until smooth. Add more juice if you need a thinner glaze, or more powdered sugar for a thicker one.
- Drizzle the sweet citrus glaze over the cooled scones. Let the glaze set before serving.
Notes
- For the flakiest scones, make sure your butter is very cold.
- If you use frozen cranberries, do not thaw them before adding them to the dough.
- For a shortcut, you can use lemon zest and juice for the glaze instead of orange.
Nutrition
- Serving Size: 1 scone
- Calories: 350
- Sugar: 22
- Sodium: 180
- Fat: 18
- Saturated Fat: 11
- Unsaturated Fat: 7
- Trans Fat: 0
- Carbohydrates: 44
- Fiber: 1
- Protein: 5
- Cholesterol: 65