

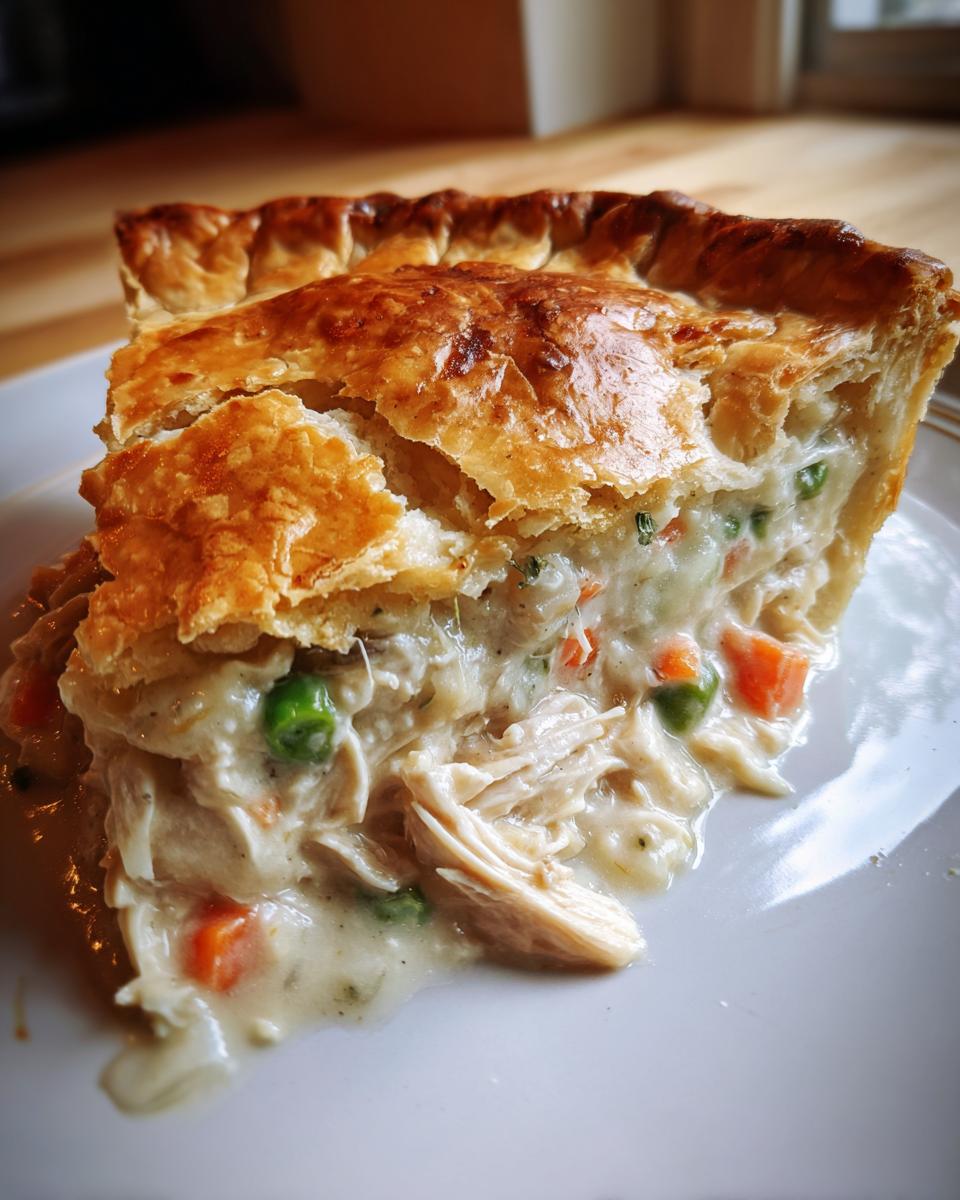
There’s nothing quite like that deep, satisfying warmth that only true comfort food can deliver, right? Forget those sad, watery frozen versions; when you crave that golden, flaky goodness, you need the real deal. I’m sharing my absolute favorite recipe today: the Classic Homemade Chicken Pot Pie with Flaky All-Butter Crust. This is the meal that always pulls me back to Grandma Daisy’s bustling kitchen. She taught me that simple ingredients, mixed with patience, make the most incredible flavor. If you’ve been searching for the perfect take on that classic—your search for the ultimate chicken pot fix ends right here! For those busy evenings, remember you can check out my list of weeknight dinner ideas, but trust me, this pie is worth slowing down for. I promise, this is worth every single mixing step.
- Why This Homemade Chicken Pot Pie Recipe is Your New Family Favorite Meals Staple
- Gathering Ingredients for the Perfect Chicken Pot
- Step-by-Step Instructions for Your Classic Chicken Pot Pie
- Tips for Success with Your Chicken Pot Pie
- Easy Chicken Pot Pie Variations and Substitutions
- Serving Suggestions for Your Hearty Chicken Meals
- Storing and Reheating Leftover Chicken Pot
- Frequently Asked Questions About Chicken Pot Pie
- Share Your Comfort Food Creations
Why This Homemade Chicken Pot Pie Recipe is Your New Family Favorite Meals Staple
Listen, I tried taking shortcuts back when I was working those crazy hours in the city. I bought the frozen stuff. I thought the canned soup versions were fine. But let me tell you, nothing—and I mean *nothing*—comes close to this homemade version when it comes to that hug-in-a-bowl feeling. This isn’t just a meal; it’s an experience, and it’s why this recipe always brings my family running to the table.
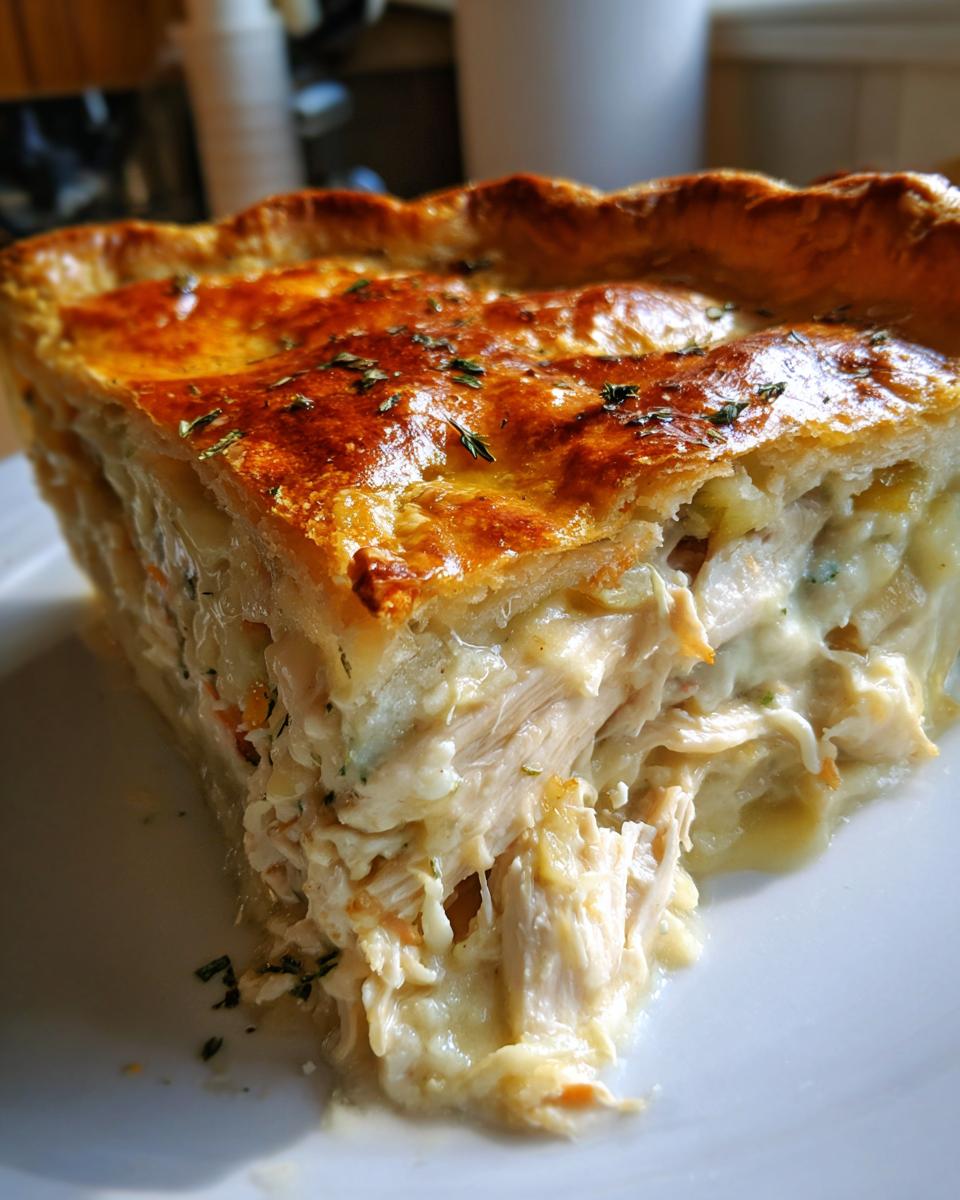
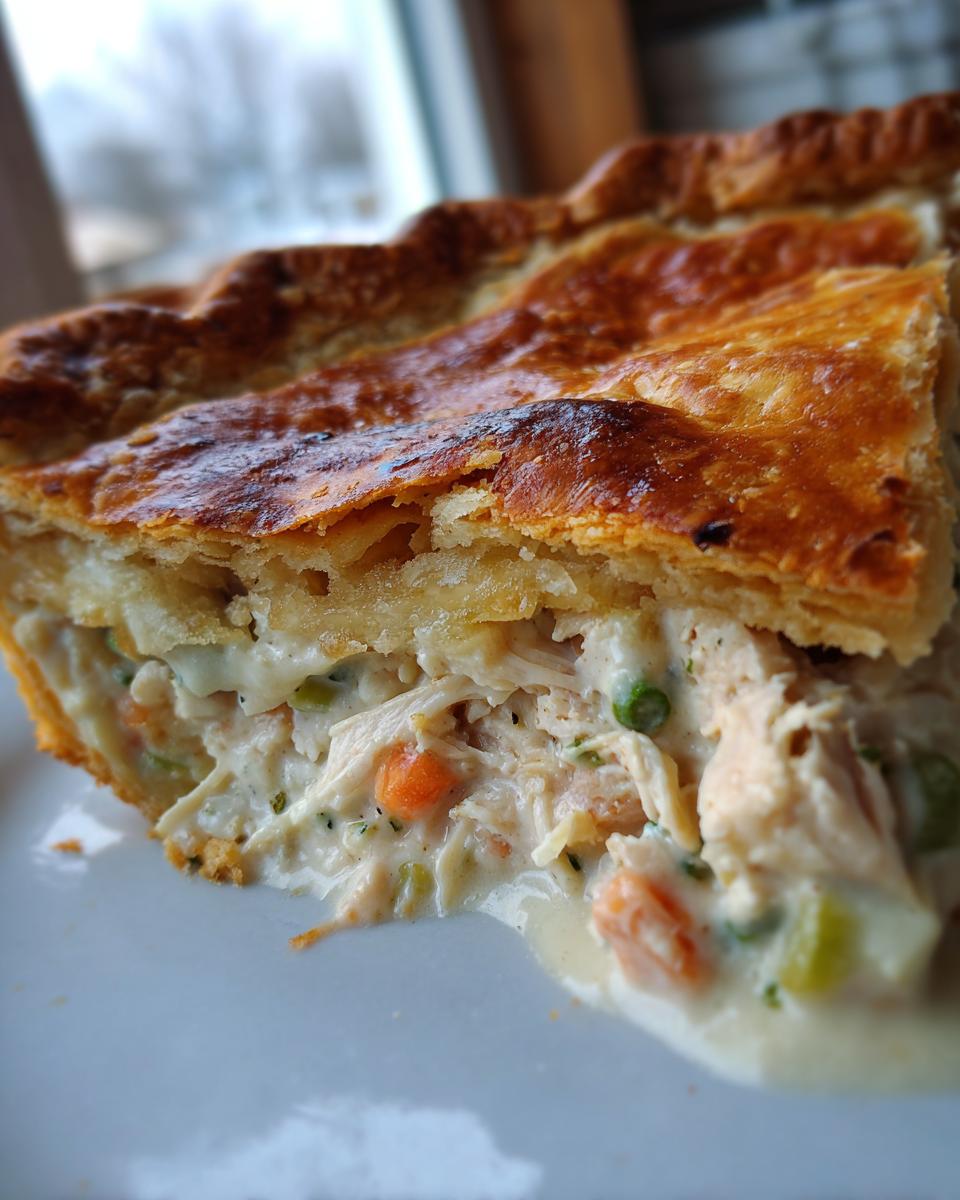
- That Flaky All-Butter Crust: You can taste the real butter—it shatters perfectly every single time.
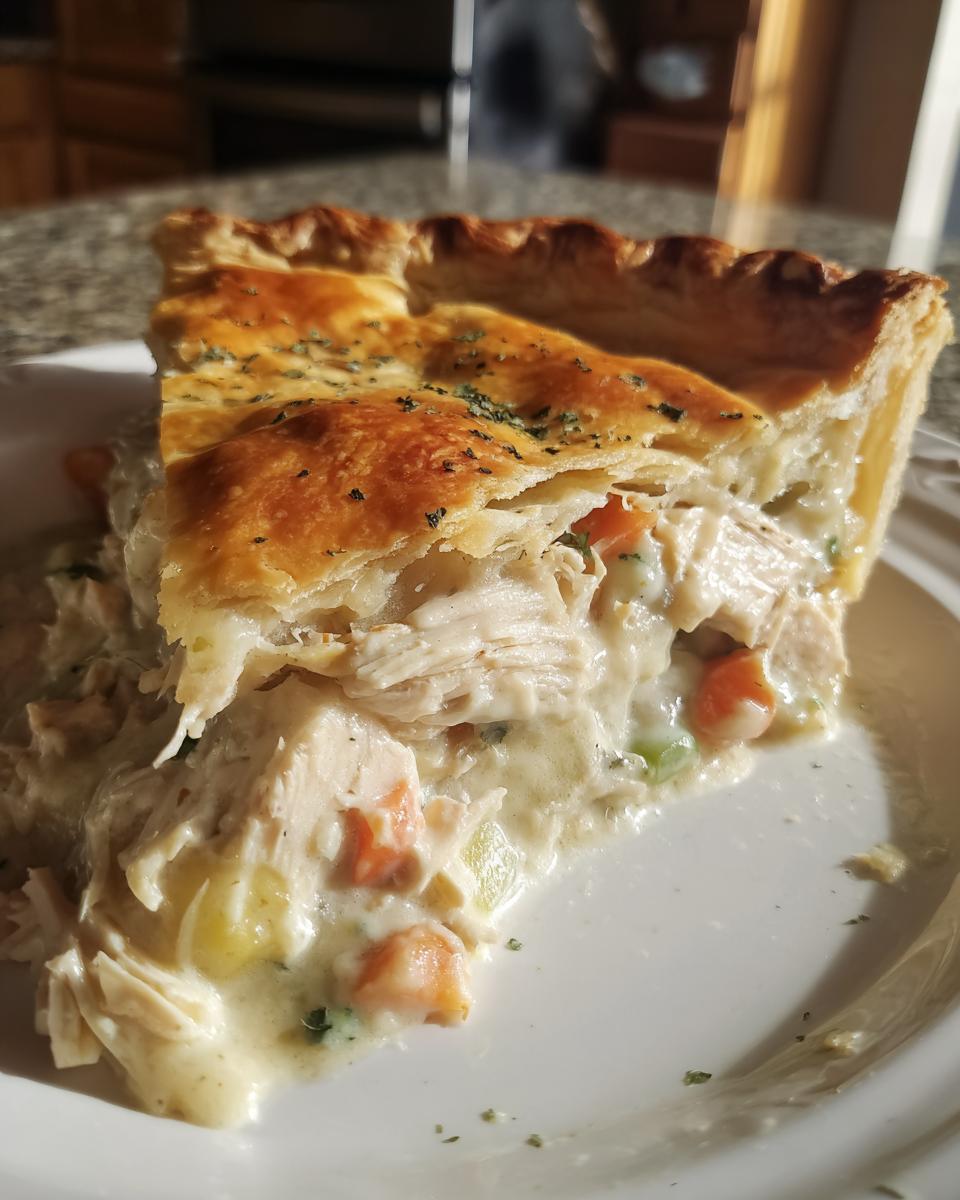
- Rich, Creamy Chicken Filling: We make the sauce completely from scratch so it’s perfectly savory, never gluey.
- Ultimate Comfort Food: It’s hearty, nostalgic, and truly satisfies that deep, craving need.
If you’re looking for more easy, satisfying mains, you can peek at my chicken fettuccine alfredo, but for pure heart-warming goodness, this pie wins. Trust Amelia on this one!
Gathering Ingredients for the Perfect Chicken Pot
Okay, so getting the ingredients ready is half the battle, and honestly, this recipe relies on keeping things simple but treating those elements right. We’re making everything from scratch because that’s how you guarantee the best flavor for our classic chicken pot pie. Don’t skimp on the butter here—it’s crucial for that flaky top!
I’ve organized the list just like I keep mine: crust first, because that needs chilling time, and then the filling components. If you’re using store-bought cooked chicken, make sure you measure out exactly two cups. Remember, if you shop smart, this becomes a much more manageable weeknight chicken dinner!
For the Flaky Pie Crust
- 2 cups all-purpose flour
- 1 teaspoon salt
- 1 cup (2 sticks) cold unsalted butter, cut into small cubes
- 6 to 8 tablespoons ice water
For the Creamy Chicken Filling
- 2 cups cooked, shredded chicken (rotisserie chicken works well)
- 1 cup chopped carrots
- 1 cup frozen peas
- 1 cup chopped celery
- 1/2 cup chopped onion
- 1/2 cup unsalted butter
- 1/2 cup all-purpose flour
- 2 cups chicken broth
- 1 cup heavy cream
- 1 teaspoon dried thyme
- 1/2 teaspoon black pepper
- 1/4 teaspoon salt
- 1 large egg, beaten (for egg wash)
Step-by-Step Instructions for Your Classic Chicken Pot Pie
Alright, time to put on our aprons! While the dough is chilling, we get the filling going. The process sounds long, but honestly, once you get into the rhythm, it flies. Remember, this is how we create that amazing depth of flavor that makes our chicken pot pie so famous. If you want to see how someone brilliant handles a similar challenge, check out this great recipe from Natasha’s Kitchen for inspiration on pie structure. Chicken Pot Pie Recipe (VIDEO) – NatashasKitchen.com.
Making the Flaky Pie Crust Dough
You need to work fast here so that butter stays cold! Whisk your dry crust ingredients, then use a pastry blender or your fingertips to work in the butter until it looks like coarse meal with some pea-sized chunks floating around—those chunks are what give us flakiness! Add the ice water bit by bit; seriously, count the spoons! Only mix until it *just* holds together. Don’t even think about kneading it! Divide it, wrap it up tightly, and get it into the fridge for at least an hour. Cold dough equals happy flavor, folks.
Preparing the Hearty Chicken Filling Base
While that dough is meditating in the fridge, melt that half-cup of butter in a big skillet over medium heat. Toss in your onions, carrots, and celery—let them soften up nicely, about 5 to 7 minutes. Now comes the part that thickens everything: sprinkle in the flour and stir that around for a solid minute so it cooks out, that’s crucial! Then, slowly, slowly whisk in that chicken broth. Keep stirring until it’s simmered down and thick. We need it thick before we add the cream, trust me!
Assembling and Baking the Chicken Pot
Preheat your oven to 400°F (200°C) first thing! Roll out your first dough disk for the bottom crust and line your 9-inch pie dish. Pour in that lovely cooled filling—make sure it’s not piping hot, or you’ll get a soggy bottom! Top it with the second crust, crimp those edges shut with purpose, and cut those steam vents in the top. Brush on that beaten egg wash for color. Bake for 35 to 45 minutes, checking often. If the edges start getting too dark before the center is bubbly, just toss a little foil ring around them. I actually love making great chicken dinner recipes, but this moment of assembly is special.
Tips for Success with Your Chicken Pot Pie
Now that you have the recipe, let me pass on the wisdom I learned the hard way—those little things that separate a good chicken pot pie from a *great* one. Because every slice should be a total winner, especially when you put this much love into it!
The biggest hurdle everyone faces is that soggy bottom crust, right? It happens if your filling is hot when it meets that pastry. My golden rule is: assemble the pie, cover the edges loosely with foil, and let the whole thing sit on the counter for about 15 minutes before it even thinks about going into the oven. It sounds counterintuitive, but letting the dough warm up just a touch helps it bake through evenly against the hot filling.
Another thing that saves my sanity when I need a quick chicken dinner—use that rotisserie chicken! I always grab one when I know a busy day is coming. Just make sure you shred it up and measure it precisely. It’s the bridge between a weekend project and a reliable weeknight staple. If you want to practice your crispy skills for another night, check out my crispy baked chicken wing recipe while you wait for the pot pie to bake!
Lastly, don’t let that filling get too watery if you’re adding extra vegetables. If you decide to throw in some fresh mushrooms, you need to sauté them *first* to release their moisture before adding them to the main filling mixture. We want creamy, not soupy! If you’re ever feeling adventurous with your poultry dishes, my recipe for easy chicken pozole is another fantastic, hearty option!
Easy Chicken Pot Pie Variations and Substitutions
Listen, I love making things totally from scratch, but sometimes life gets busy, and we need an Easy Chicken Pot Pie version that still tastes like home. That’s why I always keep these little tricks up my sleeve! If you’re looking to make your next chicken pot night a little less fussy but won’t sacrifice that creamy satisfaction, these swaps are for you.
It’s all about adapting the *feeling* of the dish, even if you change the shell. For more casserole inspiration that keeps dinner easy, you might want to check out my recipe for chicken wild rice casserole, but let’s get back to the pot pie magic.
Biscuit Topped Chicken Pot Pie Casserole Recipe
If rolling out a full top crust seems like too much trouble, the biscuit topping is your best friend! Think of it like a cozy casserole. You just skip that second disk of pastry dough we made, pour the filling into your dish, and then top it with your favorite biscuit dough—store-bought is totally acceptable here, no judgment from Grandma Daisy, I promise! Bake it just as you would the full pie until those biscuits are golden brown and puffy. It gives you that satisfying, soft topping instead of a hard, flaky shell, and it’s super popular because it feels less formal. This is how so many folks are making their Chicken Pot Pie Casserole now!
Ingredient Swaps for the Creamy Chicken Filling
The richness of the filling comes from the heavy cream, but if you don’t have it on hand or just want something slightly lighter, you can swap it out! Mix 1 cup of whole milk with about 1 tablespoon of cornstarch until it’s totally smooth—that’s your slurry. Whisk this into the hot broth mixture right before you add the chicken; it will thicken up beautifully just like the cream did. Just be sure to let it simmer gently so the cornstarch loses that raw flour taste.
And don’t be scared of adding more veggies! If you have some leftover mushrooms or a handful of frozen corn, toss them in with the peas right at the end. Just remember what I said about softening the carrot mixture first—don’t add raw, hard veggies straight into the cream sauce unless they are going to bake a long time under that crust!
Serving Suggestions for Your Hearty Chicken Meals
Now that you’ve got this glorious, rich, creamy chicken pot pie bubbling away under that golden top crust, you might be thinking, “What on earth do I serve with this?!” Honestly, this pie is a meal all on its own—it’s got protein, veggies, and all those wonderful carbs tucked inside that flaky pastry. But when you serve something this heavy and comforting, you need opposites on the side, right? We need brightness to cut through all that butter and cream!
Don’t reach for mashed potatoes or rich rolls, please! We want fresh, crisp textures. My absolute favorite thing to pair with this is a very simple, slightly acidic salad. It just wakes up your palate between bites of that decadent filling. I always whip up my easy crunchy cabbage salad because the dressing has vinegar, which works magic against the savory gravy.
If you’re feeling slightly less salad-inclined but still want green goodness, simple steamed green beans tossed with a little lemon zest and salt is perfect. Or, try serving it alongside something slightly funky and bright. I know, I know, I usually reserve my easy blue cheese dip recipe for game day, but a tiny dollop on the side of a crisp, cooling romaine leaf gives that creamy pie a surprising little kick that I just adore. It’s about balancing the richness, my friends. This helps make a proper, balanced family favorite meal!
Storing and Reheating Leftover Chicken Pot
I know, I know. Sometimes these pies are so good, there aren’t any leftovers! But if you are lucky enough to have some of that amazing chicken pot pie left over—maybe you made a double batch, lucky you!—you absolutely need to store it correctly so it tastes just as good the next day.
First thing: let it cool down completely on the counter before you even think about wrapping it up. Stuffing a hot pie into the fridge makes the bottom crust sweaty, and nobody wants that the next day. Once it’s totally cool (grab a cup of coffee while you wait, you earned it!), cover the pie dish tightly with plastic wrap or foil. You can keep this masterpiece in the refrigerator for about three to four days. Any longer than that, and I worry about that creamy filling; it’s just too good and fresh to risk it.
Now for reheating—this is where people go wrong! If you use the microwave, you are sacrificing the entire point of having that gorgeous flaky crust we worked so hard for. The microwave makes the crust soggy in seconds. Don’t do it! The absolute *best* way to save your leftovers is reheating it in the oven. Set your oven to a gentle 350°F (175°C). You want to cover the pie loosely with foil, just to protect the top from burning before the center is hot through. Bake it for about 20 to 25 minutes. This gentle heat warms everything through evenly and gives the bottom crust a chance to crisp up a little bit again!
If you’re an advanced planner like my Grandma Daisy used to be, you can totally freeze leftover pot pie pieces! Just wrap individual slices really well in plastic wrap, then slide them into a freezer bag. They last great for about two months. When you reheat them from frozen, just add about 15 extra minutes to the oven time. Easy peasy! If you’re looking for something sweet to end your meal later, check out my super simple easy 3-ingredient chocolate fudge recipe!
Frequently Asked Questions About Chicken Pot Pie
I know, I know, sometimes you just have those little lingering questions after you finish a big bake like this. That’s totally normal! That’s why I wanted to put together a quick little section answering the things I always get asked about making the perfect Homemade Chicken Pot Pie, especially when it comes to that beautiful, flaky crust. If you’ve managed to save some leftovers, you might be wondering how to keep that filling creamy, or maybe you wished you could turn this into a Chicken Pot Pie Soup!
Can I make the filling for this chicken pot ahead of time?
Yes, absolutely! This is a fantastic trick for making your day much easier, especially if you want this for a busy weeknight dinner. You can totally make the creamy chicken filling up to two days in advance. Just cook it all through—even adding the chicken—and then chill it completely. The biggest thing, and I mean this with my whole heart, is that you *must* let the filling cool totally down before you pour it into your raw bottom crust. If you put hot filling onto cold dough, the bottom crust gets steamed and turns soggy on you. We worked too hard for a soggy bottom!
What is the secret to a truly flaky pie crust?
Oh, this is the most important question! My grandma would always whisper, “Cold, Amelia, cold!” The real secret to that beautiful, shattering flaky pie crust is making sure your butter and your water are both ice cold when you start mixing. If your kitchen is warm, work fast, or even chill your bowl and flour for 10 minutes before you begin. The butter needs to stay in distinct little pieces when you cut it in; those pieces melt in the oven and create steam pockets, making the layers separate into flakes. If you overwork the dough or let the butter soften, you end up with a biscuit texture instead of a true crust. Keep it cold, keep it gentle!
Can this recipe be adapted for a Crock Pot Chicken Pot Pie?
That’s a great question for those planning a super low-effort meal! If you want to go the slow cooker route for a Crock Pot Chicken Pot Pie, you absolutely can, but you have to adjust the structure a bit. You wouldn’t put a full top crust on; the moisture in the slow cooker will steam it, and it won’t get brown and flaky like we want. Instead, you can leave it crustless, making it more of a hearty stew, or use the casserole approach! Just pour that creamy filling into the pot, top it with biscuits or maybe even some puff pastry strips right on top for the last 30 minutes of cooking. Cook on low for about 4 to 6 hours until everything is super tender. It hits that comfort food mark perfectly!
If you’re looking for more kitchen wisdom, especially about how I keep my dips perfectly textured, check out my post on the classic deviled eggs recipe with creamy filling!
Share Your Comfort Food Creations
Now that you’ve successfully brought a piece of Grandma Daisy’s kitchen right into your home, I have a little favor to ask! Cooking for my family is what keeps me grounded, and knowing that you are out there making these deeply comforting meals—that’s why I do this.
When you try this Classic Homemade Chicken Pot Pie, please come back here and let me know how it went! Did your crust turn out beautifully flaky? Did your family devour it in minutes? Drop a rating below—five stars if it earned that spot in your rotation! I seriously read every single comment; it feels like we are gathering around the kitchen table together, even from miles apart.
Don’t forget to snap a picture! Tag me on social media so I can see your gorgeous, golden-topped masterpiece. Showing off your skills is half the fun! If you have any final burning questions after making it, feel free to reach out directly through my contact page. Happy cooking, and thank you for keeping Daisy’s legacy of warm, honest food alive!
PrintClassic Homemade Chicken Pot Pie with Flaky All-Butter Crust

Make the ultimate comfort food with this classic homemade chicken pot pie recipe. You get a rich, creamy filling packed with tender chicken and vegetables, all covered by a buttery, flaky all-butter crust. This is a family favorite that tastes much better than store-bought versions.
- Prep Time: 40 min
- Cook Time: 45 min
- Total Time: 85 min
- Yield: 8 servings 1x
- Category: Dinner
- Method: Baking
- Cuisine: American
- Diet: Vegetarian
Ingredients
- 2 cups all-purpose flour
- 1 teaspoon salt
- 1 cup (2 sticks) cold unsalted butter, cut into small cubes
- 6 to 8 tablespoons ice water
- 2 cups cooked, shredded chicken (rotisserie chicken works well)
- 1 cup chopped carrots
- 1 cup frozen peas
- 1 cup chopped celery
- 1/2 cup chopped onion
- 1/2 cup unsalted butter
- 1/2 cup all-purpose flour
- 2 cups chicken broth
- 1 cup heavy cream
- 1 teaspoon dried thyme
- 1/2 teaspoon black pepper
- 1/4 teaspoon salt
- 1 large egg, beaten (for egg wash)
Instructions
- Prepare the crust: In a large bowl, whisk together 2 cups of flour and 1 teaspoon of salt. Cut in the cold butter using a pastry blender or your fingers until the mixture resembles coarse crumbs with some pea-sized pieces of butter remaining. Gradually add ice water, one tablespoon at a time, mixing until the dough just comes together. Divide the dough in half, form each half into a disk, wrap in plastic, and chill for at least 1 hour.
- Cook the filling base: In a large skillet over medium heat, melt 1/2 cup butter. Add the onion, carrots, and celery. Cook until the vegetables soften, about 5 to 7 minutes.
- Make the roux: Sprinkle 1/2 cup flour over the vegetables and stir constantly for 1 minute. Slowly whisk in the chicken broth until smooth. Bring the mixture to a simmer, stirring until it thickens.
- Finish the filling: Stir in the heavy cream, cooked chicken, thyme, pepper, and salt. Remove from heat and let the filling cool slightly while you roll out the crust.
- Assemble the pie: Preheat your oven to 400°F (200°C). On a lightly floured surface, roll out one disk of dough to fit the bottom of a 9-inch pie dish. Place the dough in the dish. Pour the cooled chicken filling over the bottom crust.
- Top the pie: Roll out the second disk of dough for the top crust. Place it over the filling. Crimp the edges to seal and cut several slits in the top crust to allow steam to escape. Brush the top crust with the beaten egg wash.
- Bake: Bake for 35 to 45 minutes, or until the crust is golden brown and the filling is bubbly. If the edges brown too quickly, cover them loosely with foil.
- Cool and serve: Let the chicken pot pie cool for at least 15 minutes before slicing and serving. This allows the filling to set.
Notes
- For a shortcut, substitute the homemade crust with store-bought refrigerated pie crusts or use a biscuit topping instead of a top crust for a Chicken Pot Pie Casserole variation.
- If you use rotisserie chicken, measure out 2 cups after shredding.
- You can add 1/2 cup of frozen peas and corn mix along with the heavy cream for extra vegetables.
Nutrition
- Serving Size: 1 slice
- Calories: 550
- Sugar: 3
- Sodium: 580
- Fat: 35
- Saturated Fat: 18
- Unsaturated Fat: 17
- Trans Fat: 0
- Carbohydrates: 38
- Fiber: 3
- Protein: 25
- Cholesterol: 110