
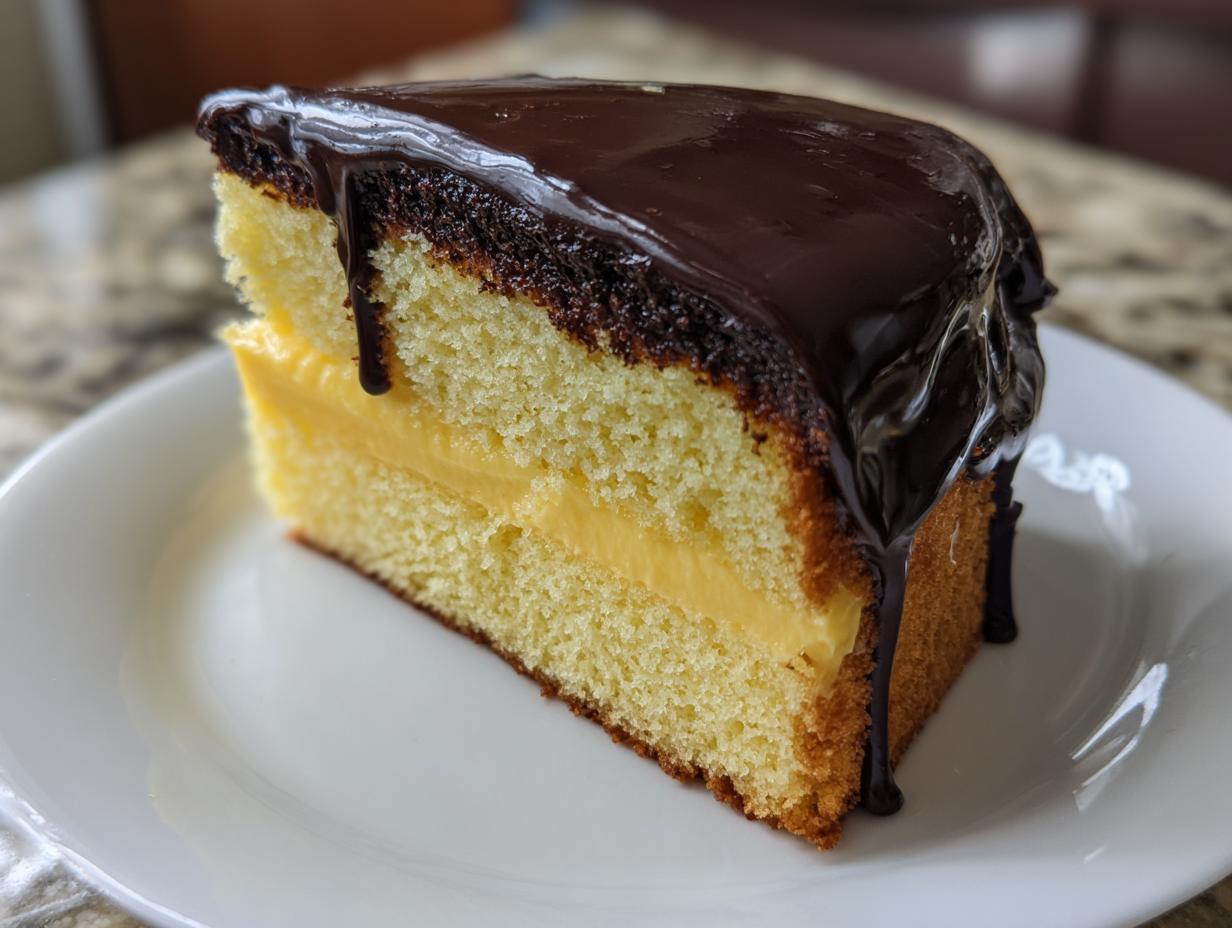
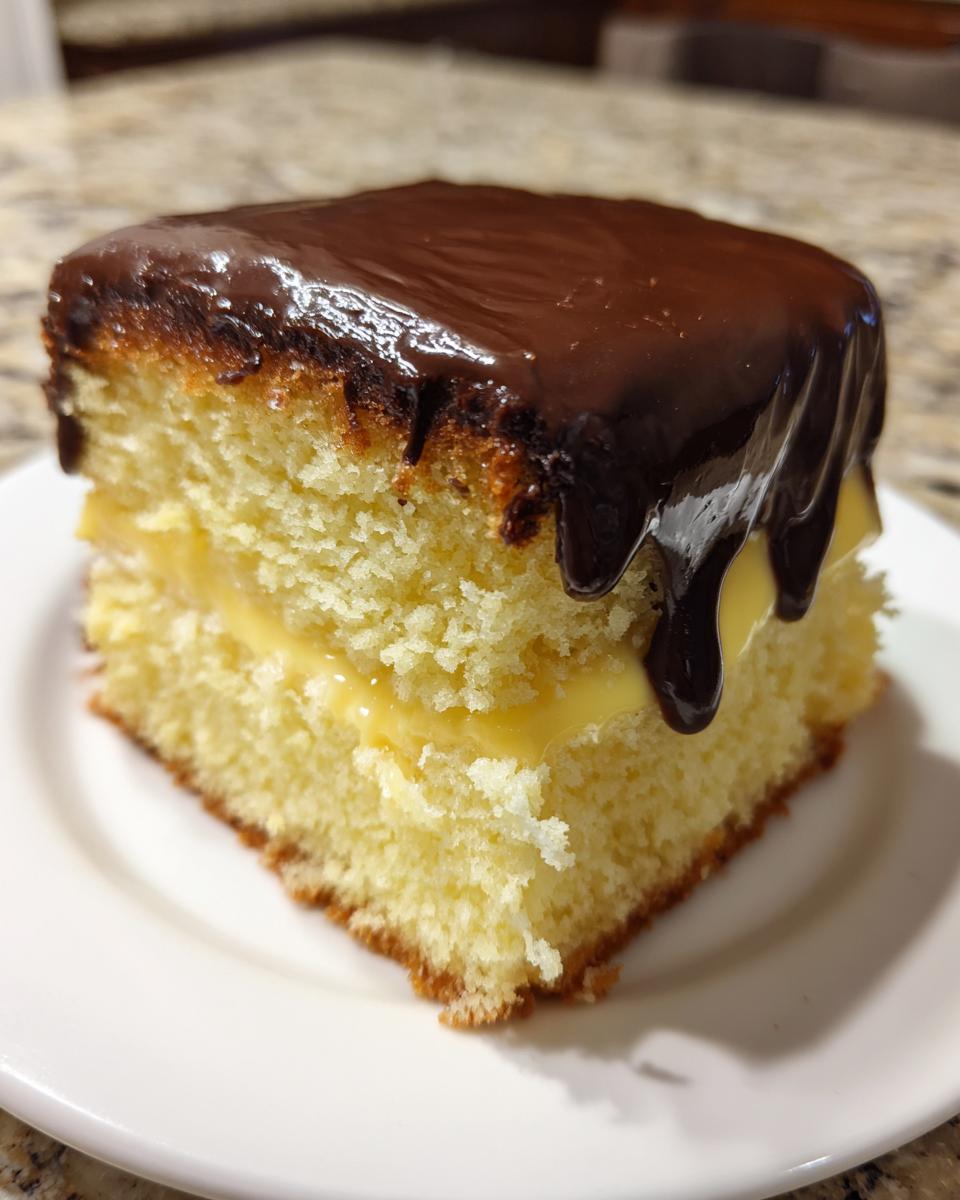
Listen, if you ask me about the king of American nostalgic desserts, there’s only one answer: The boston cream pie. It’s not really a pie, which is just part of its charm, right? It’s that perfect trifecta of fluffy vanilla cake, a thick river of luscious homemade custard, and that shiny, perfect chocolate topping. Over the years, I’ve tried shortcuts—oh goodness, have I tried them all—but nothing compares to making this from scratch. This recipe right here? This is the definitive boston cream pie. We’re talking bakery-worthy results achieved right in your home kitchen. It takes a little patience, especially with the filling, but when you sink your fork through that soft cake and hit the creamy center, you’ll understand why I swear by this technique. I absolutely love bringing this showstopper dessert to gatherings; the look on people’s faces when they bite into that perfectly balanced flavor is worth every minute!
If you’re looking for more incredible sweet treats for your next party, you absolutely have to check out my collection of delicious dessert recipes. Trust me, they are just as soul-satisfying as this pie!
- Why This From Scratch boston cream pie Recipe is the Best (Showstopper Dessert)
- Ingredients for Your Classic boston cream pie Recipe
- How to Prepare the Ultimate Homemade boston cream pie
- Tips for Success with Your boston cream pie
- boston cream pie Variations: Beyond the Classic Layer Cake Recipe
- Storage and Make Ahead Tips for your boston cream pie
- Frequently Asked Questions about boston cream pie
- Estimated Nutritional Data for this boston cream pie
- Share Your Showstopper boston cream pie
Why This From Scratch boston cream pie Recipe is the Best (Showstopper Dessert)
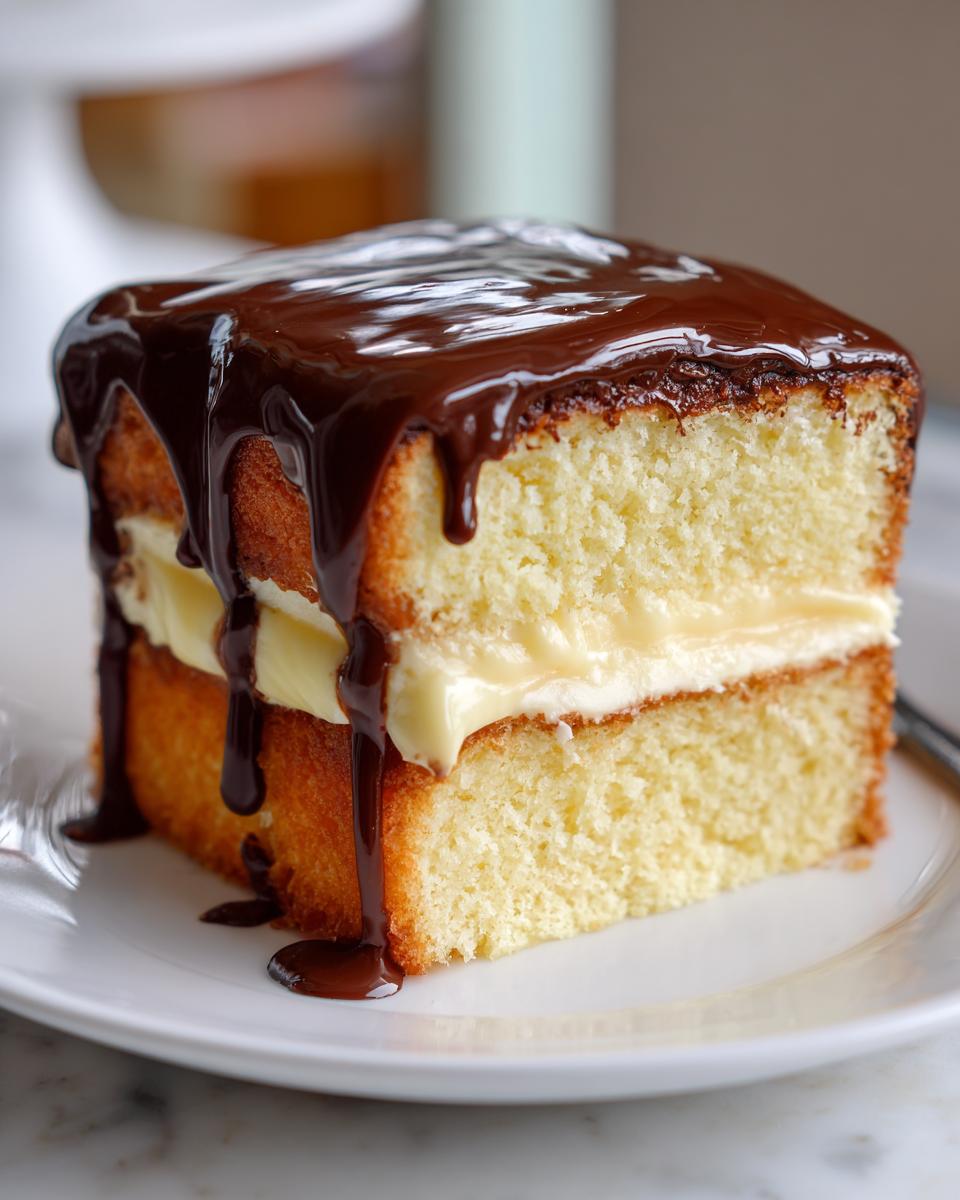
People often ask me what makes this particular **boston cream pie** stand out from all the others I’ve tested. It really boils down to three non-negotiable elements that deliver that authentic, bakery-style result. When you make it this way, you aren’t just baking a dessert; you’re building layers of textural perfection. Forget using mixes or substitutes—this scratch version is magic!
- The cake has the right structural integrity—tender, but bouncy enough to hold that heavy filling.
- The **pastry cream filling** is genuinely silky, never grainy or pudding-like.
- The chocolate topping sets up glossy and perfectly shiny, giving it that showstopper finish.
Achieving the Perfect Vanilla Sponge Cake Recipe
For the cake, you absolutely have to remember the creaming stage! Don’t rush banging the softened butter and sugar together until it looks pale and cloud-like. That’s where all the lift comes from for this particular **vanilla sponge cake recipe**. We’re not using heavy whipping cream here, so we need those air pockets built in early. If you skip that step, your cake layers will turn out dense, and we want light and fluffy layers to contrast the filling!
Silky Pastry Cream Filling Secrets
This is where many recipes go wrong, and it’s the part I obsess over when making a **Classic Boston Cream Pie**. The key to that incredibly smooth **pastry cream filling** is twofold. First: Tempering. You must slowly whisk some of that hot milk into your egg yolks first so they don’t scramble into egg bits! Second: You have to bring the whole mixture to a full, rolling boil for a good minute after it has thickened while whisking nonstop. Boiling activates the cornstarch correctly. If you pull it off the heat too soon, your filling will weep out and make a mess when you slice the pie. Trust me, let it bubble—it’s essential for that perfect, thick, dreamy custard!
Ingredients for Your Classic boston cream pie Recipe
Okay, here’s the lineup! Having all your ingredients measured out and ready before you start is half the battle, especially in a multi-stage bake like this magnificent **boston cream pie**. It saves so much scrambling later! For that amazing vanilla buttercream you might want to whip up later, I have a great recipe here, but for now, let’s focus on the three main parts of our showstopper dessert.
Remember, even though we call it a pie, it’s really a stunning layer cake, so read the descriptions here carefully!
- For the Vanilla Sponge Cake:
- 1 1/2 cups all-purpose flour
- 1 1/2 teaspoons baking powder
- 1/2 teaspoon salt
- 1/2 cup unsalted butter, softened (Make sure it’s proper, room-temperature butter!)
- 1 cup granulated sugar
- 2 large eggs
- 1 teaspoon vanilla extract
- 1/2 cup whole milk
- For the Pastry Cream Filling:
- 2 cups whole milk
- 1/2 cup granulated sugar
- 1/4 cup cornstarch (This is critical for thickness!)
- 4 large egg yolks
- 2 tablespoons unsalted butter
- 1 teaspoon vanilla extract
- For the Chocolate Ganache Topping:
- 4 ounces semi-sweet chocolate, chopped (Use good quality—it makes a difference!)
- 1/2 cup heavy cream
- 1 tablespoon light corn syrup (optional, but it really helps with that shine!)
How to Prepare the Ultimate Homemade boston cream pie
Alright, let’s get down to business! Making this boston cream pie from scratch is a journey, but I promise it’s worth it. Think of it like a little baking adventure where the payoff is pure, rich comfort. We’ll tackle the cake first, then the crucial custard, and finally, that gorgeous chocolate drizzle. Don’t panic about the steps; just follow them in order, and you’ll have a masterpiece. For handling that luscious **custard pie filling** later, I’ve got a great guide on making smooth fillings, but the technique is a little different here!
Baking the Tender Vanilla Sponge Cake Recipe
First things first: Get that oven warming up to 350°F (175°C) and prep those two 8-inch pans—I grease mine really well and then dust flour into every nook. Once your dry stuff (flour, baking powder, salt) is whisked together, move on to creaming that butter and sugar until it’s genuinely pale and fluffy—I usually beat mine for a solid three or four minutes by hand just to get the air in there. Add your eggs one at a time, mix well, and then, here’s the key: alternate the dry mix with the milk, starting and finishing with the flour mix (**Instruction Step 3**). This keeps everything happy and emulsified! Don’t overmix once the flour is in; just stop when you stop seeing streaks. Bake for 25 to 30 minutes. Let them sit in the pans for just 10 minutes to firm up before you flip them out onto a cooling rack. They need to be completely cool before we even think about the filling!
Mastering the Pastry Cream Filling for boston cream pie
Here is where we earn that **Pastry Cream Filling**! Heat your 2 cups of milk until it’s steaming hot—just shy of a boil is perfect. While that’s happening, whisk those yolks, sugar, and cornstarch together until they look like pale yellow ribbons (**Instruction Step 6**). Now, temper them! Slowly, slowly whisk about a cup of the hot milk into the yolk bowl to warm those eggs up gently. If you dump it all in at once, you’ll have scrambled eggs, and nobody wants that in their **Classic Boston Cream Pie**! Pour that warmed yolk mixture back into the saucepan with the rest of the milk. You MUST cook this over medium heat, whisking constantly, until it bubbles vigorously. I let mine boil for a full minute—don’t stop whisking! It needs that minute to get thick. Remove it from the heat, stir in the butter and that vanilla, and then, the most important part for a clean top: press plastic wrap right onto the surface of the **custard pie filling** so a skin can’t form while it cools. Totally smooth!
Assembling and Glazing Your boston cream pie
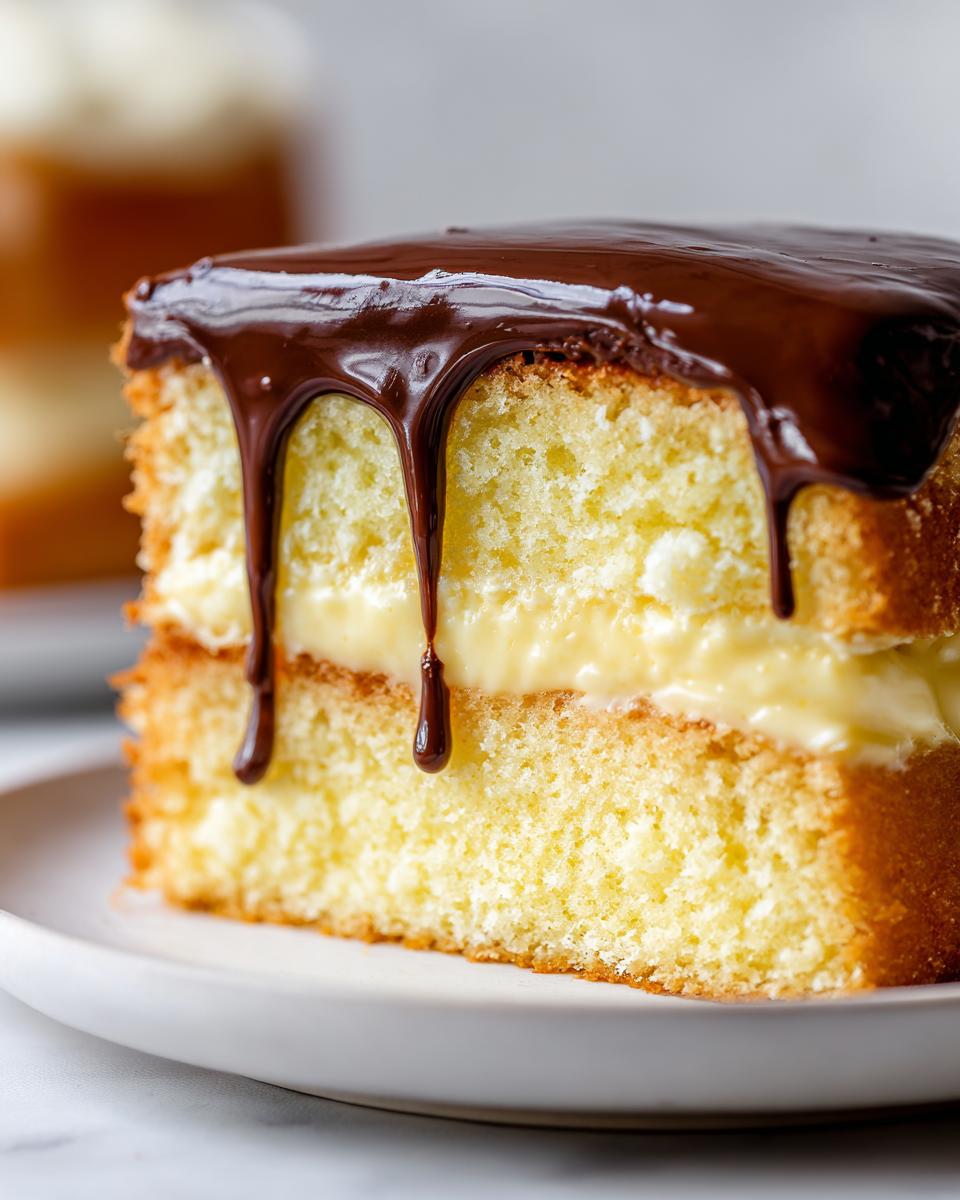
Once those cake layers are totally cool—and I mean *totally* cool, or the filling will melt—you can assemble! Place one layer down on your serving plate. Spread all that beautiful, cooled **pastry cream** evenly across the first layer, making sure you get almost to the edge. Top it with the second cake layer. Now for the finale: the **Chocolate Ganache Topping**! Just heat your cream (and corn syrup if you’re using it for extra pop!), pour it over your chopped chocolate, let it sit for five minutes to melt, then whisk until it’s liquid silk. Gently pour that beautiful glaze right over the center of the top cake layer, and let gravity do the work of dripping it down the sides naturally (**Instruction Step 11**). Don’t try to spread it too much! Pop the whole assembled **boston cream pie** into the fridge for at least an hour so the filling firms up and the glaze sets before you try slicing it. Patience rewards you!
Tips for Success with Your boston cream pie
Even following the recipe perfectly, sometimes things go a little sideways, especially with a layered dessert that has so many components. I’ve learned a few tricks over the years that save me a serious headache when making this boston cream pie. These aren’t in the main instructions, but they are my personal gold standards for achieving perfection every time. You want that flawless slice!
First up, if you are nervous about slicing—and I get it, that filling is delicate—chill the assembled cake for at least three hours before slicing, or even better, overnight! A very cold filling holds its structure much better when the knife goes in. You can use a long, thin serrated knife and wipe it clean between each cut. Makes slicing so much neater, trust me!
Second, regarding that beautiful **Chocolate Ganache Topping**: if you’re using corn syrup (and I hope you are!), but your mixture seems too thick after whisking, don’t panic! Just gently warm up two teaspoons of heavy cream on the stove and stir that into your glaze. That little bit of extra warmth loosens it right up so it flows over the cake beautifully without tearing up the pastry cream underneath. If it starts to get too stiff before you pour it, a few seconds in the microwave also works wonders.
Finally, for the cake layers, if you suspect your oven runs a bit hot or unevenly, I always recommend baking them on the lower rack for the first 15 minutes. A slight dip in temperature early on can prevent that little dome from forming too aggressively, which means less leveling is needed later. A flatter cake is a happier cake for layering! For more advanced baking science, I sometimes consult my notes on how to make starter, just to keep my foundational knowledge sharp, but these tips are just plain practical for this pie.
boston cream pie Variations: Beyond the Classic Layer Cake Recipe
One of the things I adore about a truly great boston cream pie recipe is how adaptable it is! While the classic layer cake is my absolute favorite, sometimes you need something grab-and-go, right? If you love the flavors but don’t want the fuss of slicing a tall cake, you have options!
My top recommendation is turning it into Boston Cream Cupcakes. Seriously, it’s so fun! You just use the same Vanilla Sponge Cake Recipe batter, but pour it into cupcake liners instead. Once baked and cooled, instead of layering, you core out a little donut shape in the middle, pipe in that amazing Pastry Cream Filling, and then top each little one with a drizzle of the chocolate glaze. They look so cute!
Another fun idea is making Boston Cream Poke Cake bars. You bake the cake in a 9×13 pan, poke holes all over it while it’s still warm, and pour sweetened condensed milk over the top before chilling. Then, you spread the custard and top it with the glaze. It’s super easy and decadent. Speaking of cupcakes, if you want my dedicated secrets for making perfect mini versions, I totally wrote them up over here!
Storage and Make Ahead Tips for your boston cream pie
This is one of my absolute favorite desserts to have in the fridge because it qualifies as a fantastic Make Ahead Dessert. Honestly, I think the boston cream pie actually tastes better the day *after* you assemble it! Why? Because that rich **pastry cream filling** has time to really settle into the soft vanilla cake layers, and the flavors all marry up perfectly. But, you can’t just toss it in there uncovered; we need a little strategy to protect that gorgeous chocolate top.
For refrigeration, cover the whole pie loosely with plastic wrap or place a large cake dome over it, making sure the plastic isn’t touching the chocolate too much—if it does, you risk sticking and ruining that glossy finish! It keeps beautifully in the fridge for about three to four days. If you’re worried about condensation messing up that pristine glaze, cover it loosely with foil.
Now, about freezing this beauty? This is where the custard pie filling gets tricky. Generally, I don’t recommend freezing a fully assembled boston cream pie. Custards made with egg yolks, like ours, tend to get a slightly grainy or watery texture when thawed after freezing. If you absolutely *must* freeze parts of it, bake the cake layers, wrap them tightly in plastic wrap and then foil, and freeze those only! The filling and the ganache are best made the day before you plan to serve it. So, for best results, plan to bake the cake layers a day ahead, refrigerate them, make the filling and glaze the morning you assemble, and serve the next day. Perfection!
Frequently Asked Questions about boston cream pie
I get so many questions about this dessert because everyone wants their boston cream pie to turn out absolutely perfect. People wonder about texture, terms, and shortcuts! Let’s clear up a few sticking points so you can confidently serve up the Best Boston Cream Pie!
Can I use instant pudding instead of Pastry Cream Filling for my boston cream pie?
Oh, here’s the big shortcut question! Yes, you absolutely *can* use instant vanilla pudding mixed according to the box directions if you are in a huge rush and need an Easy Boston Cream Pie. However, I have to be honest: the texture is completely different. Instant pudding is lighter, airier, and often sweeter, lacking that rich, eggy density you get from our homemade **Pastry Cream Filling**. Our scratch custard sets up firmer and silkier because of the egg yolks and the cooking process, giving you that true, old-fashioned bite. The boxed stuff just doesn’t deliver that nostalgic, heavy satisfying mouthfeel we are aiming for!
What makes this a ‘Dessert Pie Recipe’ instead of just a cake?
It’s one of those funny naming conventions in American baking! Historically, when this recipe was popularized in Boston, it was baked in a round, deep metal pan that resembled classic pie dishes of the era. Since the filling is a cooked custard—which is fundamentally what you find in many pies—it stuck! Structurally, it’s a layer cake with a round shape, but because the original inspiration used pie pans and featured that heavy custard base, it became known as the **boston cream pie**. Don’t let the name fool you; we treat it just like a **Layer Cake Recipe** during assembly!
Why do some recipes call this an ‘Old Fashioned Boston Cream Pie’?
When people use the term **Old Fashioned Boston Cream Pie**, they are usually referring to versions that skip the modern additions like heavy use of stabilizers or sometimes even use a slightly heavier cake base that’s a bit closer to a true shortcake. Our recipe honors that past by focusing on the basics: simple vanilla cake, real egg-yolk custard, and a proper chocolate glaze, not just melted chips. The essence of the old-fashioned version is that pure, unadulterated flavor profile that doesn’t rely on tons of box mixes or stabilizers. Plus, a little tip: sometimes the Old Fashioned Boston Cream Pie calls for a light sprinkle of sugar on top of the cake layer before the custard goes on—I skip that because I prefer the smooth surface for the cream!
Can I use store-bought pound cake to speed this up?
You could, but then you wouldn’t have the **From Scratch Boston Cream Pie** experience, would you? While you technically *can* stack two store-bought pound cakes, they are often too dense and dry to properly absorb or complement the richness of our homemade **Pastry Cream Filling**. The beauty of this whole dessert is the contrast between the airy sponge and the creamy center. If you’re going to spend time making the amazing custard, you really need to commit to the **Vanilla Sponge Cake Recipe**; I promise it’s quick!
What is the role of the light corn syrup in the Chocolate Ganache Topping?
That little bit of corn syrup is my secret weapon for achieving that perfect, mirror-like shine on the top layer. It doesn’t add much flavor, but it helps prevent the chocolate from looking dull or matte once it cools and sets. It keeps the **Chocolate Ganache Topping** looking flawlessly smooth, giving your dessert that undeniable professional sheen. It’s a very small trick that yields huge visual results! If you want to peek at a recipe that focuses just on fudge toppings, check out my easy chocolate fudge recipe—it uses a similar concept to keep things glossy!
Estimated Nutritional Data for this boston cream pie
Look, I’m a baker, not a nutritionist, so take these numbers with a pinch of salt! But I know some of you lovely folks are curious about what you’re getting into when you tackle this magnificent boston cream pie. This data is based on the exact measurements in the recipe above for 8 servings. Honestly, when something tastes this good, I try not to look too closely at the fat content—it’s worth every single calorie for a perfect slice of this **Nostalgic Dessert**!
- Serving Size: 1 slice
- Calories: 450
- Sugar: 40g (That’s the good stuff!)
- Sodium: 250mg
- Fat: 25g
- Saturated Fat: 15g
- Unsaturated Fat: 10g
- Trans Fat: 0.5g
- Carbohydrates: 50g
- Fiber: 2g
- Protein: 8g
- Cholesterol: 150mg
Keep in mind these totals are just estimates based on standard ingredient calculations. The final numbers can shift slightly depending on the exact brand of chocolate or butter you choose for your **Showstopper Dessert**!
Share Your Showstopper boston cream pie
Well, that’s it! You’ve done it! You’ve navigated the tempering process, you’ve nailed that fluffy Vanilla Sponge Cake Recipe, and you’ve poured the most beautiful, glossy Chocolate Ganache Topping over your very own Classic Boston Cream Pie. Seriously, pause for a minute and take a picture, because this is a moment worth savoring!
I truly want to see how your creation turned out! Did the **Pastry Cream Filling** set like a dream? Was the cake moist and tender? When you slice into that gorgeous dessert, I really hope you taste all the effort you put into making it from scratch. Hearing from you keeps me motivated to keep sharing these deeply loved family recipes, even if they require a bit of elbow grease.
If you loved making this decadent dessert, please hop down below and leave a rating! Five stars if you think this lives up to the hype—and I really think it will! Nothing makes me happier than knowing my process for the Best Boston Cream Pie worked perfectly in your kitchen too.
If you ran into any snags, or if you want to share photos of your magnificent slice, don’t hesitate to reach out! You can always send me a note through my contact page. Happy baking, everyone!
PrintClassic From Scratch Boston Cream Pie
Make a bakery-quality Boston Cream Pie featuring tender vanilla sponge cake, rich pastry cream filling, and a smooth chocolate glaze.
- Prep Time: 35 min
- Cook Time: 30 min
- Total Time: 65 min
- Yield: 8 servings 1x
- Category: Dessert
- Method: Baking
- Cuisine: American
- Diet: Vegetarian
Ingredients
- For the Vanilla Sponge Cake:
- 1 1/2 cups all-purpose flour
- 1 1/2 teaspoons baking powder
- 1/2 teaspoon salt
- 1/2 cup unsalted butter, softened
- 1 cup granulated sugar
- 2 large eggs
- 1 teaspoon vanilla extract
- 1/2 cup whole milk
- For the Pastry Cream Filling:
- 2 cups whole milk
- 1/2 cup granulated sugar
- 1/4 cup cornstarch
- 4 large egg yolks
- 2 tablespoons unsalted butter
- 1 teaspoon vanilla extract
- For the Chocolate Ganache Topping:
- 4 ounces semi-sweet chocolate, chopped
- 1/2 cup heavy cream
- 1 tablespoon light corn syrup (optional, for shine)
Instructions
- Prepare the Cake: Preheat your oven to 350°F (175°C). Grease and flour two 8-inch round cake pans. Whisk together flour, baking powder, and salt in a bowl.
- In a separate bowl, cream the butter and sugar until light and fluffy. Beat in eggs one at a time, then mix in vanilla extract.
- Alternate adding the dry ingredients and milk to the butter mixture, beginning and ending with the dry ingredients. Mix until just combined.
- Divide batter evenly between the prepared pans. Bake for 25 to 30 minutes, or until a toothpick inserted into the center comes out clean. Cool cakes in pans for 10 minutes, then turn out onto a wire rack to cool completely.
- Make the Pastry Cream: Heat the milk in a saucepan until steaming, but not boiling.
- In a bowl, whisk together sugar, cornstarch, and egg yolks until smooth. Slowly whisk about 1 cup of the hot milk into the yolk mixture to temper it.
- Pour the tempered yolk mixture back into the saucepan with the remaining milk. Cook over medium heat, whisking constantly, until the mixture thickens significantly and comes to a boil. Boil for 1 minute while whisking.
- Remove from heat. Whisk in butter, vanilla extract, and set aside to cool slightly, pressing plastic wrap directly onto the surface to prevent a skin from forming.
- Assemble the Pie: Place one cooled cake layer on a serving plate. Spread the cooled pastry cream evenly over the cake layer. Place the second cake layer on top.
- Make the Ganache: Place chopped chocolate in a heatproof bowl. Heat the heavy cream and corn syrup (if using) until simmering. Pour the hot cream over the chocolate. Let stand for 5 minutes, then whisk until smooth and glossy.
- Pour the ganache over the top center of the assembled cake, allowing it to drip naturally down the sides. Let the glaze set before slicing and serving.
Notes
- For a firmer custard, chill the pastry cream thoroughly before assembling the pie.
- You can use a single 9-inch springform pan for baking the cake layers if you prefer a slightly thicker layer.
- If you want Boston Cream Cupcakes, use the cake batter in cupcake liners and fill the center hole after baking with the pastry cream and top with ganache.
Nutrition
- Serving Size: 1 slice
- Calories: 450
- Sugar: 40g
- Sodium: 250mg
- Fat: 25g
- Saturated Fat: 15g
- Unsaturated Fat: 10g
- Trans Fat: 0.5g
- Carbohydrates: 50g
- Fiber: 2g
- Protein: 8g
- Cholesterol: 150mg