
Isn’t it crazy how much pressure we put on ourselves when planning party food? Suddenly, you need something that looks amazing, tastes incredible, and ideally, doesn’t involve turning on the oven when it’s 90 degrees outside. Well, stop stressing! I’m here to hand you the blueprint for the BEST Classic Cream Cheese Ball Recipe you will ever need. This is simple, no-bake perfection, just like my Grandma Daisy always taught me—honest food made with zero fuss. This classic cheese ball recipe is a guaranteed crowd-pleaser, whether it’s for Christmas cheer or just a big game day spread.
This recipe is an heirloom, built on Daisy’s philosophy that great food just needs good, straightforward ingredients handled with care. Trust me, you won’t need any fancy new equipment for this one; just a strong spoon and a bit of patience while it chills. You can get the base mixed up in under fifteen minutes, and it’s ready to wow your guests. If you want to see how others are styling their holiday spreads, you can check out some inspiration when styling your appetizers.
If you use this simple base, you can always add something extra later, like small marinated cheese bites to fill out your board later, as detailed in our marinated cheese recipe.
- Why This Classic Cheese Ball Recipe Is Your New Favorite Party Snack Ideas
- Ingredients for the Ultimate Cheese Ball Recipe
- How to Prepare This Easy Appetizer Recipe Step-by-Step
- Tips for Success with Your Classic Cheese Ball Recipe
- Make Ahead Appetizer and Storage for This Cheese Ball Recipe
- Variations: Beyond the Classic Cheese Ball Recipe
- Serving Suggestions for This Savory Party Food
- Frequently Asked Questions About the Best Cheese Ball Recipe
- Nutritional Estimate for This No Bake Appetizer
Why This Classic Cheese Ball Recipe Is Your New Favorite Party Snack Ideas
Honestly, I think this is the best starter because it’s foolproof. The texture, thanks to the sharp cheddar mixed right in, is unbelievably creamy—it tastes like the best, most decadent dip, but you can actually pick it up! That’s why I put this front and center when people ask me for party snack ideas. It’s the ultimate easy appetizer recipe because there’s absolutely no cooking involved, seriously, zero flame required.
My goal here is giving you reliable results every single time. This base recipe does exactly that; it holds its shape beautifully but melts in your mouth when you eat it. Plus, you know how much I love turning everyday ingredients into something special, and this classic cheese ball really shines.
Perfect for Game Day Food and Holiday Appetizer Needs
If you are hosting, this is your secret weapon. It’s hardy; it travels well. You can roll it up the day before and have it ready to coat right before guests arrive. It hits the mark perfectly for casual game day food because it’s sturdy enough for grabbing during commercial breaks. But don’t think it’s *only* for casual hangs! This is one of my favorite Christmas food ideas year after year. It looks festive clustered on a platter with some nice rosemary sprigs, making it a truly impressive holiday appetizer.
When you need something satisfying but super quick, remember this recipe. It’s much better than those complicated layered dips! If you’re looking for something sweet to balance out the savory, check out my recipe for easy fruit dip!
Ingredients for the Ultimate Cheese Ball Recipe
Alright, gathering your supplies should be quick! This ultimate cheese ball recipe relies on excellent starting materials, but they are all things you probably have on hand. Remember, the cream cheese absolutely needs to be softened—no shortcuts here, or you’ll end up beating the mixture forever! We need the rich fat from the dairy to make this happen.
Here is exactly what you need to make this wonderful savory party food:
- 8 ounces cream cheese, softened
- 8 ounces sharp cheddar cheese, shredded
- 1/4 cup sour cream
- 1 teaspoon Worcestershire sauce
- 1 teaspoon garlic powder
- 1/4 teaspoon onion powder
- 1/4 teaspoon salt
- 1/4 teaspoon black pepper
- 1 cup finely chopped pecans or walnuts (for coating)
And of course, you need the scoopers! Have your favorite crackers, pretzels, or crisp vegetable sticks ready to go right alongside this simple homemade dip.
If you want to see how I use creamy cheese in a different context, you have to try my recipe for creamy beer cheese dip!
How to Prepare This Easy Appetizer Recipe Step-by-Step
This is where the real magic happens, and I promise, it’s so straightforward you’ll wonder why you ever bought a pre-made tub of dip! We are skipping any complicated cooking, which is why this is such a fantastic easy appetizer recipe for busy nights.
Mixing the Creamy Cheese Dip Base
Grab that slightly softened cream cheese—remember, soft, not melty! Toss it into your bowl with the shredded cheddar, sour cream, and all those little seasonings like garlic powder and Worcestershire. Now, this is important: if you want that unbelievably smooth texture that makes people ask for the creamy cheese dip recipe, use a hand mixer for just a minute or two until everything is perfectly homogenous. If you just use a spoon, you’ll be stirring forever trying to get rid of those cream cheese lumps. Trust me on the mixer!
Once it’s smooth, you divide the mixture in half, or you can just mix in your add-ins, like bacon pieces. If you want to see how I handle sausage/cheese mixes, check out my tips over at the rotel sausage ball recipe.
Chilling and Shaping the Cheese Ball
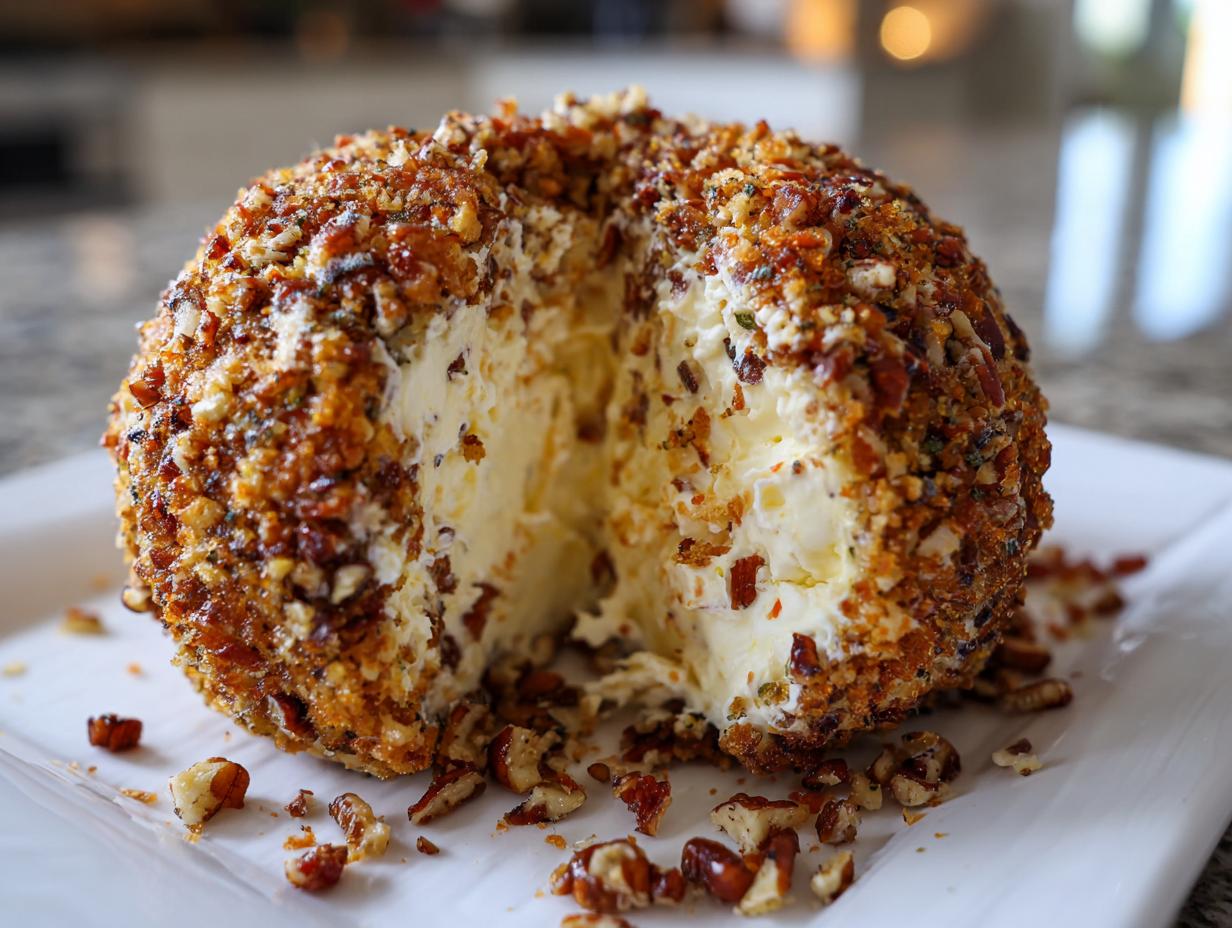
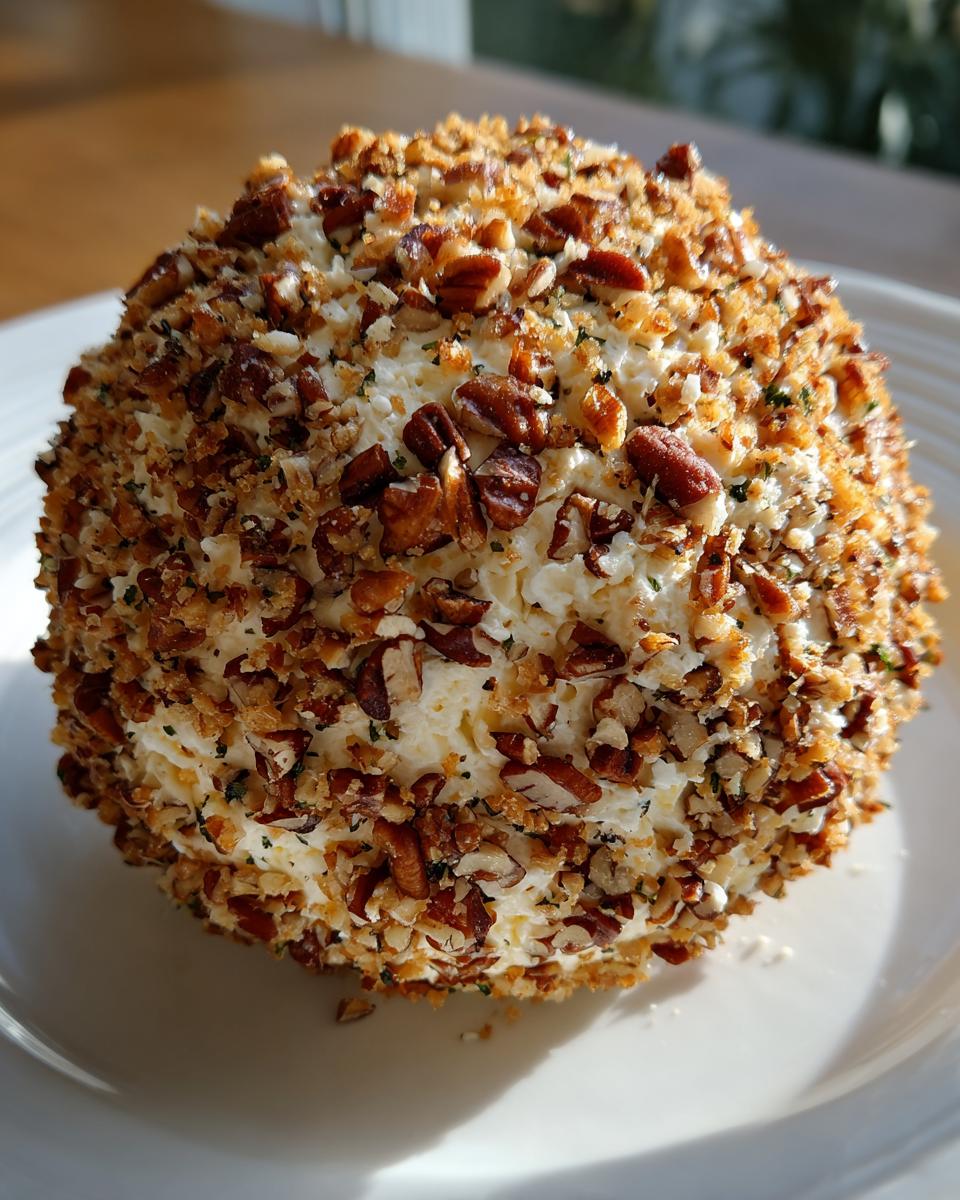
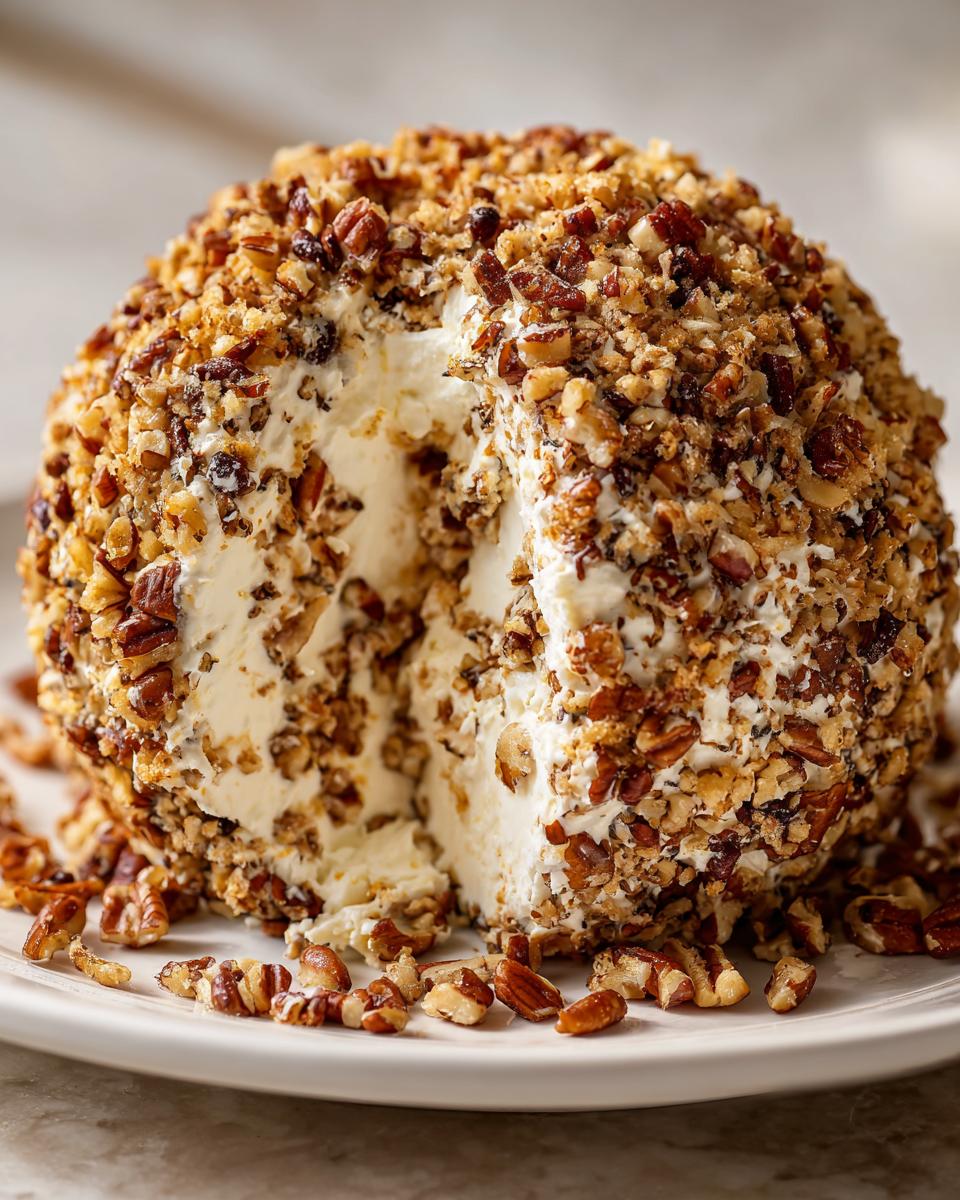
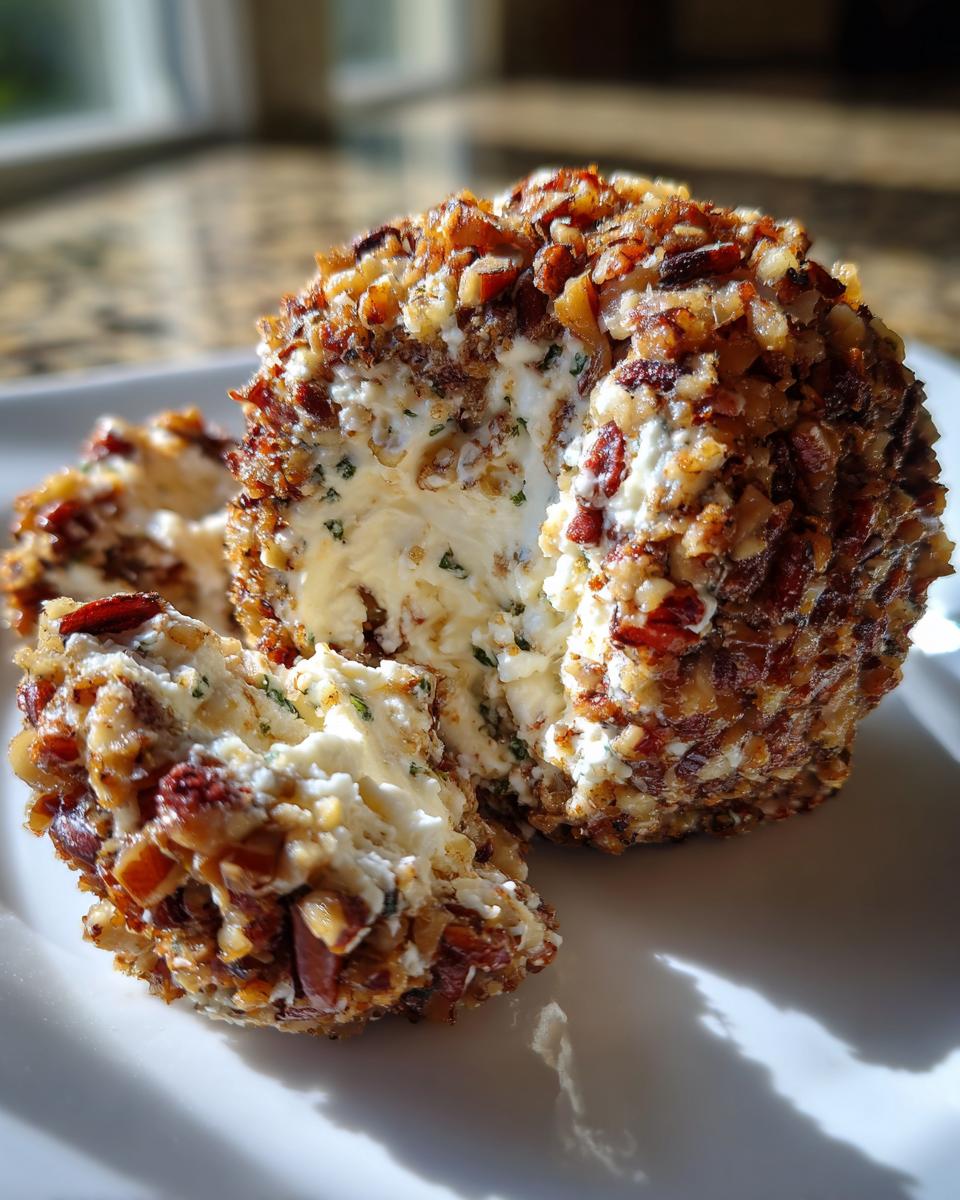
Now, take that beautiful, smooth mixture and lay it out onto a big piece of plastic wrap. Use the wrap to gently mold it into a nice, tight ball shape. This next step is non-negotiable if you want a sturdy end product! You absolutely must chill this for a minimum of two hours—I usually let mine go overnight. If you try to roll it in nuts before it’s firm, you’ll just end up with a sticky, sad mess instead of a handsome appetizer for a crowd. The chilling process is what builds the structure so it doesn’t flatten out on your platter.
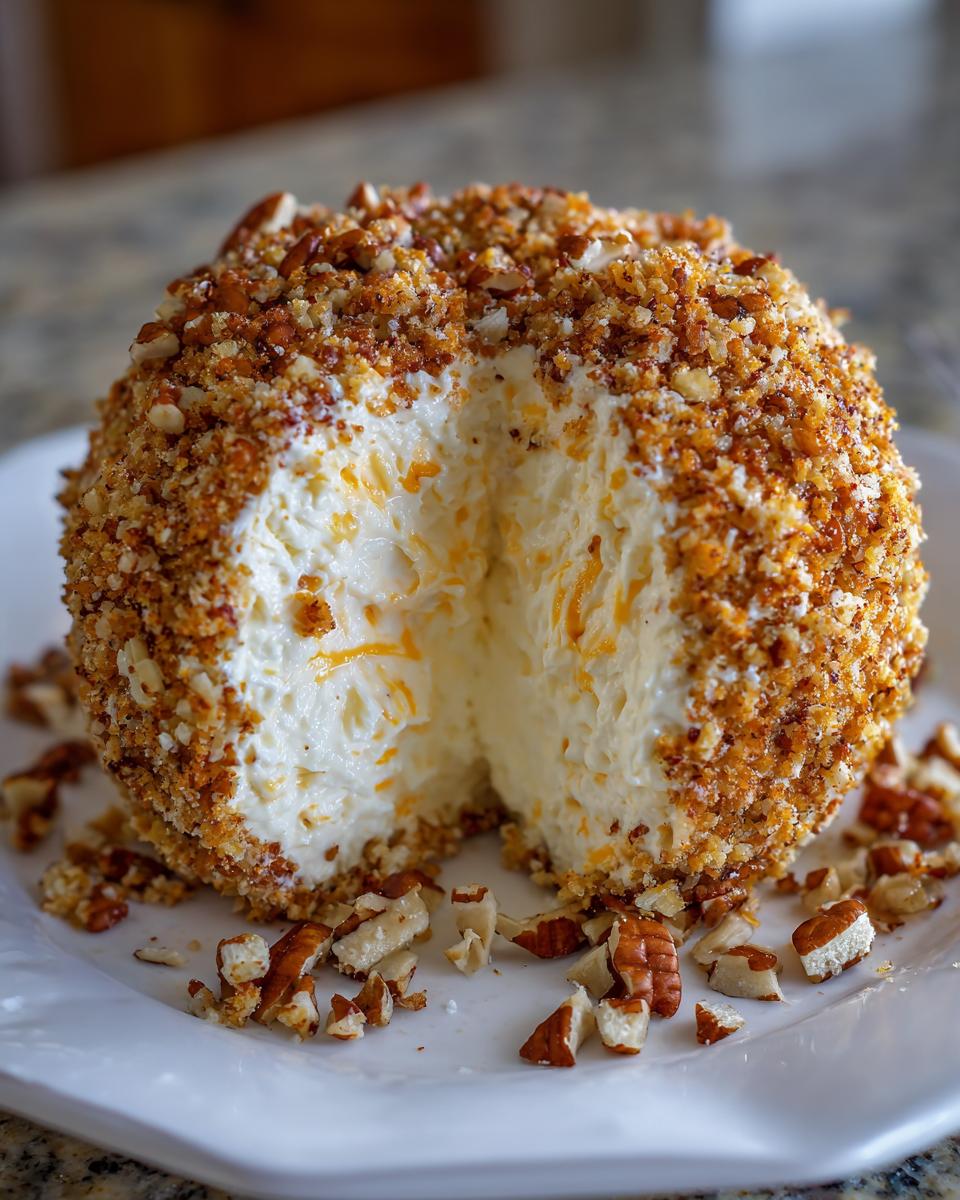
Once it’s firm, just spread those chopped nuts out on a plate. Unwrap your firm cheese ball and gently roll it around until the nuts stick evenly. If you want some other great easy party ideas, pop over to this article—they have a great take on the classic, which is very similar to what we are doing here!
Tips for Success with Your Classic Cheese Ball Recipe
Look, making any cheese ball recipe can seem simple, which means sometimes people rush the crucial bits and end up with a greasy blob instead of dazzling party snack ideas. My best tip, the one Grandma Daisy was firm about, is the temperature of your cream cheese. Don’t melt it! It needs to be truly softened—push your finger in, and you should leave a dent easily—but still cool. If it gets warm, the final ball will spread out as it sits there looking pretty.
When you go to coat it with those lovely pecans, make sure the ball is good and cold right out of that chilling time. A cold surface grabs the nuts perfectly. If you’re worried about the nuts not sticking perfectly, try rolling the ball back into the plastic wrap for five minutes right after coating it; it helps set everything in place. This little trick makes sure your final presentation is always flawless. For more timing advice on making things ahead, check out our thoughts on making appetizers ahead of time!
Make Ahead Appetizer and Storage for This Cheese Ball Recipe
I love that this recipe works so well as a make ahead appetizer. Honestly, it saves so much stress when you have guests coming over, especially around the holidays! You can mix everything up—the creamy base, without the nuts—and shape it into that tight ball, wrap it up securely in plastic wrap, and stick it right back in the fridge.
It keeps perfectly safe and ready to go for up to three full days this way. Then, when you are ready to serve it, just unwrap it, roll it in your pecans, and boom! Instant, amazing party snack ideas without lifting a finger that morning. If you need another great no-bake treat, I have a fantastic no bake peanut butter pie recipe you might want to try too!
Variations: Beyond the Classic Cheese Ball Recipe
While I adore this classic, Daisy always taught me that a good recipe is just a starting point for love. Once you master this base cheese ball recipe, you have to start playing around! The beauty of this creamy mix is how well it adapts to almost any flavor profile you throw at it. If you want to make a real showstopper that disappears in under five minutes, you need one of these variations.
The easiest way to level up is by adding robust flavors right into that creamy base before chilling. For instance, if you are worried about flavor fading, I highly suggest trying out a bacon cheese ball. Just mix in about half a cup of crispy, crumbled bacon bits right along with the cheddar. The salty smokiness works just beautifully with the tang of the Worcestershire sauce.
Then there’s the whole ranch craze! Everyone loves ranch, right? Transforming this into a ranch cheese ball is maybe the easiest thing ever, and you can see how folks are crushing it with flavors like that over at Cheddar Ranch. Just dump in a tablespoon of dry ranch seasoning mix when you add your garlic powder, and boom—instant flavor!
Creating a Jalapeno Cheese Ball Variation
Since I know so many of you are looking for a little bit of a kick, especially when serving up game day food, you should definitely try turning this into a jalapeno cheese ball. I know it wasn’t in Grandma Daisy’s original notes, but we have to adapt! All you do is drain a small jar of pickled jalapenos really, really well, chop them up finely, and mix them right in with the base ingredients. Be sure to wear gloves when chopping those peppers, or you’ll be regretting it when you rub your eye later—trust me on that one!
If you’re interested in other ways to get that savory, herbaceous flavor into your snacks without baking, you should look at my recipe for easy baked ranch chicken—it uses similar flavor profiles!
Serving Suggestions for This Savory Party Food
Once your classic cheese ball recipe is coated in crunchy nuts, the real fun starts: presentation! This isn’t just a snack; it’s the centerpiece of your table, especially when you need an appetizer for a crowd. You want to make it look as inviting as it tastes, don’t you?
Presentation is where you can really let your creativity shine, filling out the platter to make it look truly abundant. Instead of just setting the ball out, arrange your dippers all around it in a crescent or a circle. That way, guests can easily reach in and grab what they love.
For the scooping items, keep a mix of textures on hand. We always do sturdy, plain water crackers—they let the cheese flavor shine through. Then I throw in some salty pretzel crisps because that salty crunch plays perfectly against the creamy base. Don’t forget the fresh options too, since we want to make sure everyone has something they can grab!
Best Dippers to Keep Your Cheese Ball Crowd-Pleasing
If you’re building this into a bigger spread, think of it as one of your star charcuterie board additions. It sits beautifully right next to some sliced salami or maybe some good quality grapes.
Here is my go-to list for serving up this savory party food:
- Sturdy Pita Chips or Bagel Crisps
- Mini Pretzel Twists (Kids love these!)
- Carrot Sticks, Celery Sticks, and Sliced Bell Peppers
- Cucumber Rounds (They hold up really well against the richness)
If you have any leftover cheese ball mixture and just don’t want to roll it up into a ball, you could cube it and toss it gently in some nice herbs while it’s still soft. You can see how I handle similar bites in my post on marinated cheese cubes. It’s another great way to present the same flavor profile on a big board!
Frequently Asked Questions About the Best Cheese Ball Recipe
I know when you’re making something that looks this good, you want every detail perfect. I often get asked about tweaks, especially when dealing with the texture of this no bake appetizer. Don’t worry; I’ve collected the most common questions here to ensure your cheese ball is utterly flawless!
Can I use different cheeses in this simple homemade dip?
You sure can! While my Grandma Daisy insisted on sharp cheddar for that signature tang, this recipe is a great base for mixing. If you want something richer, try swapping out half the cheddar for Gruyère or even a soft goat cheese. Just keep that 8 oz of cream cheese as the anchor—that’s what holds the structure together so it doesn’t turn into a puddle when it warms up a bit on the platter. It’s all part of making this your unique simple homemade dip!
What is the best way to soften cream cheese quickly?
Okay, the biggest beginner mistake with any creamy appetizer is using chilled cream cheese. If you forgot to pull it out early, here’s the trick: take the foil wrapper off and put the block in a microwave-safe bowl. Zap it on 50% power for just 10 seconds at a time, turning it after each burst. Stop the second you can press an indent into it easily with your finger. It gives you that perfectly pliable texture needed for the best cheese ball without overheating it.
For more advice on timing and structure, check out the fantastic tips over at Natasha’s Kitchen—she has great insight on keeping things cool!
If you’re looking for some other fast methods for mixing, I break down some of my favorite quick-fix sauces in my guide to easy homemade BBQ sauce, which uses a similar quick-mix philosophy.
Nutritional Estimate for This No Bake Appetizer
I always like to give you an idea of what you’re working with here, especially since this is such a rich, satisfying no bake appetizer. Remember, these numbers are just an estimate, based on standard ingredients, assuming you are serving this lovely creation up in about 12 relatively even portions. It’s good to have a general idea, though, so folks planning their plates can factor it in!
For one ounce serving size, here are the estimated breakdowns:
- Calories: 110
- Fat: 10g
- Saturated Fat: 6g
- Trans Fat: 0g
- Cholesterol: 30mg
- Sodium: 150mg
- Carbohydrates: 1g
- Fiber: 0g
- Sugar: 1g
- Protein: 5g
See? It’s rich, but since you only need a little bit to feel satisfied, it’s perfect for mingling! If you are looking for other great treats that are easy to portion out, you definitely need to check out my recipe for easy rocky road fudge—fudge is another excellent snack for portion control!
PrintThe BEST Classic Cream Cheese Ball Recipe (Easy Party Snack)

Make this easy, no-bake classic cheese ball for your next gathering. It is a simple, savory party snack perfect for holidays or game days.
- Prep Time: 15 min
- Cook Time: 0 min
- Total Time: 2 hours 15 min
- Yield: 12 servings 1x
- Category: Appetizer
- Method: No Bake
- Cuisine: American
- Diet: Vegetarian
Ingredients
- 8 ounces cream cheese, softened
- 8 ounces sharp cheddar cheese, shredded
- 1/4 cup sour cream
- 1 teaspoon Worcestershire sauce
- 1/2 teaspoon garlic powder
- 1/4 teaspoon onion powder
- 1/4 teaspoon salt
- 1/4 teaspoon black pepper
- 1 cup finely chopped pecans or walnuts (for coating)
- Crackers, pretzels, or vegetable sticks for serving
Instructions
- Combine the softened cream cheese, shredded cheddar cheese, sour cream, Worcestershire sauce, garlic powder, onion powder, salt, and pepper in a medium bowl.
- Mix all ingredients together using a hand mixer or a sturdy spoon until the mixture is completely smooth and well combined.
- Place the mixture onto a sheet of plastic wrap. Shape the mixture into a ball.
- Wrap the cheese ball tightly in the plastic wrap. Chill in the refrigerator for at least 2 hours, or until firm enough to handle.
- Spread the chopped nuts onto a shallow plate.
- Remove the plastic wrap from the chilled cheese ball. Roll the cheese ball in the chopped nuts until it is evenly coated on all sides.
- Place the finished cheese ball on a serving platter. Serve immediately with your choice of crackers or vegetables.
Notes
- For a bacon cheese ball variation, mix 1/2 cup cooked, crumbled bacon into the cheese mixture before chilling.
- If you prefer a ranch cheese ball, add 1 tablespoon of dry ranch seasoning mix to the base ingredients.
- You can make this appetizer ahead of time; keep it wrapped tightly in the refrigerator for up to three days before coating and serving.
Nutrition
- Serving Size: 1 ounce
- Calories: 110
- Sugar: 1
- Sodium: 150
- Fat: 10
- Saturated Fat: 6
- Unsaturated Fat: 4
- Trans Fat: 0
- Carbohydrates: 1
- Fiber: 0
- Protein: 5
- Cholesterol: 30