

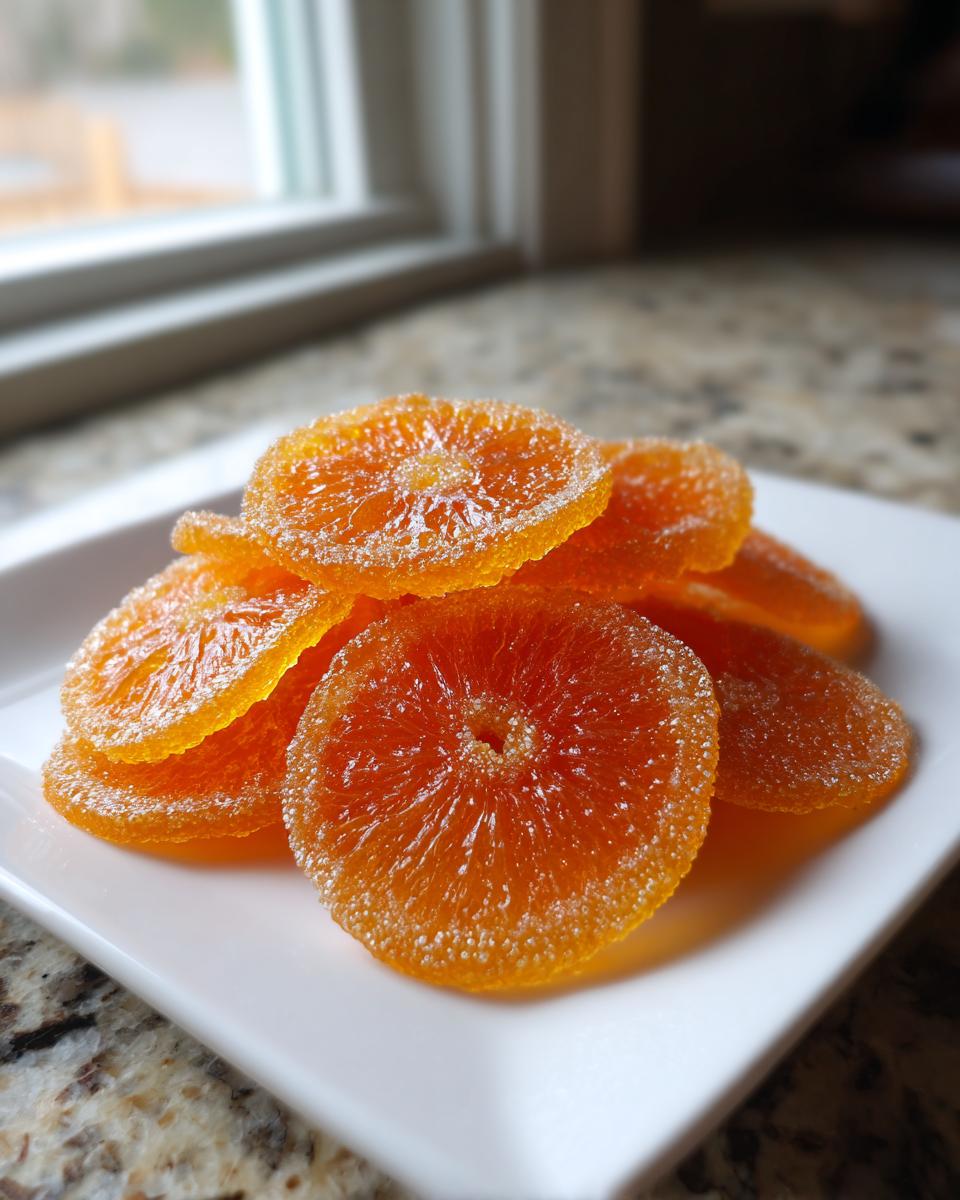
Sometimes, the most elegant treats are born from the simplest kitchens. You know, the kind of sweets we remember from Grandma Daisy’s house—those that look fancy but hide a secret simplicity? Well, these **candied orange slices** fit that description perfectly. When I started recreating my grandmother’s foundational recipes here at Daisy’s Recipes, I wanted to make sure every step honored that philosophy of keeping things honest and high-quality. Trust me, achieving those glossy, perfectly translucent slices is easier than you think! We aren’t just making snacks; we are creating little jewels that can elevate everything from a simple cheese board to a stunning, **gourmet orange garnish** for your next big cake. For more ideas on showcasing bright citrus flavors, you should check out my recipe for moist and easy orange juice cake. I’m Amelia Rosewood, and I can’t wait to share this timeless magic with you.
- Why You Will Love This Classic Candied Orange Slices Recipe
- Ingredients Needed for Homemade Candied Orange Slices
- How to Make Candied Orange Slices: A Step-by-Step Guide
- Tips for Perfect Translucent Orange Slices
- Variations on Classic Candied Orange Slices
- Serving Suggestions for Your Tangy Sweet Orange Slices
- Storage and Keeping Your Homemade Candied Orange Slices Fresh
- Frequently Asked Questions About Candied Orange Slices
- Nutritional Estimate for Candied Orange Slices
- Share Your Homemade Candied Orange Slices Creations
Why You Will Love This Classic Candied Orange Slices Recipe
Honestly, these slices just make you feel like you’ve accomplished something special without breaking a sweat! They are so versatile, you’ll use them constantly. Here’s why this recipe is going straight into your favorites cookbook:
- They bake up into that perfect, slightly **chewy orange candy** texture we all love.
- The resulting slices look so elegant—perfect for serving as **edible homemade gifts**.
- Seriously simple—it’s just oranges, water, and sugar to start!
- You can jazz them up with chocolate dipping for extra flair!
For pairing ideas, these treats go beautifully alongside a glass of my make-ahead holiday sangria.
Ingredients Needed for Homemade Candied Orange Slices
You’ll be thrilled by how few things you need to pull off these beautiful **candied orange slices**! This recipe is intentionally straightforward because preserving the natural brightness of the orange is what matters most. We are aiming for that translucent, shiny look, and the core ingredients are simple: oranges, water, and white sugar. My advice, gleaned from one too many uneven batches, is to choose your oranges wisely. You want them firm and ideally all about the same size—think three small oranges or maybe a couple of the larger tangelos.
Why uniform size? Because when you simmer them, if one slice is paper-thin and the next is thick as a coin, the thin one dissolves while the thick one stays tough. We want them all cooked through together! The other key elements are for the finishing touches. If you want to take them up a notch and make them into the ultimate **edible homemade gifts**, you will need about four ounces of good quality dark chocolate—the higher the cacao, the better the contrast with the sweet-tart orange. A little sprinkle of flaky sea salt on top of the chocolate just makes everything sing, too. For the full recipe, I’ve detailed the exact amounts, but focus on getting those oranges right before you even think about the sugar.
When you’re ready to bake, maybe you’ll want to check out my recipe for a richer dessert, like my cranberry orange cake, which uses similar bright flavors!
How to Make Candied Orange Slices: A Step-by-Step Guide
Making truly beautiful **candied orange slices** is all about patience during the cooking process. Don’t rush anything, especially the first step! If you follow my instructions here, you’ll end up with slices that look like stained glass—shimmering, slightly chewy, and bursting with that tangy sweet orange flavor we are aiming for. For more inspiration on using these bright citrus flavors, have a look at my recipe for moist and easy orange juice cake.
Preparing the Oranges and Removing Bitterness
First things first: wash those oranges thoroughly! Then, you need to slice them very consistently, aiming for about 1/8 of an inch thick. Grab a sharp knife for this; thin slices absorb the sugar better. Because we want these to be sweet preserves, not bitter pith bombs, we have to blanch them. That means boiling them briefly, then immediately draining them, and doing that whole process two more times with fresh water. Yes, three times! This triple blanching is the non-negotiable secret to making sure your final **candied orange slices** taste divine, not harsh.
Simmering the Slices in Simple Syrup Oranges
Now we build that sweet bath. You’ll make a simple syrup using equal parts sugar and water—so three cups of each, if you followed the main recipe. Bring that mixture to a rolling boil until the sugar completely disappears. Once dissolved, toss in your blanched orange slices. Turn the heat way, way down—we need a lazy, gentle simmer, people! This part takes time, usually 45 minutes to an hour. You’ll know they are ready when they look soft and translucent, meaning they have truly absorbed that syrup. This is exactly how we turn them into those wonderful **sweet preserved oranges**.
If you want them extra chewy, let them go for the full hour. If you need some syrup for other things—maybe brush it on a cake? My homemade caramel recipe uses similarly thick syrup!—you can save the leftover liquid after you pull out the fruit.
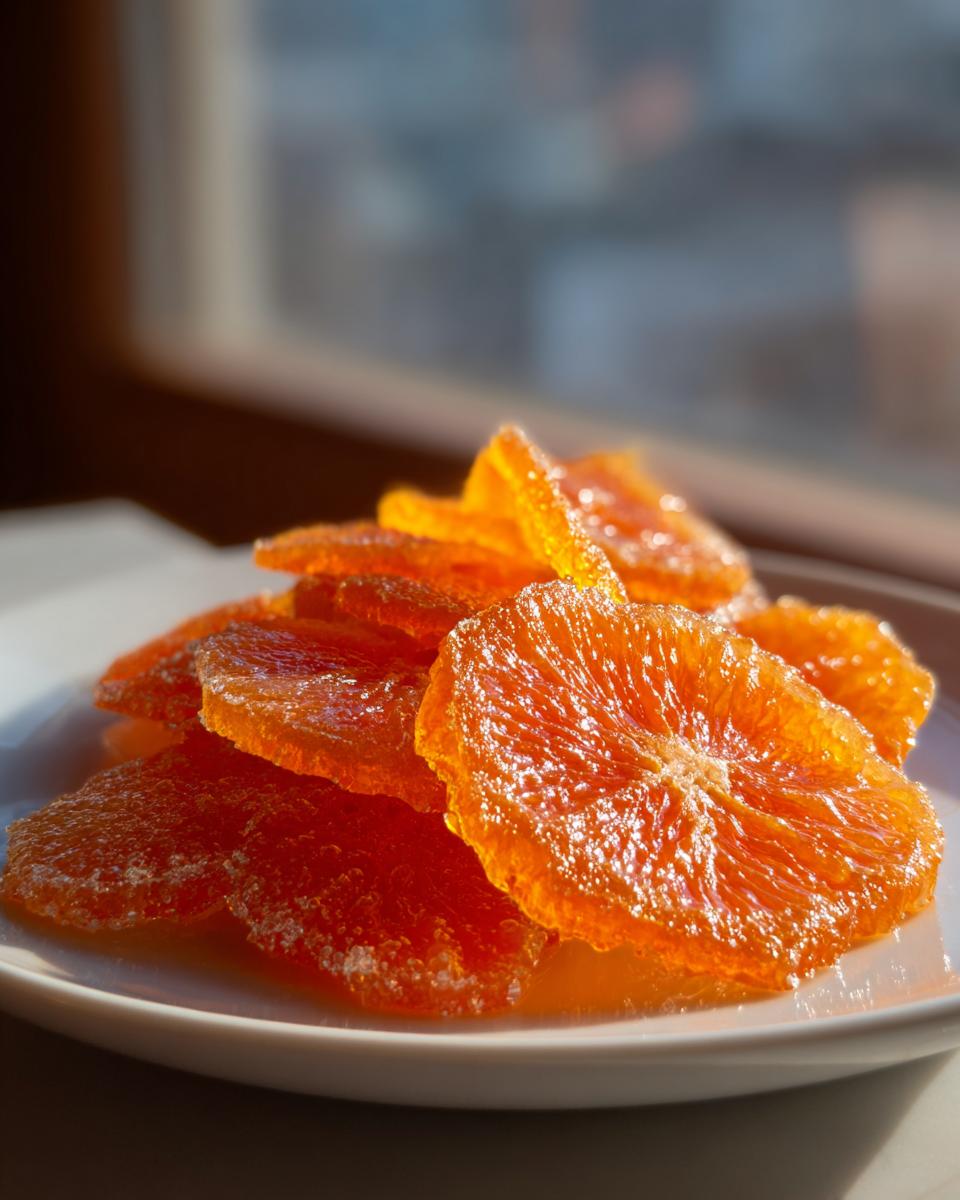
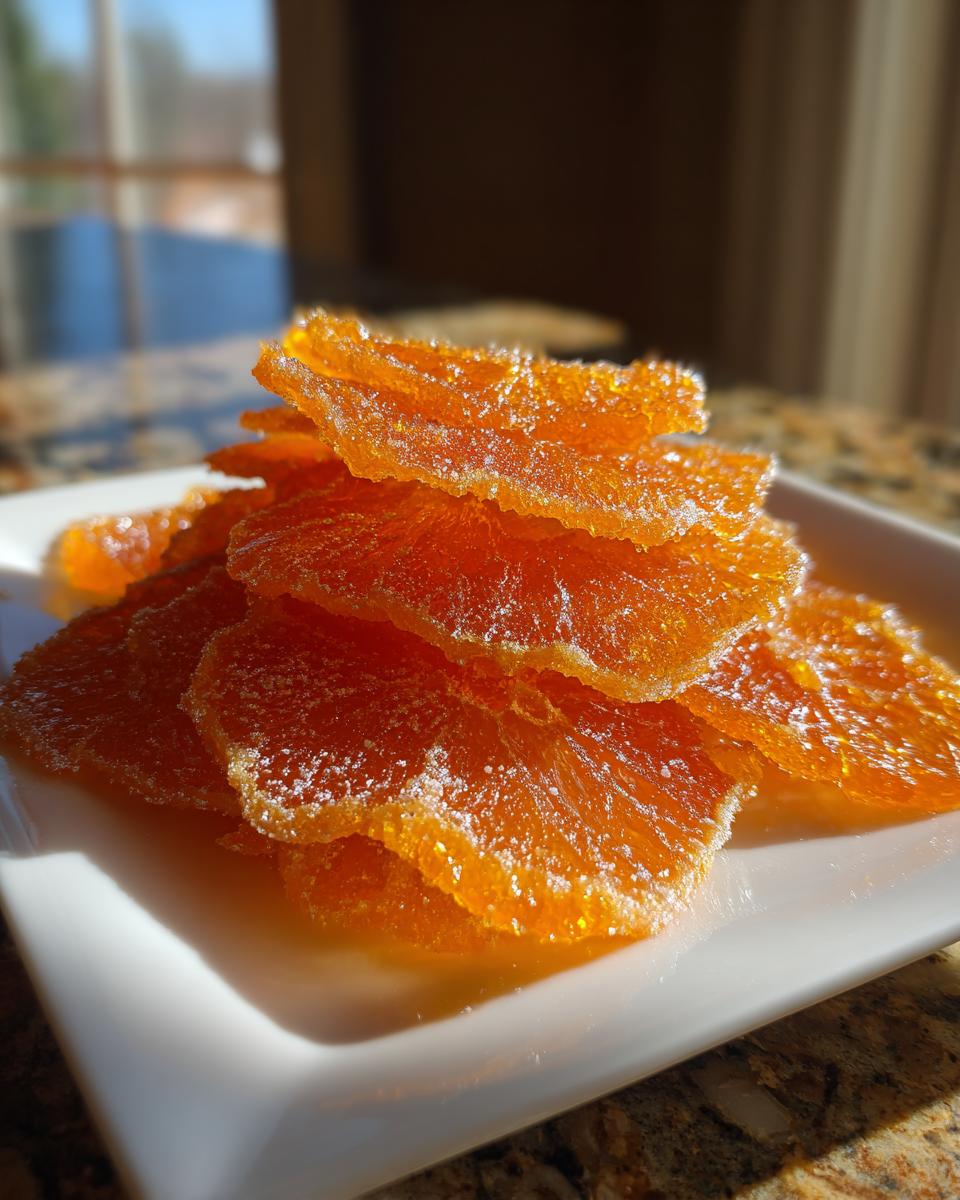
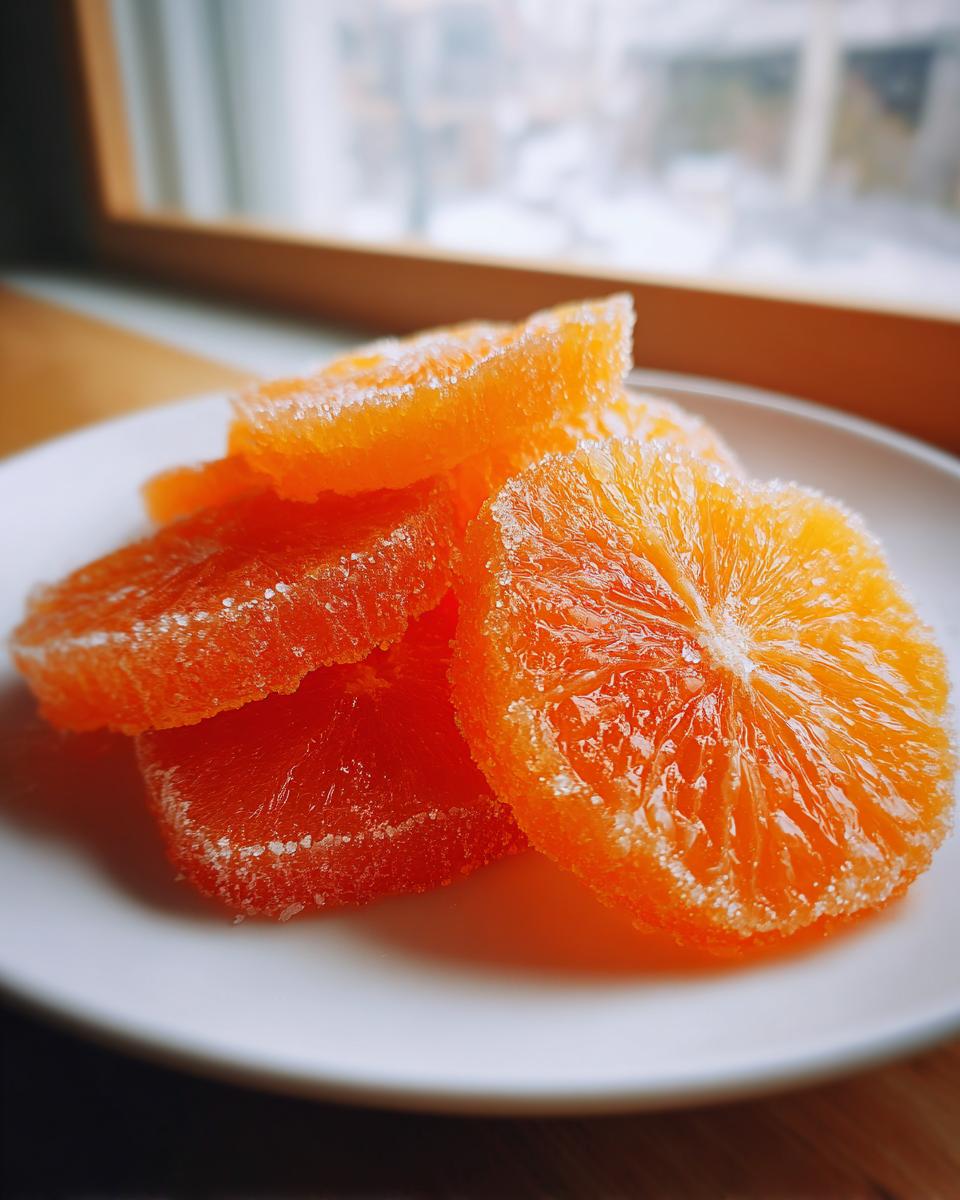
Drying and Finishing Your Candied Orange Slices
This next step is where you have to trust the process! Carefully lift the slippery slices out of the syrup with tongs and let them drip for a moment. Then, lay them out on a wire rack set over a baking sheet. Do not stack them! They need space to air dry. You are looking at 12 to 24 hours at room temperature until they feel dry to the touch and have that hard, glossy shell. Don’t try to speed this up too much—a low oven setting can work in a pinch, but they dry unevenly. Once fully dry, you have your classic treat! If you’re feeling fancy, melt some chocolate (you can find my favorite method for easy chocolate fudge to use as a base!) and dip half of each slice. A little pinch of flaky sea salt on the wet chocolate? Perfection! People rave about these garnishes for cocktails.
If you have leftover homemade vanilla buttercream, this is the perfect topping for a cake those slices will decorate! I know some folks over at Miss Cooks have a great take on finishing these up, too!
Tips for Perfect Translucent Orange Slices
Okay, listen up, because this is where people mess up their beautiful citrus work. We need to talk about heat and patience. If you want those picture-perfect, shiny, **translucent orange slices**, you absolutely cannot rush the cooking part. I learned this the hard way—trying to boil the syrup instead of simmering it turns the oranges into mush really fast. Remember during the simmer, we were aiming for tender, right? Don’t let that syrup get angry; keep it barely wobbling at a low temperature. If it seems too sticky while simmering, just add a splash more water, but keep the heat down low.
Now, let’s talk texture, because some people like them soft, and others want that satisfying, slightly firmer bite that makes them truly feel like **chewy orange candy**. If you want that extra chewiness, push past the 50-minute mark during simmering. The longer they cook in the sugar bath, the more the pectin sets up, making them tougher (in a good way!).
But the real trust-builder, the thing that guarantees success, is the drying time. I know you’re eager to dip them in chocolate, but you must let them air dry for a full 12 hours minimum. If you try to rush drying, they’ll leach moisture back out of the air, and you’ll end up with sticky puddles instead of elegant decorations. I know sometimes life doesn’t wait, and if you absolutely must speed things up, you can place them on a rack in an oven set to its absolute lowest temperature—like 150°F—for about an hour. Keep the door cracked open so the steam can escape! It almost works, but air drying on the counter is always, always better for that professional glaze look. For more reliable cooking tips, check out how I handle tricky sauces in my easy chicken Marsala recipe; it’s all about controlling the heat!
Variations on Classic Candied Orange Slices
While the basic recipe for **candied orange slices** is magnificent on its own, you know me—I love tweaking things just a little bit to see what magical new flavor we can unlock! This basic method is so foolproof, it’s perfect for experimenting with other **orange confection recipe** ideas.
The most obvious swap is the citrus itself. Why stick to just oranges? I have made stunning batches using thinly sliced lemons—they come out a little tarter, which is amazing—or even using grapefruit, though those are quite large! Just remember, if you switch fruits, you might need to slightly adjust the simmering time if the slices vary in thickness from the original oranges.
If you want to lean into that warm, cozy feeling, especially now that we are heading toward the holidays, try adding some gorgeous warm spices to that simple syrup while it’s simmering. A couple of cinnamon sticks or even a single star anise pod floating in there adds such an elegant, subtle background note that really elevates the final product. Don’t use too much, though; we don’t want to overpower that lovely orange scent!
The best part? Because we start with just fruit and sugar, these remain wonderfully inclusive. If you are baking for friends who prefer plant-based foods, you are already set! This recipe is inherently vegan, which means you can feel great serving your beautiful **tangy sweet orange slices** to everyone. If you’re looking for a great non-alcoholic sipper to serve alongside these citrus wonders, you absolutely must try my peppermint espresso martini recipe—sub out the espresso for strong black tea to keep it cozy!
Serving Suggestions for Your Tangy Sweet Orange Slices
Once you have your dazzling, glossy **tangy sweet orange slices** ready, the real fun begins: figuring out how to show them off! Because we took the time to make them look so professional, we shouldn’t just hide them in a container. They deserve a spotlight!
My absolute favorite use is when they become a fancy **gourmet orange garnish.** If you are mixing up cocktails—whether it’s an Old Fashioned or maybe something sparkly—draping one of these over the rim instantly makes the drink look like it came straight from a high-end bar. It’s the simplest way to nail that perfect **cocktail garnish recipe** presentation without much effort at all.
They are also incredible for decorating baked goods. Forget those boring sprinkles; use these shiny slices as your main feature! They add amazing texture and color to the top of cheesecakes, bundt cakes, or even cookies. It’s a fantastic source of **baking decoration ideas** that tastes 100 times better than plastic frosting. They look fantastic arranged in a fan pattern on top of a rich dark chocolate cake.
And please, don’t forget cheese boards! When I put out a platter for guests, I always tuck a few of these in near the brie or a sharp cheddar. The sweet-tart component cuts through the richness of the cheese beautifully. Honestly, once you see how handsome these **candied orange slices** look, you’ll be searching for excuses to use them everywhere!
If you need something rich and fudgy to balance the tartness of the oranges, you have to try my recipe for peppermint brownies. They are surprisingly fudgy and the mint plays so nicely with the citrus finish!
Storage and Keeping Your Homemade Candied Orange Slices Fresh
So you’ve gone through the work—the blanching, the simmering, the glorious 24 hours of drying—and now you have this gorgeous haul of preserved citrus! The big question is: how do we keep them looking this good? Luckily, they are pretty resilient because they are basically made of sugar, which acts as a natural preservative, thank heavens.
The number one, absolute best way to keep your **candied orange slices** fresh is to let them breathe just a little bit, but keep them protected. You absolutely must store them in an airtight container, but keep that container at room temperature—nothing in the fridge, please! The fridge can sometimes make them sweat or encourage them to stick together again, and we worked way too hard for sticky goo. If you’ve stored them well, they should stay perfectly glossy and delicious for up to two weeks. Sometimes I’ll layer them with a small square of parchment paper between the layers just to be extra safe, but honestly, a loose layer is usually fine.
Now, what if they get a little sad on you? Say a few weeks pass, or maybe the damp weather crept in and they look a little soft or slightly sticky? Don’t panic and throw them out! We can revive them quickly. If they have lost their snap, pop them back onto a clean wire rack set over a baking sheet and put them in a very low oven—think 175°F (77°C). Give them about 30 to 45 minutes, keeping a close eye on them. This gentle heat just helps any residual moisture evaporate, bringing back some of that firmness. It’s not quite as good as the original air dry, but it’s a fantastic fix!
If you decided to make the dipped version, the chocolate-dipped ones are slightly more delicate, mainly because the chocolate can melt if it gets too warm. Keep those away from direct heat sources. If you’re looking for another simple recipe to batch-make alongside these candies, you should look at my favorite recipe for easy 3-ingredient chocolate fudge; it lasts forever and is great for gifting!
Frequently Asked Questions About Candied Orange Slices
I totally get it—when you see a recipe like this, your brain immediately starts sparking ideas and questions! It’s great that you’re thinking ahead about using these treats. I’ve gathered a few of the things people always ask me about making these **sweet preserved oranges**.
Can I make candied orange slices faster than 24 hours?
That is the eternal question when you need something *now*! You can definitely get the cooking part done quickly—the simmering only takes about an hour, so you’ve got that part beat. However, you cannot rush the drying process if you want that beautiful, glossy, non-sticky finish. The 12 to 24 hours of air drying is non-negotiable for achieving truly professional **candied orange slices**. If you try to put them in a low oven, they tend to dry out unevenly or even scorch the sugar before the moisture fully evaporates. I’d really only suggest the low oven trick (150°F with the door ajar) if you are absolutely desperate, but my advice is to make these on a Saturday so they are perfect for Sunday’s fun!
What can I do with the leftover simple syrup?
Oh my goodness, please don’t toss that syrup! That is pure, concentrated, orange-infused sweetness down the drain, and that would make Daisy gasp! That syrup is fantastic. If you’ve got leftover **simple syrup oranges** mixture, pour it into a clean jar and store it in the fridge. It’s amazing added to tea—hot or iced—to give it a lovely citrus boost. You can also use it exactly as you would simple syrup in cocktails, or perhaps thin it out with a little water and use it as a glaze for your next cake. It’s especially wonderful brushed over a plain pound cake. If you try using it on my cherry cake, let me know how you like the orange twist!
Are chocolate dipped candied orange slices considered vegan?
This is a smart question, especially since the base recipe is already totally vegan! Yes, your **chocolate dipped candied orange slices** can absolutely remain vegan, but you have to check that chocolate label! Most high-quality dark chocolate, especially anything 70% cacao or higher, is naturally dairy-free (just sugar, cocoa solids, and maybe vanilla). If you use a milk chocolate, of course, it immediately switches to non-vegan. So, just grab the darkest chocolate you can find that doesn’t list milk solids or butterfat. That way, your elegant **holiday citrus treats** are safe for everyone!
If you’re looking for other easy desserts that fit dietary needs, my recipe for an easy no-bake ice cream pie can often be adapted easily, depending on the crust and ice cream you choose!
Nutritional Estimate for Candied Orange Slices
Okay, so we all know these beautiful **candied orange slices** are made primarily of fruit and sugar, so they aren’t exactly a low-sugar snack, but they sure beat a processed candy bar, right? Remember, since we are candying them, they absorb a good amount of that simple syrup during the simmer, which definitely bumps up the sweetness and calorie count. This section gives you a rough idea, but please take it with a grain of salt—or maybe a sprinkle of that flaky sea salt we added!
This estimate is purely for one plain slice of orange candy, without any of the optional dark chocolate dipping or extra salt. The nutrition will definitely change if you dip them, so if you add that lovely coating, add the calories and fat from the chocolate on top of this base figure. If you’re looking for some lighter ways to start your day, I have some fantastic healthy breakfast ideas you might enjoy while these are drying!
Here is the general breakdown per serving (one slice):
- Serving Size: 1 slice
- Calories: 120
- Sugar: 30g (Yes, that’s mostly from the deep sugar bath!)
- Carbohydrates: 30g
- Protein: 0g
- Fat: 0g
- Cholesterol: 0mg
- Sodium: 1mg (Only what was naturally in the orange)
The main goal here isn’t the nutritional breakdown—it’s the joy of making something beautiful and delicious from scratch! These are meant for savoring in small amounts, maybe to top a slice of cake or enjoy as an elegant little treat!
Share Your Homemade Candied Orange Slices Creations
Now that you’ve made these beautiful, glistening **candied orange slices**, I just have to know what you did with them! Seriously, the best part of keeping Daisy’s legacy alive here is seeing how you all adapt and enjoy these simple, wonderful recipes in your own kitchens. Did you leave them plain and shiny? Did you go for the decadent chocolate dipped candied orange slices, maybe adding a drizzle of almond extract to the chocolate?
I would be absolutely thrilled if you took a minute right now to leave a rating right down below. Did this recipe work perfectly for you? Or maybe you tried adding some cardamom during the simmer—we love hearing about those small tweaks that make the recipe your own! Drop all your lovely comments, pictures (if you can upload them!), or any questions you have in the comments section. This feedback helps me make sure the next person who tries these amazing **holiday citrus treats** has just as much fun as you did.
If you’ve got a particularly amazing use for these citrus jewels—maybe a spectacular cake topper or a favorite cocktail presentation—please share the inspiration! And if you ever need to send me a direct note or feedback outside of the comments, you can always reach out through the contact page. Happy baking, friends!
PrintClassic Homemade Candied Orange Slices

Make glossy, sweet-tart candied orange slices using a simple process. These translucent treats are perfect for cake decoration, cocktail garnishes, or dipping in chocolate for an edible homemade gift.
- Prep Time: 20 min
- Cook Time: 1 hr 15 min
- Total Time: 1 hour 35 min
- Yield: About 20 slices 1x
- Category: Dessert
- Method: Simmering
- Cuisine: American
- Diet: Vegan
Ingredients
- 3 small oranges or tangelos
- 3 cups granulated white sugar
- 3 cups water
- Optional: 4 ounces dark chocolate for dipping
- Optional: Flaky sea salt for garnish
Instructions
- Wash the oranges well. Slice each orange thinly, about 1/8 inch thick. Discard any seeds.
- Place the orange slices in a medium saucepan and cover them completely with cold water. Bring the water to a boil, then immediately drain the oranges. This step removes bitterness. Repeat this blanching process two more times with fresh water each time.
- In the same saucepan, combine the 3 cups of sugar and 3 cups of water to create a simple syrup. Bring the mixture to a boil over medium heat, stirring until the sugar dissolves completely.
- Add the blanched orange slices to the boiling syrup. Reduce the heat to low and simmer gently for about 45 to 60 minutes, or until the slices become translucent and tender. Do not let the syrup boil rapidly.
- Carefully remove the slices from the syrup using tongs or a slotted spoon. Let excess syrup drip off.
- Place the slices in a single layer on a wire cooling rack set over a baking sheet. Allow them to dry completely at room temperature for at least 12 to 24 hours. The slices should feel dry to the touch and look glossy.
- If you choose to dip them, melt the dark chocolate in a double boiler or microwave. Dip half of each dried slice into the melted chocolate.
- Place the chocolate-dipped slices back onto the clean wire rack. Sprinkle lightly with flaky sea salt, if using. Let the chocolate set completely before serving or storing.
Notes
- For a chewier candy, simmer the oranges for the full 60 minutes. For a softer slice, reduce the simmering time slightly.
- Store finished candied orange slices in an airtight container at room temperature for up to two weeks.
- Use these slices as a gourmet orange garnish for cocktails or as baking decoration ideas for cakes.
Nutrition
- Serving Size: 1 slice
- Calories: 120
- Sugar: 30g
- Sodium: 1mg
- Fat: 0g
- Saturated Fat: 0g
- Unsaturated Fat: 0g
- Trans Fat: 0g
- Carbohydrates: 30g
- Fiber: 1g
- Protein: 0g
- Cholesterol: 0mg