
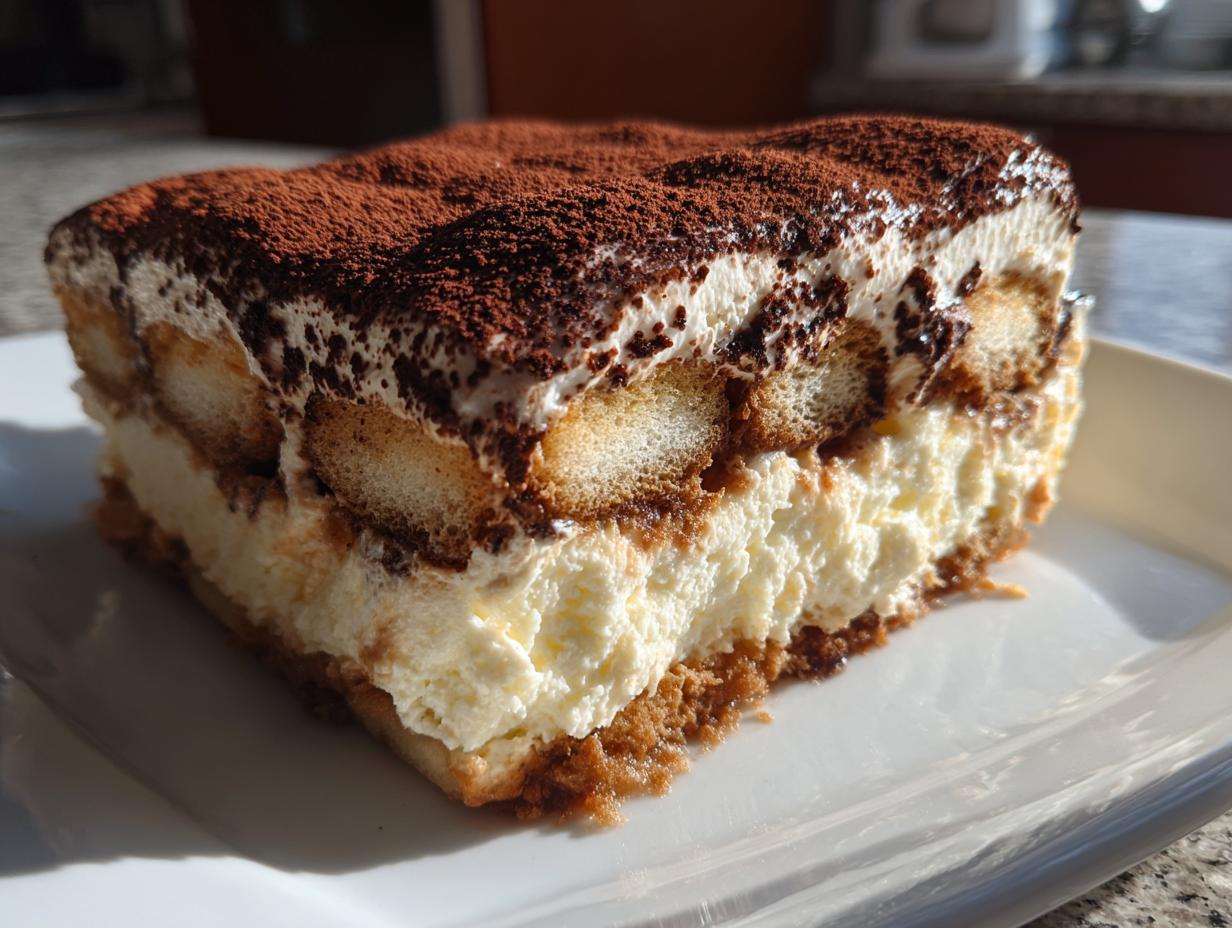
There’s a special kind of magic that happens when two incredible desserts decide to hold hands in the kitchen. I live for those hybrid creations! My grandmother, Daisy, always kept things simple and real, which is why I’m reclaiming that slow-kitchen feeling today, even amidst the city rush. And honestly, nothing shouts comfort and elegance quite like the ultimate fusion dessert: the tiramisu cheesecake. It takes everything we adore about Italian coffee indulgence and wraps it up in that irresistible, velvety cheesecake texture. The best part? This particular version lets us skip the oven entirely. Trust me, this no-bake recipe is so easy to pull together, and it’s ready to impress whenever you need something spectacular without the fuss. You can find more of our easy-to-love treats in our collection of delicious dessert recipes.
- Why This No-Bake Tiramisu Cheesecake Recipe Works (The Ultimate Cheesecake Fusion)
- Gathering Ingredients for Your Tiramisu Cheesecake
- Step-by-Step Instructions for the No Bake Tiramisu Cheesecake Recipe
- Expert Tips for the Perfect Tiramisu Cheesecake
- Serving Suggestions for Your Italian Inspired Dessert
- Storage and Make Ahead Tips for Tiramisu Cheesecake
- Common Questions About Making Tiramisu Cheesecake
- Nutritional Estimates for This Coffee Flavored Cheesecake
- Share Your Decadent Holiday Desserts Experience
Why This No-Bake Tiramisu Cheesecake Recipe Works (The Ultimate Cheesecake Fusion)
When you bring together the bold, rich coffee notes of tiramisu and the luxurious body of cheesecake, you end up with the ultimate cheesecake mashup. That’s what we have here! I love this recipe because we leave the oven off completely. That means no water baths, no delicate baking times, and absolutely no fear of cracks. This method guarantees that silky smooth cheesecake filling every single time.
For me, the true beauty lies in its make-ahead convenience. Since it needs to chill for hours anyway, I usually assemble it the day before a party. It’s one less thing to stress about when company is coming over. It’s practical, it tastes incredible, and it truly feels gourmet without needing any complicated steps. You can see how we keep things simple in our guide to easy no-bake cheesecake recipes, too.
Gathering Ingredients for Your Tiramisu Cheesecake
Pulling together this tiramisu cheesecake is all about having the right players ready to go. Since this doesn’t bake, the temperature of your dairy products is crucial—seriously, let that cream cheese and mascarpone warm up on the counter for at least an hour. I learned the hard way that cold cheese equals a lumpy filling, and we want silky smooth here!
For the Espresso-Soaked Ladyfinger Layer and Crust
For the base and those essential coffee layers, you’ll need:
- 1 1/2 cups chocolate wafer crumbs or graham cracker crumbs
- 6 tablespoons unsalted butter, melted (gotta have that fat for structure!)
- 1/4 cup strong brewed espresso or coffee, cooled
- 1 tablespoon granulated sugar
- For the soak: 1/2 cup strong brewed espresso or coffee, cooled, mixed with 1 tablespoon coffee liqueur (if you like a little kick!)
For the Creamy Mascarpone Cheesecake Filling
Now for the beautiful, rich part. Remember, make sure the cheese is soft but not greasy:
- 16 ounces cream cheese, softened
- 8 ounces mascarpone cheese, softened (this is the secret to that Italian texture!)
- 1 1/2 cups powdered sugar
- 1 teaspoon vanilla extract
- 1 cup heavy whipping cream, cold (must be cold for whipping those peaks!)
- Plus your package of 7 ounces of ladyfingers and cocoa powder for dusting at the very end.
Step-by-Step Instructions for the No Bake Tiramisu Cheesecake Recipe
This is where the magic happens, and since it’s no-bake, we keep things straightforward! Just follow these steps precisely, and you’ll have an absolutely stunning dessert that looks like you spent hours on it. Remember that you can easily incorporate this into your planning as one of the best easy make-ahead desserts.
Creating the Chocolate Cookie Crust Base
First things first, we need a sturdy base. In a bowl, mix your chocolate wafer crumbs, melted butter, sugar, and that first 1/4 cup of espresso. You’re aiming for something that sticks together when you squeeze it—the texture of really wet sand. Press this mixture firmly and evenly right into the bottom of your 9-inch springform pan. Don’t be shy; really compact it down! Once it’s flat and firm, pop that pan straight into the freezer. We want it rock solid while we handle the filling.
Mixing the Silky Smooth Cheesecake Filling
Grab your mixer for the filling! Start by beating your nice, soft cream cheese and mascarpone together until they look perfectly smooth, getting rid of any lumps early on. Then, slow and steady, mix in the powdered sugar and vanilla until everything is creamy. This is a crucial step for that creamy cheesecake recipe texture. Now, in a separate, super clean bowl, beat your cold heavy whipping cream until you form stiff peaks. Seriously, don’t stop until they hold their shape! Then, *gently* fold that whipped cream into your cheese mixture. Folding maintains all that beautiful air we just whipped in.
Assembling and Chilling the Layered Cheesecake Ideas
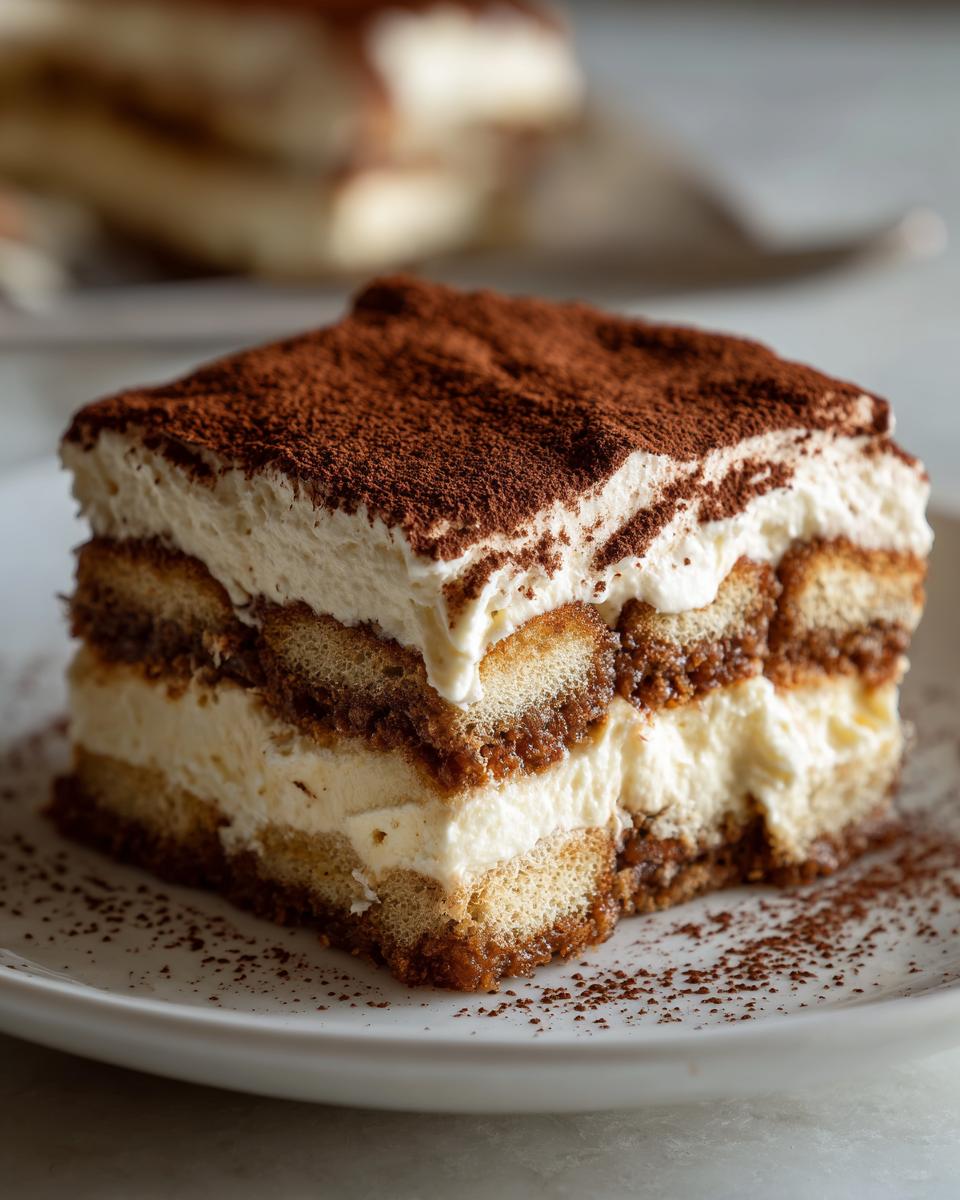
Time to build those classic tiramisu layers! Take your ladyfingers and dip each one *very briefly* into the leftover coffee/liqueur mixture. You just want to wet them; soggy fingers make for a floppy cake! Arrange the first layer of dipped ladyfingers right over your frozen crust. Spread about half of your creamy filling over them. Then, add your second layer of coffee-soaked ladyfingers, and top it all off with the remaining filling, smoothing the top nicely. Cover this beautiful tiramisu cheesecake loosely and move it to the fridge. It needs a minimum of 6 hours, but honestly, overnight is when it shines!
Expert Tips for the Perfect Tiramisu Cheesecake
You know, making something this decadent requires a little bit of know-how. Even though this is a no-bake dessert, the texture needs to be just right—that perfect balance between the rich filling and the coffee layers. I’ve learned a few tricks over the years of making this mascarpone dessert that ensure it comes out exactly how Daisy taught me: flawless and full of flavor. These little pointers are what elevate it from good to unforgettable. If you’re ever looking for other rich, comforting baked goods, check out my guide on Italian butter cookies for reference.
Achieving Intense Espresso Desserts Flavor
If you ask me, the coffee has to be the star here, right? It can’t taste watery! My biggest recommendation for these espresso desserts is to skip the weak drip coffee. You want serious punch. Use a Moka pot, an AeroPress, or even better, use instant espresso powder dissolved in boiling water. That concentrate means you don’t have to soak the ladyfingers for ages, and you get deep flavor without them turning to mush.
And about that coffee soak—if you’re making this for adults, definitely don’t skip the optional coffee liqueur! If you don’t have liqueur on hand, sometimes I’ll add a tiny splash of dark rum or even just a drop of vanilla bean paste to the soak water to give it that complex flavor depth that just screams ‘gourmet.’
Troubleshooting Common Issues
Let’s talk about the panic moments, because we’ve all had them! If you pull your cheesecake out of the fridge and the filling seems a little too soft—maybe you rushed folding in that whipped cream—don’t toss it! Just cover it back up and give it a few more hours. Sometimes it just needs longer to firm up, especially if your heavy cream wasn’t fully stiff.
The other big issue is lumps in the cheese base. If you see little chunks after mixing the cream cheese and mascarpone, it usually means your dairy was too cold. The quick fix? Set the bowl—before you add the sugar—over a pan of very warm (not hot!) water for about a minute while gently stirring. That little bit of warmth helps the fats blend beautifully. It’s a simple fix that saves a batch of what would otherwise be a slightly grainy filling!
Serving Suggestions for Your Italian Inspired Dessert
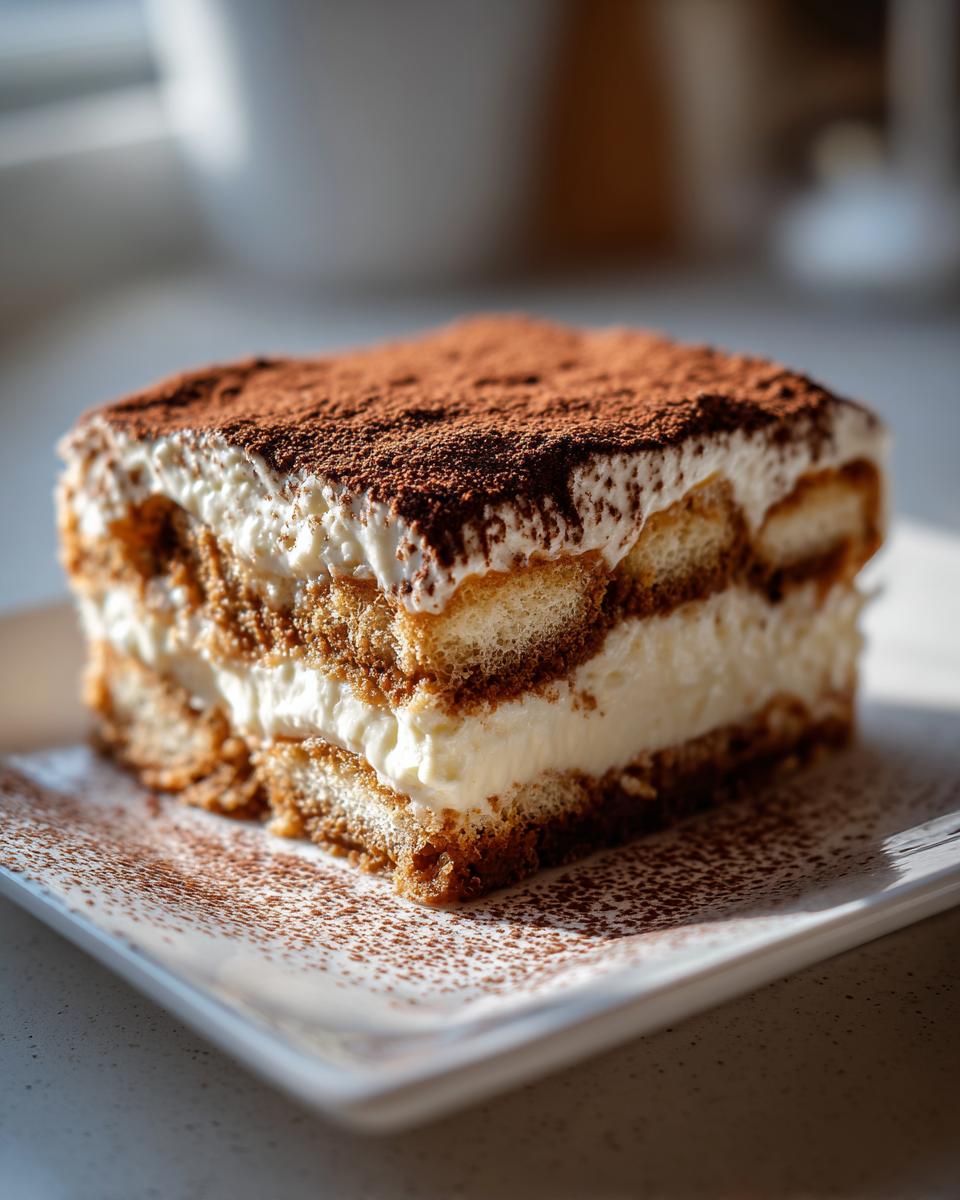
Presentation is where this tiramisu cheesecake truly gets to show off! Because this is an elegant, layered dessert, you want to treat it like true art before you slice into it. The very last step, the one that feels so final, is dusting the top generously with unsweetened cocoa powder.
I use a fine-mesh sieve for this—it’s the only way to get that light, even cloud of dark brown powder that contrasts perfectly with the white filling underneath. Don’t be timid with the cocoa; it’s essential for that authentic tiramisu flavor hit right at the start. If you’re planning this out for a big event, this absolutely qualifies as a showstopper dinner party cheesecake.
When it comes to what to serve alongside it, you want something that plays nicely with coffee and cream, right? I often avoid anything too heavy. If you want a fruit element, something bright and tart works beautifully to cut through the richness of the mascarpone. Think simple caramelized orange slices or maybe some lightly sweetened raspberries.
If you are looking for another impressive accompaniment, I highly recommend looking at techniques for poaching fruit. For example, my simple poached pears with vanilla and bourbon served on the side offer a sophisticated, warm counterpoint to the cold, creamy cheesecake. Just make sure whatever you serve, it doesn’t compete with that perfect espresso flavor built into the base!
Storage and Make Ahead Tips for Tiramisu Cheesecake
Because this is my favorite kind of dessert—the one that actually gets *better* overnight—storage is super straightforward! Since we didn’t turn on the oven, our focus is just keeping that filling beautifully chilled and preventing our lovely cocoa dusting from getting damp.
This no-bake version is truly the definition of an easy make ahead dessert. You absolutely must chill it for a minimum of six hours, but I promise you, the flavors meld together overnight in the best possible way. The coffee from the ladyfingers seeps just enough into the creamy filling to deepen everything. It’s worth the patience!
Once it’s fully set, keep your **tiramisu cheesecake** covered tightly in the springform pan (or transferred carefully to an airtight container) and store it in the refrigerator. It holds up wonderfully for up to four days! I find the texture is still heavenly on day three.
Now, what about freezing? This is always a tricky question for cheesecakes. Because we folded in heavy whipped cream for airiness, freezing and thawing can sometimes make the texture a little weepy when it comes back to room temperature. If you absolutely must freeze it, do so *before* you dust it with cocoa powder. Wrap the entire cheesecake snuggly in a double layer of plastic wrap, and then maybe a layer of foil. It should last about a month. When thawing, move it to the fridge overnight first, and then let it warm on the counter for about an hour before serving. Just remember to dust it with fresh cocoa powder right before you slice it!
Common Questions About Making Tiramisu Cheesecake
When you start making something this fun, you naturally have a few questions! I always get asked about variations and substitutions when the base recipe comes out so perfectly. I’ve gathered the most common ones here to hopefully save you a little time worrying and get you back to the mixing bowl. If you’re looking for inspiration on other creamy creations, take a peek at my chocolate chip cheesecake recipe!
Can I bake this Tiramisu Cheesecake Recipe?
That’s a great question, especially if you prefer a traditional texture! This specific recipe, however, is designed from the ground up to be a gorgeous, creamy, no-bake option. If you tried to bake this mixture, the high volume of whipped cream and the lack of eggs (which act as a binder when baked) would likely cause it to deflate into soupiness rather than set beautifully like a firm, baked cheesecake would. We rely on that long chill time to achieve smoothness here!
What is the best substitute for ladyfingers in this dessert?
Ladyfingers are ideal because they are light and soak up the coffee beautifully without disintegrating immediately, which is crucial for that authentic ladyfinger crust dessert feel in the middle layer. If you truly can’t find them, you can get away with using very thin, plain shortbread cookies, or even crushed wafers. If you use crackers, treat them really fast during the dip—you don’t want them to soak up too much liquid before they even reach the pan. It changes the final mouthfeel of these tiramisu inspired treats, but it absolutely still tastes delicious!
Nutritional Estimates for This Coffee Flavored Cheesecake
Now, when we talk about creating something this rich and decadent, we should probably mention what we’re fueling up with! I always tell folks in the kitchen that baking is a joyful act, not a restrictive one, but knowing a little bit about what’s in your slice of heaven is always helpful, especially when planning a big dinner party menu.
The numbers below are my best estimate for one slice of this glorious coffee flavored cheesecake. Since this is a no-bake recipe relying heavily on cream cheese and mascarpone, it is certainly rich in flavor and fat, which is part of what makes it so utterly satisfying. Remember, these are just baseline estimates based on the ingredients listed—using full-fat dairy means these numbers will reflect that luxurious decadence!
Use this information as a guide, not a strict rule. My grandmother, Daisy, always said, “If it’s made with love, it’s good for the soul!”
- Serving Size: 1 slice
- Calories: 450
- Total Fat: 30g (18g Saturated Fat)
- Carbohydrates: 40g
- Protein: 7g
- Sugar: 35g
We’re aiming for flavor and texture over low-calorie counts here, which is perfectly fine for a special treat! Enjoy every single bite of this tiramisu cheesecake; you’ve earned it.
Share Your Decadent Holiday Desserts Experience
Well, here we are on the other side of the mixing bowls! I truly hope you treat yourself and whip up this tiramisu cheesecake soon. Whether you decide it’s for a casual Sunday dessert or you save it for those big, beautiful holiday moments—it never disappoints.
I cannot tell you how much joy it brings me to know that one of Daisy’s old kitchen secrets is finding a new home in your refrigerator. When you make this, please, please come back and leave a rating. Did the ladyfingers soak up the espresso just right? Was the mascarpone filling as smooth for you as it was for me? I read every single comment!
And if you’re feeling extra brave, snap a picture of your final product—especially that glorious cocoa-dusted top—and share it! Tagging me lets me see how you styled your own decadent holiday desserts. Even a quick note makes a difference, connecting us past the screen and right back to what my grandma loved most: sharing good food made with love.
If you’re already looking for your next baking adventure after conquering this fusion, I have a wonderful recipe for soft Christmas Sprinkle Cookies that just screams celebration. Happy baking, my friend!
PrintNo-Bake Tiramisu Cheesecake: A Creamy Fusion Dessert
You create a luxurious dessert by combining the creamy texture of cheesecake with the coffee and cocoa flavors of classic Italian Tiramisu. This no-bake recipe uses espresso-soaked ladyfingers for an authentic taste.
- Prep Time: 30 min
- Cook Time: 0 min
- Total Time: 6 hours 30 min
- Yield: 10 servings 1x
- Category: Dessert
- Method: No Bake
- Cuisine: Italian Inspired
- Diet: Vegetarian
Ingredients
- 1 1/2 cups chocolate wafer crumbs or graham cracker crumbs
- 6 tablespoons unsalted butter, melted
- 1/4 cup strong brewed espresso or coffee, cooled
- 1 tablespoon granulated sugar
- 16 ounces cream cheese, softened
- 8 ounces mascarpone cheese, softened
- 1 1/2 cups powdered sugar
- 1 teaspoon vanilla extract
- 1 cup heavy whipping cream, cold
- 1 package (7 ounces) ladyfingers
- 1/2 cup strong brewed espresso or coffee, cooled, mixed with 1 tablespoon coffee liqueur (optional)
- Unsweetened cocoa powder, for dusting
Instructions
- Prepare the crust: Mix the chocolate wafer crumbs, melted butter, 1 tablespoon of granulated sugar, and 1/4 cup of cooled espresso in a medium bowl until the mixture resembles wet sand. Press this mixture firmly and evenly into the bottom of a 9-inch springform pan. Place the pan in the freezer while you prepare the filling.
- Make the cheesecake filling: In a large bowl, beat the softened cream cheese and mascarpone cheese with an electric mixer until smooth. Gradually add the powdered sugar and beat until fully combined and creamy. Beat in the vanilla extract.
- Whip the cream: In a separate, clean bowl, whip the cold heavy whipping cream until stiff peaks form. Gently fold the whipped cream into the cream cheese mixture until just combined. Do not overmix.
- Assemble the layers: Dip each ladyfinger briefly into the remaining espresso/coffee mixture (with or without liqueur). Arrange a single layer of the soaked ladyfingers over the chilled crust.
- Spread half of the cheesecake filling over the ladyfinger layer. Top with a second layer of dipped ladyfingers. Spread the remaining cheesecake filling evenly over the top.
- Chill: Cover the pan loosely with plastic wrap and refrigerate for at least 6 hours, or preferably overnight, until the cheesecake is completely set and firm.
- Serve: Before serving, carefully remove the sides of the springform pan. Dust the top generously with unsweetened cocoa powder using a fine-mesh sieve. Slice and serve this decadent dessert.
Notes
- For a richer coffee flavor, use strong espresso instead of brewed coffee for soaking the ladyfingers.
- If you skip the optional coffee liqueur, you can add 1 teaspoon of rum extract to the soaking liquid for depth.
- Use high-quality, room-temperature cream cheese and mascarpone to prevent lumps in your silky smooth cheesecake filling.
Nutrition
- Serving Size: 1 slice
- Calories: 450
- Sugar: 35g
- Sodium: 250mg
- Fat: 30g
- Saturated Fat: 18g
- Unsaturated Fat: 12g
- Trans Fat: 0g
- Carbohydrates: 40g
- Fiber: 1g
- Protein: 7g
- Cholesterol: 95mg