
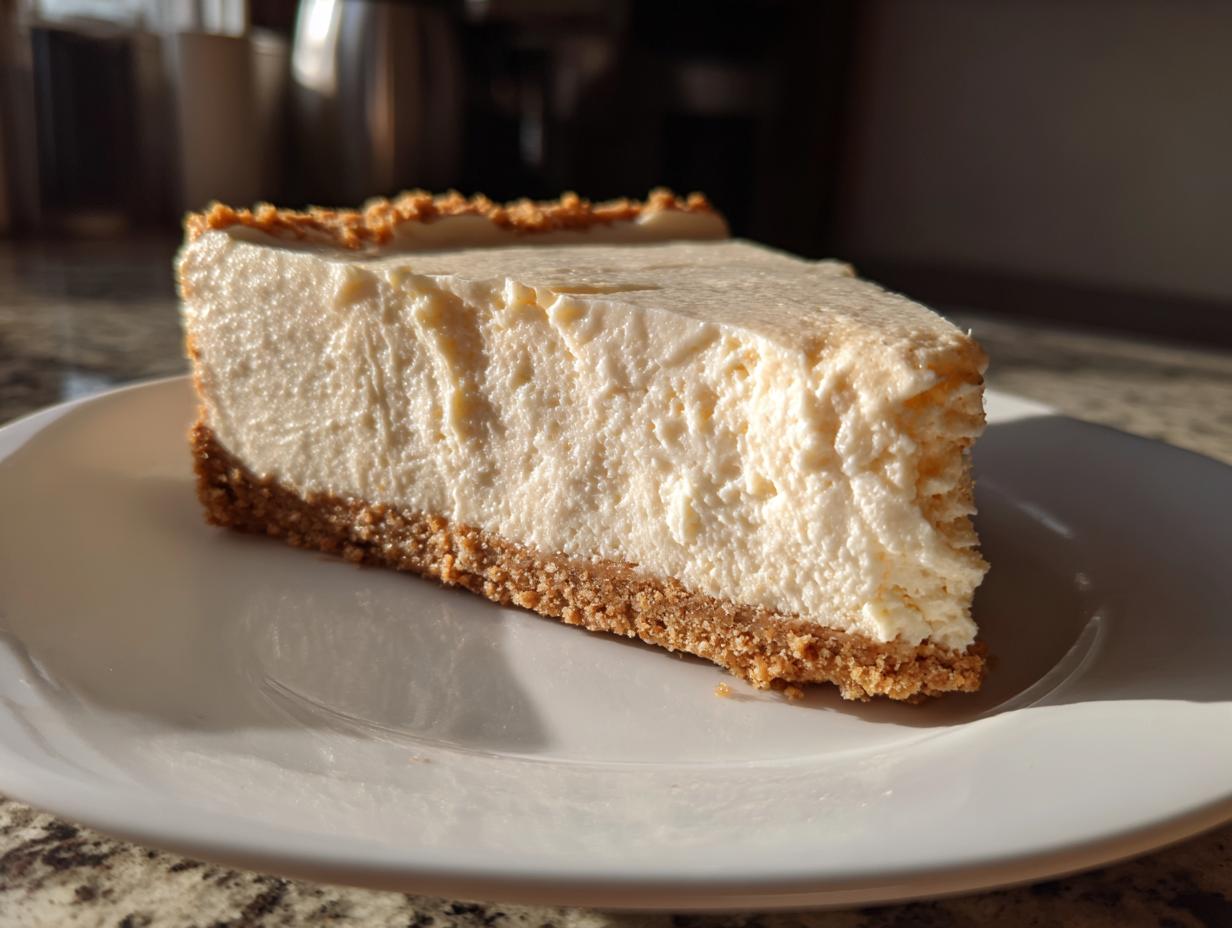
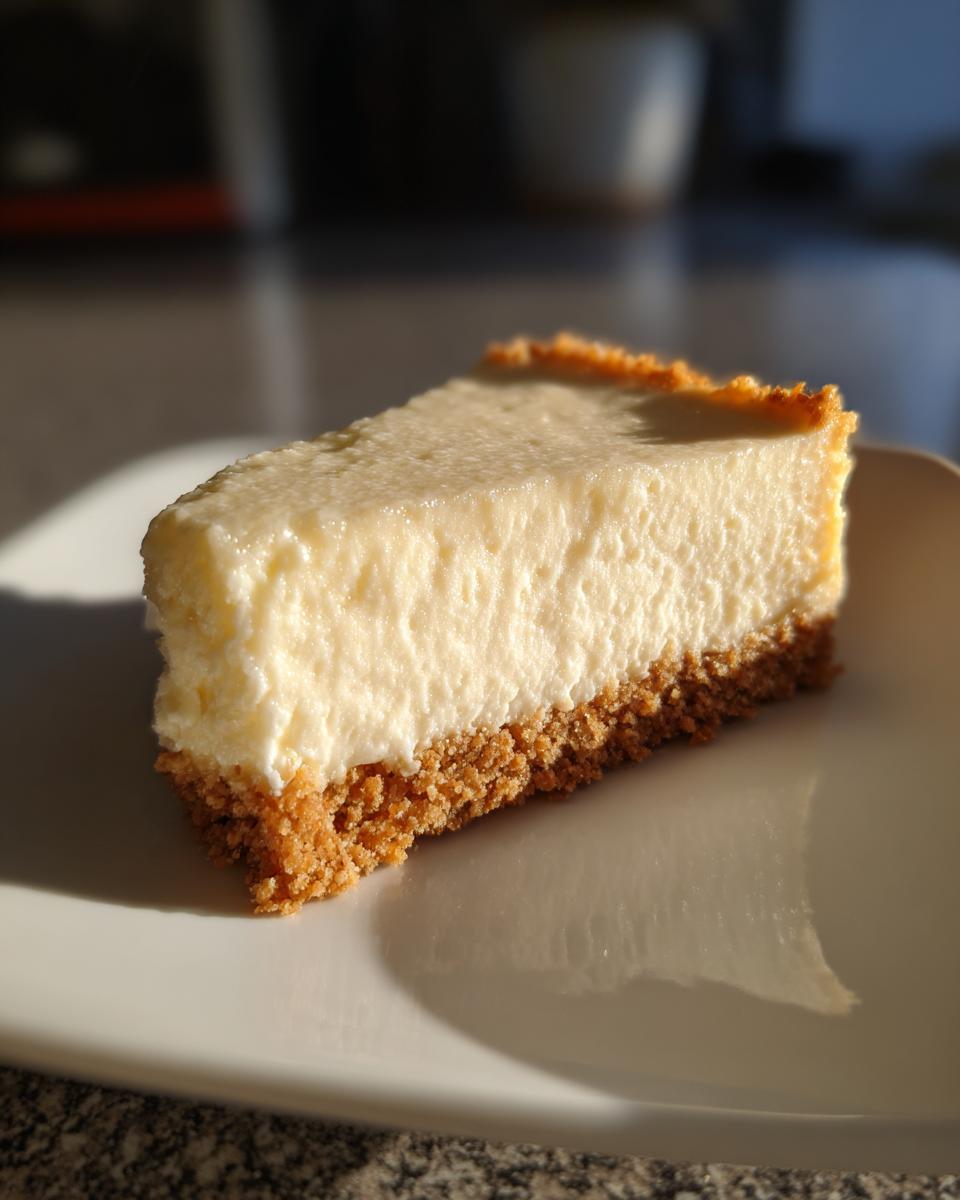
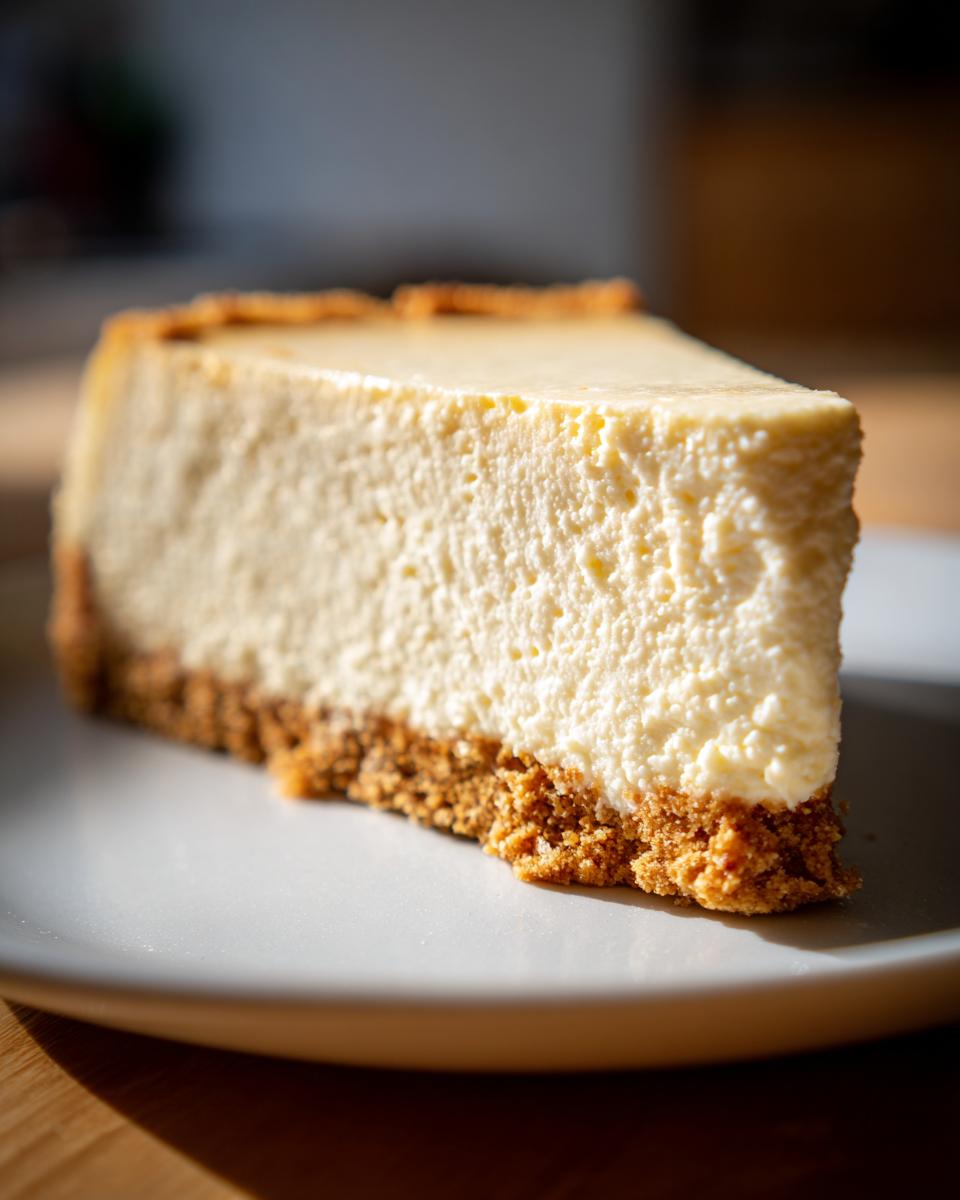
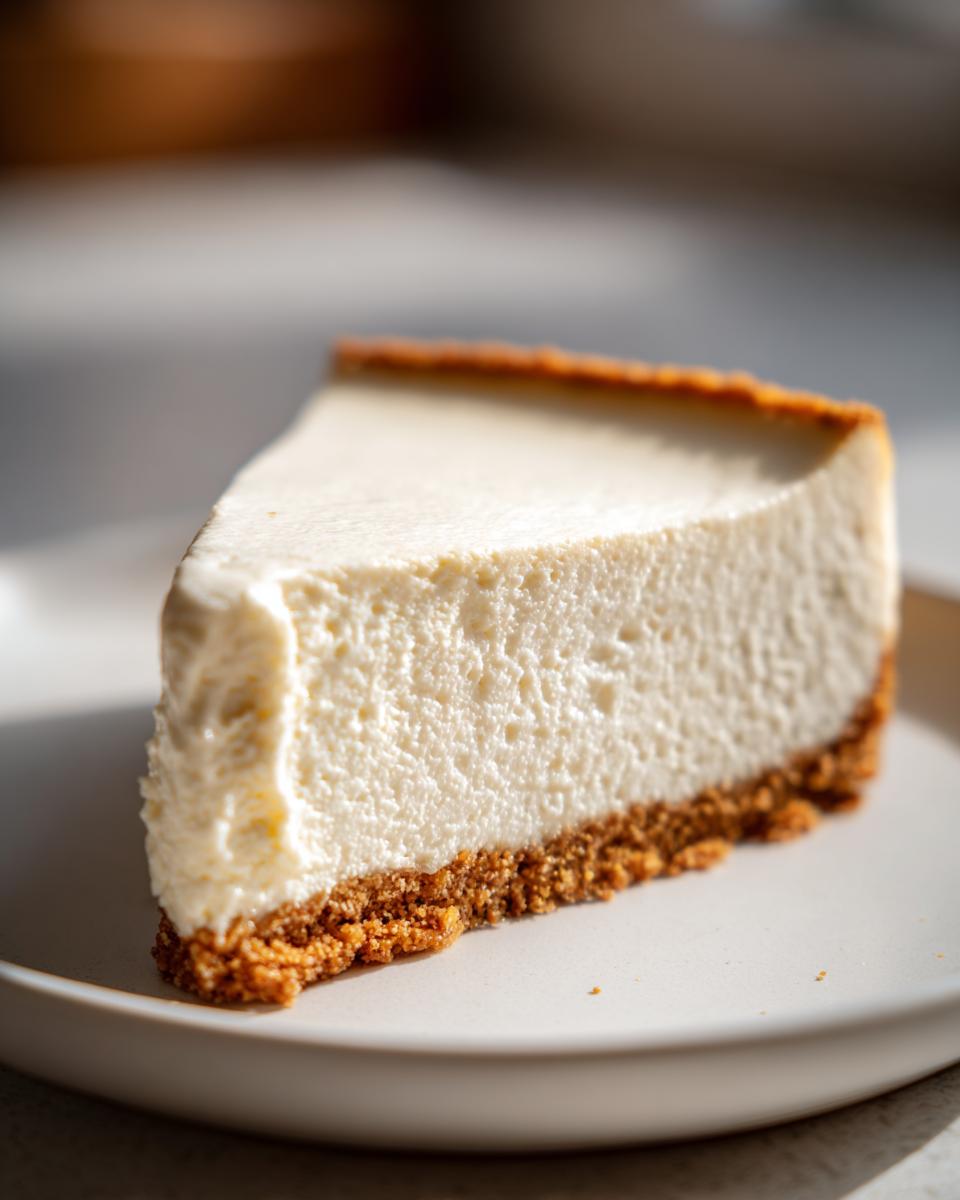
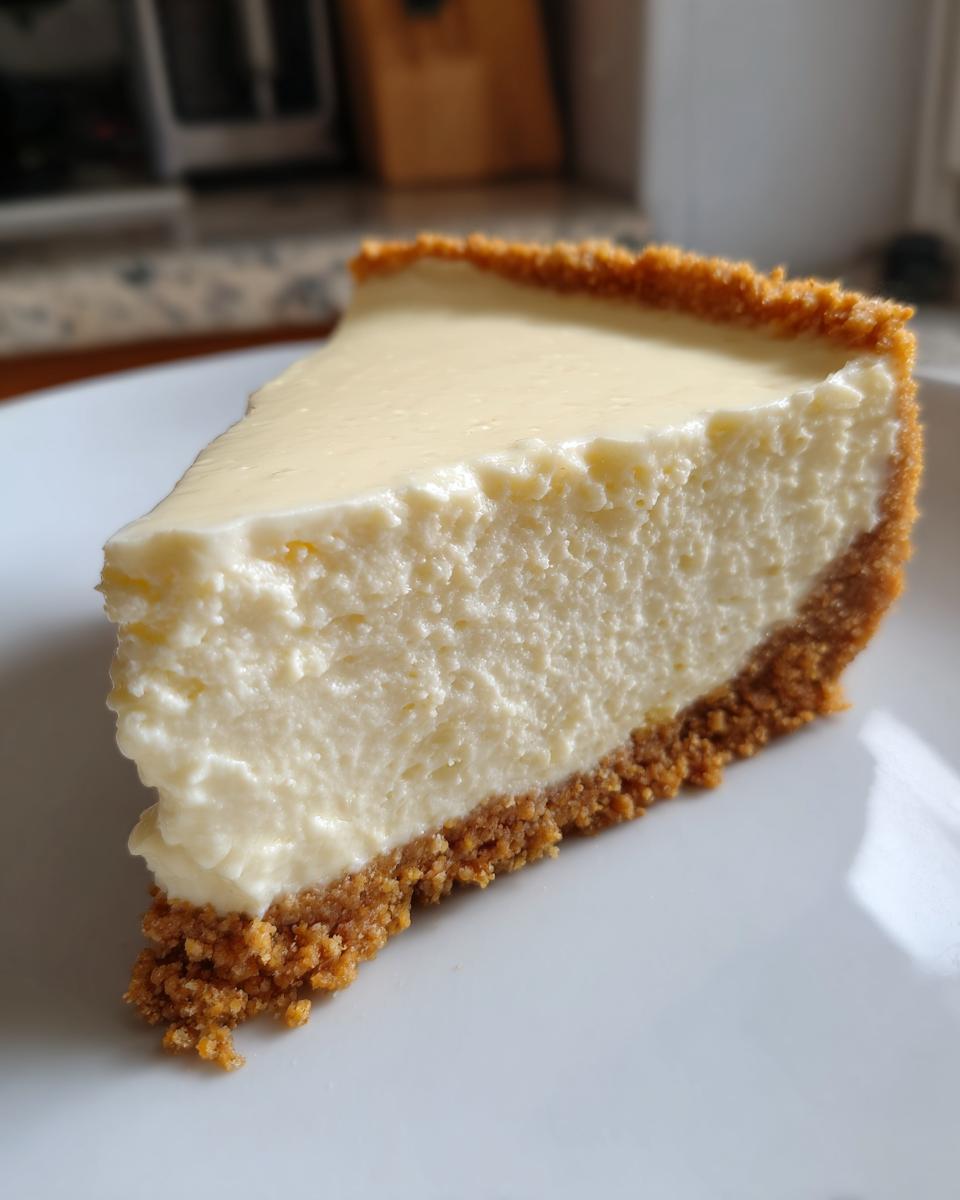
When the sun is blazing and the thought of turning on the oven feels like a personal betrayal, I know exactly what Daisy—my grandmother—would have reached for. Forget fussy water baths and praying your baked cake doesn’t crack! We’re diving headfirst into the amazing world of the no bake cheesecake. Trust me, this is hands-down the easiest, creamiest dessert you’ll ever whip up. It takes about twenty minutes of mixing, and then the fridge does all the heavy lifting. It’s that simple, honest cooking magic Amelia learned so long ago, perfect for our busy modern lives. You can read more about how we keep Daisy’s legacy alive in our story here.
- Why This No Bake Cheesecake Is Your New Favorite Summer Cream Cheese Dessert
- Gathering Ingredients for Your No Bake Cheesecake
- Step-by-Step Instructions for Your Refrigerator Cheesecake Pie
- Expert Tips for a Perfect No Bake Cheesecake
- Serving Suggestions for Your No Bake Cheesecake
- Storage and Reheating Instructions for This No Bake Cheesecake
- Frequently Asked Questions About No Bake Cheesecake
- Nutritional Estimate for Your No Bake Cheesecake Slice
- Share Your Experience Making This No Bake Cheesecake
Why This No Bake Cheesecake Is Your New Favorite Summer Cream Cheese Dessert
Honestly, this recipe is my go-to whenever I need something impressive without the heat. The best part? You totally skip the oven—zero baking time means your kitchen stays cool! We’re talking 20 minutes of prep, and then you just let the refrigerator work its magic. That’s why I call it my favorite summer cream cheese dessert.
It’s so fast and simple, which makes it the ultimate easy no bake cheesecake for last-minute plans or just a Tuesday night treat. You get that gorgeous, tangy flavor you expect from cheesecake, but in a beautifully light format.
Achieving Perfect Texture with This Easy No Bake Cheesecake
If you’ve ever panicked about a big crack appearing on your baked cheesecake right as it cools, you can breathe a huge sigh of relief now! Since we aren’t dealing with heat, cracking is impossible. The texture here is completely different; it’s light and airy, almost like a thick mousse.
We rely on two main things to keep this gelatin-set cheesecake perfect. We whip the heavy cream until it’s stiff, which incorporates tons of air. Then, the unflavored gelatin steps in to be the trusty stabilizer. It just holds everything together beautifully, giving you that satisfying, smooth slice every single time. It’s foolproof, I promise!
Gathering Ingredients for Your No Bake Cheesecake
Okay, let’s talk ingredients! Since we aren’t baking, ingredient texture is everything here. You absolutely must make sure your cream cheese is fully softened—I mean soft enough to mash with a spoon while you’re thinking about it. And the heavy cream? It has to be ice cold, straight from the back of the fridge, for maximum fluffiness. Everything else is pretty straightforward!
Crust Component Ingredients
- 1 1/2 cups graham cracker crumbs
- 1/4 cup granulated sugar
- 6 tablespoons unsalted butter, melted
Just mix those three items up until it looks like wet sand. Press that mixture firmly into your 9-inch pie plate. Think solid foundation here!
Creamy Filling Ingredients for No Bake Cheesecake
- 2 (8 ounce) packages cream cheese, softened
- 1 cup confectioners’ sugar
- 1 teaspoon vanilla extract
- 1/4 cup lemon juice, fresh squeezed
- 1 cup heavy whipping cream, cold
- 1 packet unflavored gelatin
- 1/4 cup cold water
That lemon juice needs to be fresh squeezed—it makes a world of difference in cutting through the richness of the cream cheese. Also, remember to keep that heavy cream separate and super cold until it’s time to whip it!
Step-by-Step Instructions for Your Refrigerator Cheesecake Pie
Alright, let’s get down to business! This is where we transform simple ingredients into that gorgeous, creamy slice. Since this is a no bake cheesecake, remember that our total active mixing time is super short—only about 20 minutes! The best part? Our official Cook Time is zero minutes! We’re heading straight to the fridge for the magic to happen.
Preparing the Crust and Chilling
First things first, get that crust set up so it has time to firm up while you tackle that lovely filling. Grab your graham cracker crumbs, the ¼ cup of sugar, and pour in the 6 tablespoons of melted butter. Stir it all together until every crumb looks evenly coated and moist. Then, press that mixture firmly into the bottom of your 9-inch pie plate. Press hard—you want a good, sturdy base for our next step! Once it’s packed down tight, pop that pie plate straight into the freezer. It needs to chill while we make the filling, so don’t skip this part!
Creating the Gelatin-Set Cheesecake Base
Now for setting things up right. Take your packet of gelatin and sprinkle it right over the ¼ cup of cold water in a small bowl. Just let it sit there for about five minutes; we call that blooming. While that’s happening, beat your softened cream cheese until it’s smooth as silk. Then, slowly add the confectioners’ sugar, your vanilla, and that precious fresh lemon juice. Beat it until everything looks happy and combined.
Next, take your bloomed gelatin and heat it up in the microwave—just 10 to 15 seconds is usually enough—until it’s totally liquid and clear. Seriously, be careful here; you want it liquid, but absolutely do not let it boil! Once it’s clear, drizzle it slowly into your cream cheese mixture while the mixer is on low speed until it’s just mixed in.
Folding and Setting the No Bake Cheesecake Filling
In a separate bowl, whip that cold heavy cream until you have stiff peaks. You know it’s ready when you can almost lift the beater right out of the cream without it slumping over. That whipped cream is our secret for making this a light, airy treat!
Now, gently fold that whipped cream into your smooth cream cheese base using a spatula. Use a folding motion, working gently until you don’t see any white (whipped cream) streaks left. Overmixing here is the enemy, because it knocks out all the beautiful air we just incorporated. Pour the whole gorgeous mixture right into that chilled crust you put in the freezer earlier.
Chilling Time for the No Bake Cheesecake
Cover your pie loosely with plastic wrap—we don’t want any fridge smells getting into our dessert! Now comes the waiting, which is the only hard part of this refrigerator cheesecake pie. It needs to chill for a minimum of six hours, but honestly? If you can wait overnight, the texture is even firmer and more satisfying. Stick with it, and you won’t regret the wait!
Expert Tips for a Perfect No Bake Cheesecake
I’ve made this recipe so many times trying to get it just right, and those little tweaks really make the difference between a good dessert and one people rave about. Since we aren’t using the oven, we have to be really mindful of temperature and mixing speed to get that professional, smooth outcome. These are the things I learned the hard way so you don’t have to!
Ingredient Temperature Matters for Your No Bake Cheesecake
This is my non-negotiable rule for a smooth filling. Your cream cheese absolutely must be fully softened. If it’s even slightly cool, you’ll end up with little lumps in your mixture, and no amount of beating will smooth them out once the gelatin hits! On the flip side, the heavy whipping cream needs to be ice cold. That temperature difference helps the cream whip up into those beautiful, stiff peaks we love, which gives us all that necessary volume.
Troubleshooting Common Issues with Gelatin-Set Cheesecake
Things happen, right? If you are working quickly and your liquid gelatin starts to firm up while you’re getting ready to pour it in, just pop that little bowl back in the microwave for five seconds. Don’t let it bubble, just enough to make it flow easily again. This is crucial for even distribution.
If, after chilling overnight, your no bake cheesecake still seems a little too soft—maybe you added an extra splash of that fresh lemon juice—don’t panic! Just cover it up and put it back in the fridge for a few more hours. This gelatin-set cheesecake just needs time to fully stabilize. It won’t tighten up once it’s out, so chilling is your final step for success.
Serving Suggestions for Your No Bake Cheesecake
So, your beautiful refrigerator cheesecake pie is set! This is where you get to have fun and make it totally your own. Because we kept the filling bright and tangy with that lemon juice, it pairs perfectly with nearly anything sweet and fruity—which screams summer dessert to me!
The official final step is adding toppings, and I love keeping it simple. A layer of bright, fresh raspberries or thinly sliced strawberries looks amazing against that creamy white filling. If you’re taking this to a potluck, a can of good quality cherry or blueberry pie filling poured over the top right before serving is classic and shows minimal effort for maximum payoff.
You can also whip a little extra heavy cream right before you plan to serve it for fluffy dollops. No matter what you choose, resist the urge to top it too early, or the juices might start to bleed into that gorgeous, firm filling!
Storage and Reheating Instructions for This No Bake Cheesecake
Because this glorious dessert never sees the inside of an oven, our storage routine is super simple—and that’s the way I like it! We want to keep that light, airy texture we worked so hard to achieve in the fridge until it’s time to serve.
You must keep this no bake cheesecake covered tightly and stored in the refrigerator. Don’t leave it sitting out on the counter for too long, especially if it’s warm! The cream cheese and whipped cream need that cold environment to stay firm, otherwise, by the end of the afternoon, you might just end up with a very delicious, sweet pool in your pie plate.
If you’ve done everything right—especially letting it chill that whole overnight period—this refrigerator cheesecake pie holds up beautifully for about four to five days in the fridge. If you topped it with fresh fruit, you’ll want to eat that part within two days, since the fruit starts to weep a little.
Now, for the best part about skipping the oven: reheating! There’s absolutely no need to reheat this! If it gets a little too firm after a long chill, just pull it out of the fridge about 15 minutes before you plan to serve it. That slight softening is just enough to bring back that perfect, soft sliceable texture without losing any of that firmness the gelatin provided. No oven needed, ever!
Frequently Asked Questions About No Bake Cheesecake
I get so many questions about making sure this process is truly foolproof, especially since we aren’t using the oven for help! Let me clear up a few things that keep popping up. It’s all about making this the easiest dessert possible, remember?
Can I skip the gelatin in this easy no bake cheesecake?
Oh, honey, I wouldn’t recommend it if you want that perfect set texture! The gelatin is what turns this into a true gelatin-set cheesecake rather than just a very thick cream cheese dip. If you *absolutely* have to skip it, you’ll need an alternative like using a tub of stabilized whipped topping instead of fresh heavy cream, but I have to be honest—the texture will be much softer and more like a mousse. It won’t slice quite as neatly!
How long does this refrigerator cheesecake pie last?
Because everything is dairy-based and we aren’t baking any preservatives in there, you need to keep this airtight and chilled. Stored properly in the fridge, this refrigerator cheesecake pie is fantastic for about four full days. Honestly, it tastes best on day two, once those flavors have really settled in and the crust has softened just a tiny bit underneath all that creaminess.
What is the best crust substitute for this no bake cheesecake?
That’s a fun question! If you’re out of graham crackers, you have great options. I love making this with crushed Oreos—just leave out the sugar in the crust mix since the cookies are already sweet! Or, crushing up some shortbread cookies works beautifully too. Just make sure you use about the same volume of crumbs and stick to the 6 tablespoons of melted butter so the crust holds together well. Any substitution keeps this firmly in the easy no bake cheesecake category!
If you’re looking for our privacy details, you can find them right here.
Nutritional Estimate for Your No Bake Cheesecake Slice
Now, I always tell people that when you’re making treats like this fantastic no bake cheesecake, you shouldn’t really worry too much about the numbers. We bake for joy, not for tracking, right? But since we aim for transparency here, I’ve jotted down the estimated nutritional breakdown per slice based on the ingredients list. Keep in mind these figures are based on 8 standard slices!
This isn’t meant to replace anything official, of course, but it gives you a general idea of what’s in this rich, creamy dessert. It’s surprisingly low in the carb department for a dessert, but it does have its fats since we are using real cream cheese and heavy cream!
- Serving Size: 1 slice
- Calories: 350
- Fat: 23g
- Saturated Fat: 14g
- Trans Fat: 0.5g
- Carbohydrates: 32g
- Fiber: 1g
- Sugar: 28g
- Protein: 5g
- Cholesterol: 75mg
See? It’s rich, but that’s what makes it so satisfying. A little slice of this summer cream cheese dessert really hits the spot!
Share Your Experience Making This No Bake Cheesecake
Now that you’ve enjoyed the absolute easiest, tangiest no bake cheesecake ever—or maybe you’re just about to pop yours in the fridge for the overnight chill—I really want to hear what you think!
Sharing recipes is how we build that community Daisy always dreamed of. Did you stick to the fresh berries, or did you try a surprise topping? Did you make the exact 20 minutes of prep time? Please, come back here and leave a rating for this recipe. Five stars if it saved your BBQ, or whatever number feels right!
Leave a comment below telling me what topping you chose for your slice. And if you took a picture of your beautiful, perfect refrigerator cheesecake pie setting out on the counter, share it on your favorite social platform and tag us! It truly makes my day to see that simple, oven-free magic happening in kitchens far and wide. If you have questions as you go, you can always reach out to us via our contact page!
PrintSimple No-Bake Cheesecake
Make a creamy, satisfying cheesecake without turning on your oven. This refrigerator cheesecake pie sets up quickly and is perfect for summer desserts.
- Prep Time: 20 min
- Cook Time: 0 min
- Total Time: 6 hours 20 min
- Yield: 8 servings 1x
- Category: Dessert
- Method: No Bake
- Cuisine: American
- Diet: Vegetarian
Ingredients
- 1 1/2 cups graham cracker crumbs
- 1/4 cup granulated sugar
- 6 tablespoons unsalted butter, melted
- 2 (8 ounce) packages cream cheese, softened
- 1 cup confectioners’ sugar
- 1 teaspoon vanilla extract
- 1/4 cup lemon juice, fresh squeezed
- 1 cup heavy whipping cream, cold
- 1 packet unflavored gelatin
- 1/4 cup cold water
Instructions
- Mix graham cracker crumbs and 1/4 cup granulated sugar in a bowl. Pour in melted butter and mix until crumbs are evenly moistened. Press the mixture firmly into the bottom of a 9-inch pie plate. Place the crust in the freezer while you prepare the filling.
- In a small bowl, sprinkle gelatin over cold water. Let it sit for 5 minutes to bloom.
- In a large bowl, beat the softened cream cheese until smooth. Add the confectioners’ sugar, vanilla extract, and lemon juice. Beat until fully combined.
- In a separate bowl, whip the cold heavy cream until stiff peaks form. Set aside.
- Gently heat the bloomed gelatin mixture in the microwave for about 10-15 seconds until it is completely liquid and clear. Do not boil.
- Slowly pour the liquid gelatin into the cream cheese mixture while mixing on low speed. Mix until just combined.
- Gently fold the whipped cream into the cream cheese mixture using a spatula until no streaks remain. Do not overmix.
- Pour the filling into the chilled crust. Cover the pie loosely with plastic wrap.
- Refrigerate for at least 6 hours, or preferably overnight, until the cheesecake is firm.
- Before serving, top with desired toppings like fresh berries or pie filling.
Notes
- For easy removal from the pie plate, you can line the plate with parchment paper before pressing in the crust.
- If you prefer a tangier flavor, increase the lemon juice to 1/3 cup.
- This recipe works well as a gelatin-set cheesecake for a stable texture.
Nutrition
- Serving Size: 1 slice
- Calories: 350
- Sugar: 28g
- Sodium: 210mg
- Fat: 23g
- Saturated Fat: 14g
- Unsaturated Fat: 9g
- Trans Fat: 0.5g
- Carbohydrates: 32g
- Fiber: 1g
- Protein: 5g
- Cholesterol: 75mg