
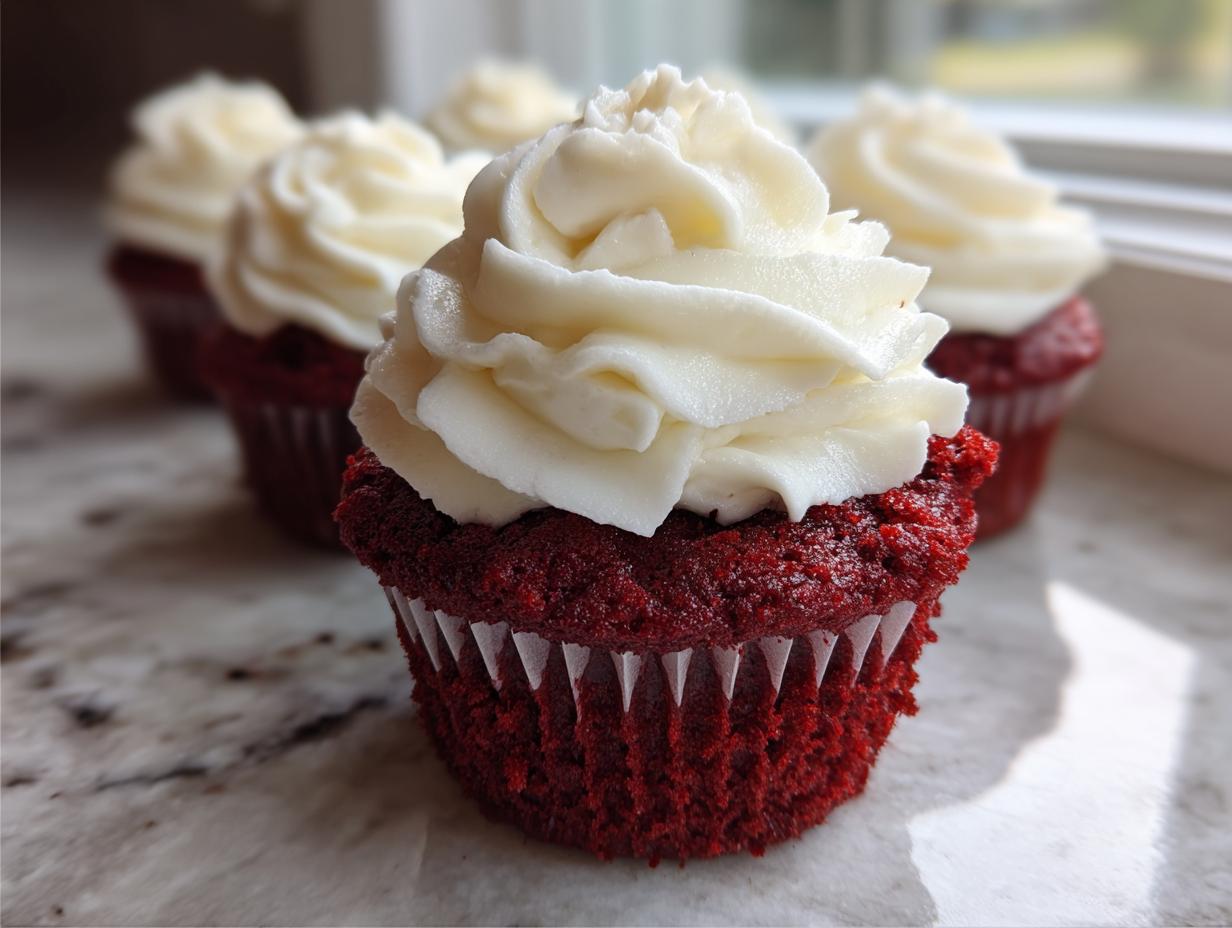
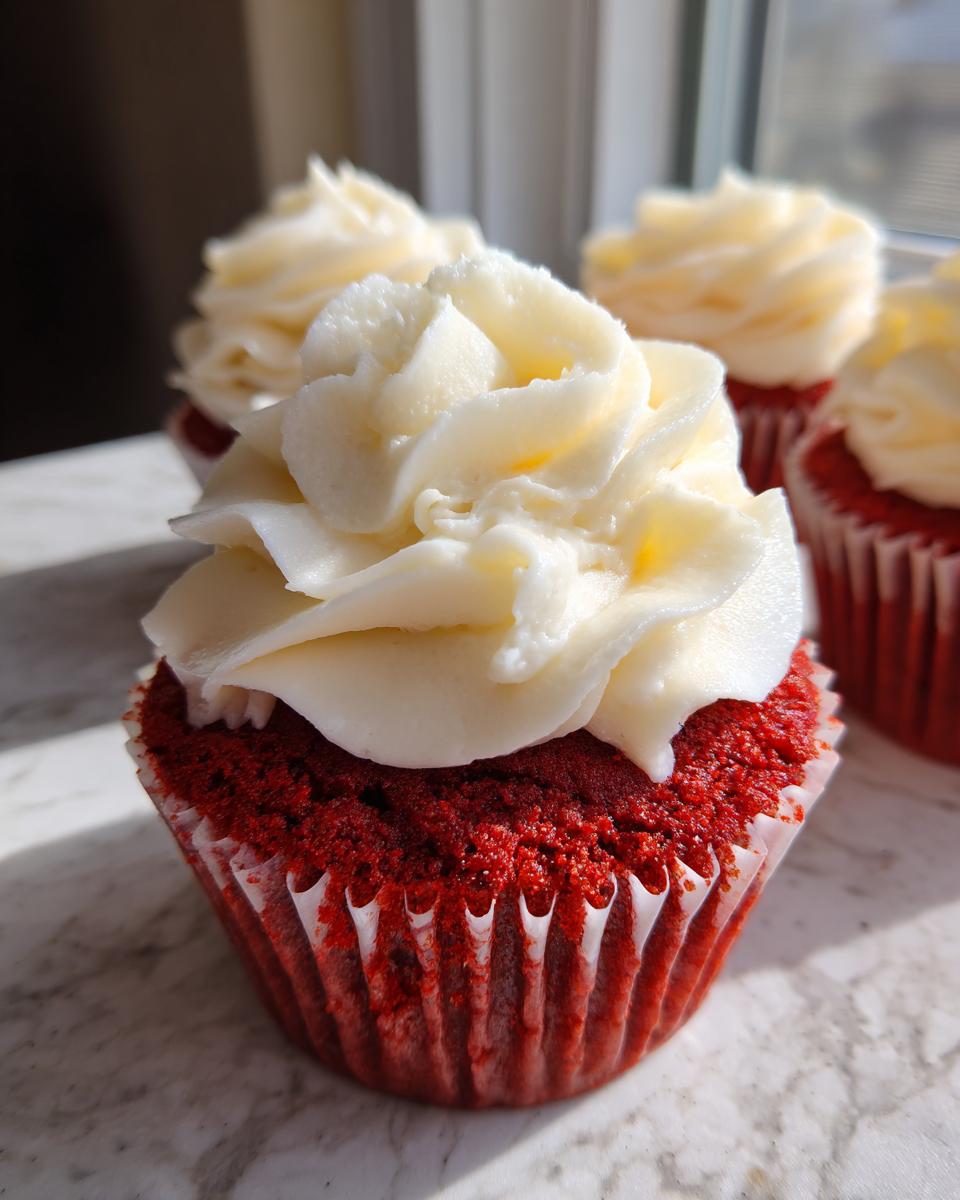
There’s something magical about pulling a perfectly baked treat from the oven, isn’t there? It pulls me right back to my grandmother Daisy’s kitchen, where every screen door slamming shut meant another batch of honest, comforting food was underway. After feeling so far removed from that simple joy in the city, I’m reclaiming that connection one recipe at a time. And today, friends, we’re tackling a classic that deserves reverence: the Best Ever Moist Red Velvet Cupcakes with Classic Tangy Cream Cheese Frosting. These aren’t just good; they are deeply soft, perfectly flavored, and that frosting snaps just right. Making these red velvet cupcakes feels like wrapping myself in a wonderful memory, and I know you’ll feel that warmth when you bake them, too.
If you’re looking for the secret to that deep, velvety crumb that melts in your mouth, I tucked my best advice for achieving that amazing texture right into the steps below. You can see my inspiration for the full cake version here: ultra-moist red velvet cake.
- Why These Are the Best Moist Red Velvet Cupcakes You Will Ever Make
- Ingredients for Ultimate Red Velvet Cupcakes
- How to Prepare Bakery Style Red Velvet Cupcakes
- Tips for Making Perfect Red Velvet Cupcakes
- Serving Suggestions for Your Red Velvet Cupcakes
- Storage and Reheating Instructions for Red Velvet Cupcakes
- Troubleshooting Common Red Velvet Cupcakes Issues
- Frequently Asked Questions About Red Velvet Cupcakes
- Nutritional Estimates for Decadent Red Velvet
- Share Your Homemade Red Velvet Cupcakes Creations
Why These Are the Best Moist Red Velvet Cupcakes You Will Ever Make
I want you to forget every dry, sad little cupcake you’ve ever encountered. These moist red velvet cupcakes are different, I promise! They aren’t fussy, but they deliver a bakery-style result every single time. When I finally nailed these for Daisy, I knew I had something special that would keep her memory alive in my own kitchen.
- They achieve an unbelievably tender and velvety crumb without needing heavy mixing.
- The classic flavor is spot-on—not too chocolatey, just perfectly balanced.
- The frosting is non-negotiable: tangy, rich cream cheese that cuts through the sweetness beautifully.
Achieving the Perfect Velvety Crumb
It all comes down to the science, but don’t worry, it’s easy science! We use oil instead of all butter. Oil stays liquid at room temperature, which keeps the cake softer for longer—that’s your moisture secret right there. Plus, the reaction between the buttermilk and the vinegar creates those tiny bubbles that keep the structure light and incredibly delicate. That’s how you guarantee a soft, velvety crumb!
The Classic Red Velvet Flavor Profile
What makes it red velvet and not just vanilla cake? It’s that barely-there hint of cocoa. It adds richness without screaming ‘chocolate.’ It’s subtle, elegant, and works perfectly for special times. I always make a batch when I need truly impressive birthday treats, but they are absolute showstoppers for intimate things like valentine desserts, too.
Ingredients for Ultimate Red Velvet Cupcakes
Alright, gathering your supplies is half the battle, right? Especially with a recipe as specific as this one. I’ve broken down exactly what Daisy taught me to have ready. Trust me, the quality of these simple things really determines the final look of your homemade red velvet. For the best results, make sure your cream cheese and butter are actually soft—we need that dreaminess when it comes to the final product!
If you love buttermilk magic, you might also want to check out my classic buttermilk pie recipe, too.
For the Moist Red Velvet Cupcakes
- 1 1/2 cups all-purpose flour
- 1 cup granulated sugar
- 1 teaspoon baking soda
- 1 teaspoon cocoa powder (just a hint matters here!)
- 1/2 teaspoon salt
- 1 cup buttermilk (make sure it’s room temperature, please!)
- 1 teaspoon white vinegar
- 1 teaspoon vanilla extract
- 1/2 cup vegetable oil
- 2 large eggs
- 1 tablespoon red food coloring
For the Classic Tangy Cream Cheese Frosting Recipe
This is where the magic happens for that incredible topping. Remember, softened dairy is key for a fluffy cupcake frosting!
- 1 cup cream cheese, softened
- 1/2 cup unsalted butter, softened
- 3 cups powdered sugar (sifted if yours is lumpy)
- 1 teaspoon vanilla extract
How to Prepare Bakery Style Red Velvet Cupcakes
Okay, time to get messy! Don’t be intimidated by the word *bakery style*; these steps are straightforward, making them perfect for our beginner baking recipes collection. We’re working with simple techniques here, but precision is what locks in that amazing moisture. Remember what I always preach: read everything first! Once we get to the coloring stage, things move fast, so preparation is key for that gorgeous final look.
I often sneak in a batch of easy cookie bars while these are baking, which is one of the perks of having two racks going at once!
Mixing the Red Velvet Cupcake Batter
First things first: get your oven preheated to 350°F (175°C) and get those paper liners snug in your muffin tin. In one bowl, you whisk together all your dry goods—the flour, sugar, baking soda, and that tiny bit of cocoa and salt. Now, in a separate bowl, combine your liquids: the buttermilk (make sure it’s room temperature, it helps!), vinegar, oil, vanilla, and those eggs. You need to mix those wet ingredients just until they are happy together.
Here’s the critical part: Pour the wet mix into the dry mix. Mix it on low speed, or gently by hand, until the streaks of flour just disappear. Do not, I repeat, do not overmix! That’s how you lose the light texture. Finally, stir in your tablespoon of red food coloring. Take your time here until you get that deep, vibrant red color that screams decadence. Divide that beautiful batter evenly; about two-thirds full in each cup is perfect.
Baking and Cooling the Red Velvet Cupcakes
Slide those tins into the 350°F (175°C) oven. They bake fast, usually just 18 to 20 minutes. You’ll know they’re done when a toothpick inserted right in the center comes out totally clean—no wet batter clinging to it! Let them relax in the pan for five minutes. Seriously, don’t try to move them now, or they might crack! After those five minutes, transfer them gently to a wire rack to cool completely. This is vital, you guys; even slightly warm cakes mean melting, sliding-off frosting!
Whipping Up the Cream Cheese Frosting Recipe
While the little cakes cool down—patience!—we make the best part. Grab your mixer and beat that softened cream cheese and softened butter together first. We need them smooth and creamy before anything else goes near them. Once they look luscious and uniform, start adding that powdered sugar slowly, keeping the speed low so you don’t create a sugar cloud in your kitchen. Once it’s incorporated, crank the speed up to medium-high and beat it until it’s beautifully fluffy!
Mix in that teaspoon of vanilla. If you taste it and think, “I need it stiffer for piping,” just add another small spoonful of powdered sugar. We’re aiming for that perfect, pipeable texture for our fluffy cupcake frosting!
Tips for Making Perfect Red Velvet Cupcakes
Even with the best recipe in hand, sometimes things just need a little nudge to become truly spectacular. Daisy always said that if your ingredients are fighting you, you need to step in and mediate! These little tricks are the ones I rely on when I’m aiming for those truly spectacular, melt-in-your-mouth moist red velvet cupcakes, especially when I’m baking for a big occasion.
If you want to learn about getting that same moisture in a quick bread, check out my recipe for easy moist chocolate chip banana bread—the oil trick works there too!
Buttermilk Substitute for Homemade Red Velvet
This is a lifesaver if you open the fridge and realize you’re out of buttermilk—which happens to me way more than I like to admit! You don’t need to run to the store. Just grab regular whole milk. For every 1 cup of buttermilk the recipe calls for, measure out 1 cup of whole milk and stir in 1 single tablespoon of white vinegar or fresh lemon juice. It sounds too simple, honestly, but let it sit on the counter for about five minutes.
You’ll see it start to curdle just a tiny bit. That’s your acid activating, and you are now set! It gives the batter the exact tang and reaction time needed with the baking soda to create that beautiful rise and the acidic kick we need for that classic red velvet taste.
Color Depth and Food Coloring Tips
The color is half the experience with red velvet cupcakes, right? If the color washes out during baking, you just end up with an expensive vanilla cupcake. That’s why I’m strict about using a high-quality, concentrated red food coloring. Skip the cheap stuff if you can!
I learned that adding the coloring right into the wet ingredients, as we do in the recipe, helps it mix in uniformly before it even hits the flour. If you want a deep, stunning color—truly decadent red velvet—don’t be shy with that tablespoon. You want the batter to look almost too red before it goes into the oven; it darkens slightly as it bakes, giving you that gorgeous, vibrant cupcake presentation.
Serving Suggestions for Your Red Velvet Cupcakes
Now that you have these gorgeous, rich red velvet cupcakes staring back at you, we have to talk about presentation! Since they are such a visually striking treat, they don’t take much fussing over. They are practically perfect as-is, but if you’re bringing them to a party or celebrating something big, a little extra touch goes a long way.
For an easy but elegant finish, especially around the holidays—think gorgeous holiday baking ideas for Christmas or Valentine’s Day—I love grating a little dark chocolate right over the peaks of the cream cheese frosting. The bitterness of the dark chocolate is just stunning against the tangy sweetness.
If you are feeling ambitious and want a true showstopper, you can pipe a small dollop of extra frosting high on top and nestle a single, perfect fresh raspberry or a candied cherry right in the center. It brightens up the deep red beautifully! Pair them with something light, like a slice of my famous apple pie cheesecake if you’re doing a dessert buffet, but honestly, these homemade red velvet treats stand proudly all on their own.
Storage and Reheating Instructions for Red Velvet Cupcakes
Okay, so you baked the most perfect batch of red velvet cupcakes, and now you have leftovers—lucky you! Because we are using that amazing, creamy cream cheese frosting recipe, these guys need a little special care. This isn’t like a sturdy pound cake that just sits out on the counter all day, remember?
You absolutely must store frosted cupcakes in an airtight container in the refrigerator. I know, I know, cold cake can be slightly firm, but it keeps that wonderful frosting safe until company arrives. They are best eaten within three days of baking. If you need to serve them after they’ve chilled, just pull them out about 30 minutes before serving. Letting them come back toward room temperature softens the cake back up perfectly so you get that lovely, decadent red velvet texture again!
Troubleshooting Common Red Velvet Cupcakes Issues
Even when we follow Daisy’s wisdom to the letter, sometimes baking throws us a curveball. Life happens, I forget to check the oven temp, or maybe the humidity decided to have a strong opinion that day. Don’t panic if your beautiful red velvet cupcakes aren’t coming out absolutely textbook perfect on the first try! I want you to know the quick fixes I turn to when I need to rescue a batch before serving.
If you ever need a baking confidence boost, check out my super simple cinnamon buns recipe—it’s hard to mess up!
My Cupcakes Turned Out Dry! What Did I Do Wrong?
Oh, that sad, crumbly experience! This nearly always means one of two things, and both are fixable. First, you likely overmixed once the flour went in—remember, we want just combined, not totally uniform. Second, and this is a big one for moist red velvet cupcakes, you might have overbaked them by just a minute or two. Even pulling them out when the toothpick has just a few moist crumbs clinging to it is better than waiting until it’s bone dry.
The Rescue Mission: If they are already baked and dry, don’t throw them out! You can bring back some life by making a quick soak. Heat up a simple syrup (equal parts sugar and water, just heated until dissolved) and gently poke a few holes in the top of the cooled cupcake with a skewer. Brush or drizzle just a *teaspoon* of the warm syrup over the top. They’ll soak up that moisture and taste infinitely better!
My Cream Cheese Frosting is Too Runny!
This is the nemesis of any baker who wants that gorgeous swirl. It usually means your butter or cream cheese wasn’t as cold as it should be when you started beating it, or you added too much vanilla or liquid when trying to blend it smooth for that perfect fluffy cupcake frosting. We want it thick enough to stand up tall, not melt down the side of the cake!
The Rescue Mission: Don’t add more liquid! You need stabilizer. Put the whole bowl in the refrigerator for about 15 to 20 minutes. Chilling it slightly firms up the fat just enough so it can hold its structure when you beat it again. If it’s still too soft after chilling, start adding powdered sugar just one tablespoon at a time, beating well after each addition, until you get that thick, pipeable texture back.
The Red Color Looks Brownish After Baking
This is a common frustration with any recipe requiring significant food coloring, especially since the intense heat can sometimes dull the vibrancy. The acid in the buttermilk and vinegar is what helps keep the red deep, but sometimes the oven is just too strong for the dye.
The Fix: As I mentioned earlier, invest in a high-quality, concentrated gel coloring—it holds up better to heat than the liquid drops you get in the little grocery store bottles. Also, ensure your baking time is spot-on; every extra minute in the heat is a minute the color dulls. Don’t forget to check out my guide on vanilla buttercream frosting if you ever decide to skip the tang for a different flavor!
Frequently Asked Questions About Red Velvet Cupcakes
It’s totally understandable if reading through all that detail sparks a few extra questions! I remember when I first started trying to replicate Daisy’s flavors, I had a million notes scribbled down. These questions pop up often, so I wanted to tackle our most common queries right here so you can feel totally confident whipping up these homemade dessert recipes. If these don’t cover it, always feel free to reach out!
Can I make these red velvet cupcakes without food coloring?
You absolutely can! The beauty of a classic red velvet cupcake lies in that tangy flavor profile, which comes from the buttermilk, vinegar, and just a hint of cocoa powder, not the red dye itself. If you leave out the coloring, you’ll end up with a lovely, light, slightly brown-tinted cupcake with that fantastic delicate texture. They’ll taste perfect, but visually, they’ll look more like a standard buttermilk cupcake. The color is definitely 100% aesthetic!
What makes these buttermilk cupcakes so moist?
That moisture is non-negotiable for me—I refuse to bake a dry cake! The secret really lies in a couple of places we highlighted. Firstly, we use oil instead of relying solely on butter; oil is liquid at room temperature, which keeps the cake impossibly tender for days. Secondly, the buttermilk mixture reacts perfectly with the baking soda. This creates the lift we need while also adding moisture and that signature tang. That combination is what locks in that beautifully soft texture we look for in moist red velvet cupcakes.
How do I get bakery style cupcakes at home?
Achieving that bakery style cupcakes look is all about restraint during mixing! When you combine the wet and dry ingredients, you want to mix it only until the flour streaks vanish. If you mix too long, you develop gluten, and suddenly your light, fluffy dome turns into a dense, chewy top. Also, accurate measuring is huge; spoon the flour lightly into your measuring cup and level it off rather than scooping straight from the bag. That small step prevents you from compacting the flour, which leads to a denser final product. Remember, less stirring equals loftier, prettier red velvet cupcakes!
If you ever want to try an alternative frosting, check out my recipe for vanilla buttercream frosting. It pipes beautifully too!
For more inspiration, some other bakers swear by their techniques, like the team over at In Bloom Bakery—it’s always fun to compare notes!
Nutritional Estimates for Decadent Red Velvet
Now, I know that for some of us, knowing the numbers is part of enjoying the treat, right? Daisy was more concerned with how much joy the food brought, but I totally get that these decadent red velvet cupcakes are rich, and it’s helpful to have an idea of what’s in them. So, remember that this information is just an estimate based on my calculations, and it can change depending on exact ingredient brands or how much frosting you pile on—and I highly encourage piling it on!
These estimates are based on one standard cupcake without being overly skimpy on the frosting. If you’re looking for more dessert inspiration, I really love the approach Mia takes over at Cooked by Mia when sharing her recipes!
Here is the scoop:
- Serving Size: 1 cupcake
- Calories: 350
- Fat: 18g
- Carbohydrates: 45g
- Protein: 4g
You can see the full breakdown below, but the main takeaways are that these are a lovely, sweet treat that fits perfectly into a balanced weekend! Enjoy every bite!
- Sugar: 35g
- Sodium: 250mg
- Saturated Fat: 8g
- Cholesterol: 45mg
Share Your Homemade Red Velvet Cupcakes Creations
Now that you have made your very own batch of the best moist red velvet cupcakes, I genuinely cannot wait to hear about them! This is where the story of Daisy’s recipes continues, and you get to be the next chapter in this tradition. When I recreate these homemade dessert recipes, seeing them come to life in your kitchens is the greatest reward for me.
Please, please, please leave a review below once you’ve tried them! Tell me how the fluffy cupcake frosting held up, or if you added a fun twist. Did you make them for a birthday? Were they the perfect valentine desserts? Every comment helps a new baker feel confident diving into this recipe next.
And if you snapped a photo of your perfectly piped, vibrant red beauties, I would absolutely love to see them! Tag me on social media if you feel inspired to share—seeing that beautiful crimson color spread around warms my heart more than anything. If you have questions or need any clarification on the method, my inbox is always open over on the contact page. Happy baking, my friends!
PrintBest Ever Moist Red Velvet Cupcakes with Classic Tangy Cream Cheese Frosting
You can make super moist, bakery-style red velvet cupcakes at home. This easy recipe features a rich cocoa flavor and is topped with a classic, tangy cream cheese frosting.
- Prep Time: 20 min
- Cook Time: 20 min
- Total Time: 40 min
- Yield: 12 servings 1x
- Category: Dessert
- Method: Baking
- Cuisine: American
- Diet: Vegetarian
Ingredients
- 1 1/2 cups all-purpose flour
- 1 cup granulated sugar
- 1 teaspoon baking soda
- 1 teaspoon cocoa powder
- 1/2 teaspoon salt
- 1 cup buttermilk
- 1 teaspoon white vinegar
- 1 teaspoon vanilla extract
- 1/2 cup vegetable oil
- 2 large eggs
- 1 tablespoon red food coloring
- 1 cup cream cheese, softened
- 1/2 cup unsalted butter, softened
- 3 cups powdered sugar
- 1 teaspoon vanilla extract
Instructions
- Preheat your oven to 350°F (175°C). Line a standard 12-cup muffin tin with paper liners.
- In a large bowl, whisk together the flour, sugar, baking soda, and salt.
- In a separate medium bowl, whisk together the buttermilk, vinegar, vanilla extract, vegetable oil, and eggs until combined.
- Add the wet ingredients to the dry ingredients and mix on low speed until just combined. Do not overmix.
- Stir in the red food coloring until you achieve a deep red color.
- Divide the batter evenly among the 12 cupcake liners, filling each about two-thirds full.
- Bake for 18 to 20 minutes, or until a toothpick inserted into the center comes out clean. Let the cupcakes cool in the pan for 5 minutes before transferring them to a wire rack to cool completely.
- To make the frosting, beat the softened cream cheese and butter together in a bowl until smooth and creamy.
- Gradually add the powdered sugar, mixing on low speed until incorporated, then increase speed to medium-high and beat until fluffy.
- Mix in the vanilla extract. If the frosting is too thin, add a little more powdered sugar.
- Once the cupcakes are completely cool, pipe or spread the cream cheese frosting on top.
Notes
- For the best velvety crumb, ensure your buttermilk is at room temperature before mixing.
- Use high-quality red food coloring for a deep, vibrant color that holds up during baking.
- If you do not have buttermilk, mix 1 cup of whole milk with 1 tablespoon of white vinegar or lemon juice and let it sit for 5 minutes before using.
Nutrition
- Serving Size: 1 cupcake
- Calories: 350
- Sugar: 35
- Sodium: 250
- Fat: 18
- Saturated Fat: 8
- Unsaturated Fat: 10
- Trans Fat: 0
- Carbohydrates: 45
- Fiber: 1
- Protein: 4
- Cholesterol: 45