
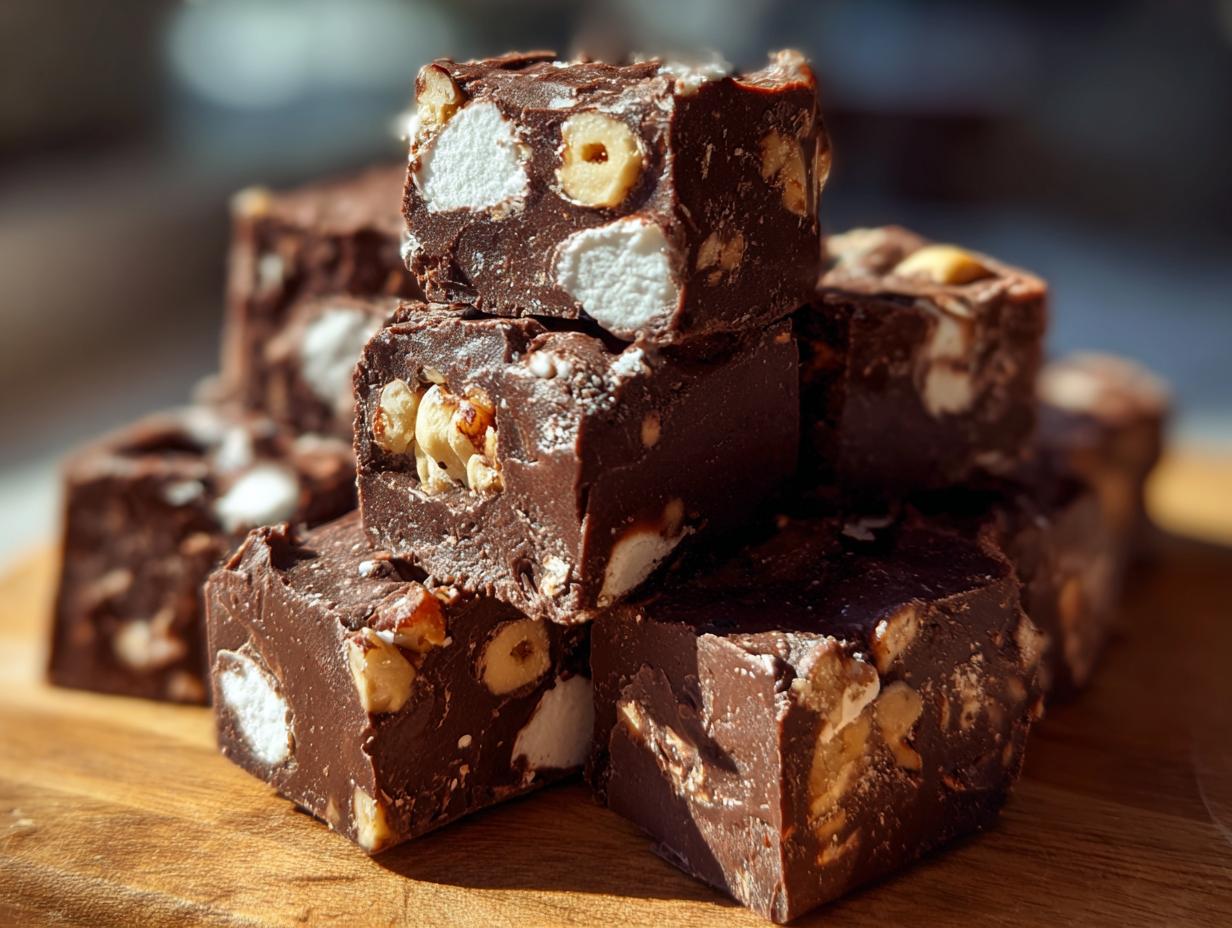
When that intense chocolate craving hits, you don’t want to wait around! I totally get it. That’s why I love sharing recipes that bring big flavor with minimal fuss. This, my friends, is the absolute easiest, no-bake rocky road fudge you will ever make. Honestly, it only takes maybe ten minutes of actual work! Seeing this rich, perfect fudge come together so fast always reminds me of my Grandma Daisy. She believed that good food didn’t need to be complicated; it just needed to be made with attention. This recipe follows that exact philosophy. It’s a wonderful shortcut to that classic holiday candy, giving you that dense, dreamy texture without ever turning on the oven. It’s simple, honest, and incredibly satisfying, just how Daisy taught me.
- Why This Easy No-Bake rocky road fudge is Your New Favorite Treat
- Ingredients for the Best rocky road fudge
- How to Make Quick Chocolate Fudge: rocky road fudge Instructions
- Tips for Perfect rocky road fudge Success
- Storage and Serving Suggestions for your Homemade Candy
- Frequently Asked Questions About rocky road fudge
- Share Your Decadent Chocolate Dessert Experience
- Nutritional Estimates for Simple Fudge Squares
- Share Your Decadent Chocolate Dessert Experience
Why This Easy No-Bake rocky road fudge is Your New Favorite Treat
If you’re anything like me, you love the idea of decadent sweets but hate the time commitment! That’s the beauty of this method. We are bypassing the stovetop altogether for what is truly one of the simplest delicious dessert recipes out there. Trust me, once you make this, it will become your go-to for satisfying that sweet spot instantly.
- It’s a genuine No Bake Fudge! No fussy double boilers or worrying about sugar crystallization here.
- Perfect for when you need Fast Dessert Recipes because the hands-on time is practically zero.
- The texture is unbelievably fudgy and holds up beautifully for transport or storage.
Quick Preparation Time for rocky road fudge
This is where we really shine! With only 10 minutes of prep time and about 2 minutes in the microwave, the actual hands-on work is done before you’ve even had your coffee. We do need a couple of hours for chilling, but you can easily whip this up after dinner and have it ready for snacking the next day. That kind of speed is magic when a craving strikes!
Perfect for Holiday Fudge Gifts
I see so many people saving this recipe when the holidays roll around, and I completely understand why. It looks incredibly impressive once it’s cut into squares, but giving someone this rich Homemade Candy feels so thoughtful. Since it’s so reliable and fast, you can whip up several batches without breaking a sweat. It’s quickly becoming one of my favorite Holiday Fudge Gifts to give out!
Ingredients for the Best rocky road fudge
Okay, let’s talk about what needs to go into the pan! The magic of this Easy Fudge Recipe is that we keep the ingredient list super short. It’s all about hitting those three main players: chocolate, sweetener, and the rocky road mix-ins. I’m listing everything out here so you have it ready before you even think about melting anything!
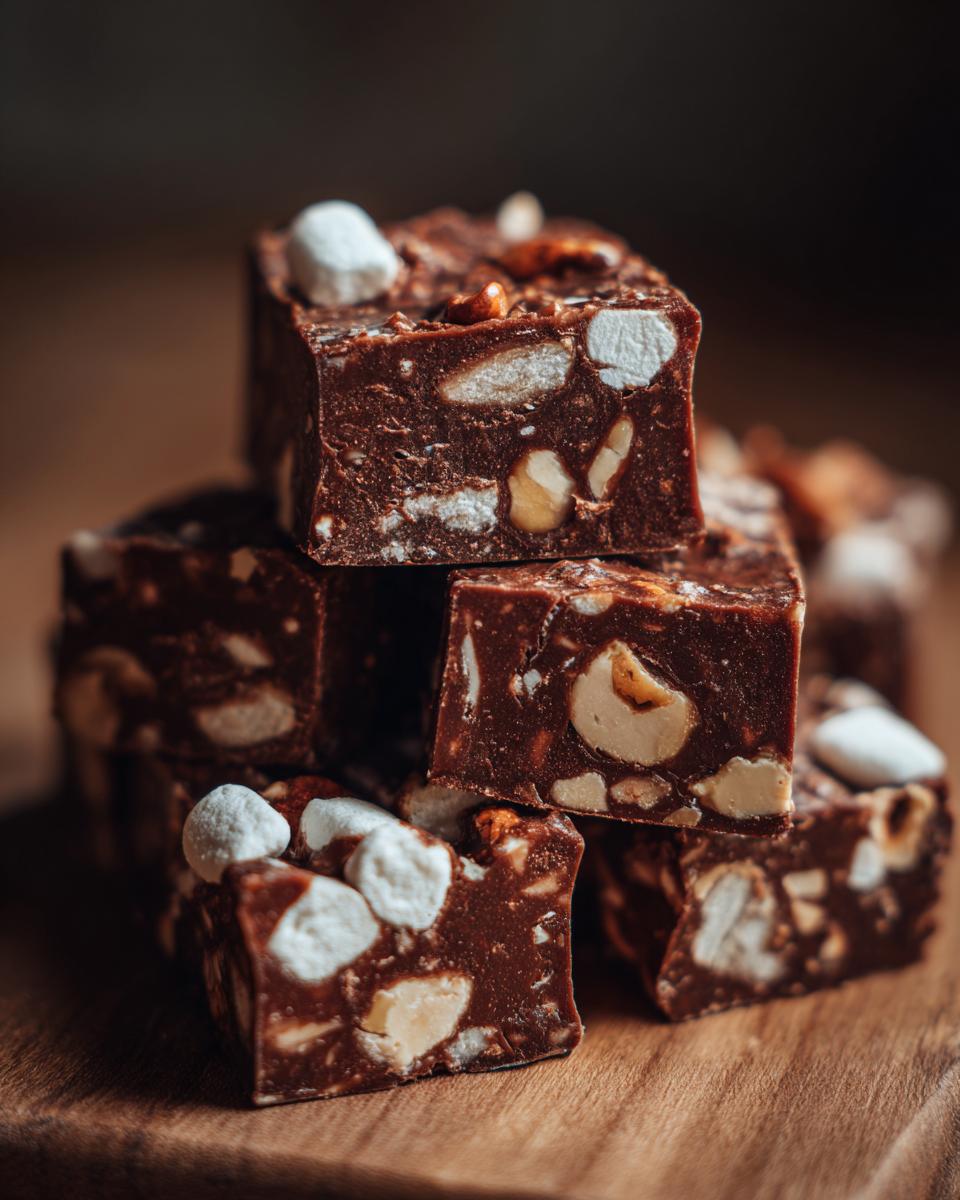
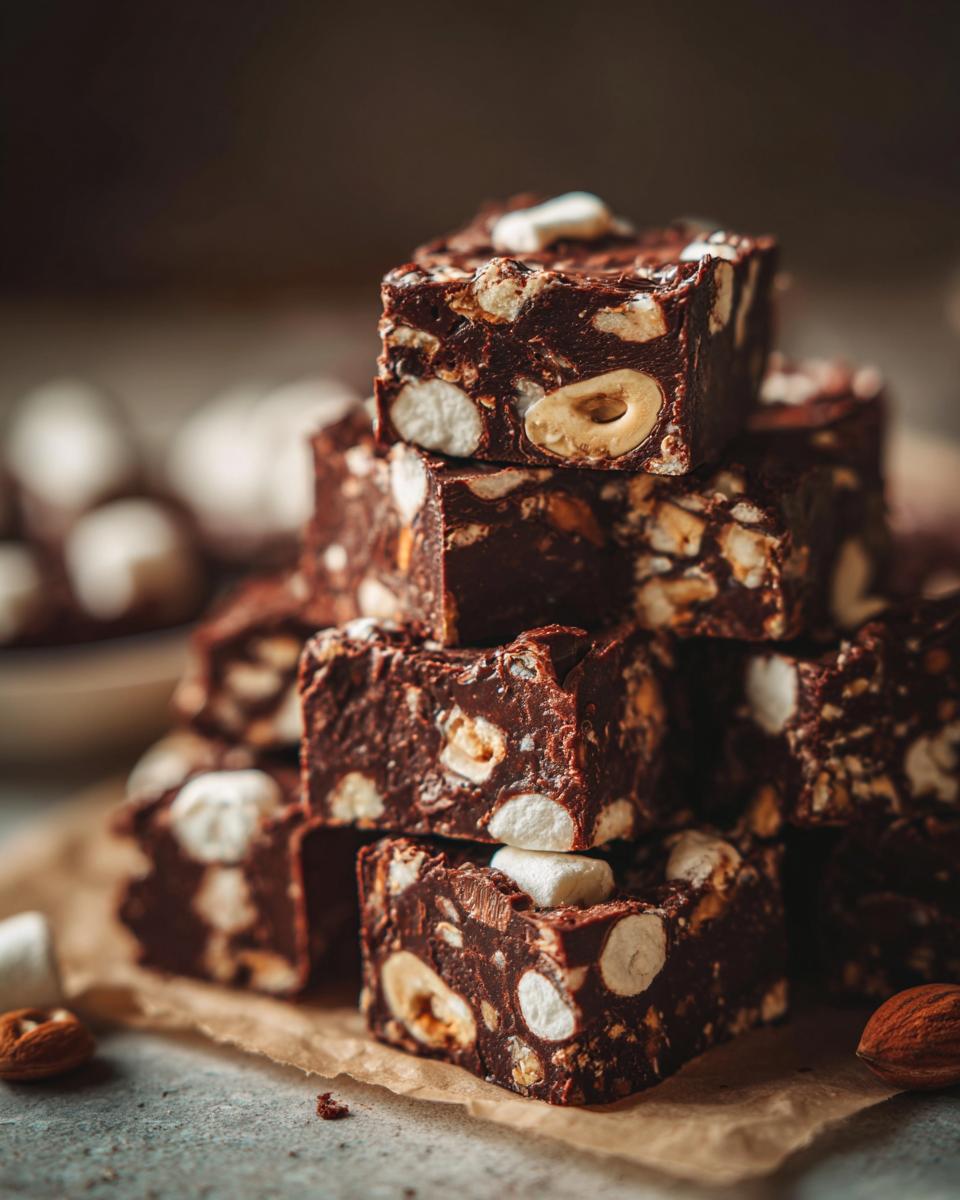
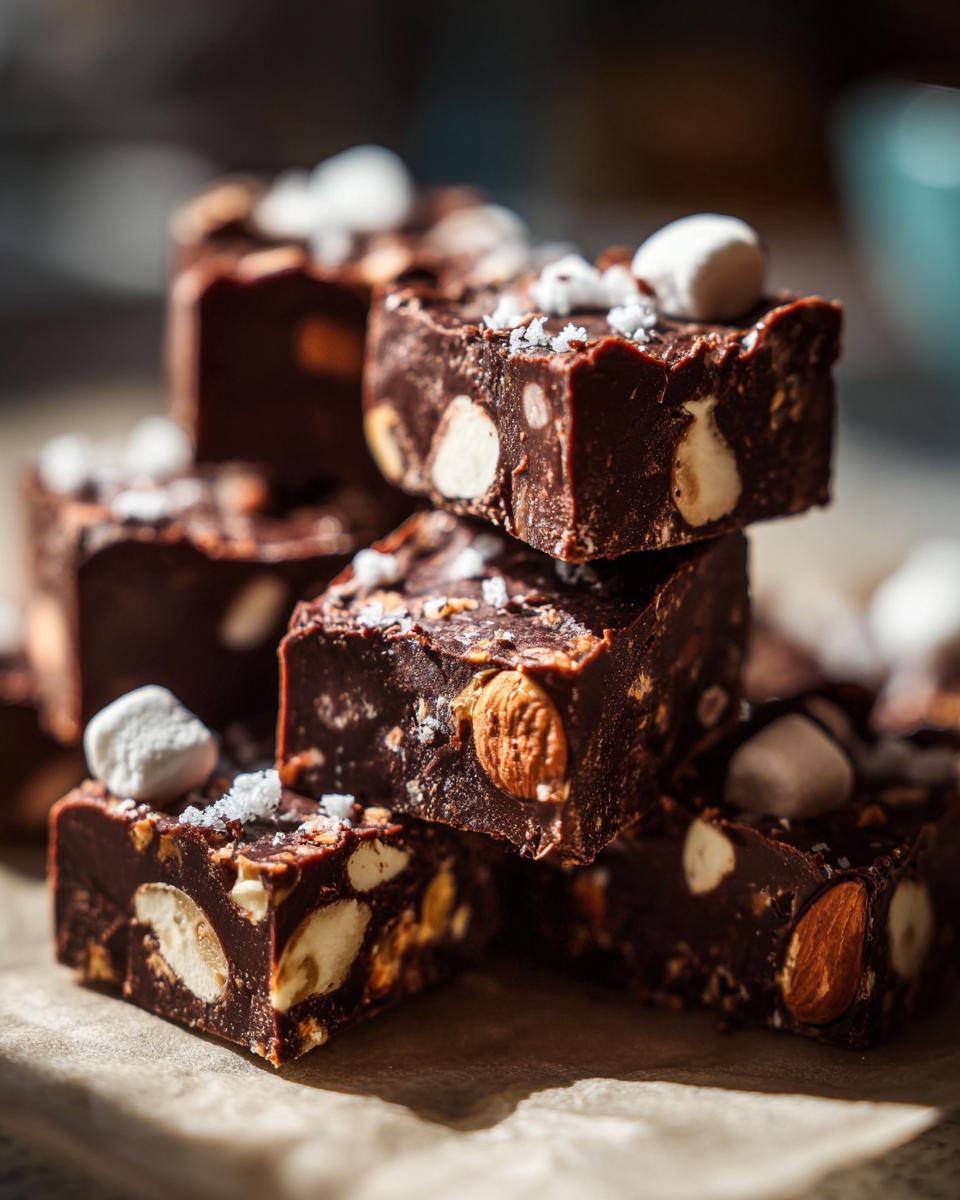
You’ll need one 14-ounce can of sweetened condensed milk—that’s non-negotiable for no-bake results! Then, two cups of semi-sweet chocolate chips. We follow that up with just one teaspoon of vanilla extract for that lovely background warmth. For the texture that makes this Marshmallow Nut Fudge famous, grab one cup of mini marshmallows and one cup of chopped walnuts or pecans. Oh, and don’t forget the one tablespoon of butter you need just to prep the pan so everything releases perfectly later.
Ingredient Notes and Substitutions for Marshmallow Nut Fudge
Since we are using so few items, the quality really matters! I always urge everyone to use good solid chocolate chips here. If you use a lower quality chip, your rocky road fudge just won’t have that gloriously glossy, rich melt. Cheap chocolate can sometimes seize up or leave a dull finish, and we don’t want that mess!
When it comes to the nuts, the recipe calls for walnuts or pecans, and that’s my family’s preference. But if you’re not a huge fan, the source notes mentioned that almonds work beautifully too! They still give you that fantastic crunch against the soft marshmallows. Just make sure whatever nut you choose is freshly chopped so they aren’t stale when you mix them in.
How to Make Quick Chocolate Fudge: rocky road fudge Instructions
Getting this rocky road fudge mixed up is honestly faster than brewing a pot of coffee! Since this is a true Microwave Fudge Recipe, we get to skip all the stovetop fuss. Just follow these steps exactly, and you’ll have gorgeous, decadent squares ready for the fridge in minutes. Remember, this whole process is what makes it such a reliably Easy Fudge Recipe.
Preparing the Pan for Simple Fudge Squares
We start with the pan because we need everything ready to go once that chocolate is melted! Take your 8×8 inch pan and either grease it lightly with butter or, my preferred method, line it with parchment paper. The key here is leaving that paper hanging over two of the sides—this creates little handles. When the fudge is nice and firm from chilling, those handles let you just lift the entire block out in one piece. It makes cutting into those perfect Simple Fudge Squares so much cleaner!
Melting and Mixing the rocky road fudge Base
Now for the actual cooking, which is the easiest part. Combine your chocolate chips and sweetened condensed milk in a microwave-safe bowl. Pop it in the microwave, but listen closely: only heat it in 30-second bursts. You must stir it really well after every zap. If you try to go too long—say, a full minute—you might scorch those delicate chocolate chips! Keep stirring until it’s completely smooth; this usually takes us about a minute or two total. Once totally melted, stir in your vanilla, and then gently fold in those marshmallows and nuts. Don’t mix too vigorously once the marshmallows are in, or they might start getting sticky and melting too soon. Then, pour that glorious mixture into your prepared pan. We need to let this amazing No Bake Fudge chill for at least two hours until it’s rock solid enough to slice.
Tips for Perfect rocky road fudge Success
You know, even though this is hailed as an ‘Easy Fudge Recipe,’ there are always little things that elevate it from just good to truly spectacular. This is where my grandmother’s patience comes in handy, even when we are skipping the stovetop! We want that luxurious texture that makes people groan happily when they realize what they are eating—not just hard chocolate blocks!
First things first, I have to stress this again: use the best chocolate chips you can find. Since this is essentially a giant chocolate chip bar, using decent quality chips here makes a massive difference in the final richness of your Homemade Candy. Don’t try to cheap out here; your taste buds will thank you later.
Another little trick that helps achieve that perfect texture is how you handle the add-ins. Make sure your nuts are chopped right before you throw them in. If they are too fine, they just disappear. If they are too big, you end up with huge, awkward clumps in your squares. We want an even distribution of crunch, so aim for a medium chop!
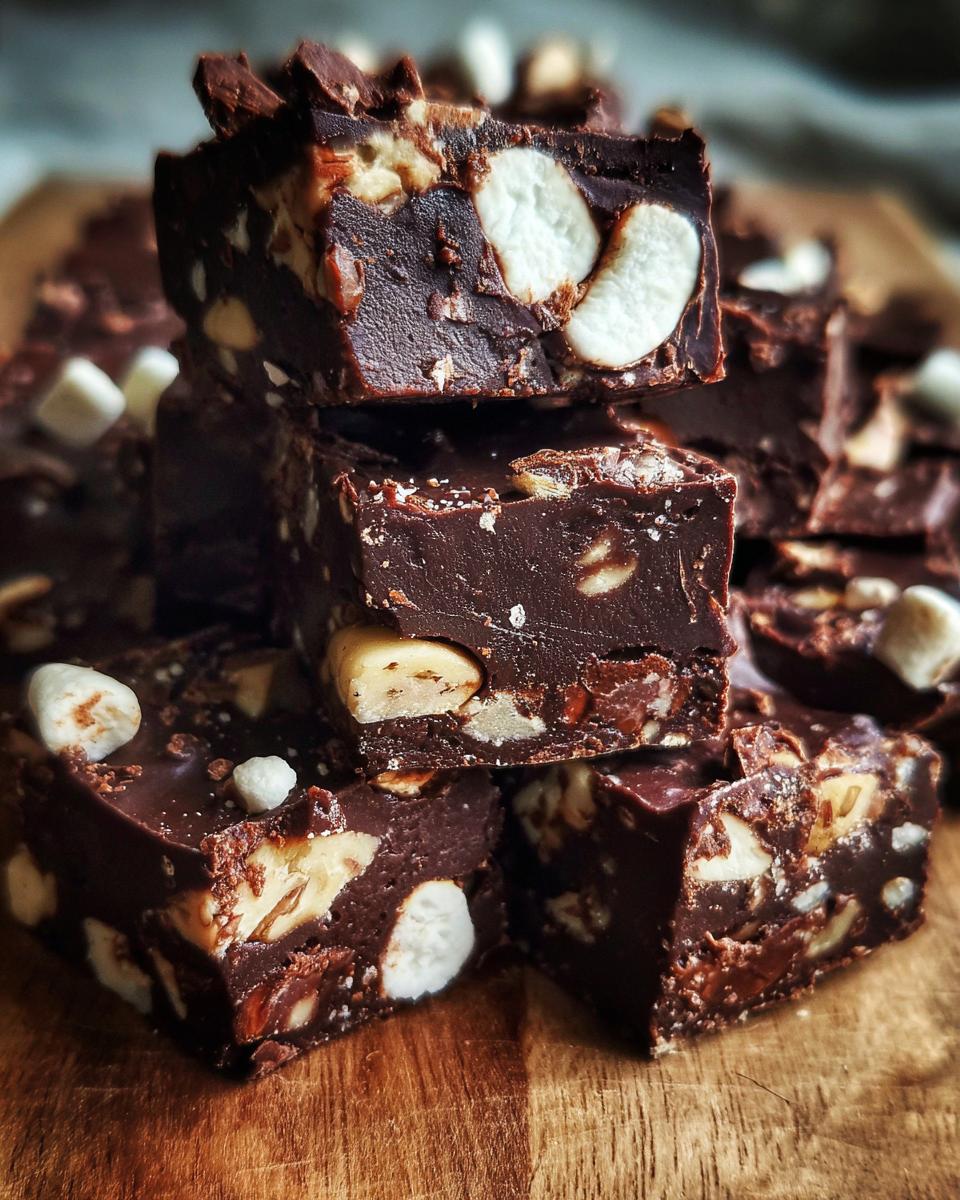
When you are folding in those marshmallows and nuts, be gentle! This is the step where a lot of people rush, and when you mix too hard, the marshmallows start to dissolve right into the warm chocolate mixture. That’s fine if you were aiming for a smooth chocolate base, but for true rocky road fudge, we want those fluffy white pockets intact. A gentle folding motion ensures they stay mostly whole. We want texture! For more inspiration on reliable, tasty treats, you can always check out great recipes like this example of easy rocky road fudge.
Finally, don’t try to rush the chilling time. Seriously, don’t. I know waiting two hours feels like torture when the pan of chocolate goodness is staring at you from the fridge, but if you try to cut it early, you’ll end up with a gooey, unusable mess instead of those clean, perfect squares. Patience truly is an ingredient in any successful fudge recipe!
Storage and Serving Suggestions for your Homemade Candy
The best part about making a huge batch of this Homemade Candy is that you don’t have to eat it all right away! You want to keep that texture perfect, right? So, here’s the scoop on keeping things fresh.
You can store this fudge just fine at room temperature, kept in an airtight container, for about a week. That’s easy enough for everyday snacking! If you need it to last longer, say, past a week or if your kitchen is super warm, pop it into the refrigerator. It will last longer in there, though I find the texture gets a little firmer when cold.
When it comes to serving, these little beauties are divine all by themselves, especially with a cup of coffee or after a big dinner. But if you want to get really fancy—and I love doing this when I gift them—I sometimes drizzle a little extra melted chocolate right on top, or even dust them with a touch of flaky sea salt. It just makes them feel extra special! For more ideas on rich treats, check out my recipe for chocolate rum balls.
Frequently Asked Questions About rocky road fudge
I know you might have some little questions buzzing around, especially if you’re new to making fudge this quickly! It’s important to me that you have success on your first try, because getting this Easy Fudge Recipe right is so satisfying. Here are some of the things people ask me most often about this Classic Rocky Road Candy.
Can I skip the microwave and melt this on the stovetop instead?
Absolutely, you can! If you really prefer the stovetop, just use a double boiler or a heat-proof bowl set over a saucepan of simmering (not boiling!) water. You still need to stir constantly until that chocolate and condensed milk are perfectly smooth. Honestly, stovetop melting can feel a little more nerve-wracking because it’s easier to scorch the chocolate, but it works just as well if you keep the heat low and gentle. It’s really just a matter of preference in this No Bake Fudge process.
What if I don’t like walnuts or pecans? What nuts are best?
Use what you love! The richness of walnuts or pecans is traditional, but if you have an allergy or just don’t prefer them, absolutely swap them out. Even almonds, as I mentioned, work wonderfully. You could even try something fun like crushed pretzels if you want a salty crunch mixed in—though that steers it a bit away from the classic look. The main thing is to make sure whatever nut you choose is chopped nicely, not pulverized into dust, so you get that nice contrast in texture we are looking for!
Can I freeze this fudge?
That is a great question, especially if you’re trying to get ahead on your Holiday Fudge Gifts! Yes, you can freeze this! Since this fudge is primarily chocolate and marshmallows, it freezes surprisingly well. Wrap the cooled, cut squares tightly in plastic wrap first, and then pop them into a freezer-safe, airtight container. It keeps really well for up to two or three months. Just let it thaw slowly in the fridge for a few hours before serving it up. If you are looking for more make-ahead holiday goodies, you should take a look at these fantastic fudgy Oreo brownies!
My marshmallows are getting a little soft. Did I mess up the timing?
Don’t panic! That’s usually just a sign that the chocolate base was quite warm when you folded them in, or maybe you folded them a bit too long. A few soft marshmallows usually won’t ruin the batch, especially once it sets in the fridge. However, to prevent this next time, make sure your melted chocolate mixture has cooled for just one minute before you fold in the marshmallows and nuts. That tiny bit of cooling time stops them from melting instantly. For more reliable treats, see what everyone else is saying about this recipe over at Simple Joy.
Share Your Decadent Chocolate Dessert Experience
I truly hope you loved making this rich, fast rocky road fudge as much as I love sharing it with you. It’s one of those foundational recipes that always brings me back to Grandma Daisy’s kitchen. There’s nothing better than that moment when you cut into the perfectly set squares!
If you followed along and whipped up a batch of this Decadent Chocolate Dessert, please stop back here and let me know how it turned out! I can’t wait to hear what nuts you used, or if you decided to drizzle extra chocolate on top. Leave a rating for the recipe below—five stars if it made your day easier!—and feel free to share in the comments who you spoiled with your batch of Homemade Candy. For reference, you can always check out other favorites like my homemade chocolate cake recipe. Happy baking, even when you aren’t actually baking!
Nutritional Estimates for Simple Fudge Squares
I always get questions about the bigger picture of what we’re eating, even with something as purely fun as fudge! While this rocky road fudge is definitely a treat, knowing the general estimates is helpful. Remember, baking is variable, so these numbers are just guidelines based on the standard ingredients when cut into 36 neat squares.
I never rely on these numbers for calorie counting, but it’s nice to see where we stand. If you use darker chocolate or different nuts, the numbers will shift a bit, of course! These estimates reflect the richness of the condensed milk and chocolate combination we use in this wonderfully Easy Fudge Recipe.
- Serving Size: 1 square
- Calories: 185
- Sugar: 22g
- Sodium: 35mg
- Fat: 10g
- Saturated Fat: 6g
- Unsaturated Fat: 4g
- Trans Fat: 0g
- Carbohydrates: 23g
- Fiber: 1g
- Protein: 3g
- Cholesterol: 10mg
Just a quick note, dear cooks: these specific figures are based on the standard measurements listed in the recipe above. If you decide to double up on the marshmallows or switch to high-fat pecans, these little numbers here will change! That’s the reality of making delicious Homemade Candy; it’s all about enjoying the moment, not obsessing over statistics!
Share Your Decadent Chocolate Dessert Experience
I truly hope you loved making this rich, fast rocky road fudge as much as I love sharing it with you. It’s one of those foundational recipes that always brings me back to Grandma Daisy’s kitchen. There’s nothing better than that moment when you cut into the perfectly set squares!
If you followed along and whipped up a batch of this Decadent Chocolate Dessert, please stop back here and let me know how it turned out! I can’t wait to hear what nuts you used, or if you decided to drizzle extra chocolate on top. Leave a rating for the recipe below—five stars if it made your day easier!—and feel free to share in the comments who you spoiled with your batch of Homemade Candy. For reference, you can always check out other favorites like my homemade chocolate cake recipe, or see what others are trying over at Tastes Better From Scratch. Happy baking, even when you aren’t actually baking!
PrintEasy No-Bake Rocky Road Fudge

Make this simple, quick Rocky Road Fudge using only a few ingredients. This no-bake recipe is perfect for fast holiday gifts or satisfying a sweet craving.
- Prep Time: 10 min
- Cook Time: 2 min
- Total Time: 132 min
- Yield: 36 small squares 1x
- Category: Dessert
- Method: No-Bake
- Cuisine: American
- Diet: Vegetarian
Ingredients
- 1 (14 ounce) can sweetened condensed milk
- 2 cups semi-sweet chocolate chips
- 1 teaspoon vanilla extract
- 1 cup mini marshmallows
- 1 cup chopped walnuts or pecans
- 1 tablespoon butter (for pan preparation)
Instructions
- Lightly grease an 8×8 inch baking pan with butter, or line it with parchment paper, leaving an overhang on two sides for easy removal.
- In a medium, microwave-safe bowl, combine the chocolate chips and sweetened condensed milk.
- Microwave in 30-second intervals, stirring well after each interval, until the mixture is completely smooth and melted. This usually takes 1 to 2 minutes total.
- Stir in the vanilla extract.
- Gently fold in the mini marshmallows and chopped nuts until they are evenly distributed throughout the chocolate mixture.
- Pour the fudge mixture into the prepared pan and spread it evenly.
- Refrigerate the fudge for at least 2 hours, or until firm enough to cut.
- Use the parchment paper overhang to lift the fudge from the pan. Cut the fudge into small squares before serving.
Notes
- For an extra rich flavor, use high-quality chocolate chips.
- If you prefer a different nut, almonds work well in this classic Rocky Road Candy recipe.
- Store the finished fudge in an airtight container at room temperature for up to one week, or in the refrigerator for longer storage.
Nutrition
- Serving Size: 1 square
- Calories: 185
- Sugar: 22
- Sodium: 35
- Fat: 10
- Saturated Fat: 6
- Unsaturated Fat: 4
- Trans Fat: 0
- Carbohydrates: 23
- Fiber: 1
- Protein: 3
- Cholesterol: 10