
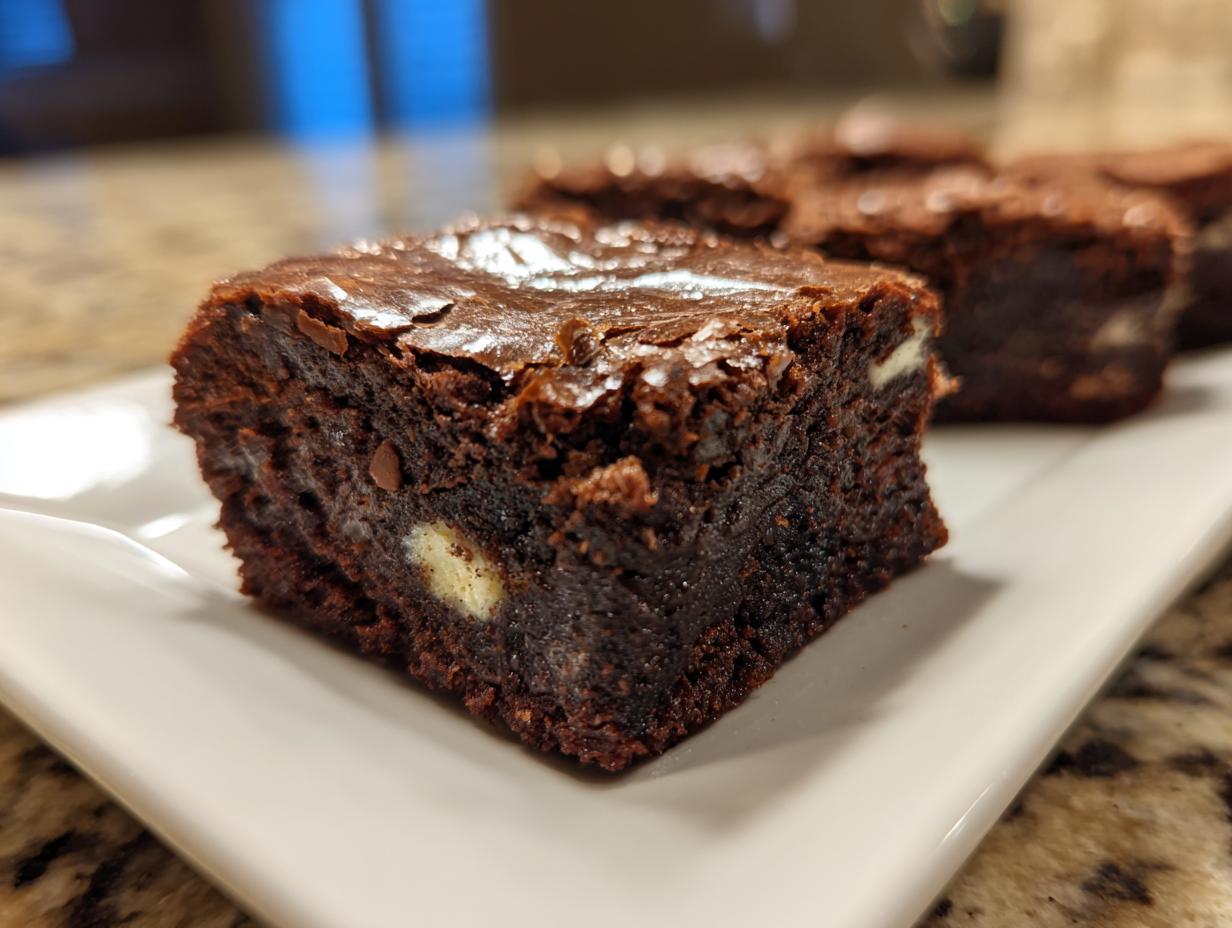
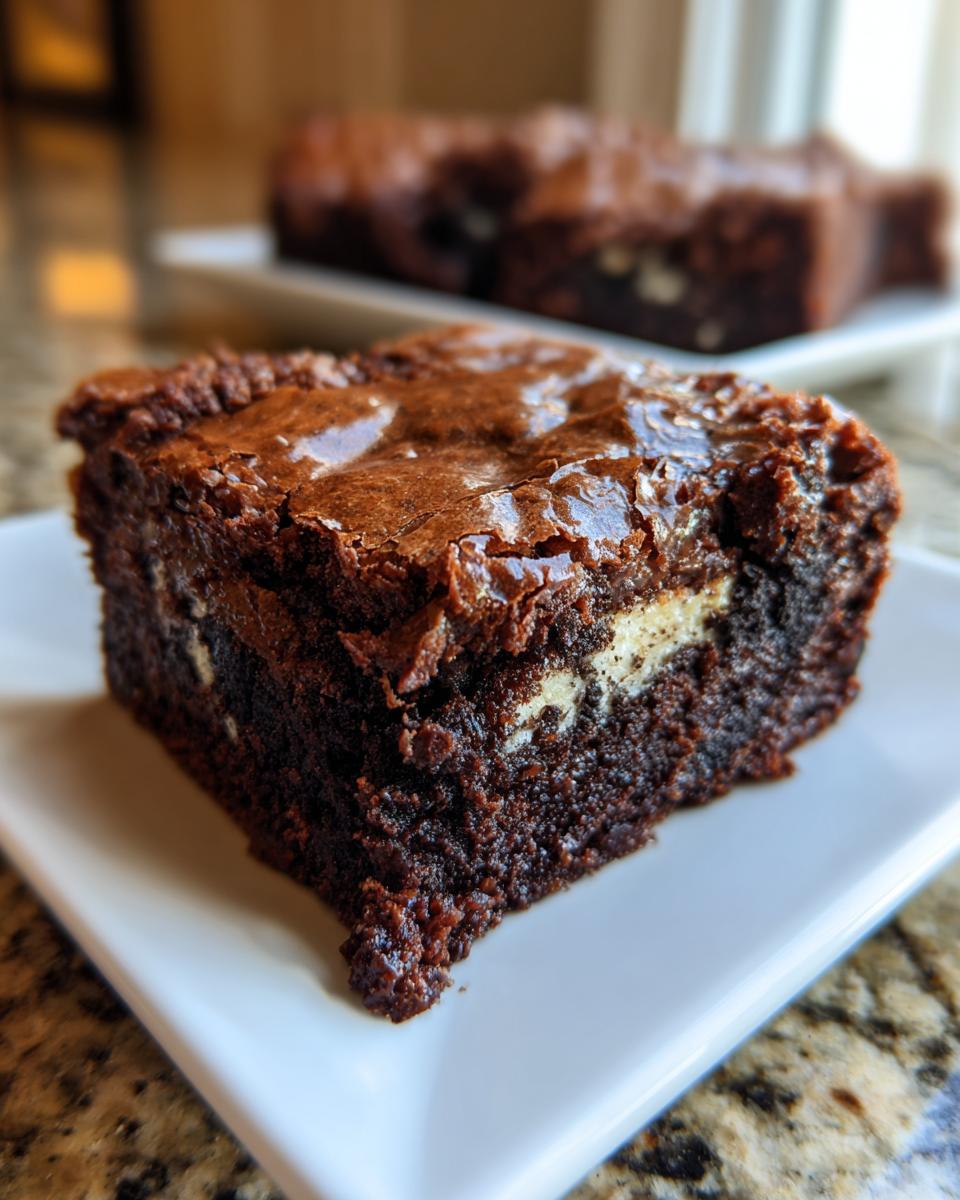
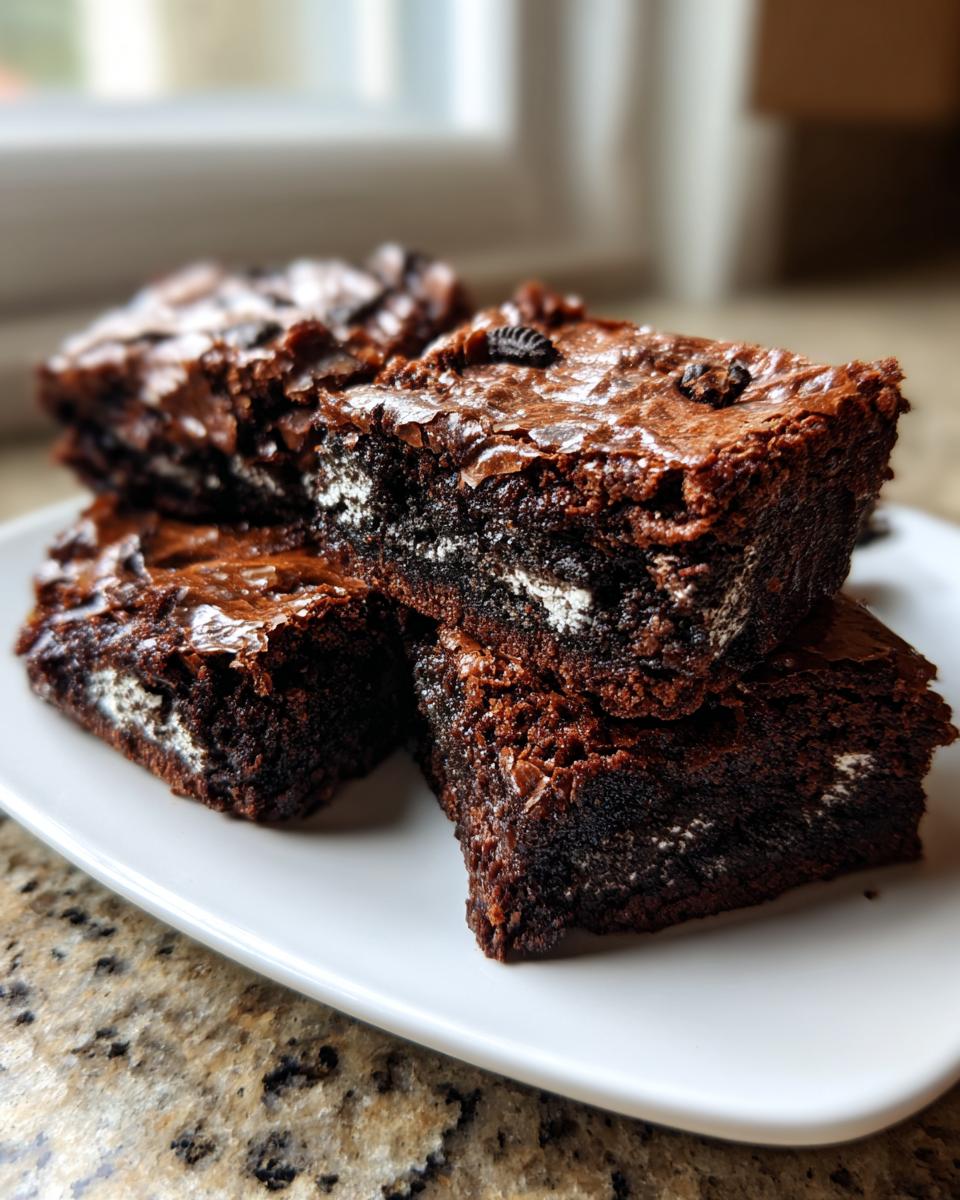
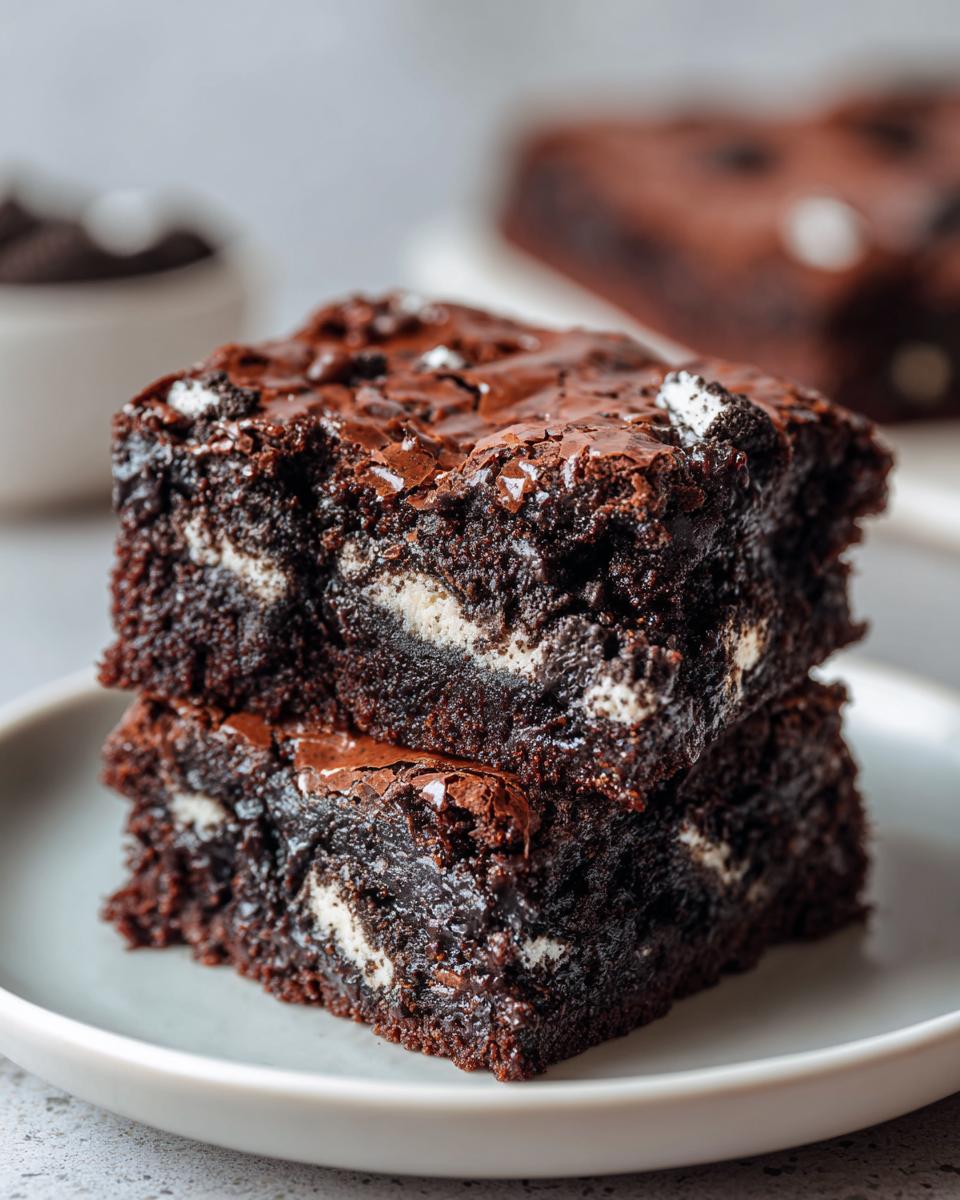
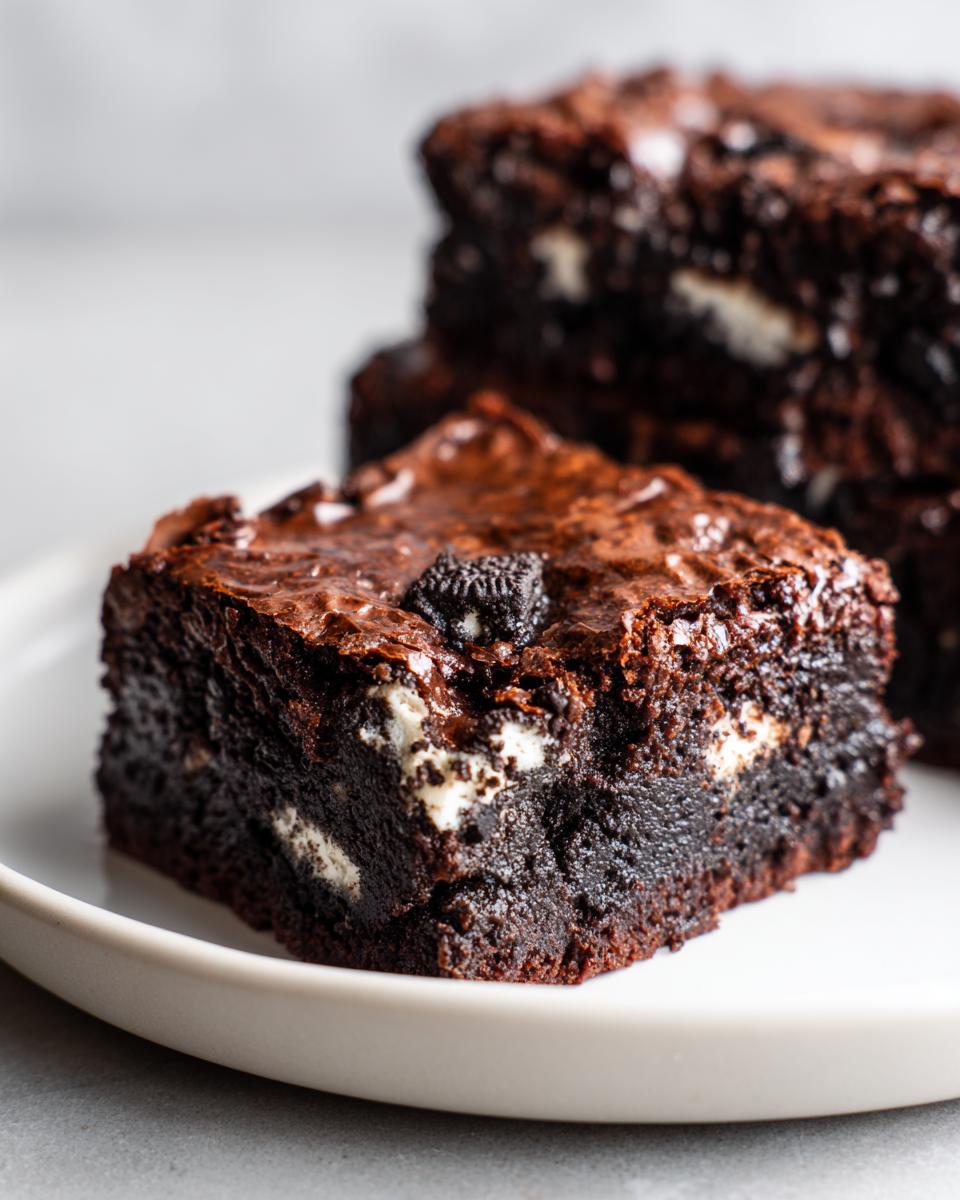
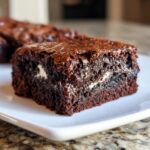
Oh, when that intense, deep, chocolate craving hits—you know the one—it demands immediate attention, and nothing fixes it faster than the perfect baked bar. Forget dry, cakey things; we are aiming straight for decadent, gooey centers. I’m absolutely certain that what you’re looking at right here is the best oreo brownie recipe you’ll ever try, guaranteed to give you that unbelievably fudgy texture wrapped in that gorgeous, shiny, crackly top. It took me a while to perfect this, moving away from the frantic pace of my city life and reconnecting with my Grandma Daisy’s philosophy of simple, honest baking. Trust me, these oreo brownies are the real deal; they bring that grounded, comforting feeling of home right back to your busy kitchen. I’ve baked these hundreds of times so you don’t have to worry about failure. You can see more about how I brought Daisy’s legacy back to life over on the About Page.
- Why This is the Best Oreo Brownie Recipe for Fudgy Chocolate Bars
- Ingredients for Ultimate Fudgy Oreo Brownies
- How to Prepare Easy Oreo Brownies Step-by-Step
- Making Homemade Oreo Treats: Baking and Cooling
- Variations: From Oreo Brookies Recipe to Layered Oreo Desserts
- Storage & Reheating Instructions for Decadent Brownies
- Frequently Asked Questions About Oreo Brownies
- Estimated Nutritional Snapshot for These Oreo Brownies
- Share Your Ultimate Chocolate Dessert Creations
Why This is the Best Oreo Brownie Recipe for Fudgy Chocolate Bars
So many recipes out there promise the world, but when you cut into them, they’re just cakey messes. Not here! The secret to these truly spectacular Fudgy Oreo Brownies lies in two things: a very high fat-to-flour ratio and barely letting them touch the oven heat. We are cutting down on flour significantly—it’s the key ingredient that would turn these into disappointing chocolate cakes. By using melted butter and relying heavily on the sugar and egg mixture for structure, we make sure these bars stay dense and chewy.
And that glossy surface? That’s the magic moment happening when you whisk the hot butter and sugar just right at the start. That gloss translates directly into the coveted Brownies with Shiny Top. It makes these oreo brownies look like they came straight from a high-end bakery, but I promise you, they are ridiculously simple. You’re going to get that decadent smash-in-your-face chocolate flavor every time.
Achieving the Perfect Fudgy Texture in Your Oreo Brownies
If you take only one thing away from this, remember this: Do not overbake! For those next-level Chewy Fudge Brownies, the center needs to look ever so slightly underdone when you pull the pan out. That residual heat is doing all the final cooking once they are cooling on the rack. When you test it, you want moist crumbs clinging to the toothpick, not wet drips of batter. Trust me, let them cool completely—that setting time is crucial for that perfect, dense bite.
Ingredients for Ultimate Fudgy Oreo Brownies
The best part about these oreo brownies? You probably have most of this stuff hanging out in your pantry already! We stick to simple, quality components because that’s what Grandma Daisy always taught me—no need for fancy extracts or pricey imports here. We need the good stuff for that foundation: one whole cup of melted unsalted butter and two cups of sugar. Grab those large eggs, and make sure you have good quality unsweetened cocoa powder. We keep the flour low, just a half cup, which is how we guarantee the fudgy texture you’re dreaming about for these Chocolate Oreo Desserts.
Ingredient Notes and Substitution Options for Oreo Brownies
I used semi-sweet chips in the recipe because they offer a good balance, but honestly, if you want to lean into that deep, dark chocolate, feel free to swap them out for bittersweet or dark chocolate chips. That’s a great tip for hardcore chocolate fans! Also, remember that granulated sugar is essential for that shiny top! It dissolves during the initial whisking and creates that glossy lacquer on top of the batter. When we are talking about Baking with Oreos, you can swap out the standard cookie for Double Stuf if you want an extra punch of cream filling goodness.
How to Prepare Easy Oreo Brownies Step-by-Step
Okay, let’s get these amazing oreo brownies into the oven! This is where we build that shiny crust, so pay close attention to the whisking—it’s not just about mixing; it’s about creating something beautiful. First things first, grab your 9×9 inch pan and line it really well with parchment paper. You want those big overhangs so you can lift the whole glorious slab out later. Get that oven warmed up to 350°F (175°C) while you work; we want everything ready to go.
In your big bowl, whisk the melted butter and the sugar together until they are completely combined. Then comes the magic step: whisk in those four large eggs one by one. You need to whisk hard here until the mixture looks smooth, glossy, and slightly lighter—that’s what creates the shine later on! Stir in your vanilla extract.
In a separate little bowl, quickly whisk your dry items—the cocoa powder, flour, and salt. Now, add these dry bits slowly to your wet mixture. Stop mixing the second they disappear! We are stopping short of everything being uniform here because overmixing develops gluten, and gluten means cake, not fudge. Gently fold in the chocolate chips and about half of your chopped Oreos. Spread that thick batter into your prepared pan and scatter the rest of those cookie chunks right on top. You can check out a similar method from another great baker here: Broma Bakery’s Fudgy Oreo Brownies.
Tips for Getting the Brownies with Shiny Top
This is the secret handshake for the perfect crust! That gorgeous, crinkly snap on top of your Fudgy Oreo Brownies comes almost entirely from whisking the eggs and sugar vigorously until that mixture is glossy and smooth before you even touch the cocoa powder. You are essentially dissolving the sugar as you beat air into the eggs, which rises to the surface during baking. If you barely whisk the wet ingredients, that sugar won’t form that beautiful glassy layer we all want on our Brownies with Shiny Top. Keep folding gently after that step, don’t go back to aggressive whisking!
Making Homemade Oreo Treats: Baking and Cooling
Time flew by, and now it’s time to put these amazing oreo brownies into the oven! We’re sticking to 350°F (175°C) for about 30 to 35 minutes. But listen closely, because this is where we lock in that fudgy, decadent texture. When you test the doneness, ignore the cakey rule of a fully clean toothpick. For these Homemade Oreo Treats, you want to pull them out when the toothpick comes out with moist, slightly sticky crumbs attached. If it’s perfectly clean, puppy, you’ve gone too far!
Also, remember that tip from the notes? If you want them ultra-fudgy, you can pull them out about two minutes early. Don’t worry, the residual heat handles the rest. My biggest piece of advice is patience during the cooling stage. You simply *have* to let these cool completely in that pan on the wire rack before you even think about lifting them out using the parchment overhang. If you cut them warm, they will collapse into a glorious, gooey puddle—and while that tastes amazing, it’s impossible to serve! Wait for them to set up!
Variations: From Oreo Brookies Recipe to Layered Oreo Desserts
You’ve mastered the foundational oreo brownies, but what if you want to go even bigger? I love taking this base recipe and putting a creative twist on it because half the fun is experimenting! If you’re looking for a truly epic dessert experience, we can easily turn this into an Oreo Brookies Recipe. That means adding a layer of your favorite chocolate chip cookie dough right under the brownie batter before you bake. Just make a batch of your preferred dough—maybe even use pre-made if you are in a rush!—press it into the bottom about the thickness of your finger, pour the brownie mix gently over the top, and then sprinkle with those extra chopped Oreos.
You might need to add five extra minutes to the baking time since we are adding that extra decadent layer, but wow, is it worth it! You can also think in terms of Layered Oreo Desserts by making a batch of salted caramel sauce and drizzling it over the top right before the final sprinkle of Oreos goes on. That salty-sweet combination with the intense chocolate is just heavenly. Honestly, once you nail this basic fudgy treat, the variations for your homemade Oreo treats are endless. You can find inspiration for those cookie mashups over at Cambre Bakes for Brookies!
Storage & Reheating Instructions for Decadent Brownies
The biggest question after devouring half the pan (which you definitely will) is how to keep these beauties fresh. Luckily, these decadent brownies store really well! Once they are completely cool and set, wrap the squares tightly in plastic wrap, or pop the entire uncut slab into an airtight container. Keep them on your counter at room temperature for about three days. They stay perfectly fudgy because of that high fat content.
If you happen to have any left after three days—good job!—you can transfer them to the fridge for another week. When you crave that molten center again, just pop a square in the microwave for about 10 to 15 seconds. Trust me, that little blast of warmth brings back that incredible gooey texture instantly!
Frequently Asked Questions About Oreo Brownies
I know you probably have a million questions rattling around after reading how incredible these oreo brownies are! It’s always good to double-check when you are aiming for that perfect result. These are the most common things people ask when they are just about to whip up a batch of these chocolate treats.
How do I make these Easy Oreo Brownies even fudgier?
That’s my favorite question! If you want to push the fudginess even further beyond what the recipe already delivers, the secret is a tiny bit of extra melted chocolate. When you are melting your butter, melt in an extra quarter cup of good quality chocolate chips right along with it. Stir that rich mixture into your batter along with the rest of the chips. This slightly increases the fat content and density, guaranteeing you get the most decadent, Chewy Fudge Brownies possible!
Can I use different types of cookies in this Oreo Brownies recipe?
Absolutely! Listen, Grandma Daisy always worked with what she had, and you should too! While the classic Oreos give you that specific crunch, feel free to swap them out for other crunchy cookies you love. Thin Mints work wonderfully if you’re feeling fancy! Even bits of peanut butter cookies or shortbread cookies work great in place of the Oreos. Just remember to chop them up roughly so you get those great surprises throughout your Fudgy Oreo Brownies.
What is the best way to cut clean squares of Fudgy Oreo Brownies?
Cutting them clean is an art form, and it all goes back to the cooling time we talked about! If you try to cut them while they are even slightly warm, you’ll get that gooey pull that messes up your nice squares. Wait until they are completely, totally cool—I mean room temperature. Then, pull the whole thing out of the pan using those parchment paper overhangs. For the cleanest cuts, use a long, sharp knife that you wipe clean between every single slice. If you’re still struggling, a quick blast of cold air from the freezer for about 15 minutes right before slicing also helps firm things up! For more general tips on fudgy texture, you can always check out the tips at Salt & Baker.
How do I ensure I get that shiny top?
Ah, the shiny top! It’s all about the initial whisking. You need to beat the melted butter and the granulated sugar together until the mixture looks lighter in texture and glossy. Then, when you add the eggs, you whisk them in vigorously until the mixture really shines. Don’t go light on that step! If you need help with general contact questions, check out our Contact Page.
Estimated Nutritional Snapshot for These Oreo Brownies
I always feel like it’s only fair to give you a heads-up on what you’re diving into when you make something this rich! Since we are using real butter and all those glorious Oreos, these bars are definitely on the indulgent side, which is totally what they are supposed to be, right? This nutritional information is just an estimate based on the ingredients listed for one standard-sized square, so keep that in mind when you’re counting things up.
If you follow the recipe and aim for 16 generous squares, here’s roughly what you’re looking at for one piece:
- Calories: About 320 a serving
- Fat: Near 18 grams (remember, a lot of that wonderful richness comes from butter!)
- Carbohydrates: Roughly 38 grams
- Protein: Around 4 grams
This isn’t exactly a health food, and that’s okay! These chocolate Oreo desserts are meant for moments of pure joy and satisfaction. Enjoying one of these decadent bars means you’re embracing that simple pleasure of a great homemade treat, just like my Grandma Daisy always intended!
Share Your Ultimate Chocolate Dessert Creations
Whew! That’s it—the secret guide to making the most decadent, fudgy, shiny-topped oreo brownies on the planet. Now comes the best part! I truly want to hear about your baking adventure. Did you manage to keep your hands off them until they cooled completely? Did you sneak in some dark chocolate chips like I suggested?
Please, please leave a comment down below telling me how they turned out! Rating the recipe is a huge help to new bakers who are just getting started on their journey to mastering the ultimate chocolate dessert. And if you snapped any pictures of your gorgeous, crinkly-topped squares, tag me! Seeing your interpretations of Grandma Daisy’s simple, joyful baking philosophy in your own kitchen really means the world to me.
Sharing food is how we connect, even if it’s just virtually through a screen. I can’t wait to see what you create! If you ever have questions about recipe policy or privacy, you can view that information over at the Privacy Policy page, but for now, just enjoy those incredible, chewy fudge brownies!
PrintUltimate Fudgy Oreo Brownies with Shiny Top
Make rich, fudgy Oreo brownies with a perfect, shiny, crackly top using simple ingredients. This recipe delivers a decadent chocolate dessert packed with cookie pieces.
- Prep Time: 15 min
- Cook Time: 35 min
- Total Time: 50 min
- Yield: 16 brownies 1x
- Category: Dessert
- Method: Baking
- Cuisine: American
- Diet: Vegetarian
Ingredients
- 1 cup unsalted butter, melted
- 2 cups granulated sugar
- 4 large eggs
- 1 teaspoon vanilla extract
- 3/4 cup unsweetened cocoa powder
- 1/2 cup all-purpose flour
- 1/2 teaspoon salt
- 1 cup semi-sweet chocolate chips
- 12 Oreo cookies, roughly chopped
Instructions
- Preheat your oven to 350°F (175°C). Line a 9×9 inch baking pan with parchment paper, leaving an overhang on two sides for easy removal.
- In a large bowl, whisk together the melted butter and granulated sugar until fully combined.
- Whisk in the eggs one at a time until the mixture is smooth and glossy. Stir in the vanilla extract.
- In a separate bowl, whisk together the cocoa powder, flour, and salt.
- Gradually add the dry ingredients to the wet ingredients, mixing until just combined. Do not overmix.
- Gently fold in the chocolate chips and half of the chopped Oreo cookies.
- Spread the batter evenly into the prepared pan. Sprinkle the remaining chopped Oreos over the top.
- Bake for 30 to 35 minutes. A toothpick inserted near the edge should come out with moist crumbs, not wet batter, for a fudgy texture.
- Let the brownies cool completely in the pan on a wire rack before lifting them out using the parchment overhang.
- Cut into squares and serve.
Notes
- For the best shiny top, do not overmix the batter after adding the flour.
- For extra fudgy brownies, slightly underbake them by about 2 minutes.
- You can substitute the semi-sweet chocolate chips with dark chocolate for a deeper flavor.
Nutrition
- Serving Size: 1 brownie
- Calories: 320
- Sugar: 35
- Sodium: 150
- Fat: 18
- Saturated Fat: 10
- Unsaturated Fat: 8
- Trans Fat: 0.5
- Carbohydrates: 38
- Fiber: 1
- Protein: 4
- Cholesterol: 65