
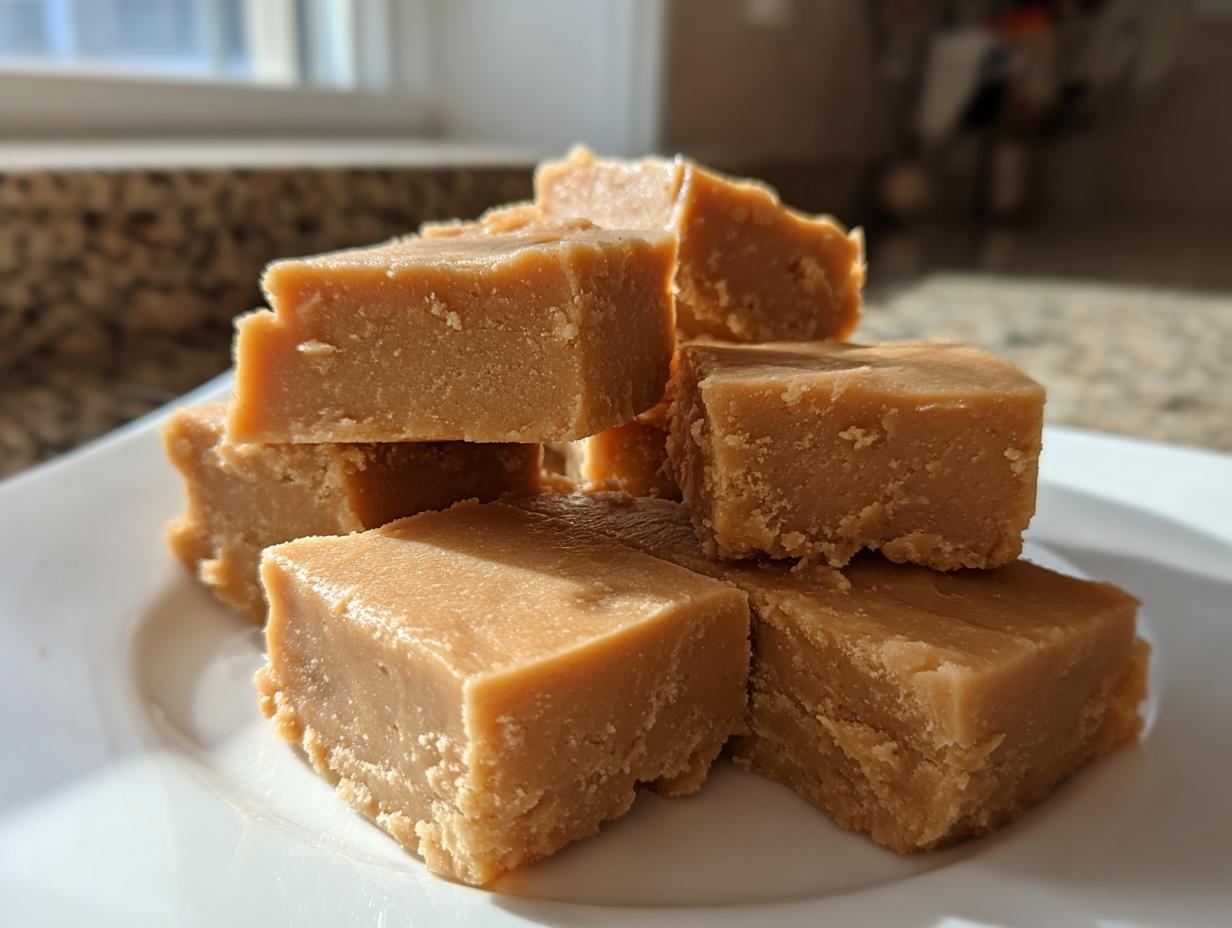
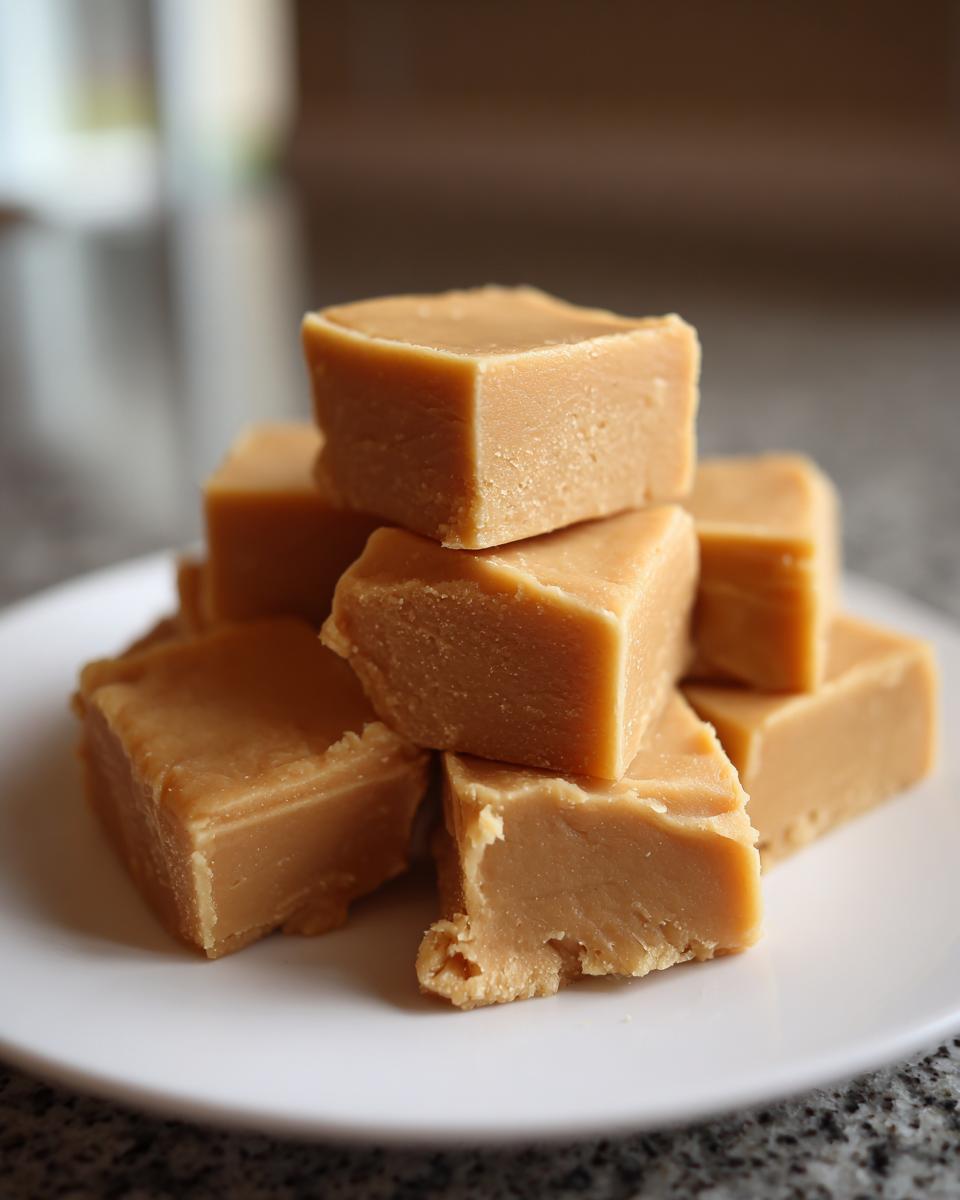
There’s just something about the first bite of perfectly smooth, nostalgic candy that pulls you right back to childhood holidays, isn’t there? When I first started reclaiming those simple, honest recipes—the ones my Grandma Daisy made without even checking a timer—this creamy peanut butter fudge was the first thing I perfected. I promise you, this is the most irresistibly creamy, no-fail recipe you’ll ever need. It yields that rich, melt-in-your-mouth dessert that’s absolutely perfect for gifting when you need a quick sweet treat. It honors Daisy’s spirit by being delightfully simple, yet incredibly decadent. You won’t believe how easy this batch of homemade peanut butter candy comes together!
- Why This Is the Best Homemade Peanut Butter Fudge Recipe
- Gathering Ingredients for Your Creamy Peanut Butter Fudge
- Step-by-Step Instructions for This No Fail Peanut Butter Fudge Recipe
- Tips for Achieving Old Fashioned Peanut Butter Fudge Texture
- Making This Simple Peanut Butter Treat for Holiday Gifting
- Storage and Keeping Your Creamy Peanut Butter Fudge Fresh
- Frequently Asked Questions About This Easy Peanut Butter Fudge Recipe
- Estimated Nutritional Data for This Classic Holiday Candy
- Share Your Experience Making This Peanut Butter Fudge
Why This Is the Best Homemade Peanut Butter Fudge Recipe
If you’ve ever made fudge the old-fashioned way—stirring over the stove until your arm aches—you know it can cause panic. Not this version! This is truly the best homemade peanut butter fudge because it delivers that unbelievably creamy, melt in your mouth dessert texture without any fuss. We use sweetened condensed milk plus a quick zap in the microwave to get perfectly smooth results every single time. Daisy insisted that food should be nourishing, but she also loved efficiency! She would have adored this quick fudge recipe because it delivers a rich peanut butter dessert feeling that’s almost impossible to beat, and it’s done before the kettle even finishes boiling!
Quick Preparation Time for Your Peanut Butter Fudge
Seriously, this is shockingly fast. You only need about 15 minutes of actual hands-on prep work before this goes into the fridge to set. Since it’s a no-bake recipe, the cooking time is practically five minutes in the microwave, tops! If you’re hunting for an incredibly fast sweet treat that looks like you slaved over it all afternoon, this is your ticket. I even have a link for some fun no-bake protein balls if you need more quick hits like this when you’re in a hurry.
Gathering Ingredients for Your Creamy Peanut Butter Fudge
Okay, the best part about this recipe is that it’s built on staples, which makes whipping up a batch of unbelievable peanut butter fudge so accessible! We rely on the magic combination of sweetened condensed milk and the right peanut butter to get that signature smooth texture. Remember, this is quick, but the quality of what you put in absolutely matters for that melt-in-your-mouth sensation.
- 1 (14 ounce) can sweetened condensed milk
- 2 cups creamy peanut butter
- 4 cups powdered sugar
- 1 teaspoon vanilla extract
- 1/2 cup butter, melted
Ingredient Notes and Substitutions for Perfect Peanut Butter Fudge
I always insist on full-fat sweetened condensed milk—please don’t try the low-fat version here! That richness is crucial for the creamy texture. For the peanut butter, creamy works best for that decadent smoothness, but if you absolutely love texture, you can swap out up to half a cup for crunchy. Be mindful, though: if you use natural peanut butter (the kind that separates), your fudge might set up a bit softer because it lacks stabilizers, which is fine, just chill it a little longer!
Step-by-Step Instructions for This No Fail Peanut Butter Fudge Recipe
Getting this rich, glorious peanut butter fudge set up perfectly is easier than tying your shoes! We’re barely cooking anything, so pay attention to the mixing steps, and you’ll see why everyone calls this a no-fail recipe. I always have my 8×8 pan ready to go before I even hit the microwave button. It’s all about being ready for that quick assembly phase!
Preparing the Pan and Melting the Base for Quick Fudge Recipe
First thing: grab an 8×8 pan and line it with parchment paper. Make sure you leave a good overhang on the sides—this is like your built-in handle later! Lightly grease that paper, too, just for insurance. Next, in a big, microwave-safe bowl, you’ll put your sweetened condensed milk and the peanut butter together. Pop that bowl into the microwave for exactly 60 seconds on high. Once it’s done, you must stir it really well until it smooths right out. It should look like thick, creamy caramel.
Mixing and Incorporating Fats for Rich Peanut Butter Dessert
Now we start adding the structure! Stir in the vanilla extract first, then start folding in half of your powdered sugar until it’s just combined—don’t overmix yet. Then, add the rest of the sugar and mix until it homogenizes and gets really thick. The real secret to that rich peanut butter dessert quality comes next: melt your butter separately (don’t let it brown!) and pour it right in. Stir that butter in until everything is one uniform, glorious mass. Now, press it firmly into your prepared pan. I like to check out these easy brownie recipes if you want to try topping your fudge later! Trust me, checking tips from people like the wonderful folks at Kippi at Home helps too!
Tips for Achieving Old Fashioned Peanut Butter Fudge Texture
Everyone wants that amazing, smooth, classic texture—that perfect, soft slice that almost melts the second it hits your tongue. If your homemade peanut butter fudge ever comes out grainy or too crumbly, it’s usually because of two things: the sugar or the mixing temperature. When I was learning this from Daisy, she always told me that patience during the mixing phase is key to this old fashioned peanut butter fudge heaven.
To avoid graininess, make sure you mix vigorously *after* adding the melted butter and *before* you press it into the pan. That final incorporation really emulsifies everything, locking in that creamy texture throughout the whole block. If your fudge feels too soft setting up, that’s often the ratio of peanut butter to the powdered sugar mix, so don’t skimp on the sugar! A little extra chill time, maybe an extra 30 minutes in the fridge, always firms up things perfectly for a clean slice. It’s worth the wait for that truly melt-in-your-mouth dessert experience. For more tips on achieving that softness, check out my recipe for butter cookies—they share that melt-in-your-mouth quality!
Making This Simple Peanut Butter Treat for Holiday Gifting
When I was trying to recreate Daisy’s desserts for my city friends, I realized this no-bake peanut butter fudge was the perfect low-stress, high-impact treat for holiday gifting. Honestly, who doesn’t love classic holiday candy that tastes this homemade? Since this recipe makes about 36 small squares, you can easily double it and have enough for neighbors, teachers, and your own desk drawer!
To make it look professional for those holiday fudge recipes, make sure you chill it for those full two hours so you get clean cuts. Once it’s firm, lift it out using those parchment handles and slice evenly. For gifting, I wrap mine in small squares of decorative wax paper—it keeps the rich peanut butter dessert protected and looks so festive. If you have extras that don’t fit the gift boxes, maybe make a batch of chocolate rum balls to go alongside them!
This simple peanut butter treat is wonderful because it stays stable, but for the absolute best presentation, try to keep the squares separated. If you’re looking for other highly-saveable holiday ideas, you should definitely check out the beautiful creations over at Sugar & Soul. It’s always a hit when I bring out this peanut butter fudge!
Storage and Keeping Your Creamy Peanut Butter Fudge Fresh
One thing I adore about this straightforward candy is how beautifully it holds up. If you’re making this ahead of a big party—which I highly recommend for reducing stress—you are in luck! You absolutely must let this confectionery chill for at least two hours until it’s fully firm before you even think about cutting it. Trying to slice it early is a recipe for a gooey mess, even if it smells amazing!
Once it’s firm and cut into those perfect little squares, storage becomes really simple. We keep this fudge in an airtight container, layered between sheets of wax paper or parchment paper at room temperature, and it stays just wonderfully creamy for about a week. Seriously, a week! If you’re hoping to let it last longer—maybe you made a massive batch for Christmas gifting that you want to keep frozen—you can definitely pop it in the freezer. Just wrap those individual squares super tightly in plastic wrap first, and then seal them in a freezer bag. It keeps its fantastic texture even after thawing!
This make-ahead quality is why this recipe is a lifesaver during busy seasons. Knowing you have a delicious, homemade treat ready to go, like these no-bake cheesecake bites that also store well, brings such a sense of calm to the kitchen. It’s the kind of dessert that keeps giving!
Frequently Asked Questions About This Easy Peanut Butter Fudge Recipe
When I first started making this, I had a million questions myself! It’s so useful to troubleshoot before you even start mixing. Here are the things I hear most often about perfecting this creamy peanut butter fudge.
Can I use crunchy peanut butter instead of creamy?
You certainly can, yes! If you love texture, crunchy peanut butter works just fine in this simple peanut butter treat. Just remember that creamy peanut butter truly delivers that ultra-smooth, melt-in-your-mouth dessert feeling people rave about. Crunchy just adds extra chewiness, which some people prefer for their homemade peanut butter candy!
Why is my fudge grainy instead of smooth?
Graininess usually happens if the sugar crystals don’t dissolve properly, or if the mixture cools too fast before the final mixing stage. If you’re making the three ingredient fudge versions that skip the butter, that can sometimes be trickier, too! When you use the butter like we do here, it acts as a major emulsifier, coating those sugar particles and keeping the entire peanut butter fudge smooth, creamy, and perfect.
Do I absolutely have to use sweetened condensed milk?
For this specific recipe, yes, you do! It’s the backbone of this entire amazing, no-fail fudge recipe. Using sweetened condensed milk is what gives you that ultra-creamy texture without having to stand over a stovetop for ages. If you’re looking for a substitute, you’d have to swap it for evaporated milk combined with a tonific of extra sugar and cream, which is a completely different recipe altogether. This method using fudge with condensed milk is just too easy to skip!
Can I skip the melted butter step?
Oh, please don’t! I know you are looking for the quickest route, but that melted butter is essential for that *rich* peanut butter dessert mouthfeel. Without it, your fudge will be much firmer and more crumbly—think less ‘melt-in-your-mouth’ and more ‘chalky.’ It literally takes ninety seconds to melt, and it’s the secret to keeping this the best homemade fudge!
Estimated Nutritional Data for This Classic Holiday Candy
I always feel a *little* guilty looking at the numbers after making something this delicious, but it’s good to know what we’re working with, right? Since this classic holiday candy is made from scratch, the exact breakdown can wobble a tiny bit depending on the exact brand of peanut butter or condensed milk you grab off the shelf. I always caution everyone to treat these figures as a really solid guideline rather than gospel.
This data is based on the recipe yielding 36 small squares, which is what Daisy always aimed for—tiny, perfect bites. If you cut larger pieces, just adjust the math accordingly! If you’re interested in low-sugar baking swaps in general, some of my banana oatmeal muffin recipes have notes on how different sugars impact the final nutrition count.
- Serving Size: 1 square
- Calories: 180
- Sugar: 22g
- Fat: 9g (with 3g Saturated Fat)
- Carbohydrates: 24g
- Protein: 4g
- Cholesterol: 10mg
- Sodium: 85mg
Just a little note here: because we are using butter and peanut butter, the fat content is naturally higher, but that’s what gives you that wonderful, rich foundation. Don’t sweat the small stuff—this is an indulgence meant to be enjoyed!
Share Your Experience Making This Peanut Butter Fudge
Now it’s your turn! Once you’ve enjoyed this ridiculously easy peanut butter fudge, I’d love for you to come back and leave a rating—five glorious stars if it earned them! Did you stick to the strict recipe, or did you add a tiny sprinkle of sea salt on top? Share your results and any sweet twists you tried in the comments below. There’s nothing that brings me more joy than knowing this simple magic is filling someone else’s home with wonderful, homemade sweet treats!
If you’re already looking for your next bake, try my soft applesauce cookies next time!
PrintClassic Creamy Peanut Butter Fudge
Make this rich and creamy peanut butter fudge using simple ingredients. This no-fail recipe yields a smooth, melt-in-your-mouth dessert perfect for holiday gifting or a quick sweet treat.
- Prep Time: 15 min
- Cook Time: 5 min
- Total Time: 25 min
- Yield: 36 small squares 1x
- Category: Dessert
- Method: No-Bake/Microwave
- Cuisine: American
- Diet: Vegetarian
Ingredients
- 1 (14 ounce) can sweetened condensed milk
- 2 cups creamy peanut butter
- 4 cups powdered sugar
- 1 teaspoon vanilla extract
- 1/2 cup butter, melted
Instructions
- Line an 8×8 inch baking pan with parchment paper, leaving an overhang on the sides for easy removal. Lightly grease the paper.
- In a large microwave-safe bowl, combine the sweetened condensed milk and peanut butter. Microwave on high for 60 seconds. Stir well until smooth.
- Add the vanilla extract and half of the powdered sugar to the peanut butter mixture. Stir until combined.
- Add the remaining powdered sugar and mix until the mixture is uniform and thick.
- In a separate small bowl, melt the butter. Pour the melted butter over the fudge mixture and stir until fully incorporated. This step helps create the creamy texture.
- Press the fudge mixture evenly into the prepared baking pan. Smooth the top with a spatula.
- Refrigerate for at least 2 hours, or until firm enough to cut.
- Use the parchment paper overhang to lift the fudge from the pan. Cut into small squares.
Notes
- For an extra rich flavor, use natural, unsalted peanut butter.
- If you prefer a firmer fudge, chill it for 3 hours before cutting.
- You can use a microwave or a double boiler to melt the butter, but do not let it brown.
Nutrition
- Serving Size: 1 square
- Calories: 180
- Sugar: 22
- Sodium: 85
- Fat: 9
- Saturated Fat: 3
- Unsaturated Fat: 6
- Trans Fat: 0
- Carbohydrates: 24
- Fiber: 1
- Protein: 4
- Cholesterol: 10