
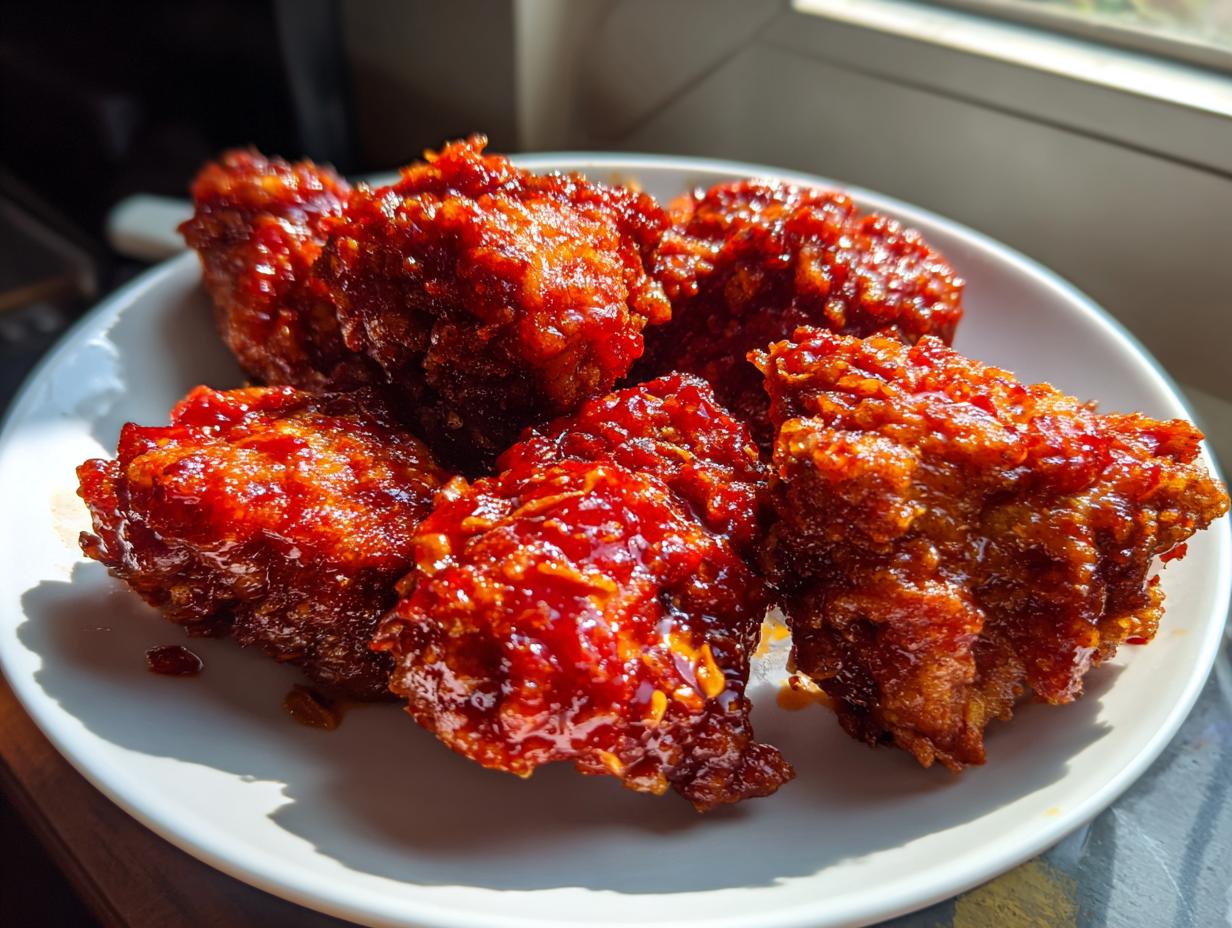
You know that craving, right? That deep, undeniable pull for chicken that audibly cracks when you bite into it? The kind of texture that other fried chicken recipes just can’t touch? For years, I thought that shatteringly crisp crust and staying-juicy interior belonged only to the takeout spot. But then I started diving back into the methods my grandmother valued—simple, proven techniques executed with care. This korean fried chicken recipe is the result of that rediscovery. It’s using the classic double-fry method, which might sound fussy, but trust me, it’s the key to culinary gold. Making this dish feels like carrying on a beautiful tradition in my own little kitchen, miles away from where I learned it. If you’re looking for something truly impressive for the weekend or just need a fantastic weeknight dinner ideas pivot, you’ve found it.
- Why This korean fried chicken recipe Delivers Restaurant Style Crunch
- Gathering Ingredients for Your korean fried chicken recipe
- Mastering the Double Fried Chicken Technique for Your korean fried chicken recipe
- Creating the Perfect Glaze for Your korean fried chicken recipe
- Tips for Success with this Authentic Korean Fried Chicken
- Serving Suggestions for Your korean fried chicken recipe
- Storage and Reheating Instructions for Crispy Chicken Recipe
- Frequently Asked Questions About This korean fried chicken recipe
- Sharing Your Homemade KFC Creations
- Estimated Nutritional Data for This korean fried chicken recipe
Why This korean fried chicken recipe Delivers Restaurant Style Crunch
When I first tried mimicking restaurant-style chicken, I was always disappointed. It was either soggy or overly dense. This recipe changed everything because we aren’t just frying once; we’re mastering the Double Fried Chicken Technique. What sets this apart is that thin, almost paper-like coating that becomes shatteringly crisp. It’s not about heavy breading; it’s about layering that starch and flour just right. When you see how this technique works, you realize why people rave about takeout—but now, we can capture that magic right here at home. Seriously, once you master this, you won’t go back to the old way, and you can see why folks rave about the results at this incredible source. Making this dish feels like carrying on a beautiful tradition in my own little kitchen; it truly transforms your approach to restaurant-style fried chicken.
The Secret to Juicy Chicken Wings: Preparation Matters
If you take one piece of advice from me, make it this: get your chicken bone-dry. I mean aggressively dry with paper towels. Any surface moisture turns to steam when it hits the hot oil, and steam is the enemy of crunch. It literally creates a barrier between your batter and the heat, leading to sad, soft spots. I usually stick to wings or separate drumettes because bone-in pieces hold moisture so well internally. But whether you choose wings or boneless thighs cut into chunks, patting them down is non-negotiable!
Gathering Ingredients for Your korean fried chicken recipe
Every great dish begins with knowing exactly what you need! For this chicken, the ingredients aren’t fussy, but boy, do they work together perfectly. When you gather your supplies, pay close attention to that starch—it’s what gives you that signature light, crackly coat. Don’t worry about the optional sauce for a minute; let’s focus on the chicken and the batter that locks in all the juice. I always keep my eye out for high-quality pantry staples, just like my grandmother taught me. You can also check out my guide for easy homemade BBQ sauce recipe ideas if you want another dipping option later!
For the Crunchy Coating and Chicken
Here’s what you need for the bird itself and the batter that turns it magical. Remember, these proportions are pretty specific for that perfect thin coating:
- About 2 lbs of your favorite chicken pieces—whether you use wings, drumettes, or boneless thighs cut into chunks, it works brilliantly.
- 1 cup all-purpose flour.
- 1/2 cup potato starch or cornstarch. Seriously, grab the starch! This is critical for that crunch.
- 1 teaspoon baking powder.
- 1 teaspoon salt and 1/2 teaspoon black pepper.
- 1 cup very cold water or, if you’re feeling fun, club soda for extra lift!
For the Sweet & Spicy Gochujang Glaze
This is the classic sticky sauce every time I make this batch. You’ll want everything simmered down until beautifully glossy:
- 1/4 cup gochujang (Yes, that’s the Korean chili paste; don’t skip it!).
- 1/4 cup honey or light corn syrup—syrup helps it stay less sticky.
- 2 tablespoons soy sauce.
- 2 tablespoons rice vinegar.
- 1 tablespoon brown sugar.
- 1 teaspoon minced garlic and 1 teaspoon grated fresh ginger—fresh flavor pops here!
- 1 tablespoon water to get it moving.
Optional Soy Garlic Glaze Ingredients
If you are serving a crowd with different tastes, this salty, savory option is fantastic. It’s very simple:
- 1/4 cup soy sauce.
- 1/4 cup honey or corn syrup.
- 2 tablespoons water.
- 1 tablespoon rice vinegar.
- 1 teaspoon minced garlic.
- 1 teaspoon sesame oil—added right at the end.
Mastering the Double Fried Chicken Technique for Your korean fried chicken recipe
Alright, here is where the magic happens, and frankly, this is the part that separated my early, sad attempts from the glorious results I get now. You have to embrace the Double Fried Chicken Technique. I know it sounds like extra work, but this second dip in the oil is what creates that light, nearly weightless, shatteringly crisp coating we crave. It builds the crunch in two stages, cooking the meat fully in the first bath and then blasting the exterior to perfection in the second. My learning curve was steep here—frying too long the first time meant the crust burned in the second round! It took practice to feel the rhythm of the temperature changes.
Step 1: Mixing the Batter and First Fry (Low Temperature)
Once your chicken is dry and coated, make sure that batter isn’t thick! It needs to be thinner than typical American pancake batter—think more like a silky, runny coating. When you dip the chicken, you should still be able to see through the batter a little bit. Heat your oil carefully to 325°F (160°C). This lower temperature is crucial because it cooks the muscle completely without burning that delicate starch coating. Fry your pieces for about 6 to 8 minutes. They will look pale golden. Pull them out immediately and place them on the wire rack. Now, set a timer for 15 minutes. That rest is vital; it lets steam escape and lets the crust set up before the final assault from the heat. Remember to check out the secrets on achieving that ultimate crunch.
Step 2: The Second Fry (High Heat for Ultimate Crunch)
After that rest, it’s time for the fireworks! Bump that oil temperature way up to 375°F (190°C). You want that hot, hungry oil ready to seal the deal. Carefully drop the rested chicken back in. This fry is fast—only 2 to 3 minutes, tops. You’re just looking for that deep, gorgeous golden-brown color and that amazing crackle. As soon as they hit that color, pull them out! They’ll drain beautifully on the rack, ready for their sauce finish. For great sides to go with your masterpiece, you might want to check out my recipe for garlic parmesan chicken and potatoes!
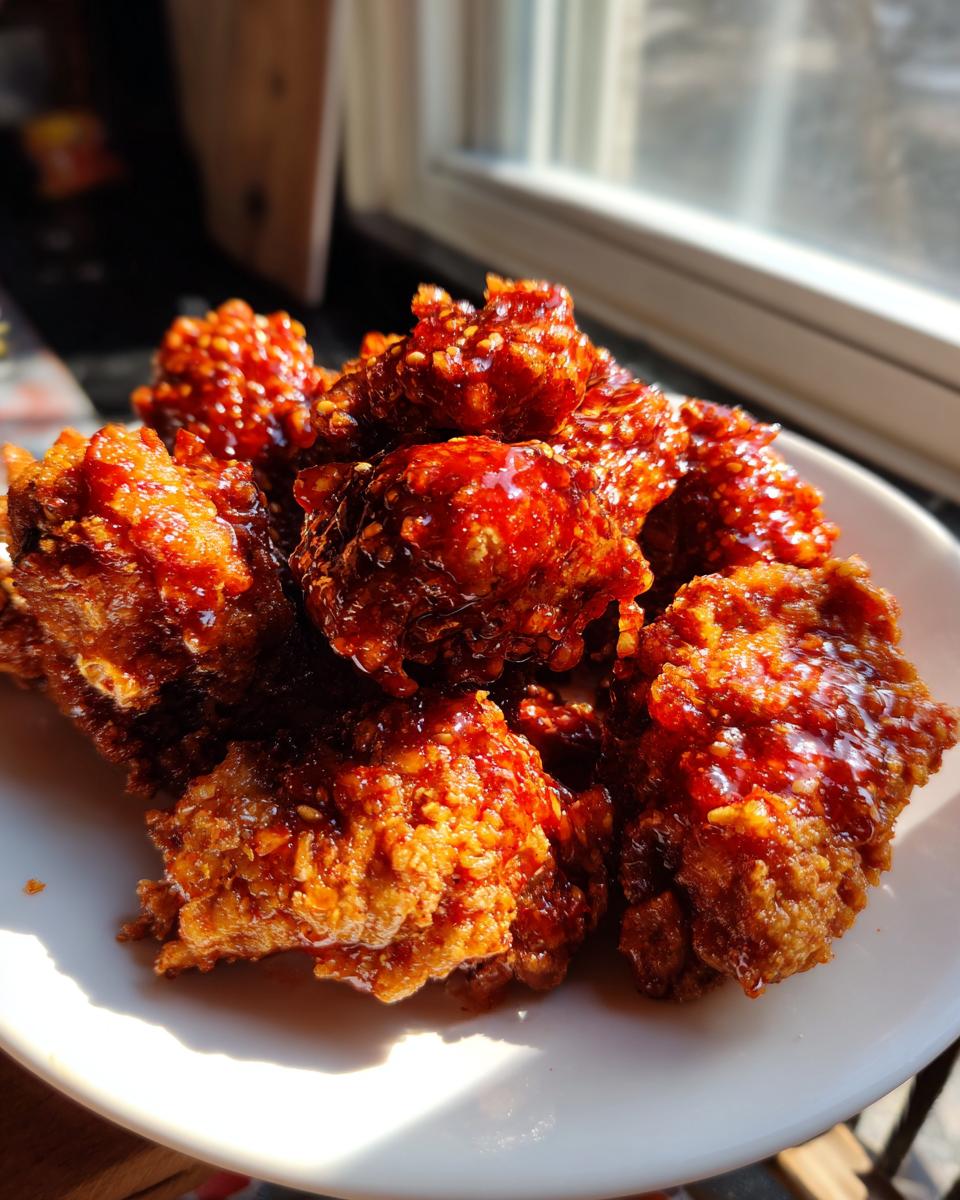
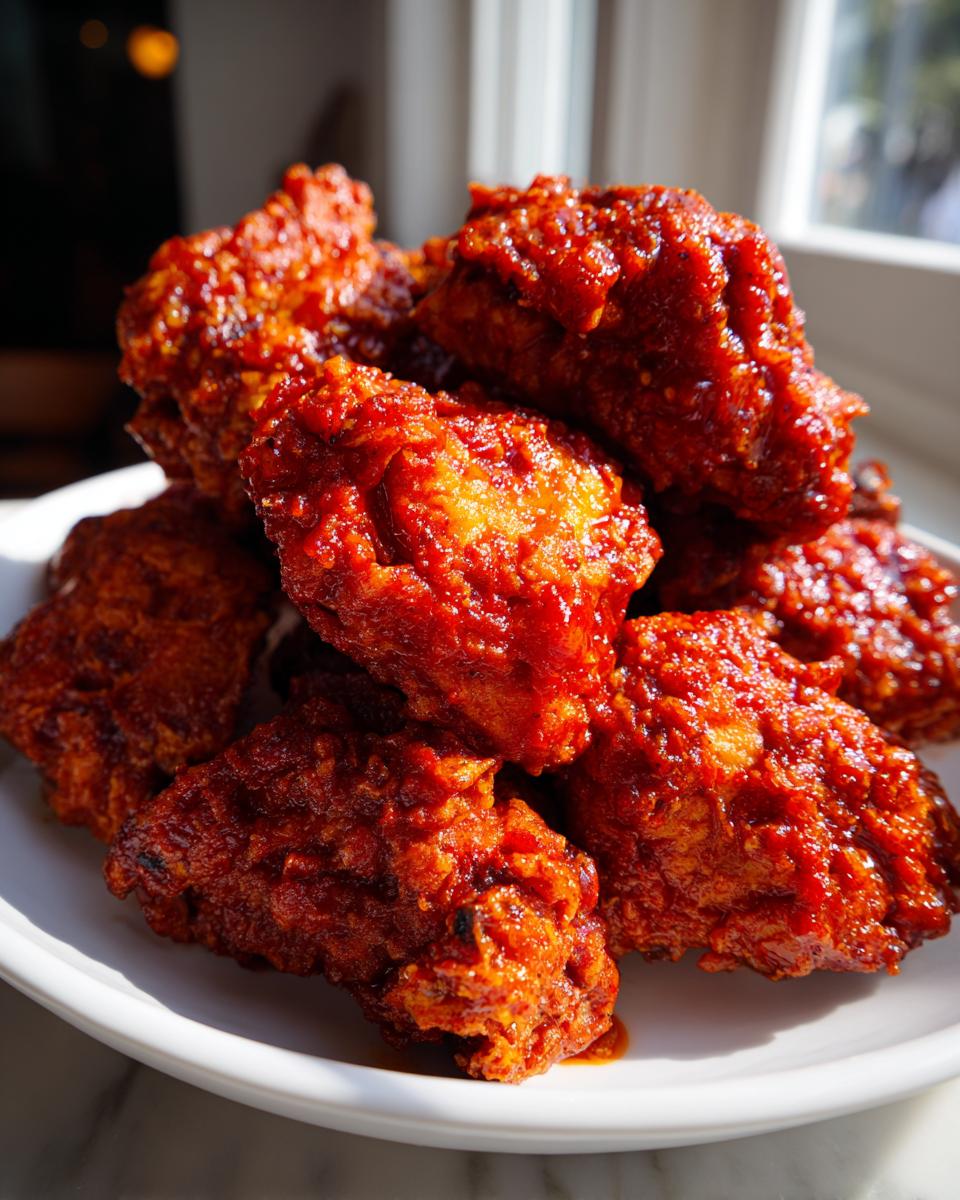
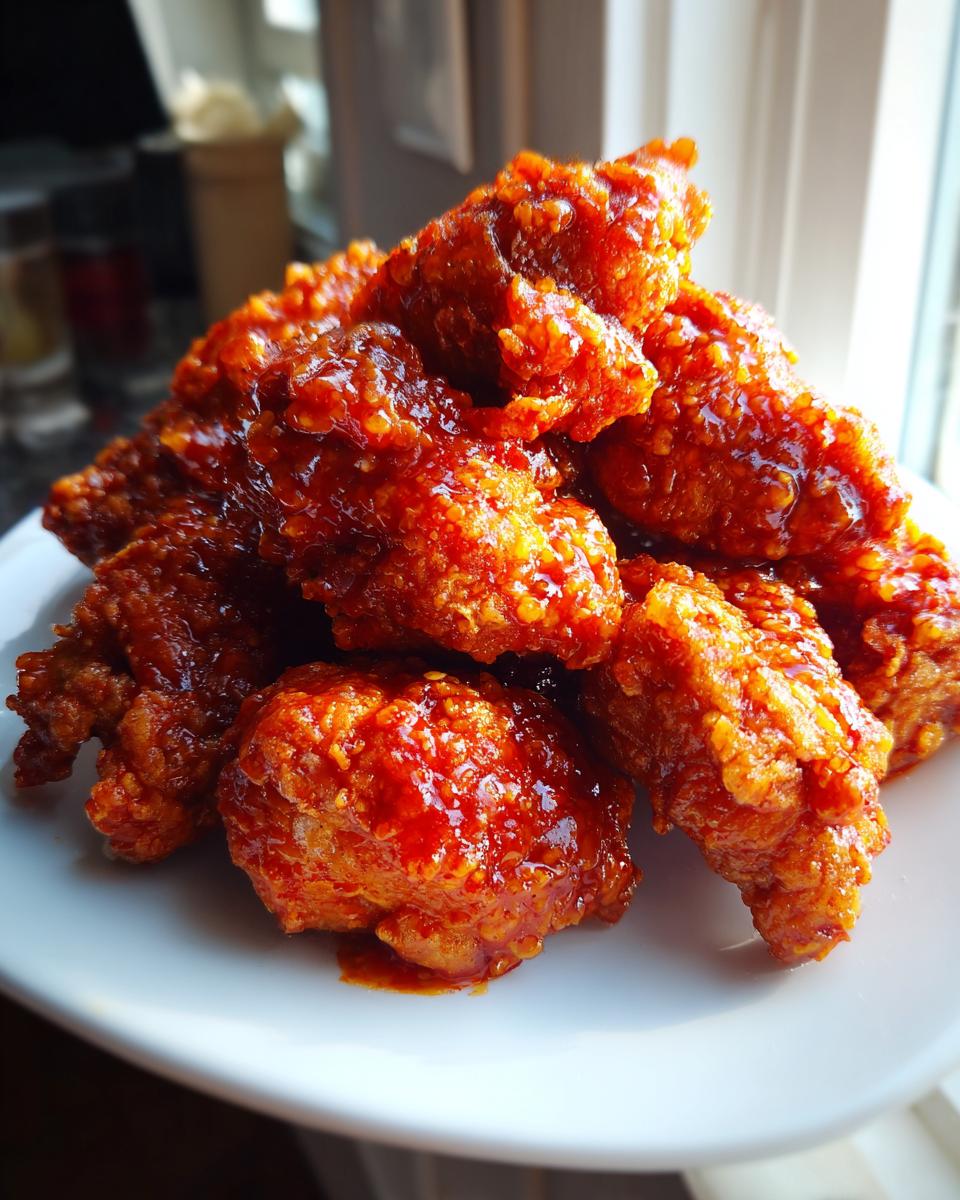
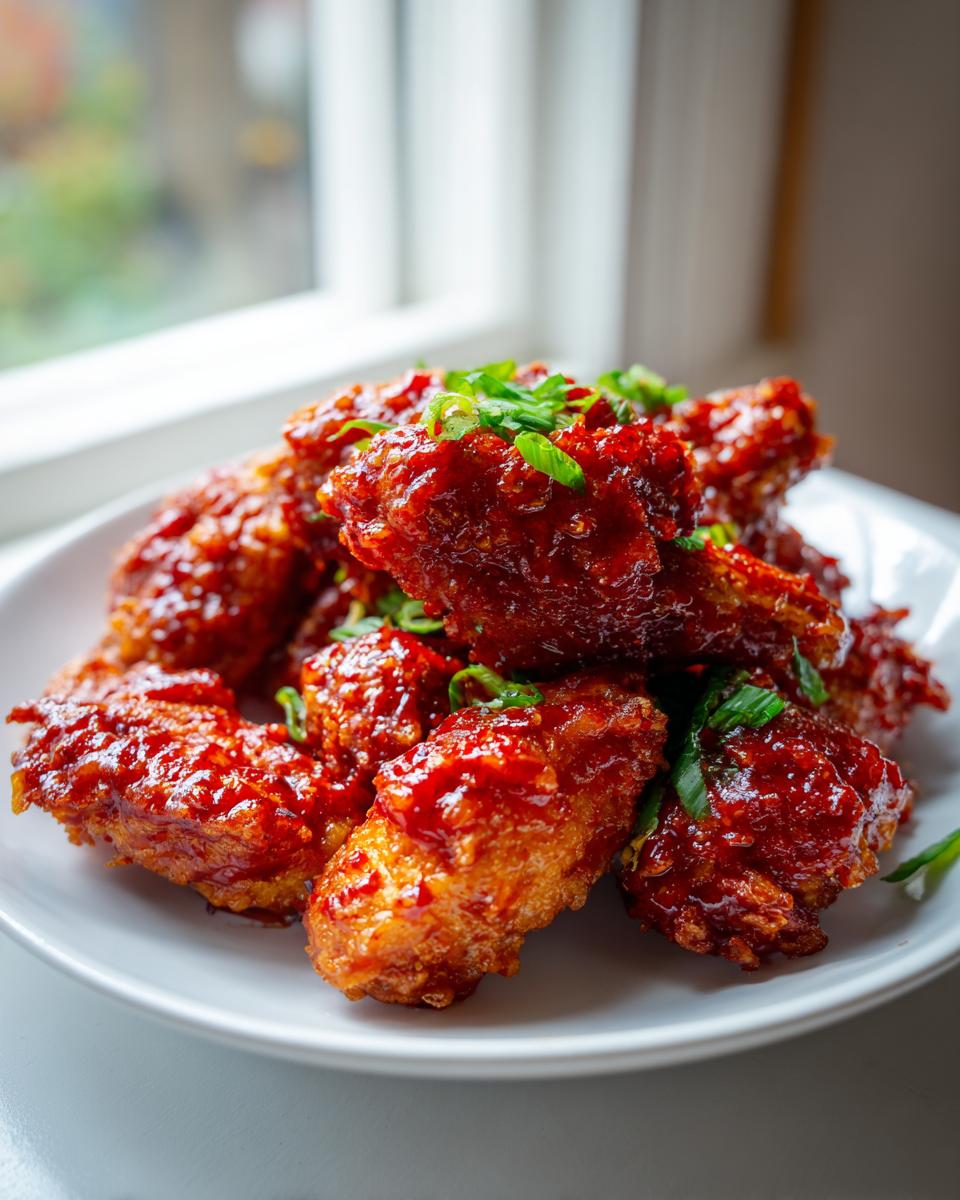
Creating the Perfect Glaze for Your korean fried chicken recipe
This step—the glazing—is where things can go wonderfully right or terribly wrong if you hesitate! We’ve spent all this time getting that exterior shatteringly crisp, so when we introduce the sauce, we have to move quickly. You don’t want your beautiful crunchy coating turning into a soggy mess. We are simmering these sauces just long enough to thicken them up slightly so they cling perfectly to that double-fried surface. This is the moment where we transition from perfect fried meat to that iconic, sticky Gochujang Sauce Chicken flavor profile. If you’ve made my recipe for easy homemade BBQ sauce recipe, you know how quickly sweet sauces can reduce!
Making the Sweet and Spicy Glaze
Get all those glaze ingredients—gochujang, honey, garlic, ginger, everything—into a small saucepan over medium heat. Stir it gently until it just starts bubbling and you see the sugar dissolve. It only needs about three minutes total to thicken up into that luscious, sweet and spicy kick we love. Pull it off the heat right away. Then, work fast! Drop your super-hot, crispy chicken pieces right into your biggest bowl, pour that warm glaze over immediately, and toss with purpose, coating every nook and cranny before that glaze sets. Take a peek over at this lovely execution of a similar recipe for inspiration!
Preparing the Soy Garlic Chicken Wings Option
If you are going savory, this sauce is just as easy but totally different! Combine the soy sauce, honey, vinegar, garlic, and water in another small pan. Bring that mixture to a simmer and let it reduce down slowly. You are looking for it to get syrupy, clinging nicely to a spoon. Once reduced, take it off the heat and swirl in that teaspoon of sesame oil right at the end for the best aroma. Toss your second batch of chicken wings in this beautiful savory coating for a completely different experience!
Tips for Success with this Authentic Korean Fried Chicken
I mentioned earlier that mastering this technique took me a few tries, and it wasn’t just about the double-fry. It’s about control, honey. My grandmother always preached about respecting the process, and deep frying is all about managing the heat energy you are putting into the oil. You can’t just guess; you have to trust your tools here if you want that perfect, Best Fried Chicken Recipe result.
Oil Temperature Management for Best Fried Chicken Recipe
If there’s one mistake that can ruin the entire batch, it’s letting the oil temperature drift. You absolutely need a reliable thermometer clipped to the side of your pot. When you first drop in the battered chicken, the temperature is going to drop significantly—that’s why the first fry has to be lower, at 325°F. We want to cook the inside gently. If you dump cold chicken into oil that’s too hot, the outside burns before the inside even thinks about cooking. When you come back for that second fry, bumping it to 375°F, you have to be quick to pull them out once they hit that gorgeous deep brown shade. Even a minute too long after that point, and that delicate crust starts to darken too much!
Ingredient Swaps and Variations
I love experimenting, but sometimes simplicity is best. If you aren’t feeling the sticky glazes for a weeknight meal, don’t feel trapped! You can completely skip the sauce step after the second fry. Just drain those beauties really well, and toss them immediately with a little flaky salt and maybe some extra freshly ground black pepper. That is just as good, honestly—pure, Crunchy Chicken Coating goodness. Also, remember those boneless thighs I mentioned? They cook much faster, so keep an eye on them during that first fry, maybe reducing the time by a minute or so. If you’re into making something truly spectacular, you should check out some amazing tips for maximizing crispiness.
Also, never be afraid to adjust the seasoning in the dry mix. If you want to sneak in a little garlic powder or onion powder for an added flavor punch, go for it! Just remember we are sticking closely to the starch/flour ratio for texture integrity. For an easy weeknight pivot, sometimes I toss the finished naked chicken with a simple garlic salt mixture. For even more ideas on simplifying your kitchen routine, check out my guide to air fryer shrimp garlic parmesan crispy recipes!
Serving Suggestions for Your korean fried chicken recipe
Now that you have conquered the ultimate crunch, what do you serve alongside this incredible snack? This is pure, unadulterated Game Day Chicken perfection, but it transitions beautifully into a full Asian Chicken Dinner too. If I’m keeping it traditional, nothing beats the cooling shock of pickled radish cubes—they just cut through the richness so perfectly. A crisp Asian slaw works wonders, too. If you are feeling lazy, just grab some steamed white rice and call it a night! For a little something extra that my readers love, check out how I make a simple kani salad restaurant-style spicy recipe to balance the heat!
Storage and Reheating Instructions for Crispy Chicken Recipe
This is the tough question, isn’t it? You’ve made the perfect batch of Crispy Chicken Recipe, and you have leftovers. Congratulations! But we have to be realistic: any fried food that sits overnight, particularly if you’ve tossed it in that sticky gochujang sauce, is going to lose a little integrity. The glaze is the main culprit here; that honey and sugar mixture absorbs moisture quickly and softens the crust. If you have plain, unglazed chicken, you’re in much better shape.
If you must save some for later—and I always hope there’s some left, wink—the microwave is absolutely forbidden. It steams the crust, and you might as well just eat boiled chicken at that point! My recommendation is to reheat leftovers in a single layer on a wire rack set over a baking sheet. Pop that into a 375°F oven for about 8 to 10 minutes. This dries out the exterior just enough to bring back that fantastic crackle.
If an oven seems like too much effort, the air fryer is your very best friend for saving fried chicken dreams! Just a quick blast at 360°F for about 4 to 5 minutes usually does the trick, bringing back that delightful crunch better than any other method. For other great ways to repurpose leftovers and sneak them into new meals, you should definitely look at my instructions for easy baked ranch chicken!
Frequently Asked Questions About This korean fried chicken recipe
I always get so many great questions when I share a recipe that relies on a specific technique like this one. It’s natural! We all want that perfect, crackly crust, and I’m happy to share what I’ve learned over making tons of batches of the Best Fried Chicken Recipe this way.
Can I make this korean fried chicken recipe in an air fryer?
You absolutely can, and it offers a healthier option! However, I must be honest: you won’t achieve that exact, paper-thin, shatteringly crisp texture that the double-fry method guarantees. The air fryer tends to bake the coating more than fry it, so it will be crunchy, but it just won’t have that signature KFC weightlessness. It’s still totally delicious though, especially if you are looking for an easy chicken appetizer!
What is the best oil to use for this fried chicken?
When you are frying this much batter, you need a neutral oil with a really high smoke point. I usually reach for vegetable or canola oil without a second thought because they are clean and don’t impart any flavor. Peanut oil is fantastic if you have it, but vegetable oil is my go-to budget-friendly choice that works perfectly every time for getting that Juicy Chicken Wings result.
How far ahead can I prepare the Gochujang glaze?
Oh, you can definitely make the Sweet and Spicy Glaze ahead of time! I usually make a double batch when I’m making wings because it’s fun to try out the optional Soy Garlic option, too. Just store the glaze in an airtight container in the fridge. When you are ready to toss the chicken right out of that second fry—and remember, move quickly there—gently reheat the sauce in a small saucepan until it’s warm and pourable again. Then toss immediately!
For more insight into authentic textures, I always recommend looking at how other passionate cooks approach this, like the details provided by Two Plaid Aprons on their recipe!
Sharing Your Homemade KFC Creations
Now that you’ve got the secret to that ultra-crispy crust and the sticky, glorious glazes, the kitchen really feels like a joyful place again, doesn’t it? My grandmother always said the best part of cooking was seeing the faces light up when people took that first bite. That’s what this heritage is all about—connection. I genuinely hope this korean fried chicken recipe brings that same sense of gathering and comfort to your table, whether it’s for a big game night or just a cozy Tuesday.
I would absolutely love to hear how it turned out for you! Did you stick with the sweet and spicy gochujang? Or did you go full savory with the garlic soy? Please leave a star rating on the recipe card and drop a comment below telling me your favorite part. If you snapped a picture of your amazing, crackly creation, feel free to reach out to me directly through my contact page; I treasure seeing what you all create!
Estimated Nutritional Data for This korean fried chicken recipe
Now, I have to be upfront here—my focus in the kitchen is always on flavor and that unforgettable crunch, not breaking out the calorie counter! But for those of you who need to know, here are my best estimates based on serving four people:
- Serving Size: 4 pieces
- Calories: 650
- Fat: 35g (8g saturated)
- Carbohydrates: 45g
- Protein: 38g
- Sugar: 25g
Please remember, these numbers are just a guideline based on the ingredients listed above. If you use lighter honey or adjust the amount of glaze you toss on, those amounts will surely shift. This is just a starting point for your delicious, authentic Korean fried chicken!
PrintThe Ultimate Double-Fried Korean Fried Chicken with Sweet & Spicy Glaze
Make restaurant-style Korean Fried Chicken at home using the double-frying technique for an ultra-crispy crust and juicy interior. This recipe includes instructions for a popular sweet and spicy gochujang glaze.
- Prep Time: 25 min
- Cook Time: 25 min
- Total Time: 65 min
- Yield: 4 servings 1x
- Category: Dinner
- Method: Deep Frying
- Cuisine: Korean
- Diet: Non-Vegetarian
Ingredients
- 2 lbs chicken pieces (wings, drumettes, or boneless thighs)
- 1 cup all-purpose flour
- 1/2 cup potato starch or cornstarch
- 1 teaspoon baking powder
- 1 teaspoon salt
- 1/2 teaspoon black pepper
- 1 cup cold water or club soda
- Vegetable oil, for frying
- For the Sweet & Spicy Glaze:
- 1/4 cup gochujang (Korean chili paste)
- 1/4 cup honey or corn syrup
- 2 tablespoons soy sauce
- 2 tablespoons rice vinegar
- 1 tablespoon brown sugar
- 1 teaspoon minced garlic
- 1 teaspoon grated fresh ginger
- 1 tablespoon water
- For the Soy Garlic Glaze (Optional):
- 1/4 cup soy sauce
- 1/4 cup honey or corn syrup
- 2 tablespoons water
- 1 tablespoon rice vinegar
- 1 teaspoon minced garlic
- 1 teaspoon sesame oil
Instructions
- Prepare the chicken: Pat the chicken pieces completely dry with paper towels. This step is key for crispiness.
- Make the batter: In a large bowl, whisk together the flour, potato starch, baking powder, salt, and pepper. Gradually whisk in the cold water or club soda until you have a thin, smooth batter, similar to pancake batter. Do not overmix.
- Coat the chicken: Dip each piece of chicken into the batter, allowing excess to drip off. You want a thin, even coating.
- First Fry: Heat about 3 inches of vegetable oil in a deep, heavy-bottomed pot or Dutch oven to 325°F (160°C). Carefully place the battered chicken into the hot oil, ensuring you do not overcrowd the pot. Fry for 6 to 8 minutes until the chicken is cooked through and lightly golden. Remove the chicken and place it on a wire rack set over a baking sheet. Let it rest for at least 15 minutes. This resting period is part of the double-fried chicken technique.
- Increase oil temperature: Raise the oil temperature to 375°F (190°C).
- Second Fry: Return the rested chicken pieces to the hot oil in batches. Fry for an additional 2 to 3 minutes until the crust is deep golden brown and shatteringly crisp. Remove and place back on the wire rack.
- Prepare the Sweet & Spicy Glaze: While the chicken rests after the second fry, combine all glaze ingredients (gochujang, honey, soy sauce, vinegar, sugar, garlic, ginger, and water) in a small saucepan. Bring to a simmer over medium heat, stirring until the sugar dissolves and the sauce thickens slightly, about 3 minutes.
- Toss the chicken: Place the hot, crispy chicken in a large, clean bowl. Pour the glaze over the chicken and toss quickly to coat every piece evenly. Work fast so the chicken stays crunchy.
- Prepare the Soy Garlic Glaze (if using): Combine all soy garlic ingredients in a small saucepan and simmer until slightly reduced and syrupy. Toss a portion of the chicken in this glaze if desired.
- Serve immediately.
Notes
- For the best crunch, use potato starch or cornstarch in the batter instead of relying only on flour.
- If you prefer boneless chicken, cut boneless, skinless thighs into 1-inch pieces before coating.
- You can substitute the sweet and spicy glaze with a simple dusting of salt and pepper after the second fry for a plain crispy style.
Nutrition
- Serving Size: 4 pieces
- Calories: 650
- Sugar: 25
- Sodium: 850
- Fat: 35
- Saturated Fat: 8
- Unsaturated Fat: 27
- Trans Fat: 0
- Carbohydrates: 45
- Fiber: 2
- Protein: 38
- Cholesterol: 110