

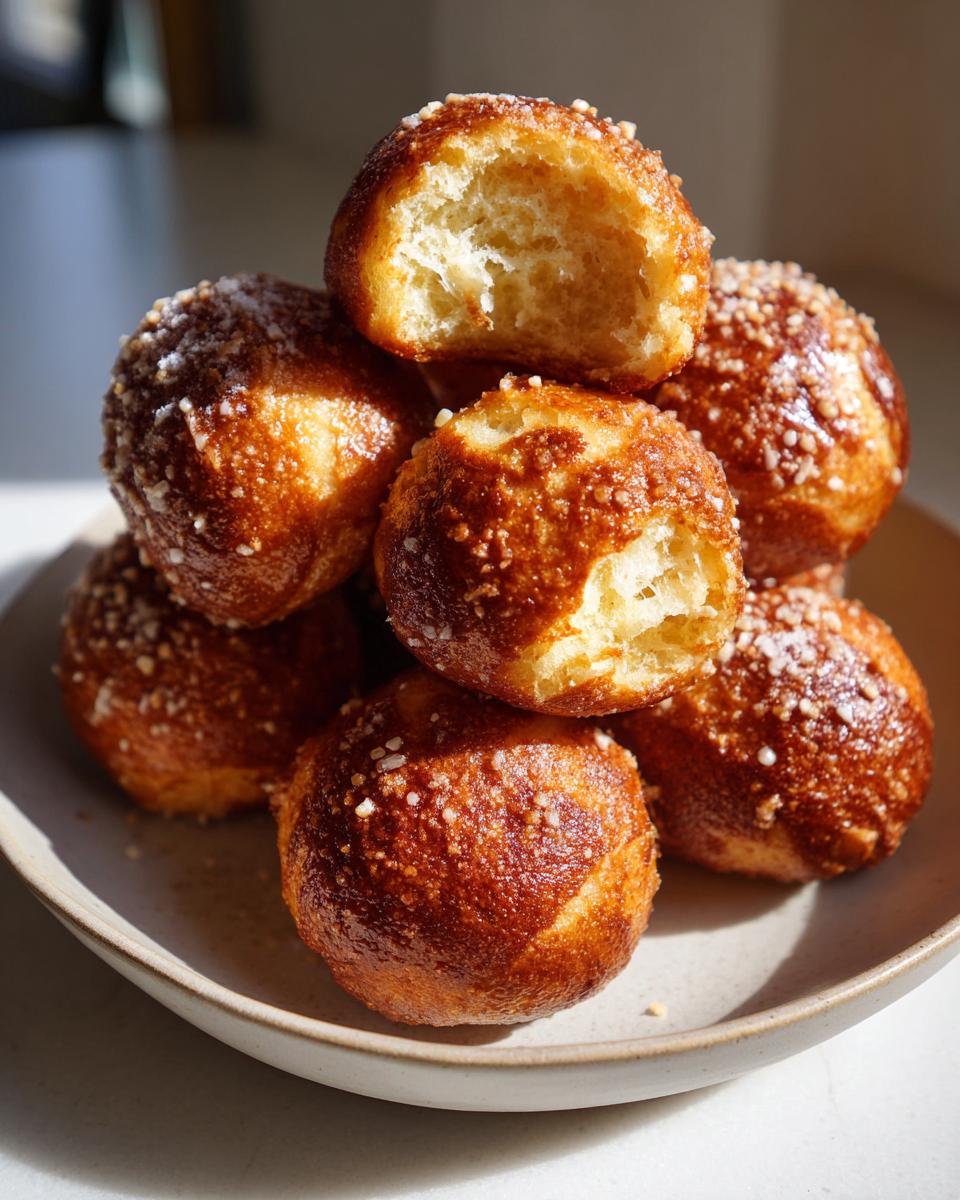
If you’re hosting a crowd or just need a seriously satisfying warm snack, forget those dry, store-bought things! Nothing beats having pretzel bites fresh from the oven, especially when they have that perfect, deep brown color and chew. I’m sharing my grandmother Daisy’s method here, which uses a quick boiling bath to guarantee these are the softest, chewiest homemade pretzel bites you’ll ever taste. This recipe brought me back to her kitchen when I felt most disconnected in the city. It’s simple, honest food, and I know you’re going to love making them for your own gatherings.
- Why You Will Love These Easy Homemade Soft Pretzel Bites
- Essential Ingredients for Perfect Pretzel Bites
- Step-by-Step Guide to Making Chewy Pretzel Bites
- Tips for Making The Best Pretzel Bites Every Time
- Serving Suggestions for Your Game Day Appetizer Pretzel Bites
- Variations: Sweet and Savory Pretzel Bites Options
- Storage and Reheating Instructions for Soft Baked Snacks
- Frequently Asked Questions About Homemade Pretzel Bites Recipe
- Estimated Nutritional Data for Pretzel Bites
Why You Will Love These Easy Homemade Soft Pretzel Bites
Honestly, these little guys fly off the plate faster than anything else I make! They are the ultimate crowd-pleaser because they hit all the right notes for a great appetizer recipe for parties. Trust me, you want these in your rotation.
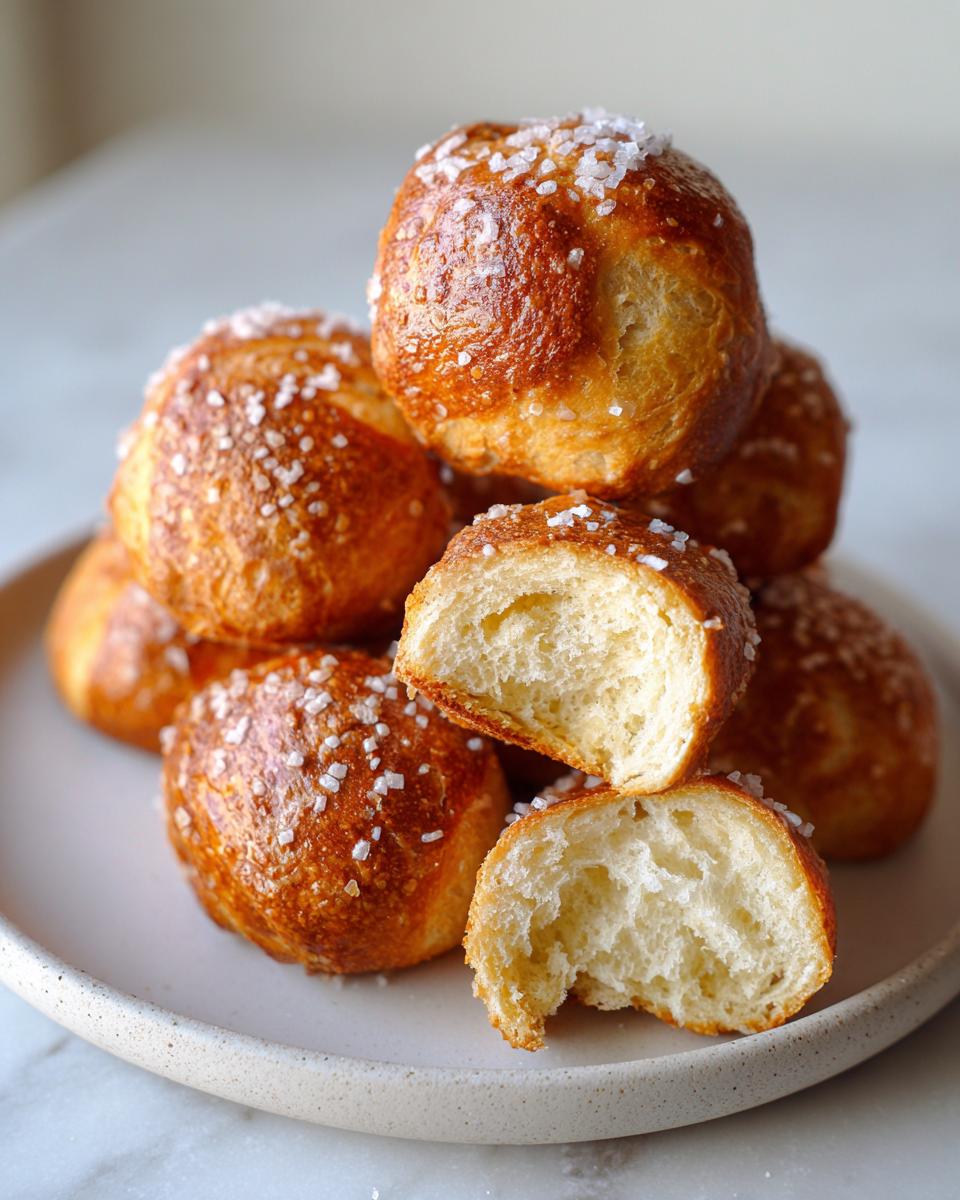
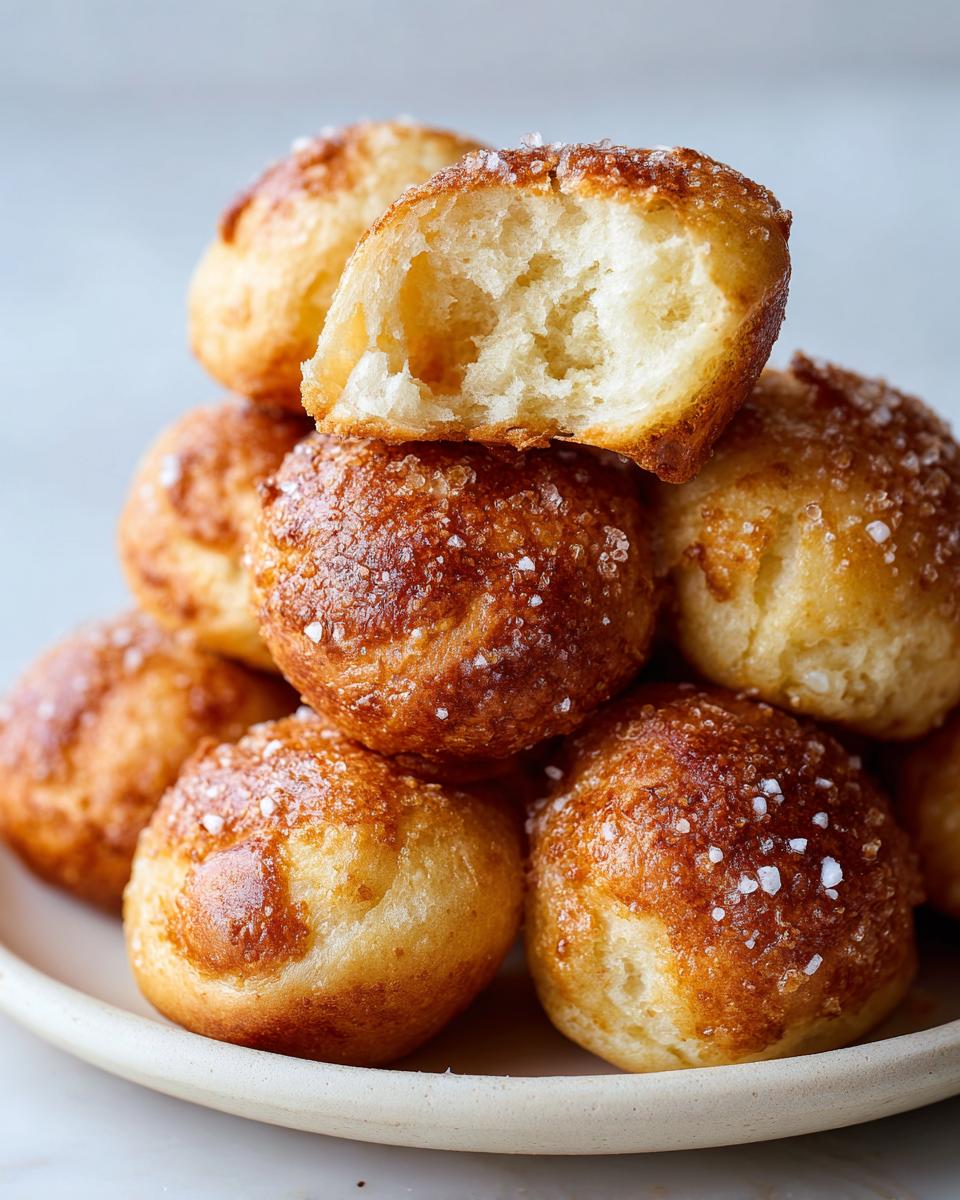
- They are unbelievably soft and chewy inside, thanks to that magical baking soda bath.
- The prep time is surprisingly short for a yeast dough—we can have game day appetizer perfection ready quickly!
- They get that stunning, deep golden-brown crust that screams authentic flavor.
- They freeze beautifully, which means you can whip up a big batch ahead of time. Check out my tips for easy dinners too, but these bites save the day when unexpected guests drop by!
Essential Ingredients for Perfect Pretzel Bites
Baking from scratch always feels more rewarding, and for homemade pretzel bites, every ingredient plays a specific role. You don’t need anything fancy here, which is another reason Daisy loved this recipe so much! The dough is almost like a simple bread dough, but the secret weapon, the baking soda bath, is what turns it into genuine pretzel magic.
Here is what you’ll need to gather before you start mixing:
- 1 ½ cups warm water (aim for about 110°F—warm to the touch but not steaming hot!)
- 1 packet active dry yeast (that’s exactly 2 ¼ teaspoons, don’t eyeball it!)
- 1 teaspoon granulated sugar (this wakes up the yeast, bless its heart)
- 3 ¾ cups all-purpose flour, plus extra for dusting your counter
- 2 tablespoons unsalted butter, melted, plus more for brushing them hot
- 1 ½ teaspoons salt (for the dough itself)
- ½ cup baking soda (Listen up: This is non-negotiable! It creates that beautiful brown crust for your chewy pretzel bites.)
- 1 large egg, beaten (this is our simple egg wash for color)
- Coarse pretzel salt, for topping (the bigger the crystals, the better the crunch!)
Step-by-Step Guide to Making Chewy Pretzel Bites
Okay, here’s where the fun starts! Baking these pretzel bites from scratch is way easier than you think, but we have to respect the yeast and that magic water bath. Take your time with the dough—it’s the foundation of those perfect, chewy pretzel bites, and rushing it just won’t do. We need about an hour for the dough to relax and rise, so maybe start the kettle for the bath while you wait!
Activating Yeast and Mixing the Pretzel Bites Dough
First things first: wake up the yeast. In your big bowl, mix the warm water, yeast, and sugar. You have to let it sit for about 10 minutes until it looks foamy on top. If nothing happens there, your water was too hot or too cold, and you need to start over with new yeast—that foamy layer is how you know it’s ready to work its magic!
Once foamy, dump in your flour, melted butter, and salt. Mix it roughly until it looks shaggy. Then, turn it out onto a floured surface and get kneading! You want to work that dough for about 5 to 7 solid minutes. When it stops sticking everywhere and feels smooth and elastic—like a nice soft earlobe, that’s the texture my grandma taught me—you know you’ve built enough structure for amazing homemade pretzel bites.
Tuck that smooth dough into an oiled bowl, cover it up, and let it rest in a warm, draft-free spot for a full hour. It needs to double in size. If you’re planning on making that incredible cheese dip, this is the perfect time to get that going!
The Crucial Baking Soda Bath for Soft Pretzel Bites
This part sounds intimidating, but it’s so quick! First, crank your oven up to 450°F and get those baking sheets ready with parchment paper. Now, the bath: boil 8 cups of water, then carefully whisk in that half-cup of baking soda. Be ready, it will fizz up a lot! This bath is what gives your soft pretzel bites that signature dark brown color and that slightly tangy chew. It’s not just for show, folks!
Working in small batches—no more than 8 or 10 bites at a time—carefully drop your dough balls into the bubbling water. Let them boil for *exactly* 30 seconds, flipping them over halfway through. Any longer and they start getting tough! Use a slotted spoon to transfer them right back onto your waiting parchment-lined sheets. If things look complicated, remember what that blogger noted about keeping them quick—speedy draining is key here!
Baking and Finishing Your Warm Pretzel Bites
Once your bites are sitting on the tray, grab your beaten egg and brush the entire tops generously. This is what helps the coarse salt stick and gives them that beautiful sheen. Sprinkle on that coarse pretzel salt—don’t be shy!
Bake them hard at 450°F for about 10 to 12 minutes. You are looking for a deep, rich golden brown color. The second they come out of the oven, you need to brush them immediately with a little extra melted butter. This stops them from drying out and makes the whole kitchen smell absolutely heavenly. Serve these warm! They are best eaten within the first hour, but you know what they say—they never last that long at a party anyway!
Tips for Making The Best Pretzel Bites Every Time
You gotta trust the process, especially with yeast doughs, but I’ve learned little kitchen tricks over the years that really smooth things out. If you follow the recipe exactly, you get great results, but if you know what to *look* for, you get legendary results. These are the things Grandma taught me by watching, not by reading a timer!
First, let’s talk about sticking. Parchment paper is your absolute best friend when making soft baked snacks like this. You can use parchment on your baking sheets, but I also use it when I let the dough rise in the bowl—it just peels right off the top wrapper if you grease the sides slightly.
If your dough feels a little too stiff after kneading, don’t panic and dump in extra water. Just let it rest under the cover for 15 minutes before trying to knead again. Sometimes the flour just needs time to fully absorb the liquid. If you can’t wait for the rise time, check out my sourdough guide; that teaches you patience with dough, too, but for these quick pretzel bites, the rising hour is worth it for true chewiness.
Now, about the color! If your bites aren’t getting that classic deep brown, check two things: make sure your baking soda is fresh (old baking soda loses its power!) and ensure you are using the full 30 seconds in the bath—that’s where the browning chemistry happens. For the quickest fix, you can always brush them with a little extra egg wash right before they go into the oven. For a great overview of how one of my favorite food bloggers handles the browning, take a peek at this guide.

Finally, for the days when you just can’t wait 90 minutes for dough to rise (we all have those days!), use the shortcut from the recipe notes. Skip the yeast and use refrigerated biscuit dough. Cut each biscuit into quarters before you boil them. They won’t have that deep, fermented flavor of the yeast dough, but they are still fantastic warm buttery snacks, ready in under 30 minutes total. It proves you don’t always need complicated steps for quality!
Serving Suggestions for Your Game Day Appetizer Pretzel Bites
Honestly, serving these soft pretzel bites naked seems like a crime! They are fantastic all on their own, especially when dripping with butter right out of the oven, but dips turn them into an unforgettable game day appetizer. You need something creamy and something tangy to cover all your bases. I always make two options because everybody argues over which one is best!
For that super rich, decadent option, you need cheese. I have a totally easy cheese dip recipe that you can whip up while the dough is rising. It’s just sharp cheddar melted down with a tiny splash of milk and a pinch of cayenne—it really brings out the saltiness of the pretzel. You can find my favorite quick method right here.
If you prefer something brighter, the honey mustard is the way to go. Mix equal parts Dijon mustard and that good, thick honey. It’s so good! I also sometimes make a lighter, sweeter dip—like something you’d use for fruit—if I’m trying to balance out the saltiness of the pretzels, which you can see how to make over on my fruit dip post. But trust me, for these salty bites, cheese and mustard are the winning combo!
Variations: Sweet and Savory Pretzel Bites Options
I love that these homemade pretzel bites stick faithfully to that classic, salty, buttery finish, but honestly, sometimes you just need to switch things up! If you’re making a huge batch for a super long party, offering a sweet option guarantees that everyone—even the folks who think everything needs frosting—finds something they love. These are fantastic party snack ideas because they can be customized so easily after they come out of the oven.
Remember, these changes happen *after* you finish the baking and boiling steps. We keep the main dough and the soda bath exactly the same to lock in that chewy texture.
For those who like things warm and sweet, you absolutely have to try the cinnamon sugar variation. This is almost as addictive as the salty ones! After you brush the hot pretzel bites with melted butter coming right out of the oven, immediately toss them in a bag filled with a mixture of white sugar and plenty of cinnamon. They turn into something dreamy, like tiny, soft cinnamon rolls, and they are ridiculously good with coffee. If you love that warm spice profile, check out my recipe for cinnamon roll bites—it uses similar flavor concepts but in a different shape!
If you are sticking to the savory side but are sick of plain salt, try this garlic parmesan coating. While the bites are still glistening with that post-bake butter brush, toss them with a finely grated Parmesan cheese and some garlic powder. It gets crispy and smells incredible while it cools! It’s amazing how simple swaps make these feel like a totally new snack. For some other ways people dress up their dough after baking, you can get some inspiration over at Aubriella’s site.
Storage and Reheating Instructions for Soft Baked Snacks
I have to be honest with you: these soft pretzel bites are at their absolute peak glory about twenty minutes after you pull them from the oven, brushed with that final layer of buttery goodness. My family rarely has leftovers because they disappear so fast! But when we *do* manage to save some, I know exactly how to bring them back to life later. You want to treat them like any good, soft bread—air is the enemy!
If you have leftovers, don’t just toss them in a Ziploc bag on the counter. They’ll get hard and chewy in the wrong way. I always store mine in an airtight container at room temperature. If you think they’ll last more than two days, maybe put half in the freezer right away. They freeze really well, which is great for planning ahead for those big football food recipes gatherings!
How to Keep Pretzel Bites Fresh at Room Temperature
When storing them on the counter, I actually keep them in a large, loosely sealed plastic bag, or maybe even a bread box if you have one. You want to trap *just* enough moisture to keep them soft, but you can’t completely seal them airtight because condensation will make the crust soggy—and nobody wants a soggy pretzel, right?
If you decide to freeze them? That’s the best long-term move. Place the cooled bites in a freezer-safe, heavy-duty bag. Squeeze out as much air as you can before sealing it up. They easily last up to a month this way, and you’ll always have happy hour snacks ready to go. This technique is perfect for having make-ahead appetizers ready for unexpected weekend potlucks!
Bringing Your Soft Baked Snacks Back to Life
Reheating is crucial to restoring that warm, fresh-from-the-oven feeling. Don’t even think about the microwave unless you only have about five seconds to spare, because it will ruin that amazing chew we worked so hard for by making them rubbery. The oven is your friend here.
For the best revitalization, preheat your oven to about 300°F. Arrange the bites in a single layer on a baking sheet. If they are rock hard from the freezer, give them a spritz of water first—just a tiny mist, don’t soak them! Bake them for about 5 to 8 minutes. You’ll know they are ready when they are heated through and springy to the touch again. If you want an extra boost of flavor after reheating, give them a very quick brush of melted butter right when they come out. That classic buttery snack recipe smell will fill your kitchen again, and nobody will guess they weren’t baked five minutes ago!
Frequently Asked Questions About Homemade Pretzel Bites Recipe
I know when you try a new recipe, especially one that involves yeast and a boiling bath, you’re going to have questions swirling around! I get them all the time from folks trying these for the first time. Don’t worry; we’re going to troubleshoot everything so you get perfect, chewy pretzel bites for your next party.
Can I skip the baking soda bath?
You really shouldn’t, sweet friend! If you skip it, you’ll end up with soft, yeasty bread balls—delicious, sure, but they won’t be pretzel bites. That baking soda bath is non-negotiable for getting that classic dark color and the slight external snap and chewiness that defines a true pretzel.
How long do these soft pretzel bites stay soft?
If you are aiming for that true “fresh out of the oven” texture, they are incredible for about three hours. After that, they start to firm up a bit. But don’t fret! They are still tasty at room temperature the next day, especially if you’re serving them with a good dip. As I mentioned before, reheating them properly in the oven brings back most of that original softness.
Can I use bread flour instead of all-purpose flour?
You absolutely can! Bread flour has more protein, which means you might get an even slightly chewier bite, which isn’t a bad thing at all for these salty snack recipes. If you swap it out, you might notice the dough stiffens up a tiny bit faster during kneading, so watch your texture closely. If you love working with dough, you might enjoy my guide on quick homemade pizza dough, which responds really well to bread flour!
Can I make the dough ahead of time?
Yes, this is one of my favorite time-savers! After you knead the dough and it has risen once, you can punch it down, roll it into balls, and place those little balls in an airtight container in the fridge for up to 24 hours. Just let them sit on the counter for about 30 minutes before you start the boiling bath so they aren’t ice cold when they hit the water!
Estimated Nutritional Data for Pretzel Bites
Now, I always tell people that baking food at home means you get control over what goes in, but for reference, I’ve pulled the estimated breakdown for these pretzel bites based on the amounts listed in the recipe. Keep in mind, these values are just approximations, kind of like trying to guess how much salt Grandma *actually* put in something back in the day!
This data is based on a serving size of about 5 bites. Every bite you take is delicious, but they really are best enjoyed as part of a fun spread, not eaten straight off the cooling rack (though I’m guilty of that!).
- Serving Size: 5 bites
- Calories: Roughly 180
- Fat: About 4 grams (Since we use butter, it’s real fat, not that stuff from the tub!)
- Carbohydrates: Around 32 grams
- Protein: Approximately 5 grams
- Sodium: This comes in higher due to the coarse salt topping, so be mindful if you are watching your salt intake—you can always go lighter on the topping!
Please remember that the final nutritional content for these buttery snack recipes will change depending on the specific brands of flour, the exact amount of butter you brush on afterward, and what you choose to dip them in. If you go heavy on the cheese dip, the count goes up fast!
PrintEasy Homemade Soft Pretzel Bites with Baking Soda Bath

Make soft, chewy pretzel bites from scratch using a simple yeast dough and a baking soda bath for authentic texture. These are perfect game day appetizers served warm with cheese dip or mustard.
- Prep Time: 20 min
- Cook Time: 12 min
- Total Time: 1 hour 32 min
- Yield: About 40 bites 1x
- Category: Appetizer
- Method: Baking
- Cuisine: American
- Diet: Vegetarian
Ingredients
- 1 ½ cups warm water (about 110°F)
- 1 packet active dry yeast (2 ¼ teaspoons)
- 1 teaspoon granulated sugar
- 3 ¾ cups all-purpose flour, plus more for dusting
- 2 tablespoons unsalted butter, melted, plus more for brushing
- 1 ½ teaspoons salt
- ½ cup baking soda
- 1 large egg, beaten (for egg wash)
- Coarse pretzel salt, for topping
Instructions
- Activate the yeast: In a large bowl, combine the warm water, yeast, and sugar. Let stand for 5 to 10 minutes until foamy.
- Mix the dough: Add the flour, melted butter, and salt to the yeast mixture. Mix until a shaggy dough forms. Turn the dough out onto a lightly floured surface and knead for 5 to 7 minutes until smooth and elastic.
- First rise: Place the dough in a lightly oiled bowl, turning to coat. Cover the bowl with plastic wrap and let it rise in a warm place for 1 hour, or until doubled in size.
- Shape the bites: Punch down the dough. Divide the dough into 4 equal pieces. Roll each piece into a long rope about ¾ inch thick. Cut each rope into 1-inch pieces. Roll each piece into a small ball.
- Prepare the bath: Preheat your oven to 450°F (232°C). Line two baking sheets with parchment paper. In a wide, shallow pan, mix the baking soda into 8 cups of boiling water.
- Boil the bites: Working in batches, carefully drop about 8 to 10 dough balls into the baking soda bath. Boil for 30 seconds, turning once. Use a slotted spoon to remove the bites and place them on the prepared baking sheets.
- Egg wash and salt: Brush the tops of the boiled dough balls with the beaten egg wash. Sprinkle generously with coarse pretzel salt.
- Bake: Bake for 10 to 12 minutes, or until deep golden brown. Brush the hot pretzel bites immediately with melted butter. Serve warm with your favorite dips.
Notes
- For a quick alternative, you can substitute the yeast dough with refrigerated biscuit dough, cutting the biscuits into quarters before boiling.
- To make a simple cheese dip, melt 1 cup of sharp cheddar cheese with ¼ cup of milk and a pinch of cayenne pepper over low heat.
- For honey mustard dip, mix equal parts Dijon mustard and honey.
Nutrition
- Serving Size: 5 bites
- Calories: 180
- Sugar: 1
- Sodium: 450
- Fat: 4
- Saturated Fat: 2
- Unsaturated Fat: 2
- Trans Fat: 0
- Carbohydrates: 32
- Fiber: 1
- Protein: 5
- Cholesterol: 20