
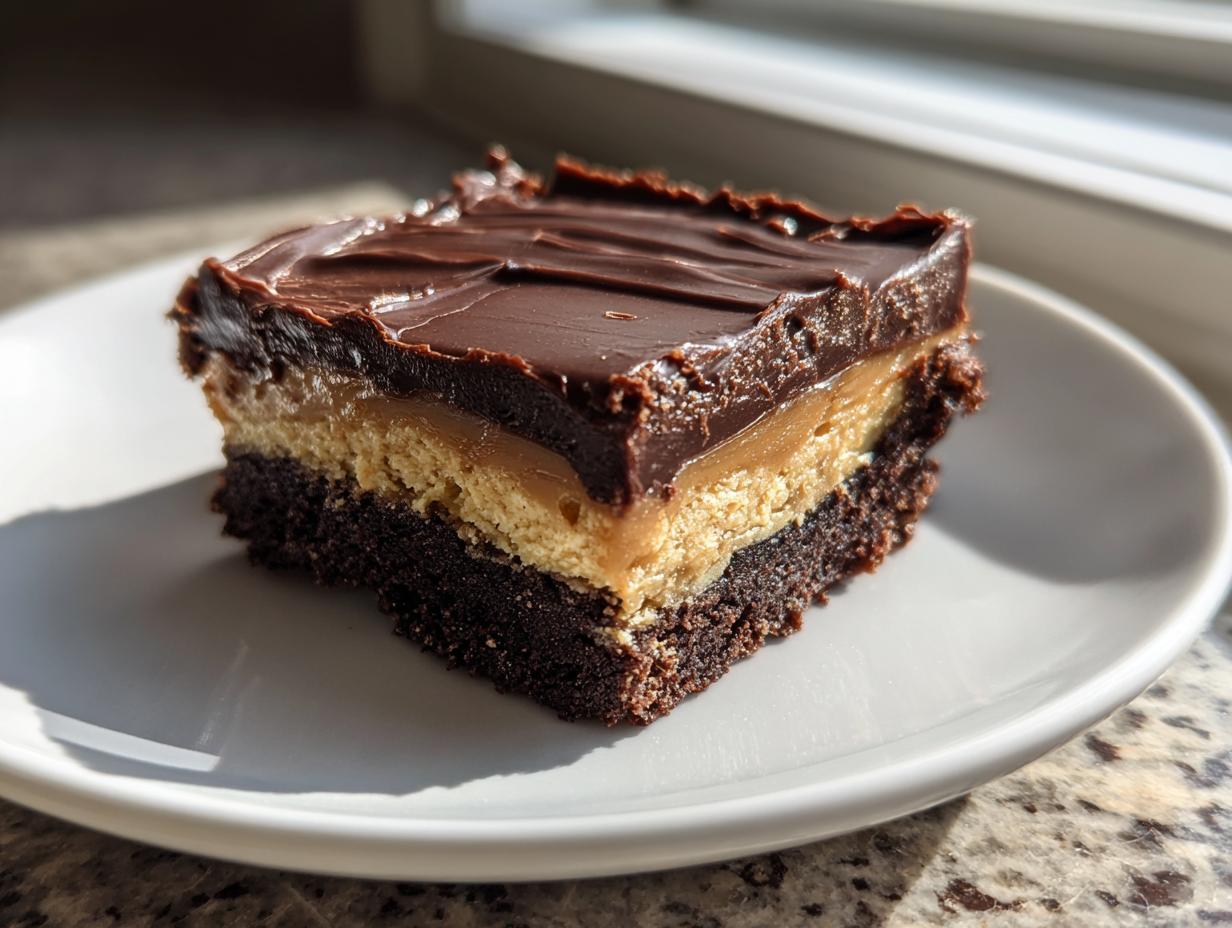
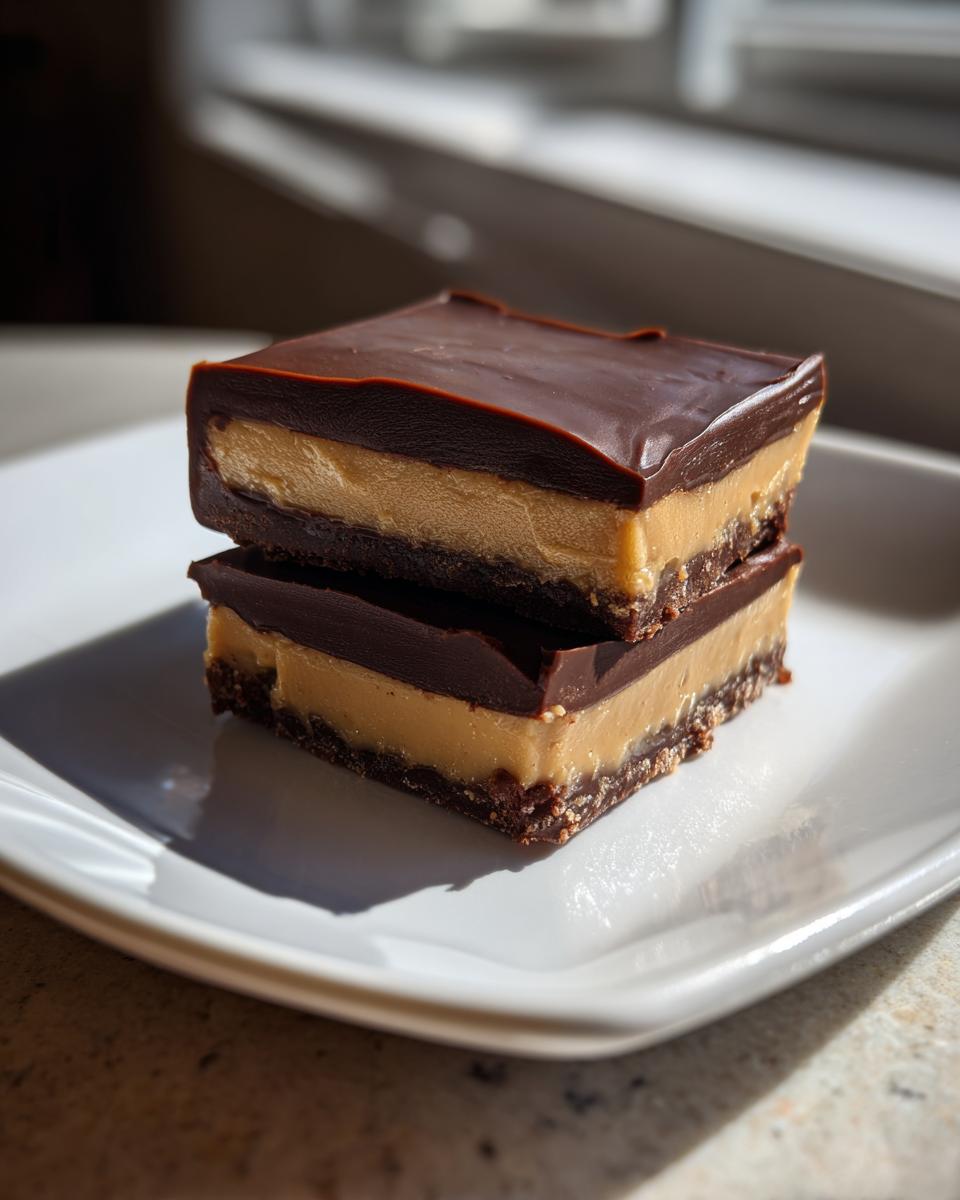
Oh, that perfect marriage of creamy peanut butter meeting rich, dark chocolate—it’s just pure comfort, isn’t it? If you’re anything like me, you crave that nostalgic flavor blend, but maybe you don’t always have the energy for complicated dipping and rolling. When I took a step back from the city hustle and sought out the simple joys my Grandma Daisy cherished, I knew I needed treats that fit my modern, busy life. That’s why I perfected my recipe for The Ultimate Easy No-Bake Buckeye Fudge. This recipe delivers that iconic sweet and salty hit, but here’s the best part: it requires zero oven time! This peanut butter cup cookies flavor profile in fudge form is my go-to for quick homemade candy gifts or just when I need a sweet memory made tangible.
- Why You Will Love This Easy Chocolate Peanut Butter Fudge
- Essential Ingredients for Perfect Buckeye Fudge
- Step-by-Step Instructions for Buckeye Fudge Recipe
- Tips for the Best Buckeye Fudge Texture
- Storage and Reheating Instructions for Buckeye Fudge
- Variations on Classic Buckeye Fudge
- Frequently Asked Questions About Buckeye Fudge
- Estimated Nutritional Data for Buckeye Fudge
- Share Your Buckeye Fudge Creations
Why You Will Love This Easy Chocolate Peanut Butter Fudge
When you’re grabbing ingredients from the pantry, you want results, right? You don’t need a degree in confectionary arts to make something absolutely decadent. This recipe just proves that simplicity can taste totally high-end. Trust me, these are keepers!
- It’s completely no-bake! Seriously, the oven stays off, and the process is fast. We just need a little stovetop time to melt the topping, which means less mess and less heat in the kitchen.
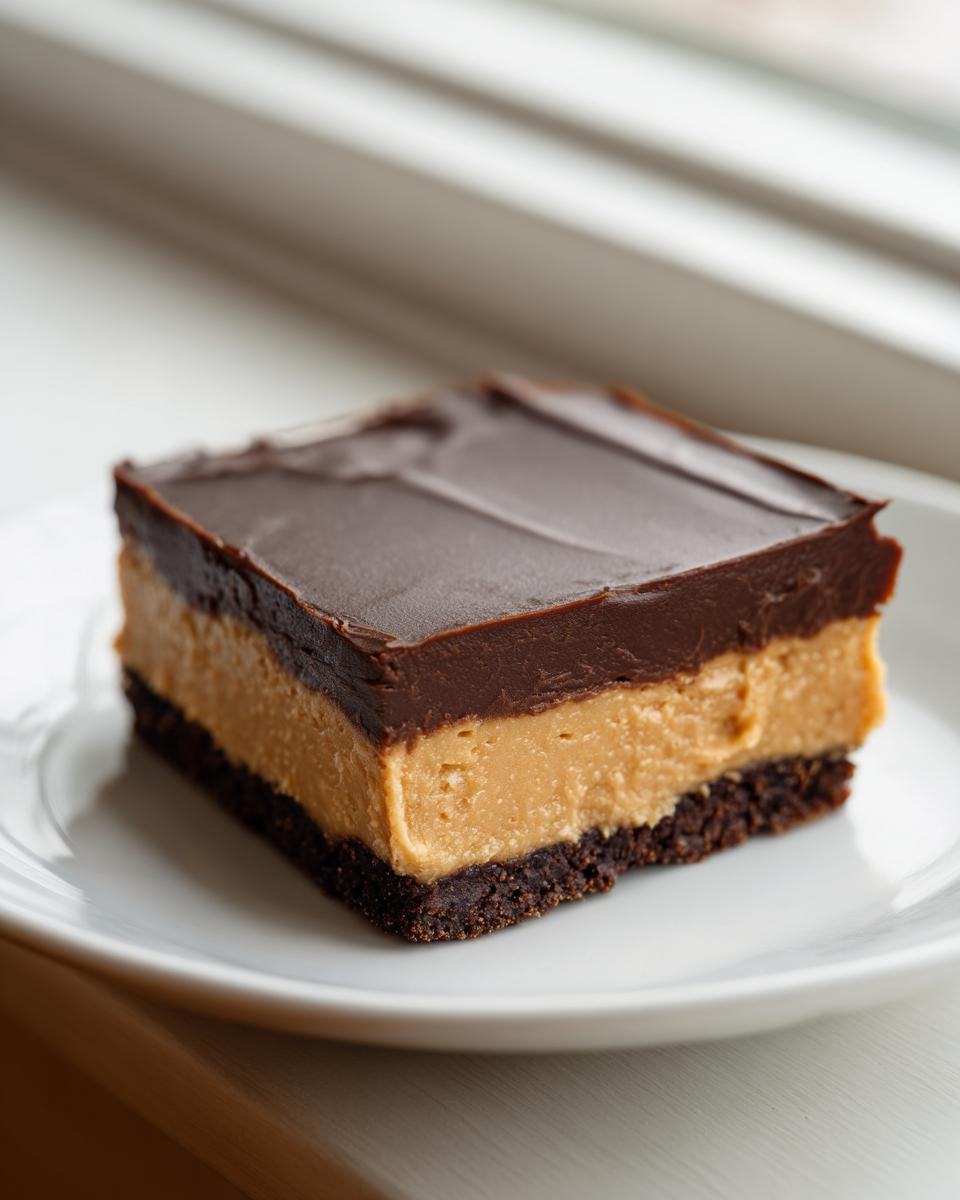
- The texture is just heavenly. That peanut butter layer is unbelievably creamy, and the chocolate topping sets up firm enough to cut cleanly, but melts beautifully in your mouth. It’s the perfect sweet and salty fudge combination.
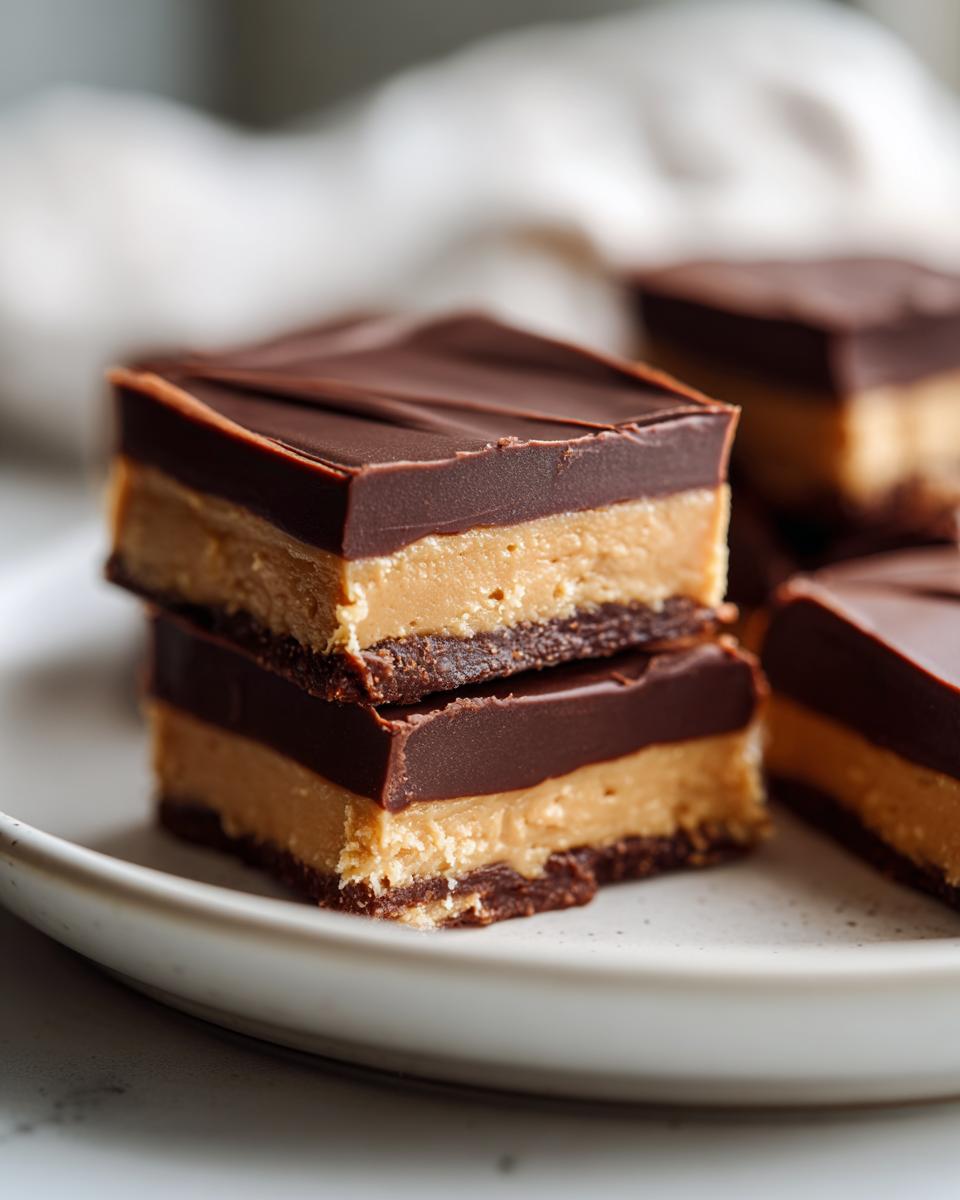
- It’s a huge yield from minimal effort. You get about 3 dozen little squares from one pan, so if you’re making treats for a gathering or for easy homemade candy gifts, this is a real winner.
- The classic flavor profile is spot on. If you love those famous peanut butter balls, this fudge captures that exact, comforting taste but in a much easier format. You can’t go wrong!
Essential Ingredients for Perfect Buckeye Fudge
When you’re whipping up something this good, the ingredients matter! Daisy always said that low quality fat equals low quality flavor, so let’s stick to the good stuff here. We aren’t doing anything complicated, but paying attention to how the butter is softened or if the sugar is sifted makes all the difference between good fudge and *amazing* fudge. These ingredients are the backbone of our soft, chewy peanut butter base.
Peanut Butter Layer Components
Get these measured out first, because once the butter and peanut butter are creamed, you need to work quickly! Make sure that one cup of butter is truly softened—soft enough to press a finger into easily, but not melted or greasy.
- 1 cup unsalted butter, softened
- 1 1/2 cups creamy peanut butter (use the classic style, not the runny natural kind!)
- 1 teaspoon vanilla extract
- 3 1/2 cups powdered sugar, sifted (This is important! Sifting keeps the base smooth.)
Rich Chocolate Topping for Buckeye Fudge
This simple topping is what gives us that classic look, just like the original Ohio treat. The secret weapon here for richness is the sweetened condensed milk—don’t confuse it with evaporated milk! We need that extra smooth consistency for our Buckeye Fudge topping.
- 7 ounces sweetened condensed milk (that’s usually half of a standard can).
- 1 1/2 cups semi-sweet chocolate chips
- 2 tablespoons butter (for that extra sheen!)
Step-by-Step Instructions for Buckeye Fudge Recipe
Alright, this is where the magic happens! Since this is a No Bake Peanut Butter Fudge, we aren’t using any complicated baking science here, just a little patience while things cool down. Follow these steps exactly for the richest, creamiest layers you’ve ever tasted. I put this quick homemade candy together while the kettle was boiling last week!
Preparing the Base for Your No Bake Peanut Butter Fudge
First up, grab that 8×8 inch pan. I want you to line it with parchment paper, but here’s the trick from Grandma Daisy: leave plenty of overhang on the sides. You’ll use those flaps later to lift the whole thing out in one piece!
In your biggest bowl, grab your mixer. Beat that softened butter, creamy peanut butter, and vanilla extract until they are totally smooth. You want zero lumps here. Now, start adding that sifted powdered sugar slowly—a cup at a time—mixing well after each addition. If you dump it all in at once, you’ll end up wearing half of it!
Once it looks unified and nicely soft, press that glorious peanut butter mixture evenly into your prepared pan. Don’t press it so hard that it gets rock solid now; just make it flat and even. Set that pan aside while we tackle the chocolate layer.
Creating the Smooth Chocolate Layer for Buckeye Fudge
This next part needs your attention! In a small saucepan over the lowest heat you can manage, toss in your sweetened condensed milk, the chocolate chips, and those two tablespoons of butter. Stir, stir, stir! You must keep it moving constantly. This Buckeye Fudge Recipe can get grainy fast if you rush this melting step.
Remember, we are just melting, never boiling! High heat burns the milk and totally changes the texture of your topping, leaving you with a crumbly mess instead of a smooth top layer. Once it’s glossy and completely smooth—no chips left in sight—carefully pour it right over top of your peanut butter base. Use an offset spatula to spread it gently until the top is covered evenly.
Chilling and Serving Your Buckeye Fudge
Now comes the hardest part: waiting! Place the whole pan into the refrigerator. You need to chill this for a minimum of 3 hours. Honestly, I usually let mine go for four just to be safe, especially if I’m making it ahead of time.
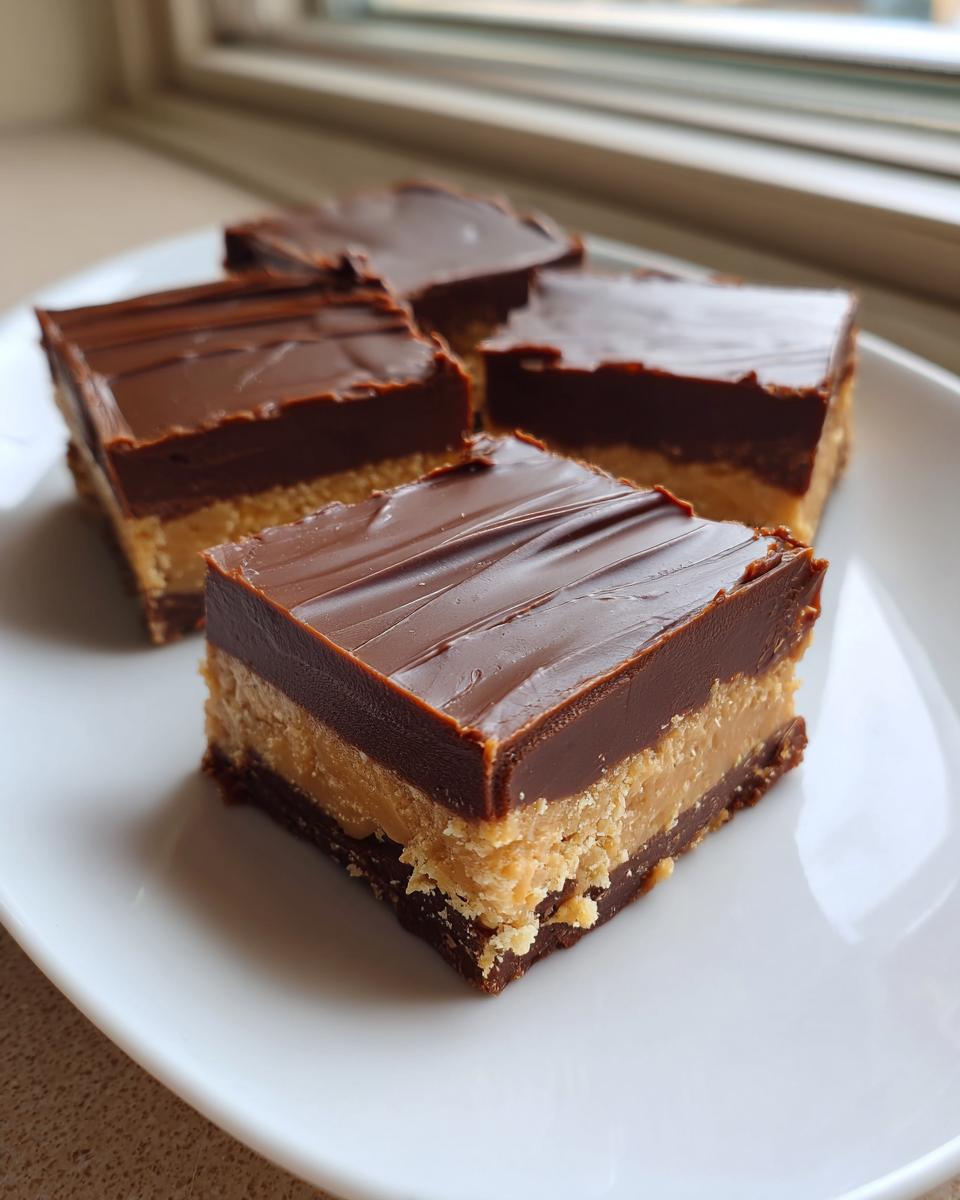
Once it’s rock solid—firm to the touch—use those parchment paper handles to lift the entire block out onto a cutting board. Wipe down your knife between cuts! Now, slice it into those small, perfect squares. Remember, fudge is rich, so small pieces go a long way!
Tips for the Best Buckeye Fudge Texture
Even though this is a no-bake recipe, texture is everything with fudge. You want that luxurious mouthfeel, right? If your peanut butter layer ends up a little gritty or your chocolate topping seems too soft, it usually comes down to temperature or mixing technique. Let’s troubleshoot so you get that perfectly rich, sliceable Buckeye Fudge every single time. My goal here is that melt-in-your-mouth experience, not a crumbly block!
Remember those little notes about the powdered sugar and butter? They matter! It’s easy to overlook them when you’re rushing, but those details are what separates good fudge from the best darn homemade candy you’ve ever made.
- Temperature is Your Friend: This might be the biggest game-changer for texture. Make sure your butter is *softened* for the peanut butter layer, but definitely not melted. Melted butter brings too much liquid in too soon, which throws off the powdered sugar ratio, resulting in a greasy or soft base.
- Sifting Isn’t Optional: I know, I know, sifting powdered sugar feels like extra work. But if you skip it, those little clumps of sugar don’t dissolve completely into the fat, leaving you with a slightly sandy texture in the peanut butter layer. Sifting ensures that beautifully smooth, creamy peanut butter dessert consistency we are aiming for.
- Watch the Heat on the Chocolate: When you’re melting the chocolate chips and milk, keep that heat on low. If you let it get hot enough to even simmer slightly, you risk scorching the sugar in the sweetened condensed milk. Scorched milk gives you a grainy, almost hard chocolate shell instead of a fudgy one. Be patient here, just stirring until it’s glossy and flows like velvet.
- Don’t Skimp on Chilling Time: People often get impatient at the end, trying to cut the fudge after only two hours in the fridge. It’s still too warm! If you cut it too soon, it smears all over the knife and sticks to the cutting board. Give it the full three hours—or even four—to firm up completely. That deep chill guarantees clean, professional-looking squares.
Storage and Reheating Instructions for Buckeye Fudge
This is such a wonderful treat because, unlike those tricky cookies you have to eat right away, this Creamy Peanut Butter Dessert keeps beautifully! Honestly, if you can keep your hands off it until the next day, you’ll be rewarded because the flavors seem to meld together perfectly after a little rest in the fridge.
Since this is a dairy-rich, no-bake confection, we always keep it cold to maintain that perfect fudgy texture. You definitely don’t want this sitting out on the counter during a party, especially if it gets warm in the room!
For keeping your treats fresh, here is my simple plan, taught to me by Daisy when I used to hoard holiday candy:
- Airtight is Absolutely Key: You need to place your cut squares in a sturdy, airtight container. If you don’t seal it well, the fudge can absorb smells from other things in the fridge (nobody wants celery-flavored fudge!). I like using glass containers with snapping lids.
- Refrigerate Promptly: Once those squares are cut and tucked into their container, pop them right into the refrigerator. They should stay perfectly good for about two weeks. I know they won’t last that long, but it’s good to know they have staying power if you make a big batch for gifts!
- Handling at Room Temperature: If you plan on serving them, take the container out about 20 minutes before people start digging in. This lets them soften *just* slightly from fridge-cold to luxuriously creamy. They shouldn’t get warm, just less hard.
And reheating? Don’t worry about it! This homemade candy recipe is designed to be eaten cold. If you try to microwave it, you’ll just end up with a runny, gooey chocolate soup, and we worked too hard for that!
Variations on Classic Buckeye Fudge
Now, once you’ve mastered the classic approach—which, let’s be honest, is amazing on its own—you might want to tweak things slightly for different people or just for fun. Daisy was always the first to adapt a recipe, provided the core comfort remained intact. Since we aren’t baking anything, we can play around with the layers without ruining the structure of our Buckeye Fudge. These little changes keep the recipe fresh even when you make it weekly!
If you’re looking for that perfect balance of flavor, try adding an extra pinch of seasoning to the peanut butter layer. This can really elevate the dessert into that amazing category of sweet and salty fudge you sometimes see.
Chocolate Layer Tweaks
The chocolate topping is the easiest spot to customize! If you prefer something richer and less sweet than semi-sweet chips, don’t hesitate to reach for dark chocolate chips instead. They give the fudge a deeper, almost bittersweet contrast to that sweet peanut butter center.
Alternatively, if you are making these for younger crowds or just prefer a milkier flavor, you can swap the semi-sweet chips for milk chocolate chips. Just a warning: milk chocolate melts a bit softer, so make sure you give it an extra hour in the fridge to firm up properly before you slice it. Even better, try combining half semi-sweet and half milk chocolate chips!
Amelia’s Peanut Butter Additions
For my own little twists, I love tinkering with the peanut butter base before I press it into the pan. The main thing is to keep the powdered sugar ratio the same, as that controls the density! A few things that work beautifully:
- A Dash of Sea Salt: If you only make one change, make it this one. Add about 1/2 teaspoon of finely ground sea salt—not table salt—to the peanut butter mixture when you beat in the vanilla. It really makes the chocolate and peanut butter flavors pop.
- Mini Buckeye Twist: If you want to lean into the classic ball shape but keep the ease of fudge, try folding in about 1/2 cup of mini semi-sweet chocolate chips into the peanut butter layer *before* pressing it into the pan. It gives you a lovely texture surprise throughout the base, almost like a homemade buckeye candy alternative, but baked into the fudge.
Feel free to experiment, but always remember: the foundation of a great Buckeye Fudge is high-quality, creamy peanut butter and butter! That’s Daisy’s true wisdom shining through.
Frequently Asked Questions About Buckeye Fudge
I get so many messages asking for little tweaks to this recipe, and honestly, it’s so fun to see how everyone makes it their own! Since this is such a beloved flavor combination, I hear similar questions all the time. If you’re wondering about ingredients or timing, chances are it’s covered right here. This list should help you create the absolute best Buckeye fudge possible!
Can I use natural peanut butter instead of creamy?
Oh, I really, really advise against using natural, oily peanut butter here. We need that stable, processed creamy kind—the one that’s smooth and holds its shape. Natural peanut butter separates really easily, and the extra oil content messes up the texture of the powdered sugar base. You’ll end up with a runny, oily mess that won’t set right for your quick fudge treat. Stick to the classic type for reliability!
How long until the fudge is ready to cut?
Patience is key for clean cuts with any good Homemade Buckeye Candy Alternative! The recipe calls for a minimum of 3 hours in the refrigerator. If your kitchen is naturally warm, or if you used chocolate chips that were a bit softer, I always suggest pushing it to 4 hours, or even chilling overnight. When it’s set, you should be able to lift the layer out using the parchment paper overhang without the peanut butter layer squishing out at all.
Can I make this a chewy fudge recipe rather than a firm bar?
This specific recipe leans towards a firm, sliceable fudge texture, which is great for gifting! If you want it *chewier*, you need to slightly decrease the amount of powdered sugar you add to the peanut butter base—maybe by about half a cup to start. The powdered sugar gives fudge its structure, so reducing it reduces firmness. You’ll still need to chill it well, but the final result will be softer and almost carmelly. This is how you adjust it to move closer to a chewy fudge recipe!
What’s the secret to making this an Easy Chocolate Peanut Butter Fudge without using baking chocolate?
The beauty of this recipe is harnessing the power of sweetened condensed milk! Traditional fudge often relies on boiling sugar syrups carefully, but by using the condensed milk and melting the chocolate chips gently over low heat, we skip that tricky step entirely. That milk provides the necessary sweetness and smooth liquid base needed for the topping without ever needing a candy thermometer. It’s such a fantastic shortcut for easy homemade candy!
Can I make this a layered dessert bar instead of traditional fudge squares?
Absolutely! If you are looking for a thicker, more substantial treat, you can easily adapt this into simple dessert bars. Instead of using an 8×8 pan, use a 9×9 inch pan. This spreads the same amount of batter thinner, resulting in shorter bars that might need slightly less chilling time because the heat penetrates faster. However, if you want thicker bars like traditional fudge, stick to the 8×8 pan and use the full chilling time!
I hope these little tips help as you gather your ingredients! If you want more super simple ideas, I put together all my fastest dessert wins right here for when you need sweetness in a pinch.
Estimated Nutritional Data for Buckeye Fudge
Now, I know plenty of you lovely bakers out there are watching your macros, or maybe you’re just curious about what all that chocolate and peanut butter goodness packs in a single bite. Daisy never worried too much about precise counts—she just wanted to know if it tasted good enough to eat twice—but I believe in giving you all the facts so you can serve your family with confidence. Since this is a rich, decadent dessert, remember that moderation is the sweetest virtue!
The following information is based on the yields provided in the recipe—meaning we divided the entire pan into 36 small squares. This is pretty much what I cut for my girls when they stop by after a long week. You can find some of my other easy meal ideas right over here, but for this treat, keep these numbers in mind for a single square serving.
Please remember, these numbers are estimates! They can change quite a bit depending on the exact brands of chocolate chips or peanut butter that you use. This data is just a general guide for this rich delight.
- Serving Size: 1 square
- Calories: 210
- Sugar: 22g
- Sodium: 95mg
- Fat: 13g
- Saturated Fat: 6g
- Unsaturated Fat: 7g
- Trans Fat: 0g
- Carbohydrates: 22g
- Fiber: 1g
- Protein: 4g
- Cholesterol: 20mg
As you can see, it’s a sweet treat through and through! But hey, zero guilt if you grab two squares because you deserve it after all that hard work making dinner, right?
Share Your Buckeye Fudge Creations
Now for my favorite part: hearing from all of you! Making these treats in my kitchen in honor of Daisy is wonderful, but knowing you all are finding joy in the simplicity of this Rich Chocolate Fudge Recipe in your own homes? That truly warms my heart.
I poured my soul into making this Easy Chocolate Peanut Butter Fudge as straightforward as possible, so I really want to know how it turned out for you! Did you stick strictly to the measurements, or did you sneak in that extra pinch of salt like I sometimes do?
Don’t be shy! Please leave a star rating right below this section—it helps other bakers know this recipe is reliable and worth their time. And if you managed to get a photo before devouring the whole pan (it happens!), I’d love to see it! Tag me on social media so I can cheer you on. Sharing our successes is how we keep that legacy of simple, loving food alive.
If you have any questions while you’re baking, or if you used a substitution that worked out beautifully, drop a detailed comment in the section below so we can all learn from your experience. If you need to reach out directly, you can always find my contact form right here. Happy treating, and don’t forget to check out how others made their fantastic Buckeye Fudge!
PrintThe Ultimate Easy No-Bake Buckeye Fudge
Make this rich, creamy Buckeye Fudge using simple steps. This no-bake treat combines classic peanut butter and chocolate flavors, perfect for holiday gifts or gatherings.
- Prep Time: 15 min
- Cook Time: 5 min
- Total Time: 35 min
- Yield: 36 servings 1x
- Category: Dessert
- Method: No Bake
- Cuisine: American
- Diet: Vegetarian
Ingredients
- 1 cup unsalted butter, softened
- 1 1/2 cups creamy peanut butter
- 1 teaspoon vanilla extract
- 3 1/2 cups powdered sugar, sifted
- 7 ounces sweetened condensed milk (half of a 14-ounce can)
- 1 1/2 cups semi-sweet chocolate chips
- 2 tablespoons butter (for topping)
Instructions
- Line an 8×8 inch baking pan with parchment paper, leaving an overhang for easy removal.
- In a large bowl, beat the softened butter, creamy peanut butter, and vanilla extract until smooth.
- Gradually add the sifted powdered sugar to the peanut butter mixture, beating until fully combined and creamy.
- Press the peanut butter mixture evenly into the prepared pan. Set aside.
- In a small saucepan over low heat, combine the sweetened condensed milk, chocolate chips, and 2 tablespoons of butter. Stir constantly until the chocolate is fully melted and the mixture is smooth. Do not let it boil.
- Pour the melted chocolate mixture evenly over the peanut butter layer in the pan. Spread gently to cover the entire surface.
- Refrigerate the fudge for at least 3 hours, or until completely firm.
- Lift the fudge out of the pan using the parchment overhang. Cut into small squares before serving.
Notes
- For the best texture, ensure your butter is truly softened, not melted.
- Sifting the powdered sugar prevents lumps in the peanut butter layer.
- Store leftover fudge in an airtight container in the refrigerator.
Nutrition
- Serving Size: 1 square
- Calories: 210
- Sugar: 22g
- Sodium: 95mg
- Fat: 13g
- Saturated Fat: 6g
- Unsaturated Fat: 7g
- Trans Fat: 0g
- Carbohydrates: 22g
- Fiber: 1g
- Protein: 4g
- Cholesterol: 20mg