
Oh, friends, if you’re looking for the pinnacle of cozy, decadent Fall baking, stop what you’re doing. We are talking fireworks in your mouth! This Apple Crumble Cheesecake isn’t just one dessert; it’s three amazing things rolled into one magnificent, creamy tower. When I moved back to simpler cooking after my busy city life, I needed recipes that felt meaningful, just like Grandma Daisy used to make. This fusion dessert was my moment of realizing that simple, honest ingredients can create something truly show-stopping. Trust me when I say this method gets you an Apple Crumble Cheesecake that tastes absolutely restaurant-quality, but you’ll have made it right there in your own kitchen. You’re going to love this slice of heaven!
You can find more of my favorite simple recipes right here: Delicious Dessert Recipes.
- Why This Ultimate Apple Crumble Cheesecake Recipe Works (E-E-A-T)
- Gathering Ingredients for Your Apple Crumble Cheesecake
- Step-by-Step Instructions for the Apple Crumble Cheesecake
- Ingredient Notes and Substitutions for Your Apple Crumble Cheesecake
- Tips for Success Making Decadent Fall Baking
- Serving Suggestions for Your Apple Crumble Cheesecake
- Storage and Reheating for Your Apple Crumble Cheesecake
- Frequently Asked Questions About Apple Crumble Cheesecake
- Share Your Ultimate Apple Crumble Cheesecake Creation
- Estimated Nutritional Data for Apple Crumble Cheesecake
Why This Ultimate Apple Crumble Cheesecake Recipe Works (E-E-A-T)
This isn’t just about mixing layers; it’s about respecting the structure, just like Grandma Daisy taught me. We build this Apple Crumble Cheesecake on honesty—using ingredients that give us their best flavor and texture. That focus on quality ingredients and patient technique is what separates a good bakery item from a truly memorable one. It’s the heart of what I share on Daisy’s Recipes.
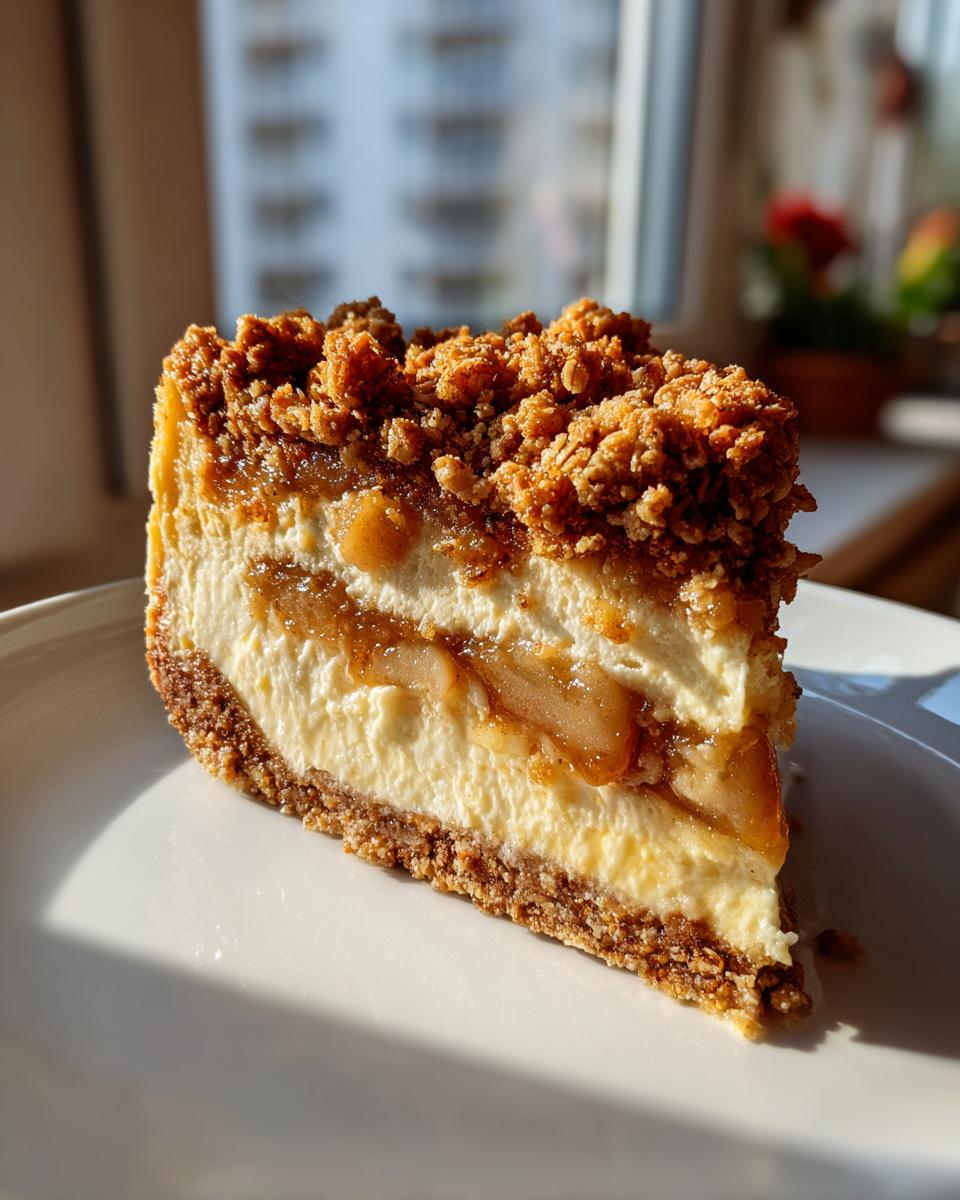
- Incredibly creamy, dense cheesecake filling
- Warm, tart, perfectly spiced apple centers
- A delightfully crunchy oat topping that stays crisp
If you’re interested in another recipe where technique really shines through, check out my tutorial on Basque Cheesecake. It has that same dedication to texture!
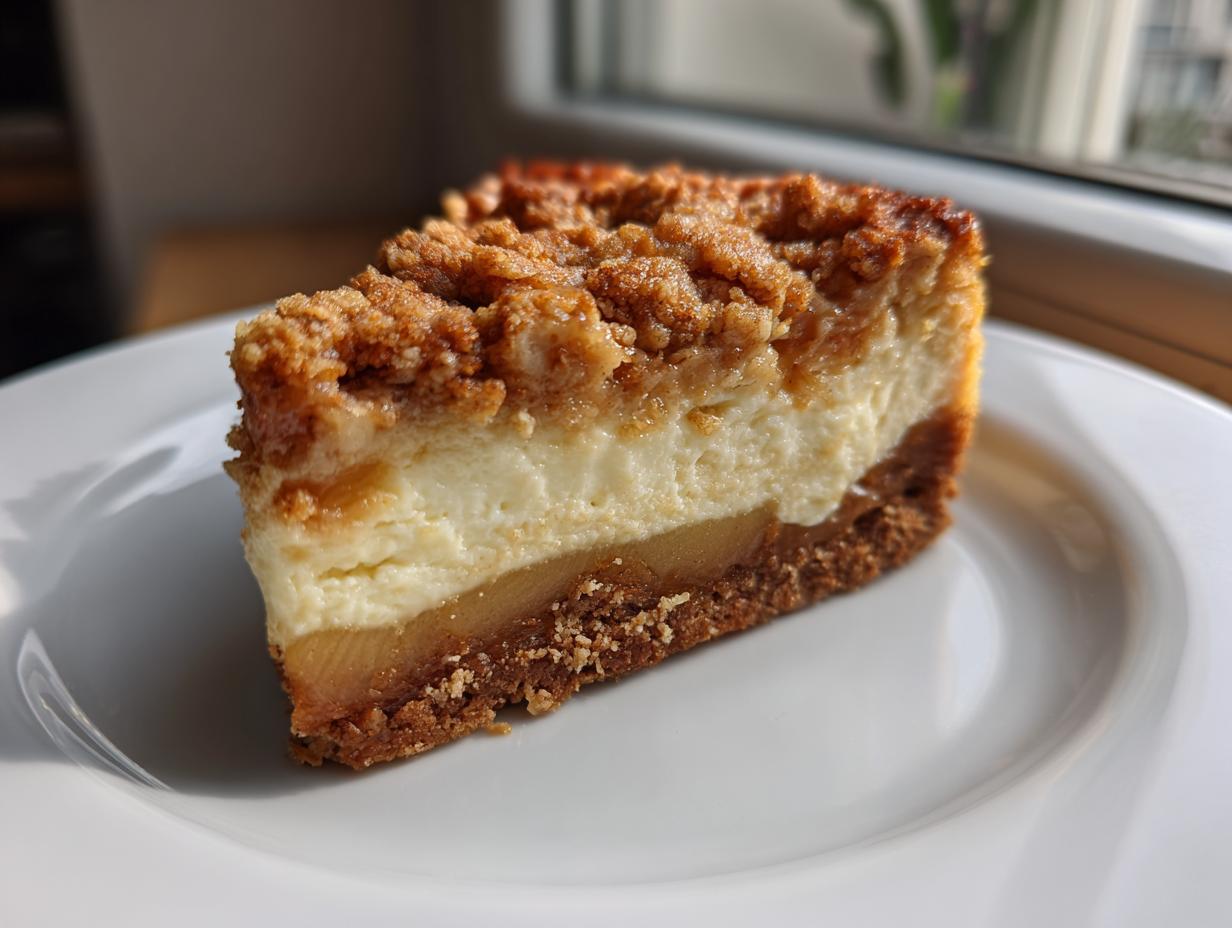
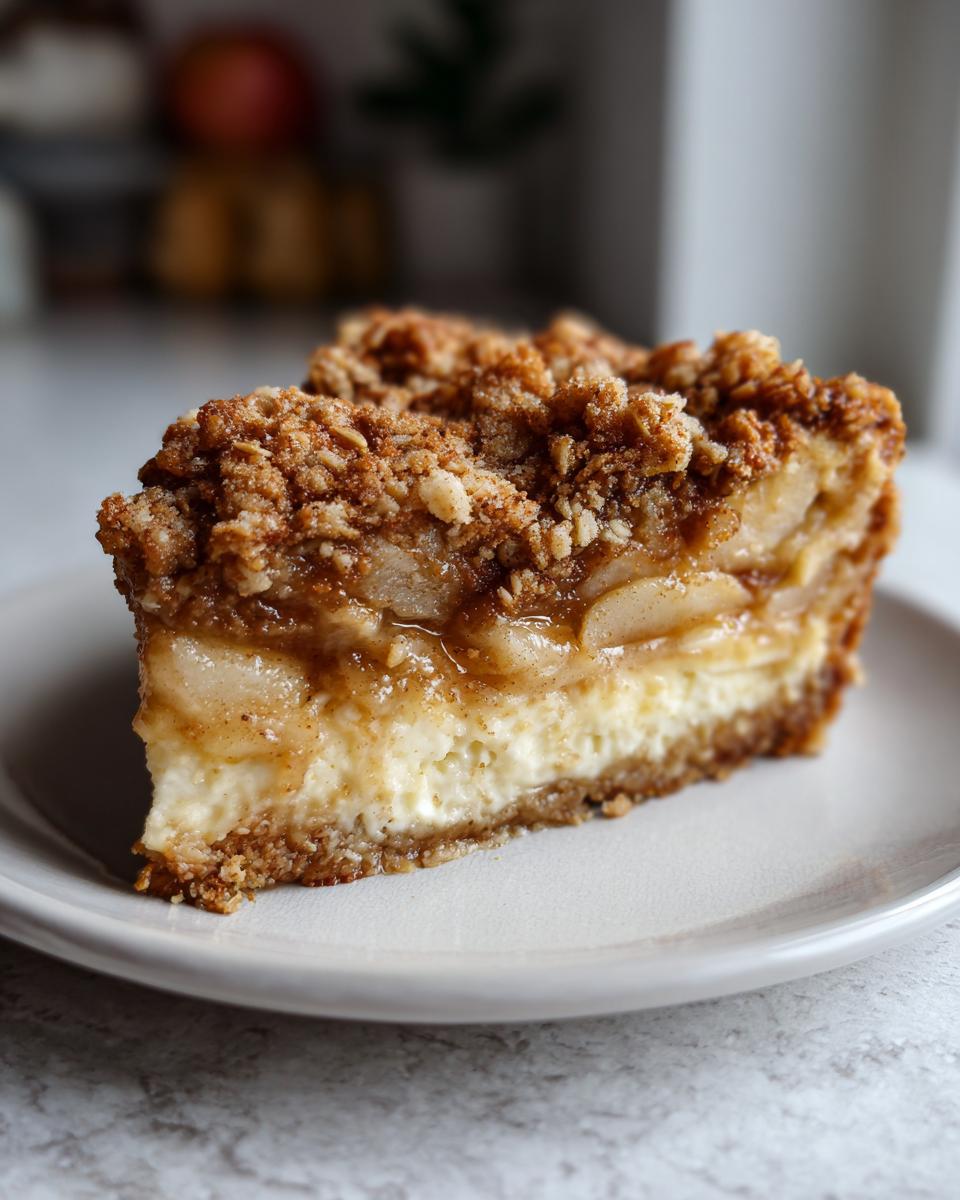
The Perfect Balance of Textures in Your Apple Crumble Cheesecake
When you take that first bite, you need the full experience. The base has to be sturdy enough to hold everything up—no flimsy crusts here! Then you hit the smooth, cool cheesecake, which acts like the perfect canvas for the tart, warm Granny Smith apples nestled inside. Finally, that oat crumble brings the satisfying crunch on top. This process ensures you end up with what I truly believe is the Best Baked Cheesecake you’ll ever have at home.
Gathering Ingredients for Your Apple Crumble Cheesecake
Okay, getting the right ingredients is where the fun starts because this amazing Apple Crumble Cheesecake has three separate personalities! We need components for the base, the sweet and spicy heart, and the crunchy top. When I dug through Daisy’s notes, she stressed that using excellent starting pieces leads to that restaurant quality we’re aiming for. Don’t skimp here; this investment in flavor is worth every penny. For more basic baking tips on getting ingredients right, check out my guide on moist carrot cake—the philosophy is the same!
For the Digestive Biscuit Crust
We start with the simple, firm base. You’ll need about 1 1/2 cups of digestive biscuit crumbs—you can make these yourself or buy them ready to go. Then grab 1/4 cup of regular white granulated sugar, and 6 tablespoons of good quality unsalted butter that you’ve melted down until it’s smooth and golden.
For the Spiced Apple Topping
This section needs love! I insist on 4 medium Granny Smith apples for this. They hold their shape beautifully and give us that necessary tartness to cut through the richness of the cheesecake. You’ll mix those peeled and diced apples with 1/4 cup of packed brown sugar, 1 teaspoon of ground cinnamon, 1/4 teaspoon of ground nutmeg, 1 tablespoon of fresh lemon juice (don’t skip that!), and 1 tablespoon of cornstarch to make sure the filling thickens up nicely when it bakes.
For the Creamy Cheesecake Filling
This is the star, so pay attention to the temperature here! You need 3 full (8 ounce) packages of cream cheese, and they absolutely must be softened to room temperature—this is my first big expert tip for a smooth texture. We mix that with 1 1/2 cups of granulated sugar, 1 teaspoon of vanilla extract, 1/4 teaspoon of salt, 4 large eggs all at room temperature, and finally, 1/2 cup of sour cream. Room temperature eggs mix much better!
For the Crunchy Crumble Topping
This layer gives us that perfect textural contrast. To make the Crunchy Crumble Topping for your apple crumble cheesecake, you’ll combine 1 cup of all-purpose flour, 1/2 cup of rolled oats, an extra 1/2 cup of packed brown sugar, 1/2 teaspoon of ground cinnamon for that extra warmth, 1/4 teaspoon of salt, and 6 tablespoons of cold unsalted butter cut into small little cubes. It’s all about keeping that butter cold!
Step-by-Step Instructions for the Apple Crumble Cheesecake
Now we put it all together! This process makes sure every layer cooks perfectly, giving you that gorgeous, impressive look for your Apple Crumble Cheesecake. Don’t rush the cooling, though; that’s the real secret to a perfect slice.
Preparing the Crust and Preheating
First things first, get your oven warmed up to 350°F (175°C). While it heats, mix your biscuit crumbs, sugar, and melted butter until it looks like wet sand. Press it down firmly into that 9-inch springform pan—make sure it’s nice and compact on the bottom. Pop that into the oven for exactly 10 minutes to set. Once you pull it out, immediately drop your oven temperature down to 325°F (160°C) because cheesecakes hate high heat!
Assembling the Apple Layer and Cheesecake Batter
While the crust is baking, toss all your apple layer ingredients together in a bowl. You want those apples coated evenly with the spice mixture. Then, get to that filling! Beat the cream cheese mixture until it’s perfectly smooth, add the eggs one at a time, and mix until *just* barely combined. My expert tip? Don’t overmix the batter once the eggs go in, or you’ll introduce too much air, which causes cracks in your finished New York style cheesecake.
Layering and Adding the Crumble Topping
Okay, time for layering! Pour about half of your smooth cheesecake batter right over that cooled crust. Spoon out all those lovely spiced apples evenly over the batter. Then, gently pour the rest of the cheesecake batter on top of the apples. For the grand finale, take your flour, oat, and butter mixture and sprinkle that Crunchy Crumble Topping all over the top layer. Try to distribute it evenly so every slice gets some!
Baking and Cooling the Apple Crumble Cheesecake
Bake this beauty at 325°F (160°C) for about 60 to 75 minutes. You’re looking for mostly set edges with just a tiny wiggle left in the very center. This is super important for a successful homemade cheesecake tutorial! When it’s done, turn the oven OFF. Prop the door open slightly with a wooden spoon and leave the cheesecake inside for a full hour. This slow cool-down prevents major cracking. After that hour, let it rest on the counter, and then, you must chill it in the fridge for at least 6 hours, but overnight is what the pros do!
Ingredient Notes and Substitutions for Your Apple Crumble Cheesecake
When it comes to a showstopper like this Apple Crumble Cheesecake, the quality of a few key players really shines through. Since this is a layered dessert, a small change in one spot can echo through the whole bite, so I want to give you the insider knowledge Daisy shared with me. We need maximum flavor for this Apple Crumble Cheesecake Recipe, right? I’ve paired some notes on swaps below, but honestly, don’t forget to check out my whipped honey butter recipe if you ever need a simple side for something sweet!
Crust Swaps: Digestive vs. Biscoff
The base recipe calls for simple digestive biscuits, and they give you a fantastic, sturdy platform. But if you want to take this to the next level—especially for a *Decadent Fall Baking* moment—you absolutely must try swapping them out for Biscoff cookie crumbs. That spiced, brown-sugar flavor of Biscoff just sings with the cinnamon apples above it. It’s an easy swap in terms of quantity; just use the same amount of crumbled cookies, give or take, and it drastically boosts the richness. It makes the whole thing feel extra special!
Achieving a Crack-Free Apple Crumble Cheesecake Surface
Everyone fears the crack, don’t they? For this particular recipe, the sour cream in the filling and the weight of the crumble topping actually help prevent major fissures. However, if you *really* want the sleek, perfect, bakery-case look of the Best Baked Cheesecake, you should consider a water bath. It might seem fussy, but it’s so gentle on the filling. You wrap your springform pan very securely in heavy-duty foil—two layers, folded tight—and set that pan inside a larger roasting pan. When you put it in the oven, carefully pour hot water into the roasting pan until it comes about an inch up the sides of your springform. That steamy environment keeps the edges from setting too fast, ensuring that beautiful, smooth surface.
Tips for Success Making Decadent Fall Baking
We’ve got the recipe down, but if you want folks to ask where you bought this magnificent Apple Crumble Cheesecake, here are a few extra things I learned watching Daisy work—little touches that turn good baking into truly memorable baking. These tips are how we make sure your layers stay distinct and that the texture is just perfect for your next big **Dessert for Holiday Gatherings**.
- Don’t Skip the Room Temperature Ingredients: Seriously, this is crucial for the filling! Cold cream cheese and eggs don’t combine smoothly; they leave lumps, which ruins the velvety texture we are going for. Take them out at least two hours before you plan to start the filling. It’s essential for that premium feel.
- Manage Your Apples: Before you mix your apples with the sugar and spice, give them a quick sauté for about five minutes in just a tiny bit of butter until they start to soften just slightly. This pre-cook step means they release moisture into the cheesecake layer *before* it bakes, preventing a watery center and making sure they are tender, not crunchy, in the final product.
- The Oven Door Trick is Non-Negotiable: When the baking time is up, resist the urge to yank the cheesecake out! Leaving it inside the cooling oven with the door propped for that full hour is the absolute best way to introduce it gently to room temperature. This mimics the controlled environment of a professional bakery and dramatically cuts down on the worst cracking.
- Chill, Chill, Chill: I know you want to dig in the second it comes out, but cheesecake firming up happens in the fridge. Six hours is the minimum, but overnight is when the acid from the apples balances against the fat of the cream cheese perfectly. This long chill is what gives you that beautiful, clean slice, which is the hallmark of a Restaurant Quality Cheesecake.
If you love diving deep into technique, you should check out the secrets for my creamy white chocolate cheesecake, too—lots of the same cooling rules apply there!
Serving Suggestions for Your Apple Crumble Cheesecake
This apple crumble cheesecake is already so rich and decadent—it truly stands on its own as a showstopper for any gathering! But if you want to make the presentation even cozier, especially for a chilly Fall evening, a little something extra on the side goes a long way. My favorite thing is a tiny drizzle of good quality caramel sauce right before serving; it just enhances the brown sugar notes.
If you have some extra icing hanging around, a delicate swirl of fluffy vanilla buttercream on the plate edge looks fancy without sacrificing flavor. Just keep it simple, serve it chilled, and watch everyone dive in! You really won’t need much else for this amazing dessert.
Storage and Reheating for Your Apple Crumble Cheesecake
This is perhaps the most important part for a big holiday like Thanksgiving. You want to make sure your beautiful Apple Crumble Cheesecake stays perfect, right? The good news is, like most great cheesecakes, it actually gets better the next day after that long chill we talked about. You can absolutely bake this ahead of time, which is a lifesaver when you’re hosting!
For storage, keep it right in that springform pan, but cover it really well. Plastic wrap is fine, but I try to use a baking dome or a large, loose cover so I don’t squish that lovely crumble topping. In the refrigerator, covered tightly, this cheesecake is fantastic for up to four days. If you leave it uncovered, the surface might dry out a little, and that crumble topping can absorb fridge smells, so secure that lid!
Now, can you freeze it? Yes, you can, but I always suggest we only freeze the *cheesecake* part, not the whole thing with the topping. Freezing and thawing can actually ruin the texture of that oat crumble. If you must freeze, let the whole thing chill completely overnight first. Then, remove the crumble topping, wrap the plain cheesecake tightly in a couple of layers of plastic wrap and then foil. It keeps well for about a month. When you go to thaw it, let it defrost slowly in the fridge overnight, and then sprinkle on some fresh, untoasted crumble when you’re ready to serve.
When it comes to reheating, please do not try to warm up the whole cake! Cheesecake shines when served cool, as that firm, creamy texture is part of its charm. However, if you are serving a slice on a chilly evening and you want it slightly less refrigerator-cold, you can let your individual slice sit on the counter for about 20 minutes before eating. Some folks even give the plate a very quick, 5-second blast in the microwave—not the cake itself, just the plate underneath it—to take the chill off the bottom layer. To learn more about handling cream cheese desserts, you can browse my notes on cream cheese banana bread storage; those rules apply here too!
Frequently Asked Questions About Apple Crumble Cheesecake
Can I make this apple crumble cheesecake ahead of time?
Oh, absolutely! In fact, I highly encourage it, especially if you plan on serving this **Apple Crumble Cheesecake** for your **Dessert for Holiday Gatherings**. Cheesecake layers are famous for tasting better the next day. The flavors have time to marry—the spice permeates the apples, and the cream cheese firms up perfectly against the crust. Make it a day before, keep it chilled and covered tightly, and you’re golden. It takes the pressure off your oven on the actual big day!
What apples work best for the spiced apple topping?
I’m still a big believer in the Granny Smith for this recipe. We use a lot of sugar and fat in the cheesecake layer, right? So, we need something that fights back a little bit! Granny Smiths offer that necessary tartness that cuts right through the richness, making this incredibly satisfying Creamy Apple Dessert rather than just one heavy note. If you use a sweeter apple, I suggest bumping up the lemon juice slightly to keep that beautiful balance! Don’t worry; they soften up perfectly during the bake.
Is this recipe suitable for a Thanksgiving Cheesecake Recipe?
Suitable? Honey, this recipe was practically *designed* for Thanksgiving! It’s everything wonderful about the holidays packed onto one platter. It looks stunning on the table, checks all the boxes for seasonal spices, and gives you that impressive, layered look that makes people gasp when you bring it out. If you are planning your menu, this is definitely one of the best Fall Cheesecake Ideas you can include to wow your guests. It’s richer than a pie but still has all those familiar, cozy apple and cinnamon moments.
To see more ways to use these wonderful seasonal flavors, check out my thoughts on Pecan Pie Cupcakes!
Share Your Ultimate Apple Crumble Cheesecake Creation
Well, we did it! We navigated the crust, tamed the apples, and whipped up a truly incredible Apple Crumble Cheesecake. Now, I want to see what you’ve made! Daisy always said that a recipe isn’t truly finished until it’s been shared and enjoyed around a table. So, once you’ve chilled this masterpiece and had that first perfect, creamy bite, please take a second to come back here.
If you loved this recipe as much as I hope you did, would you mind leaving a rating? Five stars makes my day and helps others find this cozy, decadent dessert. And if you snapped any pictures—or if you decided to throw caution to the wind and add a caramel swirl—I would honestly love to see them! Drop your feedback, your questions, or your successes in the comments below. Connecting with you all is the biggest joy of continuing Daisy’s legacy.
You can always reach out to me directly if you have specific catering questions or just want to chat baking philosophy over on my contact page: Get in Touch with Amelia. Happy baking, everyone!
Estimated Nutritional Data for Apple Crumble Cheesecake
Now, I know we bake with love around here, not spreadsheets, but I always like to give you an idea of what you’re working with when you create something this decadent. Since this apple crumble cheesecake is built on full-fat cream cheese, sugar, and butter, it is certainly a rich treat—perfect for a special occasion dessert!
Please keep in mind these numbers are just an estimate based on the ingredients list and the 12-serving yield we calculated. Your exact figures might shift a tiny bit depending on the exact brands of biscuit crumbs or the size of your apples. It’s best to view this as guidance for your holiday planning!
- Serving Size: 1 slice
- Calories: Approximately 450 per slice
- Sugar: Around 35g (that rich brown sugar really adds up!)
- Fat: Roughly 28g total fat
- Protein: About 7g
I focus on the fact that this is truly a showstopper for your **Thanksgiving Cheesecake Recipe** lineup. We’ll save the lighter fare for another day. This is pure, comforting indulgence!
PrintUltimate Apple Crumble Cheesecake with Spiced Oat Crumble
This decadent apple crumble cheesecake combines creamy cheesecake, spiced apple filling, and a crunchy oat topping. This baked cheesecake recipe delivers restaurant-quality results using simple ingredients.
- Prep Time: 35 min
- Cook Time: 75 min
- Total Time: 110 min
- Yield: 12 servings
- Category: Dessert
- Method: Baking
- Cuisine: American
- Diet: Vegetarian
Ingredients
- For the Crust: 1 1/2 cups digestive biscuit crumbs, 1/4 cup granulated sugar, 6 tablespoons unsalted butter, melted
- For the Apple Layer: 4 medium Granny Smith apples, peeled and diced, 1/4 cup packed brown sugar, 1 teaspoon ground cinnamon, 1/4 teaspoon ground nutmeg, 1 tablespoon lemon juice, 1 tablespoon cornstarch
- For the Cheesecake Filling: 3 (8 ounce) packages cream cheese, softened, 1 1/2 cups granulated sugar, 1 teaspoon vanilla extract, 1/4 teaspoon salt, 4 large eggs, 1/2 cup sour cream
- For the Crumble Topping: 1 cup all-purpose flour, 1/2 cup rolled oats, 1/2 cup packed brown sugar, 1/2 teaspoon ground cinnamon, 1/4 teaspoon salt, 6 tablespoons cold unsalted butter, cut into small pieces
Instructions
- Prepare the Crust: Preheat your oven to 350°F (175°C). Mix the biscuit crumbs, 1/4 cup sugar, and melted butter. Press the mixture firmly into the bottom of a 9-inch springform pan. Bake for 10 minutes. Remove and let cool slightly. Reduce oven temperature to 325°F (160°C).
- Prepare the Apple Layer: Toss the diced apples with brown sugar, cinnamon, nutmeg, lemon juice, and cornstarch in a medium bowl. Set aside.
- Make the Cheesecake Filling: Beat the softened cream cheese, 1 1/2 cups sugar, vanilla extract, and salt in a large bowl until smooth. Beat in the eggs one at a time, mixing just until combined after each addition. Mix in the sour cream. Do not overmix.
- Assemble and Bake: Pour half of the cheesecake batter over the cooled crust. Spoon the apple mixture evenly over the batter. Pour the remaining cheesecake batter over the apples.
- Make the Crumble Topping: In a separate bowl, combine flour, oats, brown sugar, cinnamon, and salt. Cut in the cold butter using your fingers or a pastry blender until the mixture resembles coarse crumbs. Sprinkle this crumble evenly over the top layer of cheesecake batter.
- Bake: Place the springform pan on a baking sheet. Bake at 325°F (160°C) for 60 to 75 minutes, or until the edges are set and the center has a slight jiggle.
- Cool: Turn off the oven and prop the door open slightly. Let the cheesecake cool in the oven for 1 hour. Remove from the oven and cool completely on a wire rack. Chill in the refrigerator for at least 6 hours, preferably overnight, before serving.
Notes
- Use a water bath for the best, crack-free cheesecake texture, though this recipe is designed to minimize cracking without one.
- For a richer flavor, substitute Biscoff cookie crumbs for the digestive biscuits in the crust.
- Serve chilled for the best contrast between the creamy filling and the spiced apples.
Nutrition
- Serving Size: 1 slice
- Calories: 450
- Sugar: 35g
- Sodium: 250mg
- Fat: 28g
- Saturated Fat: 17g
- Unsaturated Fat: 11g
- Trans Fat: 0.5g
- Carbohydrates: 45g
- Fiber: 2g
- Protein: 7g
- Cholesterol: 110mg