

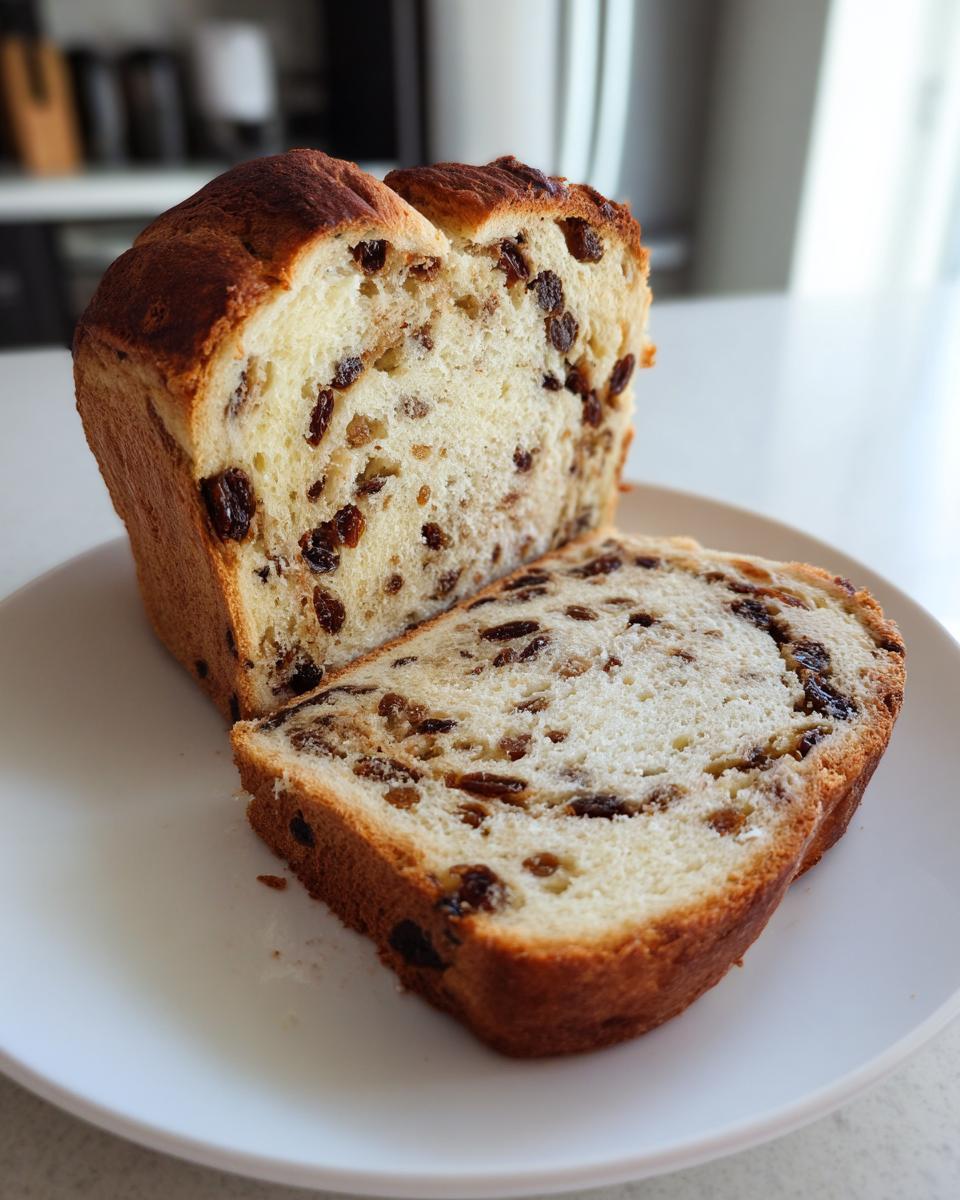
Oh, there is just nothing that settles the soul like the smell of fresh baking, is there? When I first started drawing connections back to Grandma Daisy’s kitchen, this Classic Cinnamon Raisin Bread was one of the first recipes I absolutely *had* to nail down. Forget those dry, flavorless loaves from the supermarket! This is truly the Best Raisin Bread Recipe you’ll find because we’re focusing on that pillowy soft texture and, of course, that rich, gooey cinnamon swirl. Trust me, bringing this traditional raisin bread home means bringing the original comfort back to your table. If you love those comforting bakes, make sure you check out my recipe for cream cheese banana bread soon!
- Why This Homemade Raisin Bread Recipe Delivers Comfort
- Gathering Ingredients for Your Classic Raisin Loaf
- Step-by-Step Instructions for Easy Raisin Bread Baking
- Tips for the Best Raisin Bread Recipe Results
- Serving Suggestions for Your Breakfast Bread with Raisins
- Storage and Reheating Instructions for Homemade Raisin Bread Recipe
- Frequently Asked Questions About Yeast Raisin Bread Loaf
- Estimated Nutritional Data for Your Sweet Raisin Bread
- Share Your Cozy Homemade Bread Experience
Why This Homemade Raisin Bread Recipe Delivers Comfort
When you pull this loaf out of the oven, you’ll understand why folks rave about homemade bread. It’s not just about taste; it’s about the whole experience that Grandma Daisy always created. This loaf lasts longer on the counter than my store-bought loaves ever did, too! If you pair a thick slice of day-old toast with my whipped honey butter, you’ve got breakfast perfection.
- Achieving that Signature Soft Raisin Bread Texture: We use yeast and a good, solid knead to develop the gluten just right. That 6-to-8-minute knead builds the structure you need for that classic soft, fluffy crumb—it’s not dense like a cake, it’s light!
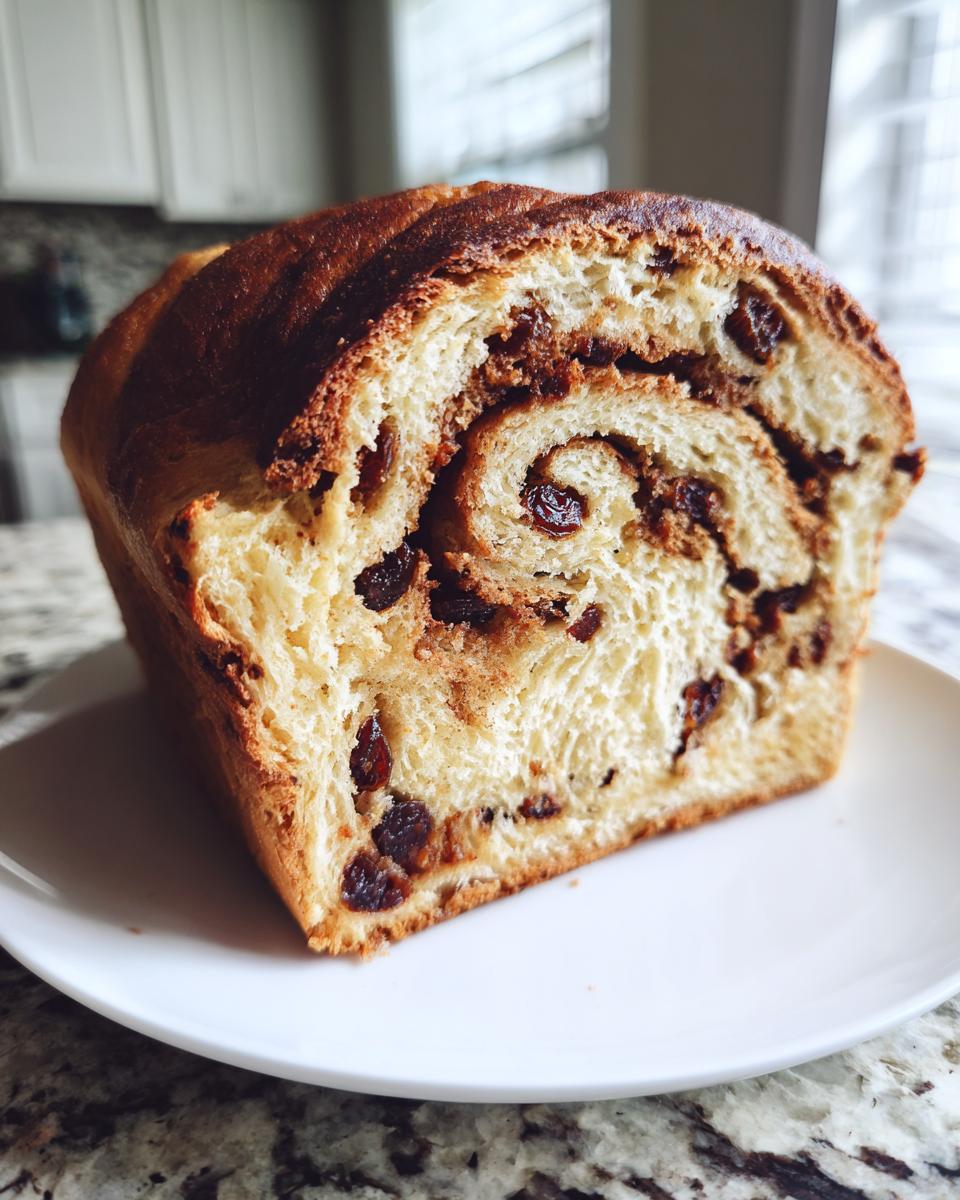
- The Perfect Cinnamon Swirl Raisin Bread Aroma: Honestly, the smell is half the reason you bake this! That rich mix of brown sugar and cinnamon clinging to the raisins warms up the entire house. It’s the scent of a slow, cozy weekend morning.
Gathering Ingredients for Your Classic Raisin Loaf
Okay, the secret to a show-stopping loaf isn’t some fancy mixer; it’s making sure your ingredients are ready to go when you are. For this Classic Raisin Loaf, we need two little teams: the dough-makers and the swirl-makers. Precision matters here, otherwise, your yeast might throw a fit! If you get your components ready, you can whip up the swirl while your dough is having its first nap. Speaking of sweet toppings, have you checked out my recipe for vanilla buttercream? It’s a lifesaver for cakes!
For the Yeast Raisin Bread Loaf Dough
These are the building blocks for that soft, fluffy texture we love so much:
- 1 cup warm water—and listen to me, it HAS to be between 105°F and 115°F. Too hot, and you kill the yeast!
- 2 ¼ teaspoons active dry yeast (that’s one standard packet!).
- ¼ cup granulated sugar.
- 1 large egg, making sure it’s at room temperature; this helps with mixing.
- ¼ cup unsalted butter, just melted and cooled slightly.
- 3 cups all-purpose flour, plus extra for dusting the counter.
- 1 teaspoon salt.
- 1 cup raisins—and remember, we need to plump these up later!
For the Sweet Cinnamon Swirl
This part is non-negotiable for that bakery quality feel. We want this to spread like butter!
- ¼ cup packed brown sugar—the molasses flavor is key here.
- 1 tablespoon ground cinnamon.
- 2 tablespoons unsalted butter, making sure it’s nice and softened, not melted!
Step-by-Step Instructions for Easy Raisin Bread Baking
This is where the magic happens, but don’t get intimidated! We’re taking this one gentle step at a time. We want this beautiful, rustic loaf, and following these steps ensures amazing texture every time you try this Easy Raisin Bread Baking project. If you’re enjoying the process, I use the exact same patience when I’m learning how to make my own sourdough starter from scratch!
Activating the Yeast and Mixing the Dough
First, we wake up the yeast! Pour your warm water (remember that 105°F to 115°F sweet spot!) into a big bowl, sprinkle in the yeast, and wait about five minutes. If it gets foamy on top, fantastic! That means your yeast is alive and ready to work. Now, stir in the granulated sugar, your room temperature egg, and the melted butter. Whisk those dry ingredients—the flour and salt—together in another bowl, and then slowly start adding them into your wet mixture until it looks shaggy. Don’t overmix yet!
Kneading and First Rise for Your Raisin Bread
Time to bring out the muscle! Turn that shaggy dough onto my favorite floured counter and knead it for a solid 6 to 8 minutes. You’re looking for smooth and elastic—it should really spring back when you poke it. Once it feels right, gently fold in those plump raisins until they’re just spread out. Put the dough into a lightly oiled bowl, cover it up, and let it be for about 1 to 1.5 hours. You want it completely doubled in size for a good, chewy structure.
Creating the Cinnamon Swirl and Shaping the Loaf
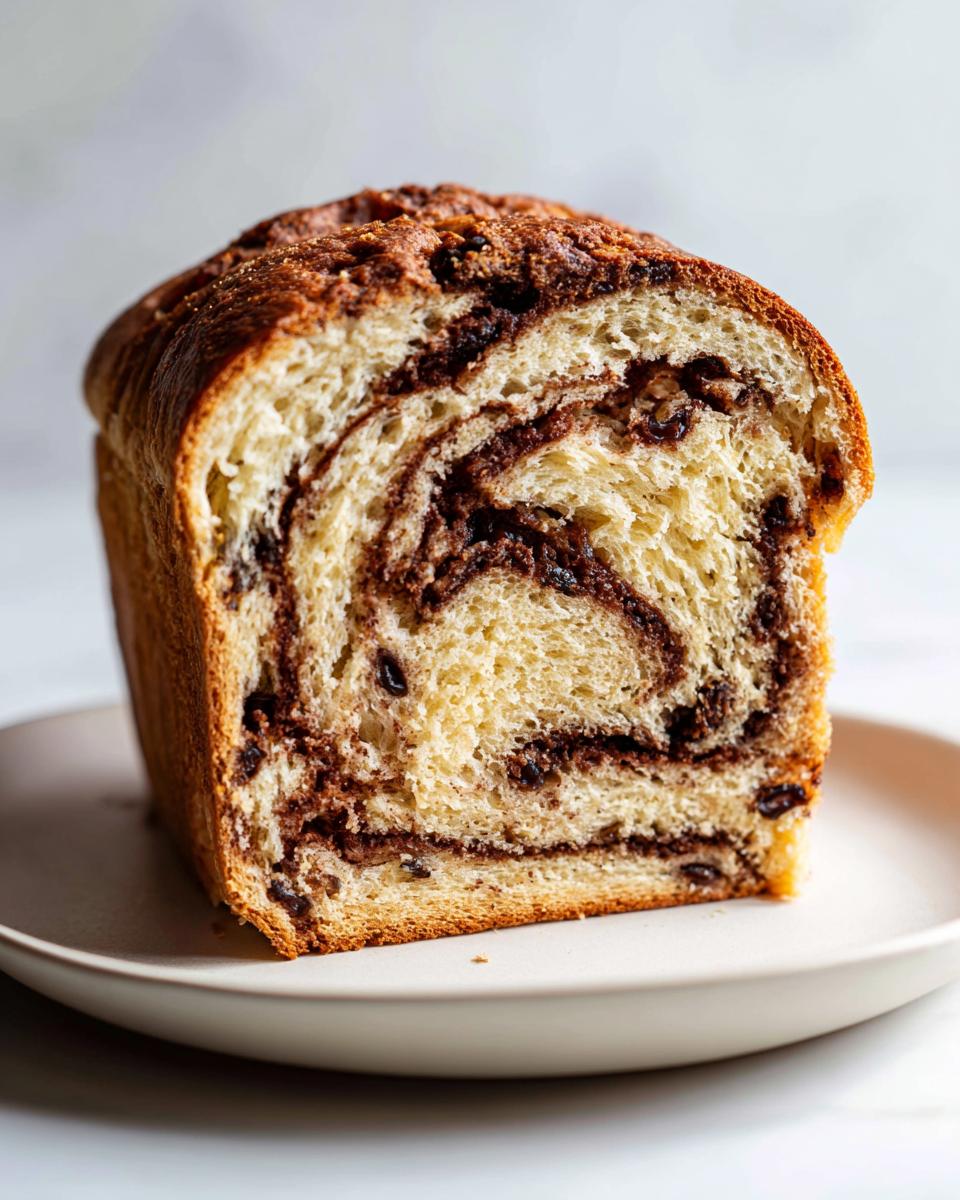
While the dough is rising, mix up your swirl ingredients in a tiny bowl: that soft brown sugar and the cinnamon. Once the dough has puffed up, punch it down gently—say goodbye to those bubbles! Roll the dough out into a nice big rectangle, about 12 by 16 inches. Now, smear that softened butter all over the surface, and sprinkle that sweet cinnamon-sugar mixture evenly on top. Roll it up tightly, seam-side down, and tuck that lovely log right into your greased 9×5 inch loaf pan. This is how we get that perfect Cinnamon Swirl Raisin Bread effect.
Second Rise and Baking the Sweet Raisin Bread
Cover the pan loosely and let it have another rest—about 30 to 45 minutes. You know it’s ready to bake when the dough has crowned maybe an inch over the rim of the pan. Preheat your oven to 375°F (190°C) while it’s resting! Bake it for 30 to 35 minutes. You’re looking for golden brown, but the real test is the internal temp—190°F (88°C) means this Sweet Raisin Bread is done. If the top looks dark early, just tent it loosely with foil. You must—and I mean *must*—get it out of the pan right away to cool on a rack!
Tips for the Best Raisin Bread Recipe Results
Baking bread is always a learning process, even when you’re following a tried-and-true recipe like this one. But honestly, a few little tricks I picked up from watching Grandma Daisy—and from a few failed loaves, oops!—can make the difference between good and simply unforgettable. These final checks elevate this from a nice loaf to the Best Raisin Bread Recipe you’ll want to keep forever. If you’re looking for another quick win in the quick-bake department, you have to try my easy 3-ingredient chocolate fudge!
Expert Tip: Plumping Your Raisins
This is such a small step, but it makes a huge difference in the final texture of your loaf. Raisins are little dried-out bundles of joy, and if you toss them straight into the dough, they steal moisture from the surrounding bread! That makes the bread around them hard and dry. Never do that!
If you’re short on time, just drop your raisins into a small bowl and cover them with hot water—just hot tap water is fine. Let them soak for about 10 minutes while your dough is doing its kneading work. Once they’re plump and slightly jiggly, you must drain them really well and even pat them dry with a paper towel before gently folding them into the dough. They stay moist, and your bread stays soft!
Achieving a Tender Crust on Your Raisin Bread
I love that wonderful golden-brown color on top, but sometimes that crust can get a little too hard, especially the next day when you’re just trying to make toast. We don’t want that! The best trick for a tender crust comes right after the bread finishes baking.
As soon as you pull that hot loaf out of the pan and set it on the wire rack, take a tiny brush and lightly paint the entire top surface with a little bit of melted, unsalted butter. Don’t drown it, just a light coat. The heat of the bread melts the butter slightly into the crust, keeping it from drying out as it cools. It adds a lovely, soft sheen, and honestly, who doesn’t love a little extra buttery flavor?
Serving Suggestions for Your Breakfast Bread with Raisins
Isn’t that the best part? Knowing you have a whole loaf of gorgeous, fragrant bread waiting for you? This delicious Breakfast Bread with Raisins is actually incredible right out of the oven with just a tiny pat of butter—it melts right into the swirl. But let’s be real, the true test of any good loaf is what happens the next morning!
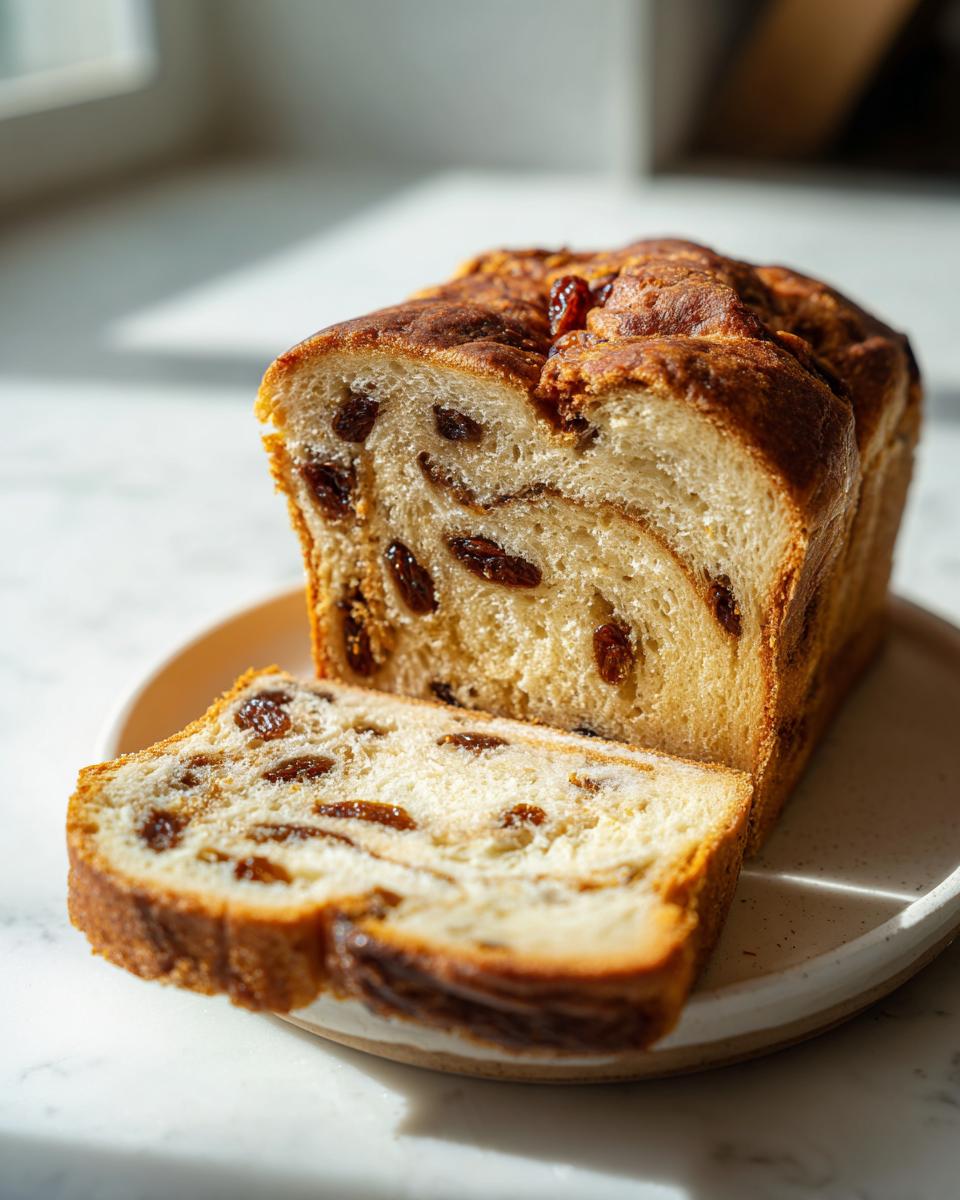
You absolutely must try it toasted, just sliced thick enough that the cinnamon swirl gets warm and gooey again. That’s when it’s perfect for spreading just a little more butter, or making the best French toast you’ve ever had. You should really check out my recipe for ultimate French toast; it starts with a loaf just like this!
If you want something truly decadent, a generous smear of cream cheese is fantastic, too. But truly, whether you eat it plain or loaded up, this sweet loaf is meant to be enjoyed slowly. Don’t rush it!
Storage and Reheating Instructions for Homemade Raisin Bread Recipe
You’ve put in the work, and now we need to make sure this incredible Homemade Raisin Bread Recipe stays perfect! The biggest mistake people make right after baking is slicing it while it’s still piping hot. Don’t do it! You have to let it cool down on that wire rack for at least an hour, ideally longer, before you slice into it. If you cut it warm, all that steam rushes out, and you smash the beautiful airy structure we worked so hard to build. Believe me, I’ve ruined a few loaves that way!
Once it’s completely cool (make sure it’s cool to the touch, not just warm!), you can store it pretty easily. The best way to keep that soft texture and buttery crust is to wrap it up tightly in plastic wrap first. I usually do two layers, just to seal out any air that might sneak in and dry it out.
If you wrapped it well, it will stay wonderfully fresh on the counter at room temperature for about three or four days. If you made two loaves—good for you!—you can totally freeze one. Just wrap that cooled loaf tightly in plastic, then wrap it again in aluminum foil to protect it from freezer burn. It freezes beautifully for up to three months.
When you’re ready to enjoy that frozen loaf, just let it thaw completely on the counter while still wrapped. If you want that fresh-baked taste again, pop the thawed slices straight into a toaster or under the broiler. If you can’t wait, I use a similar technique to warm my caramelized onions before serving them—warm food just tastes better, doesn’t it?
Frequently Asked Questions About Yeast Raisin Bread Loaf
I know when I’m baking something new, I always have a hundred little questions buzzing around! That’s totally normal, especially when yeast is involved. Here are a few things folks often ask me about making this beautiful loaf. If you’re looking for something even faster next time, check out my easy 15-minute fried noodles—it’s a totally different kind of comfort food!
Can I make a No Knead Raisin Bread version of this recipe?
You totally can! While this recipe relies on kneading for that classic soft texture, you can certainly shift it toward an No Knead Raisin Bread style. The main difference is ditching the 6-to-8-minute kneading step. Instead, mix everything until just combined, put it in the oiled bowl, and let that first rise go for much longer—maybe 3 to 4 hours, or until it’s really puffy. You’ll still need to gently roll it out for the swirl, but you skip the muscle work! Be prepared that the crust might be a bit more rustic, closer to an Artisan Raisin Bread texture, but it will still be delicious.
What is the best way to slice this raisin bread without crushing it?
This is critical! Remember how I stressed letting it cool completely? That’s step one. If you go at a warm loaf with a standard knife, you are just squishing all that wonderful air out. The true secret is using a good, long, slightly serrated bread knife, like the one I used for cutting my holiday pies.
Use a gentle sawing motion rather than pressing straight down. Let the knife do the work! Once it’s fully cool, the structure is set, and a gentle sawing motion will slice right through the dough and the swirls without flattening your beautiful loaf. It makes all the difference in the world.
Can I use different dried fruit instead of raisins in this raisin bread?
Absolutely, this recipe is very forgiving! Raisins are the classic choice, but you have options if you want to mix it up. I love swapping them out sometimes for dried cranberries, especially around the holidays—it adds a nice little tartness that plays well with the cinnamon. Currants or chopped dried apricots would also work wonderfully in place of the current cup of raisins.
Just remember the trick from the tips section: plump *any* dried fruit you use! Soak them for about 10 minutes in warm water, drain them super well, and pat them dry before you fold them into the dough. Keeps your bread soft!
Estimated Nutritional Data for Your Sweet Raisin Bread
Now, I know some of us count calories when we’re enjoying a slice of this glorious Sweet Raisin Bread, and others just dive right in! I’ve pulled together the estimated nutritional breakdown based on the ingredients we used for one slice. Just remember, this is just a guide, my friends—we’re making food for love and comfort, not for a science lab!
For a real treat, you can check out my thoughts on healthy breakfast ideas for when you need something a little lighter, but honestly, this bread is best enjoyed guilt-free!
- Serving Size: 1 slice
- Calories: 220
- Sugar: 10g
- Sodium: 250mg
- Fat: 5g
- Saturated Fat: 3g
- Unsaturated Fat: 2g
- Trans Fat: 0g
- Carbohydrates: 40g
- Fiber: 1g
- Protein: 5g
- Cholesterol: 30mg
I have to put in a little disclaimer here, just because I always want to be upfront. These numbers are estimates based on standard ingredient measurements. If you skip the butter brushing on top, of course, your fat content goes down! But that optional butter is worth it, trust me. The point is, this is real, honest food from my kitchen to yours!
Share Your Cozy Homemade Bread Experience
Well, that’s it! We’ve taken the dough from a shaggy mess to a beautiful, golden, cinnamon-swirled loaf. Honestly, if you followed along, you just made one of the best things you’re going to eat all week. That warm, slightly sweet smell of this raisin bread should still be clinging to your curtains!
Now, this is where I need your help. Baking is so much better when we share the results. If you made this loaf, please, please leave me a rating right down below. A few stars and a comment about how soft your crust ended up is the best encouragement I could ask for. Every time I see someone else’s kitchen filled with this aroma, it feels like Grandma Daisy is right there with us!
And if you snapped a picture of your glorious finished loaf—especially if you sliced it thick for morning toast—I would truly love to see it! Tag me on social media or just drop me a line through the contact page. I can’t wait to hear how this classic loaf worked out for you. Happy baking, friends!
PrintClassic Cinnamon Raisin Bread: Soft, Homemade Loaf

Bake this classic cinnamon raisin bread for cozy mornings. This recipe yields a soft, fluffy loaf with a sweet cinnamon swirl and plump raisins, perfect for toasting.
- Prep Time: 25 min
- Cook Time: 35 min
- Total Time: 2 hr 40 min
- Yield: 1 loaf (about 12 slices) 1x
- Category: Breakfast
- Method: Yeast Baking
- Cuisine: American
- Diet: Vegetarian
Ingredients
- 1 cup warm water (105-115°F)
- 2 ¼ teaspoons active dry yeast
- ¼ cup granulated sugar
- 1 large egg, room temperature
- ¼ cup unsalted butter, melted
- 3 cups all-purpose flour, plus more for dusting
- 1 teaspoon salt
- 1 cup raisins, plumped
- For the Cinnamon Swirl:
- ¼ cup packed brown sugar
- 1 tablespoon ground cinnamon
- 2 tablespoons unsalted butter, softened
Instructions
- In a large bowl, combine the warm water and yeast. Let it sit for 5 minutes until foamy.
- Stir the granulated sugar, egg, and melted butter into the yeast mixture.
- In a separate bowl, whisk together 3 cups of flour and the salt. Gradually add the dry ingredients to the wet ingredients, mixing until a shaggy dough forms.
- Turn the dough out onto a lightly floured surface and knead for 6 to 8 minutes until the dough is smooth and elastic.
- Gently knead in the plumped raisins until they are evenly distributed.
- Place the dough in a lightly oiled bowl, turning to coat. Cover the bowl with plastic wrap and let it rise in a warm place for 1 to 1.5 hours, or until doubled in size.
- While the dough rises, prepare the cinnamon swirl: In a small bowl, mix the brown sugar and cinnamon. Set aside.
- Gently punch down the risen dough. On a lightly floured surface, roll the dough into a rectangle about 12×16 inches.
- Spread the 2 tablespoons of softened butter evenly over the dough surface. Sprinkle the cinnamon-sugar mixture over the butter.
- Roll the dough tightly along the long edge to form a log. Pinch the seam closed.
- Carefully place the dough log, seam-side down, into a greased 9×5 inch loaf pan.
- Cover the loaf pan loosely and let it rise again in a warm spot for 30 to 45 minutes, or until the dough has crowned about 1 inch over the rim of the pan.
- Preheat your oven to 375°F (190°C) during the last 15 minutes of the second rise.
- Bake for 30 to 35 minutes, or until the top is golden brown and the internal temperature reaches 190°F (88°C). If the top browns too quickly, loosely tent it with foil.
- Remove the bread from the pan immediately after baking and cool completely on a wire rack before slicing for the best texture.
Notes
- To plump raisins quickly, soak them in hot water for 10 minutes, then drain and pat them dry before adding them to the dough.
- For an extra soft crust, brush the top of the loaf with melted butter immediately after it comes out of the oven.
- This homemade raisin bread is excellent toasted the next day for breakfast.
Nutrition
- Serving Size: 1 slice
- Calories: 220
- Sugar: 10g
- Sodium: 250mg
- Fat: 5g
- Saturated Fat: 3g
- Unsaturated Fat: 2g
- Trans Fat: 0g
- Carbohydrates: 40g
- Fiber: 1g
- Protein: 5g
- Cholesterol: 30mg