
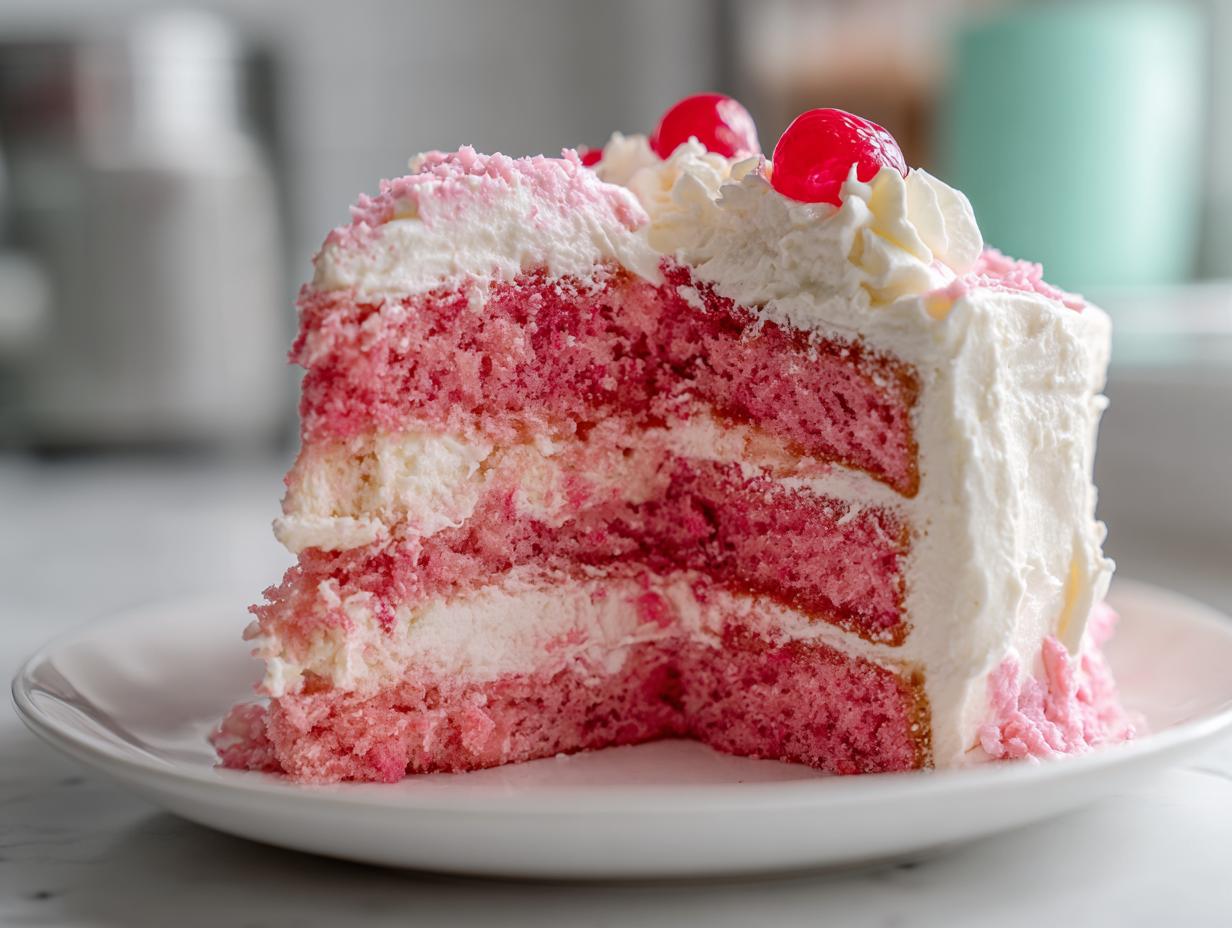
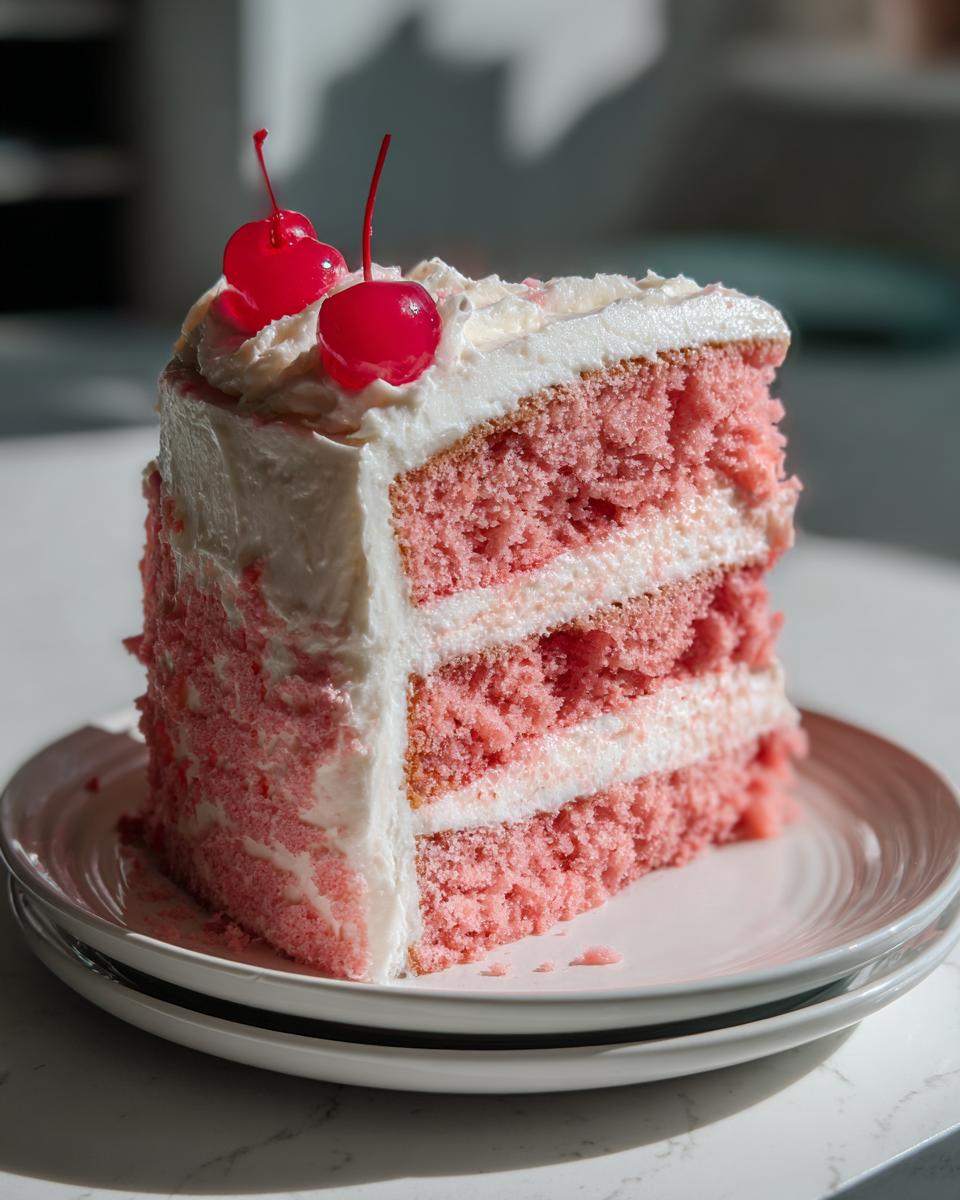
Oh, friends, let’s talk about truly nostalgic desserts for a minute. You know the ones—the recipes that instantly transport you back to a simpler time, maybe a cheerful birthday party or a glittering holiday gathering? I’ve got the absolute top-tier recipe for you today: my Nostalgic Pink Maraschino Cherry Layer Cake. This is the ultimate celebration cake, rich and fluffy, and yes, it has that gorgeous, vibrant pink color we all remember. Baking this version of cherry cake brings me right back to my Grandma Daisy’s kitchen. She taught me that simple, honest baking is always the best kind, and this beauty, topped with a decadent cherry cream cheese frosting, proves her right every single time. If you love wonderfully moist desserts, you should also check out my easy moist Jello poke cake recipe for another trip down memory lane!
- Why This Nostalgic Cherry Cake Recipe Stands Out
- Gathering Ingredients for Your Homemade Cherry Layer Cake
- Step-by-Step Instructions for the Best Cherry Cake Recipe
- Assembling Your Vintage Cherry Cake Recipe
- Tips for the Ultimate Bakery Style Cherry Cake
- Storage and Reheating Instructions for Your Cherry Cake
- Serving Suggestions for This Fruity Dessert Recipe
- Frequently Asked Questions About Making Cherry Cake
- Sharing Your Celebration Cakes Experience
- Sharing Your Celebration Cakes Experience
Why This Nostalgic Cherry Cake Recipe Stands Out
I’ve baked a lot of cakes in my life, but this incredible cherry cake hits different. It’s not just another fruit dessert; it’s basically a happy memory baked into layers. People always ask me what makes mine the best cherry cake recipe, and honestly, it’s all about hitting those classic nostalgia points without sacrificing texture. You want that vibrant color and that amazing frosting, right? We nail all that.
- This cake achieves that perfect, playful pink shade that just screams celebration. No artificial nonsense here!
- The texture is unbelievably soft. It’s never dry—I promise you’ll get that moist cherry cake you’re after.
- And the topping? We skip the boring vanilla and go straight for a tangy, rich cherry cream cheese frosting. It’s heavenly. You can also grab my guide on making the best white pizza recipe if you need a savory break later!
Achieving the Perfect Pink Cherry Cake Hue
Okay, the pink is crucial. If you want that genuine, vintage look, you have to embrace the maraschino cherries. I stir in the reserved juice—that bright, slightly tangy liquid right from the jar—directly into the batter. It not only colors the cake beautifully, giving you that signature pink cherry cake, but it also adds a subtle layer of that classic cherry flavor that you just can’t replicate with fresh fruit alone.
Moist Cherry Cake Crumb Guaranteed
For the best texture, you need a little science working for you. My method relies heavily on making sure the butter is perfectly creamed (we’ll get to that next!), but the secret weapon here is the buttermilk. Buttermilk reacts beautifully with the baking soda to give you lift, but it keeps everything tender. Paired with the high fat content from the softened butter, you end up with a moist cherry cake that stays soft for days. Seriously, don’t skip the buttermilk!
Gathering Ingredients for Your Homemade Cherry Layer Cake
Alright, to bake a truly show-stopping homemade cherry layer cake, we need to use ingredients that are ready to go! This isn’t the time to rush things when it comes to texture and flavor payoff. I’ve broken down the list into two parts: what you need for the cake layers themselves, which will give us that dreamy pink color, and what you need for the rich topping. Remember, softness and moisture start right here, so please make sure your butter and cream cheese are actually softened, not melted. For a peek at how I get maximum flavor out of foundational items, take a look at my guide on caramelized onions!
Ingredients for the Fluffy Cherry Layer Cake
These items form the base of our tender, fluffy layers. Don’t forget to drain those chopped cherries really well so they don’t water down the batter!
- 1 3/4 cups all-purpose flour
- 1 1/2 cups granulated sugar
- 1 teaspoon baking soda
- 1/2 teaspoon salt
- 1 cup unsalted butter, softened (for the cake structure!)
- 4 large eggs
- 1 teaspoon vanilla extract
- 1/2 cup maraschino cherry juice (The good stuff, straight from the jar!)
- 1/2 cup buttermilk
- 1/2 cup chopped maraschino cherries, drained thoroughly
Ingredients for the Cherry Cream Cheese Frosting
This frosting is tangy, sweet, and pairs perfectly with the cherry flavor. Make sure your cream cheese and butter are very soft so you don’t end up with lumps!
- 1 cup cream cheese, softened
- 1/2 cup unsalted butter, softened
- 3 cups powdered sugar, sifted (Sifting is non-negotiable for silky smooth frosting!)
- 1 teaspoon almond extract (This really wakes up the cherry flavor!)
- 1 tablespoon maraschino cherry juice (for that hint of color and taste)
- Extra maraschino cherries for garnish
Step-by-Step Instructions for the Best Cherry Cake Recipe
Okay, now that we have our beautiful stack of ingredients, let’s get this best cherry cake recipe into the oven! Baking this homemade cherry layer cake really does feel like an honest process, just like Grandma Daisy taught me. Take your time with the mixing—it’s worth it! We’re going to go through preparing the batter, getting these layers baked perfectly, and whipping up that dream frosting.
Preparing the Pink Cherry Cake Batter
First things first, crank that oven up to 350°F (175°C). We need it fully heated before things get busy. Get those two 8-inch pans greased, floured, and lined with parchment paper on the bottom—we don’t want any sticking drama later!
In your biggest bowl, whisk together the dry stuff: flour, sugar, baking soda, and salt. Next, move to your wet ingredients. We start by creaming that one cup of softened butter until it’s light and fluffy. Then, beat in the eggs, one at a time, followed by the vanilla. Your liquid mix is simple: whisk the reserved 1/2 cup of cherry juice with the buttermilk.
Here is where we build the structure! Slowly alternate adding your dry ingredients and your buttermilk mixture, always starting and ending with the dry. Mix only until you see *just* combined streaks of flour disappear. And please, trust me on this: do not overmix the batter! Overmixing is the enemy of a fluffy cake. Once it’s just uniform, gently fold in those chopped, drained maraschino cherries. That’s when the magic pink color really pops!
Baking and Cooling Your Cherry Cake Layers
Divide that gorgeous pink batter evenly between your two pans. Pop them into the hot oven for about 30 to 35 minutes. You’ll know they’re done when a wooden pick inserted right in the center comes out clean, maybe with a few moist, beautiful crumbs clinging to it.
This cooling step is critical for a clean release. Let them hang out in those pans for exactly 10 minutes. After those ten minutes are up, gently invert them onto a wire rack and let them cool completely. If you try to frost them warm, well, say hello to a melted mess!
Making the Creamy Cherry Cream Cheese Frosting
While those layers are cooling down—which feels like forever, I know—we can make the frosting. This is easy, but technique matters! Make sure your 1 cup of cream cheese and 1/2 cup of butter are truly soft. Beat them together until they look like smooth silk before you even think about adding sugar.
Gradually beat in the 3 cups of sifted powdered sugar. Once it’s all mixed, beat it on high for a minute or two until it gets genuinely light and fluffy. Finish it off by beating in the almond extract and that final tablespoon of cherry juice. If you need more examples of how to make great creamy bases, check out my recipe for honey butter or even my easy cannoli cookies!
Assembling Your Vintage Cherry Cake Recipe
This is where all our hard work protecting those beautiful, fluffy cherry layer cake layers pays off! Getting the assembly right is what elevates this from a pretty home bake to a genuine showstopper worthy of any celebration. When I think about making a vintage cherry cake recipe, I picture those perfect edges and that balanced layer of filling—it needs to look neat, but still feel homemade and loving.
Make sure those cake layers we baked are completely cool. If they are even slightly warm, the cream cheese frosting will start to slide right off, and we definitely don’t want that gooey disaster! Leveling your cakes isn’t strictly required, but if one top is domed, just trim it gently with a serrated knife. That ensures your final cake stands straight and tall!
Place your first layer onto your cake stand or serving plate. Now, here’s my specific instruction for the filling: take about one-third of your gorgeous Cherry Cream Cheese Frosting and spread it evenly across that first layer. Don’t go right to the edge; leave a small, clean border so that when you place the top layer on, the filling doesn’t squish out everywhere. It keeps the sides much cleaner for the final coat.
Gently set the second layer right on top. Now, we smooth it out! We need a nice crumb coat first. Take a small amount of remaining frosting and lightly cover the entire cake—top and sides. This seals in any stray crumbs so they don’t end up mixing into your final beautiful coat. Don’t stress about perfection here; this layer is just for sealing everything up. If you want more inspiration on frosting techniques, I’ve got a great look at what makes my vanilla buttercream frosting recipe so beloved.
Once that crumb coat is set (about 15 minutes in the fridge helps!), grab the rest of that frosting and cover the entire cake smoothly. I like to use an offset spatula to create gentle swoops around the edge for that rustic, classic look. Finally, dot the top center with those reserved, stunning maraschino cherries. It instantly screams celebration! If you’re looking for visual cues on that classic pink look, you absolutely must see the photos from this beautiful pretty in pink cherry cake inspiration.
Tips for the Ultimate Bakery Style Cherry Cake
You know, baking a cake at home that genuinely stands up to what you’d get from a fancy bakery takes just a few little tricks. We’ve nailed the core recipe for this cherry cake, but these final touches are what push it into that truly professional ‘bakery style cherry cake’ territory. It all comes down to temperature and treating those cherries right. If you want a cake that everyone asks for the recipe to, stick with these extra steps. For more insights on getting creamy perfection, check out my guide on cream cheese chocolate chip cookies!
Ingredient Spotlight: Maraschino Cherry Juice Quality
I cannot stress this enough: the quality of your maraschino cherries absolutely dictates the flavor of your whole pink cherry cake. If you buy the cheapest jar you can find, the cake will taste artificially sweet, almost like cough syrup. We want that bright, slightly weird, but wonderful cherry flavor, not something overpowering.
When you shop, look for higher-end brands, even if they cost a little more. They usually use better food coloring that results in a softer, more natural-looking pink once baked. And remember, that juice needs to be room temperature when you add it to the batter, just like the buttermilk. That temperature consistency helps everything combine smoothly without shocking the butter and crushing those air bubbles we worked so hard to create during the creaming stage! For a gorgeous presentation that channels that classic vibe, you should definitely look at this vintage cherry chip layer cake for inspiration.
Storage and Reheating Instructions for Your Cherry Cake
Okay, we’ve got this gorgeous, towering cherry cake assembled, and now we have to talk about keeping it happy until party time! Because we used that fantastic, tangy cherry cream cheese frosting, we absolutely cannot leave this beauty sitting on the counter.
It needs to chill out, literally. Cover the whole cake loosely with some plastic wrap—make sure the wrap doesn’t actually touch the frosting, or you’ll end up peeling off delicious pink chunks when you go to serve it! Then, tuck it into the refrigerator for storage. It holds up really well in the fridge for about three to four days, which is a lifesaver when you’re planning ahead for a big celebration.
Now, here’s the most important part about storing this moist cherry cake: you cannot serve it cold! Serving a cake with cream cheese frosting straight from the fridge makes the layers firm and the frosting hard and dense, and all that beautiful fluffiness we worked for disappears. So, plan ahead, my friends. About two hours before you plan to slice into it, pull it out of the fridge and let it sit on the counter under a cake dome or loosely covered.
That short time allows the butter and cream cheese in the frosting to soften just enough to be creamy again, and it brings the cake layers back to that perfect room temperature softness. It’s just like my guide on lemon crinkle cookies—cold just ruins the experience! Patience here means maximum fluff and flavor payoff for your amazing efforts.
Serving Suggestions for This Fruity Dessert Recipe
We’ve made a magnificent, celebration-worthy cherry cake! Now, how do we serve it to make it look and taste like it came straight from a fancy bakery? Since this fruity dessert recipe already has such bold flavor from the maraschino cherries and that rich cream cheese frosting, we want accompaniments that complement the cake without stealing its spotlight, you know? We want to enhance the experience, not drown it out.
For picnics or summer parties where you want something light alongside a slice of that pink perfection, keep it simple. A very light vanilla whipped cream, homemade if you can manage it, is lovely. It adds a touch of airy elegance without competing with the cherry tang. Just a dollop on the side is perfect.
If you want something a little more substantial, I highly recommend serving thin slivers of toasted, lightly salted almonds sprinkled subtly around the plate. The nuttiness plays surprisingly well with the cherry and the slight saltiness contrasts just beautifully with the sweetness of the frosting. My Grandma Daisy always said a little texture contrast makes everything better!
And if you want another slightly tangy, fruit-forward companion for when you want a full dessert spread, you have to try making my rhubarb crisp recipe! It’s completely different but hits that same homemade, comforting spot.
Frequently Asked Questions About Making Cherry Cake
I know you might have a few questions swirling around, especially if you’re trying to make this the centerpiece of your next gathering! It’s completely normal. When I first started recreating Grandma Daisy’s best cherry cake, I had tons of trial-and-error moments. Here are some of the specific things people usually ask me about making sure this homemade cherry layer cake turns out perfect every time.
Can I skip the buttermilk and use regular milk instead for this recipe?
Oh, I really hope you don’t! While you *could* technically substitute regular milk, you’ll be sacrificing that tender crumb we’re aiming for. The acidity in the buttermilk is key because it reacts with the baking soda, giving the cake structure and keeping it light. If you absolutely must substitute it for an easy cherry cake recipe, add one teaspoon of white vinegar or lemon juice to half a cup of regular milk and let it sit for about five minutes to curdle slightly. That gives you a makeshift buttermilk! But honestly, the real deal makes the moist cherry cake so much better.
Why is my cake batter turning out bright pink instead of pale pink?
Don’t panic! A vibrant pink color is actually a sign you are using fantastic maraschino cherry juice, which is great for achieving that nostalgic look. If it looks almost neon, it usually means you used a heavier amount of juice than I suggested, or your specific brand is extra pigmented. This is totally safe, though! The color will soften slightly once it bakes and cools. If you’re worried about it being *too* dramatic for your preferences, try reducing the juice by one or two tablespoons next time, but remember, that juice is what makes it a true pink cherry cake!
What if I only have fresh or frozen cherries—can I use those instead of canned maraschino cherries?
That’s a great question about swapping those ingredients out! While fresh or frozen cherries are delicious, they behave totally differently in the oven than the preserved ones. Maraschino cherries are soaked in syrup, which alters their moisture content and flavor profile significantly. If you use fresh cherries, your cake will be much more tart, and you’ll likely need to increase the sugar or use less buttermilk to account for the extra water they release.
For this specific vintage cherry cake recipe, I strongly recommend sticking to the jarred variety because of that unique flavor and color contribution. If you really want to try fresh, I suggest gently tossing them in a bit of flour first to keep them from sinking to the bottom of your layers. For more insight on using different cherry preparations, you can peek at results from others baking a similar maraschino cherry cake.
Can I make the Cherry Cream Cheese Frosting ahead of time?
Yes, you absolutely can, and sometimes I recommend it for celebration cakes! You can whip up the frosting and store it in an airtight container in the fridge for up to three days. Remember my rule about serving this cake at room temperature? That applies here too! You need to pull the frosting out of the fridge at the same time you take the cake layers out—at least two hours before you start assembling. This ensures it softens up enough to be spreadable and super creamy, giving you that amazing final texture.
If you end up with extra frosting, I have a fantastic recipe that uses cream cheese in a different way, my recipe for sourdough banana bread, which actually goes surprisingly well with whipped cream cheese frosting on top if you feel like baking another treat!
Sharing Your Celebration Cakes Experience
Baking this magnificent cherry cake is such a personal journey, and I love hearing how it turns out in your kitchens! Whether you’re making this for a milestone birthday or just because you deserve a slice of something wonderful, please don’t be shy about sharing your experience.
Did you stick to Grandma Daisy’s original vision, or did you sneak in an extra splash of vanilla? Did your frosting come out perfectly fluffy? I want to see your beautiful pink layers! Drop a rating below so others know what a fantastic from scratch cake recipe this is, and if you snap a photo of your final masterpiece, tag me! I treasure seeing these celebration cakes come to life. Can’t wait to read your stories!
Sharing Your Celebration Cakes Experience
Baking this magnificent cherry cake is such a personal journey, and I love hearing how it turns out in your kitchens! Whether you’re making this for a milestone birthday or just because you deserve a slice of something wonderful, please don’t be shy about sharing your experience.
Did you stick to Grandma Daisy’s original vision, or did you sneak in an extra splash of vanilla? Did your frosting come out perfectly fluffy? I want to see your beautiful pink layers! Drop a rating below so others know what a fantastic from scratch cake recipe this is, and if you snap a photo of your final masterpiece, tag me! I treasure seeing these celebration cakes come to life. If you want another fun cookie to try baking alongside your cake, my recipe for Christmas sprinkle cookies is always a hit!
PrintNostalgic Pink Maraschino Cherry Layer Cake
You will bake a moist, fluffy, bakery-style cherry layer cake featuring the classic pink color from maraschino cherries, topped with a rich cherry cream cheese frosting. This homemade cherry cake is perfect for celebrations.
- Prep Time: 25 min
- Cook Time: 35 min
- Total Time: 60 min
- Yield: 10 servings 1x
- Category: Dessert
- Method: Baking
- Cuisine: American
- Diet: Vegetarian
Ingredients
- 1 3/4 cups all-purpose flour
- 1 1/2 cups granulated sugar
- 1 teaspoon baking soda
- 1/2 teaspoon salt
- 1 cup unsalted butter, softened
- 4 large eggs
- 1 teaspoon vanilla extract
- 1/2 cup maraschino cherry juice (from the jar)
- 1/2 cup buttermilk
- 1/2 cup chopped maraschino cherries, drained
- 1 cup cream cheese, softened
- 1/2 cup unsalted butter, softened (for frosting)
- 3 cups powdered sugar, sifted
- 1 teaspoon almond extract
- 1 tablespoon maraschino cherry juice (for frosting)
- Extra maraschino cherries for garnish
Instructions
- Preheat your oven to 350°F (175°C). Grease and flour two 8-inch round cake pans. Line the bottoms with parchment paper.
- In a large bowl, whisk together the flour, granulated sugar, baking soda, and salt.
- In a separate bowl, cream together the 1 cup of softened butter until light and fluffy. Beat in the eggs one at a time, mixing well after each addition. Stir in the vanilla extract.
- In a small bowl, whisk together the 1/2 cup maraschino cherry juice and buttermilk.
- Gradually add the dry ingredients to the wet ingredients, alternating with the buttermilk mixture, beginning and ending with the dry ingredients. Mix until just combined. Do not overmix.
- Gently fold in the 1/2 cup of chopped, drained maraschino cherries. The batter will be pink.
- Divide the batter evenly between the prepared cake pans. Bake for 30 to 35 minutes, or until a wooden pick inserted into the center comes out clean.
- Let the cakes cool in the pans for 10 minutes before inverting them onto a wire rack to cool completely.
- Prepare the Cherry Cream Cheese Frosting: In a large bowl, beat the cream cheese and 1/2 cup butter until smooth. Gradually add the powdered sugar until fully incorporated. Beat in the almond extract and 1 tablespoon of maraschino cherry juice until the frosting is light and fluffy.
- Once the cakes are completely cool, place one layer on a serving plate. Spread about one-third of the frosting evenly over the top. Place the second layer on top. Frost the top and sides of the entire cake.
- Garnish the top of your homemade cherry layer cake with extra maraschino cherries before serving.
Notes
- For the best pink color, use high-quality maraschino cherries and reserve the juice for the cake batter and frosting.
- If you want a slightly more intense cherry flavor, you can soak the chopped cherries in a tablespoon of cherry liqueur before folding them into the batter.
- This cake tastes best when served at room temperature.
Nutrition
- Serving Size: 1 slice
- Calories: 450
- Sugar: 55g
- Sodium: 280mg
- Fat: 22g
- Saturated Fat: 14g
- Unsaturated Fat: 8g
- Trans Fat: 0.5g
- Carbohydrates: 60g
- Fiber: 1g
- Protein: 5g
- Cholesterol: 85mg