
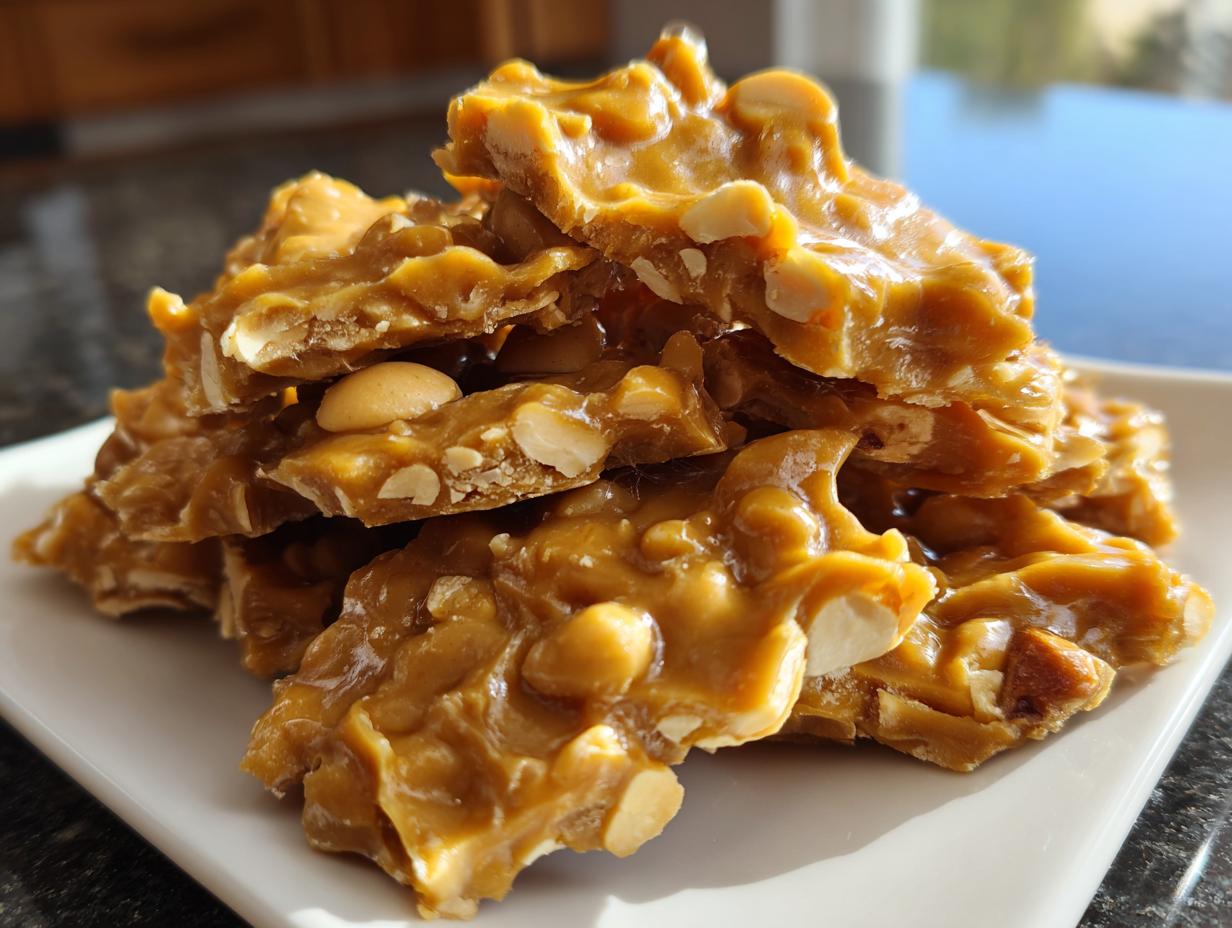
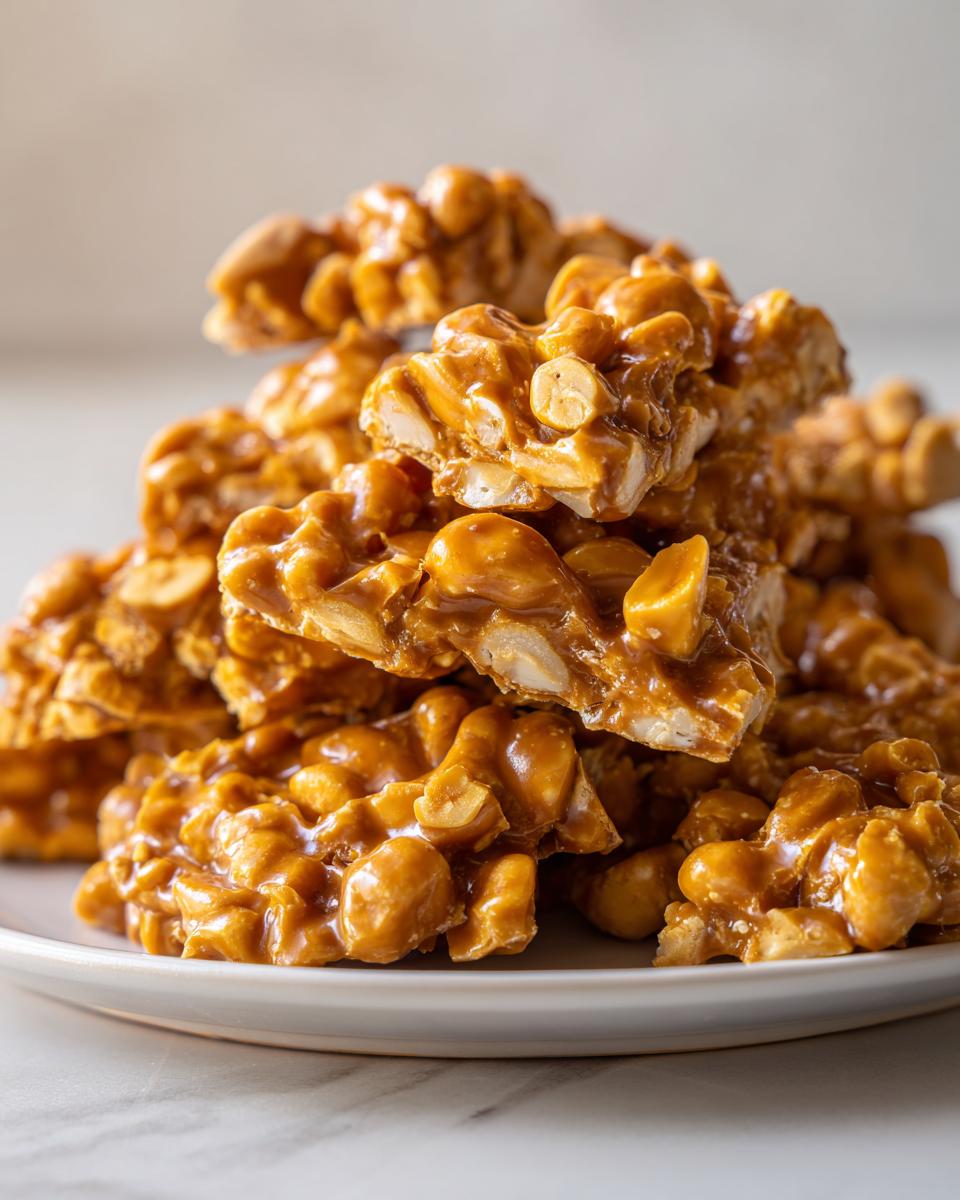
Oh, that satisfying sound! There’s nothing quite like the moment you crack open a sheet of homemade candy and hear that perfect, sharp CRUNCH. If you’ve ever been afraid of candy making because you ended up with heavy, chewy messes instead of glass-like shards, trust me, I’ve been there. That’s why I’m sharing my go-to peanut brittle recipe today: the Easy, Old-Fashioned Peanut Brittle Recipe with Perfect Snap Guarantee. This method comes straight from my Grandma Daisy’s kitchen philosophy—simple, honest ingredients and techniques that just work, every single time. Forget the fuss; we’re going for that classic, buttery crunch. You can find more of my favorite sweets like this over at my delicious dessert recipes collection.
- Why This Peanut Brittle Recipe Delivers the Perfect Snap
- Simple Peanut Brittle Ingredients for Your Classic Brittle Recipe
- How To Make Brittle At Home: Step-by-Step Peanut Brittle Recipe
- Tips for Success with Your Homemade Peanut Brittle
- Storage & Reheating Instructions for Your peanut brittle recipe
- Serving Suggestions for this Sweet and Salty Snack
- Frequently Asked Questions About This peanut brittle recipe
- Sharing Your Old Fashioned Brittle Success
Why This Peanut Brittle Recipe Delivers the Perfect Snap
If you want that truly satisfying Perfect Snap Candy shatter, we need to talk temperature. The difference between the greatest Old Fashioned Brittle and a sad, sticky flop is just a few degrees! Chewiness creeps in when the sugar syrup doesn’t have enough energy to fully crystallize, leaving you with something that bends instead of breaks. I learned this the hard way when I tried making brittle for Christmas one year. It looked fine, smelled amazing, but when I snapped a piece, it stretched like taffy! Ugh. I realized I stopped cooking too soon, scared of burning the sugar. Since mastering the thermometer, those failures are a thing of the past.
The Science Behind Crunchy Peanut Candy
It all comes down to what candy makers call the “Hard Crack Stage.” When we hit exactly 300°F, we boil off enough water that the sugar molecules link up in a way that is super rigid when cooled. Think of it like turning liquid glass! If you stop short, say at 270°F, there’s still too much moisture held in the syrup, and it stays soft. That’s why that final 10 degrees is the secret handshake for truly crunchy peanut candy.
Simple Peanut Brittle Ingredients for Your Classic Brittle Recipe
Grandma Daisy always kept her pantry stocked, and honestly, this Buttery Peanut Brittle recipe only requires very Simple Peanut Brittle Ingredients—the basics you probably have right now! The magic isn’t in fancy additives; it’s in the quality of these core items and how we treat them. We aren’t bringing home any weird stuff; we are relying on time-tested pantry staples for that delicious payoff.
Here’s what you need to gather before you even turn on the stove. Remember, candy moves fast, so having everything measured out—what we call *mise en place*—is half the battle!
- You’ll need 2 cups of granulated sugar. White sugar is key here for that clear, glass-like appearance.
- One cup of light corn syrup is crucial. Don’t swap this out for honey or pancake syrup; corn syrup keeps the sugar from crystallizing too soon, which is vital for spreading later on.
- One cup of water to get the process started and help dissolve everything smoothly.
- Two cups of roasted, unsalted peanuts. Make sure they are roasted! If they aren’t, you’ll need to toast them first, which I cover later. Unsalted is important so we can control the final salt level.
- Two tablespoons of good quality unsalted butter. This is what gives us that rich, buttery flavor we all love.
- One essential tablespoon of baking soda. This is what foams up and creates those famous little salty air pockets!
- And finally, just one teaspoon of vanilla extract for that warm background note.
See? Super straightforward! These humble ingredients transform into something incredibly special when treated right.
How To Make Brittle At Home: Step-by-Step Peanut Brittle Recipe
Okay, deep breath! This is where the magic happens, and it requires focus, but please don’t let the heat intimidate you. Making this peanut brittle recipe is more about timing than complicated steps. First things first: get your work surface ready! You need a large baking sheet, and you must lightly grease it or, better yet, lay down a silicone baking mat. Trust me, scrubbing burnt, hardened sugar off a sheet pan is a nightmare no one needs. Set that pan right next to the stove where you can easily reach it. This is the start of your assembly line!
Grab your heavy-bottomed saucepan—we need even heat distribution. Combine the sugar, corn syrup, and water. Stir it over medium heat until you can no longer feel any grit on the bottom; that’s the sugar dissolving. Now, this is important: stop stirring once it starts boiling! Stick your candy thermometer in there, and let it climb. We cook to texture, not guesswork, which is why this candy lives or dies by accurate temperature control. I used to skip this part, and boy, did I pay for it—sticky messes galore!
You’re watching that thermometer climb past 250°F (Soft Ball) and onward to 300°F (Hard Crack stage). While that’s happening, I usually take a quick moment to review my final additions, maybe even glancing at some of my other favorite quick recipes, like my easy 3-ingredient beer bread recipe, just to calm my nerves before the final rush!
Thermometer Tips Candy Making for Perfect Results
The thermometer is your co-pilot here. Watch it closely as it approaches 290°F. If you have the time and you’re worried about accuracy, you can always test your candy thermometer beforehand by boiling water (it should read 212°F at sea level, or slightly lower if you’re high up!). Once you hit 300°F—that Hard Crack stage—it is time to move! That syrup heats up fast, and you have maybe 90 seconds before it starts cooling too much to work with.
Working Quickly After Removing from Heat in Your peanut brittle recipe
When the thermometer hits 300°F exactly, yank that pot off the burner immediately. This is the moment of truth for your peanut brittle recipe. You must work FAST! Toss in the butter, vanilla, and that tablespoon of baking soda all at once. Stir it vigorously but briefly—it will foam up like crazy, creating all those beautiful air bubbles. Don’t dawdle checking the foam; just stir until they are incorporated, and then immediately pour that gorgeous, bubbling mess onto your prepared sheet. Use a heat-safe spatula to nudge it into a thin layer right away. If you wait even 20 seconds, it will start setting up too hard to spread thinly!
Tips for Success with Your Homemade Peanut Brittle
Now that you’ve seen the steps, let’s talk about dialing in that Best Peanut Brittle Formula. Even with the right instructions, ingredient quality makes such a big difference in candy making. First off, please check your baking soda! If it’s old, it won’t react properly when we toss it in at the end, and you’ll end up with a flat, dense brittle instead of that lovely, airy crunch. Make sure it’s fresh.
Also, about those peanuts—they really ought to be roasted, unsalted ones. If you’re starting with raw peanuts, take five minutes to toast them in a dry skillet before you start the sugar. This brings out so much more nutty flavor, and they won’t absorb moisture from the syrup as readily. We want them ready to go! If you love that deep flavor, you might also enjoy trying my recipe for homemade caramel sometime soon—it uses similar principles of heating sugar just right!
Storage & Reheating Instructions for Your peanut brittle recipe
Getting that perfect crunch is only half the battle; *keeping* it crunchy is the real challenge! The absolute enemy of perfect brittle is humidity. If you leave your beautiful batch of peanut brittle recipe out on the counter on a damp day, it will weep, soften, and turn totally floppy overnight. Don’t let your hard work go to waste!
The absolute best way to store this candy is in a container that seals up tight. I use old Tupperware containers that I know have good seals, or even heavy-duty zip-top bags with all the air squeezed out. Make sure the brittle is completely cool—I mean, stone cold—before you seal it up. Keep this airtight container in a cool, dry spot. Avoid putting it in the fridge, though! The cold, moist air inside a refrigerator is a quick way to ruin that glorious snap.
When it comes to reheating, I’m going to be blunt: don’t. Once brittle goes soft, it’s almost impossible to bring that perfect texture back. If it’s only *slightly* soft, you can try setting your oven to its lowest temperature (maybe 200°F) and placing the pieces on a parchment-lined sheet for about five minutes. But you have to watch it like a hawk! If you see any sign of melting or stickiness, pull it out immediately. Honestly? If it softens up, the best call is usually just to re-melt the whole mess and turn it into peanut butter brittle bark instead—it’s delicious, and nobody will ever guess it started as a failed batch of hard brittle!
Serving Suggestions for this Sweet and Salty Snack
Once you’ve mastered this wonderful Sweet and Salty Snack, you have to decide what to do with it, and that’s almost as fun as making it! Since this recipe is so straightforward and yields that amazing crunch, it truly shines as a homemade gift. Honestly, handing someone a mason jar filled with these golden shards is way better than any store-bought chocolate box.
For packaging your Holiday Candy Recipes, I love layering the pieces between sheets of wax paper inside clear cello bags, tied with a rustic piece of twine. They look gorgeous piled high on a platter alongside fudge and caramels during the holidays.
But don’t just save it for Christmas! We crush ours up all year long. Sprinkle the tiny, sharp bits over vanilla ice cream—the texture contrast is divine! Or try using it as a topping when you bake up my holiday sangria recipe for a festive garnish on a cheese board. If you’re feeling particularly decadent, try crumbling some over a simple chocolate chip cookie dough before baking. The salty-sweet combination, plus the snap, takes that cookie to a whole new level. It’s truly the most versatile candy I make!
Frequently Asked Questions About This peanut brittle recipe
I get so many notes from folks who are just a little nervous to tackle candy making, and that’s totally understandable! Candy can be finicky, but honestly, once you understand the heat, you’ll be set. Here are some of the things I hear most often about getting this peanut brittle recipe just right. Don’t worry if you mess up the first time; we all do! Keep mixing, and you’ll get there. If you’re looking for a much less scary dessert to start with, check out my easy moist jello poke cake recipe.
Can I make this peanut brittle recipe without a candy thermometer?
Oh, honey, I really, really advise against it! If you want that true, glass-like snap—that signature crunch—you absolutely need a reliable candy thermometer. It’s the only way to guarantee you hit the 300°F mark needed for the “Hard Crack” stage, which is essential for Perfect Snap Candy. If you absolutely cannot find one, the oldest trick is the cold-water test: drop a teaspoon of syrup into a cup of ice-cold water. If it immediately turns hard and brittle, you’re good. If it’s soft or bends, it needs another minute on the heat. But honestly? It’s a lot of guesswork compared to just using that great little thermometer!
What causes peanut brittle to turn out chewy instead of crunchy?
This is the big one, and there are two main culprits! Nine times out of ten, it’s just not cooked long enough. If the sugar mixture doesn’t reach 300°F, it hasn’t boiled off enough water, and it will always stay a little soft or bendy. It’s the biggest heartbreak! The second reason, which you can’t always control, is humidity. If you try to make brittle on a really rainy or muggy day, the high moisture content floating in the air gets absorbed by the hot sugar, making it soft and sticky almost immediately. If the weather’s bad, maybe save the brittle for another day!
Is it okay if the mixture foams up a lot when I add the baking soda?
Yes! That foaming is actually a good thing, provided you’re ready for it. That dramatic reaction comes from the baking soda hitting the hot acid in the sugar syrup, releasing tons of tiny carbon dioxide bubbles. These bubbles get trapped in the cooling candy, creating those little air pockets that make brittle light and easy to break instead of rock-hard and dense. Just make sure you have your butter, vanilla, and baking soda ready to go *before* the syrup hits 300°F, because you need to stir it quickly and get it on the sheet before it sets solid right in the saucepan!
Do the peanuts really need to be unsalted?
For this specific homemade peanut brittle recipe, yes, they do. Since we are adding salt via other means (like the baking soda reaction, which creates a beautiful balance), using salted peanuts throws off our final flavor profile, usually making the candy too salty overall. Plus, if you use heavily salted peanuts, you might not realize how much salt you’re adding until it’s too late. Using unsalted nuts lets us control the entire seasoning process from start to finish!
Sharing Your Old Fashioned Brittle Success
Well, that’s it! You’ve conquered the heat, you’ve tamed the sugar, and now you have the happiest, crunchiest batch of Old Fashioned Brittle. I truly hope you hear that satisfying snap when you break off the first piece! I’d love to see your golden shards, so please drop a star rating below or share a picture in the comments. If you used this recipe and it gave you that perfect crunch you were looking for, let me know! For more amazing holiday ideas, you can always check out the results my friends have gotten over at this classic peanut brittle recipe. Happy snacking!
PrintEasy, Old-Fashioned Peanut Brittle Recipe with Perfect Snap Guarantee
Make classic homemade peanut brittle with a buttery crunch that snaps perfectly every time. This straightforward recipe uses simple pantry ingredients and clear candy thermometer guidance to achieve the hard crack stage reliably.
- Prep Time: 10 min
- Cook Time: 25 min
- Total Time: 55 min
- Yield: About 1 pound 1x
- Category: Candy
- Method: Stovetop Cooking
- Cuisine: American
- Diet: Vegetarian
Ingredients
- 2 cups granulated sugar
- 1 cup light corn syrup
- 1 cup water
- 2 cups roasted, unsalted peanuts
- 2 tablespoons unsalted butter
- 1 tablespoon baking soda
- 1 teaspoon vanilla extract
Instructions
- Prepare a baking sheet by lightly greasing it or lining it with a silicone mat. Set aside.
- In a heavy-bottomed saucepan, combine the sugar, corn syrup, and water. Stir gently until the sugar dissolves.
- Place the saucepan over medium heat. Insert a candy thermometer. Do not stir the mixture once it begins to boil.
- Cook the syrup without stirring until the temperature reaches 250 degrees Fahrenheit (Soft Ball stage).
- Add the roasted peanuts to the syrup. Continue to cook, stirring occasionally to prevent scorching, until the mixture reaches 300 degrees Fahrenheit (Hard Crack stage). This step requires attention to detail.
- Remove the saucepan from the heat immediately. Quickly stir in the butter, baking soda, and vanilla extract. The mixture will foam up rapidly.
- Pour the hot mixture onto the prepared baking sheet. Use a heat-safe spatula to spread it thinly and evenly. Work quickly.
- Let the brittle cool completely at room temperature until hard, about 30 to 45 minutes.
- Once fully cooled and hard, break the peanut brittle into irregular pieces. Store in an airtight container.
Notes
- Use a candy thermometer for accuracy; hitting the 300°F hard crack stage is key to achieving the perfect snap.
- Ensure your baking soda is fresh; this ingredient helps create the airy structure needed for brittle.
- If you do not have roasted peanuts, you can lightly toast raw peanuts in a dry skillet before starting the recipe.
Nutrition
- Serving Size: 1 ounce piece
- Calories: 160
- Sugar: 18g
- Sodium: 35mg
- Fat: 8g
- Saturated Fat: 2g
- Unsaturated Fat: 6g
- Trans Fat: 0g
- Carbohydrates: 21g
- Fiber: 1g
- Protein: 4g
- Cholesterol: 5mg