
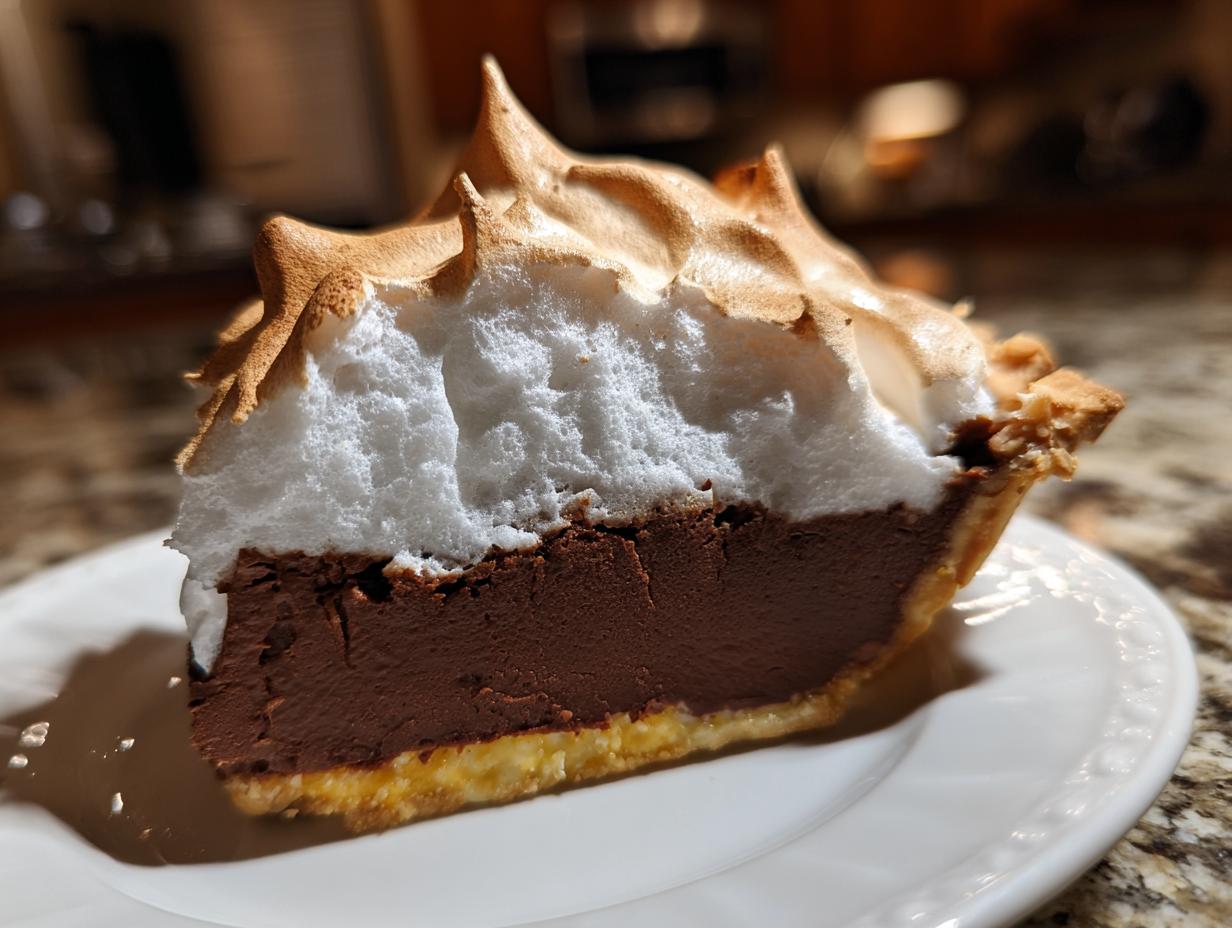
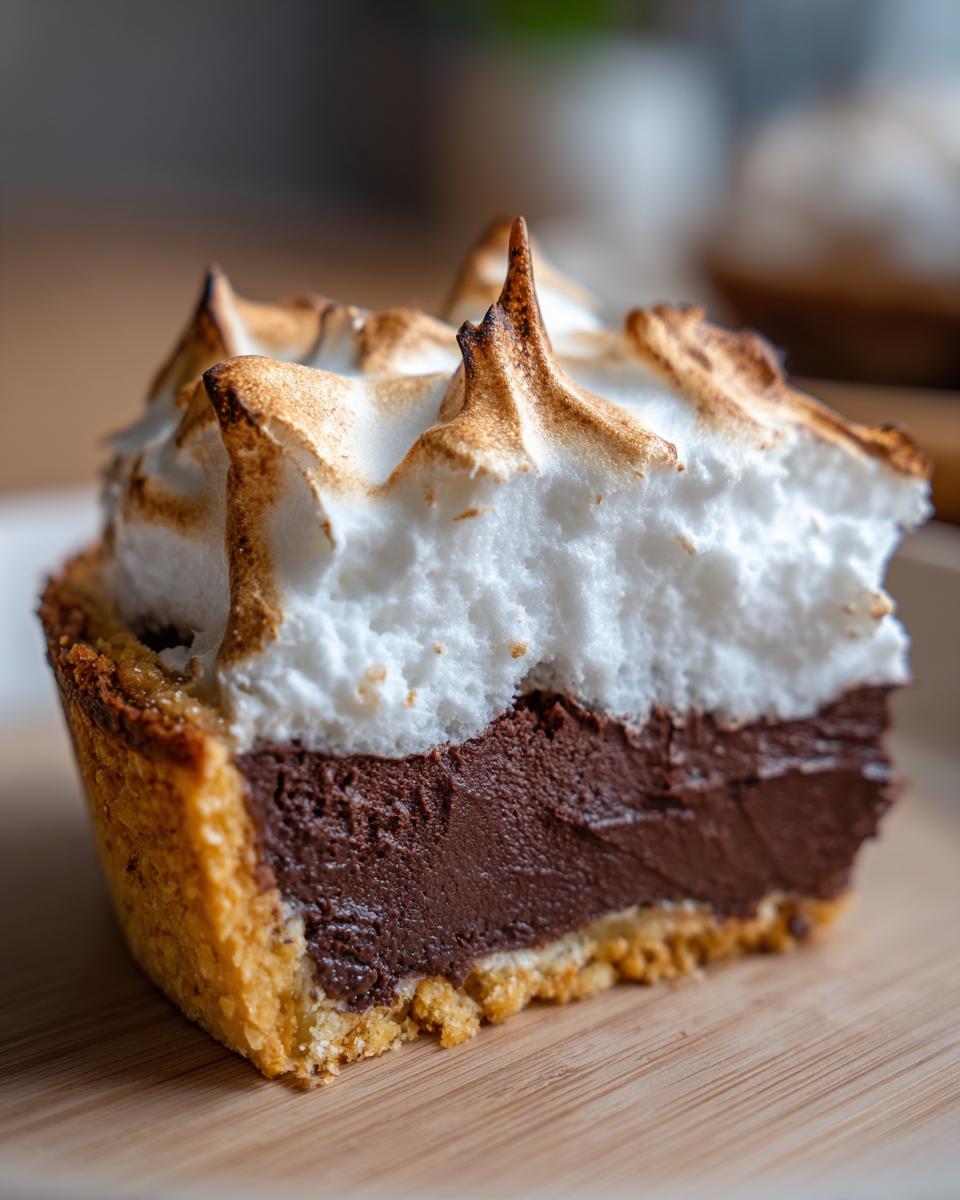
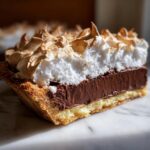
There’s just something magical about an old-fashioned dessert that hasn’t gone out of style, isn’t there? When I think about what truly feels like home, it’s the towering, marshmallow-like cloud of meringue melting into a deep, dark chocolate filling. That’s why I worked tirelessly to crack the code for the Ultimate No-Fail Chocolate Meringue Pie. Trust me, I ran into every disaster imaginable—weeping fillings, collapsing meringue—before I landed on this version. It brings me right back to my grandmother Daisy’s kitchen, where we learned that patience and a few key techniques are the secret to a perfect chocolate meringue pie every single time. If you’re ready for a truly rich and decadent pie that actually holds up, you’re in the right spot. You can find more of Daisy’s legacy in our collection of delicious dessert recipes.
- Why This Chocolate Meringue Pie Recipe Works (The Secrets to Success)
- Gathering Ingredients for Your Chocolate Meringue Pie
- Step-by-Step Instructions for the Ultimate Chocolate Meringue Pie
- Expert Baking Tips for Perfect Chocolate Meringue Pie
- Serving Suggestions for This Showstopper Dessert Recipe
- Storage and Reheating Instructions for Homemade Meringue Pie
- Frequently Asked Questions About Making Chocolate Meringue Pie
- Nutritional Estimates for This Indulgent Chocolate Treat
- Share Your Sweet Endings Dessert Experience
Why This Chocolate Meringue Pie Recipe Works (The Secrets to Success)
Honestly, achieving that perfect texture—silky filling, towering meringue—is half science and half intuition. I learned that the secret to my grandmother’s legendary chocolate meringue pie wasn’t some fancy ingredient; it was sticking to a few non-negotiable steps. We skip the dry or runny disasters by mastering two critical components: the filling’s structure and the topping’s stability. If you follow these small tips, you’ll feel like you’ve unlocked an old family secret. You can explore more of our no-fail pie recipes right here.
Achieving a Creamy Chocolate Custard Filling
Forget those thin, yellowish fillings! Our goal is a deep, creamy chocolate custard filling that sets up perfectly. The key here is cornstarch; it’s what gives that beautiful, velvety body when cooked correctly. You absolutely must bring the mixture to a full boil and let it bubble for a solid minute—I know it feels scary, but that activates the starch fully. Then, tempering the egg yolks slowly is your safety net. It warms the yolks gently so they don’t scramble when they hit that hot cocoa mixture. It’s quick, but it keeps everything smooth as silk.
How to Make Stable Meringue Topping
We want a cloud, not a puddle! The number one rule for a fluffy meringue topping that doesn’t weep is making sure your egg whites are spotless and perfectly room temperature. Any trace of fat in that bowl, and they won’t whip right. That’s where the cream of tartar swoops in—it’s an acid that stabilizes the proteins immediately. We beat them until they are just foamy, then add the sugar *slowly*, a tablespoon at a time. This gradual addition is vital to how to make stable meringue; it allows the sugar to fully dissolve into the egg white structure instead of melting out later.
Gathering Ingredients for Your Chocolate Meringue Pie
Okay, once you’ve committed to making this chocolate meringue pie, we need to talk ingredients. Think of this list as your mission briefing! I’ve laid everything out exactly as it goes into the steps, so you don’t have to stress about hunting things down mid-boil. Don’t substitute that beautiful, buttery crust—it’s the foundation holding all that creamy goodness! Let’s get everything measured out since speed is key once we hit the stove.
For the Rich Chocolate Custard Filling
- 1 (9-inch) pre-baked buttery pie crust – Don’t skip pre-baking this!
- 1 cup granulated sugar (Set the other 1/2 cup aside for the meringue!)
- 1/2 cup cornstarch
- 1/4 teaspoon salt
- 3 tablespoons unsweetened cocoa powder
- 1 1/2 cups cold water
- 3 large egg yolks, lightly beaten
- 2 tablespoons unsalted butter
- 1 teaspoon vanilla extract
For the Fluffy Meringue Topping
This part needs precision, so make sure your whites are totally clean and at room temperature. That volume just won’t happen otherwise.
- 4 large egg whites, at room temperature
- 1/4 teaspoon cream of tartar
- The remaining 1/2 cup granulated sugar
Step-by-Step Instructions for the Ultimate Chocolate Meringue Pie
Alright, this is the fun part! Don’t let the multi-step process intimidate you; we’re just layering liquids and air to create magic. Remember, this is the process that makes this chocolate meringue pie legendary, not fussy. Work with confidence! Because the custard needs to be hot when the meringue goes on, speed is your best friend here. If you want more deep-dive instructions on similar sauces, check out my guide on classic custard pie recipes. If you’re looking for inspiration after this pie, this classic chocolate meringue pie recipe looks divine too!
Making the Velvety Chocolate Custard Filling
This is where the richness comes from, so don’t rush the cooking time!
- First thing: Grab your medium saucepan. Whisk together 1 cup of your sugar, the cornstarch, salt, and cocoa powder until everything is totally blended dry. No lumps allowed!
- Now, slowly whisk in the cold water until the whole mixture looks smooth and uniform.
- Put that pot over medium heat. You have to cook this constantly stirring until it gets super thick and actually starts bubbling—that’s a true boil. Once it boils, keep stirring and let it boil for one full minute. Seriously, one minute! Then pull it off the heat.
- Time for tempering! Take your three lightly beaten egg yolks in a separate little bowl. This step protects them. Slowly, slowly drizzle about 1 cup of that hot chocolate mixture into the yolks while whisking the yolks like crazy. If you dump it, you get scrambled eggs, and nobody wants that!
- Once those yolks are warmed up, gently pour that tempered yolk mixture right back into the saucepan with the rest of the hot chocolate.
- Return the pan to medium heat. Keep stirring until it bubbles and thickens *again*. Boil it for one more minute, then take it off the heat immediately. Stir in the butter and vanilla until it’s all shiny and smooth. Pour this glorious, hot custard straight into your waiting, pre-baked pie crust, and set it aside. It needs to be hot for the meringue!
Whipping the Golden Toasted Meringue
This part is all about creating volume and stability. Your mixing bowl must be sparkling clean—I mean, wipe it down with a paper towel dipped in vinegar if you have to. Fat is the enemy of meringue!
- Take your 4 room-temperature egg whites and pop them into your stand mixer bowl fitted with the whisk attachment. Start beating them on medium speed until they look foamy, kind of bubbly.
- Toss in the cream of tartar—this is our secret weapon for structure. Keep beating until soft peaks form. They should look like gentle waves when you lift the whisk.
- Now, the sugar gets added slowly. Add the remaining 1/2 cup of sugar, just a tablespoon at a time, waiting about 15 seconds between each addition. This keeps things stable.
- Crank the speed up to high and beat until you get stiff, glossy peaks. When you lift the whisk, the peaks should stand straight up without flopping over. That means you have a strong, fluffy meringue topping that’ll stand tall!
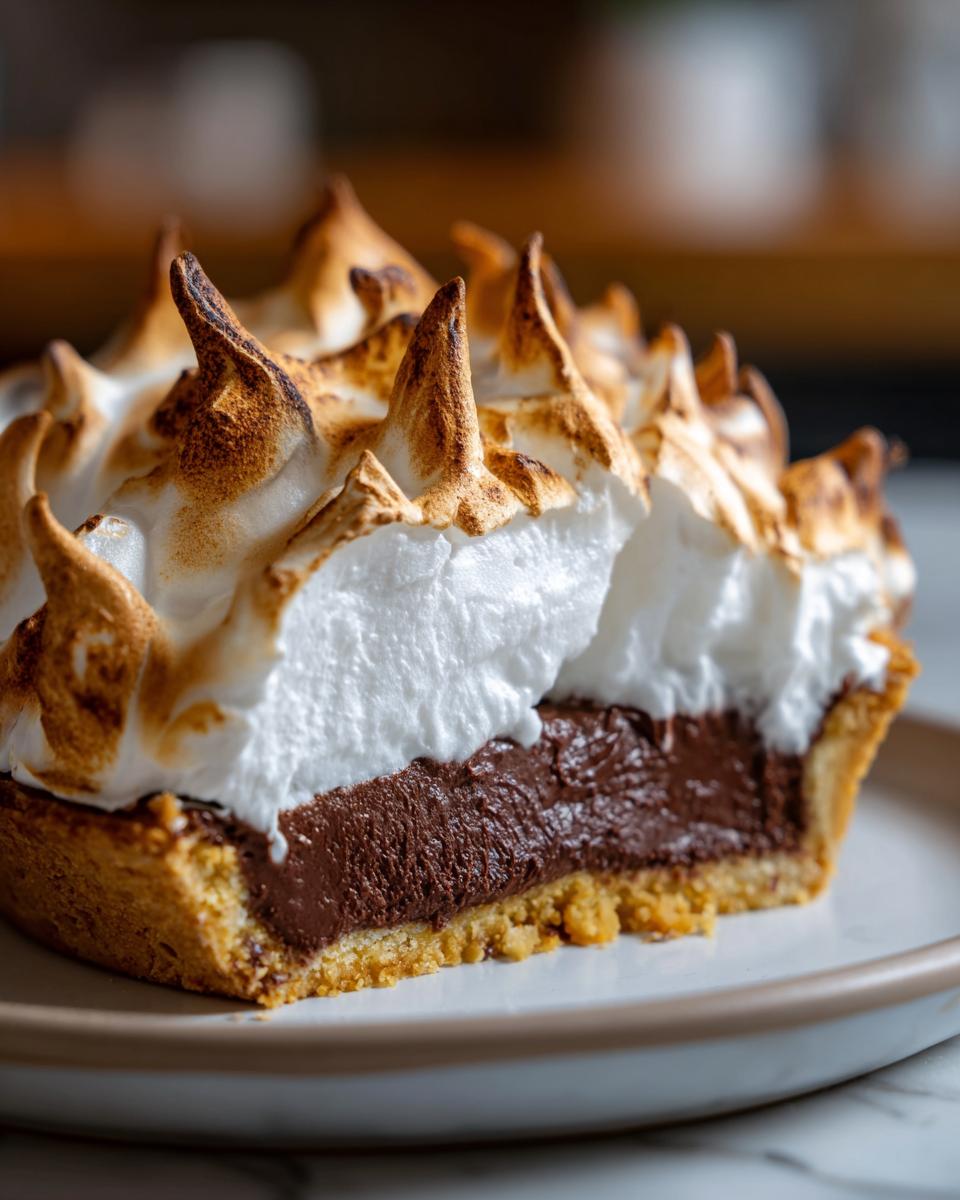
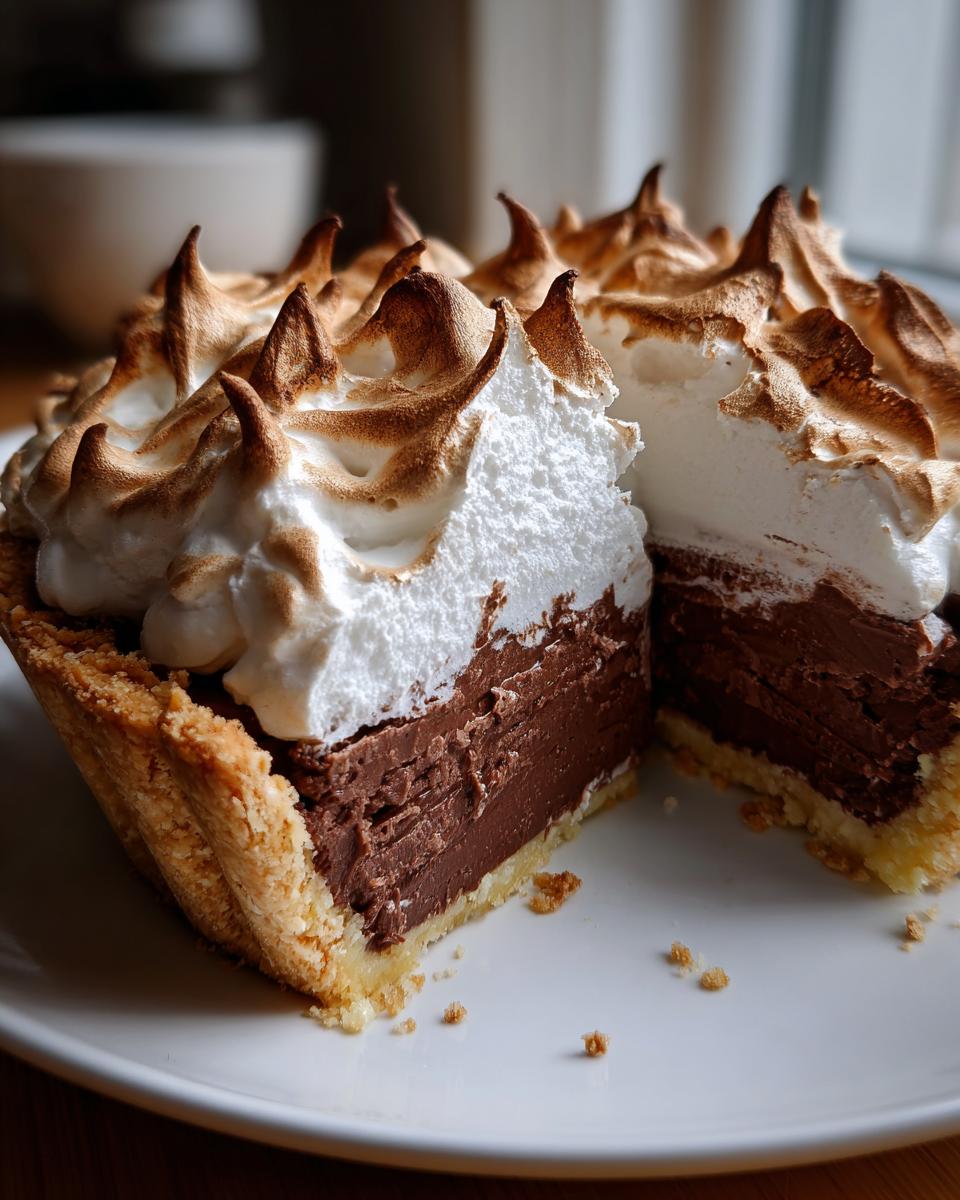
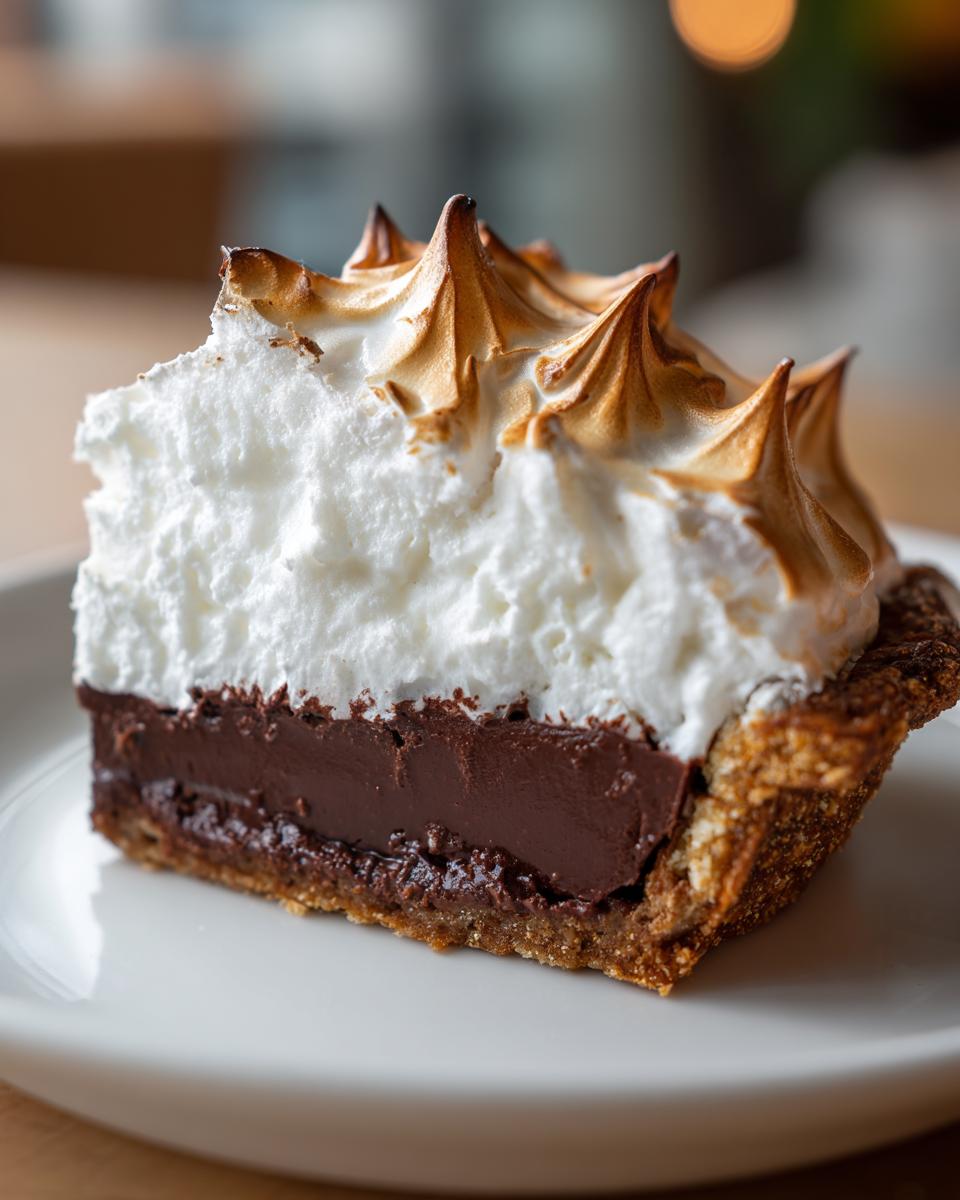
Assembly and Baking the Chocolate Meringue Pie
We’re almost at that decadent finish line for this chocolate meringue pie.
- Take that lovely, stiff meringue and carefully spread it all over the hot custard filling. Don’t just plop it in the middle! You need to make sure the meringue touches the crust edge all the way around the rim. This seals the custard in and is the key step to stop weeping later on.
- Pop the pie into your preheated 350°F oven. Bake it for 12 to 15 minutes. You’re just looking for that beautiful golden-brown color on the meringue tips.
- This step is the hardest part: Cooling! Let the pie cool slowly on a wire rack. It needs at least 4 long hours to set completely. Don’t rush it into the fridge right away, or that temperature shock will make the meringue start weeping puddles on the filling. Patience pays off!
Expert Baking Tips for Perfect Chocolate Meringue Pie
Even with the best recipe, sometimes my chocolate meringue pie needs a little extra coaxing! My grandmother Daisy always said that baking troubles are just opportunities to learn more about what the ingredients are telling you. These little tricks, gleaned from years of trial and error in my city apartment kitchen, are what separate a good pie from a truly show-stopping one. If you’re looking for more great baking tips for meringue pie, these are my go-to fixes!
Troubleshooting Weeping and Shrinking Meringue
Weeping happens when moisture escapes the meringue sitting between the meringue and the hot custard. You’ve gotta seal it tight! Make sure when you spread that fluffy meringue topping, it’s touching the crust all the way around. It creates a physical barrier. Also, remember how I mentioned cleaning that mixing bowl? Even a teaspoon of oil from your hands or dirty bowl will make the whites collapse or weep. If you’re nervous, wipe the bowl and whisk down with a paper towel dampened with a splash of white vinegar or lemon juice first. It kills any fat residue instantly!
Flavor Variations for Your Rich Decadent Pie
While this recipe is already an indulgent chocolate treat, you can certainly tweak it for a personal touch. For an even richer decadent pie custard, swap out a quarter cup of the cold water for 1/4 cup of heavy cream. That fat addition makes the chocolate unbelievably smooth. Also, I highly recommend using a high-quality, deep Dutch-process cocoa powder if you can find one; it really punches up that classic chocolate flavor we love. If you’re interested in caramel swirls, check out my notes on making caramel at home, which would be delicious drizzled *under* the meringue!
Serving Suggestions for This Showstopper Dessert Recipe
This showstopper dessert recipe is so rich and decadent all on its own, but sometimes a little contrast is perfect! Since the pie is served cool or room temperature after its long cool-down, serving it slightly chilled works best. I love how a little whipped cream brings a textural change. Don’t go overboard, though—you want that gorgeous meringue peak to be the star!
If you want to elevate it even further, a tiny drizzle of homemade salted caramel right before serving—only on the plate, not smothering the meringue!—is absolutely divine. You can try my recipe for caramel, if you dare. A nice, slightly tart raspberry coulis on the side cuts through the sweetness just beautifully, too. It turns a great pie into an event!
Storage and Reheating Instructions for Homemade Meringue Pie
This is the tricky part about any amazing homemade meringue pie—it doesn’t love being tucked away in the cold too soon! Remember how I insisted on that 4-hour cooling period on the counter? Keep it there until it’s fully set and room temperature. After that initial setting time, you can carefully transfer it to the fridge. Ideally, eat it within a day or two; the meringue just doesn’t have the same light texture the next day, even when stored correctly.
Do NOT try to reheat this pie, ever! That will just encourage the sugar in the meringue to liquefy. If you have leftovers, cover them loosely with plastic wrap and keep them cool. It’s best enjoyed the day after baking, once it’s had that essential time to structure itself!
Frequently Asked Questions About Making Chocolate Meringue Pie
I know baking a showstopper like this chocolate meringue pie can bring up a few questions! That’s totally normal; every baker has been there standing over a hot stove wondering if they’re doing things right. I’ve pulled together the questions I get asked most often about this recipe. If you’ve got more burning questions, feel free to check out my general tips for quick weeknight meals too, though the next section focuses just on pie worries!
Can I use a store-bought pie crust for this chocolate meringue pie?
Oh, yes, absolutely! Life gets busy, and sometimes we need a shortcut. I champion ease where possible. However, if you are using a pre-made crust, please make sure it is fully pre-baked before you put the custard in. A raw crust will never bake correctly under that hot custard. A nice, flaky, buttery crust is always best for this classic chocolate pie recipe.
How long does the meringue take to get golden brown?
In a preheated 350°F oven, you’re looking at about 12 to 15 minutes. You just want those peaks turning a soft, lovely gold. If you prefer that really dramatic, slightly charred look, or if your custard pie is already cool, skip the final baking! Just spread the meringue on and use a good kitchen torch to create that perfect golden toasted meringue. It gives you total control over the browning!
What is the best way to slice this pie without messing up the meringue?
This is the eternal struggle! If you try to use a regular knife, you’ll just smash the beautiful height right off. The best trick for clean slices is to use a very long, thin knife—or even a piece of dental floss if you’re brave! Dip your knife into a tall glass of hot water and wipe it completely dry between every single cut. That heat melts just enough of the meringue and custard to allow for a clean separation. It makes serving your homemade meringue pie so much cleaner!
Nutritional Estimates for This Indulgent Chocolate Treat
Now, I know we aren’t counting calories when we make something this wonderful, but I do think it’s important to know what goes into your slice of heaven. This is truly an indulgent chocolate treat, loaded with richness from the butter and sugar needed for that perfect texture. Whether you’re preparing this for a holiday gathering or just a cozy weekend treat, I wanted to give you a general idea of what you’re looking at per serving.
Please remember, these numbers are just estimates! They are based on the exact ingredients listed, assuming you use a standard 9-inch buttery crust and divide the pie into 8 equal slices. Baking is chemistry, and ingredients can fluctuate, so take this as a helpful guideline rather than gospel.
- Serving Size: 1 slice
- Calories: 380
- Sugar: 45g
- Fat: 18g
- Protein: 6g
- Carbohydrates: 52g
- Cholesterol: 110mg
See all that sugar? That’s what helps stabilize the meringue and gives that incredible caramelized flavor when toasted! That’s why we bake this pie with love and enjoy every single bite without apology. It’s a classic for a reason!
Share Your Sweet Endings Dessert Experience
Now that you have the secrets to that creamy chocolate custard filling and that picture-perfect, towering meringue, I’m practically begging you to give this chocolate meringue pie a whirl! Seriously, there is nothing more satisfying than seeing a perfect slice of this dessert land on a plate. If you love making decadent pies, don’t forget to check out my hub for all my delicious dessert recipes!
When you tackle this recipe, please come back below and tell me how it went! Did your meringue get perfectly golden? Did you manage to keep the filling smooth? Drop a star rating so others know they can trust this recipe too. I absolutely live for seeing your creations, so share your sweet endings with me in the comments—I read every single one!
PrintThe Ultimate No-Fail Chocolate Meringue Pie: Rich Custard and Perfect Fluffy Meringue
You can make a show-stopping, classic chocolate meringue pie with a rich, creamy chocolate custard filling and a towering, stable, golden meringue topping. This recipe focuses on simple techniques for a velvety chocolate pie that avoids weeping or cracking.
- Prep Time: 25 min
- Cook Time: 25 min
- Total Time: 4 hours 50 min
- Yield: 8 servings 1x
- Category: Dessert
- Method: Baking
- Cuisine: American
- Diet: Vegetarian
Ingredients
- 1 (9-inch) pre-baked buttery pie crust
- 1 1/2 cups granulated sugar, divided
- 1/2 cup cornstarch
- 1/4 teaspoon salt
- 3 tablespoons unsweetened cocoa powder
- 1 1/2 cups cold water
- 3 large egg yolks, lightly beaten
- 2 tablespoons unsalted butter
- 1 teaspoon vanilla extract
- 4 large egg whites, at room temperature
- 1/4 teaspoon cream of tartar
Instructions
- Prepare the chocolate custard filling: In a medium saucepan, whisk together 1 cup of the sugar, cornstarch, salt, and cocoa powder.
- Gradually whisk in the cold water until smooth. Place the saucepan over medium heat.
- Cook, stirring constantly, until the mixture thickens significantly and comes to a boil. Boil for 1 minute, stirring constantly. Remove from heat.
- Temper the egg yolks: In a small bowl, whisk the egg yolks. Slowly drizzle about 1 cup of the hot chocolate mixture into the yolks while whisking constantly.
- Pour the tempered yolk mixture back into the saucepan with the remaining chocolate mixture. Return to medium heat. Cook, stirring constantly, until the mixture returns to a boil and thickens again. Boil for 1 minute. Remove from heat.
- Stir in the butter and vanilla extract until smooth. Pour the hot custard immediately into the pre-baked pie crust.
- Prepare the fluffy meringue topping: In a clean, dry bowl of a stand mixer fitted with the whisk attachment, beat the egg whites on medium speed until foamy.
- Add the cream of tartar and continue beating until soft peaks form. Gradually add the remaining 1/2 cup of sugar, 1 tablespoon at a time, beating well after each addition.
- Increase the speed to high and beat until stiff, glossy peaks form. This creates a stable meringue.
- Spread the meringue over the hot custard, making sure the meringue touches the inner edge of the crust all the way around to seal it. This helps prevent weeping.
- Bake the pie in a preheated 350°F oven for 12 to 15 minutes, or until the meringue is golden brown.
- Cool the pie completely on a wire rack for at least 4 hours before slicing. Do not refrigerate immediately, as rapid cooling can cause the meringue to weep.
Notes
- To achieve a golden toasted meringue without baking, you can use a kitchen torch after spreading the meringue onto the cool or warm filling.
- For a richer custard, substitute 1/4 cup of the water with 1/4 cup of heavy cream.
- Always use room temperature egg whites for the most volume when making meringue.
- Wipe down your mixing bowl and whisk with a little vinegar or lemon juice before starting the meringue to remove any trace of fat, which prevents the whites from whipping properly.
Nutrition
- Serving Size: 1 slice
- Calories: 380
- Sugar: 45g
- Sodium: 180mg
- Fat: 18g
- Saturated Fat: 10g
- Unsaturated Fat: 8g
- Trans Fat: 0.5g
- Carbohydrates: 52g
- Fiber: 1g
- Protein: 6g
- Cholesterol: 110mg