
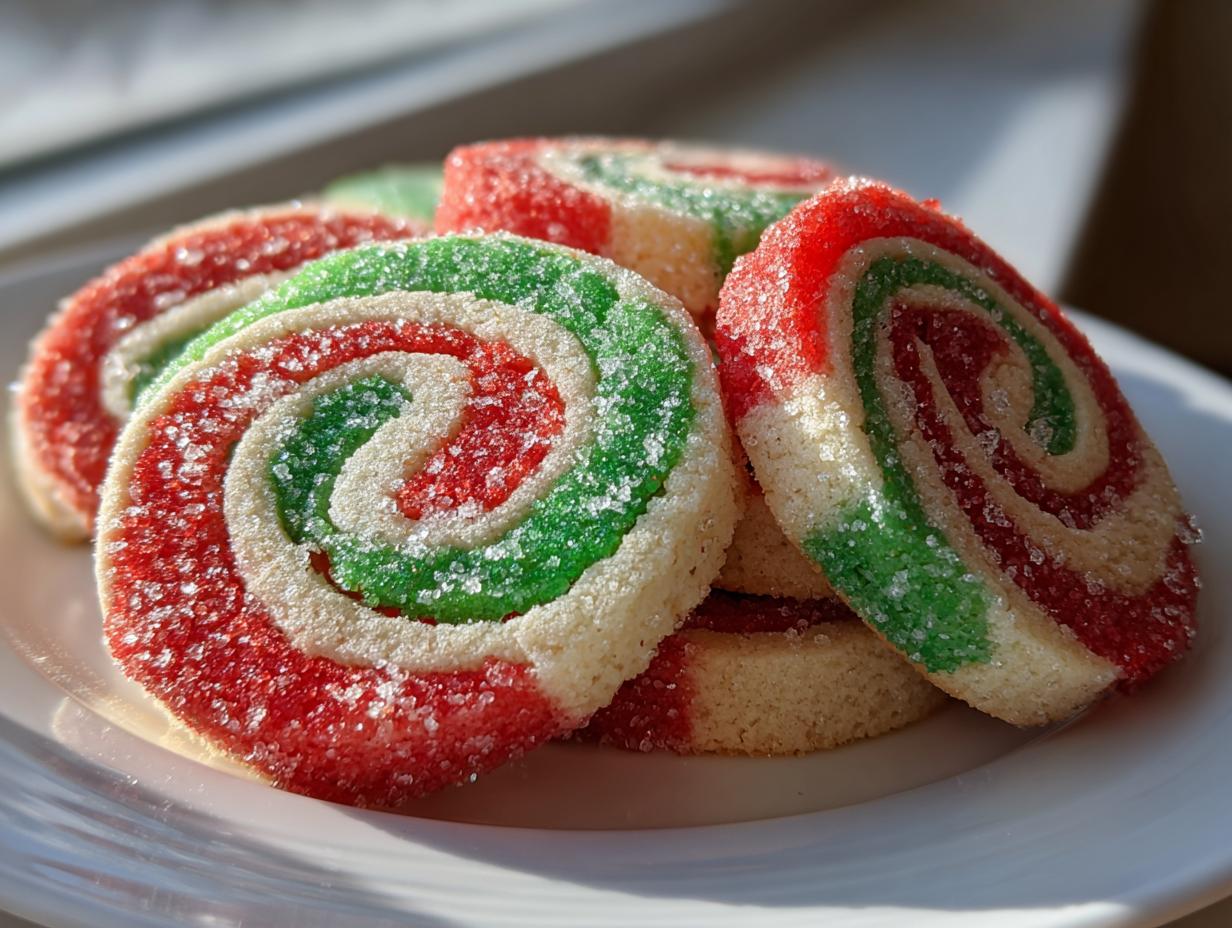
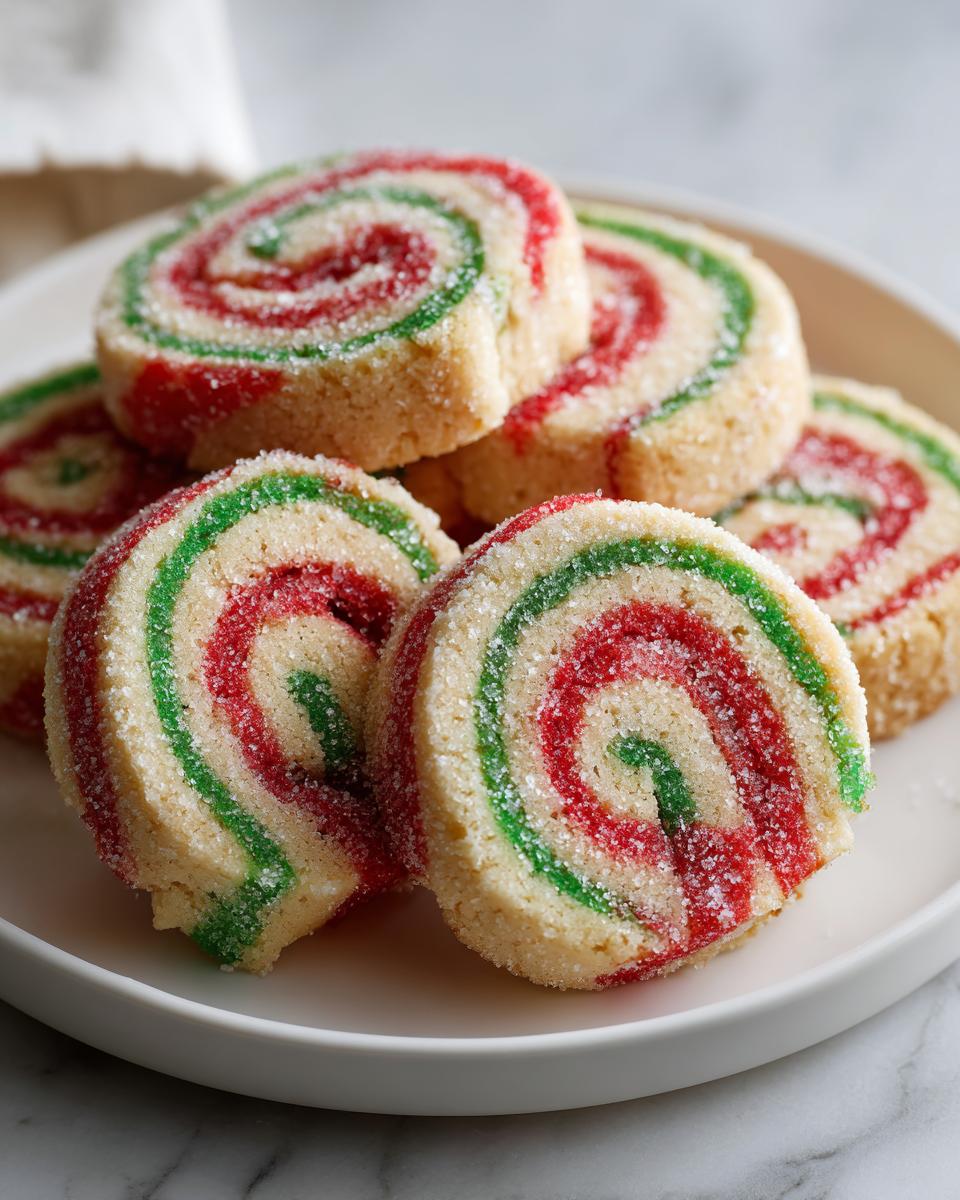
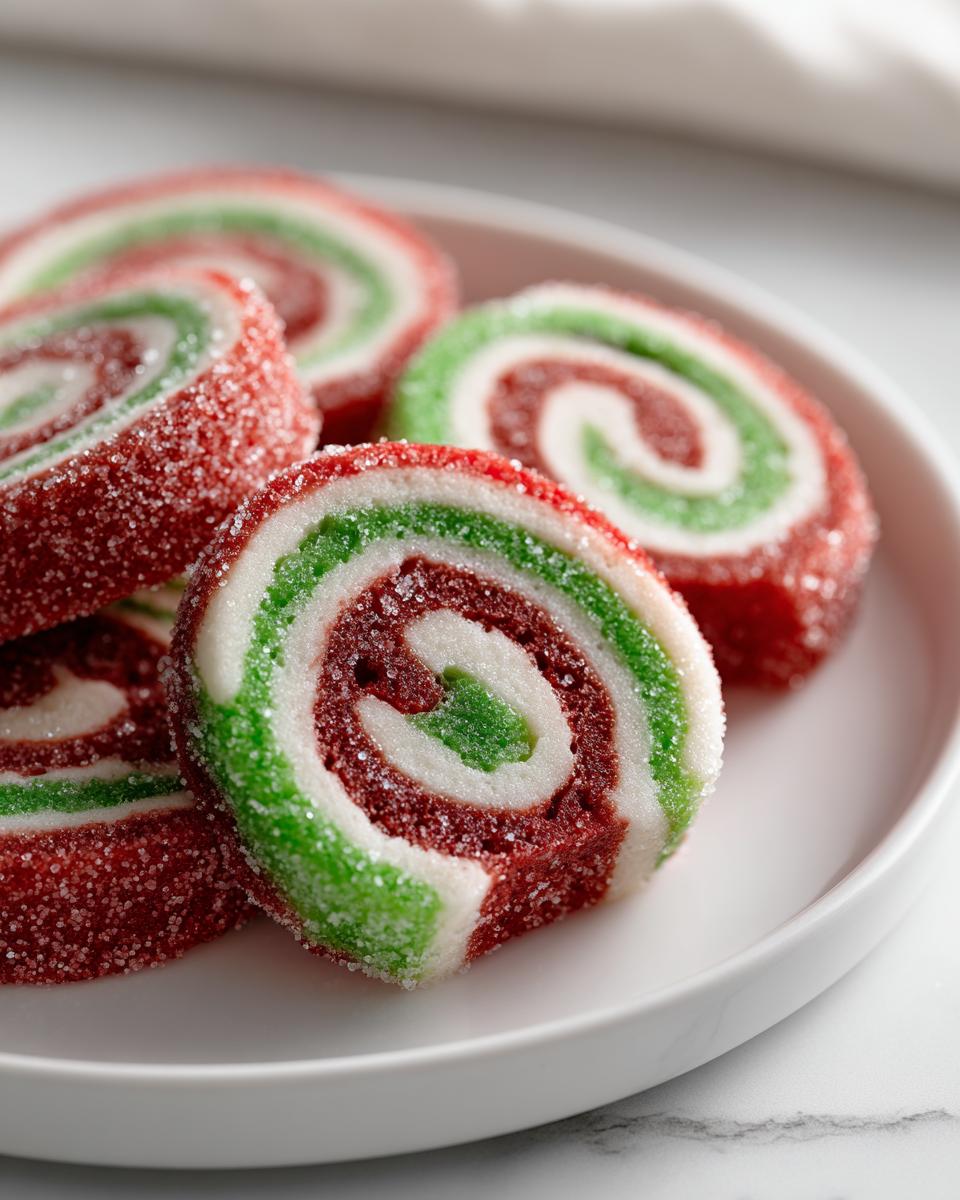
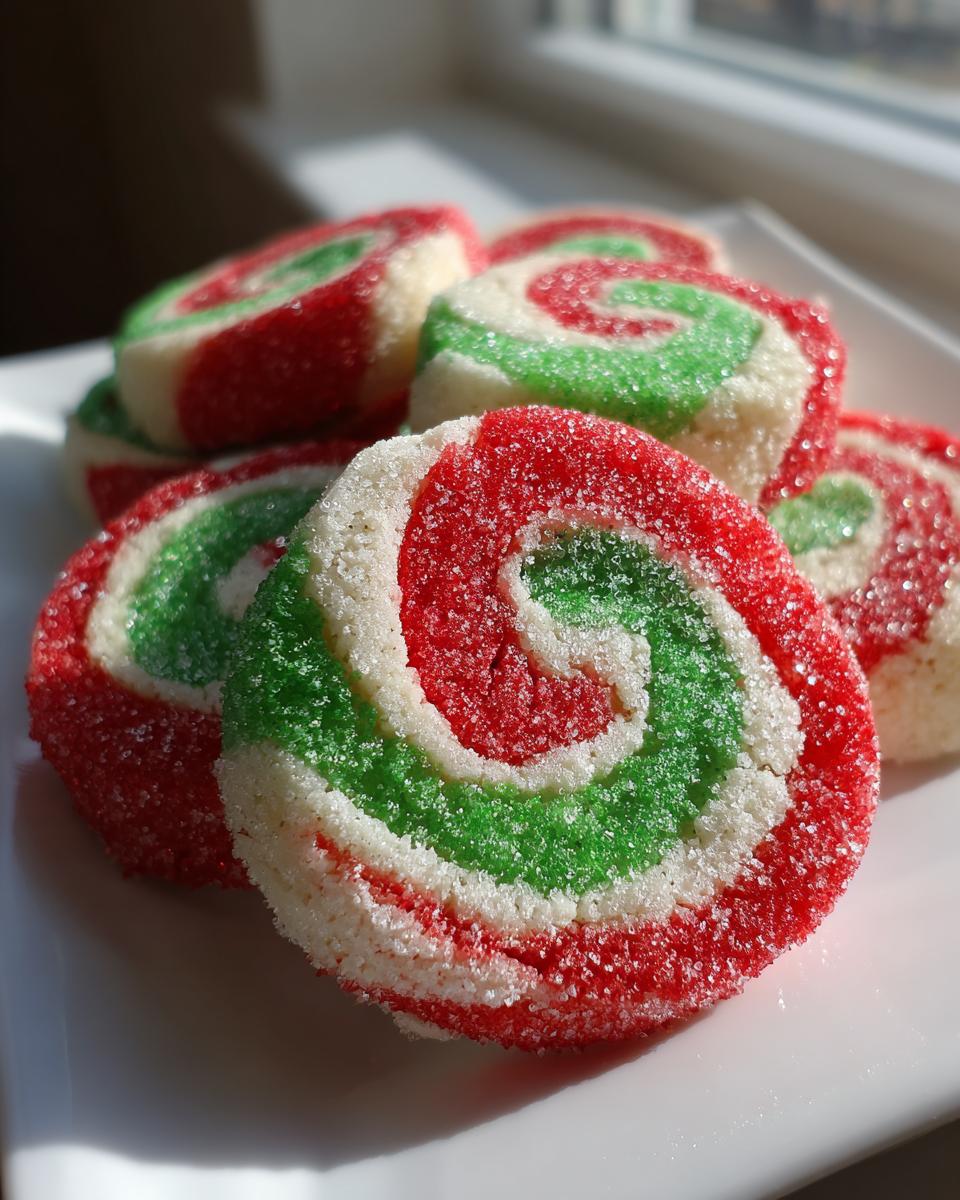
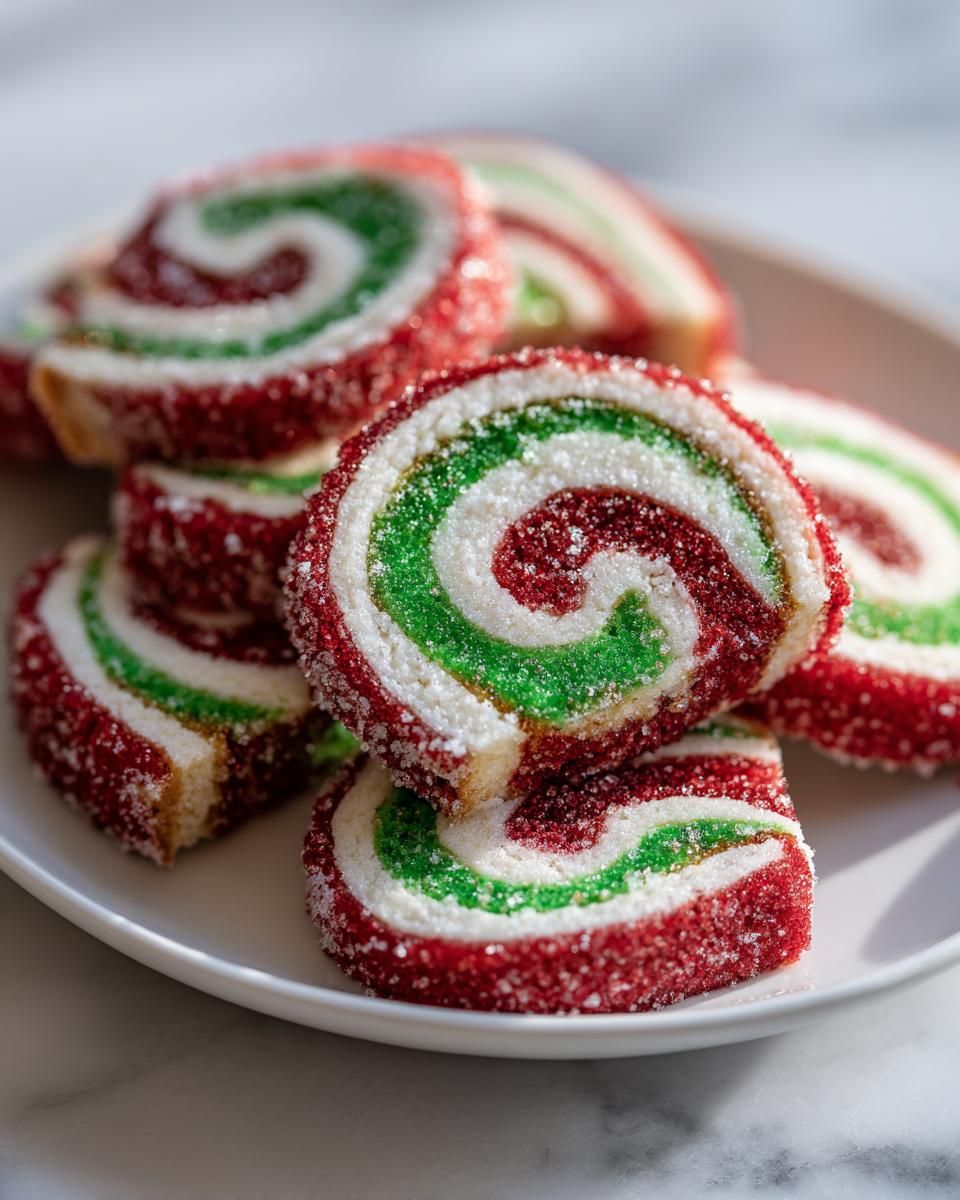
There is just something about the scent of sugar and butter baking in December that pulls me right back to Grandma Daisy’s kitchen. She always made sure our holiday table was bursting with color, and nothing did that better than her fabulous, festive pinwheel cookies. These aren’t the fancy, fiddly cookies you see everywhere else. No, these are truly honest baking—a simple sugar cookie base dyed brilliant red, white, and green, then sliced and baked. If you are looking for impressive Holiday Baking Ideas that are surprise-easy, you’ve found your winner. Trust me, this slice and bake recipe is perfect for making ahead! I know Grandma Daisy would approve of how simple this classic beauty is to recreate; you can see more of her sprinkle cookie inspiration right here.
- Why These Classic Christmas Pinwheel Cookies Are Essential Holiday Baking Ideas
- Gathering Ingredients for Buttery Pinwheels
- Preparing the Best Pinwheel Cookie Dough
- Chilling and Slicing Your Pinwheel Cookies
- Baking Instructions for Slice and Bake Cookies
- Tips for Success with Festive Cookies
- Variations on Classic Pinwheel Cookies
- Storing and Serving Your Pinwheel Cookies
- Frequently Asked Questions About Pinwheel Cookies Recipe
- Sharing Your Baking Journey
Why These Classic Christmas Pinwheel Cookies Are Essential Holiday Baking Ideas
When the holiday rush hits, you need cookies that deliver big on looks without demanding hours in the kitchen. That’s what makes these buttery pinwheels a must-have! They are simply the best way to look like a baking superstar with minimal effort. I love pulling these out of the freezer stash when unexpected guests pop by.
- The texture is pure perfection—soft, rich, and undeniably buttery, just like good old-fashioned sugar cookies.
- They look incredibly festive! That classic red, white, and green combination screams holiday cheer.
- The slice and bake convenience means you can mix the dough whenever you have a free moment; they are true make-ahead heroes. You can see my favorite base recipe for soft sugar cookies over here, though this dough base is slightly denser for stability!
The Appeal of Easy Spiral Cookies for Cookie Box Fillers
Honestly, the swirl pattern is the secret weapon here. It gives the illusion of complicated work, but we know the truth—it’s just three colored dough rectangles stacked neatly! They pack beautifully into any tin, making them ideal cookie box fillers for friends or coworkers. If you bring these to your next Christmas Cookie Exchange, they will disappear first, I promise!
Gathering Ingredients for Buttery Pinwheels
Before we can start creating those gorgeous holiday spins, we need to chat about what goes into these buttery pinwheels. The key, as always in Daisy’s Recipes, starts with quality—especially that butter! Make sure yours is truly softened, not melted, to get the right structure later on. We’re keeping this recipe straightforward, relying on pantry staples we usually have on hand, which keeps our baking happy and unstressed!
You can check out my favorite recipe for purely buttery cookies here, but remember, these need to hold their shape, so consistency matters!
Ingredient Notes and Color Substitutions for Pinwheel Cookies Recipe
A quick word on colors: if you want those amazing, vibrant Red White Green Cookies, you absolutely must reach for gel food coloring. The liquid stuff just adds too much water and makes the dough sticky, which ruins the whole rolling process. Please don’t skip that tip!
If you want to swap out the colors for a different look—maybe you want rich brown swirls instead of green—you can easily turn one portion of the dough into a Chocolate Vanilla Swirl Cookies version by swapping a bit of flour for cocoa powder, just like I noted in the recipe details. It’s easy to customize these festive treats!
Preparing the Best Pinwheel Cookie Dough
Okay, we’re moving past ingredients and into the real fun now—making the dough! Remember, Grandma Daisy always said that creaming the butter and sugar correctly is non-negotiable for good texture. Use your mixer to beat that softened butter and cup of sugar until it’s genuinely light and fluffy—almost pale in color. This traps the air we need for a wonderfully soft dough.
Next, we bring in the wet stuff, the egg and vanilla, incorporating them gently. Then, we tackle the dry side: flour, baking powder, and salt whisked separately. Don’t dump all the dry ingredients in at once! Add them slowly, mixing just until *almost* combined. Overmixing at this stage is how you get tough sugar cookie swirls, and we definitely want to avoid that!
Coloring and Layering for the Perfect Pinwheel Cookies Swirl
This is where the magic turns into art! Once you have that gorgeous, soft base dough, divide it perfectly into three equal piles. One stays white, and the others get our vibrant gel colors—red and green—mixed in until they look wild and fully dyed. Now, the layering part requires a little finesse, but you’ll nail it your first try.
Take your plastic wrap, and lay out the three colors. Flatten the white first into a rectangle, then put the red on top, and finish with the green. The trick here is making sure all three rectangles are roughly the same size before you stack them. If one piece is way bigger, your final swirl is going to look lopsided! Press them together gently so they stick, but don’t smoosh them flat.
Chilling and Slicing Your Pinwheel Cookies
That beautiful, colorful stack of dough we just created? It absolutely needs a nap! Don’t even think about skipping the chilling time. We need a minimum of two hours in the fridge, often more, for the dough to firm up properly. If you try to slice it warm, trust me, it smears everywhere, and those gorgeous layers blend into a muddy mess rather than sharp, neat swirls.
Once it’s firm like a cold log of wood, wrap it up tightly and let it rest. Once it’s nice and firm, we move on to rolling it into the final log shape. It needs to be packed tight—we’re aiming for about 1.5 to 2 inches across for the best outcome. Roll it, wrap it, and chill it again!
The final pop of visual appeal comes from rolling that chilled log in extra granulated sugar. This makes them beautiful Colorful Slice Cookies and gives the edges a lovely little crunch. Slice them evenly, about a quarter-inch thick—that’s the sweet spot for perfect cookies that don’t spread too much in the oven. I’ve got a great article on why frosting recipes sometimes fail, and keeping dough cold is just as vital for a clean bake!
Baking Instructions for Slice and Bake Cookies
Alright, oven preheated to 375°F (190°C), baking sheets lined with parchment paper—we are ready for the final transformation! Remember, these are super quick, so don’t wander off. We’re aiming for 8 to 10 minutes total. You’re looking for the edges of these Easy Spiral Cookies to just start looking set, but the center should still look soft.
If you overbake them, those gorgeous swirls get hard and dry, and we absolutely want that soft, buttery bite! Once they look ready, pull them out. Let them nap right there on the hot pan for about five minutes to firm up a bit before moving them over to a wire rack to cool completely. That little bit of residual heat keeps the insides tender!
Tips for Success with Festive Cookies
I want your experience making these beautiful swirl cookies to be perfect! Achieving those sharp, crisp color lines is the hardest part, so here are a few things I learned the hard way watching Grandma Daisy. First, make sure those three colored dough rectangles are pressed together firmly before you roll up the log. You shouldn’t see any gaps between the layers when you stack them.
Also, I can’t stress enough: resist the urge to bake them longer! These are sugar cookies, and they dry out fast. If you see them starting to get golden brown all over, pull them. We want that soft, slightly underbaked look that promises tenderness when they cool. For more tips on keeping sugar cookies tender, you might want to check out my advice here on preventing spread!
Make Ahead Holiday Desserts: Freezing Pinwheel Cookies Dough
This is truly the key to surviving the chaos of a Christmas Cookie Exchange! The dough freezes beautifully. Once you have that log rolled up, shiny and coated in sugar, wrap it super tight in plastic wrap and then maybe another layer of foil. Pop it in the freezer for up to a month. Seriously, it’s a lifesaver!
When you need cookies last minute, you just take the frozen log out and slice away. You might need to let it sit on the counter for just five or ten minutes to get it soft enough to slice without cracking, but otherwise, it’s instant Make Ahead Holiday Desserts ready to go. Easy peasy!
Variations on Classic Pinwheel Cookies
While the red, white, and green are my absolute favorite for delivering that festive feeling, these simple sugar cookie swirls are just begging to be customized! That’s the beauty of a good, reliable base recipe, right? You can easily spin this off into other fun designs, too.
If you’re looking past Christmas, try making Chocolate Vanilla Swirl Cookies. Instead of coloring one section green, whisk in some cocoa powder (I suggest 1/4 cup for that rich color and flavor). This gives you a beautiful dark brown and creamy white contrast that is just wonderful year-round!
For a real holiday kick, consider peppermint! You can easily pivot to making Peppermint Pinwheel Cookies by swapping the vanilla extract for peppermint extract in the colored dough sections. If you love chocolate and peppermint together, check out my double chocolate recipe over here for inspiration!
And if you want something completely different, you can look into fillings! Some folks make traditional Date Pinwheel Cookies where you flatten the dough, spread a sweet date paste in the middle, and then roll it up. It looks totally different, but it uses that same soft dough concept. If that sounds fun, you can see how someone else tackles that classic filling over at House of Nash Eats!
Storing and Serving Your Pinwheel Cookies
Once these beauties are fully cooled, keeping them tasting fresh is easy! I always store my completed cookies in a simple airtight container right on the counter. They honestly stay wonderfully soft at room temperature for about five days—but trust me, they rarely last that long!
Because they are pretty sturdy slice and bake cookies, you don’t really need to reheat them, but if you wanted to refresh that buttery scent before serving, just 30 seconds in a low oven (maybe 300°F) does the trick.
They are perfect on their own, of course, but they look fantastic served next to a hot cup of coffee or nestled alongside a rich serving of my homemade cinnamon butter, kind of like a Texas Roadhouse treat! You can find the recipe for that if you’re feeling ambitious!
Frequently Asked Questions About Pinwheel Cookies Recipe
Can I skip chilling the dough for these slice and bake cookies?
Oh, please don’t! Seriously, this is one of those steps you really can’t rush if you want beautiful pinwheel cookies. Chilling for at least two hours firms up the butter so much that when you slice the log, the edges stay sharp and distinct. If you skip it, the dough will spread out on the baking sheet, and your pretty swirls will turn into flat, multicolored puddles instead of lovely buttery pinwheels.
What is the best way to get even swirls?
It all comes down to laying those three colors as flat and equally sized as possible before you begin the rolling process. Think of it like assembling a perfect sandwich! When you flatten the colored dough rectangles, try to make them exactly the same thickness. After rolling the colored layers together into a tight cylinder, make sure you gently try to make the outside diameter perfectly even before wrapping it up. That even density ensures you get uniform easy spiral cookies across the whole batch.
Are these good for Valentine Day Pinwheel Cookies too?
Absolutely! They are incredibly versatile! If you’re looking for Valentine Day Pinwheel Cookies, simply skip the green dough and use two portions of white dough, or try one white and one pink (using a good quality pink or red gel coloring). These Simple Cookie Recipes for Beginners are perfect because you can customize the colors for any holiday. For pink-only swirls, check out a great example recipe over here!
How many cookies should I get from this recipe?
This recipe is designed to yield about 3 dozen cookies, depending on how thickly you slice them. If you cut them thinner than 1/4 inch, you’ll get more cookies, but you risk increasing bake time or having them get oddly crispy. If you cut them thicker, you’ll get fewer truly beautiful cookies, but they will be wonderfully soft! If you want more options for holiday trays, I have a fantastic cannoli cookie recipe you might also love!
Sharing Your Baking Journey
Well, that’s it! You’ve successfully made Grandma Daisy’s beautiful, buttery swirls. I truly hope you loved making these festive treats as much as I do. Once you’ve tried them out, please hop back down and leave a rating—let me know what colors you ended up choosing!
I always love seeing your pictures! If you share your spirals on social media, tag me so I can see your amazing work. For more simple, honest recipes that keep the joy in the kitchen, browse my favorite dessert collection!
PrintClassic Christmas Pinwheel Cookies: Easy Slice and Bake Recipe

Make these impressive, festive red, white, and green swirl cookies. This slice and bake recipe uses simple sugar cookie dough, making it perfect for holiday baking and cookie exchanges.
- Prep Time: 30 min
- Cook Time: 10 min
- Total Time: 2 hours 40 min
- Yield: About 3 dozen cookies 1x
- Category: Dessert
- Method: Baking
- Cuisine: American
- Diet: Vegetarian
Ingredients
- 1 cup unsalted butter, softened
- 1 cup granulated sugar
- 1 large egg
- 1 teaspoon vanilla extract
- 3 cups all-purpose flour
- 1 teaspoon baking powder
- 1/2 teaspoon salt
- Red food coloring (gel preferred)
- Green food coloring (gel preferred)
- Extra granulated sugar for rolling
Instructions
- In a large bowl, cream together the softened butter and 1 cup of sugar until light and fluffy. Beat in the egg and vanilla extract until combined.
- In a separate bowl, whisk together the flour, baking powder, and salt. Gradually add the dry ingredients to the wet ingredients, mixing until a soft dough forms.
- Divide the dough evenly into three separate bowls. Leave one bowl plain (this will be white). Add red food coloring to the second bowl and mix until the color is uniform. Add green food coloring to the third bowl and mix until the color is uniform.
- Take the white dough and flatten it slightly into a rectangle on plastic wrap. Repeat this process with the red dough and the green dough, making three rectangles of similar size.
- Place the red rectangle on top of the white rectangle, and then place the green rectangle on top of the red one. Gently press the layers together.
- Roll the layered dough into a tight log, about 1.5 to 2 inches in diameter. Wrap the log tightly in plastic wrap. Chill the dough in the refrigerator for at least 2 hours, or until firm enough to slice.
- Preheat your oven to 375°F (190°C). Line baking sheets with parchment paper.
- Pour extra granulated sugar onto a plate. Unwrap the chilled dough log and roll the outside surface in the sugar until fully coated.
- Use a sharp knife to slice the log into rounds about 1/4 inch thick. Place the slices onto the prepared baking sheets, leaving about 2 inches between them.
- Bake for 8 to 10 minutes, or until the edges are lightly set. Do not overbake; the centers should remain soft.
- Let the cookies cool on the baking sheet for 5 minutes before transferring them to a wire rack to cool completely.
Notes
- For the best swirl, use gel food coloring instead of liquid, as it adds less moisture to the dough.
- You can make and freeze the dough logs up to one month ahead of time for easy holiday baking.
- If you prefer chocolate swirls, replace 1/4 cup of flour in one portion of the dough with 1/4 cup of unsweetened cocoa powder.
Nutrition
- Serving Size: 1 cookie
- Calories: 145
- Sugar: 12g
- Sodium: 75mg
- Fat: 7g
- Saturated Fat: 4g
- Unsaturated Fat: 3g
- Trans Fat: 0g
- Carbohydrates: 19g
- Fiber: 0g
- Protein: 2g
- Cholesterol: 30mg