
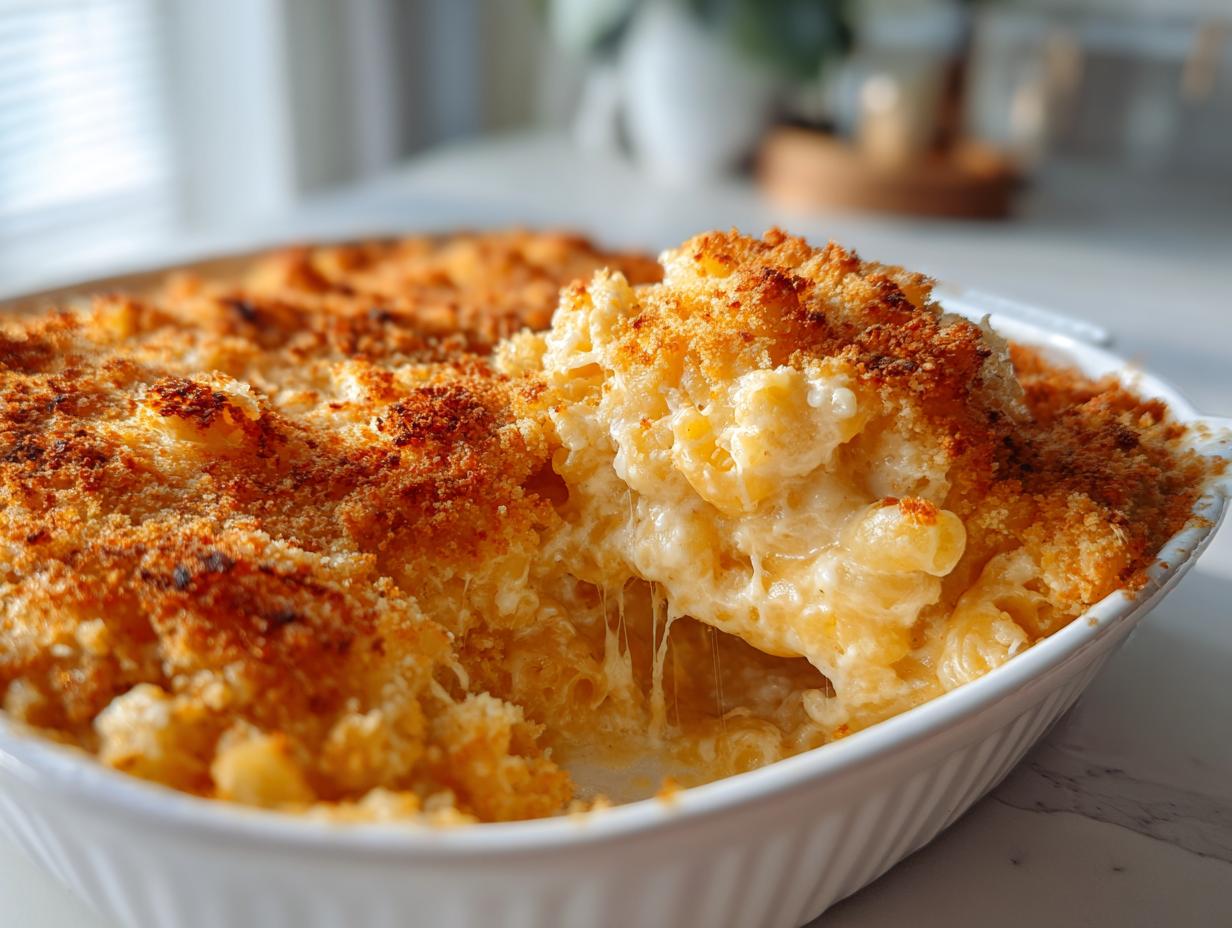
When the world outside feels too loud or too fast, there is nothing—and I mean *nothing*—that compares to pulling a pan of perfectly rich, bubbling **baked mac and cheese** out of the oven. This isn’t just any casserole; this is the centerpiece of comfort. My goal here is to show you how to nail the two things most people struggle with: keeping that creamy baked mac and cheese sauce silky smooth inside, while building a buttery, crisp topping that actually stays crunchy. It took me realizing how much my Grandma Daisy valued simple, honest cooking to reclaim this recipe for myself after moving to the city. If you loved learning about my favorite ways to make morning meals special, you’ll want to check out my guide to ultimate French toast, because this approach to deep comfort applies everywhere!
- Why This is the Best Baked Mac and Cheese Recipe You Will Make
- Gathering Ingredients for Ultimate Baked Mac and Cheese
- Step-by-Step Instructions for Creamy Baked Mac and Cheese
- Tips for the Most Indulgent Cheesy Baked Pasta
- Variations on Classic Baked Mac and Cheese
- Serving Suggestions for Your Cheesy Baked Pasta
- Storage and Reheating for Leftover Baked Mac and Cheese
- Frequently Asked Questions About Baked Mac and Cheese
- Sharing Your Ultimate Comfort Food Recipes Experience
Why This is the Best Baked Mac and Cheese Recipe You Will Make
I promise you, once you try this method, you won’t go back to those dry, crumbly casseroles we all had as kids. This recipe is built specifically to solve those kitchen woes. We’re creating the *best baked macaroni and cheese* experience possible, and it all comes down to two main construction phases. I’ve tried everything, and these points are why I trust this recipe completely, especially if you struggle with getting that *foolproof creamy cheese sauce* right.
- You get reliably *creamy baked mac and cheese* every single time—no more grainy texture surprises!
- It’s rich enough to feel truly indulgent, making it perfect for holidays or when you just need a proper comfort meal.
- The contrast is divine: ultra-smooth pasta against that perfectly toasted, crunchy crown.
Achieving Silky Smooth, No Grain Cheese Sauce
The absolute secret to that stretchable, velvety interior is taking the pan off the heat *before* adding the cheese. Seriously, pull it off the burner! Adding the cheeses when the liquid is cooling just slightly means the proteins don’t seize up and get gritty. This off-heat melting technique ensures you get a true *no grain cheese sauce* that wraps around every piece of pasta beautifully.
The Perfect Buttery Panko Crunch Topping
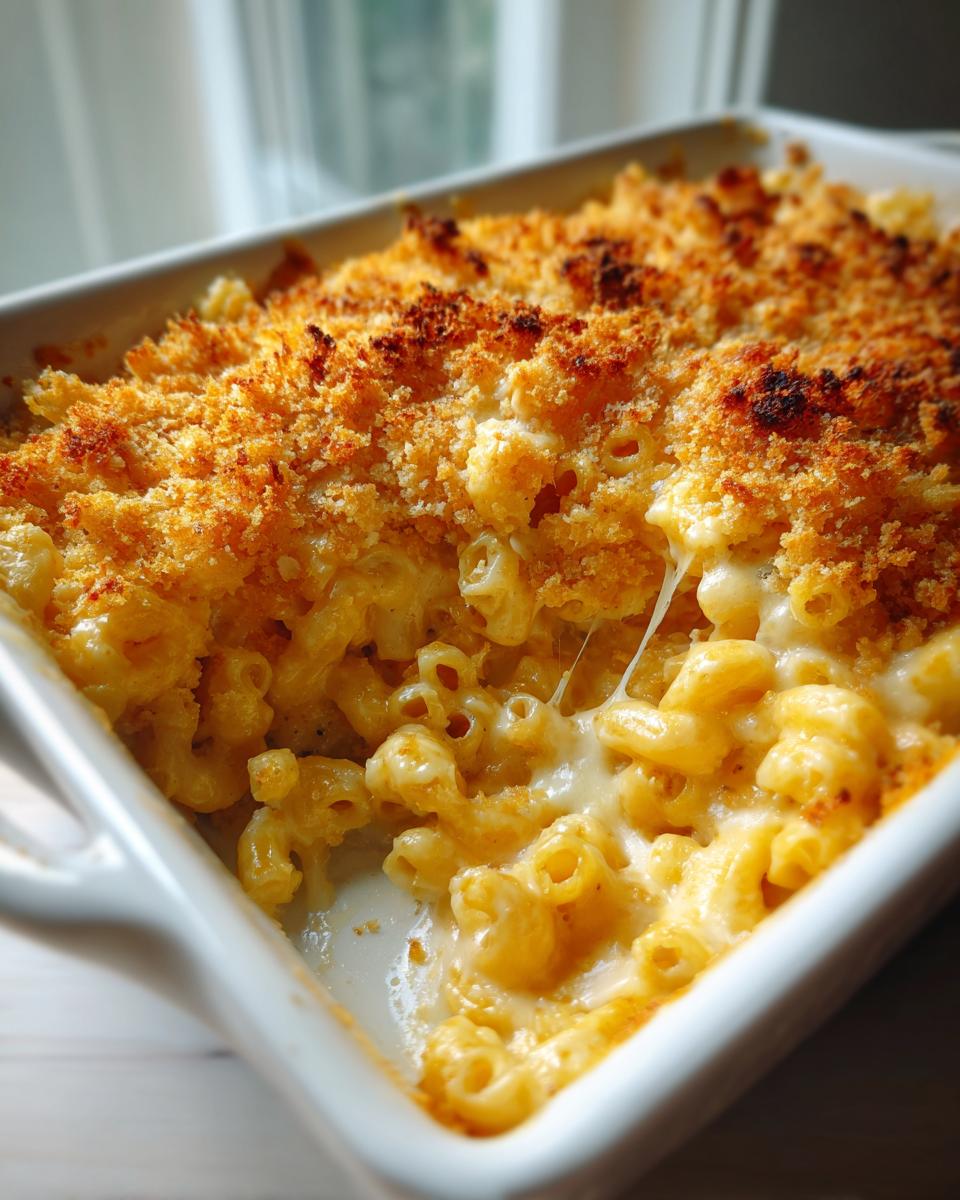
You can’t have great baked mac and cheese without that glorious top layer that shatters when you cut into it. That’s why we use Panko breadcrumbs—they are lighter and crispier than regular breadcrumbs, soaking up just enough butter to toast up golden in the oven. This crispy shell is essential for that textural excitement against the gooey interior. If you need more ideas on crafting better toppings for your bakes, check out my notes over on my cosmic brownies post; the principle of contrasting textures is the same!
Gathering Ingredients for Ultimate Baked Mac and Cheese
Okay, let’s get real about ingredients, because this is where the magic—or the disaster—happens! For a truly *rich baked mac and cheese*, you can’t cheap out or take shortcuts on the core components. This list is precise because every measurement has a job to do, especially when we are aiming for that *foolproof creamy cheese sauce*. And trust me on this one: buy the blocks of cheese. Pre-shredded cheese has anti-caking nonsense in it that gums up the works. You’ll thank me later when you see how silky smooth this comes out! If you’re looking for other star sides, you should peek at my recipe for candied sweet potatoes too; quality ingredients are everything!
Pasta and Dairy Components
We start simple here. You’ll need:
- 1 pound elbow macaroni (we are cooking this until just al dente—a little bite left is key!)
- 4 cups whole milk, warmed (Yes, warm! It helps the roux stay smooth.)
Cheese Blend for Rich Baked Mac and Cheese
This blend gives us flavor depth but also incredible melt quality. Remember, these absolutely must be shredded by hand:
- 4 cups sharp cheddar cheese, shredded (Sharpness is non-negotiable here!)
- 1 cup Gruyère cheese, shredded
- 1 cup Fontina cheese, shredded
For the Buttery Panko Crunch Topping
And finally, the star contrast to all that creaminess. Don’t forget to divide your butter! We use 4 tablespoons for the sauce, and these last bits are critical for the top:
- 2 tablespoons unsalted butter, remaining amount
- 1 cup Panko breadcrumbs (for that beautiful, coarse crunch)
Step-by-Step Instructions for Creamy Baked Mac and Cheese
Alright, let’s get this masterpiece built! This process is straightforward, but listening to these steps is how we guarantee that rich, satisfying result without any headache. You want that signature *creamy baked mac and cheese*, and we are going to get it by following Daisy’s method exactly. Pay close attention to the temperatures and timing, especially when we start making that perfect cheese sauce. If you want even more cozy, slow-cooked goodness after this, check out my easy crockpot potato soup recipe, because this approach to comfort applies everywhere!
Pasta Preparation and Oven Setup
First things first, get that oven preheated to 375°F (190°C). While it’s warming up, grease up your 9×13 inch baking dish—a little butter is all you need. Now for the pasta: boil your elbow macaroni according to the package instructions, but and this is huge—pull it out when it’s just barely al dente. Seriously, if it’s soft when you drain it, it’ll be mushy when it comes out of the oven. Drain it well and set that aside while we magic up the sauce, my friend.
Building the Foolproof Creamy Cheese Sauce Base
Time for the roux, which is the secret backbone of any good sauce! In a big saucepan, melt 4 tablespoons of butter over medium heat. Whisk in your flour and cook that mixture for just one minute—we call this ‘cooking out the raw flour taste.’ Next, slowly, slowly, whisk in the warm milk. I mean it, stream it in gradually! Keep stirring constantly until the sauce thickens up enough to coat the back of a spoon. This continuous stirring is what keeps those lumps out of your *homemade mac and cheese recipe*.
Melting the Cheese for Ultimate Creaminess
Flavor time! Once the sauce is thick, yank the pan right off the heat. Add your spices—salt, pepper, nutmeg, and cayenne—and stir them in. Now, the most important trick for that *no grain cheese sauce mac and cheese*: add your shredded cheddar, Gruyère, and Fontina cheeses in small handfuls. Wait until the first handful is completely smooth and melted into the sauce before you even think about adding the next one. Patience here is non-negotiable for creaminess!
Assembling and Baking the Baked Mac and Cheese
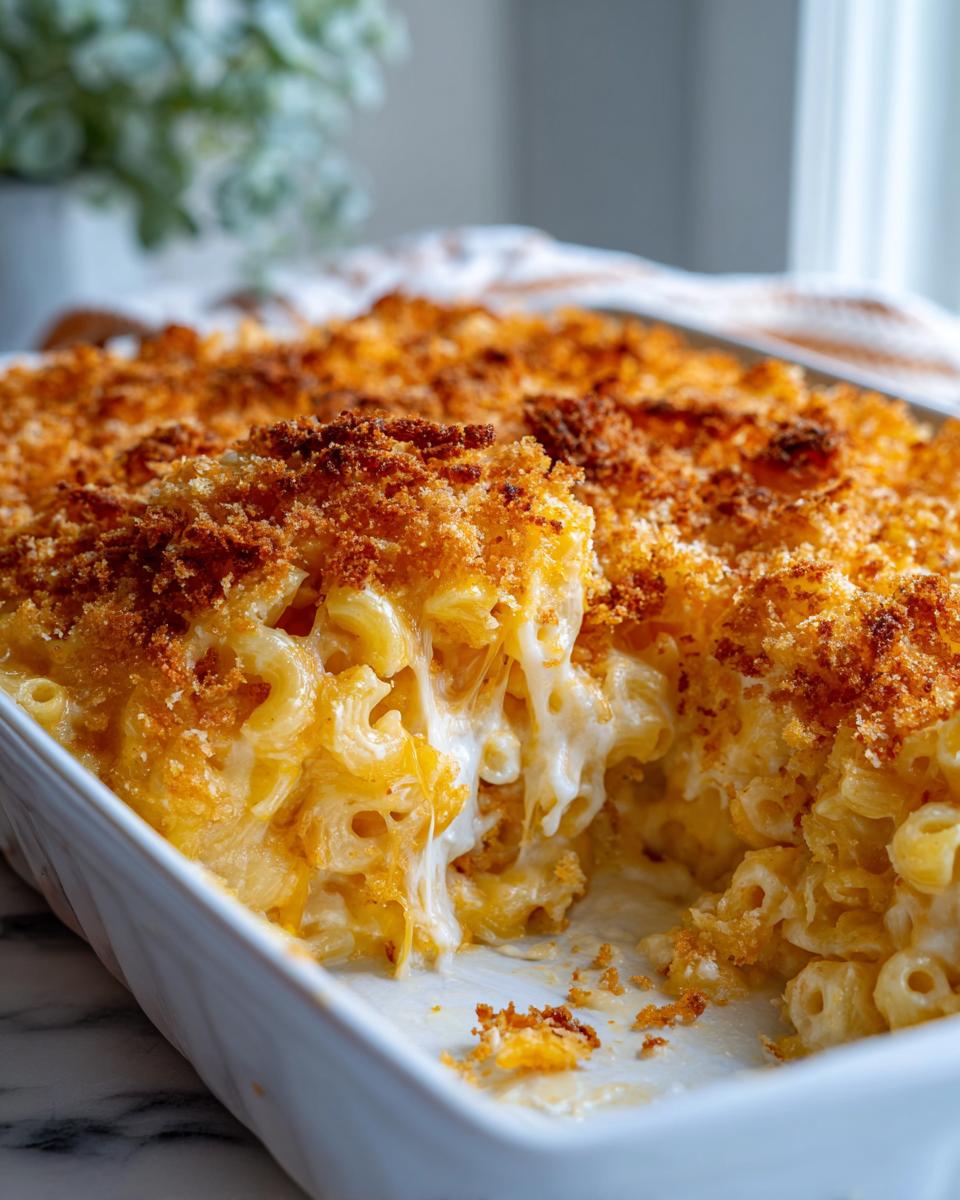
Once the cheese is fully incorporated and you have that stunningly smooth liquid gold, gently fold in your drained pasta until every piece is coated. Pour that whole luscious mixture into your prepared baking dish. In a tiny skillet, toast your remaining 2 tablespoons of butter with the Panko breadcrumbs until they are golden brown and smelling amazing. Sprinkle that crunchy goodness right over the top. Bake it for about 20 to 25 minutes. Wait just 10 minutes after it comes out—that resting time lets it set up perfectly before serving that *creamy baked mac and cheese*.

Tips for the Most Indulgent Cheesy Baked Pasta
We’ve made the ultimate comfort dish, but want to make sure it’s truly special—something worthy of your holiday table or just a Tuesday when you really need a hug in a bowl! My Grandma Daisy always said that shortcuts only lead to disappointing dinners, and that really rings true when we are aiming for that *rich baked mac and cheese*. The small details in ingredient choice and temperature management are what keep this from becoming just another *baked cheese casserole* and turn it into the *gourmet baked mac and cheese* experience people rave about.
Ingredient Quality for Superior Flavor
Listen, I know buying pre-shredded cheese is easy, but those additives are designed to keep the shreds from clumping in the bag, and that’s the exact opposite of what we want in a sauce! When you shred the cheese yourself from the block, you get pure dairy goodness that melts beautifully and creates those irresistible, stretchy strands. If you’re looking to bump up the flavor in other creamy bakes you make, think about the quality of your dairy there too, like in my recipe for creamy garlic parmesan chicken and rice. And hey, if you need something bright and fresh to cut through the richness, even a quick, easy blended drink like my easy creamy watermelon smoothie works wonders!
Temperature Control for Smooth Sauce
You absolutely must warm your milk before you introduce it to the roux. If you pour cold milk into that hot flour-and-butter base, you shock the mixture, and lumps form instantly, giving you problems down the road. But the real game-changer is taking the pan completely off the heat before the cheese goes in. If the temperature is too high when the cheese hits the pot, it causes the fat to separate from the proteins, which is how you end up with that sandy or oily texture instead of perfectly smooth sauce.
Variations on Classic Baked Mac and Cheese
Now that you’ve mastered the ultimate base, it’s time to play dress-up! This recipe is the perfect canvas for your own creativity. It’s sturdy enough to handle mix-ins and bold enough that a few tweaks won’t wreck that beautiful flavor. Think of this as your core *family favorite macaroni and cheese*, ready for an upgrade. If you’re looking for other ways to bring big flavor to the table, you absolutely have to see what I do to amp up flavor in my Texas Trash Dip recipe while keeping it just as easy!
Adding Protein to Your Baked Pasta Casserole
If you want to turn this side dish into a hearty main course—a true one-dish meal—you just need to bulk it up a bit! Crispy bacon crumbled throughout adds a salty depth that pairs beautifully with the cheddar. Shredded rotisserie chicken blends right into the sauce, making it an incredible *baked pasta casserole*. Sometimes I even stir in some browned smoked sausage toward the end for a smoky kick. Just make sure whatever protein you add is fully cooked before folding it into the cheese sauce.
Spice and Herb Twists for Southern Style Baked Mac and Cheese
If you’re leaning toward that richer, slightly earthier profile, a few pantry spices can really push this toward a lovely *Southern style baked mac and cheese*. Adding half a teaspoon of smoked paprika along with your black pepper gives the sauce a lovely, subtle smokiness without overpowering the cheese. Also, don’t sleep on dry mustard powder; just a quarter teaspoon brightens up the flavor of the cheddar wonderfully. For more inspiration on deeply flavored, comforting dishes, you should definitely see how the pros handle their classics over at Headlines Diner!
Serving Suggestions for Your Cheesy Baked Pasta
This baked mac and cheese is so rich and decadent—it’s the peak of *comfort food mac and cheese*! Because it’s so heavy and satisfying on its own, what you serve next to it needs to be bright and refreshing to cut through all that goodness. We need acid and crisp texture, not more creaminess!
I always keep things simple. A sharp, vinegary green salad is my first choice. Seriously, a simple mixed green salad tossed with a bright lemon vinaigrette does wonders to cleanse the palate between bites. If you need a go-to recipe for that, I love my easy crunchy cabbage salad. Roasted or lightly steamed green beans tossed with just a pinch of salt and pepper also work beautifully when you need a little green on the plate.
Storage and Reheating for Leftover Baked Mac and Cheese
Oh, the blissful leftovers! This *baked cheese casserole* tastes almost as good the next day, but you have to treat it right to avoid drying it out in the fridge. When storing, cover that beautiful dish tightly with plastic wrap or scoop servings into an airtight container. Keep it refrigerated. Do *not* try to eat the dried-out top layer straight from the fridge—we have to revive the sauce!
When you reheat, the key to keeping it smooth is moisture replenishment. I find if I warm my servings gently on the stovetop, I add just a splash (maybe a tablespoon) of whole milk or even a little cream per portion before heating slowly. This rehydrates that lovely sauce! If you are using the oven to heat the whole thing up, cover that baking dish tightly with foil first. If that sounds like too much fuss, try my turkey pot pie recipe instead—it reheats almost effortlessly!
Frequently Asked Questions About Baked Mac and Cheese
When you are aiming for that *ultimate comfort food* experience, questions pop up, right? Honestly, my favorite part of sharing these recipes is hearing what you worry about most! Don’t stress; we can troubleshoot any issue to ensure you get that perfect, stretchable, *creamy baked mac and cheese*. If you’re looking for another easy dish to master, my recipe for best sugar cookies shows that even simple recipes benefit from careful attention to small details!
How do I prevent my baked mac and cheese from drying out?
The biggest factor here is twofold! First, don’t overbake it! We pull it out when it is bubbly, not when it looks like a brick. Second, and this is vital, let it rest for about 10 minutes after it comes out of the oven. That resting period allows the sauce to settle back around the pasta instead of remaining too runny when you scoop it. That perfect sauce-to-pasta ratio we built together is designed to hold moisture beautifully!
Can I use different cheeses in this homemade mac and cheese recipe?
Absolutely, but use good judgment! You need cheeses that melt well. Cheddar is the flavor backbone, so try not to swap that out entirely. If you don’t have Gruyère or Fontina, look for other excellent melters like Monterey Jack or Gouda. Avoid fresh mozzarella or anything too high in moisture, as that can break down the sauce and turn your beautiful *homemade mac and cheese recipe* watery instead of creamy.
Can this be made ahead of time?
Yes! This makes it such a fantastic dish for potlucks or holidays. You can assemble the entire thing—sauce mixed with pasta, topping sprinkled on—cover it tightly with plastic wrap, and keep it in the fridge for up to 24 hours. When you’re ready to bake, just add about 10 to 15 minutes to the recommended baking time since it’s starting cold. It still comes out like the best *cheesy baked pasta*!
Sharing Your Ultimate Comfort Food Recipes Experience
Now that you’ve pulled this amazing, golden, bubbling pan of *ultimate comfort food recipes* out of your oven, I really want to know what you think! Did you manage that perfect balance between the creamy interior and the crunchy topping? I hope this recipe brings the same kind of satisfying warmth to your table that Grandma Daisy’s cooking always brought to mine. I spend so much time trying to perfect these nostalgic dishes so that you don’t have to guess!
Did you end up sneaking in any secret additions? Maybe you went for smoked sausage, or perhaps you doubled down on the sharp cheddar. Tell me what you added in the comments below! I love seeing how you all adapt these classics. If you want to try another one of my favorite no-fuss treats next, you can check out the recipe for my easy buckeye fudge—it’s guaranteed to satisfy that sweet tooth!
If you made this *best baked macaroni and cheese* and it’s now in your regular rotation, please consider giving it a star rating right at the top of the recipe card. And if you found an amazing resource elsewhere that really helped you, I’m always on the lookout for new inspiration! I stumbled across this other take on the best baked mac and cheese from Mom on Timeout recently and it’s worth a look too!
PrintThe Ultimate Creamy Baked Mac and Cheese with a Buttery Panko Crunch

This recipe delivers the ultimate comfort food: baked macaroni and cheese that stays silky smooth inside while featuring a perfectly golden, crunchy topping. It is a foolproof method for rich baked cheddar mac and cheese.
- Prep Time: 15 min
- Cook Time: 30 min
- Total Time: 45 min
- Yield: 8 servings 1x
- Category: Side Dish
- Method: Baking
- Cuisine: American
- Diet: Vegetarian
Ingredients
- 1 pound elbow macaroni
- 6 tablespoons unsalted butter, divided
- 1/2 cup all-purpose flour
- 4 cups whole milk, warmed
- 1 teaspoon salt
- 1/2 teaspoon black pepper
- 1/4 teaspoon nutmeg
- 1/4 teaspoon cayenne pepper
- 4 cups sharp cheddar cheese, shredded
- 1 cup Gruyère cheese, shredded
- 1 cup Fontina cheese, shredded
- 1 cup Panko breadcrumbs
Instructions
- Preheat your oven to 375°F (190°C). Lightly grease a 9×13 inch baking dish.
- Cook the macaroni according to package directions until al dente. Drain well and set aside. Do not overcook the pasta.
- Prepare the cheese sauce: In a large saucepan, melt 4 tablespoons of butter over medium heat. Whisk in the flour and cook for 1 minute, stirring constantly, to create a roux.
- Gradually whisk in the warm milk until the mixture is smooth. Continue cooking, stirring often, until the sauce thickens enough to coat the back of a spoon, about 5 to 7 minutes. Do not let it boil rapidly.
- Remove the saucepan from the heat. Stir in the salt, pepper, nutmeg, and cayenne pepper.
- Add the shredded cheddar, Gruyère, and Fontina cheeses to the sauce in handfuls, stirring until each addition is completely melted and smooth before adding the next. This technique prevents graininess.
- Gently fold the cooked macaroni into the cheese sauce until fully coated. Pour the mixture into the prepared baking dish.
- Prepare the topping: In a small skillet, melt the remaining 2 tablespoons of butter over medium heat. Add the Panko breadcrumbs and toast, stirring frequently, until golden brown, about 3 to 4 minutes.
- Sprinkle the toasted Panko evenly over the macaroni and cheese.
- Bake for 20 to 25 minutes, or until the sauce is bubbly and the topping is golden brown and crisp. Let the dish rest for 10 minutes before serving.
Notes
- For the creamiest texture, shred your own cheese from blocks; pre-shredded cheese contains anti-caking agents that can make the sauce slightly grainy.
- Using warm milk helps the roux incorporate smoothly, preventing lumps in your foolproof cheese sauce.
- Allow the baked mac and cheese to rest after removing it from the oven. This lets the sauce set slightly, ensuring every scoop is rich and not runny.
Nutrition
- Serving Size: 1 serving
- Calories: 580
- Sugar: 6
- Sodium: 650
- Fat: 35
- Saturated Fat: 20
- Unsaturated Fat: 15
- Trans Fat: 1
- Carbohydrates: 45
- Fiber: 2
- Protein: 25
- Cholesterol: 95