
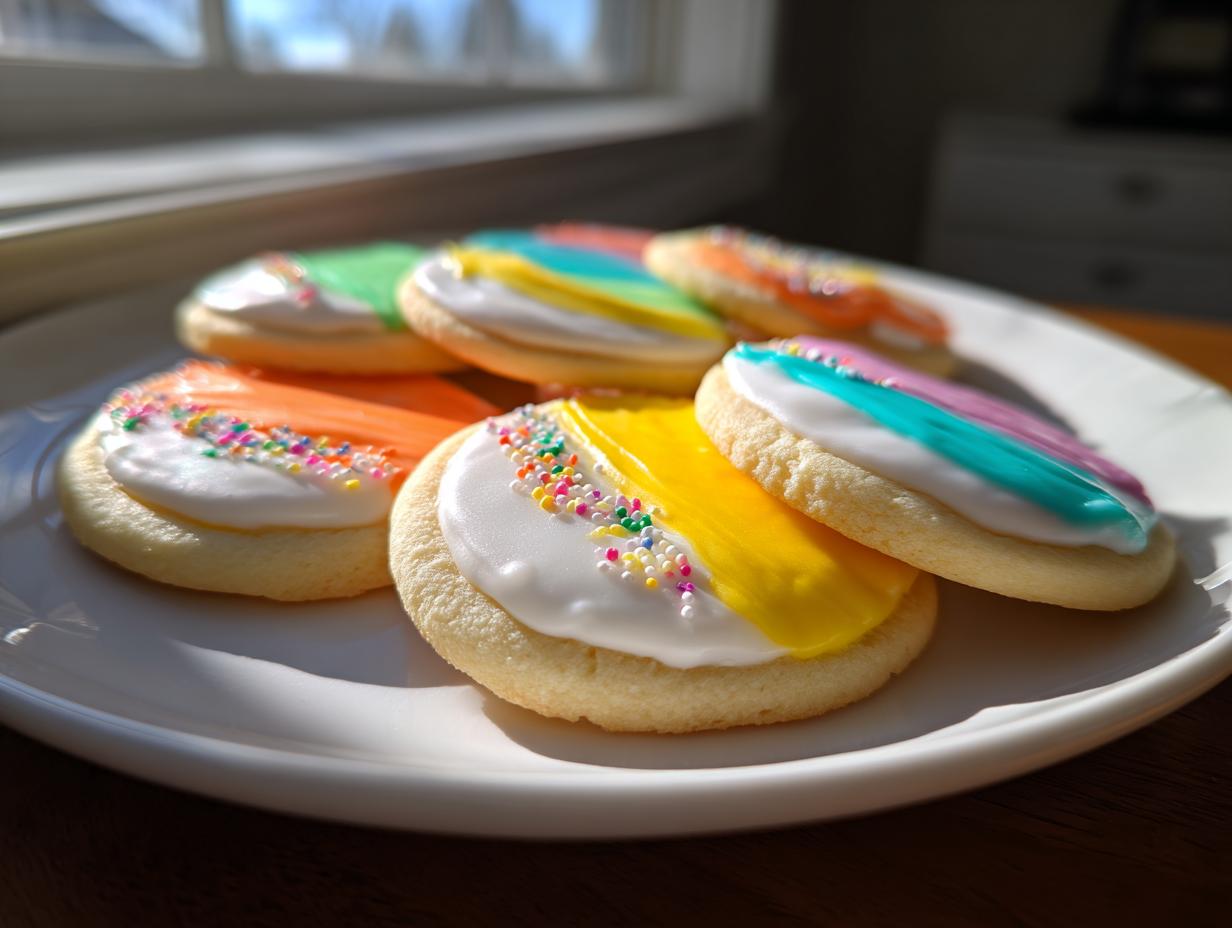
Are you ever heartbroken when you pull out your beautifully cut sugar cookies, only to see your carefully applied icing turn into a soupy, sad puddle overnight? Oh, I know that feeling! It’s so frustrating when you spend time rolling and cutting only to have the decoration act totally flaky. That is precisely why I developed this go-to sugar cookie icing recipe. It’s the secret I brought back from my demanding city life to honor my grandmother Daisy’s kitchen—straightforward, reliable, and it guarantees you get that smooth, glossy sugar cookie icing that dries hard every single time. Trust me, once you try this simple, foolproof method, you won’t look back. If you love decorating, you should also check out my tips for making Boston Cream Pie Cookies!
- Why This Simple Sugar Cookie Icing Recipe Works So Well
- Gathering Ingredients for Your Sugar Cookie Icing
- How to Make Sugar Cookie Icing That Dries Hard Step-by-Step
- Tips for Success When Using This Hard Setting Cookie Icing
- Recipe Details: Prep Time, Yield, and Flavor Profile
- Storage and Reheating Instructions for Leftover Sugar Cookie Icing
- Frequently Asked Questions About This Easy Sugar Cookie Icing Recipe
- Estimated Nutritional Data for This Vanilla Cookie Icing Recipe
- Share Your Perfect Sugar Cookie Icing Creations
Why This Simple Sugar Cookie Icing Recipe Works So Well
When my grandmother Daisy baked, everything just *worked*. It wasn’t magic; it was knowing a few key science tricks. This recipe moves beyond a simple powdered sugar and water mix that stays sticky forever. We use a few simple additions that mean your hard work stays perfect, even after stacking them in tins for gifting. This is truly the best advice I can give for achieving that desirable icing that dries hard for cookies.
The end result is a wonderfully smooth glossy cookie icing that looks professional but takes me less than ten minutes. You won’t need to deal with the fuss of separating eggs or waiting hours for complicated meringue powder to set up. If you want to dive into the more intricate world of those beautiful piped designs, check out my guide on Royal Icing for Sugar Cookies later!
The Secret to Hard Setting Cookie Icing: Corn Syrup
That shiny finish you want? That’s where the light corn syrup comes in! It’s not just filler; it battles the dreaded grainy texture that happens when you mix sugar and liquid. Corn syrup keeps the sugar crystals from forming as they dry. If you skip it, your icing might eventually harden, but it’ll often feel tacky or slightly rough. We want that sweet, hard shell, and the corn syrup locks it down beautifully.
Achieving a Beginner Cookie Decorating Icing Consistency
Look, I’m not an artist when it comes to piping fine details, and you don’t have to be one either! This recipe is designed to be incredibly accessible, which is why I call it a beginner cookie decorating icing. It starts off perfect for ‘flooding’—that technique where you fill in a whole cookie outline smoothly. If you need to pipe borders, you just let this batch sit for a few extra minutes, or add a tablespoon more sugar, and it firms right up for outlining those edges. It’s super versatile!
Gathering Ingredients for Your Sugar Cookie Icing
When my grandmother Daisy taught me to cook, the first thing she drilled into me was respect for the recipe card. If she wrote ‘sifted,’ you better believe I was sifting! This sugar cookie icing is simple—only a few things needed—but precision is what makes it set up perfectly hard. We’re aiming for a batch that covers about two dozen of your standard-sized cookies, which is a great amount for gifts or a small holiday platter.
Here’s what you need to have ready before you even think about mixing anything in your bowl:
- 4 cups confectioners’ sugar, and yes, you absolutely must sift it first!
- 1/4 cup milk or water (I’ll explain the difference in a minute).
- 1 tablespoon light corn syrup—don’t try to skip this miracle worker!
- 1 teaspoon vanilla extract for that classic warm flavor.
- Food coloring, if you’re planning anything brighter than white.
If you’re looking for the easiest cookie base to put this icing on, you have to try my simple butter cookie recipe! It’s amazing how far a few good ingredients can take you.
Ingredient Notes and Substitutions for Perfect Sugar Cookie Icing
Let’s talk about the crucial players so your icing doesn’t end up a sticky mess. The light corn syrup I mentioned before? It’s the key ingredient for getting that bakery-style, hard shell without tasting crunchy. It stops the sugar from crystallizing on the surface, leaving you with that beautiful, smooth look. Don’t substitute it unless you plan on only serving cookies the same day!
Now, for the liquid: milk versus water. If you use milk, your recipe for sugar cookie frosting will be slightly creamier and taste a little richer. However, if you want the absolute hardest, most durable finish—the kind that can handle being stacked in a box and shipped across town—use water instead of milk. Water evaporates cleaner, promoting that rock-hard set we’re after. Just remember, the ratio of liquid to sugar is what determines if you’re coloring right away or waiting a bit!
How to Make Sugar Cookie Icing That Dries Hard Step-by-Step
This is where the magic happens, but you have to move calmly! I learned early on that rushing the mixing process leads to lumps, and lumps lead to tears, especially when you’re trying to cover a whole tray of beautifully shaped cookies. We are going to mix this gently until it’s perfectly uniform. Grab your bowl and whisk, and let’s get this fantastic sugar cookie icing base ready.
- First things first: Combine all your dry ingredients—that big pile of sifted confectioners’ sugar—with your liquid ingredients: the milk (or water), that essential corn syrup, and the vanilla.
- Now, whisk slowly! Seriously, start slow. If you whip it too fast right away, you’ll end up wearing your sugar and ending up with a powdery mess everywhere. Whisk until everything is blended and you don’t see any dry pockets of sugar left.
- The next step is critical for getting that icing that dries hard for cookies. You need to check the consistency. Dip a spoon in and pull it out. The icing should coat the back of the spoon nicely and slowly drip off. If it runs off instantly like water, it’s too thin. If it just sits there like cement, it’s too thick.
- Too thick? Just add a teaspoon of milk or water at a time and whisk gently again until it flows slowly. If it’s too runny, add a tablespoon of powdered sugar. Keep tweaking until it feels right—like honey moving off a spoon.
Adjusting Your Sugar Cookie Icing for Coloring and Consistency
Once you have that beautiful base consistency, it’s time to divide everything up if you have multiple colors planned. I find using high-quality gel colors works best because they don’t add extra moisture the way liquid food coloring does. Mix your color right into the small bowls until it’s perfectly even. If you need a wonderfully classic, smooth topping that isn’t this glaze, you should check out my vanilla buttercream frosting recipe!
Now, here’s a little trick my grandmother never taught me because she only used white icing! If you are just flooding large areas, you want the icing thin enough to smooth itself out. But if you plan on doing any writing or borders, you need a stiffer texture—a true piping consistency icing. For that, just let the divided portion sit on the counter for about 15 minutes, or mix in just one extra tablespoon of sifted sugar. It will thicken up perfectly so you can create those sharp edges on your cookies!
Tips for Success When Using This Hard Setting Cookie Icing
After all that work mixing up the perfect batch of sugar cookie icing, the last thing we want is for it to stay sticky, especially if we need to stack these beauties for holiday tins! My connection back to Grandma Daisy’s kitchen is all about making sure the effort pays off, so here are the few things I always watch out for to guarantee a rock-hard finish.
First, you have to pay attention to the weather—I know, cheesecake in the city taught me this the hard way! Humidity is the total enemy of dry icing. If it’s raining outside or super humid in your kitchen, it’s going to take ages to set. Seriously, if you have a dehumidifier, turn it on high in the room where the cookies are drying. Airflow is key, too; don’t pile the cookies on top of each other until they are completely, totally firm to the touch.

These cookies also need space to dry. Try to ice them on a surface that allows air circulation underneath, maybe even use an actual cooling rack placed over a baking sheet. This encourages evaporation from all sides, which helps achieve that flawless, hard setting cookie icing texture faster. If you are using intense colors, be aware that they sometimes slow the drying process just a tiny bit, so give those extra time!
Remember, this icing needs to be used right after you finish testing that perfect flow. If you let it sit unused for too long, it starts skinning over in the bowl. If that happens, don’t panic and throw the whole batch out! Just scrape off any skin on top, and stir in one teaspoon of water or milk. That usually gets the flow right back to where it needs to be for smooth decorating. If you need more amazing tips for getting moisture right in your baking, my recipe for moist chocolate chip banana bread has a few great tips on managing texture!
Recipe Details: Prep Time, Yield, and Flavor Profile
Sometimes, after all the mixing and fussing over consistency, you just want the facts, right? When I was trying to squeeze in baking between city meetings, knowing exactly how much time I needed was everything. This recipe is exactly what you need when you’re looking for speed and flavor without sacrificing structure. This is my go-to vanilla cookie icing recipe because it’s quick, reliable, and tastes wonderfully sweet and classic—that perfect backdrop for any cookie design.
Here’s a quick snapshot of what you’re getting with this simple approach. This isn’t a fancy, complicated royal icing; it’s baking streamlined, just like Grandma Daisy would have wanted for a busy day!
- Prep Time: A speedy 10 minutes! That’s right, total mixing time is just ten minutes.
- Cook Time: Zero minutes! Aren’t no-bake recipes the best?
- Total Time: Ten minutes, though you do need to factor in the drying time afterward, obviously.
- Yield: This batch is perfect for approximately two dozen standard-sized sugar cookies. If you’re tackling a massive holiday bake, you’ll definitely want to double this batch!
- Category: Dessert, obviously!
- Method: No-Bake decoration magic.
- Cuisine: Straightforward American kitchen classic.
- Diet: Vegetarian friendly, of course.
The flavor profile is exactly what you’d hope for—pure, sweet vanilla goodness that complements the spiced or buttery cookie beneath it without fighting for attention. For a deeper dive into flavor layering, you might enjoy my thoughts on achieving the very best-tasting sugar cookie icing on the blog!
Storage and Reheating Instructions for Leftover Sugar Cookie Icing
This is one of the best parts about using this particular sugar cookie icing: you don’t have to use every drop right away! If you’re planning ahead for holiday cookie decorating sessions spread over a few days, storing it correctly is super important. If you just leave it sitting on the counter uncovered, you’ll come back to a crusty, sad block of sugar that takes ages to fix. Don’t let that happen to my beautiful glaze!
When you’re done icing for the day, you need to create a barrier that stops air from touching the surface. I take a square of plastic wrap—the cheap stuff works fine—and I gently press it directly onto the top of the icing in the bowl. I mean *press* it on, so it’s actually touching the surface. Then, I cover the whole bowl with a tight lid or another piece of plastic wrap over the top. This prevents that hard skin from forming.

This type of icing, made with corn syrup, doesn’t actually need to be reheated in the traditional sense. If you pull it out the next day and it seems too stiff to pour or spread, don’t stress! You’re not reheating it; you’re just reviving the flexibility. I take my plastic wrap off, and then I whisk in just one teaspoon of milk or water at a time. Whisk it gently until it flows nicely again. It loosens right up!
If you have extra colored icing that you want to save for longer than a day or two, don’t forget to transfer it into airtight containers after pressing the plastic wrap directly onto the surface. Since this glaze doesn’t use eggs, it keeps really well in the fridge for about a week. Right before you plan to use it again, let it come to room temperature and give it a good stir with a spoon—it should become that perfect, pourable consistency again, ready for your next round of decorating! This simple storage trick keeps the whole batch of my sugar cookie icing fresh and ready to go, saving you time later. If you’re looking for other dips that store well, check out my recipe for an Easy Fruit Dip!
Frequently Asked Questions About This Easy Sugar Cookie Icing Recipe
I know when you’re baking for a big holiday event, there are always a few nagging little questions that pop up right before you put the cookies on the rack to dry. I’ve gathered up the ones I used to ask Grandma Daisy all the time, hoping to save you a last-minute panic! This is the simplest way to get a professional-looking finish, but let’s nail down those details first.
Can I use water instead of milk in this sugar cookie icing?
Yes, you absolutely can! In fact, if you are decorating cookies that you plan to stack, store for a few days, or ship off to someone, I highly recommend using water instead of milk. Why? Because milk has fat content in it, which keeps the icing ever-so-slightly pliable, even when set. Water is pure, so when it evaporates, you get a marginally harder and more durable shell. It’s a small difference, but for maximum set-strength for your sugar cookie icing, go with water!
How long does this icing take to dry completely?
This depends almost entirely on your kitchen humidity, which drives me crazy every winter when I try to decorate! If the weather is dry and you have good airflow, you might find the surface hard to the touch in just three or four hours. But for safely stacking and boxing them up, I always give them an overnight rest. I’d go check out this helpful external resource from Snackin’ Style about getting the best sugar cookie icing recipe for hardening if you need some major reassurance on the drying process!
Is this recipe better than a traditional royal icing recipe for sugar cookies?
That depends on what you’re trying to achieve! If you want something fast, something you can mix up while the cookies cool, and something that tastes sweet and simple, *this* glaze is much better and easier. It’s the perfect hard setting cookie icing for beginners who want a solid, smooth coat. However, if you need to pipe super-fine lines, write tiny letters, or create highly dimensional 3D elements, you’ll need a true royal icing made with meringue powder or egg whites for that incredible structural integrity. This recipe is for coverage and shine; traditional royal icing recipe for sugar cookies is for artistry!
If you’re practicing your baking skills and want to try another great no-fuss recipe, I have a wonderful guide on cake mix cookie bars up next!
Estimated Nutritional Data for This Vanilla Cookie Icing Recipe
Sometimes, after all the back and forth about texture and drying time, you just need the numbers, right? When I was first learning, I always worried that getting that perfect hard-setting icing meant loading up on pure sugar, and while this icing is certainly sweet (it is icing, after all!), I wanted to give you a general rundown of the estimated nutrition based on the ingredients list.
Please remember, just like when Grandma Daisy used a handful of this or a splash of that, exact values can change based on the brand of confectioners’ sugar or the specific extracts you use. These figures are generalized estimates based on a standard serving size of about 1/4 cup of the finished glaze.
- Serving Size: 1/4 cup
- Calories: About 180—though remember, most of this is coming from the sugar base!
- Sugar: Around 45 grams. Yes, that’s high, but look at the upside!
- Sodium: Very low, usually around 5mg.
- Fat: 0 grams. Isn’t that fantastic? Zero real fat in this glaze!
- Saturated Fat: 0.
- Unsaturated Fat: 0.
- Trans Fat: 0.
- Carbohydrates: 45 grams total.
- Fiber: 0 grams.
- Protein: 0 grams.
- Cholesterol: 0.
See? It’s pure energy from sugar, exactly what you need when you’re running around decorating for the holidays! If you’re looking for a dessert that has a bit more substance, you can always check out my recipe for easy rocky road fudge. That one certainly has more interesting components than just sugar!
Share Your Perfect Sugar Cookie Icing Creations
Well, there you have it! My favorite, can’t-fail method for getting that incredibly smooth, shiny, and reliable sugar cookie icing that dries hard as a rock. This is the kind of simple joy I brought back from my city life to honor my Grandma Daisy—the idea that you don’t need fussy ingredients to make something beautiful that people will remember.
I sincerely hope you love using this recipe as much as I do. When you finally get those cookies stacked up, looking perfect under the holiday lights or ready to mail out, I want to see them! Please take a picture of your finished cookies, especially if you went bold with colors, and tag me or reach out through my contact page. Hearing about your successes is the reason I keep dusting off Grandma Daisy’s old mixing bowls.
If this easy icing recipe saved you from a puddle of runny glaze, please consider leaving a quick star rating for the recipe above! It helps other bakers find this reliable solution. Happy decorating, and keep that spirit of simple, joyful baking alive in your own kitchen!
PrintSimple Sugar Cookie Icing That Dries Hard

Make smooth, glossy sugar cookie icing that hardens perfectly for decorating and gifting. This easy recipe uses basic ingredients and is ideal for beginners.
- Prep Time: 10 min
- Cook Time: 0 min
- Total Time: 10 min
- Yield: Enough for 2 dozen cookies 1x
- Category: Dessert
- Method: No-Bake
- Cuisine: American
- Diet: Vegetarian
Ingredients
- 4 cups confectioners’ sugar, sifted
- 1/4 cup milk or water
- 1 tablespoon light corn syrup
- 1 teaspoon vanilla extract
- Food coloring (optional)
Instructions
- In a medium bowl, combine the sifted confectioners’ sugar, milk or water, light corn syrup, and vanilla extract.
- Whisk the ingredients together slowly until the mixture is smooth and there are no lumps. This is your base icing consistency.
- Test the consistency: The icing should be thick enough to coat the back of a spoon but still flow slowly. If it is too thick, add milk or water, 1 teaspoon at a time. If it is too thin, add more confectioners’ sugar, 1 tablespoon at a time.
- If you plan to decorate with multiple colors, divide the icing into separate bowls. Add gel food coloring to each portion and mix until the color is uniform.
- Use the icing immediately for flooding cookies. For outlining, you may need to let the icing sit for a few minutes to thicken slightly, or add a touch more sugar.
- Allow the iced cookies to sit at room temperature until the icing is completely dry and hard to the touch. This usually takes several hours, depending on humidity.
Notes
- For a truly hard, glossy finish, the corn syrup is important. Do not skip it.
- If you need to thin the icing for flooding, use water instead of milk for a slightly harder set.
- To store leftover icing, press plastic wrap directly onto the surface of the icing to prevent a crust from forming, then seal the container.
- This recipe makes enough icing to cover approximately two dozen standard-sized cookies.
Nutrition
- Serving Size: 1/4 cup
- Calories: 180
- Sugar: 45
- Sodium: 5
- Fat: 0
- Saturated Fat: 0
- Unsaturated Fat: 0
- Trans Fat: 0
- Carbohydrates: 45
- Fiber: 0
- Protein: 0
- Cholesterol: 0