
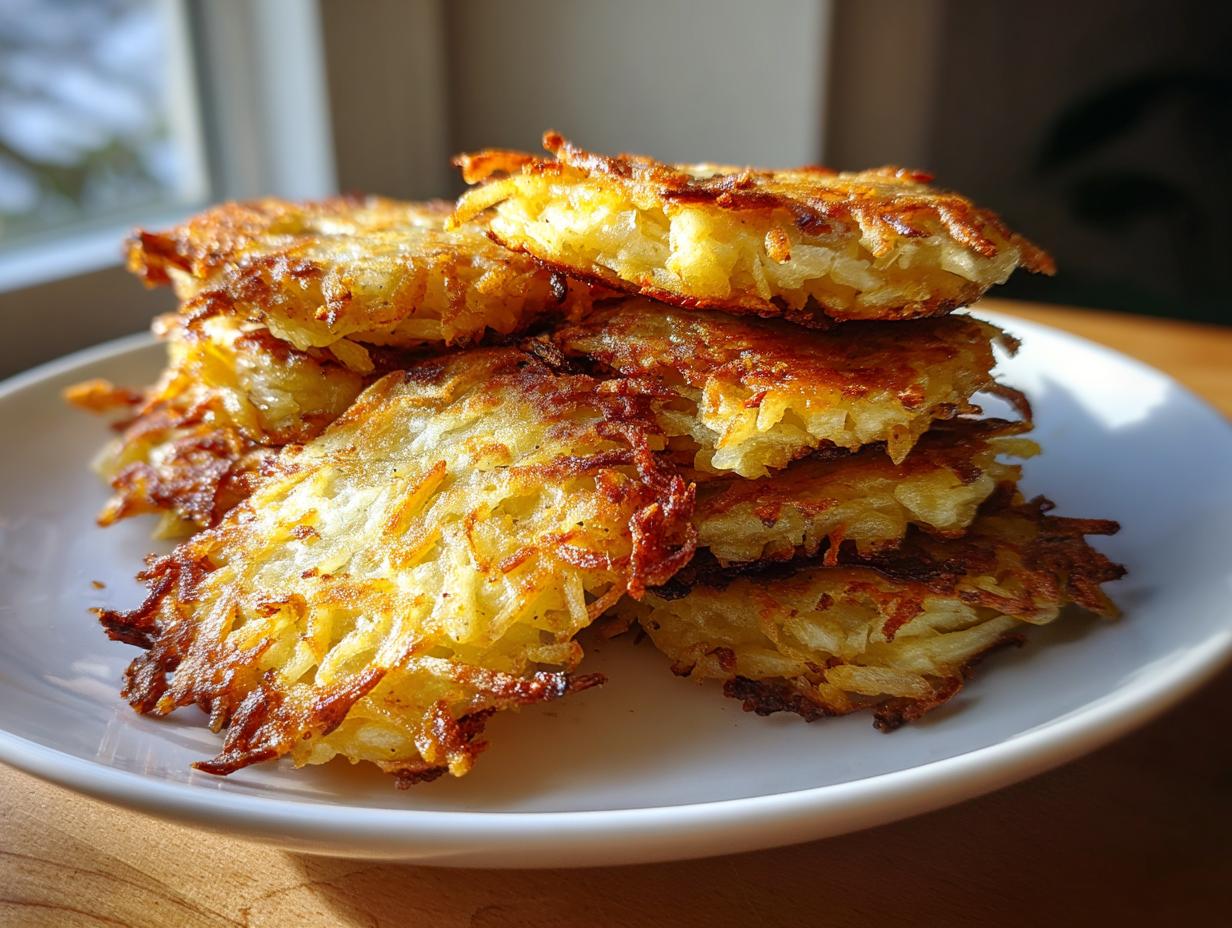
There is absolutely nothing like that first bite of a perfectly fried *potato latke*. I mean that shimmering, golden-brown crunch that shatters just right, revealing that soft, savory interior. You know, the kind that doesn’t fall apart the second you try to lift it out of the oil? Wow, that is the goal! When I was learning how to make these delicious Jewish holiday food staples from my grandmother, Daisy, she taught me that the secret isn’t in the spice blend—it’s eliminating the water. Trust me; if you follow my moisture-removal method, you will nail this crispy potato latkes recipe every single time. We’re keeping it honest and simple, just like Daisy taught me.
- Why You Will Make the Best Potato Latkes
- Essential Ingredients for Perfect Potato Latkes
- Equipment Needed for Crispy Potato Latkes Recipe
- How to Make Latkes From Scratch: Step-by-Step Potato Latkes Instructions
- Tips for Success When Frying Potato Latkes
- Serving Suggestions for Traditional Hanukkah Potato Pancakes
- Storage and Reheating Fried Potato Fritters
- Frequently Asked Questions About Potato Latkes
- Sharing Your Homemade Potato Latkes
Why You Will Make the Best Potato Latkes
I’m telling you, Amelia here, once you master this simple system, you’ll stop buying those sad, soggy freezer pucks and start making potato latkes that are famous in your own home. Daisy always made sure her food was honest and gave you confidence in the kitchen. These are the reasons you’ll love using this recipe for your Hanukkah potato pancakes:
- Unbelievable Crispiness: We are waging war against mush! The technique outlined guarantees a shatteringly crisp, golden exterior on every single fritter.
- Holds Together Beautifully: Thanks to exactly the right amount of binder and rock-solid moisture removal, these fritters stay intact straight from the pan to the plate.
- Authentic, Simple Flavor: We don’t hide the potato flavor behind too many spices. It’s potato, onion, a kick of salt, and pure deliciousness.
- Perfect for Batch Frying: The batter holds its shape, meaning you won’t lose half your mixture in the hot oil, which saves money and, frankly, sanity.
- Freezer Friendly (If You Must): While they are best piping hot, these reheat well—or they freeze beautifully after frying if you prepare ahead for a big Hanukkah gathering.
- Just Like Grandma Made Them: This is the method that brought my family together for decades. It’s tried, tested, and deeply comforting.
Essential Ingredients for Perfect Potato Latkes
When you’re making something this traditional, you can’t skimp on the core building blocks. Daisy always said that great cooking starts with respecting what you have. We only need a handful of things here, which makes this recipe so accessible, but using the right *kind* of things matters way more than having a pantry full of fancy extras. You’ll need about three large, starchy russet potatoes—I specify russets because they have the starch we need to create those gorgeous, lacy, crispy edges. We also need one medium yellow onion; don’t skip the onion! It keeps the insides savory and moist, trust me.
For the structure, we are using two large eggs, which we’ll lightly beat first. Then, you need just about a quarter-cup of your chosen binder. You can use all-purpose flour, which is easy, or you can use matzo meal if you’re keeping this strictly kosher for Passover, though it’s traditionally associated with Hanukkah potato latkes recipes. Finally, don’t forget the seasoning basics: one teaspoon of salt and just a touch of black pepper. Oh, and you will need plenty of vegetable or canola oil for frying—don’t be shy here; remember, this is what creates the magic crunch!
Potato and Binder Notes for Potato Latkes
So, let’s talk potatoes. I swear by the starchy Russets. Waxy potatoes, like red bliss, hold too much water and end up steaming your latkes instead of frying them crispy. You want that high-starch content! After grating, you must use fresh ones, just like Daisy insisted on fresh vegetables always. When it comes to that binder—the flour or matzo meal—the job is simply to absorb any remaining moisture that you couldn’t squeeze out and help hold the grated potatoes together. It shouldn’t taste like flour, so that quarter-cup measurement is important. Too much and you get a dense, gummy fritter; too little, and they fall right apart in the oil. See? Every ingredient has a job!
Equipment Needed for Crispy Potato Latkes Recipe
You don’t need a fancy stand mixer or a specialized deep-fryer for these traditional potato latkes. Honestly, Daisy made hers using just a box grater and elbow grease! But whatever makes your life easier, here’s the short list of what you’ll want on hand before you start grating those potatoes. Having everything ready keeps you calm when the oil gets hot because we need to move fast once the batter is mixed.
First thing is a way to grate! You can use the big holes on a sturdy box grater, or if you’re using a food processor, make sure you attach that shredding wheel. Next, for the most important step—draining—you absolutely need a clean, lint-free kitchen towel, or maybe some cheesecloth if you have it tucked away. Don’t use paper towels here; they just fall apart when you start wringing out that water. You also need a large, heavy-bottomed skillet. Cast iron is amazing if you have it, but any sturdy pan that holds heat evenly works great for these fried potato fritters.
Finally, once they are perfectly golden brown, you need a place for them to drain that excess oil without steaming themselves soggy. That means grab a wire rack and set it right over a couple of paper towels on your counter. Never drain them directly onto a plate! That trapped steam turns crispy edges into chewy edges, and we aren’t having that here. Once you have your grater, your squeezing cloth, your skillet, and your rack, you are totally set to make the best **crispy potato latkes recipe**!
How to Make Latkes From Scratch: Step-by-Step Potato Latkes Instructions
Okay, now for the fun part—the actual cooking! You have your ingredients ready, your skillet is waiting, and we are going to tackle this assembly line style. First things first, peel those potatoes and that onion. They need to be naked and ready for grating! Once they are peeled, grab your grater or food processor and shred everything using the large holes. I like the texture you get from the box grater, which reminds me a lot of watching Daisy work, but if you’re in a rush, the processor works fine for these how to make latkes from scratch fritters.
This next move is where everyone gets lazy, but trust me, since reclaiming Daisy’s heritage in my tiny city kitchen, which felt miles away from her farmhouse, I learned that this step is everything. You must squeeze out every drop of liquid you can physically manage. Take that fluffy, wet shredded pile and wrap it tightly in that clean kitchen towel we talked about. Now, twist, squeeze, and really put your weight into it over the sink! You’ll be shocked by how much water comes out. If you leave that liquid in there, your latkes will steam and they will be soggy—end of story. We want crispiness, remember?
Once you’ve squeezed until your arms ache a little (that’s how you know it’s working!), transfer the dried-out potato and onion mountain into a bowl. Now, gently toss in your beaten eggs, the flour or matzo meal, and the salt and pepper. Mix it all up just until everything is coated and combined. Do not overmix this batter! It should look slightly shaggy. If you whip it around too much, you’re developing the starch and encouraging a gummy texture instead of that beautiful lacy crispness.
Next, get your oil HOT. Pour about an inch deep into your heavy skillet and bring it up to that perfect temperature of right around 350 degrees Fahrenheit. Use tongs to gently drop heaping spoonfuls of the mixture into the sizzling oil, making sure they are flattened slightly into pancakes about half an inch thick. Don’t crowd the pan! Give them space to breathe and fry. Let them sit undisturbed for about three to five minutes until the bottoms are spectacularly golden brown, then flip and repeat on the other side.
The Critical Step: Removing Moisture from Potato Latkes
Seriously, guys, if you take only one thing away from this tutorial on making potato latkes, let it be this: **squeezing the liquid out of the shredded potatoes is non-negotiable**. That liquid is steam waiting to happen, and steam is the mortal enemy of a crispy potato latkes recipe. You need that high-starch potato mixture to be as dry as possible before it even touches the binder. When the batter hits the oil, we want immediate, glorious sizzling, not that sad, slow bubbling you get when the oil is used to boiling water instead of potato fluff. Ensure your frying oil is hovering right around 350°F for that perfect golden color and crunchy exterior!
Tips for Success When Frying Potato Latkes
Making potato latkes is an art that requires you to be present. It’s not a time to wander off and start washing dishes! You need to stay right there by the stove, watching the oil, making sure every batch turns out just as golden and lacy as the last. Daisy never walked away while the potatoes were frying. She said the oil could tell if you weren’t paying attention, and frankly, I believe her. These little tips are what separate the good latkes from the truly magnificent, crispy potato latkes.
First up: temperature management. It’s the constant balancing act. If the oil is too cool—say, below 325°F—the latkes soak up way too much fat, and you end up with greasy, limp snacks. If it gets too hot, over 375°F, the outside burns black before the insides even warm up. Keep your thermometer handy, or use my grandmother’s trick: drop a single, tiny shred of potato in there. If it starts bubbling violently right away, it’s too hot; if it just sits there sadly, it’s too cold. You want a vigorous, happy sizzle immediately.
Second, and this is so important for maximum crispness, never, ever overcrowd your skillet when you drop in the spoonfuls of batter. If you pack too many latkes in there, they drop the oil temperature instantly. When the temperature drops, the oil floods the sides of the fritters, and they turn soft instead of crisp. Work in small batches, frying maybe four or five at a time, depending on your pan size. Use a slotted spoon or tongs to gently flip them halfway through cooking so they brown evenly.
Finally, let’s talk about the landing zone. As soon as those beauties are perfectly brown on both sides—maybe five minutes total per batch—scoop them out quickly. You absolutely must set them on a wire rack over paper towels. I know it seems like an extra step, but this setup is crucial because it allows the hot air to circulate all around the fritters. This keeps the bottoms crisp while the excess oil drips away. If you drain them directly onto a flat plate covered in paper towels, the steam gets trapped underneath, and I promise, your beautiful Hanukkah potato pancakes will deflate right where you don’t want them to! Once you master this heat and crowd control, you’ll feel like a true culinary master.
Serving Suggestions for Traditional Hanukkah Potato Pancakes
What’s a perfect, crispy potato latke without its companions? Honestly, nothing! Making these fried potato fritters is all about the gathering, right? It’s that moment when everyone piles their plate high and you all dig in together. My grandmother, Daisy, was very traditional, but she always loved seeing people enjoy the moment. So, we have to talk about the classics first, because they are classics for a reason!
The absolute must-haves are sour cream and applesauce. In our family gatherings, we’d often have two small bowls right next to the serving platter—one for the cooling, tangy sour cream, and one for the sweet, slightly tart applesauce. The key here is balance. You need that cool dairy hit from the sour cream to cut through the richness of the fried potato, and you need the fruity sweetness of the applesauce to complement the savory onion we put in the batter. Don’t scoop big slabs of either; offer small dollops so people can mix and match what they like best on their own fritter.
Now, even Daisy—who was set in her ways—admitted that sometimes tradition could use a little nudge. If you want to try something a bit more modern but still totally delicious, I highly recommend a quick topping of smoked salmon, sometimes called lox. It turns your perfect potato latke into this incredible, slightly fancy brunch treat, or a stunning appetizer for any party. The salty, rich flavor of the salmon paired with a tiny bit of fresh dill is absolutely sensational against that crunchy base. It makes the whole experience feel a little more indulgent. So go ahead, serve up the classics, but maybe leave room for one of these elevated versions when you’re sharing them with friends!
Storage and Reheating Fried Potato Fritters
Okay, so let’s be honest: if you’ve properly made this *crispy potato latkes recipe*, there might not be any leftovers. But just in case you managed to save a few (or just made way too many—which is a good move, by the way!), you need to know how to store and reheat them so they aren’t sad, floppy disks the next day. Daisy and I learned the hard way that the microwave is banned from the reheating process entirely. It just turns anything beautifully fried into rubbery mush, and we worked too hard for that!
For storage, the absolute best way is to let the latkes cool completely to room temperature *after* they’ve drained on the wire rack, ensuring all surface oil is gone. Once they are completely cooled, you want to stack them with parchment paper or wax paper in between each layer. This prevents them from sticking together into one giant, delicious, but unmanageable potato brick. Pop that stack into an airtight container or a heavy-duty zip-top bag. They will keep well in the refrigerator for about three to four days. If you made a gigantic batch for Hanukkah, you can freeze them too—just use the parchment paper stacking method in a freezer bag, and they should last a month or so.
Now, for the crucial part: bringing them back to life! Remember, we are chasing that initial glorious crunch. Forget the microwave, I mean it! The only way to get them back to their former crispy potato glory is using dry heat. The oven is my go-to method because I can do a big batch at once. Preheat your oven to 375 degrees Fahrenheit. Lay the cooled latkes out in a single layer on a clean baking sheet—and if you have one, use a wire rack set over the baking sheet again! This circulates heat underneath them, which is key. Bake them for about 10 to 15 minutes, flipping halfway through, until they feel firm and sound crispy when tapped.
My modern cheat sheet for reheating? The air fryer! If you have one, this little gadget is perfect for small batches. Just pop a single layer of your leftover fried potato fritters inside, set it to 350°F, and cook for about 5 to 7 minutes. Check them around the 5-minute mark; they crisp up incredibly fast in there. Either way, serving them hot with a fresh dollop of cold sour cream makes them taste almost as good as when they first came out of the golden oil. Now, go enjoy your perfectly preserved culinary victory!
Frequently Asked Questions About Potato Latkes
I know you probably have a few last-minute thoughts circling your brain before you dive into that hot oil! That’s totally normal. When I first started learning how to make latkes from scratch, I had a million questions about texture and sticking. Here are a few things readers often ask me about this **crispy potato latkes recipe** to make sure you feel totally confident before you start grating.
Can I bake these Potato Latkes instead of frying?
Oh, I hear this one a lot, especially from folks trying to cut down on the oil. You *can* bake them, but I have to be honest with you: they won’t be the same thing. Baking them, even on a sheet pan, results in a drier, milder crispness, and they often lack that beautiful, deep golden color you get from frying. Baking is healthier, sure, but the magic of a true potato latke lies in that sizzling fat bath that creates that signature crunch. If you must bake, make sure you drizzle them really well with oil first and flip them halfway through for the best possible results.
What is the best potato to use for Potato Latkes?
Listen, the potato makes or breaks this recipe! You absolutely must go for high-starch potatoes. In my kitchen, that means Russets, hands down. They are reliable, they mash up nicely in texture when grated, and most importantly, they release that excess liquid more easily than waxy potatoes like Yukon Golds when you squeeze them. Remember, the starch is what helps bind and crisp everything up! Using a starchy potato is the easiest way to guarantee those crackly, lacy edges we are aiming for in our **crispy potato latkes recipe**.
Sharing Your Homemade Potato Latkes
Well, friend, that is the whole journey from whole potato to perfect, golden-brown, crispy potato latke! I really hope that making these brings a little bit of that warmth and joy back into your kitchen, just like it does for me every time I recreate Daisy’s recipe here in my city apartment. It’s more than just a recipe; it’s tradition we’re upholding, one perfectly fried fritter after another. I’m so happy I could share these secrets with you!
Now that you’ve got your oil hot and your skillet ready, I really want to know how they turned out for you. Did you stick strictly to the sour cream and applesauce, or did you try that smoked salmon twist I mentioned? Please, head down to the comments section below and let me know! Tell me how crispy they got, and maybe share a little bit about your own family’s favorite way to eat them. If you loved this recipe, please consider giving it a quick star rating so other home cooks can find this little slice of tradition, too. You can check out our official terms of use if you’re curious about sharing photos, but really, I just want to see your beautiful latkes!
Thank you so much for cooking with me today. Keep making memories around the table—that’s truly what Daisy would want!
PrintCrispy Potato Latkes Recipe

Make traditional, crispy potato latkes that are golden brown on the outside and tender inside. This recipe uses simple ingredients for authentic flavor.
- Prep Time: 20 min
- Cook Time: 25 min
- Total Time: 45 min
- Yield: About 12 latkes 1x
- Category: Side Dish
- Method: Frying
- Cuisine: Jewish
- Diet: Vegetarian
Ingredients
- 3 large russet potatoes (about 2 pounds)
- 1 medium yellow onion
- 2 large eggs, lightly beaten
- 1/4 cup all-purpose flour or matzo meal
- 1 teaspoon salt
- 1/4 teaspoon black pepper
- Vegetable oil or canola oil, for frying
Instructions
- Peel the potatoes and the onion.
- Grate the potatoes and onion using the large holes of a box grater or a food processor fitted with a shredding disk.
- Place the shredded mixture into a clean kitchen towel or several layers of cheesecloth. Twist and squeeze firmly over the sink to remove as much liquid as possible. This step is key for crispy latkes.
- Transfer the dried potato and onion mixture to a medium bowl.
- Add the beaten eggs, flour (or matzo meal), salt, and pepper to the bowl. Mix gently until just combined. Do not overmix.
- Pour about 1 inch of oil into a large, heavy-bottomed skillet and heat over medium-high heat until the oil reaches about 350 degrees Fahrenheit.
- Drop heaping tablespoons of the potato mixture into the hot oil, flattening them slightly with the back of the spoon to form pancakes about 1/2 inch thick. Work in batches to avoid overcrowding the pan.
- Fry for 3 to 5 minutes per side, until deeply golden brown and crisp. Adjust the heat as needed to prevent burning.
- Remove the latkes from the oil and place them on a wire rack set over paper towels to drain excess oil.
- Serve immediately with applesauce and sour cream.
Notes
- For the best texture, use starchy russet potatoes.
- If you do not have a thermometer, test the oil by dropping a tiny shred of potato in; it should sizzle immediately and turn golden quickly.
- If the batter seems too wet after squeezing, add one more tablespoon of flour or matzo meal.
Nutrition
- Serving Size: 1 latke
- Calories: 120
- Sugar: 1
- Sodium: 150
- Fat: 7
- Saturated Fat: 1
- Unsaturated Fat: 6
- Trans Fat: 0
- Carbohydrates: 13
- Fiber: 1
- Protein: 3
- Cholesterol: 40