
Oh, tell me honestly, how many times have you pulled a tray of baked wings out of the oven only to be met with sad, flabby skin? It’s heartbreaking! I remember those days well. My life in the city was too fast; my connection to the simple, honest cooking my grandmother Daisy taught me felt miles away. Baking was just another chore. But coming back to her methods—that slow, intentional way of cooking—helped me reconnect. If you’re looking for delicious weeknight dinner ideas that actually feel satisfying, this recipe is it!
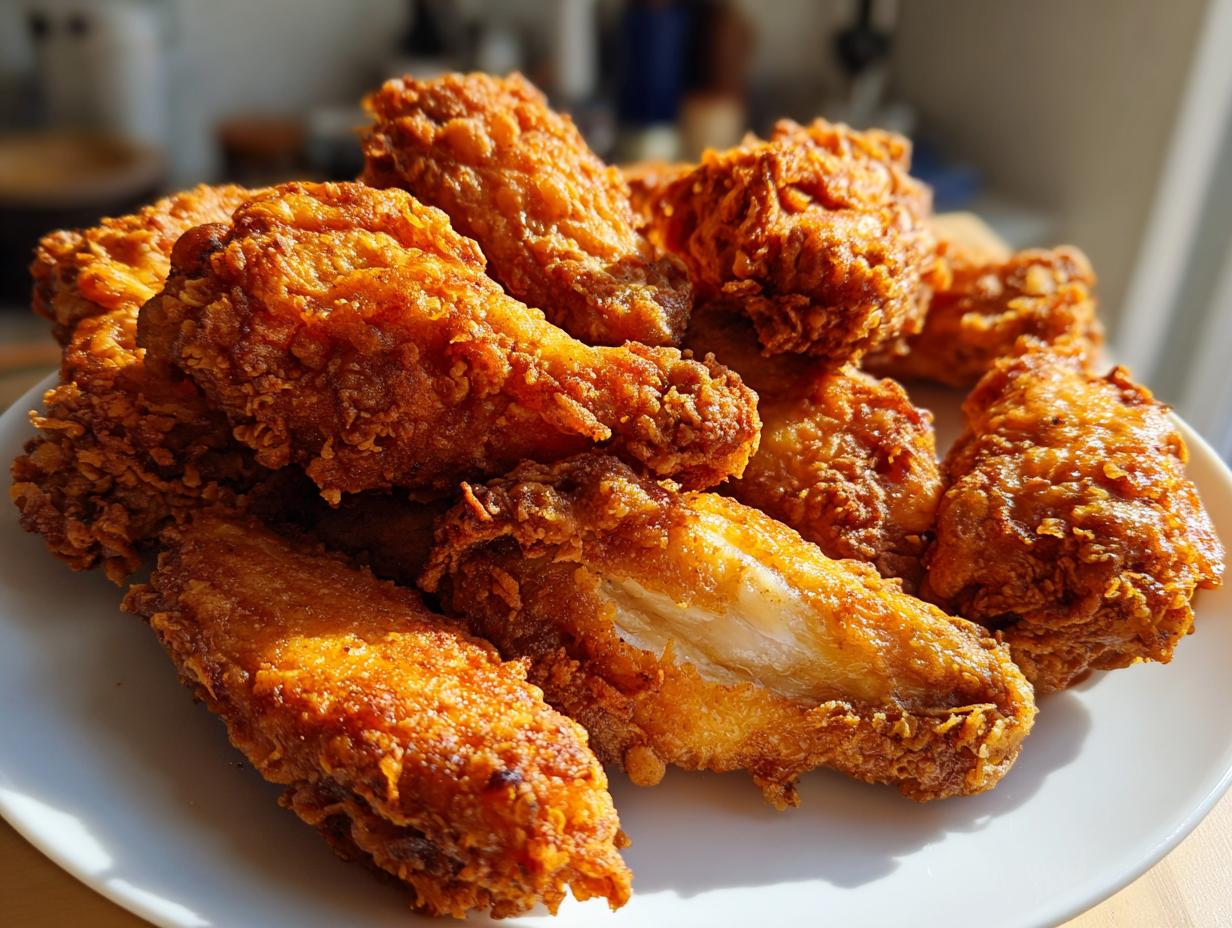
That’s why I’ve absolutely nailed down the technique for crispy baked chicken wings that actually deliver shatteringly crisp texture without ever needing a deep fryer. It all comes down to a little bit of science and knowing how to treat the skin, specifically using the baking powder trick. This guaranteed crunch proves you don’t need added oil to make amazing food. This is the simple, soulful cooking I learned from Daisy, brought into your modern kitchen. Trust me, once you try this method, you’ll never go back!
- Why You Will Make These Crispy Baked Chicken Wings Every Time
- The Secret Ingredients for Crispy Baked Chicken Wings
- How To Make Crispy Wings In Oven: Step-by-Step
- Best Tips For Crispy Baked Chicken Wings Success
- Simple Dry Rub Baked Wings and Sauce Variations
- Storage and Reheating Instructions for Crispy Baked Chicken Wings
- Crunchy Baked Wings Secret: Frequently Asked Questions
- Nutritional Estimates for Your Crispy Baked Chicken Wings
- Share Your Experience Making These Baked Wings
Why You Will Make These Crispy Baked Chicken Wings Every Time
I’m telling you, this recipe became my go-to for so many reasons! When I first perfected this method, I felt like I unlocked a secret level in home cooking. It just works, every single time, which is why I think you’ll stick with these crispy baked chicken wings long after the first batch is gone! Here’s what makes them winners:
- Guaranteed Crunch Without the Fryer Mess
- Juicy Meat Inside the Extra Crispy Skin Baked Chicken
- Perfect for Game Day Chicken Wings or Weeknight Meals
Guaranteed Crunch Without the Fryer Mess
Forget wrestling with hot oil! That’s the biggest win right there. We use good old baking powder, which sounds strange, but it does magic by raising the skin’s pH level. This dries the skin out just enough so that when it hits high heat, it crisps up beautifully. No more sad, floppy poultry on your platter!
Juicy Meat Inside the Extra Crispy Skin Baked Chicken
Texture contrast is everything, right? This method is brilliant because you seal in the moisture with that initial high blast of heat, meaning you get wonderfully tender, juicy meat underneath that layer of extra crispy skin baked chicken. It’s the best of both worlds, truly satisfying!
Perfect for Game Day Chicken Wings or Weeknight Meals
Whether you need something impressive for watching the game or you just want a quick, healthier option for Tuesday night dinner, these fit the bill perfectly. They transform from being great easy game day chicken wings into solid, fast weeknight baked chicken wings in about an hour, start to finish.
The Secret Ingredients for Crispy Baked Chicken Wings
You know, when I look back at my grandmother Daisy’s cooking, the power was always in choosing the right, simple things and treating them with respect. It’s the same here! We aren’t hiding the flavor behind heavy oil or ten different sauces. We are letting the ingredients do the heavy lifting to create the best crispy baked chicken wings you’ve ever messed with. I keep these spices stocked at all times because, honestly, the key difference between soggy wings and crunchy delights lies right here in these few items.
My pantry staple for this recipe is aluminum-free baking powder. I’ve noticed you get a cleaner crisp with it, less background taste. Also, don’t skip separating your wings! Flats and drumettes cook a little differently, but keeping them separated on the rack is the biggest non-ingredient tip I can give you.
Essential Components for Crispy Baked Chicken Wings
Here’s exactly what you need on your counter before we start mixing this dry rub magic. Measure everything out—accuracy matters when you’re depending on chemistry for crunch!
- 2 lbs chicken wings (flats and drumettes separated)
- 1 tablespoon baking powder (aluminum-free recommended)
- 1 teaspoon kosher salt
- 1/2 teaspoon black pepper
- 1/2 teaspoon garlic powder
- 1/4 teaspoon paprika
- Optional: 2 tablespoons of your favorite sauce (Buffalo, BBQ, or Garlic Parmesan) for tossing after baking. If you’re whipping up a homemade batch, check out my favorite BBQ sauce recipe for tossing!
That’s it! See? Nothing crazy, just pure efficiency to get that perfect crust. When you’re ready to move on, we’ll talk about *how* we use these simple things to change the texture of the skin completely.
How To Make Crispy Wings In Oven: Step-by-Step
Okay, sweetie, this is where the magic happens. If you follow these steps exactly, you’re going to ditch any recipe for crispy baked chicken wings you used before. This two-stage cooking process combined with the dry coating is what separates a good wing from a *restaurant-quality* one. It takes about 45 minutes total, so while it isn’t instantaneous, it’s hands-off once they get in the oven!
Prep Work: Drying and Coating for Maximum Crunch
First things first, your oven needs to be blazing hot when these wings hit the rack. Preheat everything to 425 degrees F. You’ll want a large, rimmed baking sheet lined with foil—trust me, cleanup is a dream that way—and place a sturdy wire cooling rack right on top. Now, pay attention here: take your wings and blot them until they feel almost rough from dryness with paper towels. Seriously, the drier they are, the better they crisp up. So much of the sogginess comes from moisture we leave behind!
In a big bowl, mix up our dry seasonings: the baking powder, salt, pepper, garlic powder, and paprika. Toss those totally dry wings in that mixture until every single piece is coated evenly. It’s that baking powder that’s going to do the heavy lifting later!
The High Heat Chicken Wing Baking Time Technique
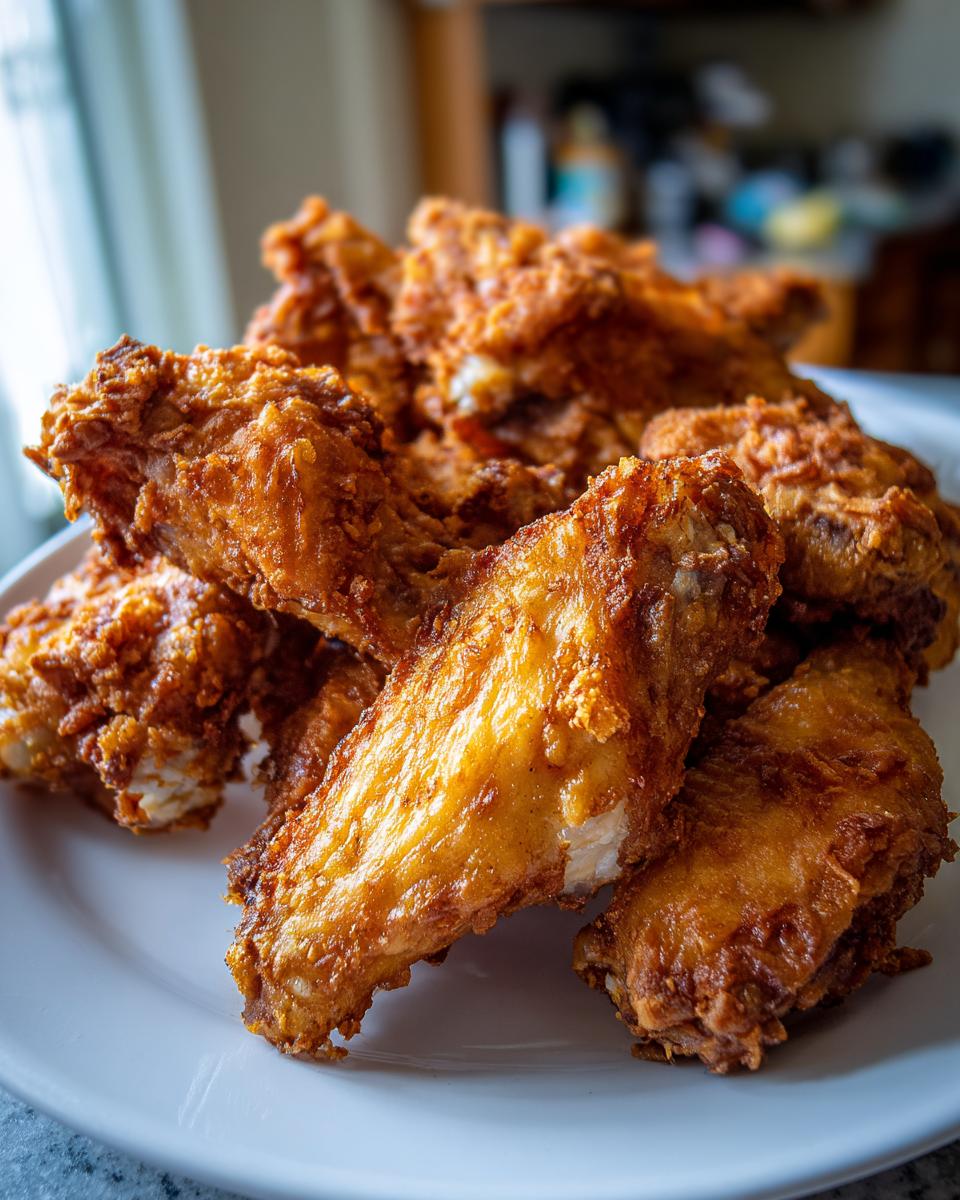
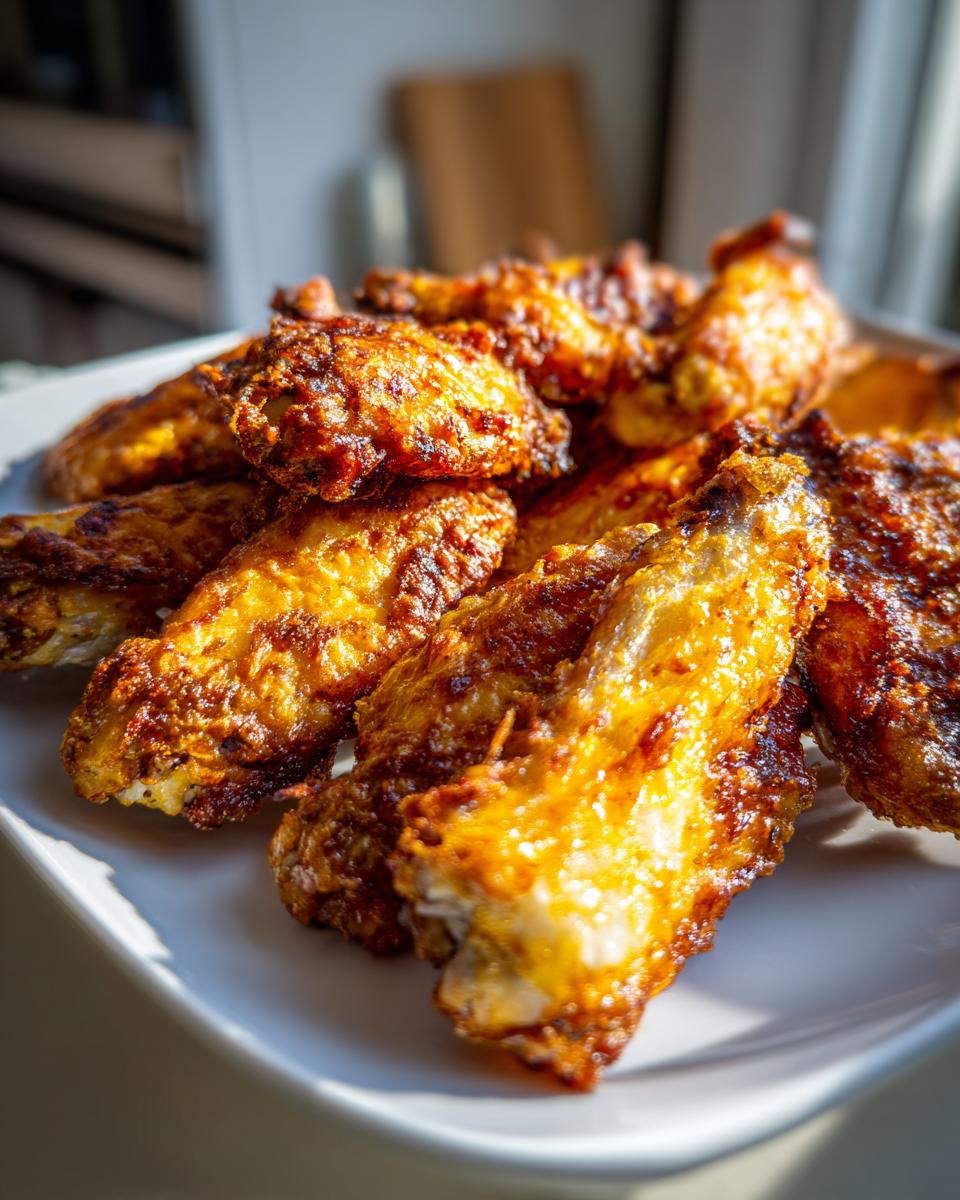
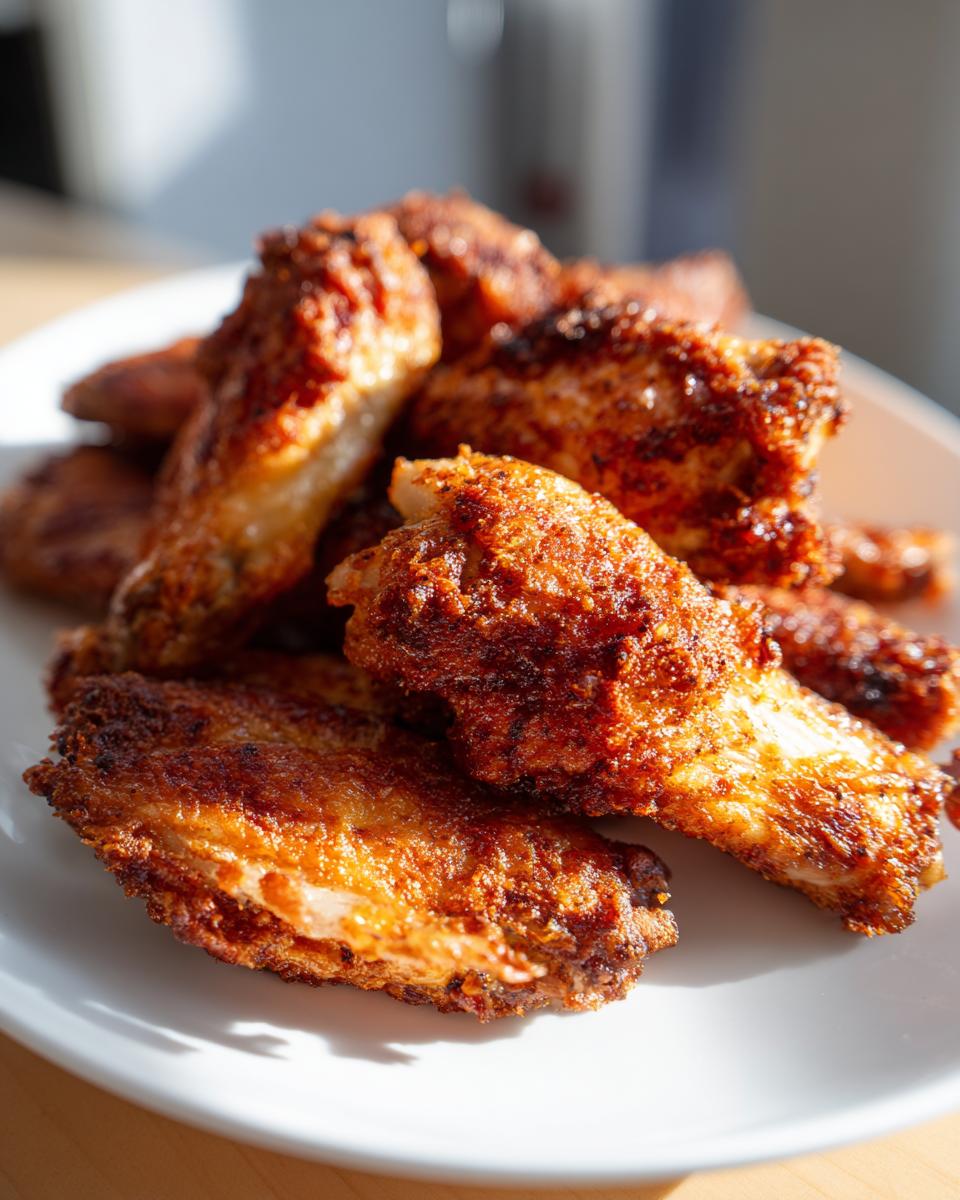
Once coated, lay those beauties out on the rack. This is another critical spot: space them out! Do not let them touch. If they touch, they steam. We want air circulating around every surface. We start them hot—20 minutes right at 425°F. This initial high temperature gets the process going. After that twenty minutes, pull the tray out, flip every wing carefully, and then knock the temperature down to a solid 400°F. Bake them for another 20 to 25 minutes. You’re watching for deep golden brown color; that’s your sign that the skin is getting that fantastic crunch. You can check out professional advice here on how long to bake chicken wings if you want more background on temperature science!
Finishing Your Juicy and Crispy Oven Wings
When they look perfect—deeply colored and crackly—pull them out. If you’re eating them plain, serve them right away! If you want sauce, immediately dump those piping hot wings into a clean bowl and toss them quickly with your sauce of choice. Keeping the sauce addition until the very end is how we keep these juicy and crispy oven wings from getting soggy again. If you want them extra glossy, pop them under the broiler for just a minute or so—but keep your eye glued to them because they burn fast!
If you’re looking for a different kind of prep method sometime, I have a great guide on making crispy potato wedges in the air fryer, too!
Best Tips For Crispy Baked Chicken Wings Success
So, you followed the steps, heated everything right, but maybe you’re worried about that little bit of moisture still lurking? Don’t panic! Getting that restaurant-level crunch on your crispy baked chicken wings is all about managing the environment in your own oven. My grandmother Daisy always said that the stove is bossy, and you have to respect its moods. These little reminders are what keep my wings from ever turning into sad, steamed poultry.
Preventing Soggy Skin: The Wire Rack Rule
I cannot stress this enough: the wire rack is non-negotiable when you are trying to bake wings without frying them. Putting the wings, coated in that magical baking powder mix, directly onto foil or a baking sheet traps the fat and moisture dripping off the chicken right underneath it. Guess what happens? That moisture steams the bottom of the wing! We want dry heat to crisp everything evenly, right? So, that rack lifts the wings up, allowing 360-degree air circulation. It’s the single most important thing you can do to achieve that enviable crunch without any oil.
Broiler Finish: Adding Extra Crispiness
This is what I call the “nuclear option” for crunch! If your wings look golden but you just want that final, *shatter* when you bite into them, this trick in the notes is your best friend. Once the wings are cooked through (Step 8, before saucing), or if you’ve already sauced them and they look a little soft, transfer them back to the oven, but this time turn on the broiler. It’s intense heat, so you have to babysit them! I mean it—step away for ten seconds, and you’ll go from crispy to charcoal fast. This just blasts that exterior skin until it’s perfect. If you want to see more about baking times, this guide on how long to bake chicken wings is super helpful when you’re tweaking!
For more simple, soulful cooking ideas that don’t require a lot of fuss, you should check out my recipe for easy coconut soup. It’s comfort in a bowl!
Simple Dry Rub Baked Wings and Sauce Variations
The base recipe we just walked through is amazing because it creates that perfect crunch with minimal seasoning. That’s why this method is so great for customization! You can totally rock these as simple dry rub baked wings—just salt, pepper, and garlic powder really shines through—or you can go wild with flavor. But listen to Aunt Amelia on this one: when we’re aiming for that ideal texture on our crispy baked chicken wings, timing the sauce application is absolutely everything.
Saucing After Baking for the Best Texture
If you dump your wings into a bowl of BBQ sauce before they hit the oven, you cover up all that beautiful, hard-earned dry skin we just worked to perfect with the baking powder! It’s like putting the brakes on the crisping process. So, the rule I stick to—and the rule Daisy always implied—is high heat first, then sauce later. Once the wings are out, golden, and crunchy, you toss them quickly in the bowl. The residual heat helps the sauce adhere beautifully without steaming the skin back into submission. We want them glazed, not soggy!
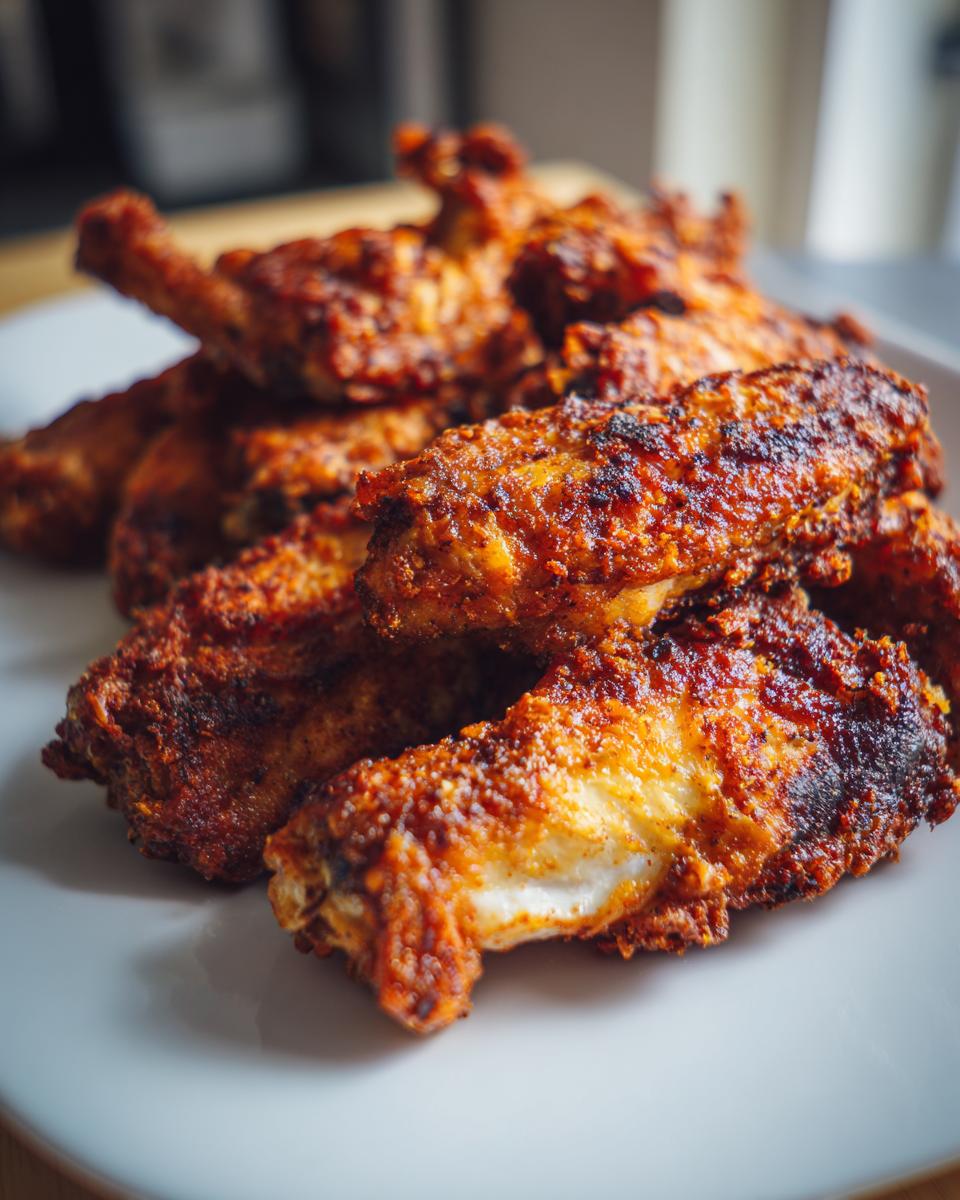
Flavor Swaps for Your Party Appetizer Chicken Wings Baked
Our base rub is lovely and neutral, but if you’re prepping these for a crowd or just feeling spicy, you can easily level up that dry mix. For a little smoky kick that works great for party appetizer chicken wings baked at any gathering, try adding a half teaspoon of smoked paprika to the mix. That gives you a beautiful reddish color and depth, too!
If you want heat, don’t be shy with the cayenne pepper—start small, maybe just a pinch, and taste your dry rub before tossing the wings. And speaking of flavor, while Buffalo is classic, I adore tossing my wings in a salty, garlicky glaze after they come out. I sometimes add a touch of garlic powder and grated Parmesan cheese to the melted butter and toss immediately. If you love sweet and savory flavors, a drizzle of my copycat recipe for Cinnamon Butter, followed by a light sprinkle of coarse salt, is surprisingly addictive on wings!
Storage and Reheating Instructions for Crispy Baked Chicken Wings
We all know the tragedy: perfectly crispy baked chicken wings disappear too fast, but if you have leftovers, you need to handle them right! Leftovers of anything crispy can be tricky, and chicken wings are no exception. If you just toss them in the fridge in a closed container, that gorgeous crust we worked so hard for will turn soft and surrender to the moisture trapped inside. That’s just physics, I guess, but we can fight it!
The absolute number one goal when storing these is to keep the air moving around them, even in the fridge. When I have extra—which honestly doesn’t happen often!—I grab a wide platter or baking sheet, line it with a paper towel, and arrange the wings in a single layer, making sure they aren’t touching at all. Then I loosely cover the entire thing with plastic wrap, or even better, parchment paper tented over them. This lets the moisture escape without drying out the meat too much.
Never store sauced wings with plain wings if you can avoid it. If you sauced them before storing, they will definitely be softer the next day. If you kept some plain before tossing them in flavor, those will always reheat better. You can store them in the fridge for about three days safely.
Now, reheating is where we bring back that crunch! Forget the microwave; that’s a soggy disaster waiting to happen. If you want them close to the original texture, you need to use dry heat again. I find that putting them on the same wire rack setup (if you’re feeling ambitious) or just directly on a baking sheet—no foil this time—and popping them into a 375-degree oven for about 8 to 10 minutes works wonders. If you want that absolute best crunch, use the broiler for the final minute, watching like a hawk. It revives that crispiness way better than any other method. If you’re looking for excellent ideas for storing baked goods, I have my tips for my famous brownies ready for you at my Cosmic Brownie recipe post!
Crunchy Baked Wings Secret: Frequently Asked Questions
I know you’ve got questions! Anyone tackling the quest for the perfect crunchy baked wings secret needs a little extra coaching sometimes. Baking wings to perfection without frying takes understanding the oven’s language, and that’s where Daisy’s old wisdom—and my testing—comes in handy. I’ve gathered the questions I get asked most often when people try this recipe for the first time. For more insight on the science behind the crunch, check out this great resource on extra crispy baked chicken wings.
Can I use regular baking powder instead of aluminum-free for crispy baked chicken wings?
You certainly can, but I really advise against it if you can find the aluminum-free kind. Remember, the whole magic trick relies on the baking powder reacting with the skin to dry it out and make it incredibly crisp. Regular baking powder sometimes has components that can leave a faint, slight metallic aftertaste in the final product. Since achieving that perfect, clean flavor for your crispy baked chicken wings is my main goal, go aluminum-free if you can splurge on it. It’s worth it for the cleaner taste!
What is the best temperature for Oven Baked Wings No Fry?
This is the key to avoiding the soggy trap! We don’t use just one temperature with this method for oven baked wings no fry; we use two! We blast them first at a super high 425°F for about 20 minutes. That high heat starts melting fat and aggressively drying the skin surface. Then, we drop the heat down to 400°F for the final 20 to 25 minutes to cook the meat through gently without burning that crisp exterior. It’s that temperature change that locks in the juiciness while guaranteeing the crunch we want!
How do I ensure my wings stay juicy and crispy oven wings?
Two things have to be perfectly executed for truly juicy and crispy oven wings. First, you must pat the wings aggressively dry with paper towels before doing anything else. I mean bone-dry! So much of the success for how to make crispy wings in oven comes down to starting with zero surface moisture. Second, do not, under any circumstances, overcrowd your wire rack. If the wings are touching, that trapped surface area will steam instead of crisping. Give them space to breathe, and you’ll get that perfect crunch all over.
If you’re looking for inspiration for what to serve alongside these wings, my turkey pot pie post has some wonderful savory side ideas that aren’t too heavy!
Nutritional Estimates for Your Crispy Baked Chicken Wings
Now, I know a lot of you, like me, love enjoying these fantastic crispy baked chicken wings without feeling like you’ve completely derailed your day. Since we aren’t deep frying these beauties, they are inherently a much healthier option compared to traditional restaurant styles. That’s one of the huge perks of mastering the oven-baked method!
I always want to be upfront about these numbers because, just like my grandmother Daisy taught me, honesty in the kitchen builds trust. These figures are based purely on the ingredients listed in the recipe above—salt, pepper, spices, baking powder, and the chicken itself. They don’t account for heavy sauces or dips you might add later, so keep that in mind if you’re tracking closely!
Here’s the general breakdown per serving (which we calculated as 4 wings, by the way—don’t forget to factor in how many you actually eat!):
- Serving Size: 4 wings
- Calories: 280
- Fat: 18g
- Saturated Fat: 5g
- Unsaturated Fat: 13g
- Trans Fat: 0g
- Carbohydrates: 1g
- Fiber: 0g
- Sugar: 0g
- Protein: 26g
- Sodium: 350mg
- Cholesterol: 90mg
See that zero sugar? That’s because we rely on the spices and the natural flavor of the chicken rather than sugary coatings before baking. If you’re looking for other ideas that keep things light and balanced during the start of your day, you can hop over to my post on healthy breakfast ideas! It’s all about nourishing yourself, whether it’s game day fuel or a morning meal.
Share Your Experience Making These Baked Wings
I feel like we’ve spent a lot of time together in this virtual kitchen, and now you have the secret to making the crispiest wings without ever needing a deep fryer near your house! Honestly, if you follow that high-heat, two-stage baking process and use the baking powder, you’re in for a real treat. I truly poured all the lessons my grandmother Daisy ever gave me about simple, honest food into these instructions.
But I’m dying to know how they turned out for you! Did you manage to get that shatteringly crisp skin? Did your friends ask for your recipe at the party? Did you choose Buffalo, BBQ, or maybe you went rogue with a different sauce?
Please, hop down to the comments below and leave me a star rating for the recipe—five stars if they blew your expectations out of the water! Tell me what you seasoned them with and what you served them alongside. I love seeing your finished projects!
If you have any specific questions that I missed, or if anything felt tricky, don’t hesitate to reach out. You can always send me a quick note via my contact page too. Happy wing making, and thank you for bringing a little bit of the warmth of Daisy’s kitchen into yours!
PrintUltimate Crispy Baked Chicken Wings: The No-Fry Secret

You can achieve shatteringly crisp, juicy baked chicken wings right in your oven without deep frying. This reliable method uses baking powder and high heat for the ultimate crunch, making them perfect for game day or any gathering.
- Prep Time: 10 min
- Cook Time: 45 min
- Total Time: 55 min
- Yield: 4 servings 1x
- Category: Appetizer
- Method: Baking
- Cuisine: American
- Diet: Low Fat
Ingredients
- 2 lbs chicken wings (flats and drumettes separated)
- 1 tablespoon baking powder (aluminum-free recommended)
- 1 teaspoon kosher salt
- 1/2 teaspoon black pepper
- 1/2 teaspoon garlic powder
- 1/4 teaspoon paprika
- Optional: 2 tablespoons of your favorite sauce (Buffalo, BBQ, or Garlic Parmesan) for tossing after baking
Instructions
- Preheat your oven to 425 degrees Fahrenheit. Line a large, rimmed baking sheet with aluminum foil for easy cleanup. Place a wire cooling rack on top of the prepared baking sheet.
- Pat the chicken wings completely dry using paper towels. This step is crucial for crispiness.
- In a large bowl, combine the baking powder, kosher salt, black pepper, garlic powder, and paprika.
- Add the dried chicken wings to the bowl. Toss thoroughly until every piece is evenly coated with the dry rub mixture. The baking powder helps draw moisture from the skin.
- Arrange the coated wings in a single layer on the wire rack. Do not let the wings touch each other; space them out to allow air circulation.
- Bake for 20 minutes at 425 degrees Fahrenheit.
- After 20 minutes, carefully flip each wing. Reduce the oven temperature to 400 degrees Fahrenheit.
- Continue baking for another 20 to 25 minutes, or until the skin is deeply golden brown and very crisp.
- If you plan to sauce the wings, remove them from the oven. Place the hot wings in a clean bowl and toss immediately with your chosen sauce until coated.
- Serve the wings immediately for the best texture.
Notes
- For extra crispy skin, you can briefly place the sauced wings under the broiler for 1 to 2 minutes, watching them closely to prevent burning.
- If you are making a large batch, bake the wings in two separate batches rather than overcrowding the pan, which traps steam and prevents crisping.
- Use aluminum-free baking powder; regular baking powder can sometimes leave a metallic taste.
Nutrition
- Serving Size: 4 wings
- Calories: 280
- Sugar: 0
- Sodium: 350
- Fat: 18
- Saturated Fat: 5
- Unsaturated Fat: 13
- Trans Fat: 0
- Carbohydrates: 1
- Fiber: 0
- Protein: 26
- Cholesterol: 90