

Oh, that glorious moment when you pull a truly perfect pie out of the oven! Nothing beats the sight of shimmering, golden peaks towering over a bright, zesty filling. Forget those runny, sad excuses for dessert you sometimes see; we are talking about the real deal here. This isn’t just a recipe; this is Grandma Daisy’s classic, homemade lemon meringue pie, and it’s all made from scratch, just like she taught me. It carries the weight of memory and the simple philosophy of honest food cooked with true love. Learning to slow down in the kitchen is key, and you can read more about our journey in our story. Trust me, following these steps takes you right back to that welcoming kitchen, guaranteeing a showstopper every single time.
- Why This Classic Lemon Meringue Recipe Stands Above the Rest
- Gathering Ingredients for Your Homemade Lemon Pie From Scratch
- Step-by-Step Instructions for the Perfect Lemon Meringue
- Expert Tips for No Weep Lemon Meringue Tips and Stability
- Serving Suggestions for Your Zesty Lemon Dessert
- Storage and Reheating Instructions for Lemon Meringue Pie
- Frequently Asked Questions About This Classic Lemon Pie
- Estimated Nutritional Data for Lemon Meringue
- Share Your Classic Lemon Pie Creations
Why This Classic Lemon Meringue Recipe Stands Above the Rest
Honestly, I’ve tried a million variations over the years, but I always come back to Grandma Daisy’s method. This is truly the best lemon meringue from scratch because it’s been refined over decades of family potlucks. There are no shortcuts here, just pure, time-tested results. When you make a homemade lemon pie from scratch, you can taste the difference!
- It’s incredibly reliable—we’ve never had a runny filling using this technique.
- The meringue holds up beautifully, thanks to a few special tricks we cover below.
- It tastes bright, fresh, and exactly like that perfect memory of a traditional dessert.
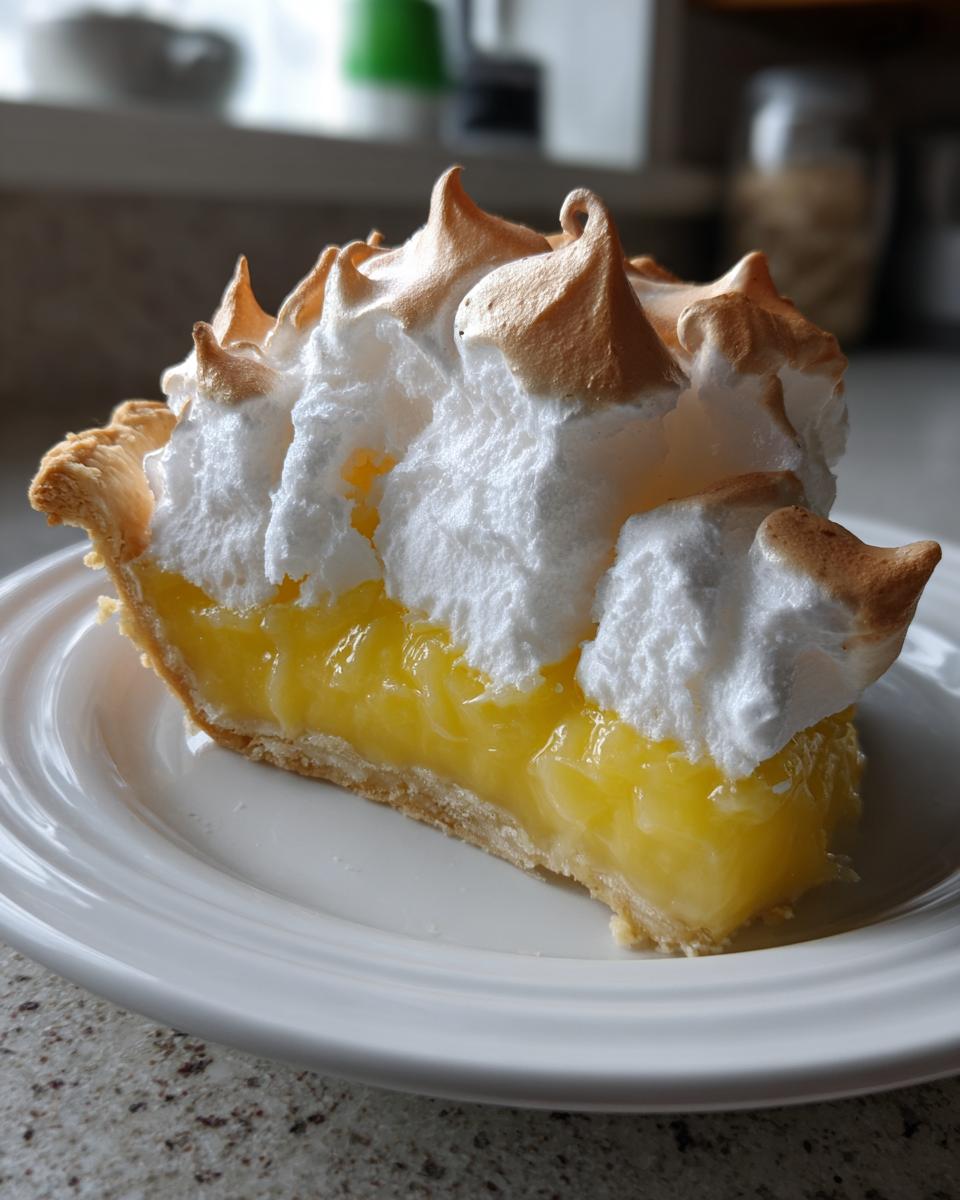
Achieving the Perfect Tart and Sweet Pie Balance
The real joy of a great lemon meringue pie is that wonderful push-and-pull between flavors. We nail the tart and sweet pie profile by carefully balancing the sugar in the filling against the brightness of the fresh juice and zest. It’s the quintessential zesty lemon dessert experience. No dull flavor here, I promise!
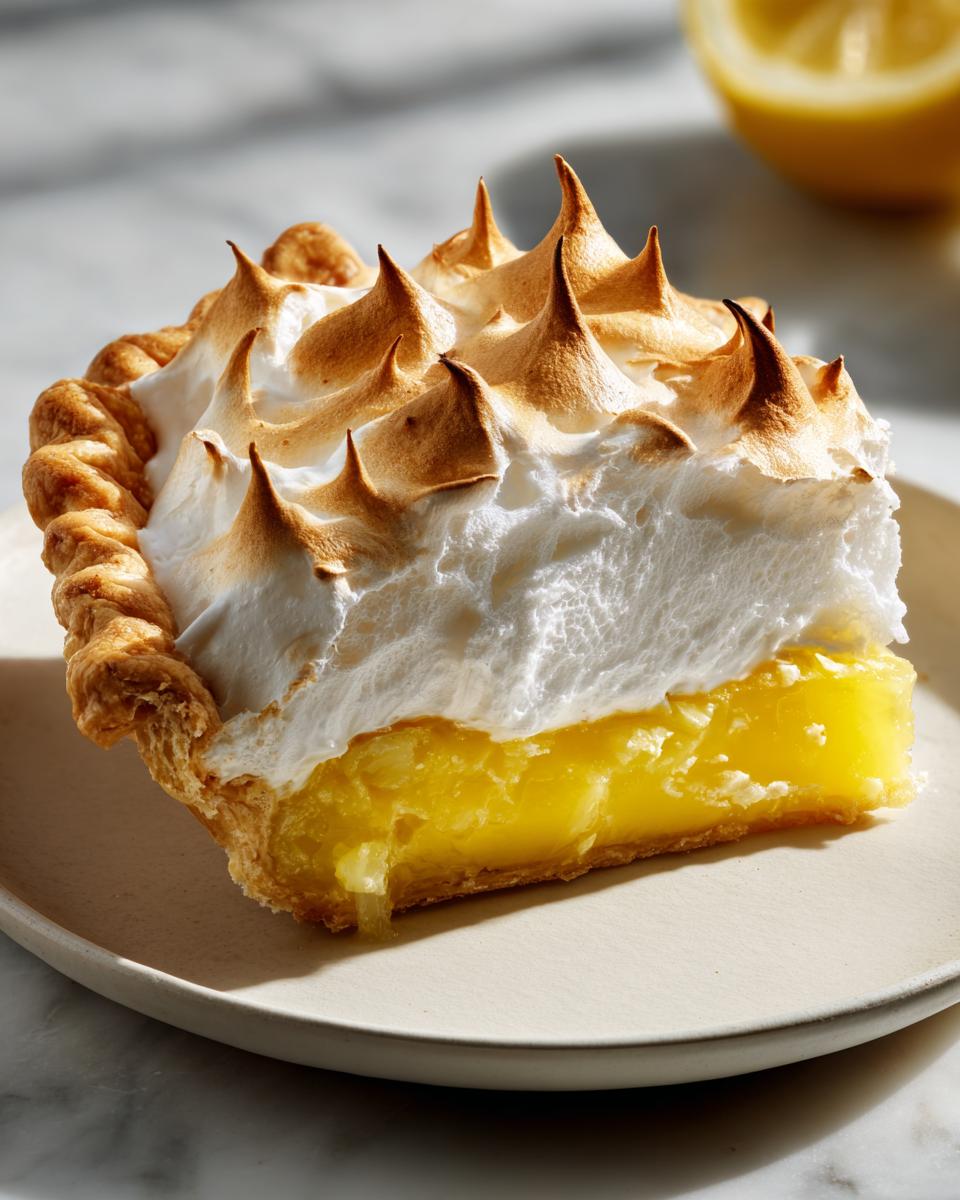
The Secret to a Showstopper Dessert
Visually, this pie is unbeatable. It’s designed to be a showstopper dessert! The high, swirled topping catches the light, and that gorgeous golden-brown color makes everyone reach for a slice first. But that meringue needs something sturdy underneath it, which is why we insist on a fully cooled, crisp buttery pie crust tutorial base. That structural integrity is half the battle won!
Gathering Ingredients for Your Homemade Lemon Pie From Scratch
Okay, let’s talk about what you need! Since this is a homemade lemon pie from scratch, we need great components for all three layers—crust, filling, and that gorgeous topping. Don’t worry if you need a refresher on the base; I always refer back to my favorite buttery pie crust tutorial whenever I start a new pie project, but for now, just make sure that 9-inch shell is pre-baked and completely cool before we start filling it.
Ingredients for the Buttery Pie Crust
This is the foundation, so treat it right! We need one fully baked and cooled 9-inch pie crust shell. Yep, that’s it for this part! Bake it until it’s golden and let it sit on the counter until it’s stone cold. If it’s warm when the filling goes in, we are asking for trouble.
Ingredients for the Zesty Lemon Filling
This is where that intense, bright citrus flavor comes from. You’ll need:
- 1 1/2 cups granulated sugar
- 1/4 cup cornstarch
- 1/4 teaspoon salt
- 1 1/2 cups cold water
- 4 large egg yolks, lightly beaten (make sure you save those whites!)
- 1/2 cup fresh lemon juice (no concentrates, please!)
- 1 tablespoon fresh lemon zest
Ingredients for the Fluffy Meringue Topping
For the cloud of goodness, make sure your bowl is spotless—I mean zero grease or yolk residue, or the whites won’t whip right. Also, grab your egg whites from the fridge a little early so they can warm up!
- 4 large egg whites, definitely at room temperature
- 1/4 teaspoon cream of tartar
- 6 tablespoons granulated sugar (this stabilizes the whole thing)
Step-by-Step Instructions for the Perfect Lemon Meringue
This is where the magic really happens, and we have to be careful not to rush it! We are making something beautiful, so take a breath. I’ve linked out to a great guide for a bright citrus flavor over here if you want to check out another take, but stick with me for Daisy’s methods, especially when it comes to handling the eggs!
Preparing the Crust and Lemon Curd Recipe Base
First things first: take that cooled, pre-baked crust and set it aside. Now, grab a medium saucepan. Whisk together the 1 1/2 cups of sugar, cornstarch, and salt really well until it looks like fine sand. Then, slowly whisk in the cold water until everything is smooth. Put it over medium heat and stir constantly. You want it to get thick and start bubbling like crazy. Keep stirring for a full minute after it starts bubbling—that crucial minute cooks off the starchy taste!
Tempering Yolks and Finishing the Lemon Meringue Filling
This is the part where people panic, but it’s so simple if you go slow! In a separate bowl, lightly beat your 4 egg yolks. Take about a cup of that hot sugar mixture and drizzle it *slowly* into the yolks while whisking like mad. This is called tempering, and it stops the yolks from scrambling! Once they look happy, pour that warmed yolk mix right back into the saucepan. Cook it again, stirring constantly, until it thickens up one more time. Off the heat, storm in that fresh lemon juice and zest. Pour this hot lemon meringue base right into your cooled pie shell!
How to Make Perfect Meringue and Bake the Lemon Meringue Pie
While the filling is still hot (this helps seal the meringue!), get those 4 room-temperature egg whites going with the cream of tartar. Beat them until you see soft peaks—they should flop over a little. Now, add the 6 tablespoons of sugar in little drizzles while you keep beating until you hit stiff, glossy peaks. Spoon that fluffy meringue topping over the hot filling, making absolutely sure the meringue hugs the crust edge all the way around. Bake it at 350°F (175°C) for about 12 to 15 minutes until the tips are just lightly kissed with gold. And here’s the last big rule: let it cool slowly at room temperature for a minimum of four hours. You must respect the cooling time!
If you’re looking for more recipe tips, you can always check the privacy policy page, just kidding, but I promise these steps give you the look of those gorgeous pies online!
Expert Tips for No Weep Lemon Meringue Tips and Stability
If you’ve ever made one of these beauties only to find little beads of liquid bubbling up on top the next day, I totally get it! That’s called weeping, and it happens to the best of us. But Grandma taught me the tricks to stop that right in its tracks. These are my essential no weep lemon meringue tips that she guarded closely. If you’re looking for a recipe that stays gorgeous, you need this advice, kind of like the wisdom you find discussed over at Rock Recipes.
Preventing Weeping and Beading in Your Lemon Meringue
The key to stopping tears is two-fold: thermal shock and a good seal. First, that slow cool down is non-negotiable! Don’t put the pie in the fridge while it’s still warm. Second, and this is super important, you have to make sure the meringue completely covers the filling right to the edge of the crust all the way around. This seals in the moisture and keeps it from escaping and turning into those annoying little drops.
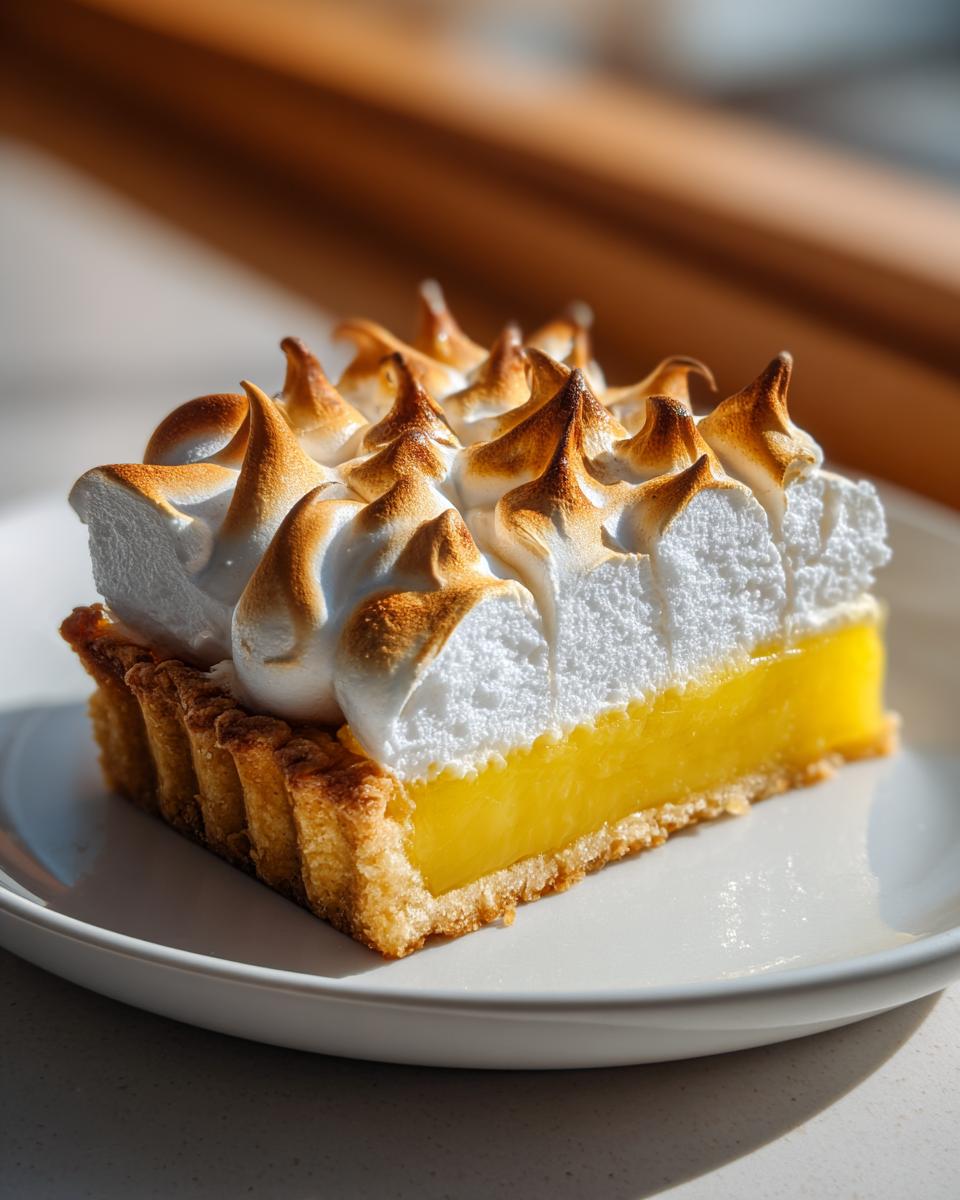
Achieving High, Glossy Peaks
Want that towering, beautiful height? That’s all about the egg whites! You must use room temperature whites—cold ones just won’t whip up properly. The cream of tartar helps stabilize them, which means they hold their shape longer. Remember to add your sugar slowly while the mixer is running. If you dump it all in at once, you shock the foam and you won’t get that truly how to make perfect meringue look. Absolute cleanliness in that bowl is the final hurdle!
Serving Suggestions for Your Zesty Lemon Dessert
Once your magnificent lemon meringue pie has set up after that required long cool-down (no peeking!), it’s time to think about serving. Because this pie is such a bright, zesty lemon dessert, it pairs beautifully with something cool and creamy to balance that intense tartness. Think of it as the ultimate summer citrus dessert centerpiece!
I always serve slices with a tiny dollop of unsweetened whipped cream—it cuts the sugar just right. For a truly decadent presentation, a light shaving of white chocolate over the top of that fluffy meringue looks absolutely stunning. It’s all about making that presentation count!
Storage and Reheating Instructions for Lemon Meringue Pie
Listen, I wish I could stand here and tell you that this lemon meringue pie tastes even better the next day, but that’s just not true for meringue! They are definitely best eaten the day you make them when the meringue is at its peak perfection. But life happens, right?
If you have leftovers, cover the pie loosely with plastic wrap—don’t wrap it tight, or the moisture gets trapped and makes the meringue weep something fierce!
You can keep it in the fridge for up to three days, though you might have to trim off weeping tops on day two! Never, ever try to reheat meringue pie; it will just turn into a soupy mess. Just pull it out of the fridge about 30 minutes before you plan to serve it so it can come closer to room temperature.
Frequently Asked Questions About This Classic Lemon Pie
It’s funny how many questions pop up once people start making a true classic lemon pie from scratch! I get so many emails about things that Grandma just instinctively knew how to handle. Don’t worry if you have questions—that means you’re committed to making this the best lemon meringue possible! You can always drop me a note on the contact page if you need more specific help.
Can I make mini lemon meringue tarts instead of a full pie?
Oh, absolutely! They are adorable for parties, especially for a little spring baking recipes setup. If you use small tart shells, you’ll need to keep a super close eye on them. Since tarts have less volume, the filling and the meringue will set much faster than the big pie. I usually drop the baking time down by about 5 to 8 minutes, but you have to watch for that golden color on the meringue!
What if I don’t have cornstarch for the lemon curd recipe?
If you’re completely out of cornstarch, you can use plain all-purpose flour instead for your lemon curd recipe base. Grandma used flour sometimes when commerce wasn’t great. The trick is, you need almost double the amount of flour compared to cornstarch, and you have to cook it a little longer to get rid of that raw flour taste. Keep stirring that thick mixture for at least two full minutes after it starts bubbling thickly.
Why did my lemon filling shrink away from the crust?
That’s just the filling contracting as it cools down too quickly! It’s super common if you rush things. We talked about this in the baking section, but I’ll say it again: you must let the pie cool completely at room temperature, which can take four hours or more. Placing that hot pie into a cold environment, like a refrigerator, causes thermal shock, making the filling shrink and leave a visible gap between the filling and the crust wall. Read more about keeping things stable here, which has great tips, too!
Estimated Nutritional Data for Lemon Meringue
Now, I’m not a nutritionist, so please take these numbers with a grain of salt! Cooking is about joy, not strict counting, but I know folks like to know the basics. Based on my best estimate for a slice of this gorgeous lemon meringue pie, here’s what we are looking at.
Keep in mind that using extra butter in the crust or more sugar in the meringue will change these numbers, of course. These figures reflect one standard slice:
- Calories: Around 380
- Total Fat: About 18g
- Carbohydrates: Roughly 55g
- Protein: About 6g
- Sugar: Alarmingly high, around 45g (but worth every bite!)
It’s definitely a treat, not an everyday snack, but wow, what a wonderful, zesty lemon dessert treat it is!
Share Your Classic Lemon Pie Creations
Well, we made it! You’ve successfully navigated the pitfalls of runny fillings and weeping meringue, and hopefully, you’ve got a magnificent, towering classic lemon pie cooling on your counter right now. I truly hope this recipe brings as much joy and nostalgic flavor to your kitchen as it does to mine!
Now that you’ve finished this amazing baking puzzle, I really want to hear all about it! Did you manage to get those dramatic swirls on your topping? Did your family immediately devour the whole thing?
Please, please, please come back here and leave me a rating—five stars if you felt like you were baking right alongside Grandma Daisy! If you had trouble anywhere, drop a comment below, too; I read every single one and I love troubleshooting with you. And if you decked out your kitchen table with this beauty, snap a picture!
Tag me on social media; seeing your successes is the best part of keeping Daisy’s Recipes alive. Maybe you even tried it with a fancy twist, like making those adorable mini lemon meringue tarts we talked about? I’d love to see any variation you whipped up. Don’t forget to check out this brilliant example of a beloved recipe over at AllRecipes for even more inspiration. Happy baking, friend!
PrintGrandma Daisy’s Classic Lemon Meringue Pie

Make a showstopper dessert with this classic, homemade lemon meringue pie. It balances a tart, zesty lemon filling with a sweet, fluffy meringue topping over a buttery crust.
- Prep Time: 30 min
- Cook Time: 30 min
- Total Time: 210 min
- Yield: 8 servings 1x
- Category: Dessert
- Method: Baking
- Cuisine: American
- Diet: Vegetarian
Ingredients
- 1 recipe for Buttery Pie Crust (for a 9-inch pie)
- 1 1/2 cups granulated sugar
- 1/4 cup cornstarch
- 1/4 teaspoon salt
- 1 1/2 cups cold water
- 4 large egg yolks, lightly beaten
- 1/2 cup fresh lemon juice
- 1 tablespoon lemon zest
- 4 large egg whites, at room temperature
- 1/4 teaspoon cream of tartar
- 6 tablespoons granulated sugar (for meringue)
Instructions
- Prepare and partially bake your 9-inch pie crust according to your preferred recipe. Let it cool completely.
- For the lemon filling, whisk together 1 1/2 cups sugar, cornstarch, and salt in a medium saucepan. Gradually whisk in the cold water until smooth.
- Cook the mixture over medium heat, stirring constantly, until it thickens significantly and bubbles. Continue to cook for one minute. Remove from heat.
- In a separate bowl, lightly beat the 4 egg yolks. Slowly temper the yolks by whisking in about 1 cup of the hot sugar mixture into the yolks.
- Pour the tempered yolk mixture back into the saucepan with the remaining hot mixture. Cook over medium heat, stirring constantly, until the filling thickens again. Do not boil.
- Remove the filling from the heat. Stir in the fresh lemon juice and lemon zest.
- Pour the hot lemon filling into the cooled, pre-baked pie crust.
- Prepare the meringue: In a clean, grease-free bowl, beat the 4 egg whites and cream of tartar with an electric mixer until soft peaks form.
- Gradually add the 6 tablespoons of sugar, beating until stiff, glossy peaks form. This is how you make perfect meringue.
- Spread the meringue evenly over the hot lemon filling, making sure the meringue touches the edge of the crust all around to prevent shrinking.
- Bake the pie at 350°F (175°C) for 12 to 15 minutes, or until the meringue peaks are lightly golden brown.
- Cool the pie completely on a wire rack at room temperature for at least 4 hours before slicing. This helps prevent weeping meringue.
Notes
- To prevent weeping meringue, make sure your mixing bowl for the egg whites is completely free of any grease or yolk residue.
- For a showstopper dessert, use the back of a spoon to create dramatic swirls and peaks in the meringue before baking.
- Cool the pie slowly at room temperature. Rapid cooling can cause the filling to shrink away from the crust.
Nutrition
- Serving Size: 1 slice
- Calories: 380
- Sugar: 45g
- Sodium: 180mg
- Fat: 18g
- Saturated Fat: 5g
- Unsaturated Fat: 13g
- Trans Fat: 0g
- Carbohydrates: 55g
- Fiber: 1g
- Protein: 6g
- Cholesterol: 110mg