
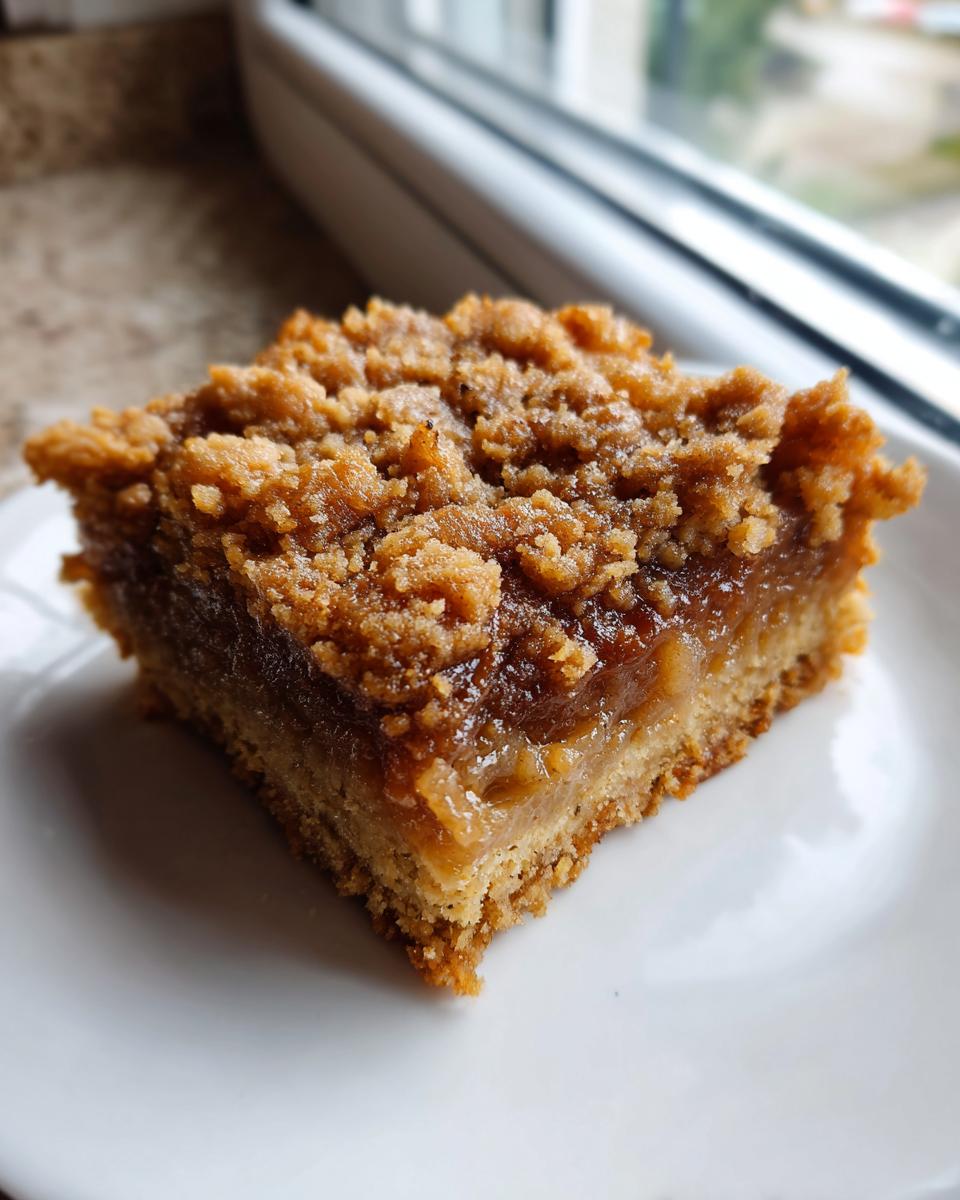
If you’re like me, sometimes you crave that deep, comforting flavor of a real apple pie, but you just can’t deal with the fuss of creating a perfect crimped crust. Rolling dough? No, thank you! That’s why I bring you the absolute best solution: Daisy’s Classic Apple Pie Bars. This recipe lets you capture all the warm cinnamon spice and tender fruit without the drama of a full pie pan. When I first started baking again after moving away from home, I desperately needed that link back to my Grandma Daisy’s kitchen. These bars, these simple, sturdy dessert bars, were the first thing that tasted exactly right. They are proof that the most meaningful food comes from trusted, time-tested family recipes, adapted for real life. If you love finding ways to simplify classics, be sure to check out my general guide on delicious dessert recipes!
- Why These Apple Pie Bars Are Your New Favorite Easy Bakes
- Gathering Ingredients for Perfect Apple Pie Bars
- Step-by-Step Instructions for Daisy's Apple Pie Bars
- Tips for Perfect Apple Pie Bars Every Time
- Variations for Your Apple Pie Bars
- Storage and Serving Suggestions
- Frequently Asked Questions About Making Dessert Bars
- Nutritional Estimates for Daisy's Recipe
- Share Your Baking Journey
Why These Apple Pie Bars Are Your New Favorite Easy Bakes
Honestly, if you want classic fall flavor without the headache, these bars are your answer. They capture everything you love about Grandma Daisy’s pies but in a format that just begs to be packed up and taken somewhere. They keep beautifully, which is why I adore them for almost any occasion.
- Perfect Picnic Food and Shareable Desserts: You don’t need forks or plates for these! They hold their shape perfectly, making them the ultimate shareable desserts for potlucks or just handing one to the kids after school. Seriously, try cutting a traditional pie neatly after carrying it a mile. Impossible!
- Simple Baking with Classic Flavor: Forget chilling dough or lattice work. We just mix up a base, press it in, dump the apples, and top it with the leftover dough crumbled on top. It’s practically foolproof, making them one of my top easy bakes. You get all that apple goodness without a fancy rolling pin!
When you need a taste of home but only have a little bit of time, turn to these. If you’re looking for one-bowl wonders that aren’t desserts, maybe check out my guide on weeknight dinner ideas for saving time!
Gathering Ingredients for Perfect Apple Pie Bars
Daisy always said that even simple recipes need quality ingredients. These apple pie bars rely on pantry staples, but the details really matter, especially when it comes to the apples! Gather everything before you even think about preheating the oven. This layout keeps things calm, which is how Daisy insisted we bake.
For the Crust and Crumble Base
This is where we get that butter-rich, slightly crisp base and the crumble topping that is just glorious when it bakes up golden brown. Don’t skimp on the real butter here—it makes all the difference in flavor!
- 1 cup unsalted butter, softened
- 1 cup granulated sugar
- 2 cups all-purpose flour
- 1 teaspoon baking powder
- 1/2 teaspoon salt
- 2 large eggs
- 1 teaspoon vanilla extract
For the Spiced Apple Filling
The filling needs enough spice to really shine through the butter, and the lemon juice is non-negotiable—it keeps those apples looking bright, not sad and brownish.
- 4 medium apples (I love using a mix of tart Granny Smith and sweet Honeycrisp!) peeled, cored, and diced
- 1/2 cup packed light brown sugar
- 1 tablespoon all-purpose flour (this thickens the juices!)
- 1 teaspoon ground cinnamon
- 1/4 teaspoon ground nutmeg
- 2 tablespoons lemon juice
Step-by-Step Instructions for Daisy’s Apple Pie Bars
We’re moving fast now, but don’t rush the mixing! Rushing the dough is what turns these wonderful bars into something tough, and we definitely don’t want that. When you break down the process, it’s honestly less work than making a full pie, but the flavor payoff is huge. If you want to compare notes on a similar recipe, my baked apple crisp guide uses a great crumb topping technique you might like! Apple crisp recipe old-fashioned oat topping.
Preparing the Pan and Crust Dough
First things first, let’s get that oven hot—set it to 350 degrees F. Get your 9×13 inch pan greased and floured up nicely. Now, for the dough: cream that softened butter and sugar until it looks fluffy, like whipped clouds. Beat in your eggs one at a time, then the vanilla. Grab your dry ingredients (2 cups flour, baking powder, salt) and add them slowly to the wet stuff. Stop mixing the second everything comes together—seriously, stop! Overmixing at this stage makes the crust hard.
Mixing the Apple Filling
While the oven is warming up, take your diced apples and toss them quickly in a bowl with the brown sugar, the extra tablespoon of flour (that’s your secret thickener!), cinnamon, nutmeg, and lemon juice. Make sure those apple pieces are diced evenly, maybe about the size of a small grape? That way, every single bite gets that sweet, spiced goodness when it bakes.
Assembling and Baking the Apple Pie Bars
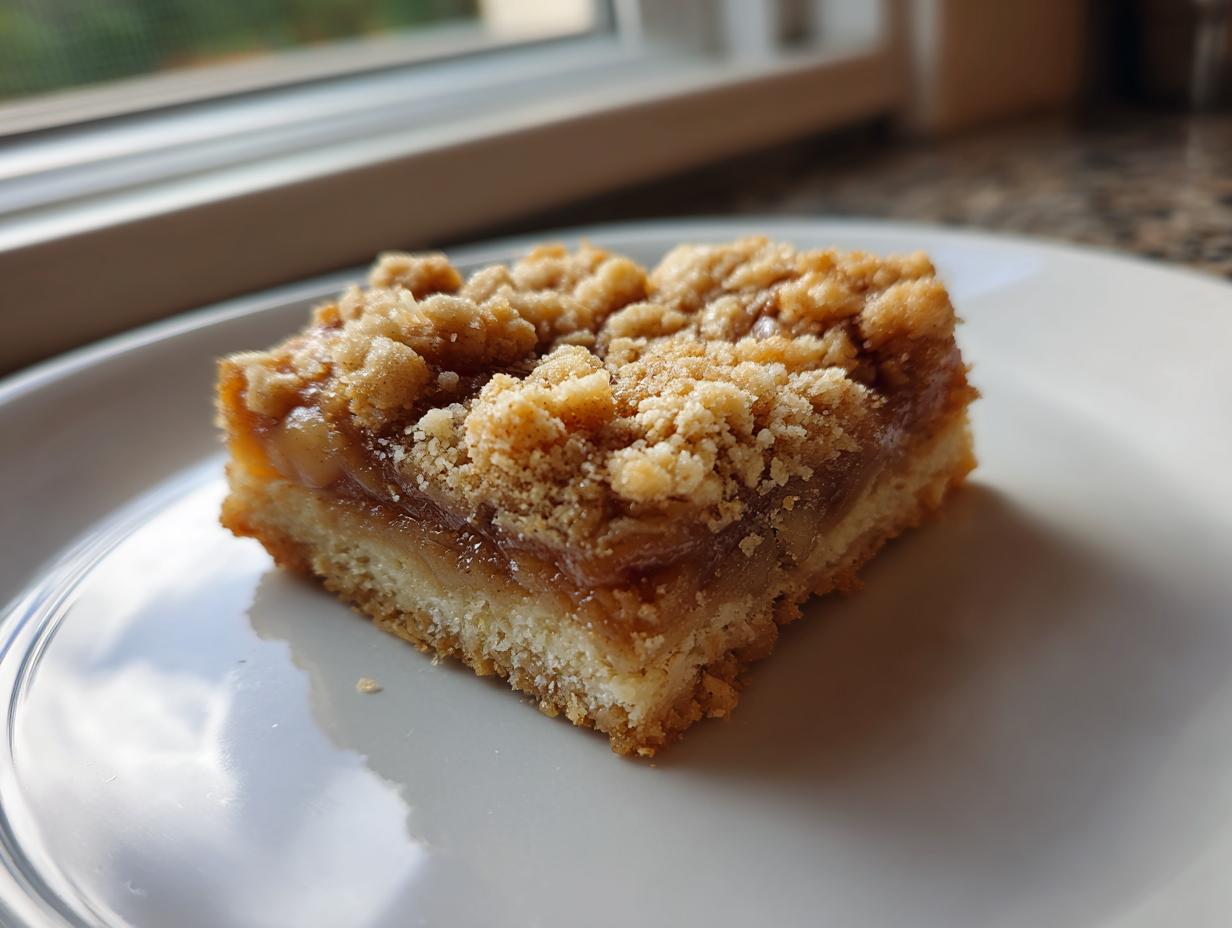
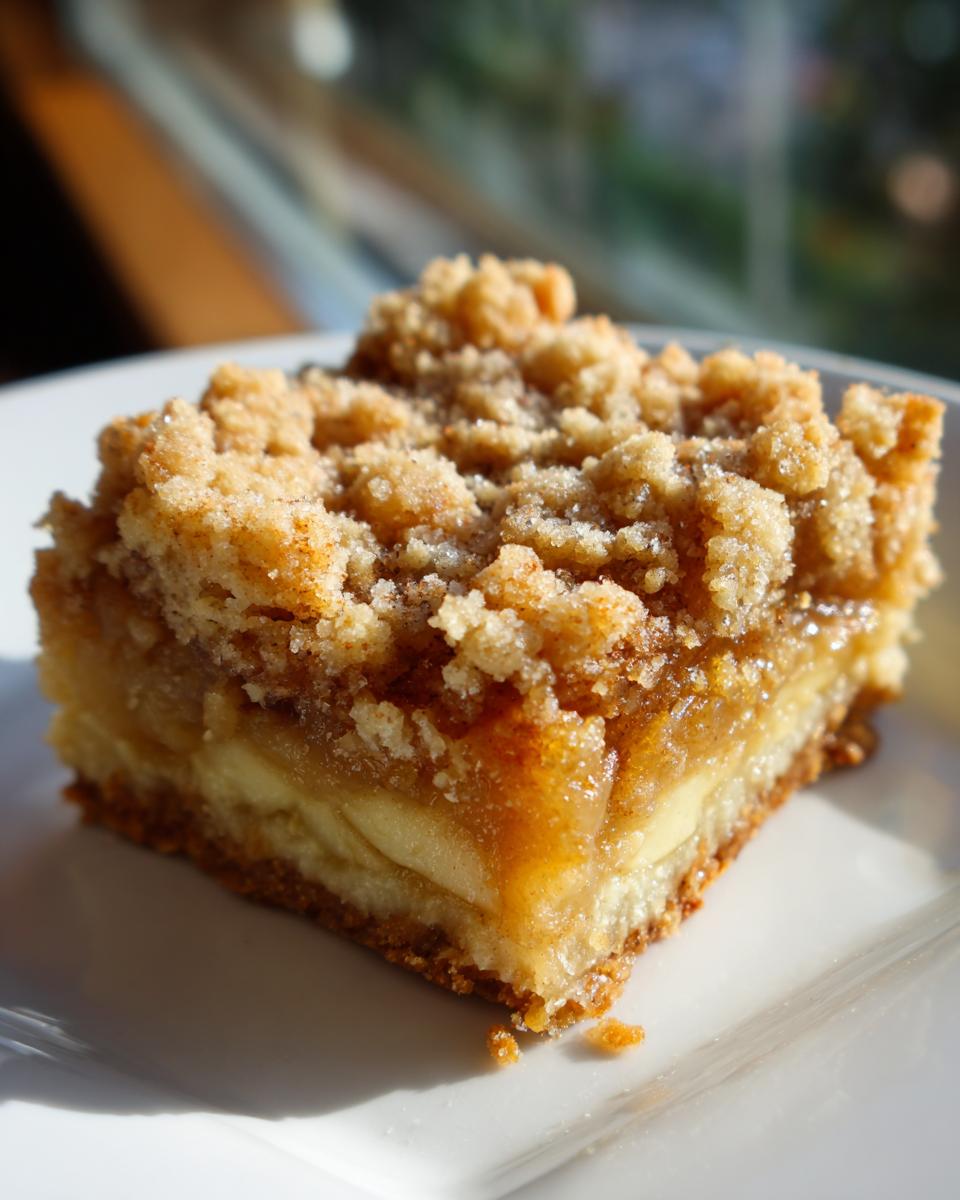
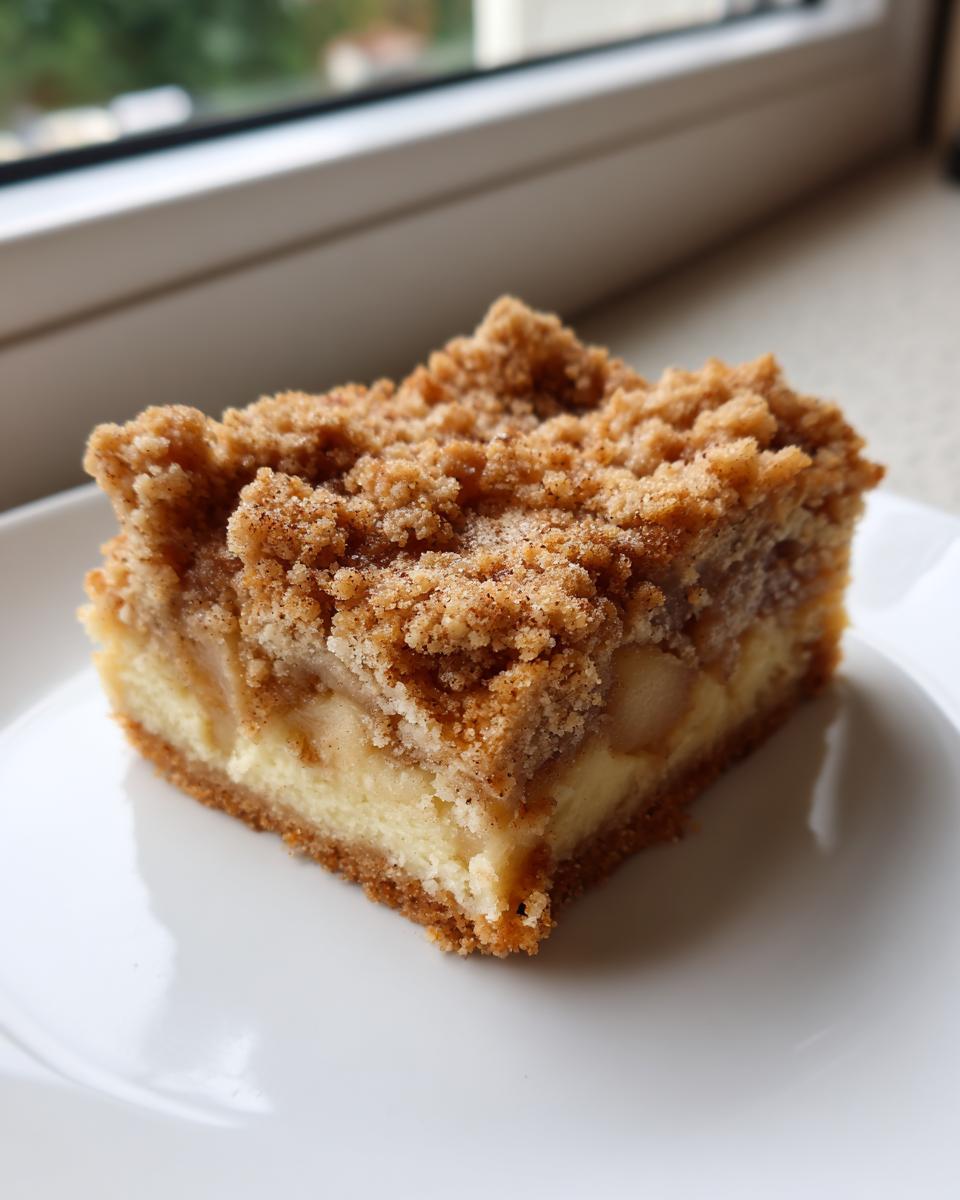
Grab about two-thirds of that perfect crust dough and gently press it evenly into the bottom of your prepared pan. It might feel a little crumbly, but just press it down firmly. Next, spread that spiced apple mixture across the base. Now for the best part: take that last third of the dough and just crumble it right over the top of the apples—don’t press it down! Pop them in the oven for 40 to 45 minutes. You’re looking for that top layer to turn gorgeous golden brown and for the filling down underneath to be nice and bubbly. Once they look like that, pull ’em out!
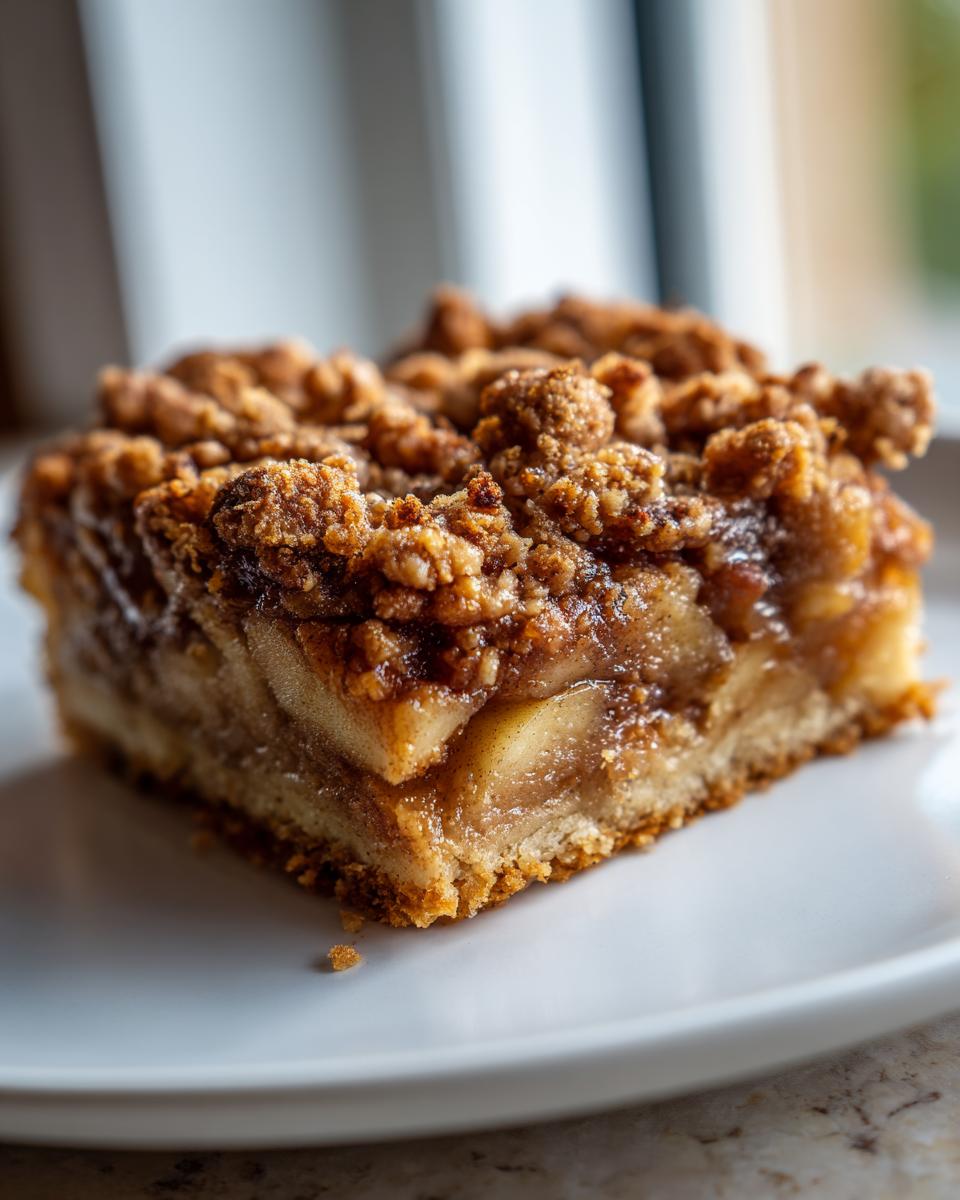
After that, resist the urge to cut them right away! These apple pie bars need to cool completely on the rack before you slice them into squares. Trust me, trying to cut them hot leads to a soupy mess—patience saves the day!
Tips for Perfect Apple Pie Bars Every Time
Grandma Daisy always told me that the recipe is just the start; your hands do the rest! I learned this the hard way once when I tried to rush these bars for a last-minute bake sale. I used all the mushy baking apples I had on hand, and they just turned into sauce—not the lovely, chunky filling these bars need! These tips will make sure your results are perfect every single time. If you want more ideas for quick desserts, my guide on easy bakes should give you lots of inspiration!
Selecting the Best Apples for Your Apple Pie Bars
This is where you can really elevate these bars. If you only use sweet apples, you miss that exciting tang that cuts through all the rich butter in the crust. Daisy always went half Granny Smith—for that tartness that stands up to baking—and half Honeycrisp or Fuji for natural sweetness. Mixing them up gives you the most complex flavor profile, which is why people always ask for my apple recipes!
Crucial Cooling Time
I mentioned it before, but I’ll say it again: you absolutely must let these cool completely. I try to convince myself to wait two hours, but honestly, waiting until they reach room temperature is best. If you try to slice these beauties when they are even slightly warm, the apple juices leak everywhere, and that beautiful crust just crumbles apart, ruining that neat square shape we’re aiming for. Patience ensures you get those clean-cut, perfect edges for that enviable presentation!
Variations for Your Apple Pie Bars
While Daisy’s original recipe is nearly perfect, sometimes you just need to jazz things up, right? I keep the technique the same—it’s too reliable to mess with—but I love throwing in different textures or boosting the spice level. These are so flexible, which is what makes them some of my favorite easy bakes to rely on when I’m feeling creative!
For the crunch lovers out there, I highly recommend adding about a half cup of toasted pecans or walnuts into the crumble topping mixture right before you sprinkle it over the apples. The nuts get perfectly toasted in the oven and add such a nice textural contrast to the soft apples and buttery crust. My cousin Sarah insists that adding pecans makes them feel like a holiday treat!
If you want to lean into the spice, don’t be afraid to play with the cinnamon and nutmeg. You could easily add a quarter teaspoon of ground cardamom to the apple filling—it gives everything a lovely, almost floral background note that pairs beautifully with tart apples. Or, if you’re feeling really adventurous and want a totally different flavor profile, you could try swapping out just a quarter cup of the apples for finely diced pears! You’ll end up with something truly special. Speaking of spiced up apple flavors, you simply have to look at my recipe for a cinnamon roll apple pie recipe when you have a bit more time!
The simplest variation, which I often do when I’ve run out of apples, is just adding dried cranberries to the filling mix—they plump up nicely while baking and give you these bright little bursts of tartness amongst the warm spices.
Storage and Serving Suggestions
One of the things I love most about moving away from traditional pies is how easy these bars are to store. Grandma Daisy hated leftovers because pies got messy sitting out, but these are built to last! You can keep them perfectly fine right on the counter. Just make sure they are fully cooled first, then place them in an airtight container. They stay wonderfully fresh at room temperature for up to three days. I find they actually taste a little more set and flavorful the second day—it’s magical how that happens!
When it comes to serving, because these are sturdy picnic food champions, you can just grab them and go. But if I’m serving these at home, I like to warm them up just a touch—maybe 15 seconds in the microwave. That slight warmth makes the apple filling gooey again. Then, you absolutely must top that warm bar with a scoop of good vanilla ice cream. If you want to get really fancy (and trust me, it’s worth the two extra minutes), I make a batch of my quick honey butter and spread a thin layer on top instead of ice cream. The salty, sweet richness with the spiced apple? Forget about it. It turns a simple bar into something truly special for an easy dessert night.
Frequently Asked Questions About Making Dessert Bars
I always get questions when I post these, which just proves how much everyone loves a good dessert bar! Baking is all about practice, so don’t worry if your first batch doesn’t look exactly like the picture. Here are the things people ask me most often about getting these right.
Can I use pre-made apple pie filling instead of fresh apples?
Oh, absolutely, you can! Sometimes you just need the convenience. If you go this route, you’ll want to cut back on that brown sugar you add to the filling recipe, maybe use only half of what it calls for, because canned fillings are usually much sweeter. Also, be sure the filling isn’t too watery. If it looks soupy, let it sit in a sieve for about 15 minutes before layering it on the crust. Too much liquid and you’ll end up with soggy bottoms, which is the death of any good batch of dessert bars.
How do I make these bars gluten-free?
That’s a great question, especially when trying to accommodate everyone! You definitely can make this work for gluten-free folks. You just need to swap out the all-purpose flour in both the crust/crumble and the filling for a high-quality 1:1 gluten-free baking blend—the kind that already has xanthan gum in it. The texture of the crust might feel a little different—maybe a bit more sandy before baking—but they still bake up wonderfully. They absolutely remain fantastic easy bakes!
Can I freeze these bars?
Yes, you really can! And this is fantastic if you like to bake ahead of time. Bake them completely, let them cool, and then slice them into squares. Wrap each square tightly in plastic wrap, then slip them all into a sturdy freezer bag or airtight container. They keep beautifully in the freezer for up to three months! I usually just take out what I need the night before and let them thaw on the counter while I’m having my morning coffee. For more baking adventures that freeze well, check out my guide on cake mix cookie bars!
Nutritional Estimates for Daisy’s Recipe
Now, I know my focus is always on the flavor—the butter, the cinnamon, the juicy apples—but sometimes, especially when serving these at family events, people get curious about the numbers. Grandma Daisy never worried about calories; she worried about smiles! But for those of you who track things, I’ve pulled the estimated nutrition facts based on the ingredient list. Keep in mind, these are just estimates, you know how it is when you rely on real butter and maybe you use slightly more brown sugar than I do!
These numbers are based on cutting the final bake into 24 standard servings. If you cut them smaller, the numbers will obviously drop!
- Serving Size: 1 bar
- Calories: 210
- Sugar: 18g
- Sodium: 85mg
- Fat: 11g
- Saturated Fat: 7g
- Unsaturated Fat: 4g
- Trans Fat: 0g
- Carbohydrates: 28g
- Fiber: 1g
- Protein: 2g
- Cholesterol: 45mg
Remember, these values can change depending on the specific brand of flour you grab or if you decide to add those toasted walnuts I mentioned earlier. But they give you a really solid ballpark idea for these incredible easy bakes!
Share Your Baking Journey
Baking shouldn’t be a solo journey, especially when it comes to honoring legacies like Grandma Daisy’s! I absolutely love hearing from all of you once you’ve tried these apple pie bars. They bring me right back to my childhood kitchen, and I can only imagine what memories you’re making while you bake them!
When you first slice into those perfectly set squares, take a picture! I want to see them! Tag me in your photos on social media—it truly makes my day to see a tray of these perfect shareable desserts sitting on someone else’s counter, ready for a picnic or a quiet afternoon slump. If you have any major hiccups or brilliant substitutions you discovered while making them, please send me a message through my contact page!
And please, when you’re done, jump back here and leave a rating. Daisy’s Recipes is all about trust and real-world results, so knowing how these apple recipes turned out for you helps our whole community of home cooks feel confident. Happy baking, everyone!
PrintDaisy’s Classic Apple Pie Bars
Enjoy the familiar taste of apple pie in an easy-to-serve bar format, perfect for picnics or simple home baking.
- Prep Time: 25 min
- Cook Time: 45 min
- Total Time: 70 min
- Yield: 24 servings 1x
- Category: Dessert
- Method: Baking
- Cuisine: American
- Diet: Vegetarian
Ingredients
- 1 cup unsalted butter, softened
- 1 cup granulated sugar
- 2 cups all-purpose flour
- 1 teaspoon baking powder
- 1/2 teaspoon salt
- 2 large eggs
- 1 teaspoon vanilla extract
- 4 medium apples (like Granny Smith or Honeycrisp), peeled, cored, and diced
- 1/2 cup packed light brown sugar
- 1 tablespoon all-purpose flour
- 1 teaspoon ground cinnamon
- 1/4 teaspoon ground nutmeg
- 2 tablespoons lemon juice
Instructions
- Preheat your oven to 350 degrees F. Grease and flour a 9×13 inch baking pan.
- In a large bowl, cream together the softened butter and granulated sugar until light and fluffy.
- Beat in the eggs one at a time, then stir in the vanilla extract.
- In a separate bowl, whisk together the 2 cups of flour, baking powder, and salt. Gradually add the dry ingredients to the wet ingredients, mixing until just combined to form the crust dough.
- Press two-thirds of the dough evenly into the bottom of the prepared baking pan. Set the remaining one-third of the dough aside.
- In a medium bowl, combine the diced apples, brown sugar, 1 tablespoon of flour, cinnamon, nutmeg, and lemon juice. Mix well.
- Spread the apple filling evenly over the crust in the pan.
- Crumble the reserved one-third of the dough over the apple filling.
- Bake for 40 to 45 minutes, or until the topping is golden brown and the filling is bubbly.
- Let the bars cool completely in the pan on a wire rack before cutting into squares.
Notes
- For a richer flavor, use a mix of tart and sweet apples in your filling.
- If you want a glaze, whisk 1 cup of powdered sugar with 2 tablespoons of milk and drizzle over the cooled bars.
- These dessert bars keep well in an airtight container at room temperature for up to three days.
Nutrition
- Serving Size: 1 bar
- Calories: 210
- Sugar: 18
- Sodium: 85
- Fat: 11
- Saturated Fat: 7
- Unsaturated Fat: 4
- Trans Fat: 0
- Carbohydrates: 28
- Fiber: 1
- Protein: 2
- Cholesterol: 45