
When the summer heat rolls in, the last thing I want to do is keep my oven blazing hot! That’s when I turn to the desserts that bring back the best memories without any fuss—and nothing captures that nostalgic vibe quite like this **No-Bake Banana Split Cake**. Honestly, this recipe is pure sunshine in a dish. It has every layer you dream of in a classic sundae—creamy, fruity, crunchy—but it all sets up beautifully right in the fridge. It’s one of those reliable, simple desserts that I got from my grandma, Daisy. She always knew how to feed a crowd easily, and this chilled **banana split cake** is my way of keeping her wonderful, stress-free cooking tradition alive. If you’re looking for more reliable treats like this, you should check out my list of delicious dessert recipes! Trust me, it’s a true keeper.
- Why This No Bake Banana Split Cake is Your New Summer Favorite
- Ingredients for the Perfect No Bake Banana Split Cake
- How to Prepare Your Easy Layered Dessert
- Tips for Success with Your No Bake Banana Split Cake
- Make Ahead Dessert and Storage for Banana Split Cake
- Variations on the Classic Banana Split Flavors
- Serving Suggestions for This Potluck Perfect Dessert
- Frequently Asked Questions About Banana Split Cake
- Share Your Banana Split Cake Creations
Why This No Bake Banana Split Cake is Your New Summer Favorite
If you’re looking for the perfect contribution to your next cookout or potluck, stop looking right now. This delicious creation is everything you need for easy entertaining. My favorite thing about it is how much it feels like a party without any actual baking involved!
- It’s one of the best Summer Party Desserts you can serve because it’s so refreshing when chilled.
- It comes together fast, making it an ideal Easy Layered Dessert for busy weeks.
- It holds those beautiful layers without slumping—a real win for a make-ahead showstopper!
Zero Oven Time: The Ultimate Chilled Banana Dessert
Seriously, not turning the oven on when it is a million degrees outside is a miracle, right? This isn’t just a dessert; it’s a savior for July barbecues. Because it’s a fully chilled **banana split cake**, it stays cool and refreshing until the last bite. You want to serve it cold, cold, cold!
Simple Assembly for an Easy Layered Dessert
Don’t let the layers scare you! This isn’t some finicky baked good. It’s genuinely about layering components: crust, cream, fruit, topping. Anyone can master this! You get all those bright, classic banana split flavors—that tangy pineapple, sweet banana, rich chocolate—without needing any fancy technique. It’s just the best kind of simple assembly.
Ingredients for the Perfect No Bake Banana Split Cake
Gathering the right ingredients is almost the fun part with this recipe, since you don’t have to worry about flour measurements or oven temperatures! Since this is a refrigerator cake, the quality of your fruit and dairy really shines through. I always organize mine into functional groups so I’m not scrambling when it’s time to assemble the layers. Trust me, having everything prepped makes putting together this **banana split cake** a total breeze. If you ever need a fluffy finish, my guide to making vanilla buttercream is a fantastic resource, though for this dish, whipped topping is what we truly need!
For the Graham Cracker Crust Cake Base
- 1 1/2 cups graham cracker crumbs
- 1/2 cup unsalted butter, melted
- 1/4 teaspoon salt
For the Cream Cheese Layer Dessert Filling
- 8 ounces cream cheese, softened (make sure this is truly softened, or it won’t mix smoothly!)
- 1 cup powdered sugar
- 1 teaspoon vanilla extract
- 1 (8 ounce) container frozen whipped topping, thawed, divided (we use half now, half later!)
Fruit and Toppings for Your Banana Split Cake
- 2 large bananas, sliced
- 1 (20 ounce) can crushed pineapple, drained well (This is so important! You need that pineapple as dry as you can get it, otherwise say hello to a watery mess.)
- 1/2 cup chopped peanuts (optional, but adds that nice crunch!)
- 1/4 cup chocolate syrup
- 1/4 cup maraschino cherries, drained
How to Prepare Your Easy Layered Dessert
This is where the magic happens! Since we aren’t messing with an oven, the precision goes into how you layer everything. This is what turns simple ingredients into that show-stopping **banana split cake** everyone raves about. Since this is an icebox cake with fruit, the chilling time is just as important as the mixing time, so don’t rush that part!
Making the Graham Cracker Crust Cake
First up, the base. Grab that medium bowl and mix your graham cracker crumbs, melted butter, and salt until it looks like wet sand—you know, the kind that holds its shape when you squeeze it. Spread this mixture into your 9×13 inch baking dish. Now, take your flat bottom of a drinking glass or a measuring cup and press that crust down! Really pack it in there so it’s firm enough to support all those yummy layers we’re about to stack. Pop that dish into the fridge immediately. I usually give it a solid 15 minutes to firm up while I get the filling ready.
Creating the Cream Cheese Layer Dessert
Time for the creamy center that makes this such a lovely refrigerator cake recipes! Start by whipping your softened cream cheese in a big bowl until it is completely smooth—no lumps, please! Then, slowly mix in the powdered sugar and vanilla. Once that’s perfectly blended, take about half of your thawed whipped topping and gently fold it in. You don’t want to deflate all the air, just incorporate it until you have a beautiful, fluffy cream cheese layer dessert filling. Spread this evenly over the chilled crust.
Layering the Fruit and Whipped Topping for the Banana Split Cake
Okay, structure time! You need to work quickly here so your bananas don’t have time to wilt. Arrange your sliced bananas right on top of that cream cheese layer. Next, evenly distribute the well-drained crushed pineapple over the bananas. Don’t skip the draining step, I’m serious! Once the fruit is covered, lovingly spread the remaining half of the whipped topping right over the top. This creates the beautiful, light top coat for our **banana split cake**.
Chilling and Finishing the Refrigerator Cake Recipes
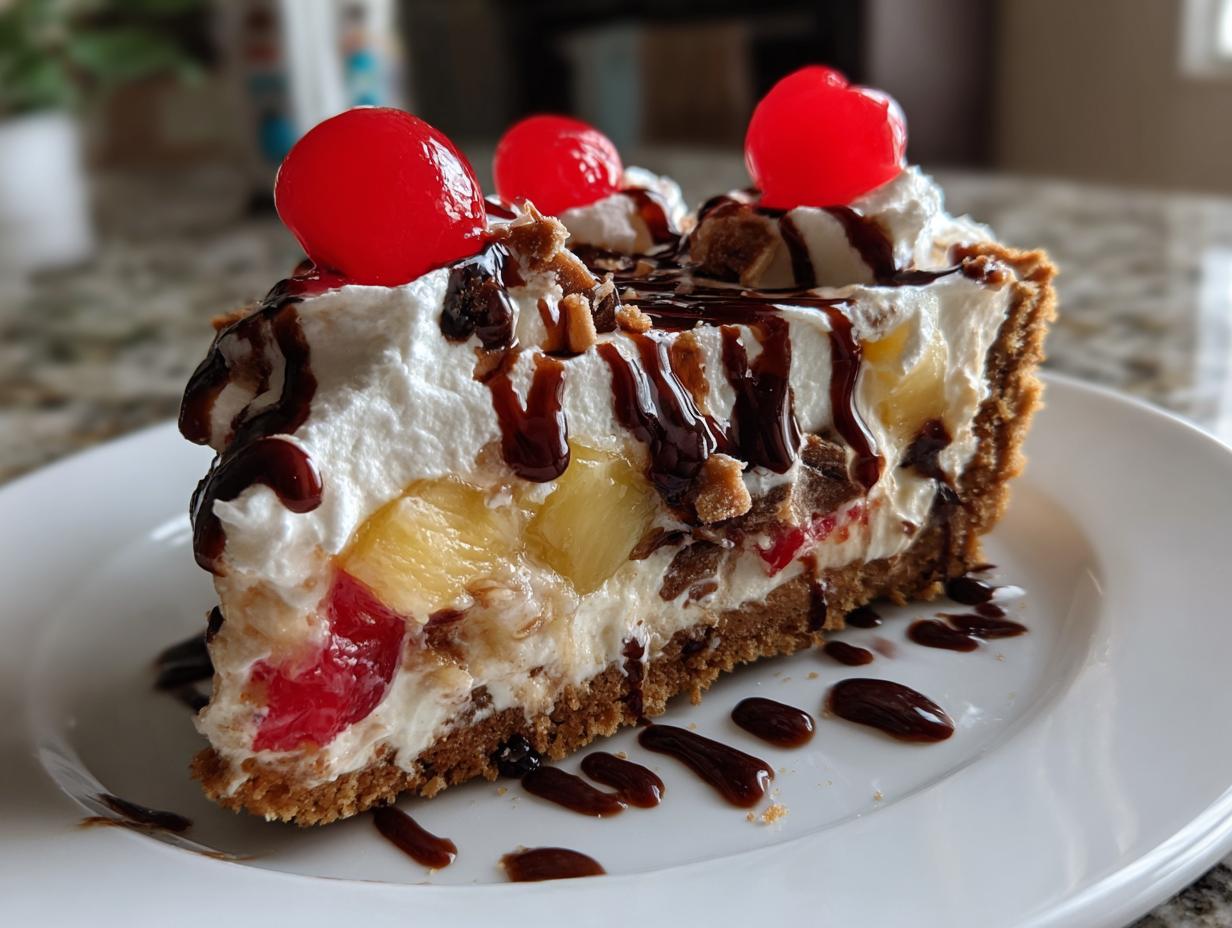
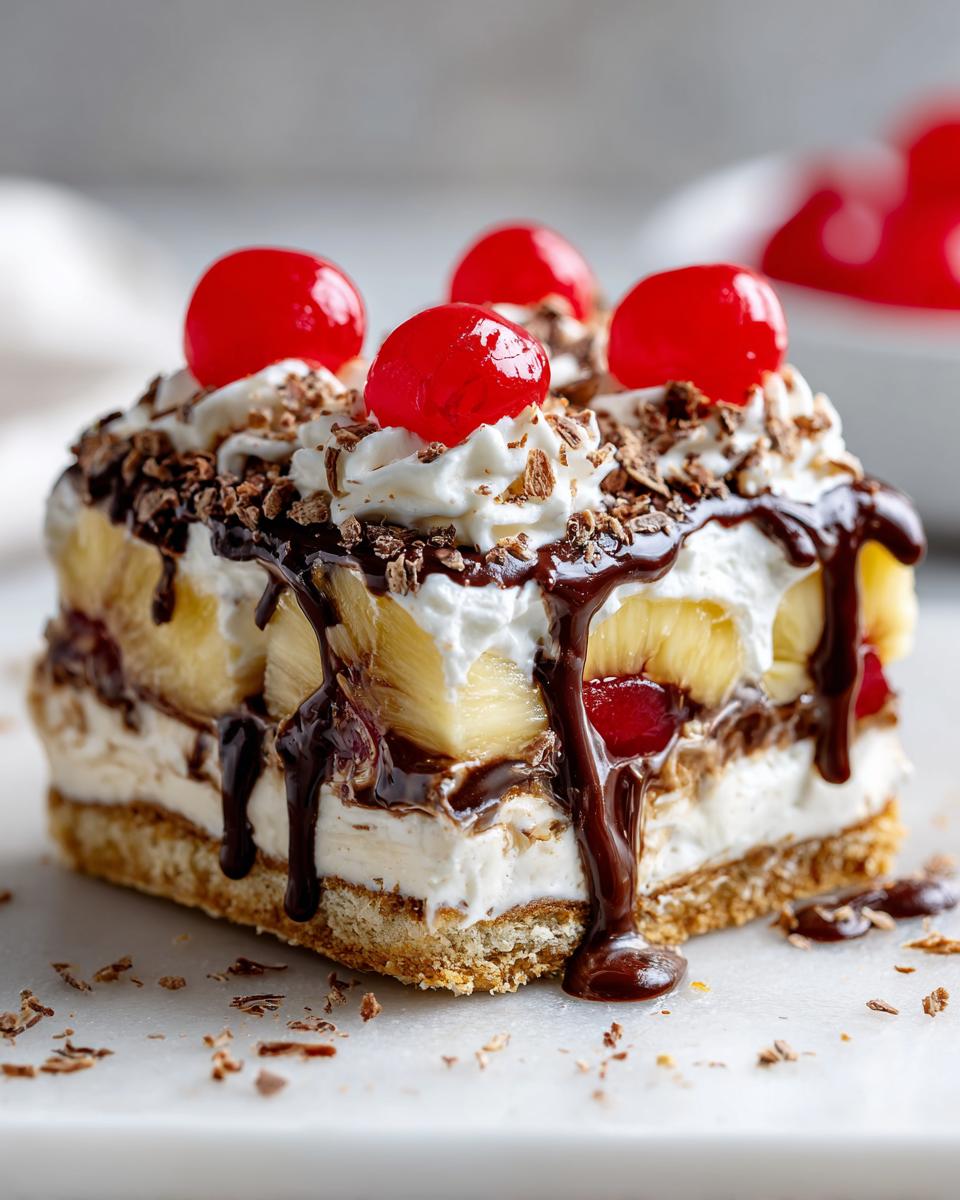
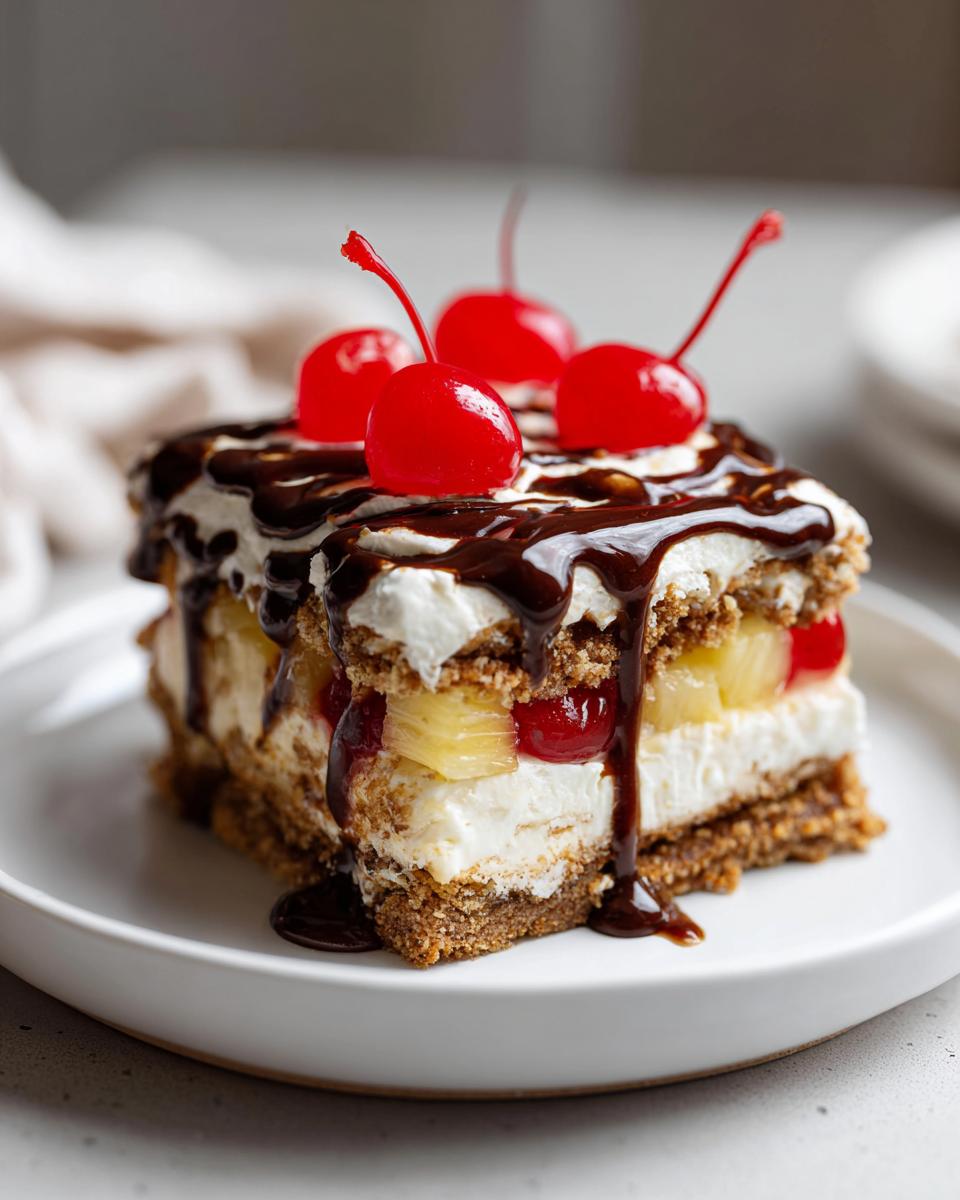
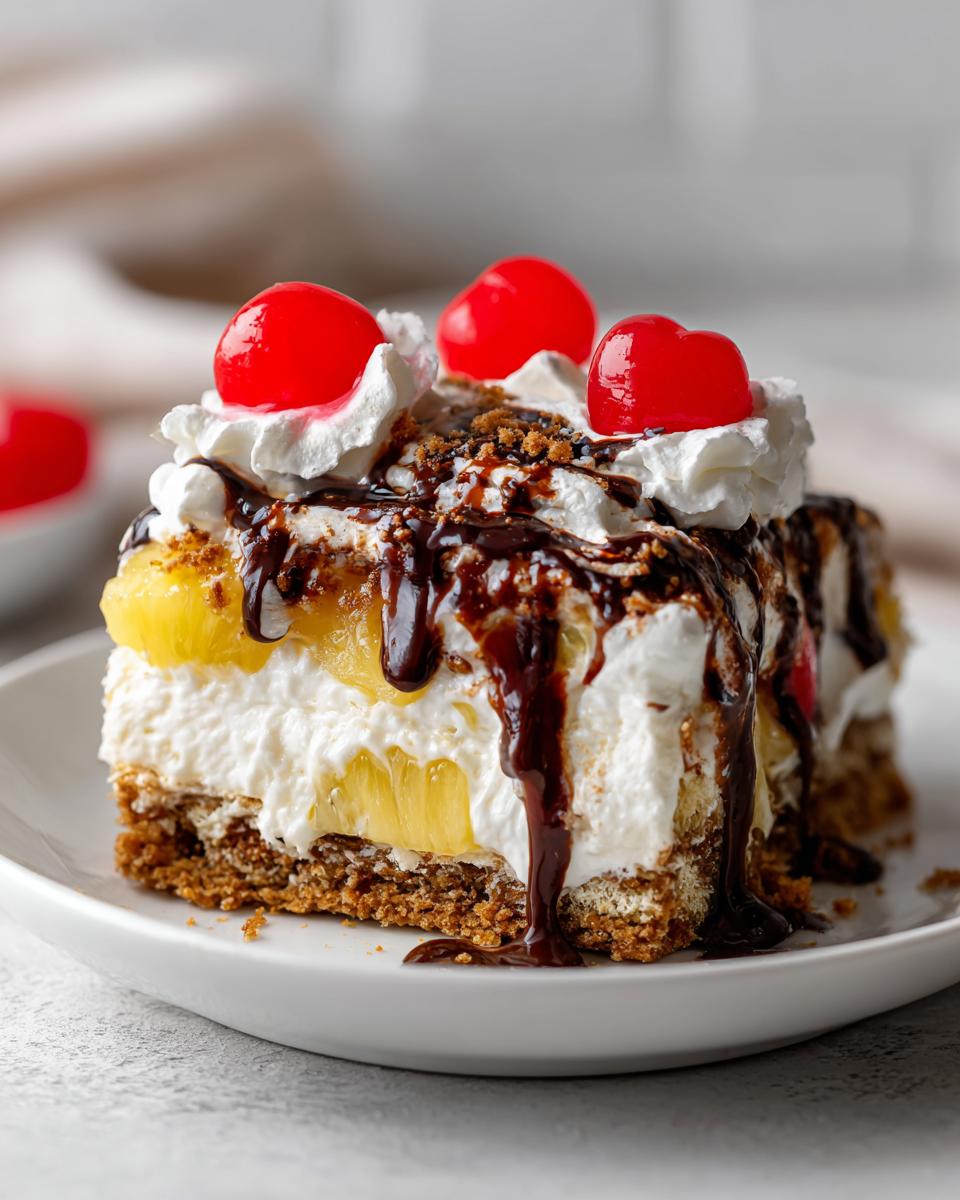
This step is the hardest part: waiting! You absolutely have to chill this **no bake banana split cake** for a minimum of four hours. If you cut it early, it will just slide everywhere. I actually prefer making this the day before, because it helps the layers really set up beautifully. Once it’s firm, bring it out, and go to town with the toppings! Drizzle that chocolate syrup dramatically across the top, sprinkle on your chopped peanuts, and crown every serving (or the whole cake) with those bright little maraschino cherries. Serve it straight from the fridge and watch it disappear!
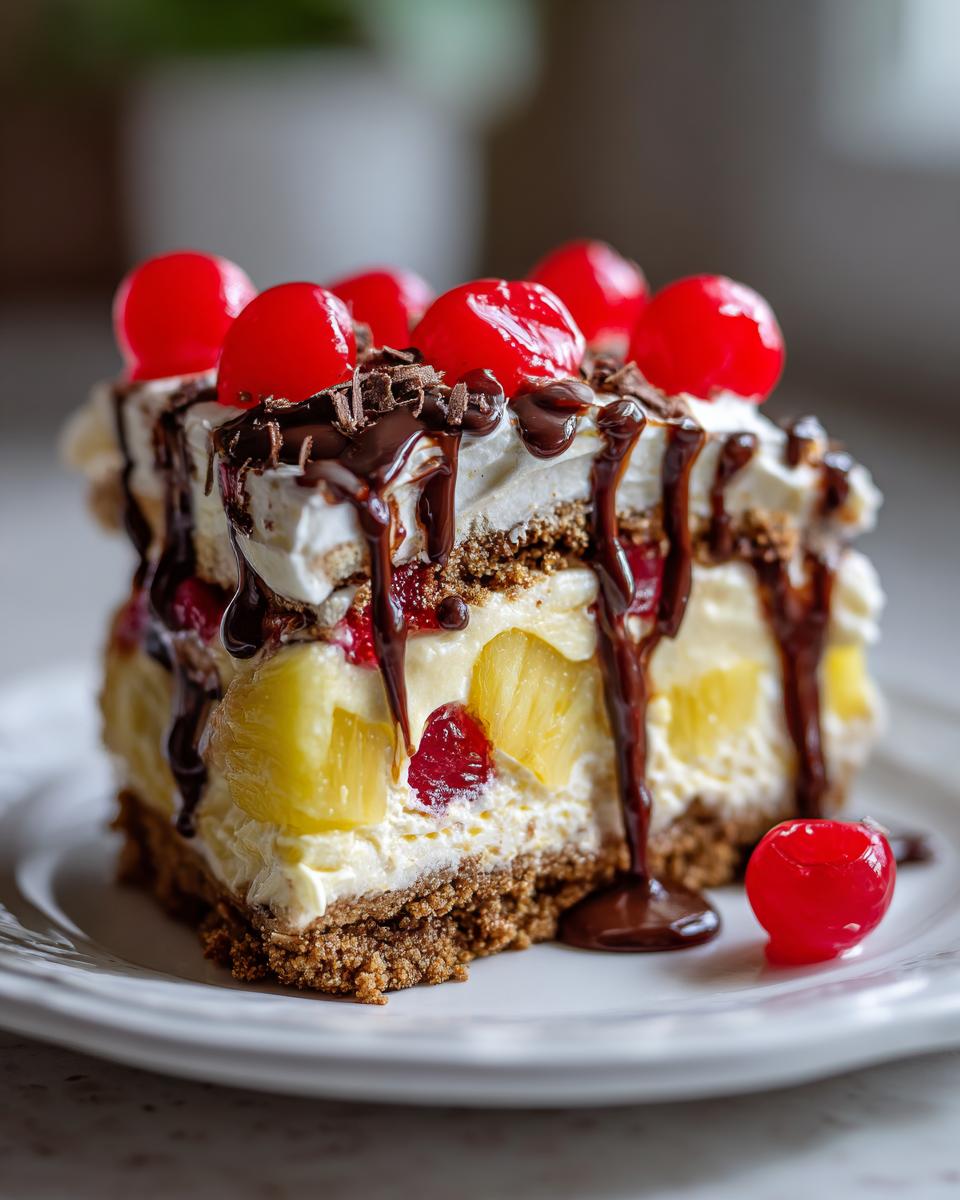
Tips for Success with Your No Bake Banana Split Cake
When you’re making a layered, chilled dessert like this, every little bit of prep counts so the finished **banana split cake** holds its shape. My grandmother, Daisy, often said that the easiest way to ruin a *refrigerator cake recipes* attempt was overlooking the fruit moisture—and oh, do I have a story about that!
Years ago, I got distracted and didn’t drain the crushed pineapple well enough. When I went to slice the cake the next day, the whole middle layer just oozed out onto the serving plate. Disaster! You want that creamy filling to be firm, not soupy. So, my biggest piece of advice, echoing the notes on the recipe card, is to drain that pineapple until it squeaks!
Another little trick I picked up? Slice your bananas relatively thickly. Thin slices tend to get mushy faster, and you want a solid, distinct layer of fruit running through this **easy layered dessert**. A quick dusting of powdered sugar on the bananas before the pineapple goes on can also help wick away any trace moisture they release as they sit. If you’re ever curious about using cream cheese in a different baking format, my cream cheese banana bread recipe is a wonderful, non-chilled treat!
For anything destined for a long chilling time, using a high-quality whipped topping—or even making your own stabilized whipped cream—makes a huge difference in keeping those layers looking clean and fresh. It’s all about that texture!
Make Ahead Dessert and Storage for Banana Split Cake
One of the absolute best things about this **banana split cake** is that it absolutely thrives when made ahead of time! Since this is a chilled, no-bake creation, patience actually makes it better. Think about it: if you’re planning a big summer party or a weekend gathering, you don’t want a fussy dessert taking up your oven space on the day of the event. This is the ultimate planner’s dream, a true make ahead dessert!
I highly recommend assembling the entire **banana split cake**—crust, cream cheese layer, fruit, and final whipped topping—at least four to six hours before you plan to serve it. This gives the graham cracker crust time to soften just slightly against the moisture of the filling, creating a beautiful texture contrast that’s softer than a fresh-baked crust but not soggy.
Now, let’s talk storage. Once it’s completely set, cover the dish tightly with plastic wrap. If you can manage it, try to keep the toppings (chocolate syrup, nuts, cherries) separate until right before serving, as the syrup can sometimes bleed into the whipped topping if stored overnight. Stored tightly wrapped in the refrigerator, this **easy layered dessert** stays delicious for about three days. Honestly, though, it rarely lasts past day two at my house! Don’t wrap the plastic wrap directly onto the toppings if they are already applied, or you’ll wind up with a sticky mess when you unwrap it.
Variations on the Classic Banana Split Flavors
The beauty of a classic dessert like this is taking the structure and making it your own. While the foundational recipe for our **banana split cake** hinges on banana and pineapple, you absolutely don’t have to stop there! Remember, Daisy always encouraged using what you had, and if you want to tailor this to your favorite sundae combination, go right ahead.
The easiest place to swap things out is with the fruit layers. If you aren’t a huge fan of pineapple, or you just want something extra cheerful, swap the crushed pineapple layer for finely chopped, macerated strawberries. Just like with the pineapple, make sure you drain those berries really well after letting them sit with a tiny sprinkle of sugar. Strawberries and bananas are just heavenly together in this cold dessert!
For the drizzles, everyone expects chocolate, but why limit yourself? A little salted caramel sauce drizzled over the top before the cherries go on adds such a sophisticated twist—it works beautifully with the banana base. Or, for a little tartness, swap that thick chocolate syrup for a slightly thinner cherry glaze. You can even use a bit of marshmallow fluff instead of folding all the whipped topping into the cream cheese layer, giving you a chewier texture that reminds me of rocky road!
And if you love that classic cherry flavor throughout, I have a wonderful cherry cake recipe, but for this no-bake version, just try adding a teaspoon of strawberry or cherry extract into that cream cheese layer. It deepens the flavor without adding any extra liquid. Keep experimenting; that’s how the best family recipes evolve!
Serving Suggestions for This Potluck Perfect Dessert
Since this **banana split cake** is so rich and packed with flavor, you don’t need a lot of fuss on the side. For potlucks, I always serve it in slightly smaller slices than I normally would; that classic banana split flavor is intense and satisfying! It’s marvelous on its own, but if you want a pairing, a really good, strong cup of coffee cuts through the sweetness perfectly.
If serving it at home, sometimes I put a little extra drizzle of that chocolate syrup on the plate next to the slice rather than pooling it on top. It looks elegant! For a truly stunning presentation, check out my recipe for easy no-bake Oreo ice cream cake—it gives you ideas for how to beautifully garnish a chilled dessert.
Frequently Asked Questions About Banana Split Cake
It’s totally normal to have questions when you are dealing with a delicate, multi-layered, chilled dessert! Since this **banana split cake** is meant to be a fantastic, hassle-free treat, let’s clear up any last bits of confusion so your assembly goes perfectly. We want this **icebox cake with fruit** to be perfect for your next gathering! If you’re dreaming up fancy finishing touches, I have a few ideas over on my guide for easy 3-ingredient chocolate fudge recipe that you could drizzle over the top!
Can I use fresh pineapple instead of canned in this banana split cake?
You certainly can, but you have to respect the moisture! Canned crushed pineapple is already syrupy and perfectly sweet, which is why I rely on it. If you use fresh pineapple, you’ll need to chop it fine, toss it with a tablespoon of sugar, and let it sit for about 30 minutes. Then, you MUST drain that juice off really well before layering it in. Fresh fruit releases more water when chilled than canned, and if you skip the draining, your graham cracker crust might start getting just a little too soft, too fast. Keep it fast and easy!
What is the best way to prevent the bananas from turning brown?
Oh, the dreaded browning! Bananas are tricky because they oxidize so fast, which ruins the look of our beautiful **quick banana dessert**. Here are my two best tricks. First, slice them relatively thickly—thicker slices hold up better than thin ones. Second, as soon as you slice them, toss them very gently in about a teaspoon of fresh lemon juice. You won’t taste it, honest! The acidity stops the brown spots dead in their tracks. The most important trick, though, is what happens next: ensure that cream cheese layer underneath is completely spread edge-to-edge, and then make sure the next layer (the pineapple or the whipped topping) completely covers the bananas so they stay sealed away from the air. Air is the enemy here!
How long does this No Bake Banana Split Cake last in the fridge?
Because we are relying on fresh fruit tucked between creamy layers, this simply isn’t meant to be a dessert you make a week in advance. For the absolute best texture—where the crust is slightly softened but still structured—you want to serve this within 24 hours. It will safely hold up for about two full days in the refrigerator when covered tightly. After day two, the fresh bananas start to get a little mushy, and while it still tastes great, the texture of this **easy layered dessert** won’t be as sharp as when it was first made. If you are using my tip about making it the day before, that’s perfect!
Share Your Banana Split Cake Creations
Now that I’ve shared my secrets for this glorious, no-oven **banana split cake**, I truly want to see what you whip up! Coming back to Daisy’s style of cooking means reconnecting with the joy of sharing food, and I love seeing how you all put your spin on these simple classics. Did you stick exactly to the chocolate syrup and peanuts, or did you use your favorite strawberry topping?
When you finish chilling your beautiful **refrigerator cake recipes**, please come back and drop a rating—five stars if you loved how easy it was! I always read every single comment. If you managed to snap a picture of your perfectly layered creation, tag me on social media! There is nothing better than knowing this simple, chilled dessert brought a little sweet nostalgia to your busy life. Don’t forget, if you ever have questions or want to share a fun variation, you can always reach out through my contact page!
PrintNo-Bake Banana Split Cake: Easy Layered Summer Dessert

Create this easy layered dessert that captures the classic flavors of a banana split sundae without using your oven. This chilled cake is perfect for parties and potlucks.
- Prep Time: 25 min
- Cook Time: 0 min
- Total Time: 4 hr 25 min
- Yield: 12 servings 1x
- Category: Dessert
- Method: No Bake/Chilling
- Cuisine: American
- Diet: Vegetarian
Ingredients
- 1 1/2 cups graham cracker crumbs
- 1/2 cup unsalted butter, melted
- 1/4 teaspoon salt
- 8 ounces cream cheese, softened
- 1 cup powdered sugar
- 1 teaspoon vanilla extract
- 1 (8 ounce) container frozen whipped topping, thawed, divided
- 2 large bananas, sliced
- 1 (20 ounce) can crushed pineapple, drained well
- 1/2 cup chopped peanuts (optional)
- 1/4 cup chocolate syrup
- 1/4 cup maraschino cherries, drained
Instructions
- Combine graham cracker crumbs, melted butter, and salt in a medium bowl. Press this mixture firmly into the bottom of a 9×13 inch baking dish. Place the crust in the refrigerator while you prepare the filling.
- In a large bowl, beat the softened cream cheese until smooth. Add the powdered sugar and vanilla extract, mixing until fully combined and creamy.
- Gently fold half of the thawed whipped topping into the cream cheese mixture until just combined. Spread this cream cheese layer evenly over the chilled graham cracker crust.
- Arrange the sliced bananas over the cream cheese layer. Spread the well-drained crushed pineapple over the bananas.
- Spread the remaining half of the whipped topping over the pineapple layer.
- Chill the cake in the refrigerator for at least 4 hours, or until firm enough to slice. This chilling time is essential for the best texture.
- Before serving, drizzle the top with chocolate syrup, sprinkle with chopped peanuts if using, and place maraschino cherries on top. Slice and serve cold.
Notes
- Drain the crushed pineapple very thoroughly; excess liquid will make the layers runny.
- You can substitute strawberries for pineapple if you prefer a different classic banana split flavor profile.
- Make this dessert the day before serving for the best set and flavor integration.
Nutrition
- Serving Size: 1 slice
- Calories: 350
- Sugar: 30g
- Sodium: 210mg
- Fat: 20g
- Saturated Fat: 10g
- Unsaturated Fat: 10g
- Trans Fat: 0g
- Carbohydrates: 40g
- Fiber: 1g
- Protein: 4g
- Cholesterol: 35mg