
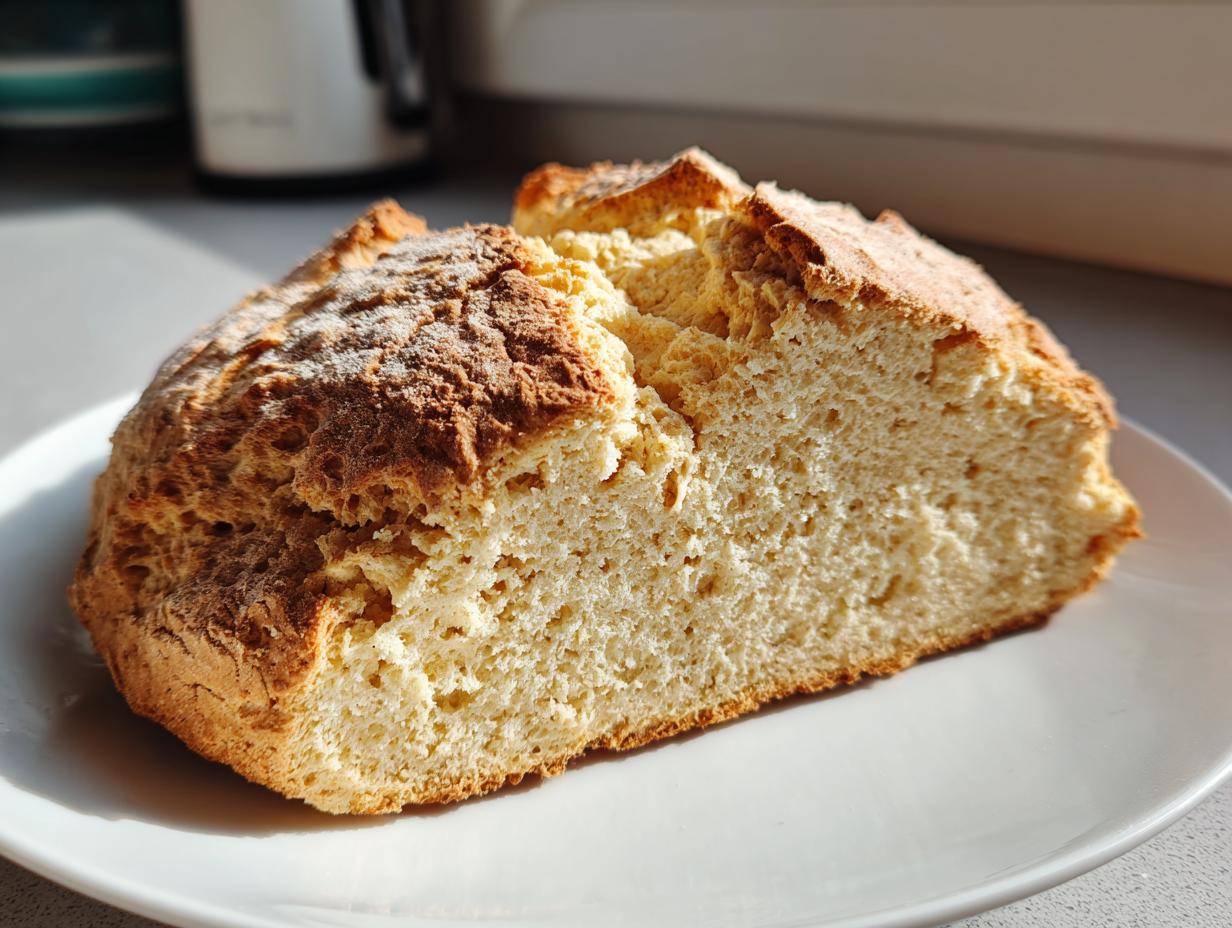
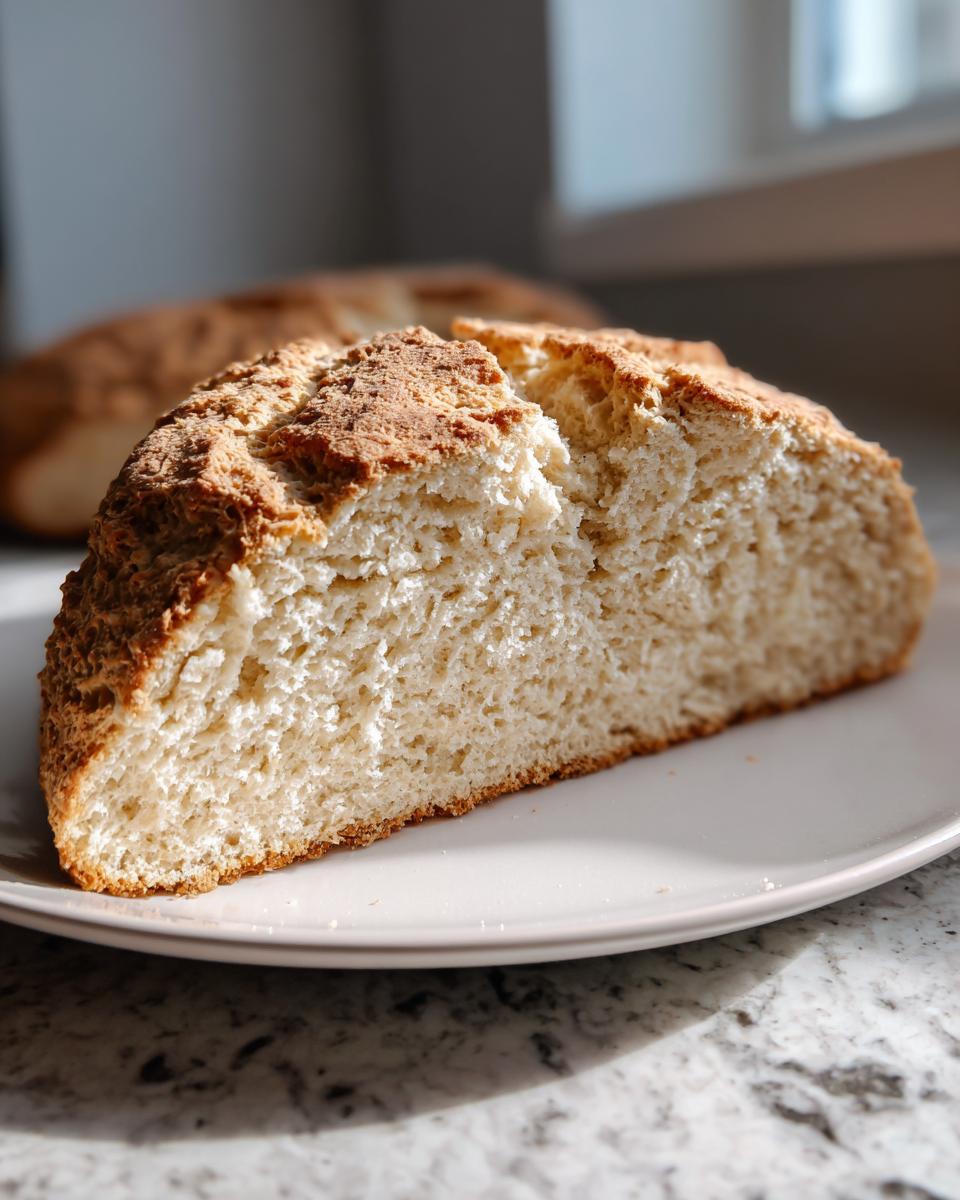
There’s something unbelievably satisfying about making bread without waiting around for yeast to wake up, isn’t there? When I first returned to my grandmother Daisy’s kitchen, I needed comfort food that didn’t demand hours of my busy life. That’s when I rediscovered the magic of true, rustic Irish baking. This recipe for **soda bread** is my absolute favorite way to honor her memory because it’s pure simplicity and flavor. Forget fussy ingredients; we’re using just four things to create the most authentic, golden-crusted loaf. Trust me, if you try this **Easy No Yeast Bread**, you’ll feel that same connection to simple traditions I found myself.
- Why This 4 Ingredient Soda Bread is the Best Homemade Bread Under An Hour
- Gathering Ingredients for Your Classic Soda Bread
- Step-by-Step Instructions for Perfect Irish Soda Bread
- Tips for Success When Making Soda Bread
- Serving Suggestions for Your Rustic Loaf Recipe
- Storage and Reheating Instructions for Soda Bread
- Frequently Asked Questions About Irish Soda Bread Recipe
- Estimated Nutritional Information for Soda Bread
- Share Your Experience Making This Soda Bread
Why This 4 Ingredient Soda Bread is the Best Homemade Bread Under An Hour
When I tell people this is my go-to loaf, they usually balk because they think homemade bread means a whole day lost to kneading and rising. Not with this **Classic Soda Bread**! This truly is the **Best Soda Bread Recipe** if time is tight. We are talking about mixing this dough in ten minutes flat and having it on the cooling rack in under an hour total. That’s right, this is your new favorite **Homemade Bread Under An Hour** solution.
This speed is the heart of **Traditional Irish Baking**, where resourcefulness leads to deliciousness. You get that beautiful, **Crusty Bread Recipe** exterior and a fantastic flavor using just those required four core elements. You won’t believe how little effort goes into this masterpiece. If you’re looking for speed and simplicity, check out how quick a little beer bread can be made, but honestly, this **Irish Soda Bread Recipe** beats that for pure comfort food.
The Secret to Tender Crumb Bread Without Yeast
The real genius here is ditching the yeast entirely! We rely on science, folks. When buttermilk—our essential liquid—hits the baking soda, they react instantly. That little fizz creates the bubbles needed to lift the dough right up in the oven. Because this reaction happens so fast, you don’t wait, and you absolutely must resist the urge to mix it further, or you’ll deflate all that glorious lift. That quick chemical reaction is what gives you that wonderfully soft, **Tender Crumb Bread** without any yeast fuss whatsoever. If you’ve ever struggled with slow-rising dough, this reliance on buttermilk makes it the perfect **Simple Bread for Beginners**.
Gathering Ingredients for Your Classic Soda Bread
Okay, let’s talk about what you need for this stunning **Classic Soda Bread** loaf. Seriously, look at this list! It’s practically a miracle that something this good only requires four components. You’ll need exactly 2 cups of all-purpose flour, 1 teaspoon of baking soda (please make sure it’s fresh!), and 1 teaspoon of salt. The star, however, is the liquid: you need a generous 1 1/2 cups of thick, tangy buttermilk. That’s it! These simple measurements are the foundation of a perfect **Buttermilk Bread Recipe** every single time.
Essential Ingredient Notes and Buttermilk Bread Recipe Hacks
Now, I know sometimes buttermilk goes missing from the fridge just when you need it most. Don’t panic! If you don’t have any on hand, you can whip up a substitute in minutes. Just take 1 1/2 cups of whole milk, stir in about 1 1/2 tablespoons of white vinegar or fresh lemon juice, and let it sit on the counter for about five minutes. It will curdle slightly, and boom—you have your batter liquid ready to go!
Also, while the recipe calls for all-purpose flour, I love adding a little more texture sometimes. If you want a slightly healthier, heartier loaf, feel free to swap out half a cup of the white flour for whole wheat flour. It darkens the color a bit, but the flavor is still wonderful in this **Rustic Loaf Recipe**!
Step-by-Step Instructions for Perfect Irish Soda Bread
Alright, let’s get baking! Since this is such a quick bread, preparation is key. First thing, get your oven cranking up—we need it HOT. Preheat that oven to 400 degrees Fahrenheit. If you have a Dutch oven (and I highly recommend using one for that amazing crust!), toss it right in there to preheat too. If you’re just using a sheet pan, line it with parchment paper so you don’t have any worries later.
Next, the dry stuff. Whisk your flour, baking soda, and salt together in a big bowl. You want them happy and mixed up. Now, here is the most important part for that beautiful, **Tender Crumb Bread**: make a little dip, a well, right in the middle, and pour in ALL your buttermilk at once. Seriously, all of it. Then, grab a wooden spoon or just use your hands and mix it quickly until it barely holds together. I mean it—stop mixing the second you don’t see any white flour streaks left. Overmixing gluten is the enemy here!
Turn that shaggy dough onto a lightly floured surface and gently pat it into a round, about an inch and a half thick. Don’t knead it, just shape it. Cut a deep cross right into the top with a sharp knife, going almost all the way down to the bottom. This isn’t just for show; it lets the heat penetrate evenly, which is vital for a perfect bake. You can learn more about shaping doughs over at my guide on working with basic doughs.
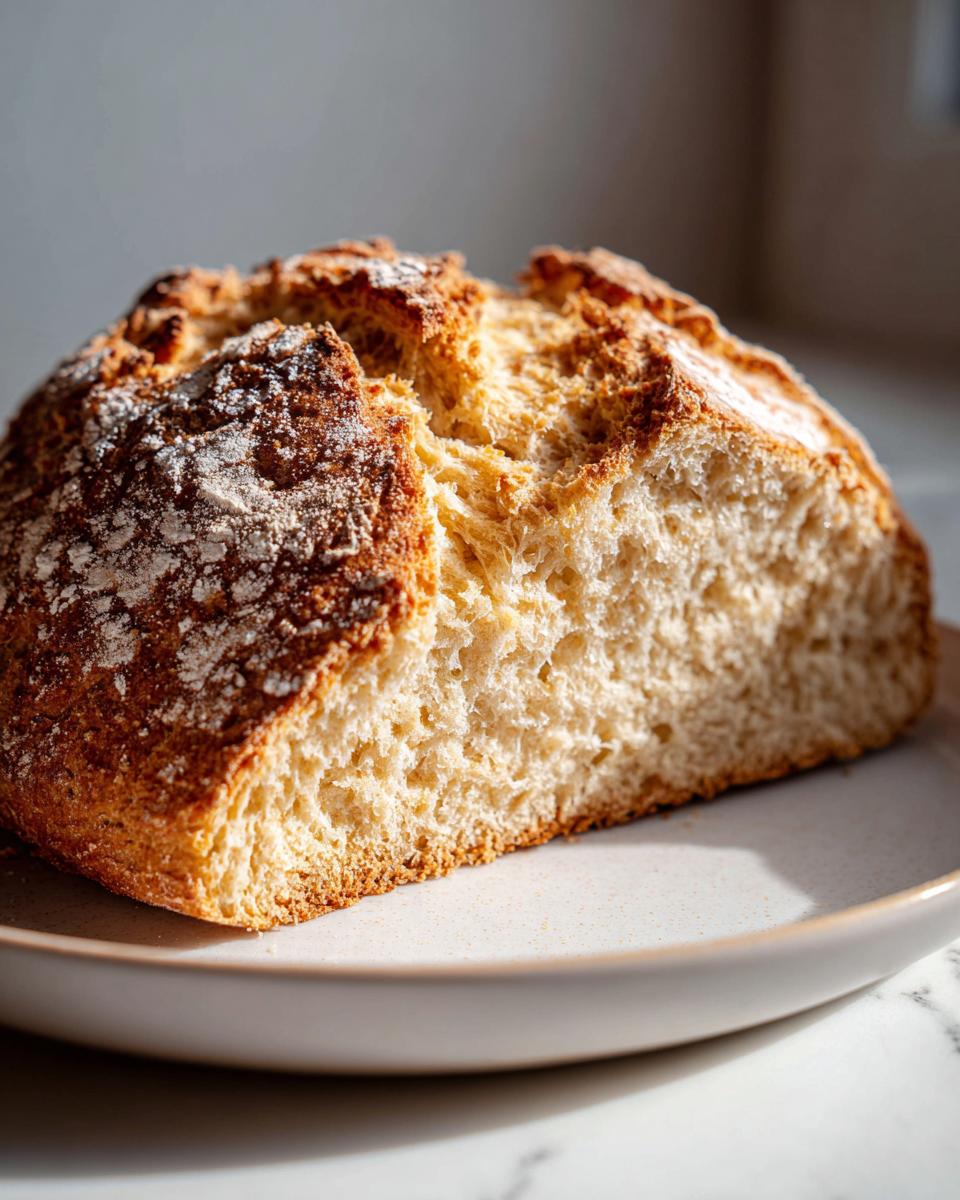
Achieving a Golden Crusty Bread Recipe Finish
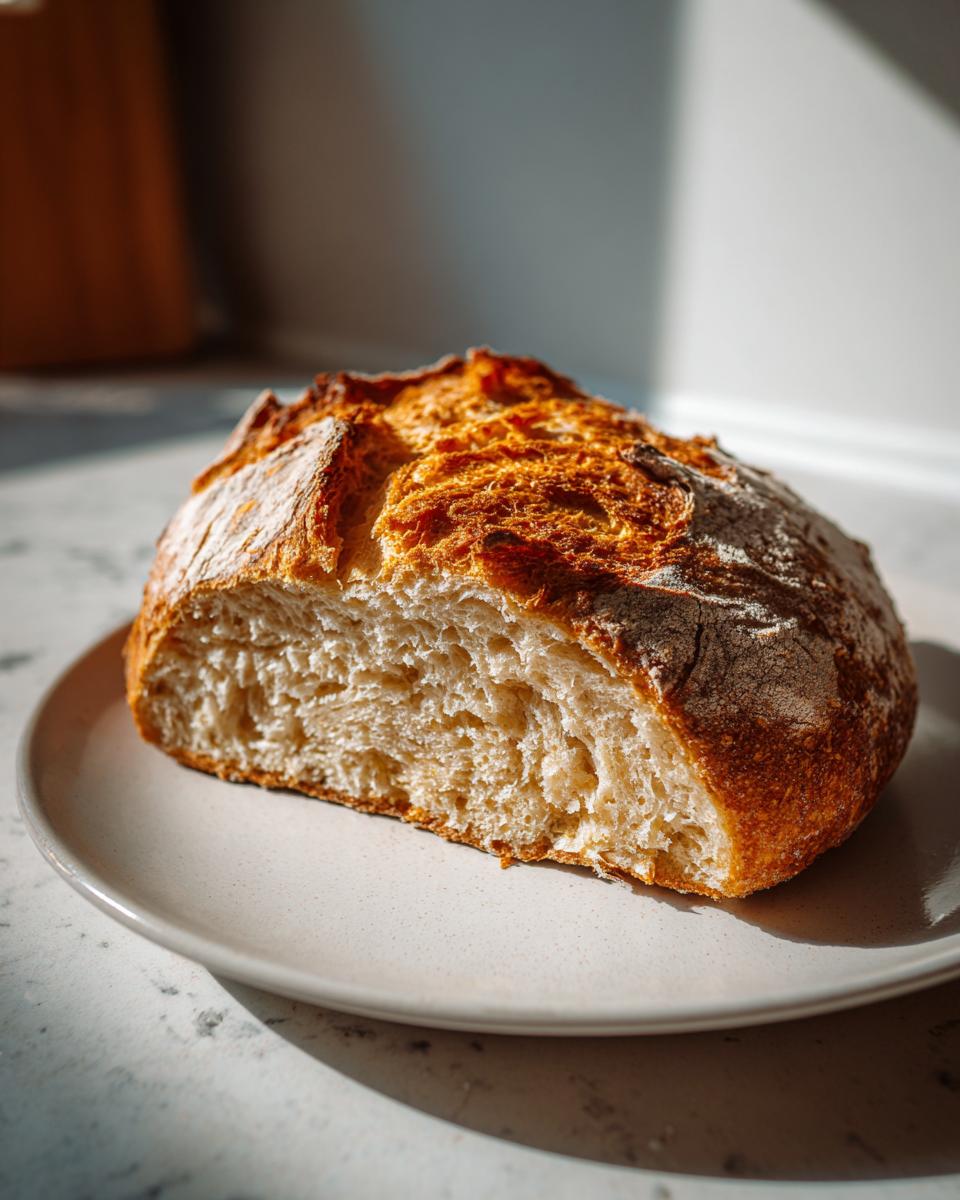
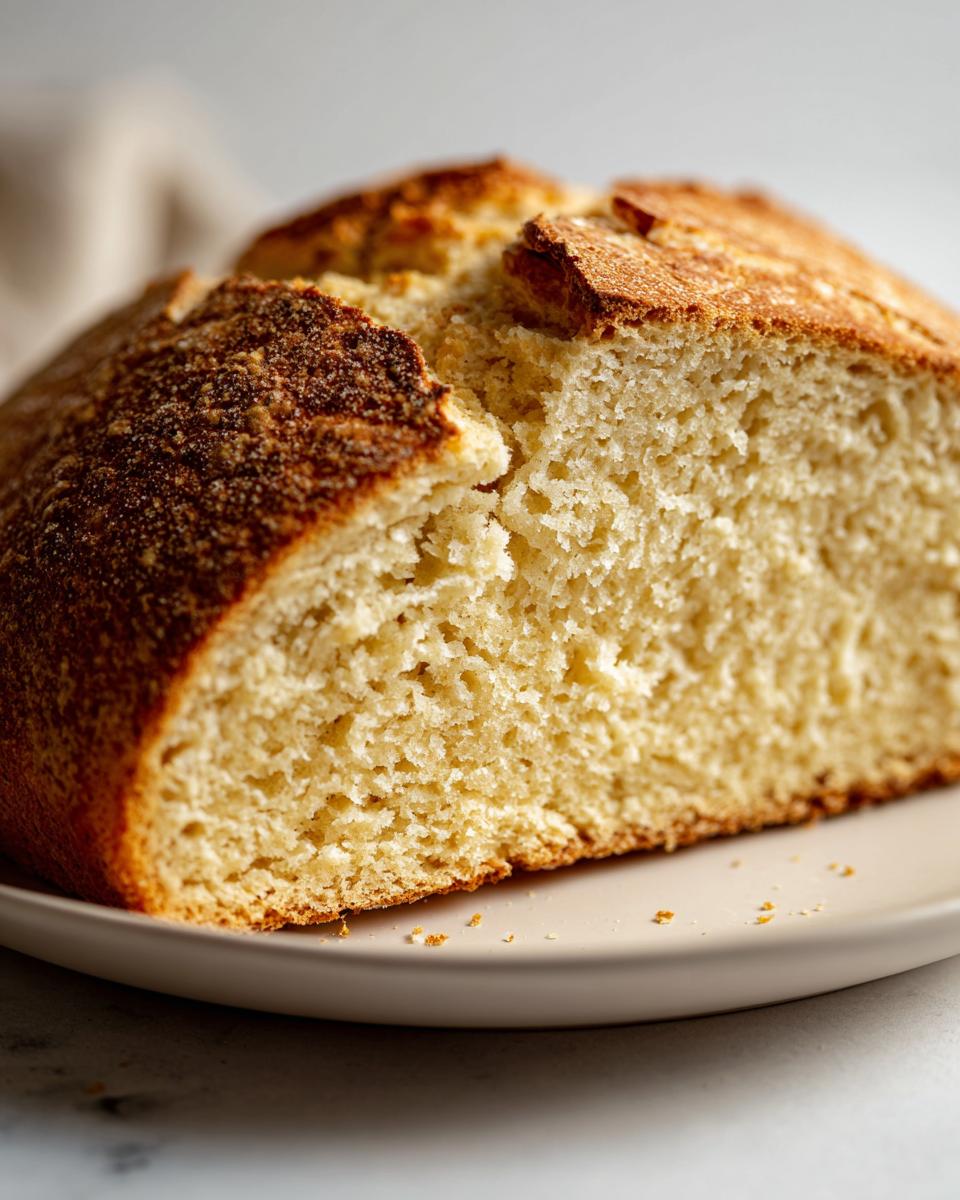
Pop your loaf into the preheated Dutch oven or onto the sheet pan. Bake it for about 30 to 40 minutes. You’re looking for a deep golden brown color on that crust—darker is better for flavor, don’t shy away from it! When you pull it out, the true test for this **Crusty Bread Recipe** is tapping the bottom. If it sounds completely hollow, you nailed it, and your **soda bread** is done. If it sounds dense, pop it back in for another five minutes. If you want to see how others handled the Dutch oven method, check out the amazing results shared by others at this link!
Tips for Success When Making Soda Bread
Even though this **Irish Soda Bread Recipe** is so simple, there are just a couple of things I learned over the years—mostly from Daisy—that keep it from being dense or gummy. Remember, we are going for that airy, slightly crumbly texture, not a brick!
First, let’s talk about quickness. The entire time the buttermilk is hitting the dry ingredients to the point where you turn the dough onto the counter needs to be super speedy—think two minutes max, tops. Once that baking soda gets wet, it starts working immediately. If you dawdle, the bubbles escape, and that’s how you end up with a flat loaf. Keep your movements brisk and intentional!
Secondly, please check your baking soda! This is perhaps the most important advice I can give for any quick bread, but especially this one since it has no backup leavener like yeast. If your baking soda is old, it won’t react strongly enough to give you the rise you need. A great tip for checking freshness is putting a tiny bit in a little vinegar; if it doesn’t bubble furiously, toss it out and buy a new container. It’s worth it for this amazing **Quick Bread Baking**! For more foundational knowledge on baking, you can always review my guide on simple bread for beginners.
Thirdly, don’t be afraid of a hot oven. I know jumping straight to 400 degrees Fahrenheit can feel aggressive, but that initial blast of heat does two things: it sets your crust beautifully, making it wonderfully golden brown, and it forces the chemical reaction in the dough to peak quickly before it can deflate. If you’re learning the ropes, you can definitely consult seasoned bakers who explain their methods for achieving the perfect loft, like the detailed guide found here: the million dollar mama’s advice on authentic soda bread.
Finally, when shaping, be gentle. You aren’t developing gluten here; you are just coaxing the shaggy mass into a round shape. Don’t squash out the air you just created! This attention to gentleness is what separates a good loaf from a spectacular one, keeping it in the realm of **Simple Bread for Beginners** success.
Serving Suggestions for Your Rustic Loaf Recipe
Now that you’ve pulled this gorgeous, steaming **Rustic Loaf Recipe** out of the oven, the real fun begins! Honestly, this **Traditional Irish Baking** masterpiece is honestly perfect just sliced thick while it’s still warm, slathered with a generous layer of good quality, cold Irish butter melting into all those nooks and crannies. That’s how my grandma always did it, and frankly, it’s hard to beat that simple perfection.
However, because it’s technically a quick bread but so hearty and satisfying, it’s fantastic for any meal, not just breakfast. Forget the fancy rolls tonight; this is the ultimate **Quick Dinner Breads** accompaniment. It absolutely soaks up every bit of liquid from a thick, hearty bowl of vegetable stew or creamy tomato soup. It’s honestly the greatest **bread to serve with soup** you will ever make.
If you’re pairing it with dinner, try serving it alongside something really flavorful and deeply savory. I find it balances perfectly against a smoky chili, like the smoky black bean chili recipe I shared last fall. The slightly sour tang from the buttermilk in the **soda bread** cuts right through the richness of the chili. For something sweeter, a smear of quality jam or honey works wonders. No matter how you serve it, enjoy every single slice!
Storage and Reheating Instructions for Soda Bread
You’ve baked this stunning loaf, and you’re wondering how long you get to enjoy its fresh-baked glory. This bread is best eaten the day it’s made, truly, nothing beats that first warm slice! But don’t worry, this **soda bread** keeps surprisingly well because it doesn’t have the high moisture content of yeast breads that go stale quickly.
For room temperature storage, wrap the leftover loaf tightly in aluminum foil or place it in a zip-top bag. Keep it somewhere dark and dry, and it should stay perfectly good for about three days. After that, it starts to taste a little dull, though it’s still usable for things like breadcrumbs.
However, if you want that amazing crust back—and you absolutely do—reheating is your secret weapon. Don’t just microwave it; that turns the crust soggy and the inside rubbery, which is the opposite of the **Rustic Loaf Recipe** texture we worked for!
Here’s the best way to revive it. You can gently slice the bread and toast the pieces in a toaster or under the broiler until they are golden again. If you have a larger chunk of loaf you want to bring back to life, wrap it loosely in foil and pop it into a 300-degree oven for about 10 minutes. This warms the interior gently while allowing the exterior to crisp back up beautifully. It smells just like you pulled it out of the oven the first time!
Frequently Asked Questions About Irish Soda Bread Recipe
Can I use regular milk instead of buttermilk for this soda bread?
You absolutely can! While buttermilk is ideal because its natural acidity helps activate the baking soda for the best rise, it’s not a dealbreaker if you run out. As I mentioned in the tips, just take 1 1/2 cups of whole milk and stir in 1 1/2 tablespoons of white vinegar or lemon juice. Let it sit on the counter for just five minutes until it looks a little bit curdled or thickened. That’s your homemade substitute, and it works perfectly in this quick bread recipe!
My soda bread turned out dense and heavy. Why?
Oh, that is the most common pitfall with **soda bread**, but don’t worry, it’s usually an easy fix! The absolute number one reason this happens is overmixing. Remember how I stressed being gentle? If you mix the flour and buttermilk for too long, you develop gluten, which makes the bread tough and heavy instead of allowing for that fluffy, **Tender Crumb Bread** texture. You should mix until *just* combined—a few streaks of flour showing are okay! Also, ensure your baking soda is fresh; old soda won’t provide the necessary lift.
Is this recipe too simple for St. Patrick’s Day celebrations?
Not at all! This **Irish Soda Bread Recipe** is ideal for your **St Patricks Day Bread** needs! Daisy always served it on St. Patrick’s Day, and that’s why I love it so much for that holiday. It’s traditional, authentic, and it handles rich meals beautifully. If you want to dress it up for a party, you can try adding a sprinkle of caraway seeds to the dough, or maybe melt some butter with a touch of honey and brush it over the top right when it comes out of the oven. For more fun ideas celebrating the holiday, check out my festive St. Patrick’s Day baking ideas!
Why is cutting that cross on top so important?
That deep cut in the top of the loaf is a traditional step that serves a real purpose! Since this is a **Rustic Loaf Recipe** that bakes up quickly, the outside sets fast. If you don’t cut that cross—and I mean cut it deep, almost to the bottom—the dense center might not cook all the way through before the crust burns. Cutting the cross lets the heat penetrate the center evenly, ensuring the whole loaf is perfectly baked and not doughy underneath. It’s a historic trick that even modern bakers like those on Natasha’s Kitchen still rely on for a foolproof bake.
Estimated Nutritional Information for Soda Bread
When you’re keeping things simple, like with this **4 Ingredient Bread**, the calories and nutrition are usually quite straightforward too! I always encourage people to focus on the experience and the fresh ingredients rather than obsessing over labels, but it’s good to have a rough idea, right?
Please remember that these numbers are estimates based purely on the four core ingredients listed in the recipe—flour, baking soda, salt, and buttermilk—and may vary slightly based on the exact brand of buttermilk you use. This breakdown is calculated for one serving slice of the total loaf.
Here is the approximate nutritional breakdown for one serving:
- Serving Size: 1 slice
- Calories: 180
- Total Fat: 1g (with only 0.5g Saturated Fat)
- Carbohydrates: 37g
- Fiber: 1g
- Sugar: 1g
- Protein: 6g
- Cholesterol: 5mg
- Sodium: 350mg
See? It’s incredibly low in fat and wonderfully simple. That’s the beauty of this **Classic Soda Bread**. It’s honest food that gives you energy without weighing you down. It’s a great simple carb base to pair with whatever healthy toppings or hearty soups you’re serving!
Share Your Experience Making This Soda Bread
Now that you’ve whipped up this incredible **soda bread**, I truly want to know how it went! Baking is a conversation, isn’t it? It’s just like how Daisy shared her loaves with neighbors back in the day—I feel like I’m sharing this with all of you now, and I’m eager to hear your results.
Did you stick strictly to the four ingredients for a perfectly **Traditional Irish Baking** result, or did you sneak in some caraway seeds? Did you manage that **Homemade Bread Under An Hour** timeframe? Please take a moment to stop by the comments below and tell me about your loaf. Did the crust get nice and golden? Did you pair it with something amazing?
Leaving a rating helps other home cooks feel confident trying this recipe for the first time, moving away from complicated baking and embracing this simple joy. Every time someone makes this **Buttermilk Bread Recipe**, it feels like we are keeping that legacy of simple, honest food alive in our modern kitchens. It’s the core of what Daisy taught me: take simple ingredients, treat them with respect, and you create connection.
If you fell in love with the ease of this savory bake, you might also be interested in exploring some of my favorite sweet bakes as well! You can check out my collection of delicious dessert recipes for your next kitchen adventure. Happy baking, and enjoy every last crumb of your fresh **Irish Soda Bread Recipe**!
PrintThe Easiest, Most Authentic 4-Ingredient Irish Soda Bread Recipe
Bake traditional Irish soda bread using only four simple ingredients. This quick bread requires no yeast, yields a tender crumb, and has a golden crust, ready in under an hour.
- Prep Time: 10 min
- Cook Time: 40 min
- Total Time: 50 min
- Yield: 8 servings 1x
- Category: Bread
- Method: Baking
- Cuisine: Irish
- Diet: Vegetarian
Ingredients
- 2 cups all-purpose flour
- 1 teaspoon baking soda
- 1 teaspoon salt
- 1 1/2 cups buttermilk
Instructions
- Preheat your oven to 400 degrees Fahrenheit (200 degrees Celsius). If you have a Dutch oven, place it in the oven to preheat. If not, line a baking sheet with parchment paper.
- In a large bowl, whisk together the flour, baking soda, and salt.
- Make a well in the center of the dry ingredients and pour in the buttermilk all at once.
- Mix the ingredients quickly with a wooden spoon or your hands until just combined into a soft, shaggy dough. Do not overmix; this keeps the crumb tender.
- Turn the dough out onto a lightly floured surface. Gently shape it into a round loaf, about 1 1/2 inches thick.
- Place the dough onto the preheated Dutch oven or the prepared baking sheet.
- Use a sharp knife to cut a deep cross into the top of the loaf, cutting almost to the bottom. This helps the bread cook evenly.
- Bake for 30 to 40 minutes. The bread is done when the crust is deep golden brown and sounds hollow when you tap the bottom.
- Remove the loaf from the oven and cool on a wire rack before slicing.
Notes
- For a slightly denser, heartier loaf, substitute 1/2 cup of the all-purpose flour with whole wheat flour.
- If you do not have buttermilk, mix 1 1/2 cups of whole milk with 1 1/2 tablespoons of white vinegar or lemon juice, let it sit for 5 minutes, and then use it in place of buttermilk.
- Serve this homemade Irish bread warm with Irish butter or alongside your favorite hearty soups.
Nutrition
- Serving Size: 1 slice
- Calories: 180
- Sugar: 1
- Sodium: 350
- Fat: 1
- Saturated Fat: 0.5
- Unsaturated Fat: 0.5
- Trans Fat: 0
- Carbohydrates: 37
- Fiber: 1
- Protein: 6
- Cholesterol: 5