
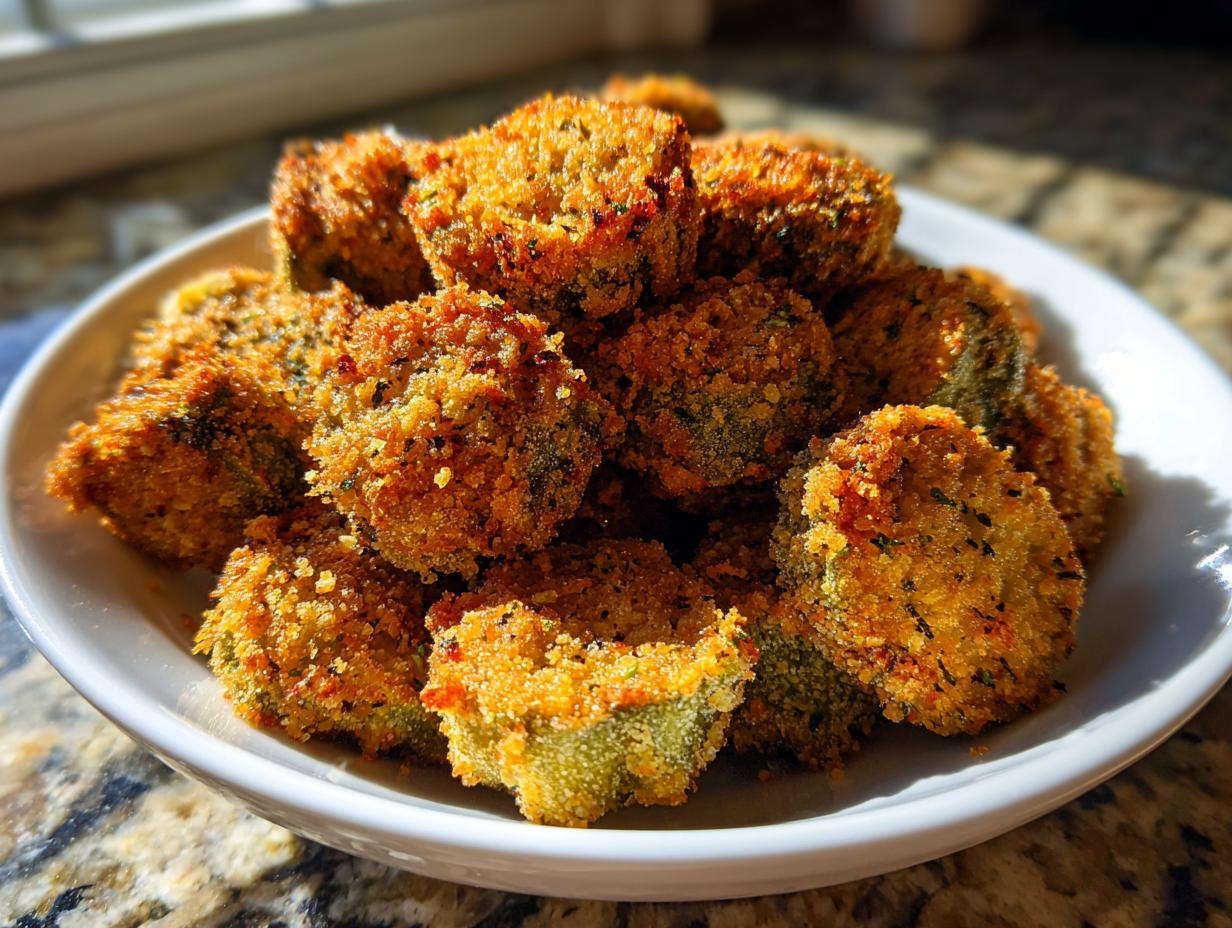
Oh, aren’t you just craving something truly comforting right now? That deep, cozy flavor that wraps you up like Grandma Daisy’s oldest quilt? I know I am, especially when the weather turns, or when I just need a little taste of home. Forget everything you think you know about soggy, slimy veggies because I’m about to hand over the definitive recipe for fried okra that is shatteringly crisp. After years of testing here in my own little kitchen, adapting Daisy’s straightforward wisdom, I can promise you this Southern favorite comes together faster than you can set the table—under 30 minutes, start to finish! This isn’t just a recipe; it’s the proven way to make the best fried okra that stays crunchy long enough for everyone to grab a second handful. I’ve made sure this method honors the simple, honest cooking she taught me while also giving you the crunch you’re truly looking for. If you’re looking for equally satisfying sides, you should check out my recipe for Southern Fried Cabbage!
- Why This Is the Best Fried Okra Recipe You Will Make
- Ingredients for Classic Southern Fried Okra Recipe
- How to Make Fried Okra Crispy: Step-by-Step Instructions
- Tips for Perfect Skillet Fried Okra Every Time
- Alternative Cooking Methods for Crispy Fried Okra
- Serving Suggestions for This Easy Okra Side Dish
- Storing and Reheating Your Fried Okra
- Frequently Asked Questions About Making Fried Okra
- Nutritional Estimate for Crispy Fried Okra
- Share Your Southern Comfort Food Creations
Why This Is the Best Fried Okra Recipe You Will Make
I totally get it—you want that satisfying *SNAP* when you bite into your okra. That’s why I made sure this recipe targets crispiness above all else. This isn’t some mushy dish; this is the Best Fried Okra that stands up to dipping sauces and lasts long enough to make it onto the dinner table intact. Every step here is geared toward eliminating the dreaded slime and making sure you have zero fryer frustration.
Achieving Ultimate Crunchy Fried Okra Texture
The secret weapon here is the one-two punch of buttermilk and our specific coating blend. The buttermilk tenderizes just a little, but its main job is gripping that heavy cornmeal crust. We aren’t messing around; we want those Crunchy Fried Okra Bites! That ratio of cornmeal to flour locks in that golden, super-crunchy exterior. Trust me, this technique beats trying to just coat it dry—that never works!
Quick Okra Recipe: Ready in Under 30 Minutes
You don’t have to wait all afternoon for comfort food! This whole production, from slicing the okra raw to pulling those perfectly golden pieces out of the oil, clocks in at just 25 minutes total cook time. That makes this a fantastic Quick Okra Recipe for busy weeknights when you need a side that feels special but takes no time. For other speedy sides that hit the spot, you might want to try my Easy Cheesy Potato Casserole!
Ingredients for Classic Southern Fried Okra Recipe
Whenever Daisy taught me a recipe, she always said, ‘Gather your players before the show begins.’ With this crispy batch, that means getting the okra ready and setting up your dredging stations exactly as specified. We keep this list short because the magic is in the technique, not in tracking down weird ingredients! You need good, fresh okra and quality Southern staples. If you’re looking for another simple favorite, check out my Easy 3-Ingredient Chocolate Fudge Recipe!
- 1 pound fresh okra, washed and sliced into 1/2-inch rounds
- 1 cup buttermilk
- 1 cup yellow cornmeal
- 1/2 cup all-purpose flour
- 1 teaspoon salt
- 1/2 teaspoon black pepper
- 1/4 teaspoon cayenne pepper (optional, for a hint of heat)
- Vegetable oil, for frying (about 1 inch deep in skillet)
Coating Components for Cornmeal Crusted Okra
This dry mix is where we build that beautiful, aggressive crunch. It’s a simple combination of creamy cornmeal and flour, seasoned just right with salt and pepper. Don’t skip that optional dash of cayenne pepper! It doesn’t make the okra truly spicy, just adds that wonderful background warmth we love in true Cornmeal Crusted Okra that balances the richness of the frying.
How to Make Fried Okra Crispy: Step-by-Step Instructions
Okay, here’s where we put the theory into practice! Making truly crispy fried okra comes down to respecting the moisture content and making your coating stick for dear life. I learned from Daisy that rushing the prep is the quickest way to ruin a batch. Follow these steps closely, and you’ll have that perfect crunch without any fuss. Once you’ve practiced the prep, check out my guide on Crispy Baked Chicken Wings for another simple side!
Preparation: The Key to No Slime Okra
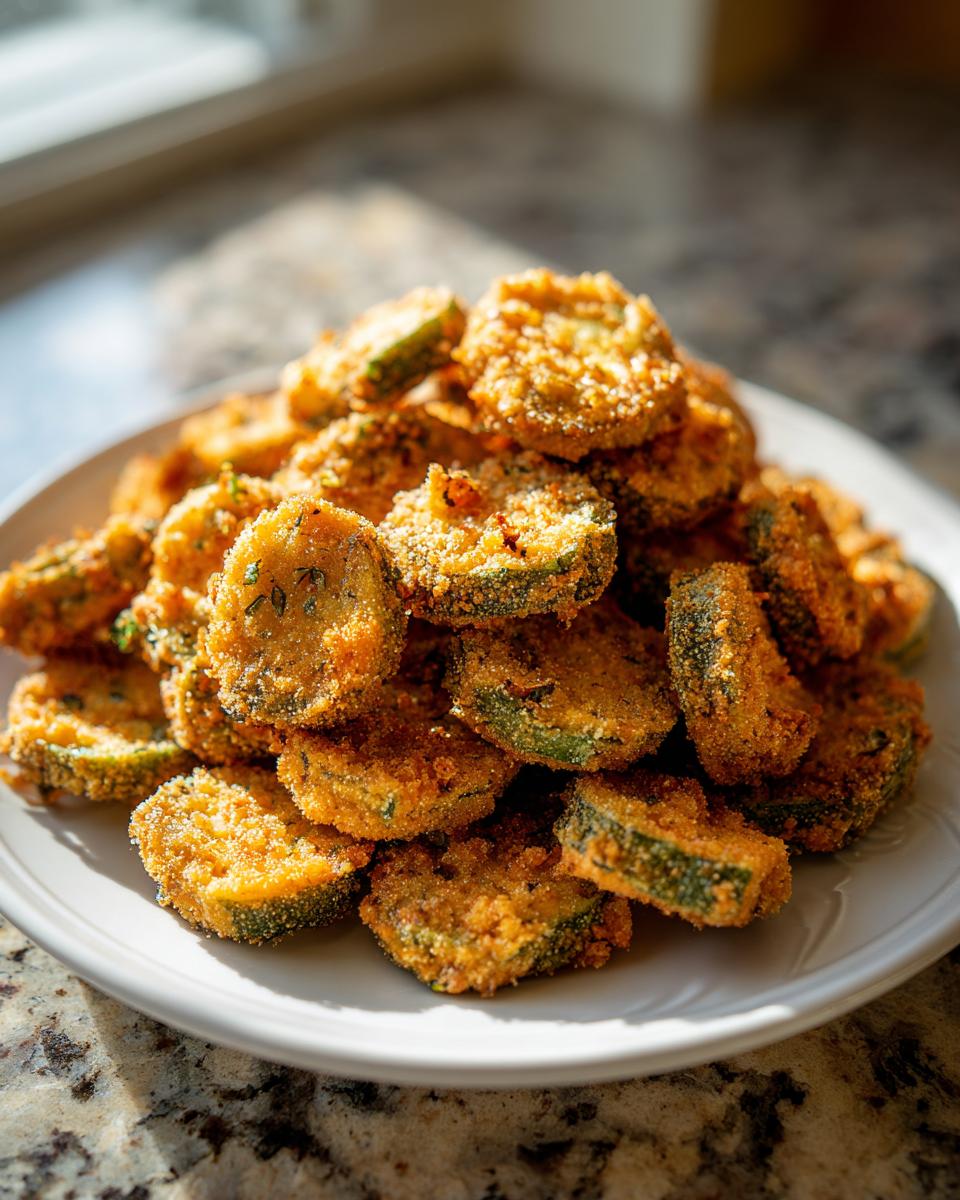
Listen up, this is the most crucial step for getting that beautiful No Slime Okra victory. First, wash your fresh okra really well. Then, and I mean *really* well, pat every single piece dry with paper towels. You want them bone dry before you even think about cutting them. Once dry, slice them into nice half-inch rounds. Don’t let the cut okra sit around; the moment you slice them, they start leaking that natural slime, so move straight to the coating!
The Double Dredge Technique for Buttermilk Fried Okra
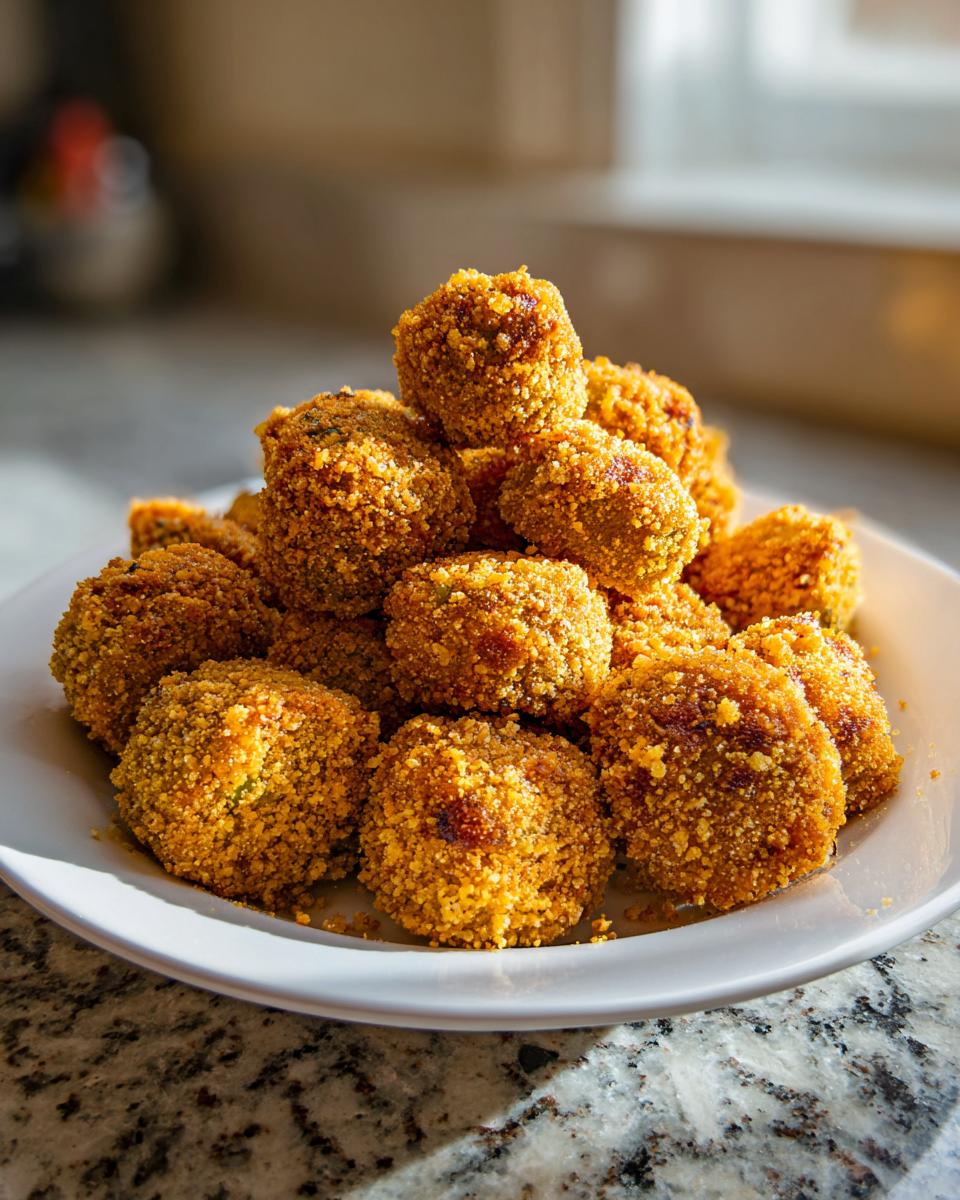
Set up your two bowls—one for wet goodness (buttermilk) and one for the dry crunch mix. Plunge your okra pieces into the buttermilk, giving them a good soak for just a second to get fully drenched, letting the excess drip back. Then, toss them right into that cornmeal mixture. For the true southern crunch, do what I call the ‘repeat performance’: pull them out, dunk them back into the buttermilk for half a second, and toss them *hard* in the cornmeal again! Press gently to make sure that coating really adheres. This double layer is what makes the Buttermilk Fried Okra so crunchy.
Frying the Okra: Temperature Control for Perfect Fried Okra
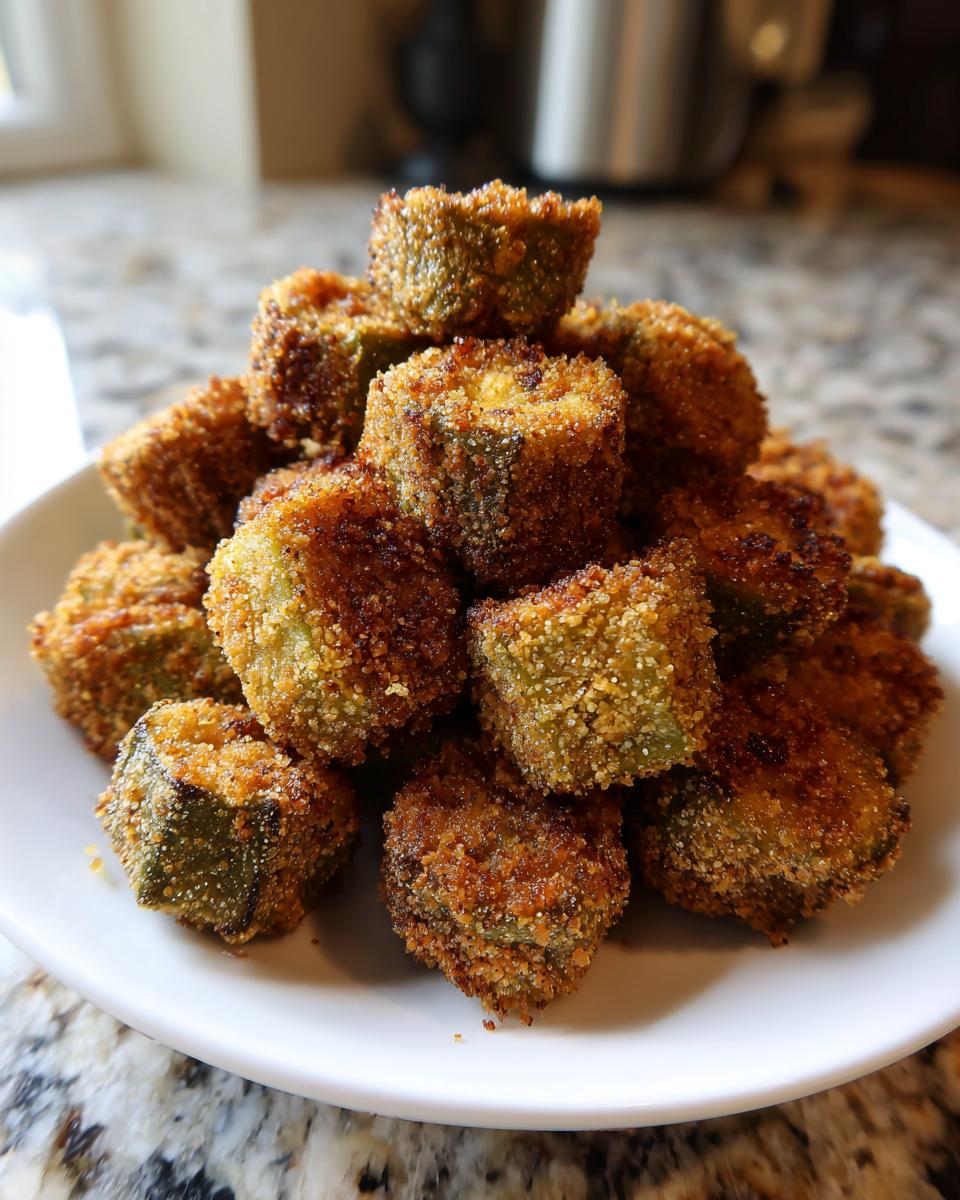
Get about an inch of vegetable oil going in your heavy skillet, warming it toward 375 degrees F before anything goes in. If the oil isn’t hot enough, your coating will soak up grease and get sad. Once you hit that sizzle, drop your coated okra in carefully. Please, please, please fry in small batches only! Overcrowding the pan crashes the oil temperature, and then that lovely coating just steams right off. Let these beautiful pieces cook, turning them gently, until they look deeply golden brown and utterly perfect. Scoop out that amazing fried okra after just three to five minutes!
Tips for Perfect Skillet Fried Okra Every Time
Even with the best recipe, little things can go wrong when you’re working with hot oil, right? I know because I’ve made the mistakes! I learned this the hard way one summer when I was trying to get this Skillet Fried Okra done before the neighbors showed up. I got impatient waiting for the oil to fully heat up and threw the first batch in while it was still just bubbling weakly. Yikes! That batch absorbed oil like a sponge and ended up limp and greasy. Never again! You must respect the temperature—that’s the secret to keeping things crispy.
The rule I live by now, which is straight from Daisy’s playbook, is to keep that oil hovering right between 365°F and 375°F. If you see the temperature dipping too low while frying, pull the pan off the burner for thirty seconds to let it recover before dropping in the next batch. Also, that wire rack is non-negotiable! Don’t let the okra sit on paper towels alone; they need air circulation underneath to avoid steaming the bottoms. If you want to read a truly helpful piece on achieving that signature southern crispiness, check out this article from Hearty Foodie on their Crispy Southern Fried Okra recipe!
Also, remember that little tip about keeping the okra waiting in the buttermilk while the oil heats? That’s fine, but don’t let it sit covered in the dry mix for more than five minutes before frying. Once it’s coated, it needs to hit that hot oil quickly to set that crunch. For more great advice on using simple ingredients to make flavorful food, take a look at my guide on Caramelized Onions!
Alternative Cooking Methods for Crispy Fried Okra
Now, I know not everyone wants to stand over a skillet of hot oil, and honestly, sometimes I’m just not feeling that deep fry setup myself. But the truth is, if you want that authentic, crackly coating, skillet frying is usually the gold standard. That said, we can absolutely get close! If you’re looking for a lighter way to make amazing Crispy Fried Okra, the air fryer is your friend. I know Daisy would have been skeptical of shiny new gadgets, but even she loved the idea of less mess!
For the air fryer crowd, you’ll want to use that double-dredge coating we talked about. Lightly spray the coated okra with a bit of cooking oil—this is key! Toss them gently in the air fryer basket, making sure not to pack them in tight. We want air flow for that crispiness! Cook them at 400 degrees F for about 10 to 12 minutes, shaking the basket halfway through until they are gorgeous and golden. For another great shortcut recipe that’s still crunchy, you absolutely have to try my Crispy Southern Cheese Straws!
If you’re avoiding oil almost entirely, you *can* bake them. Spread the coated okra onto a parchment-lined sheet and bake at 425 degrees F, turning every 10 minutes. It won’t be quite the same as the glorious skillet version, but it’s still miles better than store-bought frozen stuff. And hey, if you want to explore more air fryer magic, this Air Fryer Fried Okra recipe looks fantastic for a lighter take!
Serving Suggestions for This Easy Okra Side Dish
Once you have these golden, crunchy beauties ready—and trust me, they go fast—you need something delicious to serve them alongside! This Easy Okra Side Dish is the absolute heartbeat of any Southern comfort spread. It just begs to be next to something hearty. My go-to pairing, especially in the summer, is crisp fried chicken or maybe some slow-cooked pulled pork.
Honestly, they cut through the richness of just about any heavy main course perfectly. They’re amazing alongside meatloaf, or even just served up hot as a standalone snack straight out of the kitchen. If you are making a full Southern spread, you simply have to pair them with my Best Collard Greens Recipe—the savory greens and the crunchy, salty okra are divine together!
Storing and Reheating Your Fried Okra
The hardest part about this fried okra is stopping yourself from eating it all right then and there! But if you do have leftovers, storage matters if you want to bring that crunch back tomorrow. Daisy always said that anything fried loses its character sitting overnight, which is true, but we can fight back!
If you have any left (ha!), let it cool completely first, and then place it in an airtight container. I prefer leaving it right on the counter for up to 24 hours rather than putting it in the fridge; the fridge just breeds moisture, which is our enemy. Never, ever microwave it—that just guarantees a sad, steamed texture. If you want that perfect crunch again, the best method is a quick trip to the oven preheated to 375 degrees F for about 5 to 7 minutes on a wire rack. That heat revival works wonders!
When you’re thinking about what else you can make ahead for easy meals later on, you should definitely check out my recipe for Easy Black Bean Chili. That one actually tastes better the next day!
Frequently Asked Questions About Making Fried Okra
I get so many questions after people try this recipe, which just tells me how much folks love their veggies piled high and crunchy! Daisy always said that if you have questions, you haven’t cooked enough yet, but I’m right here to help guide you through getting this fried okra picture-perfect. We want everyone to succeed in making this easy side dish!
Can I use frozen okra for this fried okra recipe?
Oh, honey, please don’t! I really advise against using frozen okra if you are aiming for that amazing, shatteringly crisp coating. Frozen okra comes pre-cut and has absorbed a ton of water during the freezing process. Even if you try to thaw and dry it, you’ll never get it dry enough, and that extra moisture guarantees sliminess and a coating that totally falls off. Stick to fresh okra for this method; it’s worth the tiny bit of extra work!
What oil is best for achieving crunchy fried okra?
To get that beautiful, crunchy exterior on your fried okra, you absolutely need an oil with a high smoke point. I use standard vegetable oil because it’s neutral and reliable. Peanut oil works beautifully too if you like that slight nutty flavor. The most important thing isn’t the type of oil, though; it’s making sure it hits that 375°F range before that coated okra even touches the pan. Trust me, the heat has to be there!
How do I make this a gluten-free fried okra?
That’s a fantastic question for those avoiding gluten! Since our coating uses both flour and cornmeal, you need a good replacement for that flour. You can swap the all-purpose flour one-for-one with a high-quality gluten-free all-purpose blend, or you can go the purist route! Just up your cornmeal measurement slightly and perhaps swap the flour for rice flour, which helps keep things light. This is a great adaptation for a wonderful Southern Fried Okra Recipe!
If you’re looking for other quick sides, you might enjoy my Easy 15-Minute Fried Noodles Recipe!
Nutritional Estimate for Crispy Fried Okra
I always get asked about the ‘damage’ when folks see how amazingly crispy this fried okra is. And honestly, since we are deep-skillet frying, this isn’t the lightest choice on the menu, but it’s pure Southern comfort food, and that counts for something, right? Daisy believed deeply in nourishing people, and sometimes that meant a little extra richness!
Here are the rough estimates based on the ingredients in this recipe, serving four people. Remember, these numbers are just guideposts, because how much oil you use, and how much seasoning you dust on top, can change things slightly. If you want a lighter version, think about trying the air fryer method we talked about earlier, or maybe try my Graham Cracker Toffee next time you need a sweet treat without the guilt!
- Serving Size: 1/4 of recipe
- Calories: About 280
- Total Fat: Roughly 18g (Keep in mind a good amount of that is from the vegetable oil used for frying.)
- Carbohydrates: Around 28g
- Protein: About 5g
- Fiber: 5g
- Sodium: This sneaks up on you, so be mindful—we list about 450mg due to the salt in the coating.
It is a treat, that’s for sure! But when you get that perfect, seasoned crunch, I think you’ll agree it’s perfectly worth it for your next Easy Okra Side Dish.
Share Your Southern Comfort Food Creations
Well, that’s it! We’ve conquered the grease, we’ve banished the slime, and now you have the keys to the crispiest batch of fried okra this side of the Mason-Dixon line. I truly hope you made a big batch because, trust me, they disappear fast! I genuinely can’t wait to hear how it turned out for you. Did you get that perfect *snap* I was raving about?
Please, if you made this recipe and loved the crunchy texture, take a second to leave a little star rating right down below. Those ratings help other home cooks feel confident stepping up to the fryer! And if you snapped a picture of your beautiful golden basket of okra, tag me on social media; seeing your creations connects me right back to Daisy’s kitchen.
Every dish we make carries a piece of the person who taught us, and making this fried okra honors her legacy of simple, honest cooking. When you’re whipping up something sweet next time, remember me and check out my recipe for the Ultimate Fluffy Vanilla Buttercream—it pairs magically with any dessert!
PrintCrispy Southern Fried Okra Recipe

Make classic Southern fried okra that is perfectly crispy and crunchy using a simple buttermilk and cornmeal coating. This easy okra side dish is ready quickly.
- Prep Time: 10 min
- Cook Time: 15 min
- Total Time: 25 min
- Yield: 4 servings 1x
- Category: Side Dish
- Method: Skillet Frying
- Cuisine: Southern
- Diet: Vegetarian
Ingredients
- 1 pound fresh okra, washed and sliced into 1/2-inch rounds
- 1 cup buttermilk
- 1 cup yellow cornmeal
- 1/2 cup all-purpose flour
- 1 teaspoon salt
- 1/2 teaspoon black pepper
- 1/4 teaspoon cayenne pepper (optional, for a hint of heat)
- Vegetable oil, for frying (about 1 inch deep in skillet)
Instructions
- Prepare the okra: Wash the okra thoroughly and pat it completely dry with paper towels. Slice the okra into 1/2-inch rounds. Drying the okra helps prevent sliminess.
- Set up the dredging stations: Pour the buttermilk into one shallow bowl. In a second shallow bowl, combine the cornmeal, flour, salt, pepper, and cayenne pepper. Mix these dry ingredients well.
- Coat the okra: Dip the okra slices into the buttermilk, letting any excess drip off. Immediately transfer the wet okra to the cornmeal mixture. Toss to coat evenly. For extra crunch, you can perform a double dredge: dip the coated okra back into the buttermilk briefly, then back into the cornmeal mixture, pressing lightly to adhere.
- Heat the oil: Pour vegetable oil into a heavy-bottomed skillet to a depth of about 1 inch. Heat the oil over medium-high heat until it reaches 375 degrees Fahrenheit (190 degrees Celsius). Use a thermometer if possible, or test by dropping a pinch of coating into the oil; it should sizzle immediately.
- Fry the okra: Working in small batches to avoid overcrowding the pan, carefully place the coated okra into the hot oil. Do not overcrowd the skillet, as this lowers the oil temperature and results in soggy okra.
- Cook until golden brown and crispy, about 3 to 5 minutes, turning occasionally.
- Remove the okra from the oil using a slotted spoon and place it on a wire rack set over a baking sheet or a plate lined with paper towels to drain excess oil.
- Serve the crispy fried okra immediately as a classic vegetable side dish or snack.
Notes
- To reduce sliminess, do not cut the okra until you are ready to coat and fry it. Ensure the okra is completely dry before the buttermilk dip.
- For the best results in achieving a crunchy coating, maintain the oil temperature between 365°F and 375°F while frying.
- If you prefer an air fryer method, toss the double-dredged okra with a light spray of cooking oil and air fry at 400 degrees Fahrenheit for 10-12 minutes, shaking halfway through, until golden.
Nutrition
- Serving Size: 1/4 of recipe
- Calories: 280
- Sugar: 3
- Sodium: 450
- Fat: 18
- Saturated Fat: 3
- Unsaturated Fat: 15
- Trans Fat: 0
- Carbohydrates: 28
- Fiber: 5
- Protein: 5
- Cholesterol: 15