
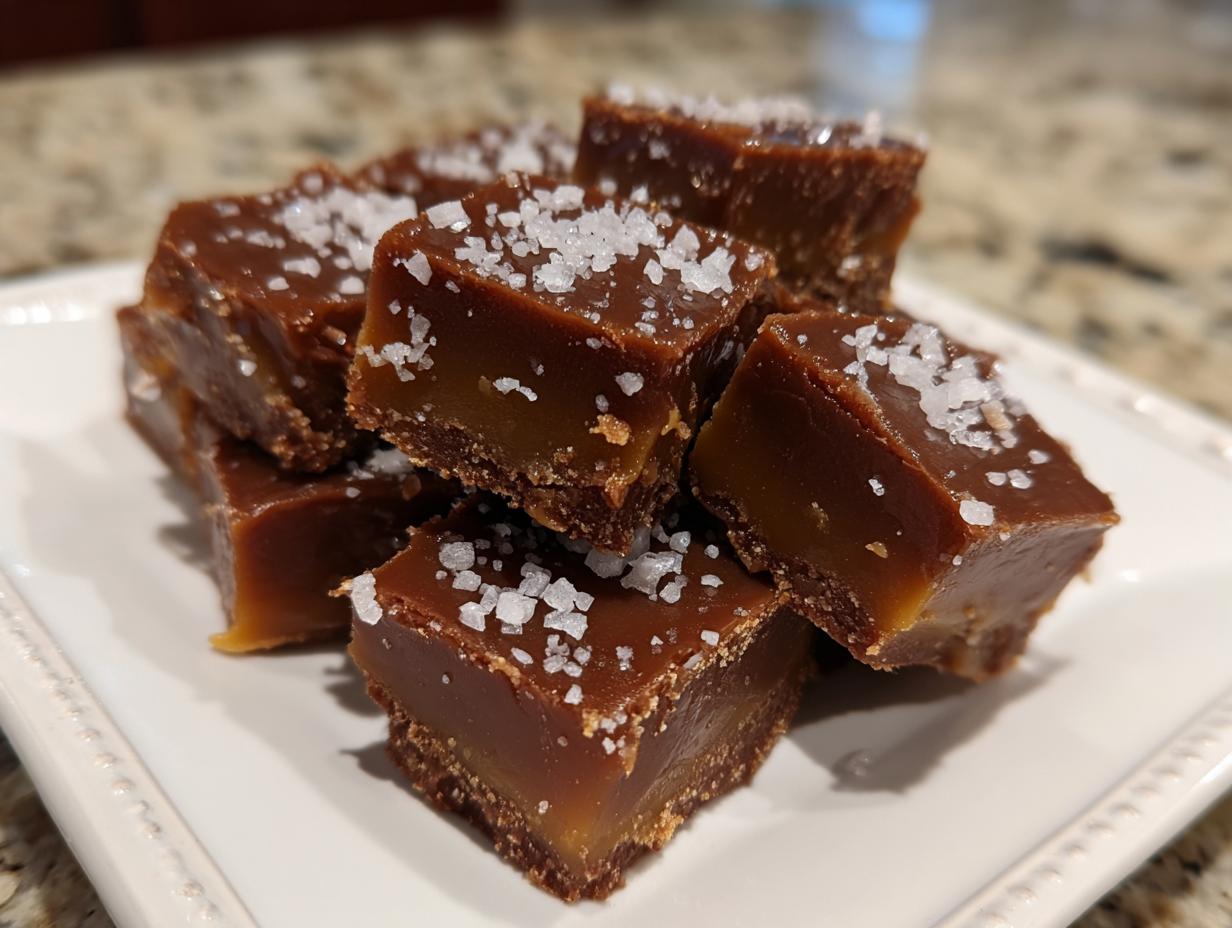
Is there anything more satisfying than that perfect clash between sweet, buttery caramel and a sharp hit of sea salt? Honestly, I don’t think so. When I first came back to the kitchen, wanting that connection to my Grandma Daisy, I skipped the fancy stuff and went straight for the comforting classics. And nothing screams comfort like amazing **salted caramel fudge**. This recipe for my Rich and Chewy Salted Caramel Fudge with Sea Salt Finish isn’t just easy; it’s the exact proof that simple ingredients, handled with care, create something truly decadent for your table. It’s the taste of home I needed to reclaim. If you love simple, decadent treats, make sure you check out my easy 3-ingredient chocolate fudge recipe while you’re here!
- Why This Is The Best Homemade Caramel Fudge Recipe
- Ingredients for Decadent Caramel Dessert
- Step-by-Step Instructions for Salted Caramel Fudge
- Tips for No Fail Caramel Fudge Success
- Variations: Beyond Basic Salted Caramel Fudge
- Serving Suggestions and Making Christmas Fudge Gifts
- Storage and Keeping Your Salted Caramel Fudge Fresh
- Frequently Asked Questions About Salted Caramel Fudge
- Nutritional Estimates for This Decadent Sweet Treat
- Share Your Homemade Candy Making Experience
Why This Is The Best Homemade Caramel Fudge Recipe
You’ll find plenty of recipes for easy salted caramel fudge out there, maybe even some microwave versions. But if you want that true, rich, melt-in-your-mouth fudge that’s delightfully chewy—not hard candy—you need to respect the process just a little bit. That’s what Grandma Daisy always taught me about candy making. This stovetop method is what transforms simple things into something truly gourmet.
- It delivers that signature chewy salted caramel candy texture we all crave.
- The combination of two cooking temperatures gives you control over the final result.
- It results in the richest, almost impossibly buttery flavor; it’s pure dessert gold!
If you’re looking for another sweet and salty fix, you have to check out my toffee pretzels recipe next! For those serious about texture, make sure you peek at why one great baker thinks this salted caramel fudge recipe is the absolute best.
Achieving Perfect Rich Buttery Fudge Texture
Candy making hinges on accuracy, and for this salted caramel fudge, that means your thermometer! We cook the initial sugar mixture until it hits 240 degrees Fahrenheit—that’s the firm-ball stage. After we stir in the dairy, we bring it back up gently to 234 degrees Fahrenheit. That second, lower temperature is the secret sauce. It sets the pudding-like consistency that melts perfectly on your tongue without making it brittle.
The Sweet and Salty Confectionery Balance
Don’t let the salt be an afterthought! This recipe demands fine sea salt in the cooking base for that deep, incorporated salty flavor throughout the fudge. But the real drama comes from the flaky sea salt sprinkled right on top. That final sprinkle gives you those beautiful little bursts of salinity with every bite. Trust me, it’s crucial for that perfect sweet and salty confectionery experience. This makes for incredible Christmas fudge gifts because the presentation is gorgeous!
Ingredients for Decadent Caramel Dessert
Okay, for this rich buttery fudge, we need precision because candy making doesn’t forgive guesswork! I know measuring everything perfectly feels a bit clinical, but Grandma Daisy always said candy is chemistry you can eat. If you want that perfect texture, you have to be specific about what goes in. When you shop, look for the best quality butter you can find—the taste really shines through here!
You’ll need these core components for your true, from scratch caramel fudge base:
- 1 (14 ounce) can sweetened condensed milk (Make sure this is the full-fat kind, please!)
- 2 cups granulated sugar
- 1 cup (2 sticks) unsalted butter. I seriously stress the full two sticks; this fat content builds the structure!
- 1 cup light corn syrup. This is essential for keeping everything smooth so it doesn’t crystallize on you.
- 1 teaspoon vanilla extract
- 1/2 teaspoon fine sea salt (This goes *into* the fudge while cooking.)
- Flaky sea salt, for topping (This is purely for that beautiful visual and flavor pop at the end.)
If you’re looking for another wonderful base recipe using caramel flavors, you should try my homemade caramel recipe sometime. It’s wonderful for drizzling!
Step-by-Step Instructions for Salted Caramel Fudge
When you’re making candy, you need to have your stations ready! This isn’t like baking bread where you can walk away for a minute. Keep your spoon nearby, your heat source steady, and your thermometer locked in. Following these steps exactly will ensure you get that amazing, gooey texture in your salted caramel fudge. If you want to see another great method for simple treats, check out my easy fudge recipe!
Preparation and Initial Cooking (Firm-Ball Stage)
First things first: pan prep! Line your 8×8 inch pan with parchment paper, leaving a generous overhang on two opposing sides. Trust me on this overhang; that’s how you lift this whole glorious block of fudge out later. Grease that paper lightly, too. Now, in a serious, heavy-bottomed saucepan—you need that heavy bottom to prevent scorching!—mix your sugar, butter, and corn syrup. Set your candy thermometer right on the side, but make absolutely sure the tip isn’t touching the bottom of the pan, or you’ll get a false, high reading.
Place that pan over medium heat and stir until the butter is melted and the sugar looks dissolved. Once it starts to boil, stop stirring! This is critical. You just let it be. Watch that thermometer climb until it hits exactly 240 degrees Fahrenheit. That’s our target for the firm-ball stage. Pull it right off the heat the second it hits it!
Achieving Soft-Ball Stage and Finishing the Salted Caramel Fudge
Once it’s off that heat, you can carefully stir in that sweetened condensed milk and your half-teaspoon of fine sea salt. Be careful; it will bubble up like crazy! That’s the dairy reacting to the hot sugar mixture. Now, put the pan back on, but keep the heat at medium-low. Stir constantly—and I mean constantly—until the mixture climbs again, this time reaching 234 degrees Fahrenheit. That’s the soft-ball stage, and it’s what guarantees that perfect, chewy texture in your from scratch caramel fudge.
Remove it from the heat for the last time. Stir in the vanilla extract. Then comes the final, important texture step: keep stirring vigorously in a figure-eight pattern for a whole minute. That agitation settles the sugar crystals just right. Pour this beautiful batter into your ready pan and immediately sprinkle that flaky sea salt all over the top. Let it sit undisturbed at room temperature for at least four hours until it’s completely firm. If you want some inspiration for other sweet spots, peek at this great salted caramel fudge technique others are using.
Tips for No Fail Caramel Fudge Success
Listen, I get it. Candy making uses terms like ‘soft-ball stage’ and that can feel intimidating, especially if you’re aiming for the best homemade caramel fudge recipe. The biggest secret, my friends, is temperature control. If you cook it past 234°F, you won’t get melt in your mouth fudge; you’ll get something you have to chew forever! That’s the difference between rich, perfect salted caramel fudge and a block of hard caramel.
If your fudge ends up crumbly or grainy, it usually means the sugar crystallized. This happens when you stir too much during the initial boil. Stick to the instructions: stir constantly *before* boiling, then leave it alone until it hits that first temperature mark.
Now, if you are really in a rush, the recipe notes mention that a quick microwave salted caramel fudge version exists, but I won’t lie—it doesn’t give you that same depth of flavor or the perfect chewiness we’re chasing here. For the real deal, the candy thermometer is your best friend. If you’re tackling something new in the kitchen, remember my simple easy 3-ingredient beer bread recipe is always a great way to build confidence!
Variations: Beyond Basic Salted Caramel Fudge
While this plain salted caramel fudge is absolutely perfect on its own—truly an indulgent sweet treat—I love that you can use this base to create so many different caramel dessert ideas! Grandma Daisy wasn’t one to stray much from a recipe once she perfected it, but I’ve experimented a bit when making batches for gifts, especially around the holidays.
One of the easiest additions that really ramps up the decadence is chocolate. If you want to make a version with chocolate swirls, you just need to reserve about one third of the fudge batter right before you pour it into the pan. Gently melt a handful of good quality semi-sweet chocolate chips with a teaspoon of butter and swirl that into the remaining fudge in the pot. Then layer and swirl it into the pan. It creates such a stunning look when cut!
Another thing folks adore is adding texture. If you are making this for people who love crunch, adding toasted pecans or walnuts right before the final stir really changes things up. You can also fold in some crushed toffee bits for extra buttery crunch, making this feel even more like a gourmet homemade candy.
If you want to see how I handle a totally different kind of fudgy perfection, you should check out my recipe for brownies with that shiny crackly top. And if you are feeling extra adventurous and want to see six different directions you can take this fudge, check out these great salted caramel fudge variations!
Serving Suggestions and Making Christmas Fudge Gifts
Once that beautiful, rich block of salted caramel fudge has sat for those required four hours—resist the urge to peek!—it’s time for the best part: cutting it up! Since we left that parchment overhang, lift the whole thing out onto a cutting board. For perfectly neat squares for serving or gifting, use a very sharp, long knife. Wipe the blade with a damp, warm cloth between cuts. This simple action prevents the fudge from dragging or sticking to your knife, keeping those edges looking sharp and clean.
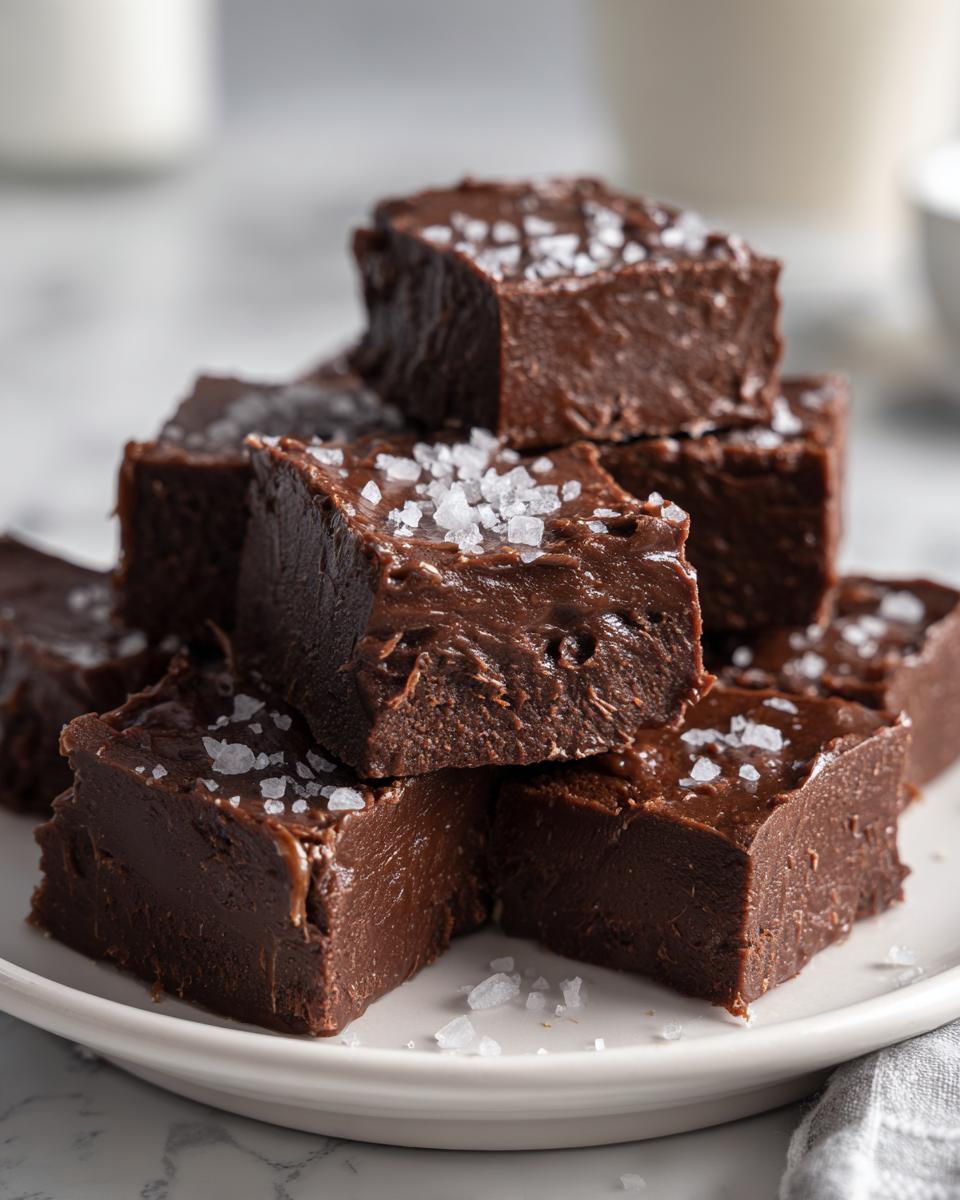
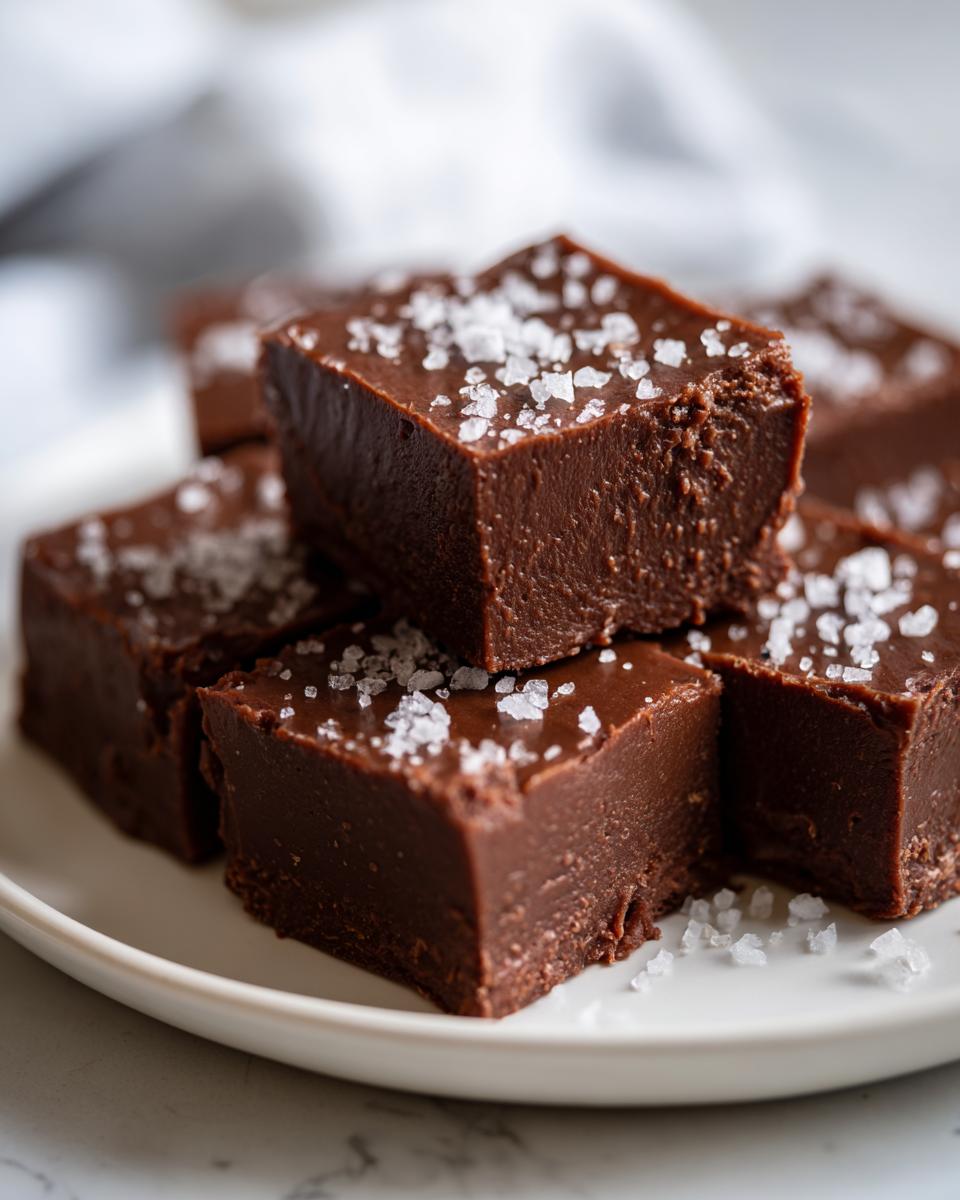
That flaky sea salt topping acts as the garnish all on its own, making these squares look incredibly professional. They look divine just stacked on a simple white platter next to espresso cups. If you’re leaning into presentation for party guests, try cutting them into small diamond shapes instead of squares—it just feels fancier!
For making these into gorgeous Christmas fudge gifts, wrapping them individually is the way to go. Skip heavy plastic wrap; it tends to make the fudge sweat a little. Instead, cut squares that are about an inch and a quarter wide. Wrap each one tightly in festive wax paper or small cellophane bags. Tie the top with some nice baker’s twine or a thin satin ribbon. You can even use small, clear candy boxes to group six or eight pieces together. People absolutely love receiving homemade candy, and these decadent squares always feel special. If you need even more holiday baking inspiration, check out my recipe for Christmas sprinkle cookies!
For more ideas on festive packaging, especially if you are making a large batch of candy for gifting, this guide on Christmas fudge recipes and gifting has some wonderful presentation tips.
Storage and Keeping Your Salted Caramel Fudge Fresh
This is a huge point, so listen up: Do not, under any circumstances, put your beautiful salted caramel fudge in the refrigerator unless you just absolutely have to. Chilling homemade fudge is terrible for the texture! It changes the internal structure and makes it hard and waxy instead of that lovely, yielding, melt in your mouth fudge we spent so much time perfecting on the stovetop.
Keep your cut pieces airtight at cool room temperature. A nice, dark pantry or even a cool spot on the counter works perfectly. Stored this way, it stays absolutely delicious for nearly two weeks! If you are looking for another great make-ahead treat, my no-bake Oreo truffle recipe is excellent for hiding in the fridge, though!
Frequently Asked Questions About Salted Caramel Fudge
I’ve collected a few questions that always pop up when people try this stovetop version for the first time. Candy making has a reputation for being fussy, but honestly, once you understand these few key points, you’ll feel like a pro—and you’ll be making gourmet homemade candy every time!
Can I make this without a candy thermometer?
This is the million-dollar question when folks are looking for an easy salted caramel fudge recipe! Technically, yes, you *can* try the ice water test for the soft-ball stage, but I really, truly advise against it for this recipe. Because we rely on two distinct temperature stages (240°F and 234°F) to control the texture between chewy and hard, using a reliable thermometer is your biggest guarantee for success. Guessing means you risk turning this beautiful fudge into a hard brick. It’s the one tool worth investing in for this specific recipe!
How do I fix fudge that turned out grainy?
Oh, the dreaded graininess! That usually means the sugar started to crystallize when you weren’t looking. If you’ve already cooked it and poured it, there isn’t much you can do to salvage that specific batch—it’s usually too late once the sugar has set that way. The best fix is prevention: make sure you completely dissolve the sugar before it boils in the first stage, and don’t stir it at all once it starts boiling until you hit 240°F. If you happen to have a batch that’s just a *little* grainy, sometimes reheating it gently on low heat with a tablespoon of water and stirring patiently will help reabsorb some of those stray crystals, but be very careful not to boil it again!
Can I use salted butter instead of unsalted butter?
You absolutely *can*, but you need to adjust the salt measurements in the recipe. Since this recipe already calls for a small amount of fine sea salt mixed into the base, if you use salted butter, you should omit the 1/2 teaspoon of fine sea salt called for in the instructions. If you skip that step, the finished salted caramel fudge might taste a little flat or lack the sharp salty counterpoint we want. If you use salted butter, just use a tiny pinch less of the flaky salt for topping. I prefer unsalted so *I* control all the saltiness!
What’s the difference between this and chewy caramel candy?
That’s a great question rooted in candy science! Traditional chewy salted caramel candy usually cooks slightly higher, often hitting that 240°F firm-ball stage and stopping there, focusing on chew. Fudge, on the other hand, requires that second cooking stage, dropping slightly to 234°F (soft-ball), and then requires that final vigorous beating at the end. That beating incorporates air and thickens the mixture before it sets, resulting in a soft, creamy, melt-in-your-mouth texture rather than a tough, pliable candy.
If you’re practicing your candy skills, you might also enjoy my quick guide to easy 15-minute fried noodles—sometimes you need a savory break after all that sugar!
Nutritional Estimates for This Decadent Sweet Treat
Now, I know we aren’t making this decadent caramel dessert because we’re counting calories! Ha! But since you asked about everything related to this incredible salted caramel fudge, I pulled the estimated data together. Remember, this is definitely an indulgence, something to share sparingly or save for true celebrations, especially since it’s so rich.
These numbers are based on yielding about 36 small squares, and they are just estimates for one square. If you cut the pieces bigger—and temptation is strong, I know—your numbers will obviously be higher. Think of this as just a guideline for your holiday weeknight dinner ideas planning, ha!
Estimated Nutrition Per Serving (1 Square)
- Calories: 190
- Total Fat: 8g
- Saturated Fat: 5g
- Carbohydrates: 30g
- Sugar: 28g (Yes, that’s a lot of lovely sugar!)
- Protein: 2g
- Sodium: 75mg
It’s a wonderfully rich treat—the butter and sugar content really shows, but that’s why it tastes so luxurious, right? Enjoy it guilt-free because you made it yourself with the best ingredients!
Share Your Homemade Candy Making Experience
Now that you’ve gone through all the steps, I am just dying to hear about your results! Making perfect salted caramel fudge is definitely an achievement, especially nailing that chewy yet melt-in-your-mouth texture. Did you get that beautiful, sharp contrast between the sweet caramel and the flaky salt on top?
Please tell me about it in the comments below! Did the thermometer cooperate? Was the final texture exactly what you hoped for? Whether you’re a total beginner to homemade candy making for beginners or you’ve been making fudge since the dawn of time, I want to hear every detail. Sharing your successes (and maybe even your near misses!) really helps our whole community feel more confident in the kitchen.
If you made a batch and you’re feeling proud, snap a picture! I love seeing your finished blocks of delicious candy. Don’t forget, if you ever have specific questions that our FAQ didn’t cover, you can reach out to me directly via the contact page. Happy sharing, and may your kitchen always smell like sweet caramel!
PrintRich and Chewy Salted Caramel Fudge with Sea Salt Finish
Make decadent, melt-in-your-mouth salted caramel fudge using simple steps. This recipe delivers a perfect balance of sweet caramel and salty finish, ideal for holiday gifts or indulgent treats.
- Prep Time: 15 min
- Cook Time: 25 min
- Total Time: 4 hours 40 min
- Yield: About 36 pieces 1x
- Category: Candy
- Method: Stovetop Cooking
- Cuisine: American
- Diet: Vegetarian
Ingredients
- 1 (14 ounce) can sweetened condensed milk
- 2 cups granulated sugar
- 1 cup (2 sticks) unsalted butter
- 1 cup light corn syrup
- 1 teaspoon vanilla extract
- 1/2 teaspoon fine sea salt (for the fudge base)
- Flaky sea salt, for topping
Instructions
- Line an 8×8 inch baking pan with parchment paper, leaving an overhang on two sides for easy removal. Lightly grease the paper.
- In a heavy-bottomed saucepan, combine the sugar, butter, and corn syrup. Stir constantly over medium heat until the butter melts and the sugar dissolves.
- Attach a candy thermometer to the side of the pan, making sure the tip does not touch the bottom.
- Bring the mixture to a boil without stirring. Cook until the mixture reaches 240 degrees Fahrenheit (firm-ball stage). This takes about 10 to 15 minutes.
- Remove the pan from the heat immediately. Carefully stir in the sweetened condensed milk and the fine sea salt until fully combined. The mixture will bubble vigorously.
- Return the pan to medium-low heat. Stir constantly until the mixture reaches 234 degrees Fahrenheit (soft-ball stage). This usually takes about 5 to 7 minutes more. Do not let it exceed this temperature.
- Remove from heat. Stir in the vanilla extract. Continue to stir the mixture vigorously in a figure-eight pattern for about 1 minute. This helps set the texture.
- Pour the fudge into the prepared pan. Sprinkle the top evenly with flaky sea salt.
- Let the fudge cool completely at room temperature for at least 4 hours, or until firm. Do not refrigerate, as this can affect the texture.
- Once firm, use the parchment paper overhang to lift the fudge from the pan. Cut into small squares.
Notes
- For the best chewy texture, monitor your candy thermometer closely. Overcooking will result in hard candy, while undercooking will leave it too soft.
- If you want a quick microwave salted caramel fudge, you can substitute the stovetop method by combining the milk, sugar, and butter in a microwave-safe bowl and heating in 1-minute intervals, stirring well between each, until the sugar dissolves, then proceed with the rest of the recipe steps.
- This rich buttery fudge makes excellent Christmas fudge gifts when wrapped individually.
Nutrition
- Serving Size: 1 square
- Calories: 190
- Sugar: 28
- Sodium: 75
- Fat: 8
- Saturated Fat: 5
- Unsaturated Fat: 3
- Trans Fat: 0
- Carbohydrates: 30
- Fiber: 0
- Protein: 2
- Cholesterol: 20