
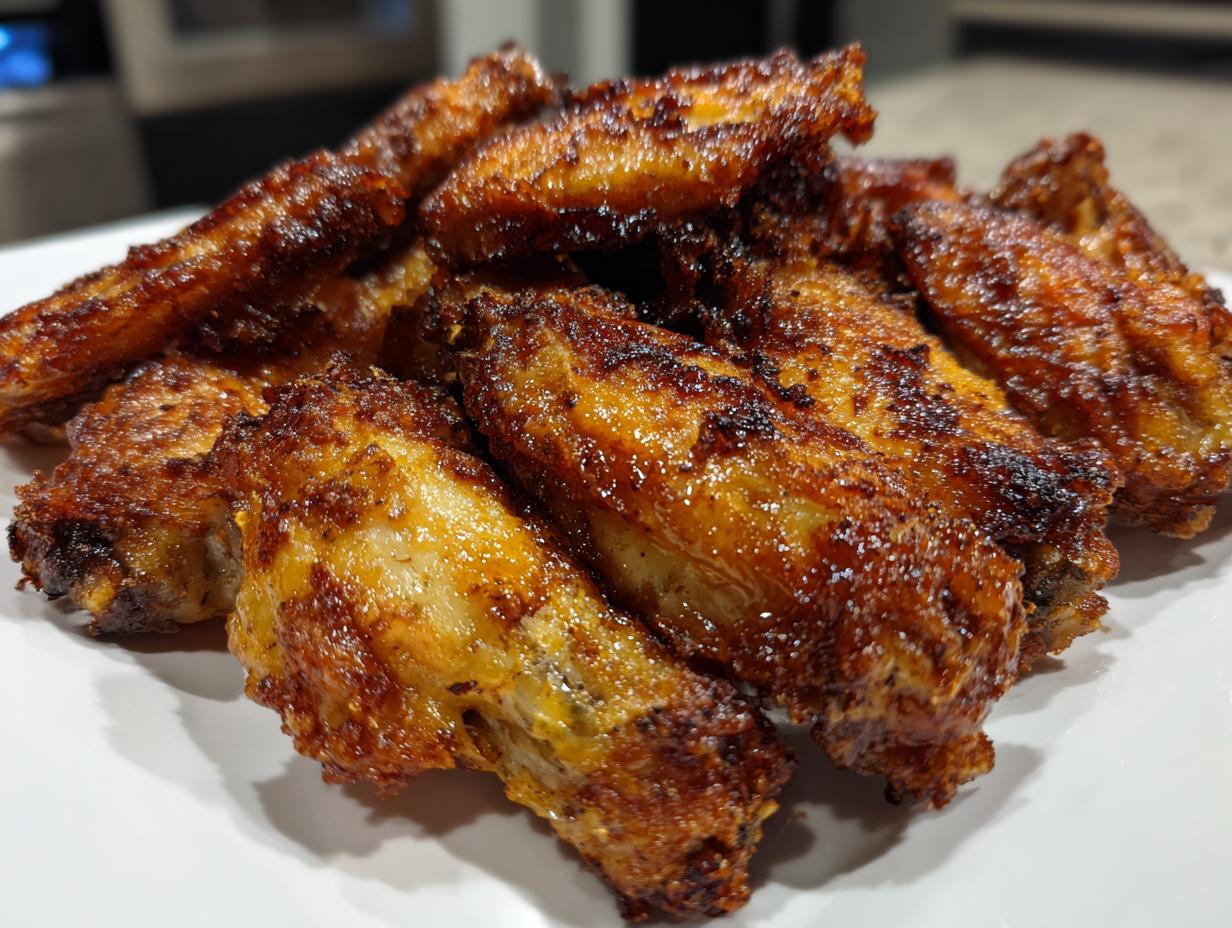
Oh, let’s talk about the mighty chicken wing! Is there any food that brings a crowd together faster, whether it’s a huge game day or just a Tuesday night when you desperately need something fun? I used to think the only way to get that perfect, shatteringly crisp skin was to stand over a vat of hot oil, but that just isn’t the simple, honest food my Grandma Daisy believed in. So, I spent ages tinkering in my little city kitchen until I found the magic trick. Forget the deep fryer; we are unlocking the secret to ultra-crispy baked wings right in your oven. This recipe honors Grandma’s spirit by making the absolute *best* wing accessible to everyone, without all the fuss!
- Why This Baked Chicken Wing Recipe Delivers Ultimate Crispiness
- Essential Ingredients for the Best Baked Chicken Wings
- Step-by-Step Instructions for No Fry Crispy Wings
- Flavor Variations: Saucing Your Baked Chicken Wing
- Tips for Perfect Game Day Chicken Wing Recipes
- Serving Suggestions for Easy Chicken Wing Appetizers
- Frequently Asked Questions About Crispy Oven Roasted Chicken Wings
- Nutritional Snapshot of This Chicken Wing Recipe
- Share Your Family Favorite Chicken Wings Experience
Why This Baked Chicken Wing Recipe Delivers Ultimate Crispiness
If you’ve ever followed a recipe promising crispy oven wings only to end up with something rubbery, trust me, I’ve been there! I wasted so many pounds of wings trying to figure out this chicken wing puzzle. Everyone talks about timing, but the real breakthrough for me was figuring out how to make wings crispy in oven without sacrificing the juicy center. It comes down to chemistry and airflow, nothing complicated, I promise!
The secret weapon is baking powder—yes, the same stuff you use in pancakes! For those of you who still enjoy a proper fried wing sometimes, my recipe for fried chicken wings ultimate crispy recipe shows a different path, but for oven wings, this powder is essential. It works by raising the pH level of the chicken skin slightly. This subtle shift helps the skin dry out much faster during baking and promotes that deep, golden browning we all chase. Once I started using it consistently, the texture changed completely.
The Science Behind the Juicy Chicken Wings Technique
The baking powder does the heavy lifting on the surface, making them truly shatteringly crisp wings. But to protect that moisture inside, you *must* use a wire rack. That rack lifts the wings off the pan, allowing 360-degree air circulation the whole time they bake. This stops the bottoms from steaming! That combination, my friends, is the key to the ultimate juicy chicken wings technique.
Essential Ingredients for the Best Baked Chicken Wings
To get those incredible results, you can’t just throw things in a bowl—though Grandma always said a little intuition helps! The core list for these wings is beautifully simple. We are keeping this recipe pure enough that it’s naturally gluten free, perfect for pleasing everyone at your next party.
- 2 lbs chicken wing sections (make sure you get a good mix of flats and drumettes!)
- 1 tablespoon baking powder (I really stress using aluminum-free if you can find it; it makes a cleaner taste, trust me.)
- 1 teaspoon salt
- 1/2 teaspoon black pepper
- 1/2 teaspoon garlic powder
- 1/4 teaspoon paprika
- 2 tablespoons melted butter (this is totally optional, only for that post-bake richness!)
Ingredient Substitutions and Notes
Look, I know pantry staples can vary. If you don’t have aluminum-free baking powder, regular will work just fine in a pinch for making those best baked chicken wings, but that slight metallic hint can sometimes come through. If you skip the optional melted butter toss at the end—maybe you’re going straight into a bold dry rub—that’s fine too! You can use about a teaspoon of a neutral oil like canola if you want a little something extra to help the seasoning stick, but the baking powder does most of the magic on its own.
Step-by-Step Instructions for No Fry Crispy Wings
Alright, the ingredients are ready, and the anticipation is building—it’s time to turn these raw wings into no fry crispy wings perfection! Remember, Grandma always taught me that preparation is 90% of the battle. For chicken wings, the very first step is non-negotiable: drying them out. I mean it—get out the paper towels and blot, blot, blot until they feel almost leathery. Excess moisture is the enemy of crispness, and we want that outer skin to be golden, not sad and steamed!
Once they are bone-dry, you toss them in your spiced baking powder mix. Make sure every single piece is coated—it looks like a lot of powder, but it mostly falls off during baking, leaving behind the magic that creates that crunchy crust. Shake off any excess clumps before they hit the rack. Then, we focus on making sure the heat can reach every angle of the wing.
Setting Up Your Oven for Perfect Chicken Wing Baking
You absolutely have to get the setup right for these oven roasted chicken wings to turn out right. First thing: crank that oven up to 425°F (220°C). High heat is our friend here. Next, you need a baking sheet lined with foil—I do this so cleanup takes literally thirty seconds! But here is the most important part: place a wire cooling rack right on top of that foil. If you just bake the wings on foil, the bottoms will steam while the tops crisp. The rack lets all that air circulate underneath them, which gives you that crispness from every single side. Don’t skip the rack!
Coating and Baking Times for Ultimate Crispy Chicken Wing Texture
Now that they are resting on their rack throne, slide them into that preheated oven. We do this in two stages to ensure they are cooked through and crunchy. Bake them undisturbed for a solid 20 minutes. Set a timer; don’t peek too early! After 20 minutes, pull the sheet out, and carefully flip every single wing over. Send them back in for another 20 to 25 minutes. Seriously, watch them closely near the end. The total cook time runs about 40 to 45 minutes, and you’ll know they’re done when they are deep golden brown and that skin looks beautifully crackly. For more great ideas on perfectly crisp applications, check out my guide on crispy baked chicken wings!
Flavor Variations: Saucing Your Baked Chicken Wing
Okay, so you’ve mastered the crispness—huge congratulations! That base layer of seasoning is honestly fantastic on its own, especially if you’re looking for dry rub chicken wings for meal prep. But let’s be real, sometimes you just need that saucy, messy, irresistible coating. The absolute golden rule when using this method is that you sauce or glaze the wings *immediately* after they come out of the oven. You want the crisp skin to grab onto that flavor and seal in the moisture, not get soggy while you mix.
If you’re making a Buffalo style wing, toss them straight away in melted butter mixed with your favorite hot sauce. For creamy options, like those rich Cowboy Butter wings, you definitely want to get them coated while they are still screaming hot! Remember, these recipes are designed to be versatile—they are great party wing ideas because they start fresh every time. For a fantastic sweet option, you can check out a great recipe I found for Honey BBQ Chicken Wings!
Quick Lemon Pepper Wings Baked Application
For my lemon pepper fans—this is my favorite easy chicken wing appetizer! Once those wings are pulled off the rack, toss them quickly in a bowl with a generous amount of lemon pepper seasoning, maybe adding a tiny drizzle of melted butter or olive oil just to help the coating stick. It’s all about speed here. If you want a pure dry rub experience, you can skip the butter entirely and just use a heavy coating of the seasoning mix, making sure you coat them evenly.
Applying Sticky Honey Garlic Wings Recipe Finish
If you want those gorgeous, deep-flavored sticky chicken wings, you need a glaze handy that’s warmed slightly, so it mixes easily. Think Honey Garlic or a thick Honey BBQ. As soon as the wings are off the rack, drop them into a large bowl, pour over your warm glaze, and toss aggressively but quickly—maybe ten seconds max—until they are fully covered. That initial blast of heat from the wings helps the glaze adhere without melting all your hard-earned crispiness away. And don’t forget the classic dips; you absolutely need a good easy blue cheese dip recipe or maybe my quick homemade cocktail sauce recipe on the side!
Tips for Perfect Game Day Chicken Wing Recipes
Planning ahead for a big crowd is how you keep your sanity when hosting, especially when you’re serving a centerpiece like wings! If you’re aiming to make these for a huge gathering, these recipes become your best game day chicken wing recipes because they are so easily prepped or reheated. Grandma Daisy hated rushing, so she taught me tricks to get as much done ahead of time as possible without sacrificing quality.
The key to making large quantities of party wing ideas successful is understanding that you cannot rush the crisping step—that needs high heat and space on the rack. However, you can do all the messy work beforehand! These wings are honestly perfect for meal prep or getting ahead of the party rush. They hold up so well!
Make-Ahead and Storage for Your Chicken Wing Prep
You can prep the entire raw, seasoned wing right up to the point where they go into the oven. Place the coated wings on the prepared rack and baking sheet, cover tightly with plastic wrap, and pop them into the fridge for up to 24 hours. The small amount of moisture they release won’t hurt the baking powder magic too much, but try to get them in the oven within a few hours if you can! If you’re freezing them (maybe you made a huge batch for later this week), lay the coated wings flat on a tray, freeze until solid, then transfer to a heavy-duty freezer bag. That layering prevents them from sticking into one giant clump.
Now, reheating is where this recipe shines compared to soggy leftovers. When you pull them from the fridge or freezer, throw them right onto that same wire rack setup. Bake at 400°F. If they were refrigerated, give them about 15 minutes. If they were frozen, start with 25 minutes. This blasts that crisp skin right back to life! It’s like magic how they regain that texture. If you need other quick filler recipes for your party spread, I have a fantastic easy pizza bites recipe under 30 mins that pairs perfectly!
And honestly, if you’re short on time on game day itself, you can bake them fully ahead of time, let them cool, and pack them away. Then, just before kickoff, reheat them at 400°F for about 7-10 minutes. They won’t be *quite* as shatteringly crisp as straight out of the oven, but they’ll be miles better than takeout, I promise! Look at this guide on crispy baked chicken wings for alternate timing ideas if you’re curious!
Serving Suggestions for Easy Chicken Wing Appetizers
The best part about serving these wings is that they elevate any casual get-together! Since we perfected the crisp texture, they really shine as easy chicken wing appetizers. Even if you aren’t a huge host, these feel fancy without any real effort. If you’re doing a dry rub, you definitely need something cool and creamy to cut through that seasoning. A quick homemade ranch or blue cheese dip is always a hit!
If you’re serving them up as a quick dinner, maybe cut the batch down and serve them alongside some simple crusty bread—my recipe for easy 3-ingredient beer bread recipe is divine next to saucy wings. Honestly, a big bowl of crunchy celery and carrot sticks is non-negotiable for classic dipping action, no matter what you serve!
Frequently Asked Questions About Crispy Oven Roasted Chicken Wings
I know when you try a new technique, especially one that claims to rival deep-frying, you’re going to have questions! That’s totally normal, and I want you to feel confident when you tackle these wings. My goal with Daisy’s Recipes is to make sure you feel prepared, especially when you’re looking for great weeknight dinner ideas that deliver big on flavor without the hassle.
Can I use baking soda instead of baking powder for my chicken wing?
That’s a question I get a lot! While both are leavening agents, they work differently. For achieving those oven roasted chicken wings that are golden and crispy, baking powder is what we need because it contains an acid component that reacts with moisture and heat to create the specific rise and pH shift we talked about. Baking soda is much stronger on its own; if you use it alone, you risk a slightly metallic, soapy taste, which is definitely not what we want for dinner!
Are these oven roasted chicken wings healthier than fried?
Absolutely, they are! We skip that deep-fryer step entirely, which automatically cuts out a massive amount of absorbed fat and calories. You still get that perfect, satisfying crunch because the baking powder and high heat do the drying work for you. You get all the texture and flavor of restaurant-style wings with a fraction of the grease. They are certainly a healthier alternative for your weekly rotation!
What’s the minimum thickness the wings need to be coated?
You want a light but complete coating. When you toss the dry wings in the baking powder mix, you aren’t trying to plaster them like you’re icing a cake! You just need enough powder mixture to evenly cover the skin. If you see thick white clumps of powder remaining after you shake off the excess, that’s too much. Remember, most of that powder is there to aid the drying process, not to form a heavy breading. Keep it light and even for the best results!
Nutritional Snapshot of This Chicken Wing Recipe
Now, I have to be upfront: Grandma Daisy was focused on love and flavor, not counting calories! But in our current world, I know it’s helpful to have an idea of what’s in your food, especially if you’re doing chicken wing meal prep. The nutrition profile here reflects the core recipe—the wings tossed with the baking powder mixture, without any heavy sauces or glazes added after baking.
These estimates are just guidelines, of course. What you toss them in at the end (like a sugary Honey Garlic glaze) will definitely change the numbers! But for the base recipe of oven roasted chicken wings, here is what you can generally expect per four-piece serving size:
- Serving Size: 4 wings
- Calories: 280
- Fat: 18g
- Saturated Fat: 5g
- Protein: 26g
- Carbohydrates: 1g
- Sugar: 0.5g
This is why I love this method for a quick dinner chicken wings option—it delivers huge flavor and satisfying protein without relying on the heavy breading or oils associated with traditional frying. Perfect for sticking to your goals while still enjoying incredible food!
Share Your Family Favorite Chicken Wings Experience
Honestly, that’s the best part of sharing recipes here at Daisy’s Recipes: seeing how you all make these dishes your own! This ultra-crispy baked chicken wing recipe is just the foundation. I’ve given you the secret to getting that perfect crunch, but what you toss them in next is totally up to you and your family’s taste buds.
Did you try the Lemon Pepper suggestion? Or maybe you went full-on sweet and sticky with a homemade glaze? I would absolutely love to hear about your flavor customizations! Whether you’re serving them up for the Super Bowl or just curing a weeknight craving, please leave a rating below and tell me what you served them with! Your feedback helps other home cooks feel confident trying something new.
If you have any questions at all after giving these a try—maybe about adapting them for an air fryer next time or finding that aluminum-free baking powder—don’t hesitate to reach out through the contact page. Happy cooking, everyone. May your wings always be crispy!
PrintUltra Crispy Baked Chicken Wings: The No-Fry Secret

You can achieve shatteringly crisp, juicy chicken wings right in your oven without deep frying. This recipe uses a simple baking powder technique to give you the best baked chicken wings for game day or a quick dinner.
- Prep Time: 10 min
- Cook Time: 45 min
- Total Time: 55 min
- Yield: 4 servings 1x
- Category: Appetizer
- Method: Baking
- Cuisine: American
- Diet: Gluten Free
Ingredients
- 2 lbs chicken wing sections (flats and drumettes)
- 1 tablespoon baking powder (aluminum-free preferred)
- 1 teaspoon salt
- 1/2 teaspoon black pepper
- 1/2 teaspoon garlic powder
- 1/4 teaspoon paprika
- 2 tablespoons melted butter (for tossing after baking, optional)
Instructions
- Prepare the wings: Pat the chicken wings completely dry using paper towels. This step is crucial for crispiness.
- Preheat your oven to 425°F (220°C). Line a large, rimmed baking sheet with foil for easy cleanup, then place a wire cooling rack on top of the foil.
- Create the dry rub: In a medium bowl, combine the baking powder, salt, pepper, garlic powder, and paprika.
- Toss the wings: Add the dried chicken wings to the bowl and toss them thoroughly until every piece is evenly coated with the baking powder mixture.
- Arrange the wings: Place the coated wings on the wire rack in a single layer, ensuring there is space between each wing for air circulation.
- Bake the wings: Bake for 20 minutes.
- Flip and continue baking: Flip the wings over and bake for another 20 to 25 minutes, or until the skin is golden brown and very crisp. The total cook time is around 40 to 45 minutes.
- Serve immediately: If you want a sauced wing, toss the hot, crispy wings in your favorite sauce (like honey garlic or lemon pepper seasoning) immediately after removing them from the oven. If using melted butter, toss them lightly now.
Notes
- The baking powder raises the pH level of the chicken skin, helping it dry out faster and brown more intensely, which creates the ultimate crispy texture.
- Do not skip drying the wings; excess moisture prevents crisping.
- For a dry rub finish, skip the butter toss and use a pre-mixed dry rub seasoning blend after baking.
- These are excellent for meal prep; reheat in a 400°F oven for 5-7 minutes to restore crispness.
Nutrition
- Serving Size: 4 wings
- Calories: 280
- Sugar: 0.5
- Sodium: 350
- Fat: 18
- Saturated Fat: 5
- Unsaturated Fat: 13
- Trans Fat: 0
- Carbohydrates: 1
- Fiber: 0
- Protein: 26
- Cholesterol: 95