
When life feels too fast—and goodness knows, city life had that effect on me for too long—there is nothing more grounding than creating a dessert that requires zero oven time and tastes absolutely decadent. My Grandma Daisy always taught me that the best food often sprang from simplicity, using what you had on hand to make something extraordinary. That philosophy is exactly what leads us to this amazing, unapologetically rich Oreo Pie! This is the ultimate crowd-pleaser, relying on that fantastic No Bake magic that lets you whip it up in under 30 minutes. It’s creamy, it’s crunchy, and it brings that same comforting satisfaction that Daisy achieved with her most beloved, straightforward recipes. Trust me, this Cookies and Cream Pie belongs in your rotation immediately.
- Why This No Bake Oreo Pie Is Your New Family Favorite Pie
- Gathering Ingredients for Your Perfect Oreo Pie Recipe
- How to Prepare This Simple Cream Pie: Step-by-Step Instructions
- Tips for Success Making the Best Oreo Pie Ever
- Variations on the Classic Oreo Pie
- Storage & Make Ahead Dessert Instructions for Your Oreo Pie
- Frequently Asked Questions About This Oreo Pie Recipe
- Nutritional Estimates for One Slice of Oreo Pie
- Share Your Experience Making This Easy Oreo Dessert
Why This No Bake Oreo Pie Is Your New Family Favorite Pie
Look, I get it. We’re busy. That’s why this specific **oreo pie** recipe is one I turn to when I need a guaranteed win without spending all afternoon wrestling with the oven. It’s ridiculously reliable, which is exactly what Grandma Daisy taught me good food should be—consistent and comforting. You don’t need a dozen fancy things from specialty stores; we’re sticking to about eight simple ingredients that layer up into something unbelievably delicious.
If you need a go-to when company shows up unexpectedly, or that perfect Quick Summer Dessert when the humidity is thick, this pie is it. It’s the one that disappears first!
Key Features of This Easy Oreo Dessert
- It earns the title of **No Oven Needed Dessert**—a lifesaver in the summer!
- The texture is that perfect balance: crunchy crust giving way to a silky, unbelievably creamy Oreo dessert filling.
- Seriously, I think this simplified version rivals those big chain bakery pies—you know, the ones people try to copycat? This one beats them!
Gathering Ingredients for Your Perfect Oreo Pie Recipe
Okay, before we even think about whipping anything up, we need to get our supplies ready. This is the beauty of the Oreo Pie Recipe—it only takes about eight core ingredients to make magic happen! Having everything measured out beforehand is key, especially since we’re not baking. Remember, Daisy always said: organize for ten minutes now, save an hour of frustration later! We need to be precise about dividing the cookies, so pay close attention to that part.
Oreo Crust Recipe Components
The foundation needs to be super solid, otherwise, the whole beautiful thing sinks! For the crust, you only need two simple players:
- One package (14.3 ounces) of Oreo cookies—make sure you set aside about half of them for later!
- 6 tablespoons of unsalted butter, all melted down until smooth.
Don’t skimp on mixing that butter into the crumbs; we need that buttery glue to hold everything tight when we chill it.
Components for the Creamy Oreo Dessert Filling
The filling is really two layers working together to create that incredible texture you’re craving. You’ll need:
- One whole package (8 ounces) of cream cheese. This MUST be softened to room temperature, or you’ll end up with lumps, and nobody wants a lumpy Oreo Pie!
- 1 cup of powdered sugar—sifted, if you can, just to be safe.
- 1 teaspoon of pure vanilla extract.
- One standard container (8 ounces) of frozen whipped topping, fully thawed (or two cups if you’re whipping your own!).
- One package (3.9 ounces) of instant chocolate pudding mix. Yep, the box kind!
- 2 cups of seriously cold milk. The colder, the better for setting up the pudding quickly.
And of course, those remaining crushed Oreos get folded right into that lovely chocolate pudding layer for maximum crunch in every bite of this Simple Cream Pie.
How to Prepare This Simple Cream Pie: Step-by-Step Instructions
Alright, this is where we turn ingredients into the dreamy Homemade Oreo Cream Pie we’ve been dreaming about! Since this is a no-bake situation, preparation and layering are everything. Follow these steps closely, especially those chilling times, or you’ll have soup instead of a firm dessert!
Creating the Crunchy Oreo Crust Recipe Base
First things first, we tackle the crust, which needs that freezer time to set up nice and hard. Grab about half of your Oreos—that’s 24 cookies—and pulse them in a food processor until they are crumbs. If you’re doing this the old-school Daisy way, ditch the machine! Just toss those cookies into a heavy-duty zip-top bag and whack away with a rolling pin until you get fine crumbs. Seriously, that rolling pin works wonders!
Once they’re crumbly, mix those bits with your 6 tablespoons of melted butter. Press that buttery mix firmly into the bottom and up the sides of your 9-inch pie plate. Don’t be shy here; press it down hard so it holds its shape. Slide that crust into the freezer while you move on to the creamy part.
Layering the Cream Cheese and Pudding for the Oreo Pie
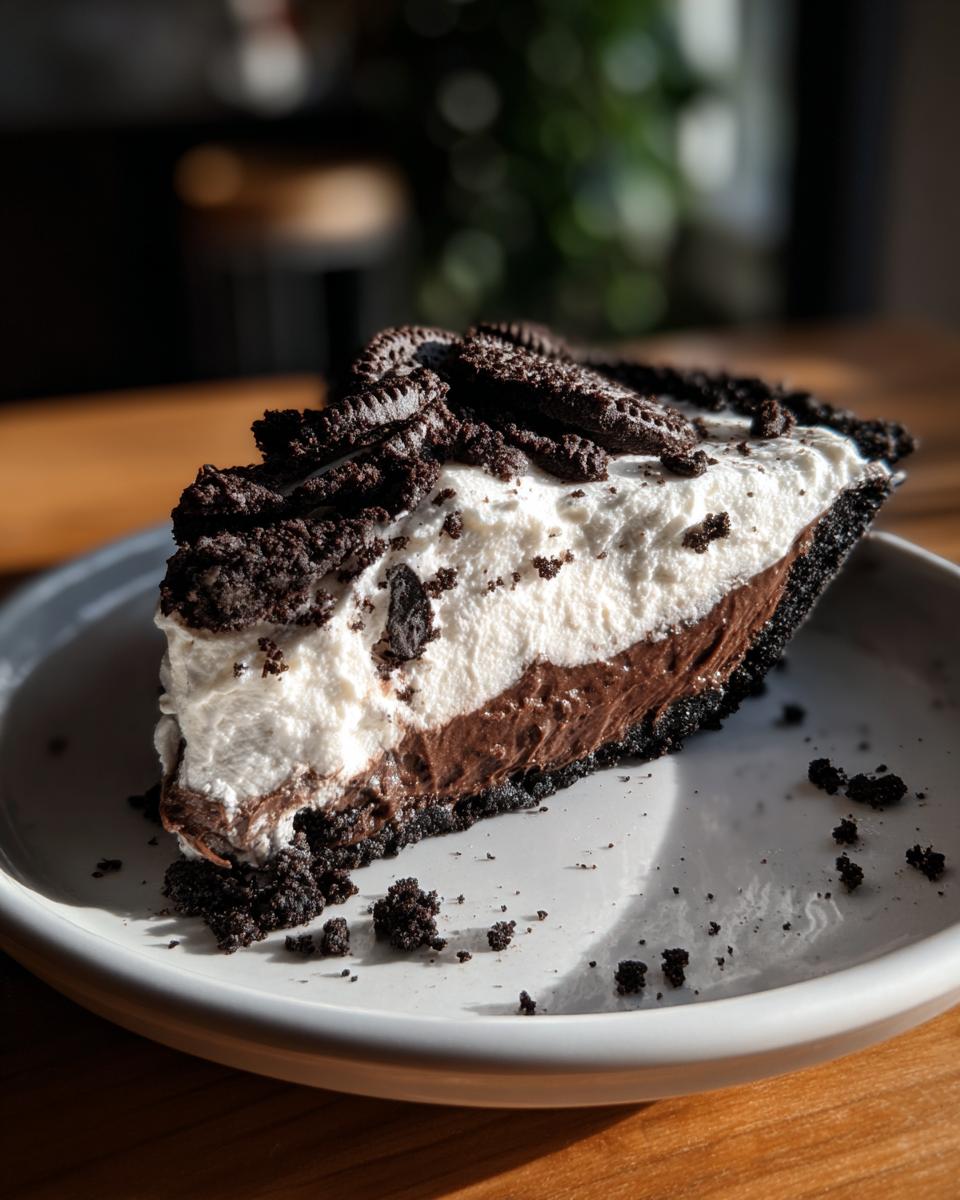
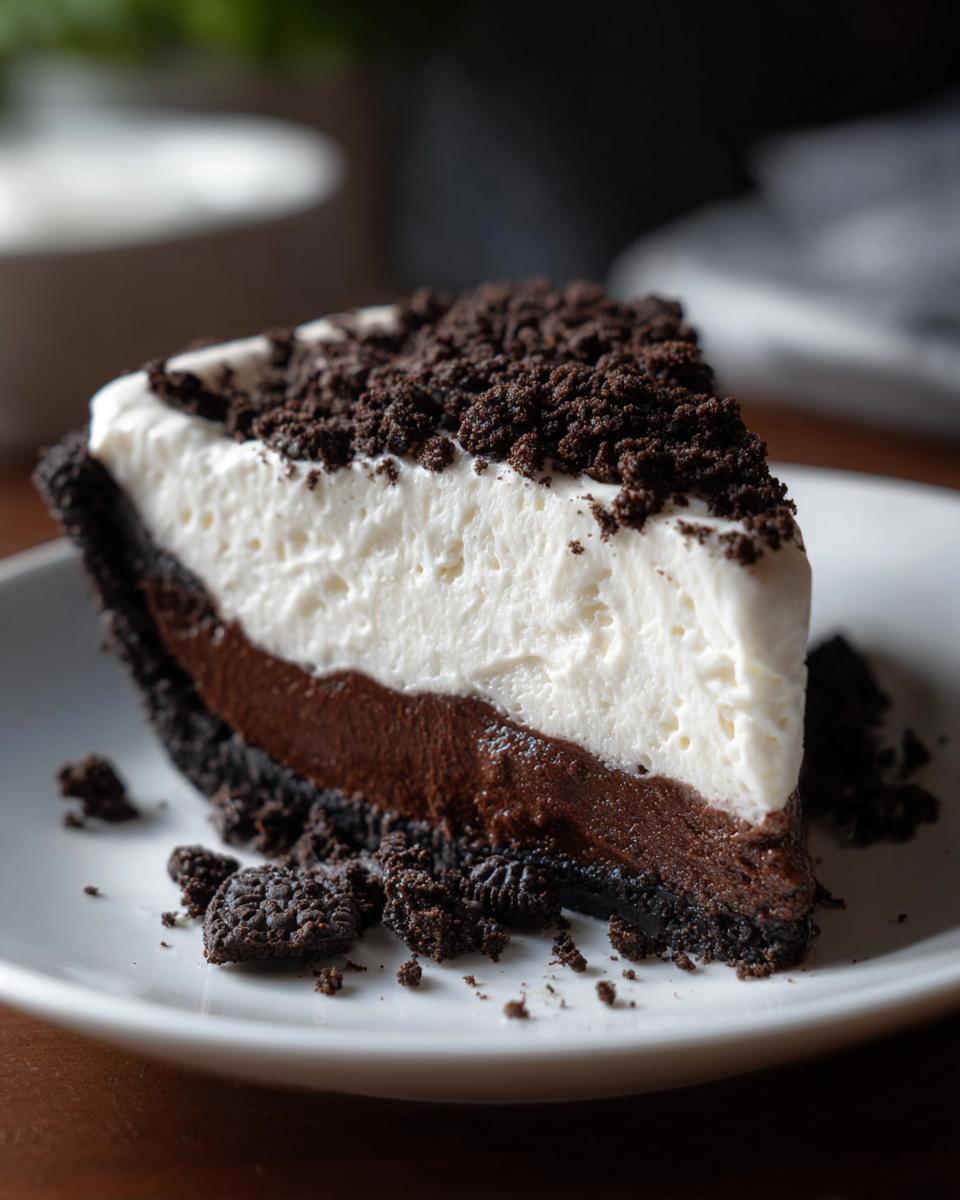
Next up is the creamy layer. Grab your softened cream cheese—remember, soft, not melty! Beat it until it’s smooth so you don’t get any hard chunks hiding in your delicious **oreo pie**. Then, beat in the powdered sugar and that teaspoon of vanilla until everything looks uniform. Now, very gently, fold in your thawed whipped topping. When I say gently, I mean gently—we want air in there! Spread that fluffy mix right over your chilled crust.
While that’s sitting, quickly crush your remaining Oreos coarsely. In a separate bowl, whisk that instant chocolate pudding mix vigorously with 2 cups of ice-cold milk for about two minutes until it starts to thicken up nicely. Then, fold about half of those reserved crushed Oreos right into that chocolate pudding. Spoon this chocolate layer carefully over the cream cheese layer. Try not to disturb the white layer underneath!
Chilling and Serving Your Homemade Oreo Cream Pie
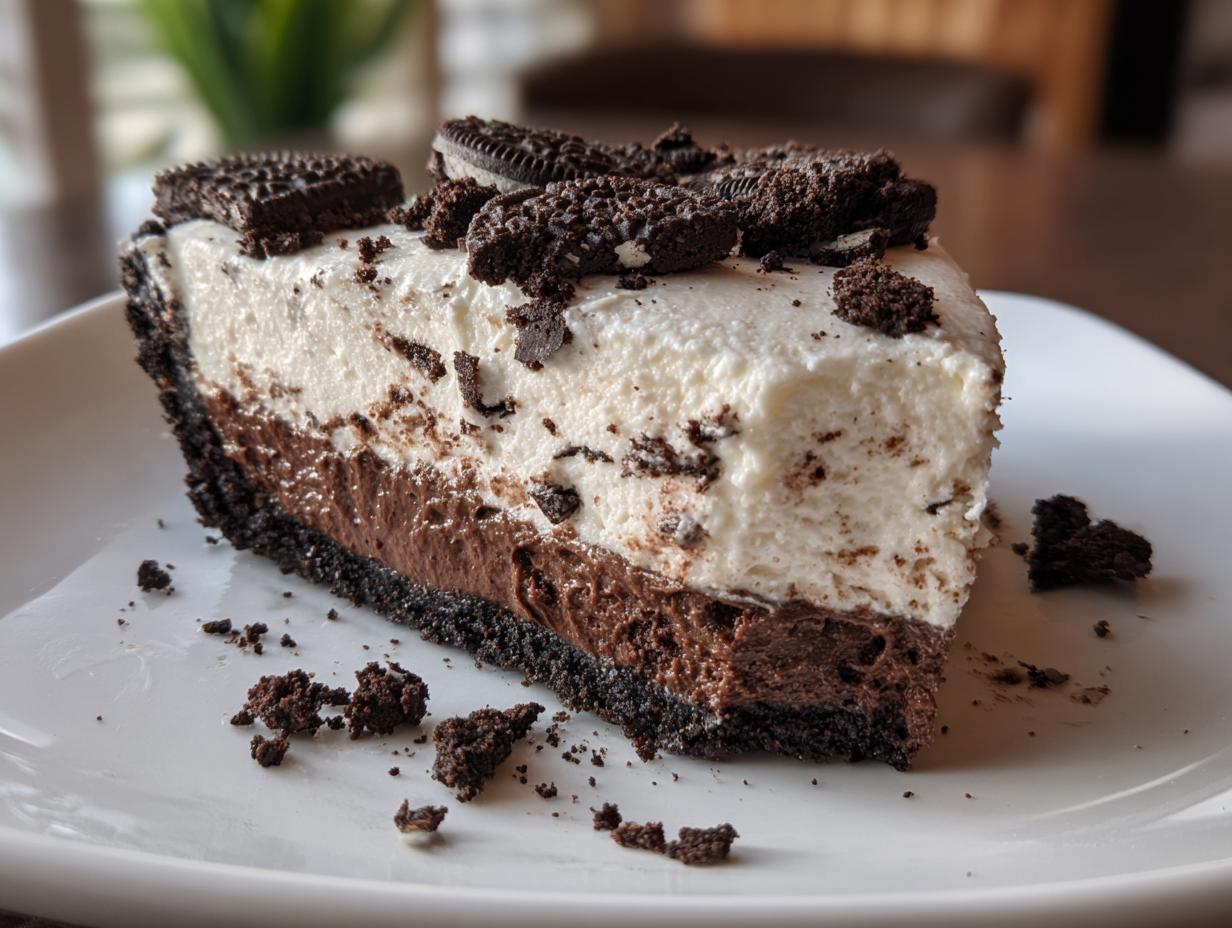
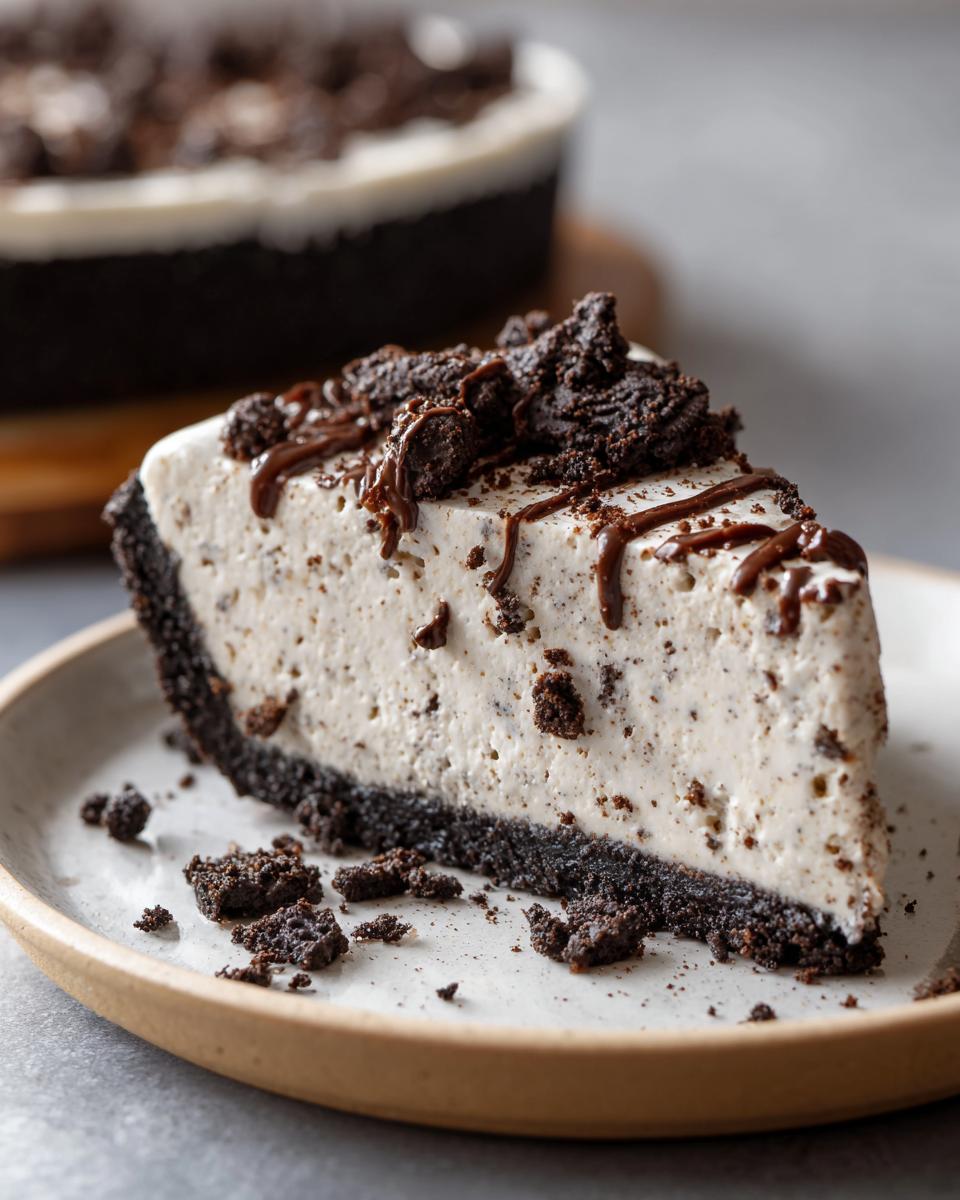
This is the hardest part: waiting! Cover the pie loosely with some plastic wrap—make sure the wrap doesn’t touch the filling yet!—and pop it into the fridge. You absolutely need a minimum of 4 hours for this Simple Cream Pie to set properly; overnight is even better if you can manage it. Right before you slice and serve, sprinkle the last of those crushed Oreos over the top. That crunch right against the pillow-soft filling is just heavenly!
Tips for Success Making the Best Oreo Pie Ever
Even though this **oreo pie** is nearly foolproof—because we aren’t baking, thank goodness!—there are a few little secrets I picked up from Grandma Daisy about handling the textures. These are the things that separate a good pie from the absolute best, most creamy result you’re hoping for. Trust me, a few extra seconds of attention now saves you disappointment later.
First, let’s talk pudding thickness. If you’re in a really hot kitchen, or maybe you just weren’t super vigorous whisking, your instant chocolate pudding might seem a little thin when you fold in those Oreos. Don’t panic! If it looks too soupy, just let it sit on the counter for five minutes while you finish preparing the cream cheese layer. Often, the instant mix will reactivate and thicken up beautifully on its own. If you want to guarantee a thicker texture though, you can totally toss in a second package of instant pudding mix—just use the original 2 cups of cold milk specified for the first package. It will be super dense, which I actually love for this Simple Cream Pie, especially if I know it’s going to sit for a while.
Next is the cream cheese. I cannot stress this enough: it needs to be softened properly. If you try to beat cold cream cheese, you’ll end up with bits of hard cheese floating in your smooth layer. If you forgot to pull it out, cut it into small cubes and let it sit on the counter for 15 minutes, or microwave it on 20% power for about 10 seconds. That small step ensures you get that silky smooth base layer.
Finally, for those of you looking for next-level richness, you can swap out the instant pudding entirely. If you want to go gourmet, make a homemade chocolate pastry cream instead. It takes longer, of course, but it offers a deep, cooked custard flavor that is amazing alongside the crunchy Oreos. It’s not truly “No Prep Dessert” territory then, but wow, is the flavor worth the effort if you have an extra half hour!
Variations on the Classic Oreo Pie
Just because this **oreo pie** recipe is perfect as is—a classic cookies and cream dream—doesn’t mean we can’t play around a little! I adore tweaking recipes, just like my grandma used to do when she ran out of brown sugar and improvised with molasses. Since this base is so simple, it’s perfect for slight modifications. Have you ever thought about adding just a tiny bit of instant espresso powder to the chocolate pudding layer?
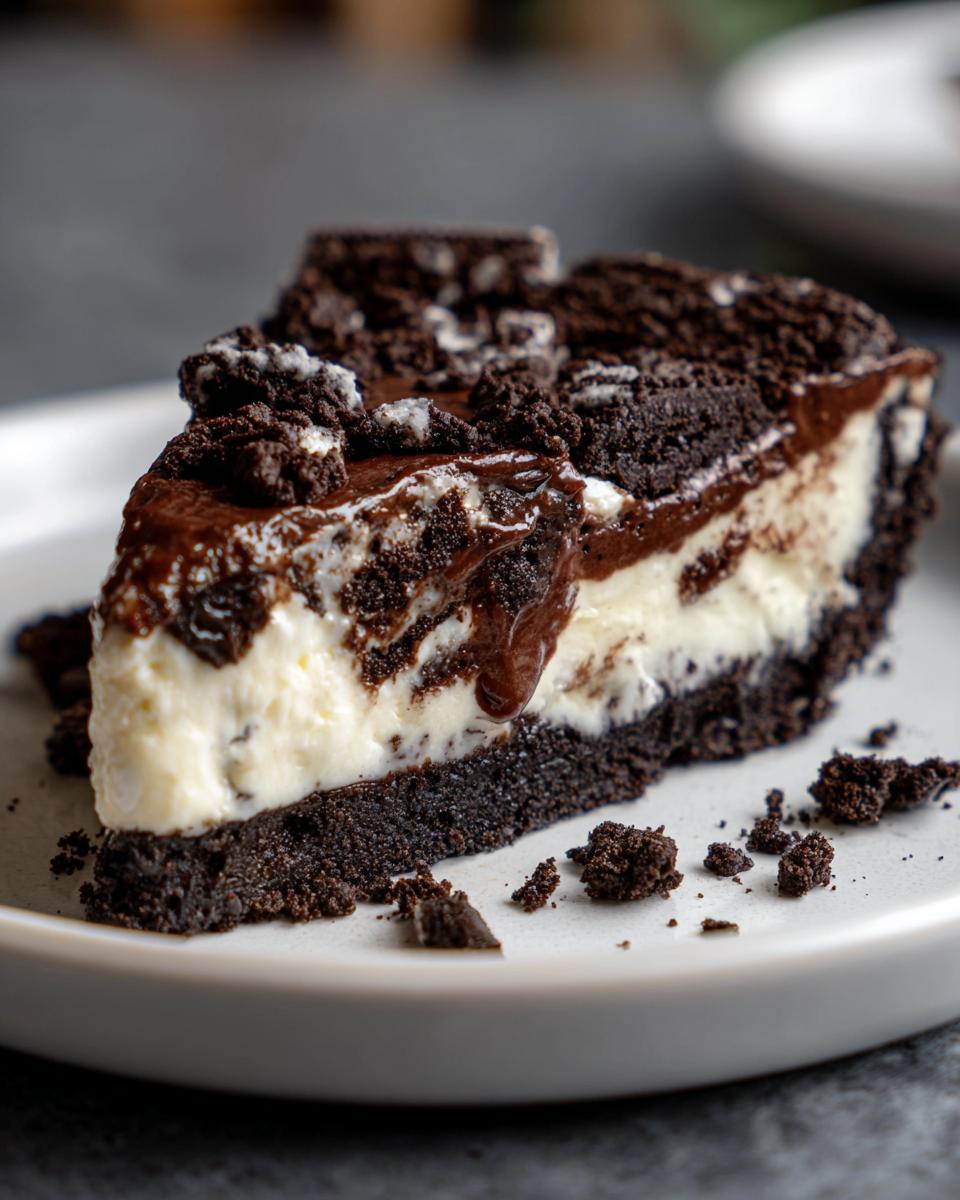
It doesn’t make the pie taste like coffee, not at all! It just deepens that already rich chocolate flavor and makes it taste almost like you’ve added an extra layer of flavor complexity. It’s a real secret weapon for things like a **Chocolate Oreo Pie** if you want it to taste truly deluxe.
We can also lean into the creamy aspect if you prefer a lighter, almost mousse-like experience, turning this into a fantastic **Oreo Pudding Pie** variation. If you find yourself making this for a huge party, maybe double the pudding layer and thin the cream cheese layer just a bit. You’ll end up with two thick, distinct layers of creamy goodness.
Creating a Rich Chocolate Oreo Pie
If plain chocolate pudding isn’t chocolatey enough for your crew, let’s kick it up a notch and focus on a true **Chocolate Oreo Pie**. My easiest suggestion is using chocolate Oreos instead of the classic ones for the crust and the mix-ins. That extra hit of chocolate in the crumbs makes a huge difference!
But if you want to go even deeper, try swapping out the plain cream cheese layer. Beat your softened cream cheese, but this time, instead of just adding the powdered sugar, beat in about half a cup of unsweetened Dutch-process cocoa powder right along with it. You’ll still follow the recipe and fold in the whipped topping, but now your base layer has that wonderful dark chocolate undertone. It pairs beautifully with the chocolate pudding on top. It’s decadent, it’s rich, and it still comes together faster than you can order takeout!
For another fun layer of flavor, I sometimes swirl in a runny peanut butter layer when assembling; it turns into an amazing Oreo Peanut Butter Pie in minutes! Just warm up some creamy peanut butter until it’s pourable and drizzle it between the white layer and the chocolate pudding layer. A few swirls with a knife, and you have a whole new Sweet Cream Dessert on your hands!
Storage & Make Ahead Dessert Instructions for Your Oreo Pie
One of the best things about this incredible **Oreo Pie** is that it’s the ultimate Make Ahead Dessert. Seriously, Grandma Daisy would have loved this because it saves time right when you need it most. Since there’s no baking involved, we are relying entirely on chilling time to let everything set up into that perfect, sliceable texture. If you’re planning a party or a big family dinner, this is your secret weapon!
You definitely want to give this pie at least four hours in the refrigerator for the fillings to firm up properly. If you rush it, you’ll end up with soupy layers, and while it might still taste great, it certainly won’t be the glorious **No Bake Oreo Pie** you see in pictures! I usually aim to make this the day before we serve it. Honestly, I think it tastes even better the next day because the moisture from the fillings has time to slightly soften the Oreo crust just enough to marry all those flavors together.
When you store it, make sure you cover it well. I use plastic wrap, but you have to be careful—if the wrap touches the whipped cream topping, it’s going to stick and tear off all your beautiful crushed Oreos when you uncover it later. So, here’s my suggestion: don’t put the final layer of crushed Oreos on until right before you serve it. Just cover the pie plate snugly with plastic wrap, making sure there’s an air pocket between the wrap and the filling.
This **Simple Cream Pie** keeps really well in the fridge. I find it maintains its best texture for about three days. After that, the whipped topping starts to look a little weep-y, and the crust can get a touch too soft—but let’s be honest, a pie this good usually doesn’t last that long in my house anyway!
Frequently Asked Questions About This Oreo Pie Recipe
I know you might have a few lingering questions before you dive into making this fantastic Oreo Pie Recipe. It happens to me every time I try a slightly new variation! These are the things folks ask me most often when they are nervous about making their first **No Bake Oreo Pie**. Don’t worry; we have simple answers for all your concerns!
Can I use a different cookie besides Oreos for the Oreo Crust Recipe?
That is such a good question, especially if you are out of the classic sandwich cookies! You absolutely *can* use a different cookie, like plain chocolate wafers or maybe even Nilla Wafers if you wanted to go fully different. But hear me out: if you switch the cookie, you are really making a different pie altogether. The whole essence of this specific **oreo pie** is that unique texture and that slight saltiness from the cream filling trapped inside the dark chocolate cookie. If you use wafers, you’ll lose that classic contrast. For the best result, stick to Oreos if at all possible for that signature crunch in your **Oreo Crust Recipe**.
How long does this No Bake Oreo Pie last in the refrigerator?
Since this is such a wonderfully light and airy **Creamy Oreo Dessert**, we have to be mindful about storage time. Generally, this pie is at its absolute peak for about two days in the fridge—the crust is still slightly firm, and the whipped topping is perfectly fluffy. You can honestly push it to three days, maybe even four, but you might notice the whipped topping starts to deflate a little bit. Also, the moisture from the pudding layer will continue to soften the crust the longer it sits. It still tastes great, but the texture starts to shift from firm and crunchy to definitely softer. Make this as a Make Ahead Dessert for the day before the party, and you will be golden!
Can I substitute the whipped topping with homemade whipped cream in this Creamy Oreo Dessert?
Yes, you totally can, and honestly, homemade whipped cream sometimes tastes even lighter! The recipe calls for one standard 8-ounce container of frozen whipped topping when thawed. If you are making your own, you’ll need about 2 cups of heavy whipping cream that you whip up with a touch of powdered sugar until you get stiff peaks. Just remember, homemade whipped cream doesn’t always have the stabilizers that the store-bought kind has, so while it makes for a lovely **No Bake Oreo Pie**, it might make your filling slightly less stable. You might need to bump that chilling time up by an hour or two just to make sure everything sets up beautifully before serving!
Nutritional Estimates for One Slice of Oreo Pie
Now, thinking about dessert always brings up the question of *how* much of what we are eating, right? Because while this **Oreo Pie** is definitely a treat, I believe in knowing what goes into our bodies. I put together the estimates below based on dividing the recipe into 8 generous servings, which is what I usually aim for when serving this to my family.
Please remember, this is just an estimate! If you used a different brand of cookies or chose to make your own whipped cream instead of the frozen kind, those numbers will shift a bit. But this gives you a good baseline for what you’re enjoying in one slice of this incredible Simple Cream Pie.
- Serving Size: 1 slice
- Calories: 410
- Fat: 25g (with about 14g of that being saturated fat)
- Carbohydrates: 45g
- Sugar: 35g (Yes, it’s sweet! It’s Oreo Pie, after all!)
- Protein: 5g
- Cholesterol: 35mg
It’s rich, it’s decadent, and it certainly hits the sweet spot for any gathering! That’s why this is always such a popular **Easy Oreo Dessert** at parties—totally worth every number!
Share Your Experience Making This Easy Oreo Dessert
Well, we did it! We made the absolute best **oreo pie** possible without even turning on the oven. Now that you have this recipe tucked away, I truly want to hear from you. Did you make it for a party? Did the kids devour it instantly? Did you try my espresso powder trick in the chocolate layer?
Please, please, please come back down below and leave a little note for me in the comments section. Tell me how you rated this **No Bake Oreo Pie** on a scale of one to five stars—your feedback helps me know if I’m keeping Grandma Daisy’s spirit alive in the kitchen!
And if you snapped a gorgeous photo of your finished **Cookies and Cream Pie** slice sitting on your favorite plate, share it with me on Instagram! Tag me so I can see how your crust held up and how fluffy your layers got. Nothing makes me happier than seeing someone else enjoy a slice of simple, honest, delicious food. Don’t forget to send your friends over to check out the recipe too!
PrintThe Best Easy No Bake Oreo Pie

You can make this creamy, rich No Bake Oreo Pie with few ingredients. It features a crunchy cookie crust and a smooth, fluffy filling, making it a simple, crowd-pleasing dessert for any gathering.
- Prep Time: 25 min
- Cook Time: 0 min
- Total Time: 4 hr 25 min
- Yield: 8 servings 1x
- Category: Dessert
- Method: No Bake
- Cuisine: American
- Diet: Vegetarian
Ingredients
- 1 package (14.3 ounces) Oreo cookies, divided
- 6 tablespoons unsalted butter, melted
- 1 package (8 ounces) cream cheese, softened
- 1 cup powdered sugar
- 1 teaspoon vanilla extract
- 1 container (8 ounces) frozen whipped topping, thawed (or 2 cups homemade whipped cream)
- 1 package (3.9 ounces) instant chocolate pudding mix
- 2 cups cold milk
Instructions
- Prepare the crust: Place 24 Oreo cookies (about half the package) in a food processor and pulse until you have fine crumbs. Set aside the remaining cookies for the filling and topping.
- Mix the crust: Combine the Oreo crumbs with the melted butter in a medium bowl. Press the mixture firmly into the bottom and up the sides of a 9-inch pie plate. Place the crust in the freezer while you prepare the filling.
- Make the cream cheese layer: In a large bowl, beat the softened cream cheese with an electric mixer until smooth. Gradually beat in the powdered sugar and vanilla extract until fully combined.
- Fold in whipped topping: Gently fold the thawed whipped topping into the cream cheese mixture until no streaks remain. Spread this mixture evenly over the chilled Oreo crust.
- Prepare the pudding layer: Crush the remaining 24 Oreo cookies coarsely. In a separate bowl, whisk the instant chocolate pudding mix and cold milk together for about two minutes until it begins to thicken.
- Assemble the pie: Gently fold about half of the crushed Oreos into the thickened pudding mixture. Spoon this chocolate layer over the cream cheese layer in the pie crust.
- Chill: Cover the pie loosely with plastic wrap and refrigerate for at least 4 hours, or until the filling is firm.
- Serve: Before serving, top the pie with the remaining crushed Oreos. Slice and serve this easy Oreo dessert immediately.
Notes
- If you prefer a thicker chocolate layer, use two packages of instant chocolate pudding mix with 2 cups of milk.
- For a richer flavor, substitute the instant pudding with homemade chocolate pastry cream.
- If you do not have a food processor, place the cookies in a large zip-top bag and crush them using a rolling pin.
Nutrition
- Serving Size: 1 slice
- Calories: 410
- Sugar: 35
- Sodium: 320
- Fat: 25
- Saturated Fat: 14
- Unsaturated Fat: 11
- Trans Fat: 0.5
- Carbohydrates: 45
- Fiber: 1
- Protein: 5
- Cholesterol: 35