
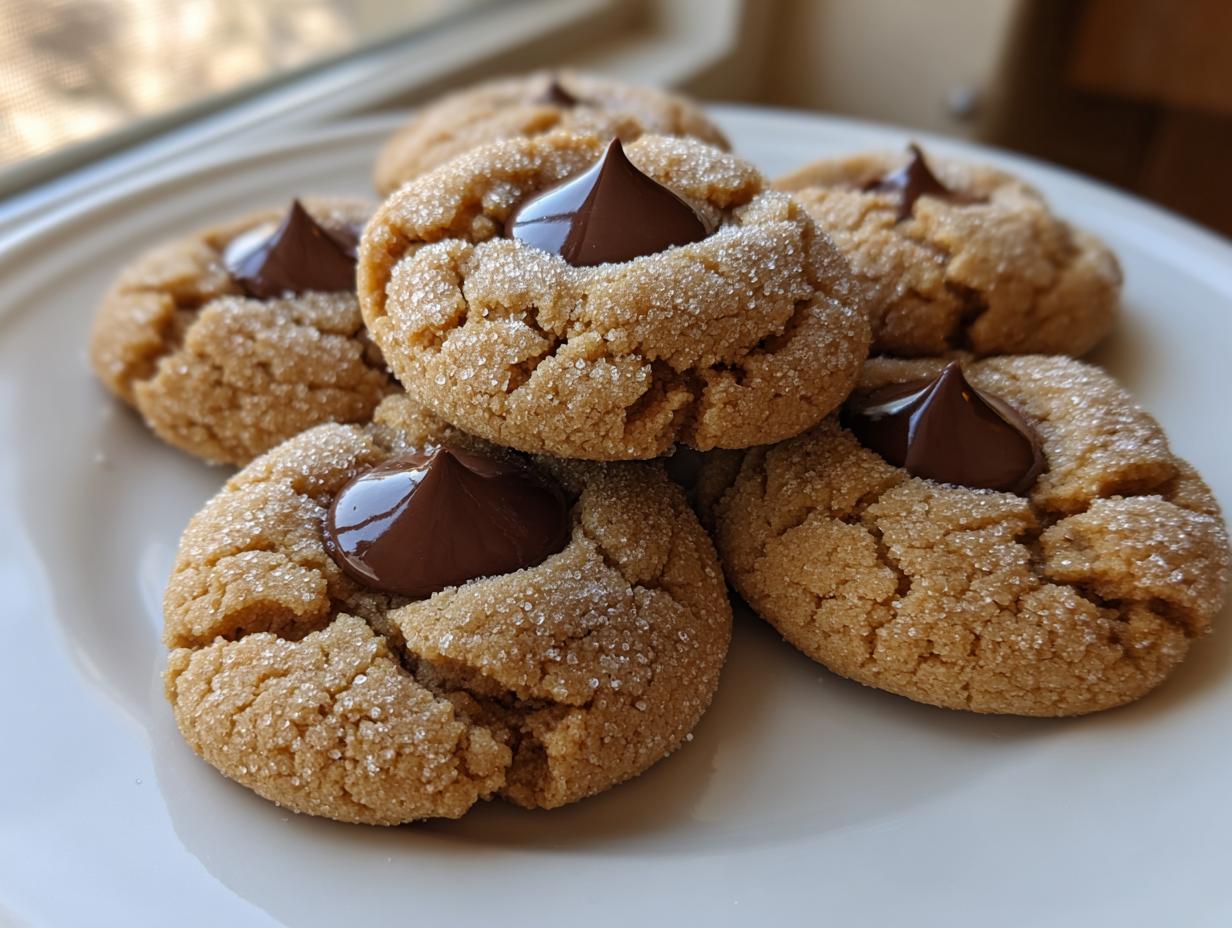
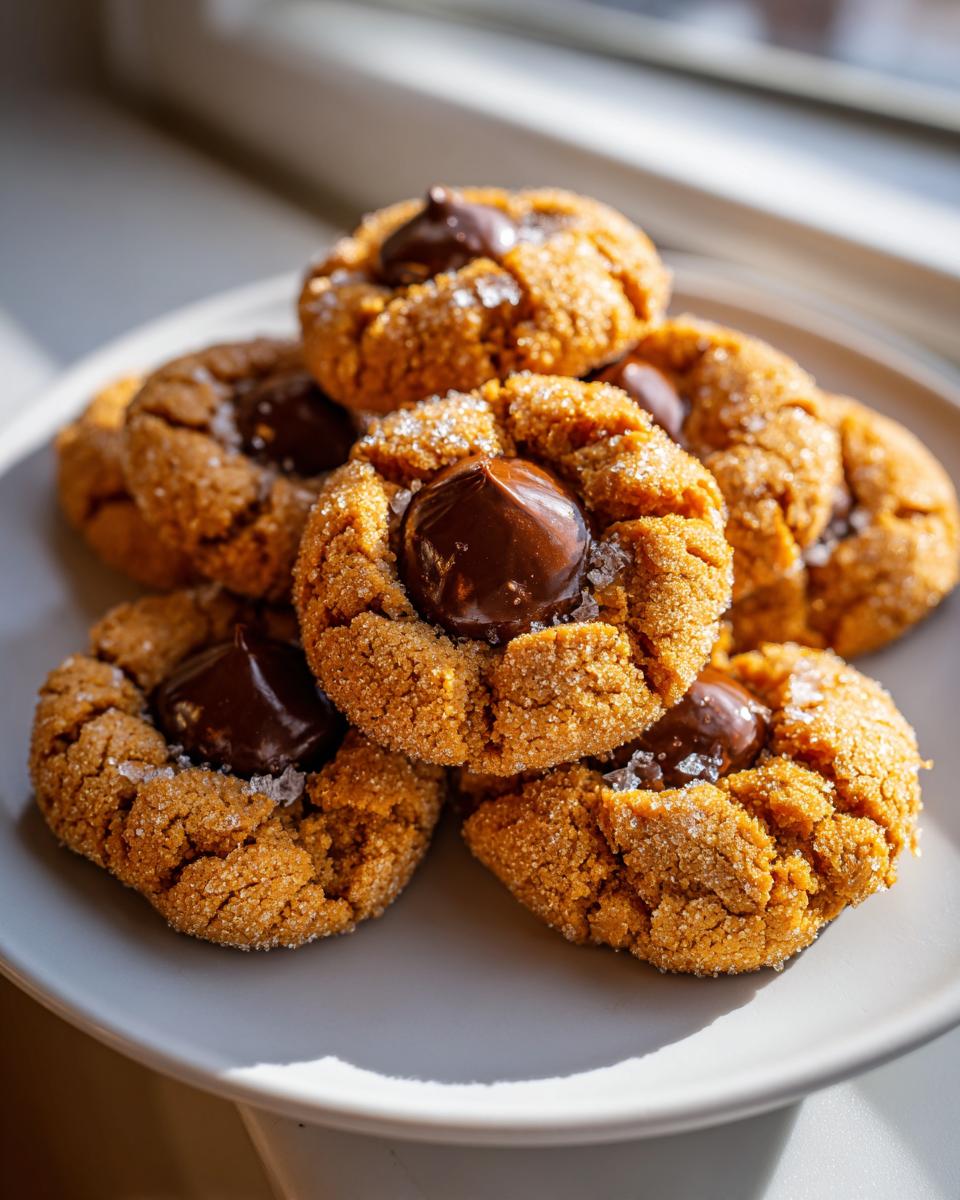
Oh, my friends, there are certain cookies that just taste like coming home, aren’t there? For me, that’s always been a batch of **peanut butter blossoms**. I swear, the world feels a little bit brighter the moment those sweet, sugary cracks appear around that iconic Hershey’s Kiss center. When I first pulled away from the rhythm of Grandma Daisy’s Midwest kitchen and started my life in the city, I tried to buy these cookies, but nothing measured up. They were always too crumbly, or the peanut butter flavor was weak.
So, I went back to her handwritten recipe card, the one stained with cardamom and vanilla. What I share with you today isn’t just a recipe; it’s the exact method a woman who barely had time to rest perfected over decades. Trust me, this version delivers that perfect, melt-in-your-mouth, soft and chewy texture every single time. It’s Daisy’s legacy baked right in. If you ever need a reminder that simple baking is the best baking, just whip up a batch of these, maybe after trying out my recipe for easy homemade soft naan bread skillet.
- Why This Recipe Makes the Best Peanut Butter Blossoms (E-E-A-T)
- Gathering Your Ingredients for Classic Peanut Butter Blossoms
- Step-by-Step Guide to Making Peanut Butter Blossoms
- Tips for Perfect Peanut Butter Kiss Cookies (Troubleshooting)
- Serving Suggestions for Your Peanut Butter Blossoms
- Storage and Keeping Peanut Butter Blossoms Fresh
- Frequently Asked Questions About Peanut Butter Blossoms
- Estimated Nutrition for Classic Peanut Butter Blossoms
- Share Your Daisy's Kitchen Creations
Why This Recipe Makes the Best Peanut Butter Blossoms (E-E-A-T)
The magic of these **peanut butter blossoms** isn’t complicated; it’s just precision, which is what Grandma Daisy always insisted on. We aim for cookies that are incredibly soft and chewy—none of that sandy, dry texture! The key to that perfect crackle top and that melt-in-your-mouth quality, especially since this recipe requires absolutely no chilling time, is making sure you treat the dough just right. I think you’ll find these are the easiest and most rewarding cookies you make all year, much like my snickerdoodles.
Achieving That Signature Soft and Chewy Cookies Texture
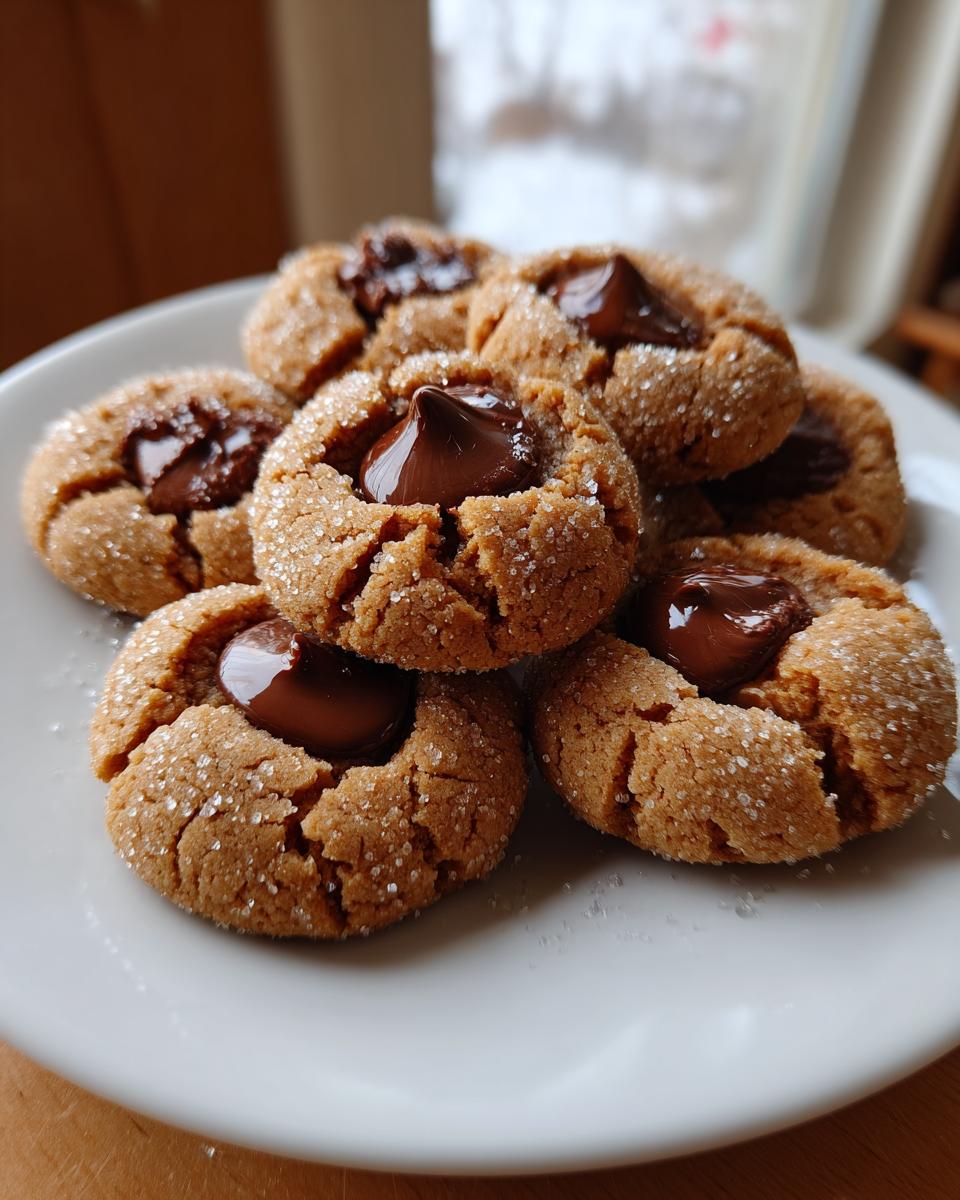
It all comes down to the sugar ratio. We use both granulated and brown sugar, and brown sugar is our best friend here because its molasses keeps things wonderfully tender. But honestly, the real game-changer is pulling them out when you think they might be a *tiny* bit underdone. They hold their shape beautifully, and they firm up perfectly on the tray without drying out. That’s how we get those coveted **soft and chewy cookies**!
The Secret to Perfect Peanut Butter Blossoms Every Time
Here’s the one thing Daisy made me promise to never skip: make sure your butter and peanut butter are truly room temperature, almost sloppy soft, before you start creaming. If the fats are too cold, you won’t incorporate enough air when you mix in the sugars, and your peanut butter blossoms will turn dense instead of fluffy. This simple step creates the necessary structure for that gorgeous sugar crust to develop as they bake.
Gathering Your Ingredients for Classic Peanut Butter Blossoms
Okay, let’s get down to what we actually need! Because these are such a wonderful, **Easy Peanut Butter Cookie Recipe**, you probably have most of this stuff sitting in your pantry right now. The ingredient list itself is just pure nostalgia. Daisy insisted on using creamy peanut butter—nothing crunchy, because we want that smooth base to contrast with the sugar coating. Make sure that light brown sugar is nicely packed into the cup!
You’ll need about a full bag of Hershey’s Kisses, and trust me on this: unwrap every last one *before* the cookies come out of the oven. You do not want to be fumbling with foil wrappers while your beautiful, hot cookies are waiting! If you’ve ever needed a simple treat to serve alongside something like my easy fruit dip, these are the ones. Here’s the list:
- 1 cup unsalted butter, softened (Remember what I said about soft!)
- 1 cup creamy peanut butter
- ¾ cup granulated sugar, plus extra for rolling
- ¾ cup packed light brown sugar
- 2 large eggs
- 1 teaspoon vanilla extract
- 2 ¼ cups all-purpose flour
- 1 teaspoon baking soda
- ½ teaspoon baking powder
- ½ teaspoon salt
- About 1 bag Hershey’s Kisses, unwrapped
Step-by-Step Guide to Making Peanut Butter Blossoms
This is the part where everything comes together! Even though these are quick, we need to follow Daisy’s rhythm. First things first: get your oven up to 375 degrees Fahrenheit and make sure those baking sheets are ready—I always throw down parchment paper to avoid any messy cleanup later. If you’re looking for other quick cookie triumphs, check out my guide to butter cookie recipe easy melt mouth!
Mixing the Dough for Peanut Butter Blossoms
You already made sure your butter and peanut butter were soft, right? Now, beat them aggressively with both sugars until that mixture looks light and fluffy—I mean really beat it until it’s pale yellow. It should look airy! Now, add your eggs one at a time, making sure each one is fully mixed in before you add the next splash of egg or vanilla. When it comes to the flour, baking soda, baking powder, and salt you whisked together, you add those dry ingredients slowly, on low speed, only until you see no more streaks of white flour. If you overmix here, those cookies harden up, and we want soft!
Rolling and Baking Your Peanut Butter Blossoms
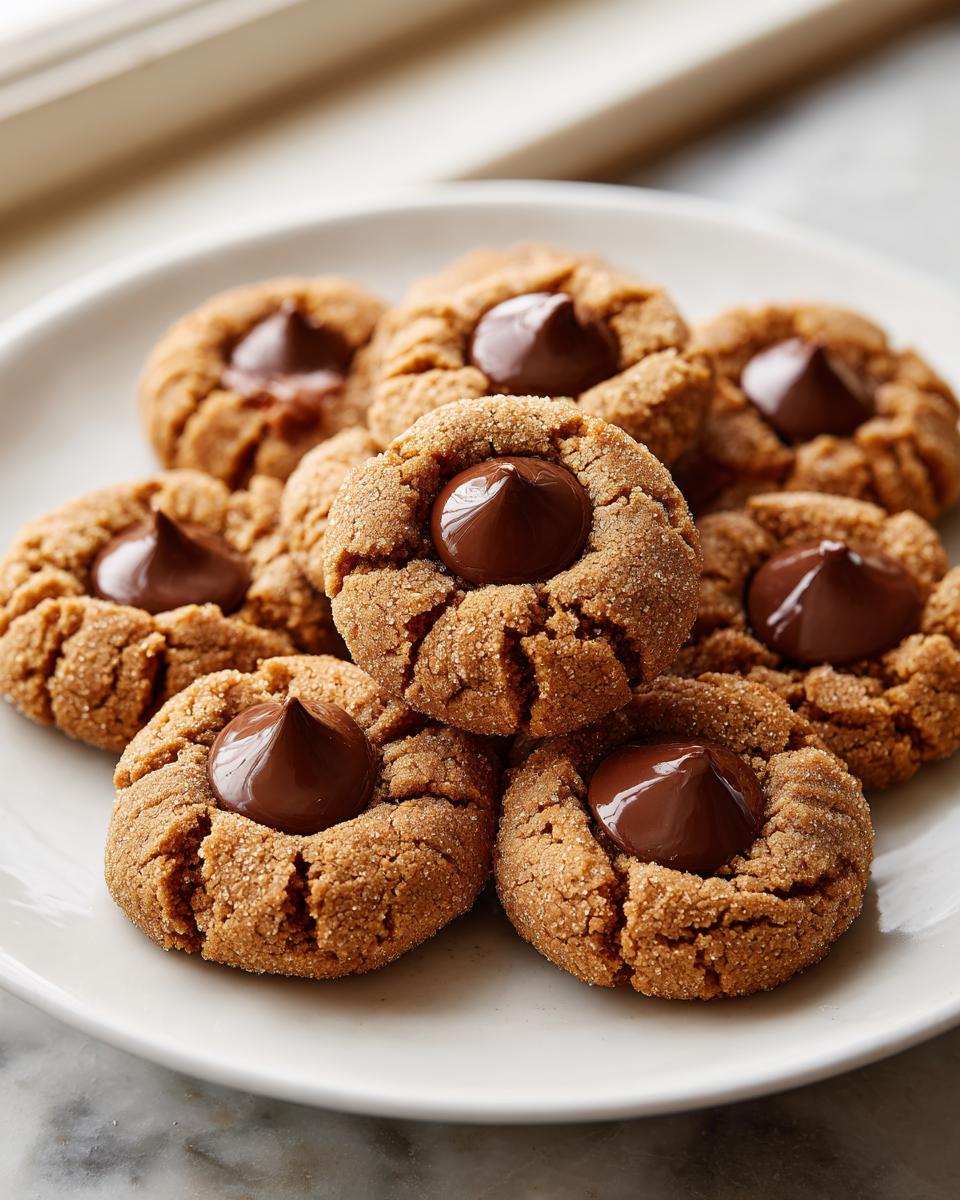
Time for the sugar coat! Pour that extra granulated sugar onto an old plate. Scoop your dough into nice, even balls—about 1 inch across is what you’re aiming for. Roll those balls right in the sugar until they are completely covered and sparkling. This coating is what gives us that amazing, crinkly top. Space them about two inches apart on your pans because they will spread out a little bit. Pop them into that 375-degree oven for only 8 to 10 minutes. You are looking for slightly set edges, but the center should still look a little soft when you peek through the glass.

The Final Touch: Adding the Chocolate Kiss to Warm Peanut Butter Blossoms
This is the most important minute of the whole process! As soon as those cookies come out of the oven, you have to work fast. Grab those unpacked Hershey’s Kisses and immediately press one firmly right into the center of each warm cookie. Don’t wait! The residual heat from the cookie is doing all the work, softening that chocolate into that perfect, gooey pool. If you wait until they cool down even a tiny bit, the chocolate won’t stick or melt nicely. Then, just let them sit on that hot tray for five minutes to firm up before moving them over to the cooling rack. If you want to see other amazing holiday recipes where presentation matters, check out this great one for classic peanut butter blossoms!
Tips for Perfect Peanut Butter Kiss Cookies (Troubleshooting)
Even with Daisy’s careful guidance, baking doesn’t always go perfectly the first time, especially when you’re rushing! But don’t worry; we can fix almost anything. Since this is a true **no chill peanut butter cookies** recipe, sometimes the dough can feel a little too soft right away, especially if your kitchen is warm. That’s okay! It’s all part of keeping them **soft and chewy cookies**.
Handling Dough That Spreads Too Much
If you roll your dough balls and they feel floppy or they look like they’re going to flatten into pancakes once they hit the sugar, don’t panic and don’t add more flour! Adding flour now ruins the texture we worked so hard to achieve. The best fix is simple physics: pop those dough balls into the freezer for just about 10 minutes. You don’t want them hard, just firm enough so they hold their shape when you roll them in the sugar. That quick chill firms up the fats just enough to stop excessive spreading while baking. Easy peasy—just like my recipe for easy peanut butter cookies on later days!
Making Peanut Butter Blossoms Ahead of Time
This is where these **Peanut Butter Kiss Cookies** really shine, especially around the holidays when you need to make make ahead Christmas desserts. You can absolutely make the dough completely, skip the rolling, and place the dough scoops (un-sugared!) onto a lined baking sheet. Cover that sheet tightly with plastic wrap and stick it in the fridge for up to three days. When you’re ready to bake, grab that chilled dough.
The main thing to remember about baking chilled dough is that the baking time needs a little boost. I suggest adding about 1 or 2 extra minutes to the standard 8 to 10 minutes. Pull them out when they look just set, push in that Kiss right away, and let them cool just like normal. They come out tasting exactly the same—tender and perfect!
Serving Suggestions for Your Peanut Butter Blossoms
Don’t just bake these beauties and hide them away! These **Peanut Butter Blossoms** truly shine when paired with something simple. If you are taking them to a cookie exchange, everyone will rave about how soft they are.
For that ultimate, **nostalgic holiday baking** feel, they must be served with a tall glass of ice-cold milk. It perfectly cuts through the richness of the peanut butter and chocolate kiss. If you are serving them as an afternoon treat, I love enjoying mine with a steaming mug of coffee. If you’re feeling fancy, try my recipe for classic Irish coffee—it’s delicious!
They look wonderful piled high on a simple white platter alongside some bright red and green M&Ms cookies, like those mentioned over at Christmas Peanut Butter Blossoms.
Storage and Keeping Peanut Butter Blossoms Fresh
One of the best parts about these cookies, besides tasting like pure childhood, is that they actually stay perfectly soft! Daisy always told me that if you bake them right—meaning, don’t leave them in the oven until they are hard—they will remain those wonderful, **melt in your mouth peanut butter cookies** for days. But how you store them makes a huge difference, right?
You must store your **peanut butter blossoms** in an airtight container. I can’t stress this enough! If air gets to them, that lovely sugary crust starts to get hard, and if you put them in a bag, the chocolate kisses can get dusty looking. Layer them carefully between sheets of parchment or wax paper so the kisses don’t smoosh into one giant cookie mess.
When stored properly at room temperature, these cookies are fantastic for at least four to five days. Honestly, they are usually gone way before that in my house! If you somehow manage to have leftovers and the chocolate kiss starts to get a little pale, don’t worry. Store them near a slice of bread or a soft tortilla (yes, really!), which keeps the moisture in the container, helping the cookies stay that perfect texture. If you are looking for another incredibly easy recipe that also stores well, you have to check out my no-bake peanut butter pie!
Frequently Asked Questions About Peanut Butter Blossoms
I know you’re going to love these, but sometimes questions pop up when you’re getting ready to bake, especially when dealing with famous **Christmas cookie recipes** like these. Grandma Daisy always taught me that even the simplest recipes deserve attention to detail. Here are a few things folks usually ask me when they bring out the Hershey’s Kisses!
Can I use crunchy peanut butter in this Easy Cookie Exchanges Treats recipe?
Yes, you certainly *can*, but I really advise against it if you’re chasing that **melt in your mouth peanut butter cookies** texture we talked about. Crunchy peanut butter adds little chunks into the dough that disrupt the smooth, tender structure we’re aiming for. It affects how the sugar coating adheres and how the cookie bakes up overall. For the truly classic, soft experience, creamy is absolutely the way to go for these **easy cookie exchanges treats**.
What is the best way to get the sugar coating to stick to the Classic Peanut Butter Blossoms?
This is all about moisture and surface area! If your dough balls are too dry to begin with, the sugar won’t stick well, leading to patchy tops. Because this is a **no chill peanut butter cookies** recipe, the dough is already slightly softer, which helps. Just make sure you are generously rolling the dough ball in the sugar—don’t just gently tap it. Really swirl it around until it’s completely covered in a thick blanket of granules. That thick coating turns into the crackle top you want!
Are there Gluten Free Peanut Butter Blossoms options for this recipe?
You know that people bake for all sorts of reasons these days, and I totally get it! Good news: this recipe converts beautifully to gluten-free with very little fuss. You just need to swap out the all-purpose flour for a good quality 1:1 gluten-free baking blend that contains xanthan gum. You don’t need to adjust any of the wet ingredients or change the baking time since the structure relies more on the fats and sugars than the wheat base. Trust me, you won’t even know the difference when you make these **Gluten Free Peanut Butter Blossoms options**!
I hope these tips help you feel confident approaching these cookies! If you’re looking for another fun baking twist, check out my recipe for cake mix cookie bars. You can find more classic tips from others making these famous treats over at Classic Peanut Butter Blossoms.
Estimated Nutrition for Classic Peanut Butter Blossoms
Now look, I want to be super clear here: this is Daisy’s kitchen, not a commercial bakery, so these numbers are my best, honest guess based on the ingredients we used. Since baking for the holidays often means making huge batches of **Christmas cookie recipes**, we’re calculating this based on the yield of about 3 dozen cookies. You know that using a slightly different brand of peanut butter or a different size of Kiss can shift things around a bit!
But generally, you can expect this timeless treat to hit around 180 calories per cookie. It’s a wonderful balance, full of energy from the sugars and healthy fats from the peanut butter. Here’s the rundown so you can keep track:
- Serving Size: 1 cookie
- Calories: 180
- Sugar: 14g
- Sodium: 110mg
- Fat: 10g (Saturated Fat: 4g)
- Carbohydrates: 21g
- Protein: 4g
It’s worth every single bite! If you’re looking for other indulgence that still feels traditional, you might want to check out my recipe for easy rocky road fudge recipe—that one travels really well on holiday trays too!
Share Your Daisy’s Kitchen Creations
Baking to me is an act of love, and Daisy always said that the best part of making something delicious is sharing it with the people you care about. Now that you have this tried-and-true recipe for the **best peanut butter blossoms**, I truly hope you take the time to enjoy the process—the smell of the peanut butter baking and the look of those chocolate kisses melting perfectly into the warm dough.
I’ve poured years of family history and my own attempts to reclaim that nostalgic comfort into this recipe. So, tell me, did they turn out soft and chewy like you hoped? Are these officially replacing another **holiday cookie favorite** on your must-make list? Please leave a rating below right after you try them—it means the world to me to see the success in your kitchen. It keeps Daisy’s spirit alive here on the blog, miles away from where she first taught me everything!
If you want to read a bit more about the journey that brought these traditional recipes back to life, you can always pop over to my About Me page. Happy baking, friends!
PrintClassic Soft and Chewy Peanut Butter Blossoms

This is the reliable recipe for soft and chewy Peanut Butter Blossom cookies, featuring a sugary crackle top and a classic chocolate kiss center. These cookies stay tender and are simple to make for any occasion.
- Prep Time: 15 min
- Cook Time: 10 min
- Total Time: 25 min
- Yield: About 3 dozen cookies 1x
- Category: Dessert
- Method: Baking
- Cuisine: American
- Diet: Vegetarian
Ingredients
- 1 cup unsalted butter, softened
- 1 cup creamy peanut butter
- ¾ cup granulated sugar, plus extra for rolling
- ¾ cup packed light brown sugar
- 2 large eggs
- 1 teaspoon vanilla extract
- 2 ¼ cups all-purpose flour
- 1 teaspoon baking soda
- ½ teaspoon baking powder
- ½ teaspoon salt
- About 1 bag Hershey’s Kisses, unwrapped
Instructions
- Preheat your oven to 375 degrees Fahrenheit. Line baking sheets with parchment paper.
- In a large bowl, beat the softened butter, peanut butter, granulated sugar, and brown sugar until the mixture is light and fluffy.
- Add the eggs one at a time, beating well after each addition. Mix in the vanilla extract.
- In a separate bowl, whisk together the flour, baking soda, baking powder, and salt.
- Gradually add the dry ingredients to the wet ingredients, mixing on low speed until just combined. Do not overmix the dough.
- Pour extra granulated sugar onto a shallow plate.
- Scoop the dough into balls, about 1 inch in diameter. Roll each ball in the sugar until fully coated.
- Place the sugared dough balls about 2 inches apart on the prepared baking sheets.
- Bake for 8 to 10 minutes. The edges should look set, but the centers will still look slightly soft.
- Remove the baking sheets from the oven. Immediately press one unwrapped Hershey’s Kiss into the center of each warm cookie. The heat from the cookie will soften the chocolate slightly.
- Let the cookies cool on the baking sheet for 5 minutes before transferring them to a wire rack to cool completely.
Notes
- For the best texture, avoid overbaking. The cookies firm up as they cool.
- You can make the dough ahead of time and chill it for up to 3 days. Roll and bake directly from the refrigerator, adding 1-2 minutes to the baking time.
- These cookies are excellent for holiday cookie exchanges and gifting.
Nutrition
- Serving Size: 1 cookie
- Calories: 180
- Sugar: 14g
- Sodium: 110mg
- Fat: 10g
- Saturated Fat: 4g
- Unsaturated Fat: 6g
- Trans Fat: 0g
- Carbohydrates: 21g
- Fiber: 1g
- Protein: 4g
- Cholesterol: 25mg