

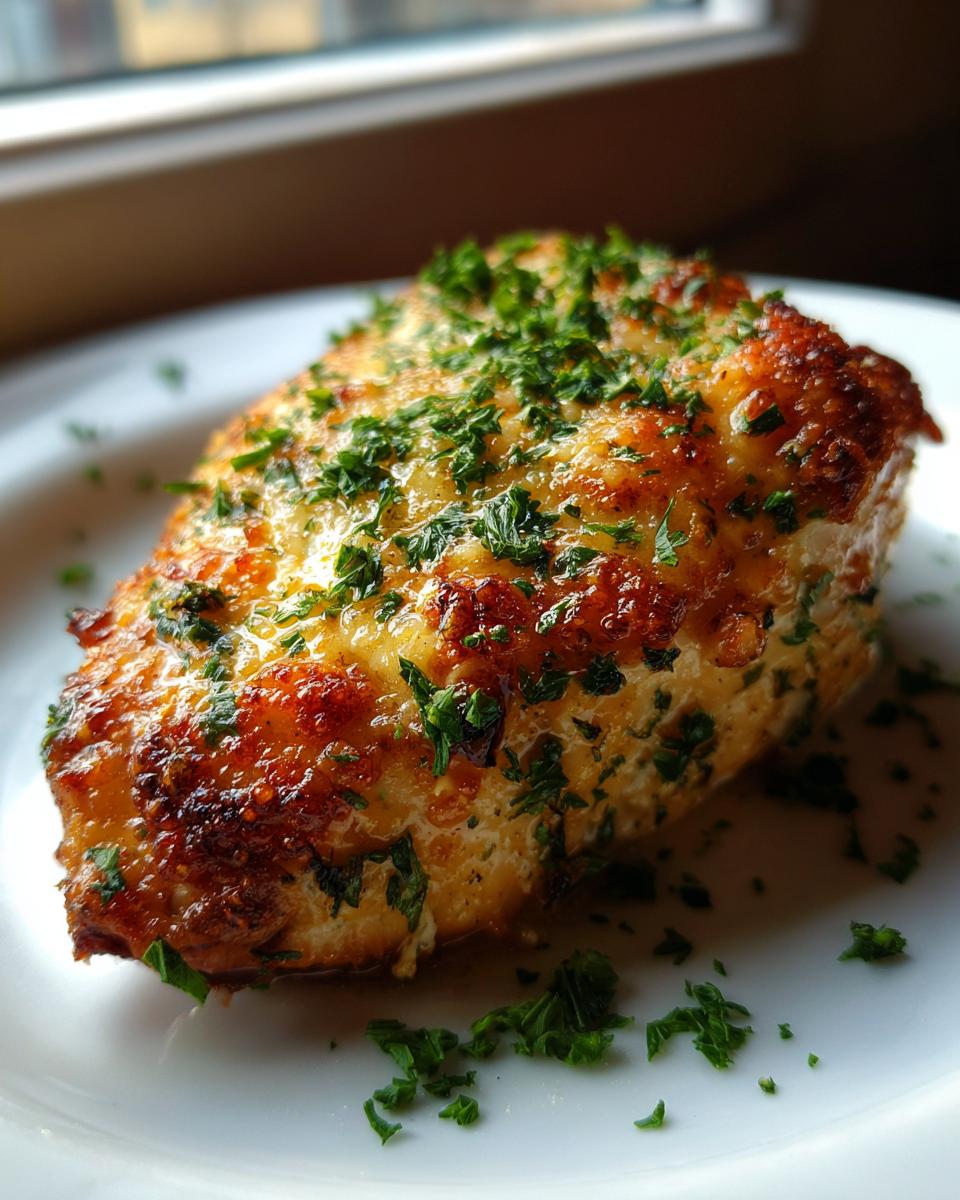
If you’re anything like me, you’ve faced the tragedy of the dry, chalky baked chicken breast more times than you care to admit. It’s the weeknight dinner villain! I spent years overcooking it or just avoiding the oven altogether because I thought it was impossible to get that melt-in-your-mouth tenderness without soaking it in brine for days. Honestly, that old way of cooking just doesn’t fit into my busy life anymore. But recently, I got back to basics, channeling my grandmother Daisy’s philosophy: simple food made with love yields the best results. And wow, did I crack the code! This Garlic Butter **baked chicken breast** isn’t just easy; it’s genuinely foolproof. It turns out juicy and flavorful every single time, making it the most reliable dinner solution I have right now.

- Why This Garlic Butter Baked Chicken Breast Recipe Works (No-Fail Method)
- Gathering Ingredients for Your Baked Chicken Breast
- Step-by-Step Instructions for the Easy Baked Chicken Breast Recipe
- Expert Tips for the Best Way to Bake Chicken
- Making This Baked Chicken Breast Ideal for Meal Prep
- Storage and Reheating Instructions for Baked Chicken Breast
- Variations on the Simple Baked Chicken Breast Seasoning
- Frequently Asked Questions About Your Baked Chicken Breast
- Serving Suggestions for This Oven Baked Chicken Breast
- Nutritional Estimate for This No-Fail Baked Chicken Breast
Why This Garlic Butter Baked Chicken Breast Recipe Works (No-Fail Method)
The secret to this being my favorite **juicy baked chicken breast tutorial** is that we are creating a mini-steam chamber right in the baking dish. This is seriously the answer for **how to bake chicken breast without drying out**! Most people just throw the raw chicken in and hope for the best, right? Not us. We rely on two things working together when we make this **baked chicken breast**.
First, that incredible garlic butter melts right over the top. It acts like a flavorful shield, locking in moisture as it cooks. But the real magic trick, the one I learned from hours of testing—and frankly, the one that saved my sanity before I found similar fantastic methods, like this one for easy Greek chicken—is the little splash of chicken broth we add to the bottom. That liquid turns into steam while it bakes, gently bathing the chicken in moisture instead of blasting it with dry oven heat. It keeps the meat happy and tender all the way to that perfect internal temperature. If you’ve been struggling to get a **tender chicken breast recipe**, this steam element is what you’ve been missing!
Gathering Ingredients for Your Baked Chicken Breast
Good food starts with good ingredients, and for this simple method, we’re keeping things wonderfully straightforward. We only need four chicken breasts for four servings here, but you can easily double this if you’re planning ahead. Remember, the quality matters, so grab your best boneless, skinless chicken when you shop. Don’t let the simple ingredient list fool you; this is where incredible flavor starts for your **baked chicken breast** dinner.
The Simple Seasoning Mix for Baked Chicken Breast
The centerpiece of this dish is our little garlic butter compound. You’ll want four tablespoons of unsalted butter, softened—and I mean soft, almost like room temperature cream, not melted! Soft butter mixes beautifully with four cloves of garlic, minced super fine. We’re adding just a teaspoon of dried Italian seasoning, half a teaspoon of salt, and a pinch of pepper. Mix that all together until it’s one gorgeous, fragrant paste. Before this paste goes anywhere near the oven, you absolutely must pat your chicken dry with paper towels. I know it seems fussy, but those paper towels wick away surface moisture. If the surface is wet, the butter just sits there in a puddle instead of sticking and flavoring the meat. Trust me, drying it off is key for that delicious crust!
Step-by-Step Instructions for the Easy Baked Chicken Breast Recipe
Okay, now that we have our ingredients prepped—that glorious garlic butter ready to go—it’s time for the fun part! Watching this **easy baked chicken breast recipe** come together is just the best, especially when you realize how little hands-on time it actually takes. We’re moving fast here, but we can’t skip the setup, because Daisy always taught me that a good foundation makes everything else easy. This is what transforms a potential weeknight disaster into a fantastic, quick meal.
Preparing the Chicken and Oven Setup
First things first: get that oven cranking up to 400°F (200°C). Don’t try to sneak it in on a lower heat; we want the sear and the steam working together quickly! While it heats up, grab whatever baking dish you have—I usually use a standard 9×13 glass one, but anything oven-safe works. Give it a quick grease or line it with parchment paper for cleanup peace of mind later. Remember what we talked about? Take your dried chicken cutlets and lay them neatly in the pan. Now, generously slather that **garlic chicken breast recipe** topping all over the top surface of each piece. This is what sets the stage for a truly successful **oven baked chicken breast for dinner**.
Baking for a Tender Chicken Breast Recipe
Here’s the crucial step to guarantee moisture: pour about a quarter cup of chicken broth or even just water right into the bottom of the dish, making sure it stays *around* the chicken, not washing the butter off! This liquid is our secret weapon for a **tender chicken breast recipe**. Pop the dish into that hot oven. You’ll want to let it bake for about 20 to 25 minutes, but listen to me: time is just a guideline. You *must* check the temperature in the thickest part of the chicken. We are aiming for 165°F (74°C). If your breasts are thinner, start checking at 18 minutes. Once you hit that number, pull them out immediately! Overcooking is the enemy here at Daisy’s Recipes.
Expert Tips for the Best Way to Bake Chicken
Honestly, mastering the oven bake method didn’t happen overnight for me. It took revisiting my grandmother’s old notes to figure out where I was going wrong! I used to get frustrated because some pieces would be done while others were still dangerously raw. The biggest lesson I learned is that we have to fight for evenness if we want the **best way to bake chicken** results.
If your chicken breasts are that classic teardrop shape—thick on one end and skinny on the other—you absolutely need to pound them slightly before seasoning. It sounds intimidating, but I just lay them between two pieces of plastic wrap and gently tap the thick spots with a rolling pin until they are about an inch thick all the way across. This trick ensures they cook uniformly, so you aren’t sacrificing the thin end while waiting for the thick end to reach temperature. If you ever need more slow-cooker inspiration, check out my Slow Cooker Garlic Parmesan Chicken, which also requires thoughtful sizing!
For those days when you want a little extra golden color or a deeper sear, I sometimes use an oven-safe skillet. I’ll sear the butter-covered chicken on the stovetop for just two minutes per side until it’s beautifully golden brown, and then, skillet and all, it goes right into the hot oven. It’s a wonderful technique found in guides like this excellent chicken baking guide, and it really takes the flavor up a notch without adding any extra time!
Making This Baked Chicken Breast Ideal for Meal Prep
Honestly, this garlic butter **baked chicken breast** is one of my favorite things to make specifically for **meal prep**. Why? Because it stays incredibly moist even after a few days in the fridge. That steaming method we used in the oven really does the trick, ensuring that your leftovers aren’t sad and dry the next day.
If you are trying to nail down that **quick weeknight chicken dinner** strategy, cooking four breasts at once means you have lunch covered for the next couple of days, too. It’s so much better than relying on processed deli meat!
When you’re packing it up, just make sure you let the chicken cool completely—don’t seal hot food in a container right away, as that creates condensation which can ruin the texture. Once it’s cool, store it in an airtight container. It’s such a versatile base. You can chop it up and toss it into hearty salads, like my absolute favorite veggie lentil salad, or slice it thinly over some steamed greens. If you are following a **healthy baked chicken recipe** plan, this is your go-to protein!
The fact that this **oven baked chicken breast** recipe uses such simple seasoning means it pairs beautifully with almost anything you throw at it later in the week. It’s just reliable good chicken, ready when you need it.
Storage and Reheating Instructions for Baked Chicken Breast
A great **baked chicken breast** shouldn’t disappear after one meal! We made it juicy and tender because we planned ahead, right? So naturally, we need to treat those leftovers with respect so they don’t turn into jerky later. Storing them properly is just as important as getting the initial bake right.
When they’ve cooled down completely—and I mean *totally* cool—you want to transfer your leftover **baked chicken breast** into an airtight container. Don’t leave them sitting on the counter! They need to be snug in the fridge, where they should last beautifully for about three to four days. We aren’t trying to push it here; four days maximum is my rule of thumb for any leftover poultry.
Now, for the crucial part: reheating! If you just zap it in the microwave for a minute on high, you’re going to ruin all the great moisture work we did earlier. To keep that texture intact, I actually prefer bringing them back to life more gently. The best method, if you have five minutes, is popping the sliced chicken back into a low oven—say, 300°F (150°C). But here’s the real trick to keeping them soft: Add just a tiny splash of broth or even some water to the bottom of whatever small dish you’re using. It creates a tiny bit of steam right around the chicken as it warms up. It works wonders!
If you’re in a massive rush and need to use the microwave, fine, I get it. But here’s how you cheat it: lay the sliced chicken on a microwave-safe plate and place a damp paper towel right over the top of the slices, then microwave in short 20-second bursts until just warm. That damp towel acts like a quick steam bath, helping your reheated **baked chicken breast** feel almost freshly cooked.
Variations on the Simple Baked Chicken Breast Seasoning
While I truly believe this garlic butter is the peak of perfection for a **baked chicken breast**, I know that sometimes we get stuck in a flavor rut! Part of keeping cooking fun is allowing yourself to play with the foundation we’ve built here. This base recipe is so sturdy—thanks to that lovely butter and the steam—that it handles flavor changes beautifully. You don’t have to worry about the chicken drying out when you experiment!
If you want to pivot away from the Italian herbs, I have a couple of go-to swaps that I pull out when I need something different for dinner. These ideas keep the cooking method totally the same, so you still get that wonderfully juicy result every time you bake your **baked chicken breast**.
First, for a deeper, smokier flavor that really sings, swap out the Italian seasoning for just one teaspoon of smoked paprika and half a teaspoon of garlic powder (in addition to the fresh garlic). That smoky kick is fantastic, and it makes for a gorgeous color on the final dish. This works perfectly if you’re aiming for something that fits a **keto baked chicken breast** profile, as long as you stick to those spices!
Another absolute winner, especially when I’m serving it with steamed green beans, is swapping the Italian seasoning for lemon. Before you mix your butter, remove about one tablespoon of the softened butter and instead mix the minced garlic into the remaining three tablespoons of butter. Then, once you’ve patted the chicken dry, instead of the garlic butter wash, brush on a little olive oil, and then sprinkle generously with salt, pepper, and the zest of one whole lemon. Use that leftover tablespoon of butter, melted, drizzled on top just before it goes into the oven. It brightens everything up! For more fantastic low-carb inspiration, you might want to check out how they handle spices when making keto-friendly dough; the flavor layering is similar.
Finally, if you’re looking for a way to incorporate more elements that fit the guidelines discussed in resources like this guide on Whole30 chicken, you can easily stick to just salt, pepper, and maybe a pinch of onion powder for a truly naked, **simple baked chicken breast seasoning** that still benefits from our broth-steaming method. Experimenting with these kinds of spice shifts is what keeps cooking exciting around here!
Frequently Asked Questions About Your Baked Chicken Breast
Look, even with the best **juicy baked chicken breast tutorial**, sometimes little questions pop up as you’re getting the hang of things. It’s completely normal! When I first transitioned to making this **no-fail baked chicken breast** recipe a regular part of my week, I had a stack of questions myself. I’ve gathered the ones I hear most often from folks trying to perfect their **oven baked chicken breast for dinner**. Don’t worry if you’re wondering about the specifics; these little details are what separate a good chicken dinner from spectacular!
What is the safest internal temperature for baked chicken breast?
This is the most important question to ask, full stop! Food safety comes first, always. For any poultry, including our beautiful **baked chicken breast**, you need to cook it until the internal temperature reaches 165°F (74°C). I can’t stress this enough: you have to use a reliable meat thermometer to check the thickest part of the breast. You can’t tell just by looking at the juices running clear anymore—that old advice leads to overcooked, dry chicken! That 165°F is your golden ticket to perfectly done, safe, and tender meat.
How can I make this a healthy baked chicken recipe?
I totally get wanting to keep things light while still enjoying great flavor. The good news is that this recipe is already miles ahead of fried chicken, but we can always tweak it for a lighter touch! The fat content mostly comes from that gorgeous garlic butter topping. If you want to lean into a truly **healthy baked chicken recipe**, you can easily swap out half—or even all—of the four tablespoons of butter for a good quality olive oil.
Does this change the flavor? Sure, a little. You lose that creamy mouthfeel the butter provides, but you still get 90% of the flavor from the garlic and herbs. The thing you absolutely cannot skip, though, is that chicken broth in the bottom of the pan. That liquid is non-negotiable if you want to maintain true juiciness, even when you reduce the fat content. It’s the steam doing the heavy lifting!
Serving Suggestions for This Oven Baked Chicken Breast
We’ve done the hard work, and now we have this impossibly juicy **oven baked chicken breast** sitting on the counter, resting perfectly. What goes well with glorious garlic and butter chicken? Honestly, almost anything, which is why this recipe is a weeknight hero! Because the chicken itself is so rich and flavorful, I usually stick to very simple sides so the main event can truly shine. I try to keep the whole meal quick, just like the chicken itself!
My absolute favorite go-to pairing for a super fast dinner is throwing some asparagus or broccoli florets right into the baking pan alongside the chicken for the last 15 minutes of cooking. They soak up all those amazing buttery, garlicky drippings that accumulate at the bottom. It keeps the hands-on time almost zero, which is exactly what I need after a long day.
If I have just a little more time, serving it over a bed of simple white or brown rice is always a winner. The rice soaks up those pan juices beautifully. But if I’m really feeling ambitious and want something truly decadent that makes this feel like a Saturday night meal, I pair it with a creamy sauce. Nothing beats taking that leftover garlic butter sauce from the pan and pouring it right over a pile of my homemade alfredo sauce and fettuccine.
For a healthier, lighter touch that still feels satisfying, I often serve slices of the **baked chicken breast** over a big green salad with a light vinaigrette. It handles the richness of the chicken perfectly! If you’re eating this plain, maybe just enjoying the flavor bomb that it is, be sure to check out other fantastic crowd-pleasing methods linked in resources like this one for a garlic butter oven bake!
Nutritional Estimate for This No-Fail Baked Chicken Breast
Now, I know some of you are watching your macros or just curious about what exactly you’re eating. Here’s the transparent truth: I’m not a nutritionist, so these numbers are an honest estimate based on the ingredients listed right above. When I cook this **baked chicken breast**, I’m focusing way more on making sure it tastes amazing and isn’t dry, but these figures give you a great guideline for planning your meals.
This recipe is fantastic because it’s naturally high in protein and low in sugars, which is exactly what I want for a filling dinner or for bulking out my lunch containers!
Here is the breakdown, based on four servings:
- Serving Size: 1 breast
- Calories: 320
- Protein: 35g
- Fat: 18g (This includes the lovely garlic butter, of course!)
- Carbohydrates: 2g
- Sugar: 1g
- Sodium: 350mg
- Cholesterol: 120mg
See how much protein you get for only 320 calories? That’s why this **no-fail baked chicken breast** is my lifeline multiple times a week. It keeps me full, energized, and satisfied way longer than a big plate of something starchy would. These are just starting points, though; if you use less butter or skip adding extra salt, your sodium or fat content will drop even further. Enjoy knowing you’re eating something clean, flavorful, and totally delicious!
PrintJuicy Garlic Butter Baked Chicken Breast (No-Fail Method)

Follow this simple oven bake method for tender, juicy baked chicken breast every time. This garlic butter seasoning is quick and perfect for weeknight dinner or meal prep.
- Prep Time: 10 min
- Cook Time: 25 min
- Total Time: 35 min
- Yield: 4 servings 1x
- Category: Dinner
- Method: Baking
- Cuisine: American
- Diet: Low Fat
Ingredients
- 4 boneless, skinless chicken breasts (about 6–8 oz each)
- 4 tablespoons unsalted butter, softened
- 4 cloves garlic, minced
- 1 teaspoon dried Italian seasoning
- 1/2 teaspoon salt
- 1/4 teaspoon black pepper
- 1/4 cup chicken broth or water
- 1 tablespoon fresh parsley, chopped (for garnish)
Instructions
- Preheat your oven to 400°F (200°C). Lightly grease a baking dish or line it with parchment paper.
- In a small bowl, combine the softened butter, minced garlic, Italian seasoning, salt, and pepper. Mix until you have a smooth garlic butter spread.
- Pat the chicken breasts dry with paper towels. This step helps the seasoning adhere and promotes better searing if you choose to sear first.
- Place the chicken breasts in the prepared baking dish. Spread the garlic butter mixture evenly over the top of each chicken breast.
- Pour the chicken broth or water into the bottom of the baking dish around the chicken. This liquid creates steam, which keeps the chicken moist.
- Bake for 20 to 25 minutes, or until the internal temperature of the chicken reaches 165°F (74°C) when checked with a meat thermometer in the thickest part. Cooking time varies based on thickness.
- Remove the dish from the oven. Let the baked chicken breast rest in the dish for 5 minutes before serving. This resting period allows the juices to redistribute, ensuring a tender result.
- Garnish with fresh parsley before serving.
Notes
- For thicker chicken breasts, pound them slightly to an even thickness (about 1 inch) before seasoning. This promotes even cooking and prevents drying out the thinner ends.
- If you want a slight sear, quickly sear the seasoned chicken in an oven-safe skillet on the stovetop for 2 minutes per side before transferring the skillet directly to the oven.
- This recipe is keto baked chicken breast friendly as it contains no added sugar or flour.
Nutrition
- Serving Size: 1 breast
- Calories: 320
- Sugar: 1
- Sodium: 350
- Fat: 18
- Saturated Fat: 10
- Unsaturated Fat: 8
- Trans Fat: 0
- Carbohydrates: 2
- Fiber: 0
- Protein: 35
- Cholesterol: 120