
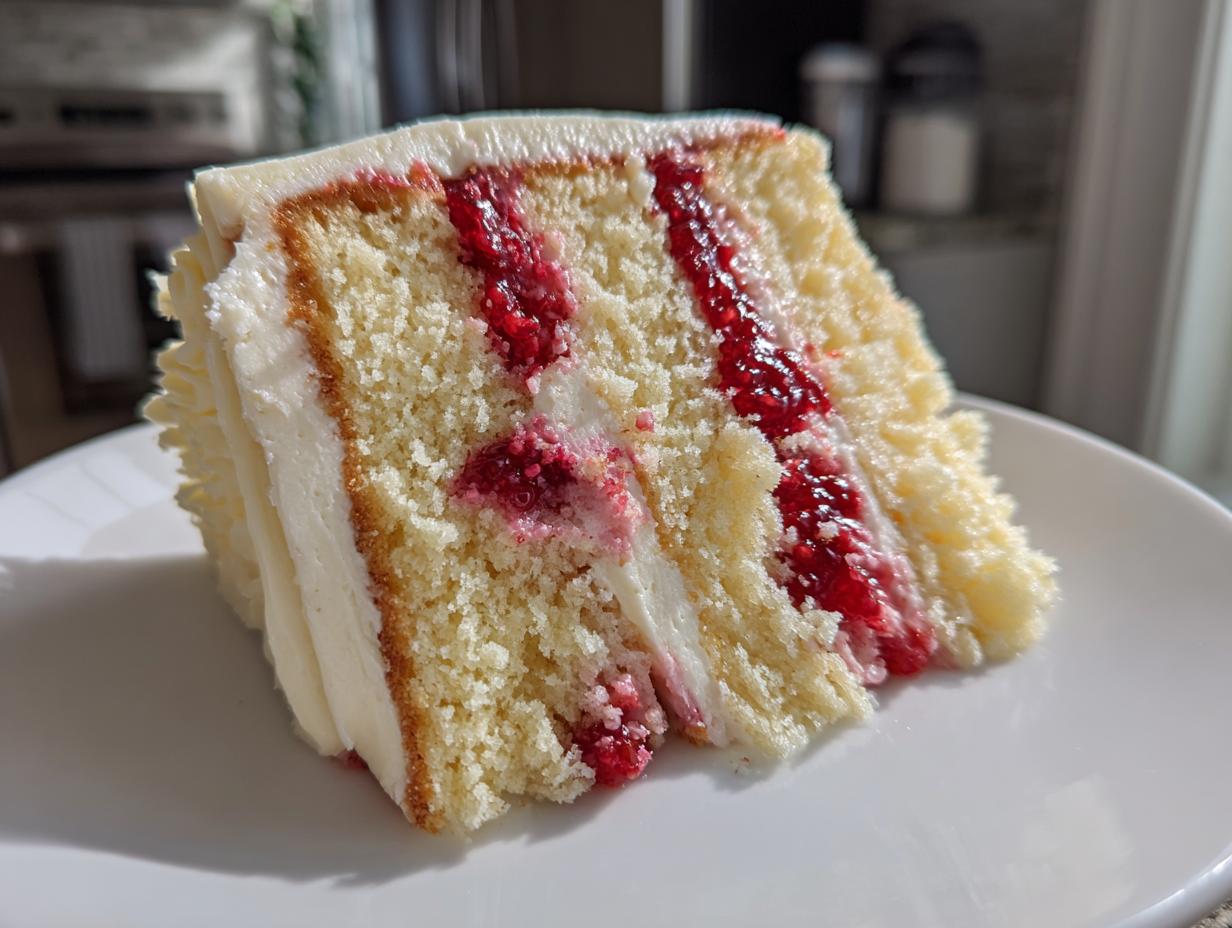
When you need a cake that screams ‘celebration’—you know the one, tall, elegant, and absolutely bursting with flavor—you can’t mess around. I’m talking about the kind of cake that makes people stop mid-sentence when they take the first bite. That’s exactly what this white chocolate raspberry layer cake is. It took me years working through Grandma Daisy’s old notes to nail this texture—a ridiculously moist white chocolate cake that actually stands up to stacking, layered with the brightest homemade raspberry filling you can imagine. If you want a truly bakery style layer cake made right here in your own kitchen, you’ve landed in the perfect spot. I’m channeling all that kitchen wisdom from my past so you don’t have to worry about a thing. Check out some of my other delicious dessert recipes while you’re here!
- Why This White Chocolate Raspberry Layer Cake is a Showstopper
- Ingredients for Your White Chocolate Raspberry Layer Cake
- Step-by-Step Guide to the White Chocolate Raspberry Layer Cake
- Assembling Your Bakery Style Layer Cake
- Pro Baking Tips for a Perfect White Chocolate Raspberry Layer Cake
- Storage and Make-Ahead Tips for Your White Chocolate Raspberry Layer Cake
- Variations on the White Chocolate Raspberry Layer Cake
- Frequently Asked Questions About This White Chocolate Raspberry Cake Recipe
- Sharing Your Experience with This White Chocolate Raspberry Layer Cake
Why This White Chocolate Raspberry Layer Cake is a Showstopper
When I finally nailed the balance on this bake, I knew I had something special. It’s not just another pretty dessert; it’s truly one of the Best Layer Cake Recipe candidates out there. It’s perfect for when you need something unforgettable.
- The cake itself is unbelievably moist thanks to that little trick with the boiling water—you’ll never have a dry white chocolate cake again!
- It offers that perfect flavor contrast: rich, sweet white chocolate against tart, bright raspberry.
- The structure holds up beautifully, making it a stable Special Occasion Cake ready for any celebration.
- The homemade raspberry filling guarantees maximum fruit flavor without getting soupy.
Ingredients for Your White Chocolate Raspberry Layer Cake
Okay, you know I am obsessed with precision when it comes to baking—Grandma Daisy always said that the quality of your ingredients writes the story of your cake. Don’t skimp on the white chocolate here; the better the quality, the smoother the buttercream will be. Please pay close attention to the temperatures listed for the milk, eggs, and especially the melted chocolate. That makes or breaks this bake!
For the Moist White Chocolate Cake Layers
This list is why we end up with that incredibly tender crumb. That boiling water seems crazy, but trust me, it blooms the flour and helps work magic with the cocoa solids in the white chocolate. If you need a good starting point for a classic frosting, check out my vanilla buttercream, but that’s for another day!
- 1 3/4 cups all-purpose flour
- 1 1/2 cups granulated sugar
- 1 teaspoon baking powder
- 1/2 teaspoon baking soda
- 1/2 teaspoon salt
- 1 cup whole milk, room temperature
- 1/2 cup vegetable oil
- 2 large eggs, room temperature
- 1 teaspoon vanilla extract
- 1/2 cup boiling water
- 4 ounces high-quality white chocolate, finely chopped or melted and cooled slightly (important!)
For the Homemade Raspberry Filling
This is where we get that gorgeous tartness to cut through all that sweet white chocolate. We want this dense, almost like jam, so it stays perfectly in place when we stack everything. This is the secret to a truly memorable Homemade Raspberry Filling.
- 10 ounces fresh or frozen raspberries
- 1/4 cup granulated sugar
- 1 tablespoon lemon juice
- 1 tablespoon cornstarch mixed with 2 tablespoons cold water (the slurry—this is what makes it thick!)
For the White Chocolate Buttercream Frosting
This White Chocolate Buttercream Frosting has to be just right. If that six ounces of white chocolate is too hot when you add it to the butter, you’ll get grainy frosting, and nobody wants that! We want smooth sailing for our final coat.
- 1 cup (2 sticks) unsalted butter, softened
- 4 cups powdered sugar, sifted
- 1 teaspoon vanilla extract
- 1/4 teaspoon salt
- 6 ounces high-quality white chocolate, melted and cooled to room temperature
- 2-4 tablespoons heavy cream
Step-by-Step Guide to the White Chocolate Raspberry Layer Cake
Alright, this is where the real magic happens, but don’t let the number of steps scare you! We’re taking this nice and slow. Every single step here builds on the last to give you that professional result. If you want to see even more detailed guides on stacking and handling cakes, I cover a lot of that when I talk about how to make layer cakes, but for now, let’s focus right here.
Baking the Perfect Moist White Chocolate Cake Layers
First things first, get that oven to 350°F (175°C) and grease up those 8-inch pans—don’t forget the parchment on the bottom! We start by whisking all our dry bits together: flour, sugar, leaveners, and salt. That ensures everything is distributed evenly, which helps avoid dense spots. In a separate bowl, give your room-temperature milk, oil, eggs, and vanilla a quick whisk. Then, mix the wet into the dry *just* until they hug each other—no heavy mixing!
Now, gently fold in your chopped or cooled white chocolate. This is where we get that incredible flavor. The final, crucial step is pouring in that 1/2 cup of boiling water and mixing until smooth. Yes, it looks thin, almost like soup, but that’s *okay*. Divide it up and bake for about 30 to 35 minutes. They are done when the toothpick comes out clean. Let them chill in the pan for exactly ten minutes before you turn them out onto the rack to cool completely. Patience is key here!
Creating the Bright Raspberry Filling
While those layers are cooling (or maybe the day before—I love prepping ahead!), we tackle the filling. Throw those raspberries, sugar, and lemon juice into a saucepan over medium heat. Let them bubble gently until the berries start to break down. Once they look juicy, whisk up that cornstarch slurry—that’s just cornstarch mixed with cold water—and pour it in while stirring constantly. Watch it thicken up fast!
Once it’s thick enough to coat the back of a spoon, take it off the heat immediately. The absolute, non-negotiable rule for this white chocolate raspberry layer cake is this: you *must* chill this filling until it is completely cold and set. If you try sneaking warm filling between your layers, I promise you, it will liquefy and run out, staining your beautiful white cake pink. Don’t let that happen!
Whipping the White Chocolate Buttercream Frosting
This is the part that separates the amateurs from the pros—temperature control! Make sure your butter is soft, but not greasy or melty. Beat that butter for a good three minutes until it’s pale and fluffy. That incorporates the air we need for texture. Slowly stream in that sifted powdered sugar, followed by the vanilla and salt.
Now, the star: pour in your white chocolate. Remember from the ingredients list, it needs to be fully melted and cooled down to room temperature—if it’s even a little warm, it’ll melt your butter and you’ll end up with soup again! Beat it until it’s combined, then add the heavy cream one tablespoon at a time until that White Chocolate Buttercream Frosting is perfectly spreadable. A final whip on medium-high for two minutes makes it airy and light, giving you those excellent Pro Baking Tips Layer Cakes results.
Assembling Your Bakery Style Layer Cake
This is the moment of truth, right? We have three gorgeous, cool cake layers, perfect fluffy frosting, and stiff raspberry filling. If you want that stunning, professional look—that true Bakery Style Layer Cake—it’s all about technique here, not rushing. We build this cake structure so it can handle being cut and served beautifully. Once you master this assembly, you realize how easy it is to get creamy, beautiful results, just like those in my white chocolate cheesecake recipe!
Layering Technique to Prevent Raspberry Bleed
If your cakes need leveling, go ahead and do that first. A flat top means a straight cake! Now, the most important defense against the dreaded pink bleed is the frosting dam. Take a piping bag fitted with a large round tip (or just use a small offset spatula) and pipe a thick ring of white chocolate buttercream around the entire outer edge of your bottom layer. This ring needs to be sturdy; it’s a wall designed to keep everything contained.
I learned this the hard way, oh my gosh. The first time I made this white chocolate raspberry layer cake, I just spooned the filling right onto the plain cake, and by the time I chilled it, the raspberry juices had seeped straight through the white cake and stained the outside frosting a sad, mottled pink. Never again! With that buttercream wall firmly in place, generously scoop your chilled raspberry filling inside the circle. Place the next cake layer right on top and repeat the process.
Finishing Touches and White Chocolate Ganache Drip
Once the top layer is on, cover the whole thing in a thin crumb coat of frosting—this traps any loose crumbs so your final coat is pristine. Chill that for about 20 minutes until it feels firm to the touch. Then, apply a generous final layer of the white chocolate buttercream. Smooth it out nicely; you’re going for crisp edges here if you want that elegant look.
For that bit of extra flair that makes it an Elegant Dessert Idea, you can add a drip! Gently warm up that reserved white chocolate ganache until it’s pourable but not hot. Use a spoon or a squeeze bottle to carefully drizzle it over the top edge, letting it cascade down the sides just slightly. A little chill before serving keeps everything perfectly set!
Pro Baking Tips for a Perfect White Chocolate Raspberry Layer Cake
Baking a beautiful cake like this isn’t luck; it’s all about nailing those little details! If you remember just a few things from my recipe, you’ll get results that look like they came right out of a pastry case. These Pro Baking Tips Layer Cakes come straight from years of trial and error in my kitchen.
First, when dealing with the white chocolate for the buttercream, make absolutely certain it’s cooled down completely before mixing it with the butter. If it’s even slightly warm, your whole frosting batch might break! Also, make sure all your cake ingredients—the milk and eggs—are truly at room temperature. Cold ingredients don’t emulsify well, and that messes up the velvety crumb of this Moist White Chocolate Cake.
Finally, when in doubt, chill it out! Chilling the filling completely is mandatory. And once the whole cake is assembled? Give it a solid 30 minutes in the fridge before you attempt the final frosting coat or any drip work. It stabilizes everything so beautifully. For another recipe where temperature control is everything, check out my ultra-moist carrot cake!
Storage and Make-Ahead Tips for Your White Chocolate Raspberry Layer Cake
This is such a showstopper cake, and you want to enjoy it all week, right? Thankfully, this White Chocolate Raspberry Layer Cake keeps really well, but since it has that fresh fruit filling, you need to treat it a little differently than a plain cake.
My best advice for making your life easier is to break the process up. You can absolutely make the raspberry filling a full day ahead of time! Just make sure you press that plastic wrap directly onto the surface so it doesn’t develop a weird skin while it chills in the fridge. It needs to be completely firm before you use it, remember?
The cake layers themselves freeze like a dream. Wrap each cooled layer tightly in plastic wrap, then maybe wrap it again in foil. They stay perfect for about a month—just thaw them on the counter wrapped up so any condensation stays on the outside wrapper. You can even whip up that gorgeous frosting the day before, too, as long as you keep it covered tightly in the fridge. Just let it warm up at room temperature for an hour and give it a quick beat before you frost!
When the whole cake is finished and frosted, I always store leftovers sealed tightly in the refrigerator. Because we used a stabilized buttercream, it holds up well. It’s best eaten within three to four days. If you’re looking for a quick, foolproof dessert to whip up when company springs a surprise visit, you might want to save my recipe for easy 3-ingredient chocolate fudge; now that reheats like a dream!
Variations on the White Chocolate Raspberry Layer Cake
Even though this White Chocolate Raspberry Layer Cake Recipe is pretty much perfect as is (I mean, Daisy would agree!), I know sometimes you just want to tweak things a little bit based on what’s in season or what you’re craving. I’ve played around with this base recipe a lot, and these small changes really shine through without compromising that moist texture we worked so hard for.
If you love bright citrus notes—and oh boy, do I—you absolutely have to try adding the zest of one whole lemon right into the dry ingredients for the cake layers. It doesn’t overpower the white chocolate, but it gives everything a gorgeous lift. It pairs perfectly with the raspberry, too!
Another fun swap is mixing up the fruit depending on the season. While raspberries are my favorite, if you have beautiful fresh strawberries in the summer, they work beautifully instead. You’ll still want to make sure you cook them down slightly, just like the raspberries, to control the moisture. If strawberries feel too mild, try swapping in tart cherries—I have a whole guide on cherry cake recipes that show you just how well those stone fruits pair with rich chocolate.
Finally, for a bit of warmth, try adding just a tiny splash of almond extract along with the vanilla when you mix your wet ingredients. It’s subtle, but that slight nutty hint really deepens the overall flavor profile of the cake. Honestly, once you have this from scratch cake recipe down, you can customize it all year long!
Frequently Asked Questions About This White Chocolate Raspberry Cake Recipe
I get so many questions about this beauty because it’s an ambitious bake, but I promise, once you know the tricks, it’s smooth sailing! Here are a few things I hear most often when folks are making this White Chocolate Raspberry Cake Recipe for the first time.
Can I substitute the whole milk in the white chocolate raspberry layer cake?
You sure can, but remember, the goal is moisture and tenderness! If you don’t have whole milk, using buttermilk is a fantastic substitute because its acidity interacts nicely with the baking soda, giving you a slightly softer crumb. If you use buttermilk, you might skip adding extra cream to the frosting later, though. If you only have regular milk, bumping it up to heavy cream cut with an equal amount of water (like half a cup of cream and half a cup of water) will keep that richness level up, ensuring you still get that amazingly Moist White Chocolate Cake.
How do I achieve a truly stable white chocolate buttercream frosting?
Stability comes from two main things: temperature and mixing time. First, make sure that melted white chocolate is completely cooled—I mean room temperature, like what you’d use for dipping strawberries. If it’s warm, it melts the butter, and you lose all the structure you just beat in! Second, after everything is mixed, beat that frosting on medium-high speed for a full two minutes. That extra time incorporates tiny air bubbles, making the frosting stiff enough to hold up tall towers and pretty decorations. It’s one of the most important Pro Baking Tips Layer Cakes I can give you!
Can I use frozen raspberries instead of fresh ones?
Absolutely, especially if you’re making this outside of peak summer! Frozen raspberries work perfectly fine for the Homemade Raspberry Filling. The method doesn’t actually change. You just need to toss them in the pot right from the freezer along with the sugar and lemon juice. They will release a lot more liquid initially, which is actually great because it gives the sugar longer to dissolve before you add the slurry. Just be sure to cook it down a tiny bit longer to make sure all that extra moisture cooks off before you chill it completely.
Is this a difficult cake to make look professional?
Not at all! While it looks like something you’d buy at a high-end bakery, the secret to its professional finish is the temperature control we talked about, plus chilling time! If you chill the assembled cake after the crumb coat, the final coat of the White Chocolate Buttercream Frosting goes on flawlessly smooth. You can find some great videos on making a clean finish on my chicken marsala page, but honestly, it’s the same principle: firm base, smooth top coat! Give yourself time, and you’ll have an Elegant Dessert Idea ready for any function.
Sharing Your Experience with This White Chocolate Raspberry Layer Cake
Baking is always meant to be shared, just like Grandma Daisy taught me! Now that you’ve mastered this gorgeous white chocolate raspberry layer cake, I truly hope you enjoy every slice. Please let me know how it turned out—leave a star rating right here on the page! Tag me on social media with your beautiful creation; seeing your results brings me so much joy and keeps Daisy’s spirit alive in my kitchen and yours. Happy baking, friends! Find all my favorite bakes here at Daisy’s Recipes.
PrintWhite Chocolate Raspberry Layer Cake

A detailed recipe for a moist white chocolate cake layered with fresh raspberry filling and covered in white chocolate buttercream frosting. This bakery style layer cake is perfect for special occasions.
- Prep Time: 45 min
- Cook Time: 35 min
- Total Time: 1 hour 55 min
- Yield: 10 servings 1x
- Category: Dessert
- Method: Baking
- Cuisine: American
- Diet: Vegetarian
Ingredients
- For the White Chocolate Cake Layers:
- 1 3/4 cups all-purpose flour
- 1 1/2 cups granulated sugar
- 1 teaspoon baking powder
- 1/2 teaspoon baking soda
- 1/2 teaspoon salt
- 1 cup whole milk, room temperature
- 1/2 cup vegetable oil
- 2 large eggs, room temperature
- 1 teaspoon vanilla extract
- 1/2 cup boiling water
- 4 ounces high-quality white chocolate, finely chopped or melted and cooled slightly
- For the Raspberry Filling:
- 10 ounces fresh or frozen raspberries
- 1/4 cup granulated sugar
- 1 tablespoon lemon juice
- 1 tablespoon cornstarch mixed with 2 tablespoons cold water (slurry)
- For the White Chocolate Buttercream:
- 1 cup (2 sticks) unsalted butter, softened
- 4 cups powdered sugar, sifted
- 1 teaspoon vanilla extract
- 1/4 teaspoon salt
- 6 ounces high-quality white chocolate, melted and cooled to room temperature
- 2–4 tablespoons heavy cream
- For Assembly:
- 1/2 cup white chocolate ganache (optional, for drip)
Instructions
- Prepare the Cake Layers: Preheat your oven to 350°F (175°C). Grease and flour two 8-inch round cake pans. Line the bottoms with parchment paper.
- In a large bowl, whisk together the flour, sugar, baking powder, baking soda, and salt.
- In a separate bowl, whisk together the milk, oil, eggs, and vanilla extract. Add the wet ingredients to the dry ingredients and mix on low speed until just combined. Do not overmix.
- Gently stir the melted or finely chopped white chocolate into the batter.
- Carefully pour the boiling water into the batter and mix on low speed until smooth. The batter will be thin.
- Divide the batter evenly between the prepared pans. Bake for 30-35 minutes, or until a toothpick inserted into the center comes out clean.
- Let the cakes cool in the pans for 10 minutes before inverting them onto a wire rack to cool completely.
- Make the Raspberry Filling: Combine the raspberries, sugar, and lemon juice in a small saucepan over medium heat. Cook until the berries break down, about 5 minutes.
- Stir the cornstarch slurry and pour it into the simmering berry mixture. Cook, stirring constantly, until the mixture thickens significantly, about 1 minute.
- Remove from heat and transfer the filling to a bowl. Press plastic wrap directly onto the surface to prevent a skin from forming. Chill completely before using.
- Make the White Chocolate Buttercream: Beat the softened butter in a stand mixer until light and fluffy, about 3 minutes.
- Gradually add the sifted powdered sugar, one cup at a time, mixing well after each addition. Add the vanilla and salt.
- Pour in the cooled, melted white chocolate. Beat until incorporated.
- Add the heavy cream one tablespoon at a time until you reach a smooth, spreadable consistency. Beat on medium-high for 2 minutes to incorporate air.
- Assemble the Cake: Level the cooled cake layers if necessary. Place the first layer on your serving plate or cake stand.
- Spread a dam of buttercream around the outer edge of the first layer. This prevents the filling from escaping.
- Spoon the chilled raspberry filling inside the buttercream dam.
- Place the second cake layer on top. Frost the entire cake with the remaining white chocolate buttercream.
- If using a ganache drip, gently warm the ganache until pourable and drizzle it over the top edge of the cake. Chill briefly before serving.
Notes
- To prevent white chocolate from seizing in the buttercream, ensure it is fully melted and cooled to near room temperature before adding it to the butter mixture.
- If your raspberries bleed into the white cake, use a slightly thicker filling or add a thin layer of plain buttercream around the edge of the cake layer before adding the raspberry filling.
- For a stable cake, chill the assembled cake for at least 30 minutes before the final frosting coat.
Nutrition
- Serving Size: 1 slice
- Calories: 580
- Sugar: 65
- Sodium: 210
- Fat: 34
- Saturated Fat: 20
- Unsaturated Fat: 10
- Trans Fat: 0.5
- Carbohydrates: 68
- Fiber: 2
- Protein: 6
- Cholesterol: 110