
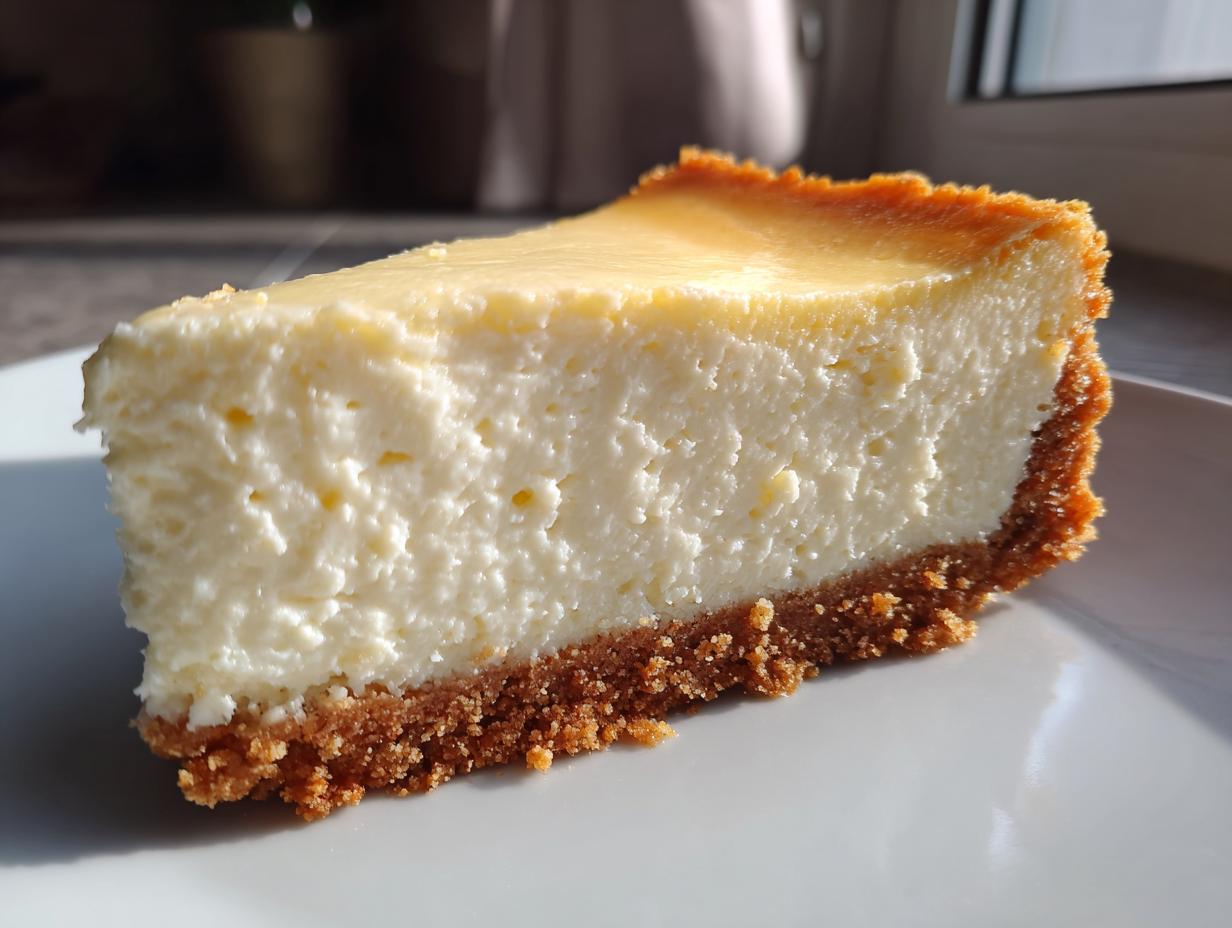
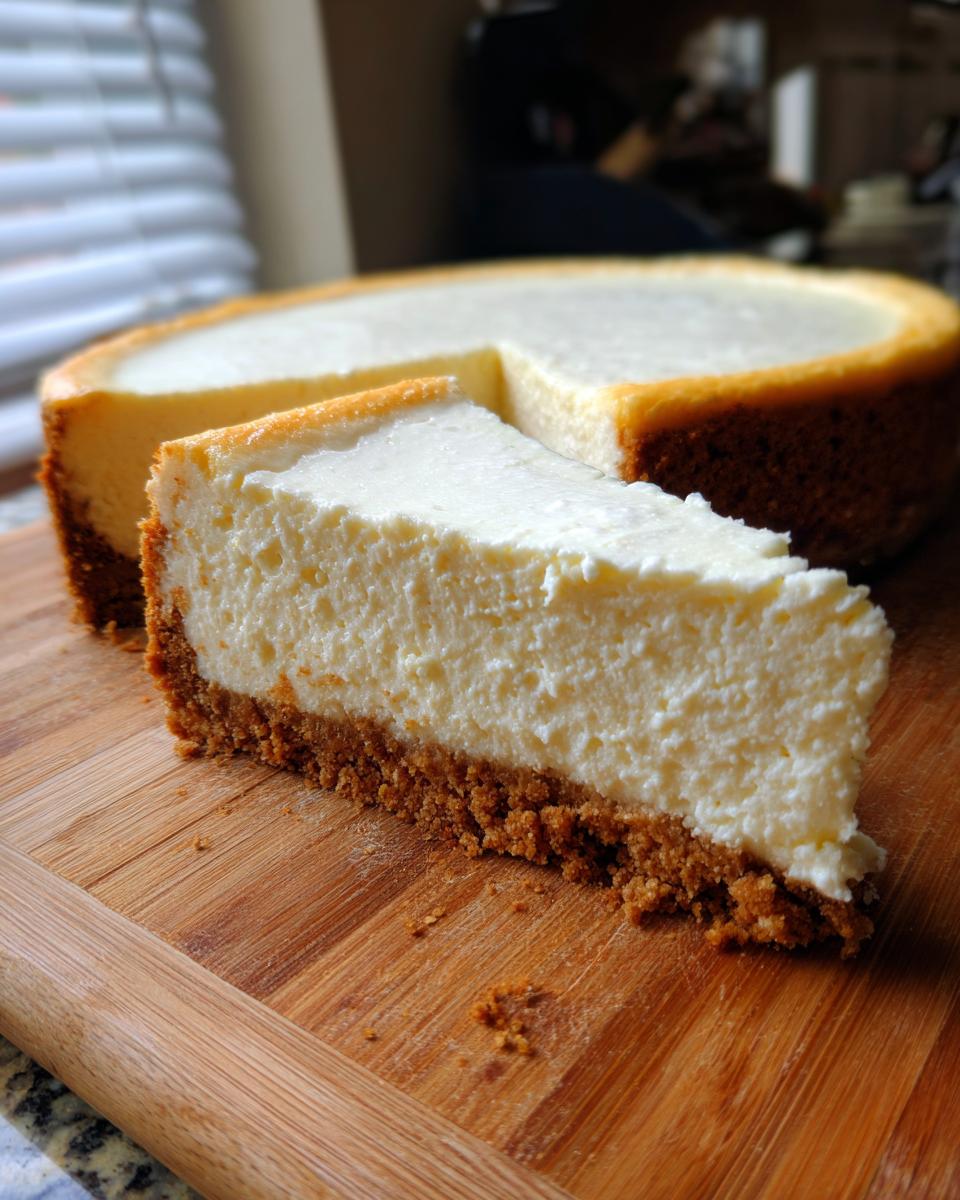
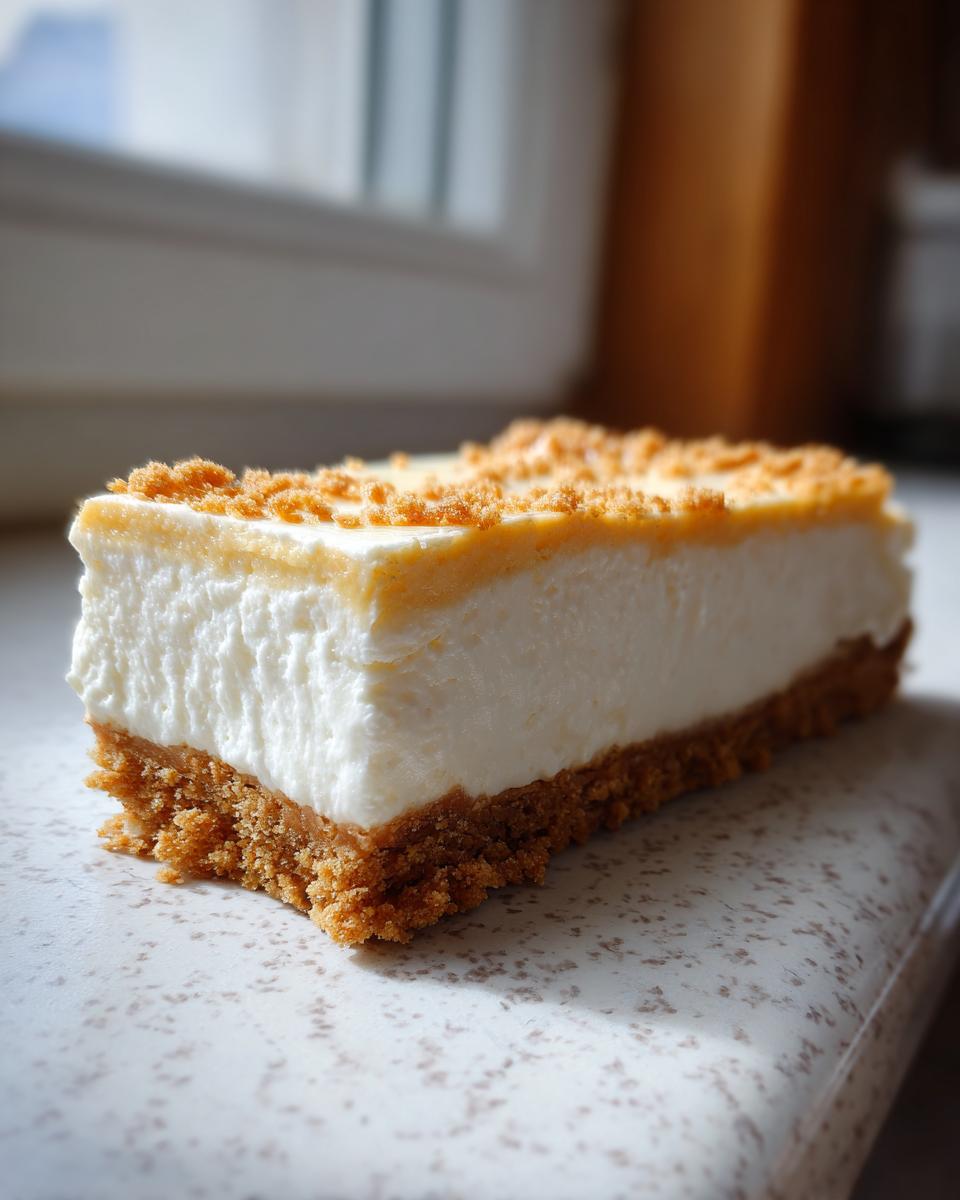
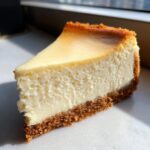
Oh, the craving for that perfect slice of dessert—you know the one I mean. I’m talking about that tall, impossibly rich, and velvety slice of heaven that absolutely defines a celebration. When I was trying to reconnect with my Grandma Daisy’s kitchen, this specific cheesecake recipe was my Everest. So many failures! But trust me, after years of practice, I finally nailed her Classic New York Style Cheesecake. It’s dense, it’s creamy, and the absolute best part? We’re going to make sure yours doesn’t crack!
This isn’t some flimsy dessert; this is the real deal from scratch, and I promise, if you follow my steps for room temperature ingredients and slow cooling, you’ll have Daisy’s legacy—and the best homemade cheesecake—right there on your table.
- Why This Classic Cheesecake Recipe Delivers Rich Dessert Ideas
- Ingredients for the Ultimate Cheesecake Recipe
- How to Make Cheesecake From Scratch: Step-by-Step Instructions
- Tips for Success with Your Homemade Cheesecake Recipe
- Storage and Reheating Instructions for Your Cheesecake Recipe
- Serving Suggestions for This Indulgent Dessert Recipe
- Frequently Asked Questions About the Classic Cheesecake Recipe
- Understanding Nutritional Data for This Cheesecake Recipe
- Share Your Perfect Cheesecake Recipe Experience
Why This Classic Cheesecake Recipe Delivers Rich Dessert Ideas
So many recipes promise the moon, but this one delivers the entire galaxy of flavor and texture! What sets this Classic Cheesecake apart is the discipline in the prep work. I know it seems fussy, but using everything at room temperature is the secret weapon for a truly superb, creamy cheesecake filling.
You get these gorgeous results because we focus on method, not just measurement. Look, I want you to feel confident serving this as one of your signature rich dessert ideas for any get-together. Ready to see why it works so well? Check out these key benefits:
- We bake it gently for that perfect, dense structure.
- We rely only on full-fat cream cheese—no substitutions here!
- This method keeps the filling smooth as silk every single time.
If you’re looking for more ways to impress, you should definitely check out my other favorite delicious dessert recipes.
Achieving the Perfect Cheesecake Texture Every Time
Let’s talk about the dreaded crack. Honestly, I used to live in fear of it! But the secret to that perfect cheesecake texture isn’t about a fancy water bath (though you can use one if you want peace of mind!). It’s about temperature.
If your cream cheese, eggs, and sour cream are cold when you mix them, you have to beat them longer to break up the lumps. That overbeating introduces too much air, which expands while baking and then collapses dramatically when cooling—hello, crack!
By using room temperature ingredients, we mix just until smooth, trapping less air. Then, the slow cooling inside the turned-off oven gently sets the structure. That’s the real magic trick for a smooth, beautiful cake.
Ingredients for the Ultimate Cheesecake Recipe
Okay, getting the ingredients ready is half the battle with this Classic Cheesecake. I always lay everything out before I even preheat the oven. Remember what I said about temperature? That goes double here! You simply cannot rush getting that cream cheese warmed up. Don’t worry about buying low-fat; for the best, thickest result, we stick strictly to full-fat cream cheese. We want true indulgence here!
This recipe is built for a 9-inch springform pan, so make sure you have one ready before you start whipping things up.
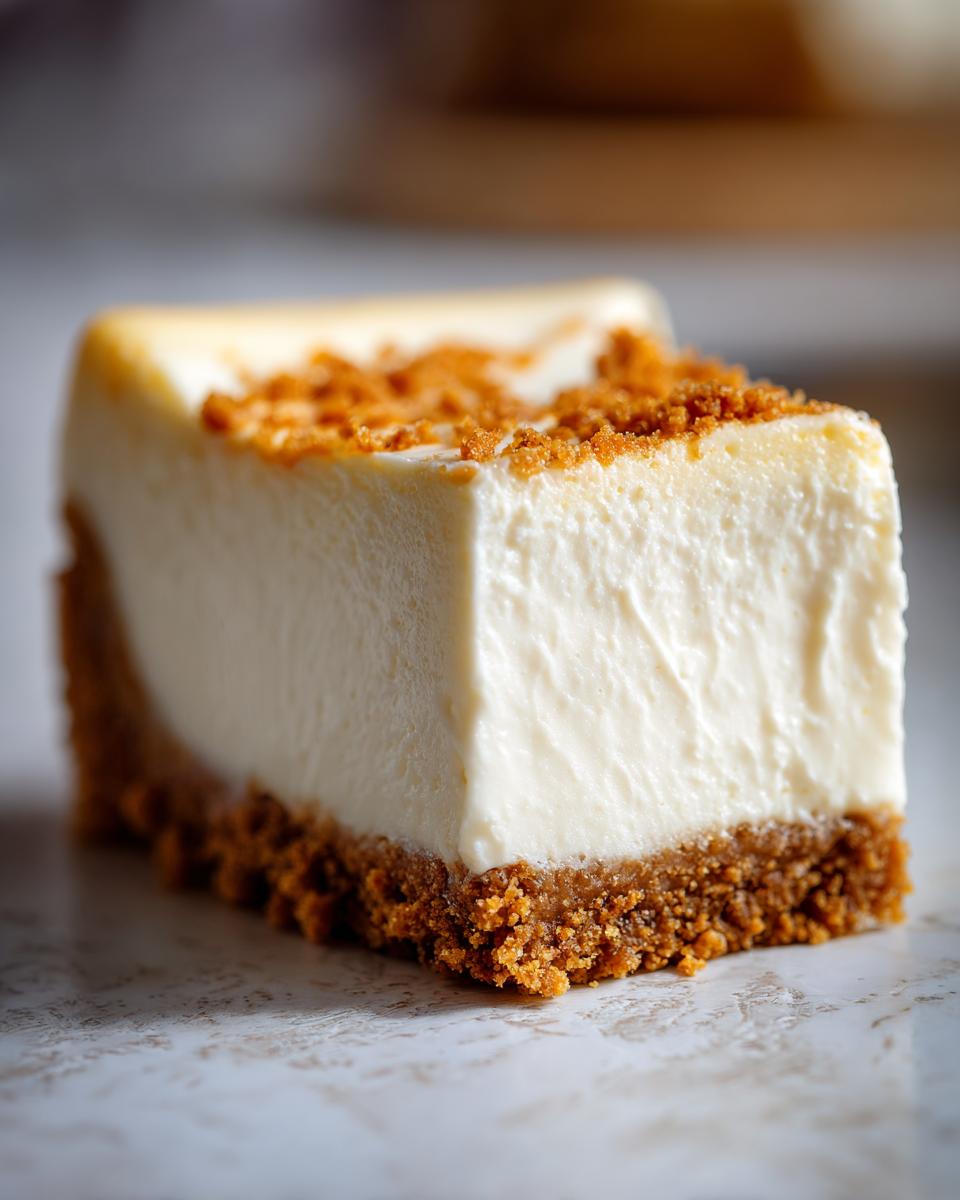
Graham Cracker Crust Components
This crust needs to be sturdy enough to hold up that gorgeous filling, so pressing it down firmly is key.
- 1 1/2 cups graham cracker crumbs
- 1/4 cup granulated sugar (for crust)
- 6 tablespoons unsalted butter, melted
Rich and Tangy Cheesecake Filling Ingredients
This list ensures we hit that perfect balance of sweet and tart for a truly tangy cheesecake filling.
- 4 (8 ounce) packages full-fat cream cheese, softened to room temperature
- 1 1/2 cups granulated sugar (for filling)
- 1/4 cup all-purpose flour
- 1 teaspoon vanilla extract
- 1/4 teaspoon salt
- 4 large eggs, room temperature
- 1/2 cup sour cream, room temperature
How to Make Cheesecake From Scratch: Step-by-Step Instructions
Look, making a genuinely great cheesecake recipe from scratch feels like a rite of passage, doesn’t it? But I’m here to tell you that once you get into the rhythm of these steps, you’ll feel like a total pro. We’re working in three main phases here: the base, the smooth filling, and the slow, patient bake. Keep those room-temperature ingredients handy, because we don’t want any lumps messing up our beautiful, rich dessert!
If you want to save these exact steps for later, make sure you check out my main cheesecake recipe guide!
Preparing and Pre-Baking the Graham Cracker Crust
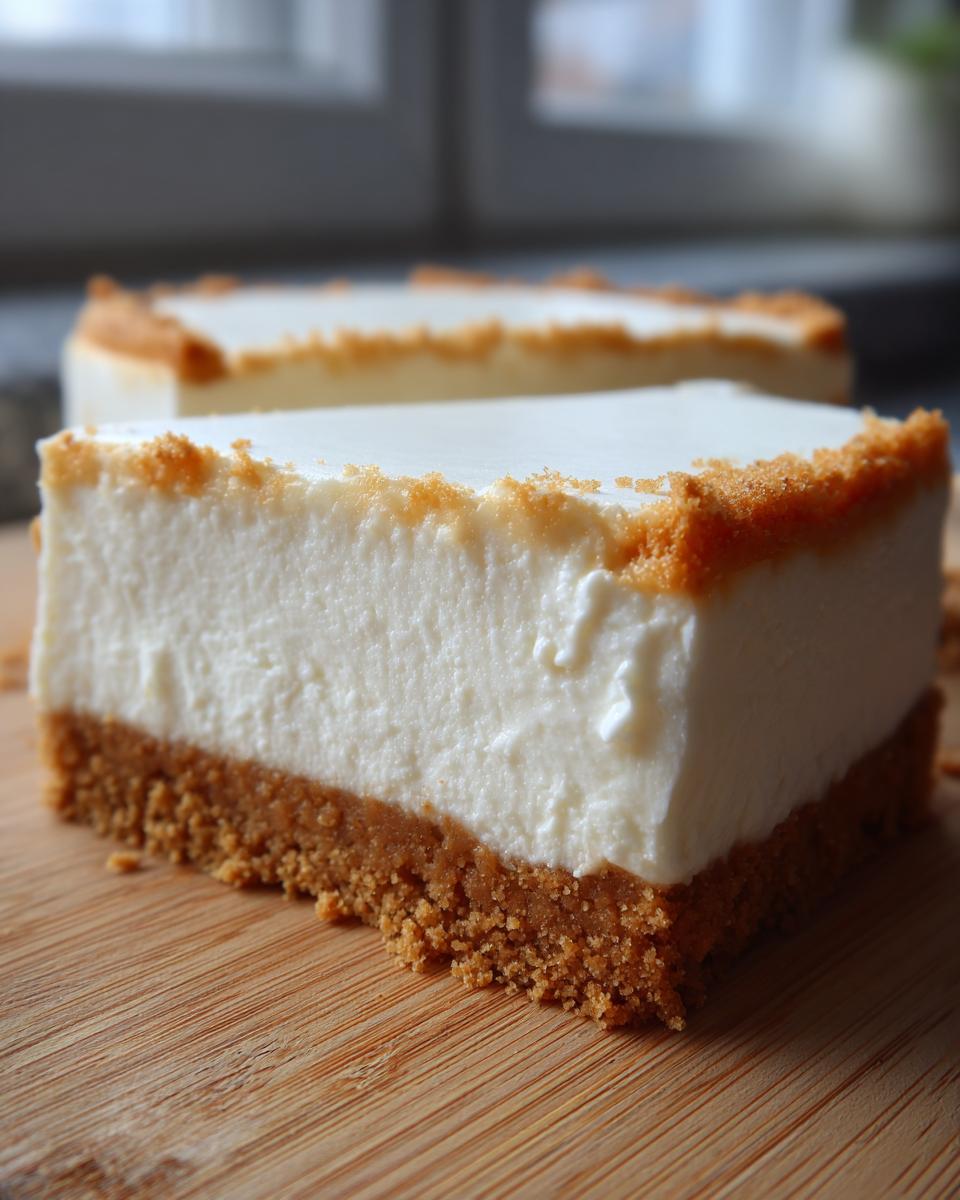
First things first, get your oven warmed up to 350°F (175°C). In a bowl, mix up your graham cracker crumbs, the crust sugar, and that melted butter until everything looks evenly wet—like damp beach sand. Press that mixture really firmly into the bottom of your 9-inch springform pan. I use the flat bottom of a measuring cup to really pack it tight around the base and about an inch up the sides. Pop that into the oven for just 10 minutes. This pre-bake sets the structure! Once done, pull it out, let it cool a bit, and then drop the oven temp down to 325°F (160°C).
Mixing the Creamy Cheesecake Filling
This part requires focus! In a big bowl, beat your softened cream cheese until it’s unbelievably smooth. I mean, zero lumps. Only after it’s perfect do you add the 1 1/2 cups of sugar, flour, salt, and vanilla, mixing just until it comes together. Now, the eggs: add them in—one at a time! You must wait until the first egg is *just* swallowed by the batter before adding the next one. After the final egg, stir in the sour cream gently. Stop mixing as soon as it’s uniform! Overbeating here guarantees air pockets resulting in zero chance of getting that No Cracking Cheesecake!
The Secret to No Cracking Cheesecake: Baking and Cooling
Pour that gorgeous batter over your cooled crust. Bake it low and slow at 325°F (160°C) for about 60 to 75 minutes. Remember the wiggle test? The edges should look set, but the middle two inches need that gentle jiggle, just like thick gelatin. When it’s done, do *not* take it out! Turn the oven off completely, crack the door open about an inch, and just let it sit there inside the cooling oven for a full hour. This slow, gradual cooling process is the ultimate insurance policy against cracks. Afterwards, pull it out, let it come to room temp on the counter, and then cover and chill overnight before daring to slice into it!
Tips for Success with Your Homemade Cheesecake Recipe
Honestly, even with the best cheesecake recipe, a few little tricks make the difference between good and *the best*. Since bringing Daisy’s techniques back into my busy city life, I’ve learned that preparation is everything for this homemade cheesecake. It’s all about respecting the dairy!
Now, my method relies on that gentle oven cooling, which usually skips the water bath, but if you’re feeling nervous about your first time, go ahead and use a water bath! It’s an extra step, yes, but it adds humidity that keeps things incredibly stable. If you do use one, make sure to wrap the bottom of your springform pan tightly in a couple of layers of heavy-duty foil so no water sneaks in and ruins that buttery crust.
Ingredient Temperature and Mixing Discipline
I can’t stress this enough: your cream cheese, eggs, and sour cream must be fully at room temperature. If you leave them out for a couple of hours, they soften perfectly, allowing the mixer to naturally incorporate air slowly. This is the key to that thick, Classic Cheesecake texture everyone raves about.
The second most important rule is what happens after the eggs go in. Once that first egg is mixed in, you are done with heavy mixing! Seriously, switch down to low speed or even use a spatula. Any extra beating once the eggs are present is just asking for air bubbles that will crack your beautiful surface later. Stay disciplined, and you’ll get that perfect, dense finish.
If you want to read more about dialing in that creamy look, check out these tips on achieving tall and creamy New York Cheesecake.
Storage and Reheating Instructions for Your Cheesecake Recipe
Now that you’ve made this masterpiece, you absolutely cannot rush eating it! This Dessert Recipe needs time to truly set up. You have to let it cool completely on the counter, and then—and this is crucial—it needs at least 6 hours in the fridge, but overnight is always better. Trust me, the flavor and texture are worlds better when it’s fully chilled!
When storing leftovers, wrap the springform pan base (or the slices) tightly in plastic wrap, and then maybe foil too. This stops it from picking up any weird fridge smells. Cheesecake is always best served straight from the cold—it keeps that beautiful, firm density we worked so hard for!
Serving Suggestions for This Indulgent Dessert Recipe
The beauty of this rich Cheesecake Recipe is that honestly, it doesn’t need much help! It’s already so decadent on its own, but if you want to dress it up for a crowd, keep it simple. Fresh berries—raspberries or a beautiful dark cherry topping—provide a wonderful, bright counterpoint to the richness.
My go-to when I’m feeling fancy is a dollop of cooled sour cream mixed with just a tiny bit of powdered sugar and a splash of vanilla. It just amps up that classic tang! Or, if the mood strikes, a thin drizzle of good quality chocolate ganache works wonders. You can find a great approach to chocolate drizzle over at my chocolate chess pie recipe page for inspiration!
Frequently Asked Questions About the Classic Cheesecake Recipe
I gathered up some of the questions I always get after people try my cheesecake recipe for the first time. Don’t sweat it if you have questions; this is an indulgent dessert that deserves a little bit of learning time! Getting this right means you unlock the secret to the best cheesecake you’ll ever make at home.
Can I make this cheesecake recipe without a springform pan?
Oh, I really wouldn’t recommend it for this specific New York Cheesecake style. Because the cake is so tall and rich, it’s famously delicate when cooling. Trying to get it out of a standard cake pan without breaking it would be a nightmare, and you’d risk ruining that beautiful side crust! If you absolutely don’t have one, your only real shot is to meticulously line a quality 9-inch pan with parchment paper, making sure you leave plenty of long overhang—a ‘sling’—on two sides so you can gently lift the whole thing out later. But honestly? Go buy a springform pan; it’s worth it for this baking dessert!
What is the best way to make an Easy Cheesecake if I don’t want to bake?
I totally get it—sometimes you need that quick fix! If baking feels like too much right now, that’s when you look for an easy cheesecake alternative. We focused here on the rich, tall baked style, but there are amazing no bake cheesecake options out there that set up beautifully in the fridge. Those usually rely on gelatin or whipped cream to hold their shape. If you need speed, search for those! But for that dense, luxurious melt-in-your-mouth classic we’re making here, the oven is your friend.
If you’re experimenting with different dairy bases later on, I have some fun ideas in my guide on keto pumpkin cheesecake recipes!
Understanding Nutritional Data for This Cheesecake Recipe
Look, I believe in eating food made with love, and this cheesecake recipe definitely checks that box! But since we’re using all that wonderful full-fat cream cheese and sugar, I know you’re curious about what’s in that tall slice. Here is the estimated nutritional breakdown based exactly on the ingredients listed above. Remember, these are just ballpark figures because when you’re making something this homemade and special, the brands of butter or sour cream you choose can make a tiny difference!
- Serving Size: 1 slice
- Calories: 450
- Sugar: 35g
- Sodium: 300mg
- Fat: 30g
- Saturated Fat: 18g
- Unsaturated Fat: 12g
- Trans Fat: 0.5g
- Carbohydrates: 40g
- Fiber: 1g
- Protein: 8g
- Cholesterol: 120mg
So, yes, it’s an indulgence! It’s meant to be rich. That’s why we only need one slice to feel totally satisfied. Don’t sweat the numbers too much; just enjoy it when you make it!
Share Your Perfect Cheesecake Recipe Experience
Now that you’ve gone through all the steps for this ultimate cheesecake recipe, I’m dying to know how it turned out! Did you finally conquer the crack? Please leave a rating below—it really helps other beginner bakers feel confident trying this out.
If you made it, snap a picture and share it with me! I love seeing your beautiful creations. If you want to reach out directly with questions or compliments, you can always contact me personally. Happy baking, friend!
PrintClassic New York Style Cheesecake Recipe: Rich and Creamy
Follow this straightforward recipe to make a tall, rich, and creamy New York Style Cheesecake with a buttery graham cracker crust. This guide focuses on simple steps to achieve a perfect, crack-free texture.
- Prep Time: 25 min
- Cook Time: 75 min
- Total Time: 1 hour 40 min
- Yield: 10 servings 1x
- Category: Dessert
- Method: Baking
- Cuisine: American
- Diet: Vegetarian
Ingredients
- 1 1/2 cups graham cracker crumbs
- 1/4 cup granulated sugar (for crust)
- 6 tablespoons unsalted butter, melted
- 4 (8 ounce) packages full-fat cream cheese, softened to room temperature
- 1 1/2 cups granulated sugar (for filling)
- 1/4 cup all-purpose flour
- 1 teaspoon vanilla extract
- 1/4 teaspoon salt
- 4 large eggs, room temperature
- 1/2 cup sour cream, room temperature
Instructions
- Prepare the crust: Preheat your oven to 350°F (175°C). In a medium bowl, mix the graham cracker crumbs, 1/4 cup sugar, and melted butter until evenly moistened. Press this mixture firmly into the bottom and about 1 inch up the sides of a 9-inch springform pan. Bake for 10 minutes. Remove and let cool while you prepare the filling. Reduce oven temperature to 325°F (160°C).
- Prepare the filling: In a large bowl, use an electric mixer to beat the softened cream cheese until it is completely smooth. Scrape down the sides of the bowl.
- Add the 1 1/2 cups sugar, flour, vanilla extract, and salt to the cream cheese. Beat on medium speed until just combined. Do not overmix.
- Beat in the eggs one at a time, mixing only until each egg is incorporated before adding the next. Mix in the sour cream last, mixing until the batter is smooth.
- Pour the filling over the cooled crust in the springform pan.
- Bake the cheesecake low and slow at 325°F (160°C) for 60 to 75 minutes. The edges should look set, but the center 2 inches should still have a slight jiggle when gently nudged.
- Turn off the oven, crack the oven door open slightly, and let the cheesecake cool inside the oven for 1 hour. This slow cooling helps prevent cracking.
- Remove the cheesecake from the oven and let it cool completely on a wire rack. Once cool, cover loosely and refrigerate for at least 6 hours, or preferably overnight, before serving.
Notes
- Use room temperature ingredients for the filling; this prevents lumps and ensures a creamy texture.
- To prevent cracking, do not overbeat the batter once the eggs are added. Mix only until smooth.
- If you want a taller cheesecake, you can use a 10-inch springform pan, but you may need to slightly increase the recipe yield.
Nutrition
- Serving Size: 1 slice
- Calories: 450
- Sugar: 35g
- Sodium: 300mg
- Fat: 30g
- Saturated Fat: 18g
- Unsaturated Fat: 12g
- Trans Fat: 0.5g
- Carbohydrates: 40g
- Fiber: 1g
- Protein: 8g
- Cholesterol: 120mg