
I swear, the search for the perfect chocolate square is a decades-long quest, right? We all want that deep, rich flavor but also that satisfying texture. Well, after weeks of tinkering, I think I’ve finally captured that elusive magic here with my Ultimate Fudgy Brown Butter Brownies with Shiny Crackly Tops. This recipe feels like the culmination of everything I learned watching Grandma Daisy. She always insisted that simple, quality baking yields the best results, and trust me, these homemade brownies prove her wisdom right. They are the absolute antidote when you need the ultimate chocolate fix.
- Why These Are the Ultimate Fudgy Brownies (The Secret to the Crackly Top)
- Gathering Ingredients for Your Brown Butter Brownies
- Simple One Bowl Brownies: Step-by-Step Instructions
- Tips for Achieving Bakery Style Brownies
- Making Brown Butter Brownies a Gourmet Brownies Experience
- Storage and Handling of Your Chewy Chocolate Brownies
- Frequently Asked Questions About These Brownies
- Nutritional Snapshot of This Rich Cocoa Dessert
- Share Your Homemade Chocolate Squares
Why These Are the Ultimate Fudgy Brownies (The Secret to the Crackly Top)
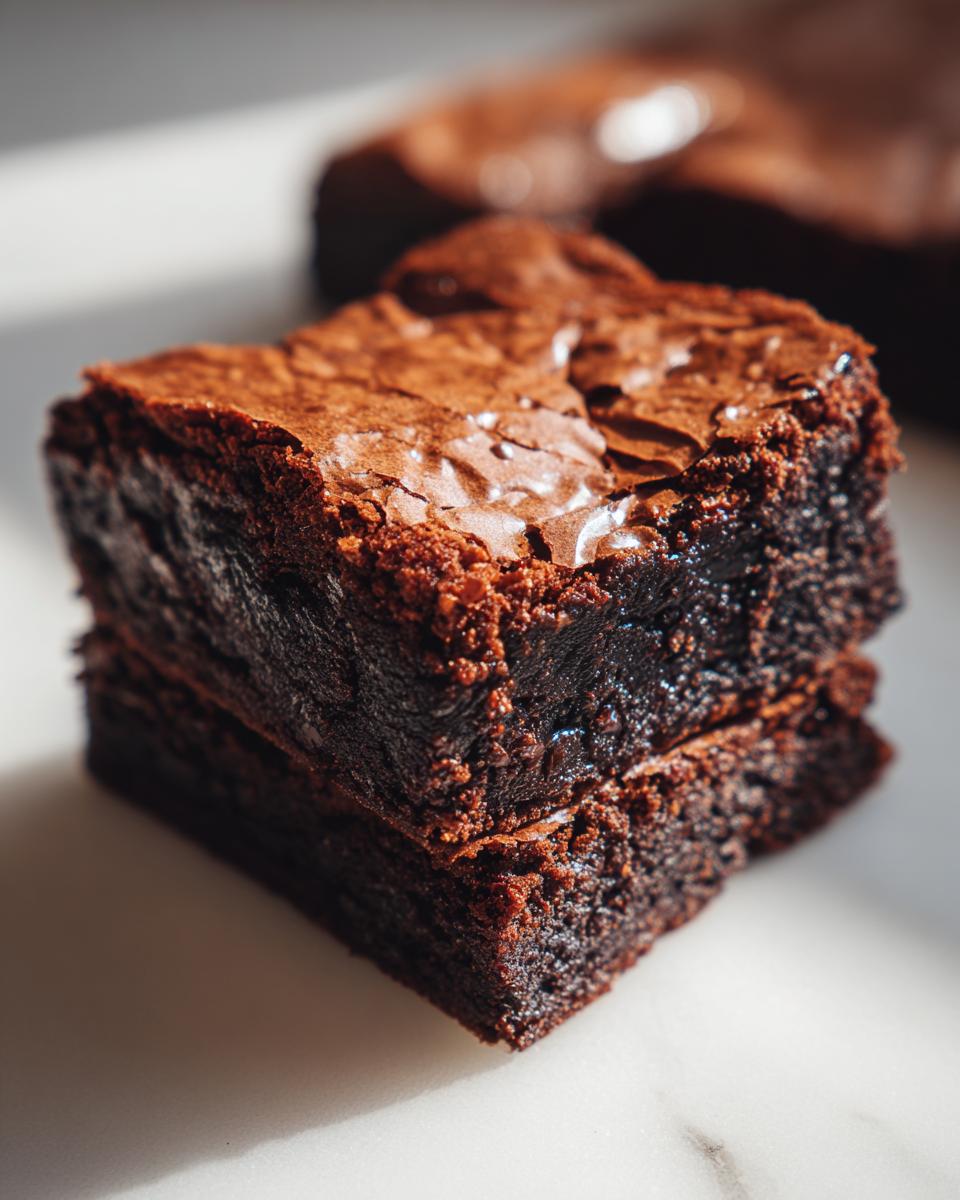
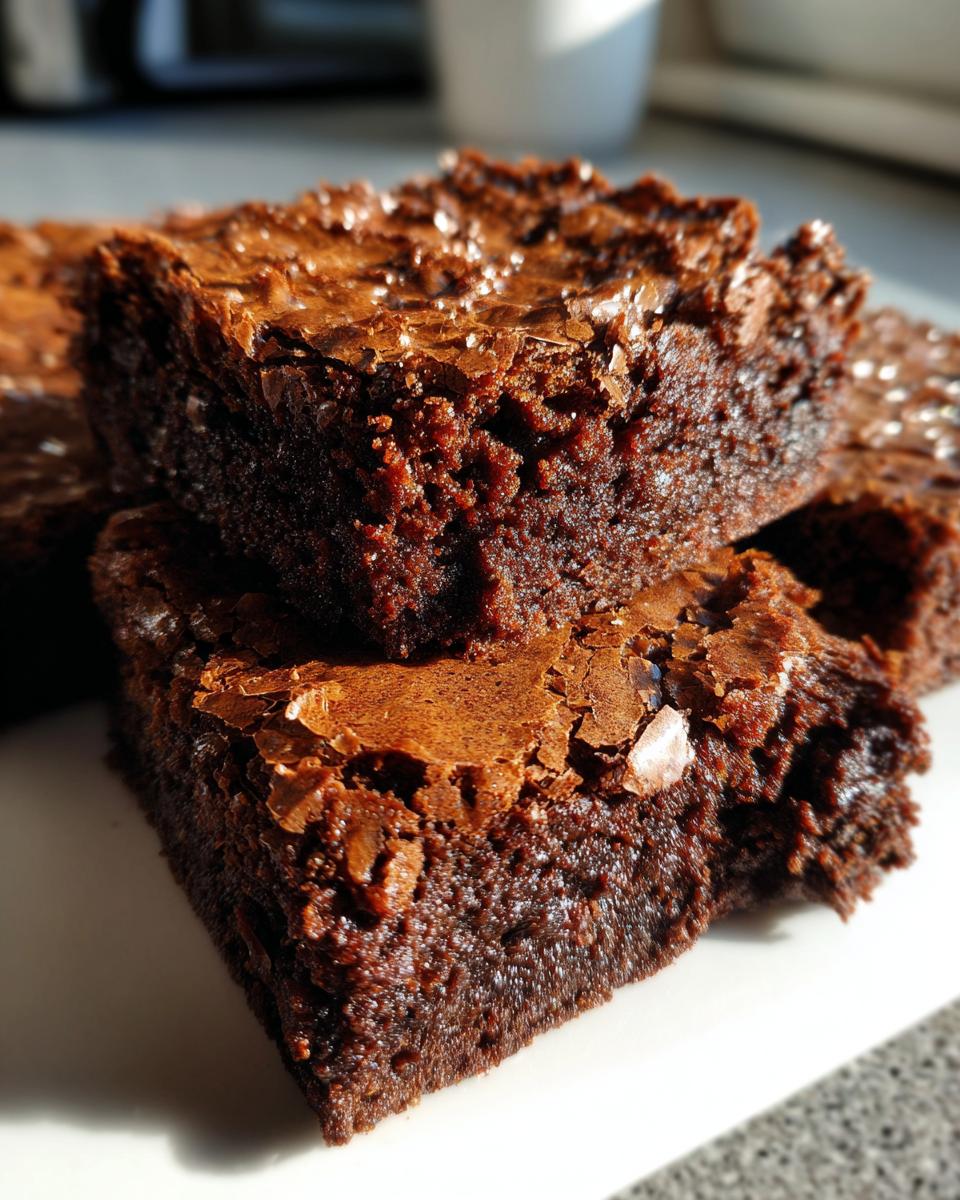
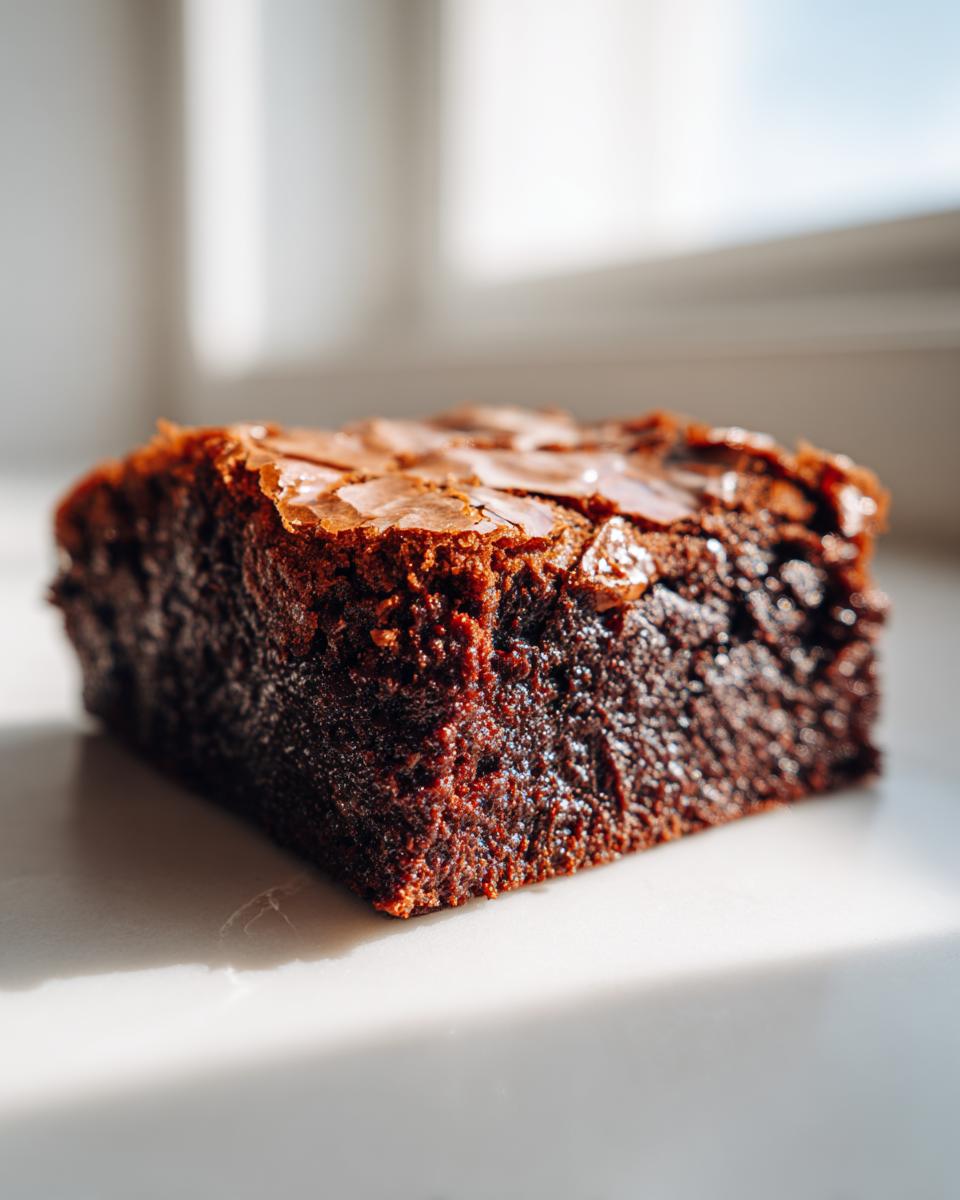
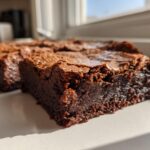
If you’re tired of cakey brownies that just don’t hit the spot, you’ve come to the right place! These deliver pure, decadent chocolate bliss because we nail two things: the texture and the shine. We’re aiming for ultra-fudgy brownies that practically melt when you bite into them, and they absolutely need that paper-thin, shimmering surface. That beautiful, fragile skin is what separates the okay treats from the truly gourmet brownies.
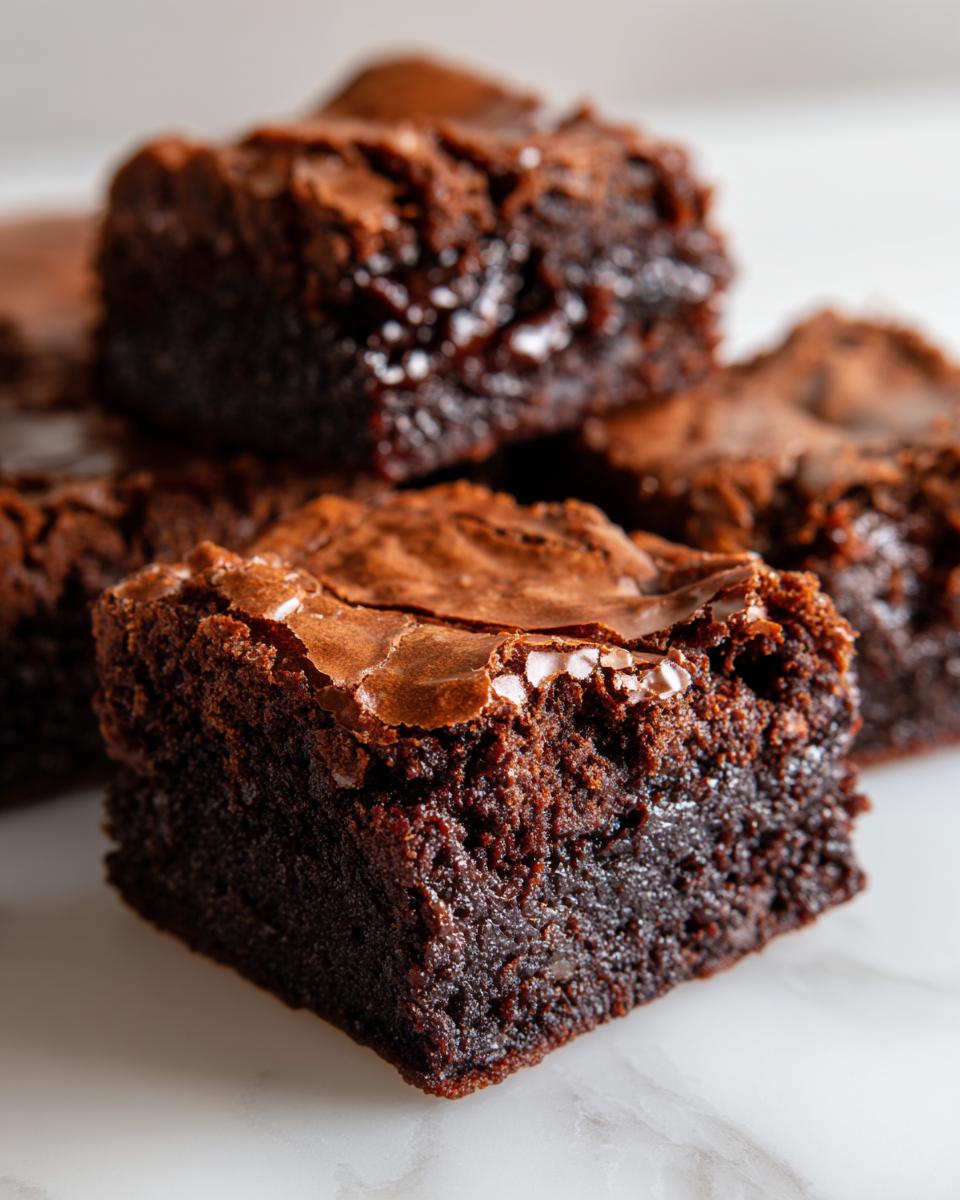
The biggest game changer? Brown butter! It totally deepens the chocolate flavor—it’s nutty, rich, and gives you that bakery-quality taste instantly. But for that signature crackly top brownies look, you have to pay attention to how you treat the sugar and eggs right after you pour in that warm brown butter. You whisk that mixture vigorously enough to dissolve the sugar, creating a syrup that, when baked, bakes up into that gorgeous glassy finish. Seriously, if you want the best, you need the brown butter!
I read about this technique years ago, and it transformed my chocolate baking overnight. You can check out what others are saying about the power of brown butter in their own fudgy creations if you don’t believe me!
Gathering Ingredients for Your Brown Butter Brownies
Okay, while these look complicated because of the brown butter, I promise this is truly a one bowl brownies setup—once you get all your little bits prepped and organized. Grandma Daisy taught me that a messy mise en place leads to a messy bake every time. We need precise amounts here, especially with the sugars, because that’s part of the magic formula for getting that perfect gooey texture.
Don’t panic about the list! It uses pantry staples, but treat every measurement with respect. Getting these ratios right is how we prevent these from turning into just glorified chocolate cake. It’s all about making sure you have the right quality components ready to go.
Essential Components for Perfect Brownies
- 1 cup (2 sticks) unsalted butter
- 1 1/4 cups granulated sugar
- 1 cup packed light brown sugar
- 4 large eggs
- 1 tablespoon vanilla extract
- 3/4 cup unsweetened cocoa powder
- 1/2 cup all-purpose flour
- 1 teaspoon salt
- 1/2 teaspoon baking powder
- 1 cup semi-sweet chocolate chips (optional)
Simple One Bowl Brownies: Step-by-Step Instructions
Now for the fun part! Even though we have that fancy brown butter step, this really is one of those easy homemade brownies recipes you can tackle after a long day. Just try to keep the measuring cups handy, and remember: don’t wander off when the butter is dancing on the stove! If you want to see how others approach fuss-free baking, check out someone who nails the one bowl method.
Preparing the Pan and Browning the Butter
First things first, get your oven warmed up to 350°F (175°C). I always line my 9×9 pan with parchment paper, letting those two sides hang over the edges like little handles—this is your lifeline for later! Now, let’s tackle the brown butter, Step 2. You are melting that butter over medium heat. Watch it closely! It will foam up, and then you’ll see little brown flecks start to form at the bottom. When it starts hitting that lovely nutty aroma—like toffee or hazelnuts—immediately yank it off the heat! If you wait too long, you move from perfection right into burned territory, and Grandma Daisy would not approve!
Mixing Wet and Dry Ingredients for Fudgy Brownies
Pour that hot butter right into your big mixing bowl and whisk in both sugars until they look happy. Now, this is where we lock in the shine! Whisk in your four eggs one at a time, making sure they are fully incorporated before adding the next. Whisk strongly here—that aggression helps build the structure needed for that great crackly top.
In a small bowl, just whisk your dry stuff—cocoa, flour, salt, and baking powder—a quick little toss so they are friends. Next, take your spatula and gently fold the dry mixture into the wet. And I mean *gently*! We stop mixing the second we see the last streak of flour disappear. Overmixing creates gluten, and that turns our beautiful batter into those dense, less desirable thick brownies instead of the gooey ones we crave.
Baking and Cooling Your Brownies
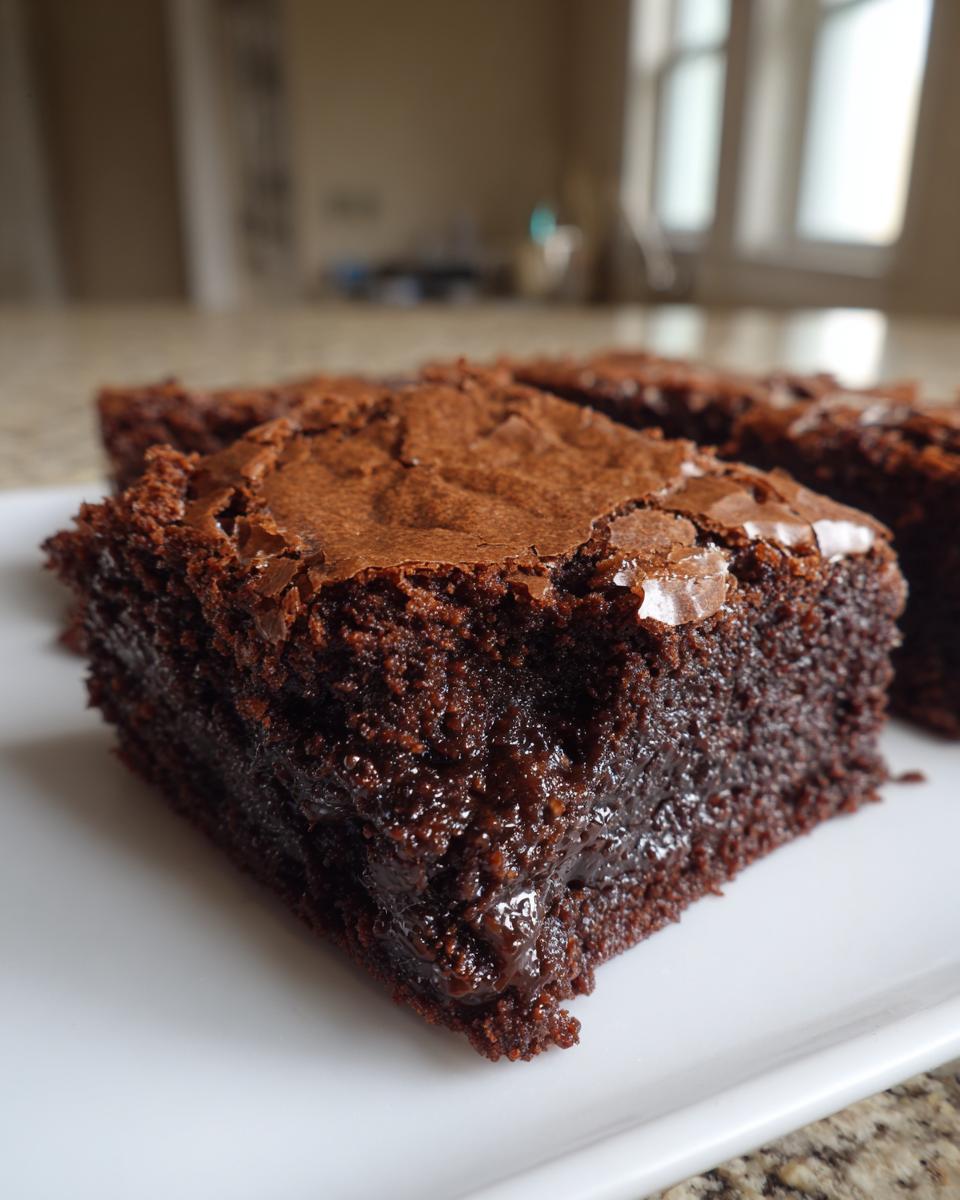
Spread that gorgeous batter into your prepared pan and pop it in the preheated oven for about 30 to 35 minutes. For the *fudgiest brownies*, remember this: you want the edges set, but the center should look just *slightly* underdone. It should jiggle just a tiny bit. Trust me on this one!
The hardest part is next: cooling! You absolutely must let them cool completely in the pan on a wire rack before you even *think* about cutting them. If you rush this, all that glorious fudginess turns into a messy pile. Patience here guarantees you can lift them out cleanly using those parchment overhangs!
Tips for Achieving Bakery Style Brownies
Getting that perfect result when baking from scratch, especially when aiming for that high-end bakery style brownies look, is all about those tiny details that separate a good batch from an unforgettable one. You already got the brown butter flavor, which handles the taste profile, but let’s talk structure.
Remember how I mentioned the center should still look a little soft? Don’t be tempted to overbake to eliminate that wiggle! That slight underdone quality is exactly what keeps them delightfully chewy and gooey later on. If you want them thicker—like a real slab—just swap out that 9×9 pan for a smaller 8×8 inch piece of metal. You’ll need to add about 5 to 10 minutes to the baking time since the heat has farther to travel to the middle, but the resulting thick brownies are worth the extra monitoring. For recipes that really lean into that dense, cocoa style, I always look at what others are doing, like this great recipe for fudgy cocoa ones right here.
And that beautiful shine? That comes straight from hitting those eggs hard after the warm butter goes in. It’s that physical step that gets air incorporated right where the sugar sits. It’s simple science, but knowing that little trick makes all the difference when staging your beautiful homemade chocolate squares!
Making Brown Butter Brownies a Gourmet Brownies Experience
Honestly, once you introduce brown butter into the equation, these stop being just good brownies and start crossing over into seriously gourmet brownies territory. It’s just a few extra minutes of attention focused on the butter, but the payoff in flavor is massive. That nutty, deep caramel essence that bursts out of the butter permeates every single crumb of this rich cocoa dessert.
It adds such a layer of complexity! It moves the experience beyond just ‘sweet stuff’ and turns it into something decadent that really showcases the chocolate. My favorite way to lean into this fancier profile is by pairing things that complement that richness. If you needed an extra push towards gourmet status, sometimes adding a hint of espresso powder takes the chocolate flavor to a whole new level. It doesn’t make them taste like coffee, it just amplifies the darkness of the cocoa!
I often think about those complicated layered desserts you see in bakeries, but you get almost all that depth and complexity right here with this decadent chocolate dessert, just in bar form. If you want to see what a coffee twist looks like, take a peek at this amazing brown butter espresso recipe—it just proves how versatile this step is!
When you serve these up, make sure you present them simply. They don’t need much dressing up because the flavor of the brown butter does all the heavy lifting. They truly are the star of any potluck or quiet evening treat.
Storage and Handling of Your Chewy Chocolate Brownies
Because these are so wonderfully moist and fudgy, storage is key if you want them to stay perfect! You absolutely must store them in an airtight container at room temperature. Don’t even think about the fridge unless you absolutely have to, because the cold tends to steal that soft, chewy chocolate brownies texture we worked so hard for.
They actually get even better on Day Two, which is wild for a baked good! If you happen to have leftovers after a couple of days—which I doubt you will—you can warm one up slightly in the microwave for about 10 seconds. It brings back that fresh-from-the-oven gooey center wonderfully. They hold up beautifully, but keeping them covered is non-negotiable!
Frequently Asked Questions About These Brownies
I get asked about this recipe all the time! Since everyone is searching for a slightly different version—be it cakey, gooey, or plain fast—I wanted to clear up a few common things people wonder about when they are ready to make their best brownie recipe at home.
Can I use regular melted butter instead of brown butter in this brownie recipe?
You totally can, if you’re in a major hurry, but you’ll miss out on the best part! Using regular melted butter will still result in great, gooey chocolate bars because of the sugar and egg ratio, but they won’t have that deep, savory, toasted depth that brown butter provides. That nutty flavor is what truly elevates these from a simple batch to a show-stopping chocolate lover’s dream treat. So stick with brown butter if you can!
How do I ensure my brownies come out fudgy and not cakey?
This is my favorite question! The secret is really two-fold, and it ties directly back to keeping that promise of a truly fudgy texture. First, look at the flour amount—it’s intentionally low compared to the fat and sugar content. That scarcity of flour is key to avoiding cakeiness. Second, and most crucial: underbake them just a hair! When you pull them out, the center needs to look almost wet enough to scare you a little bit. They keep cooking on the hot pan afterward, setting up perfectly chewy!
What is the best way to cut these brownies cleanly?
Oh, you want clean lines like you see in magazines, right? If you try to cut that soft, warm, fudgy center, you’ll end up with a messy slab you can’t serve nicely. The trick is patience again, which is hard when they smell this good! Make sure the brownies are completely, totally cool—even chill them in the fridge for about an hour before cutting. Use a big, sharp knife, wipe the blade clean between slices, and they will slice like silk. This is the final hurdle to achieving perfect homemade chocolate squares!
If you need more help before you dive in, hop over to this great resource where bakers talk about how they troubleshoot their fudgy results!
Nutritional Snapshot of This Rich Cocoa Dessert
I know some of you are watching nutrition, even when indulging in what is definitely a rich cocoa dessert like this! I pulled these numbers together for you based on the ingredients list, but please remember, these are just estimates. If you use premium dark chocolate chips instead of semi-sweet, or if your brand of butter adds a little extra salt, things will shift a tiny bit. That’s just the nature of baking from scratch!
We made 16 squares in that 9×9 pan, and here is the breakdown for one of these amazing, fudgy treats:
- Calories: Around 280
- Fat (Total): Approximately 16g (Be smart about that good butter!)
- Carbohydrates: About 34g
- Protein: Roughly 4g
It’s important to be transparent, so take these numbers as a solid guide, not gospel. But honestly, when something tastes this decadent, I try not to dwell too much on the details. Enjoying one of these incredible best chocolate dessert bars is worth every single calorie!
Share Your Homemade Chocolate Squares
Well, that’s it! You’ve graduated from simple box mixes to making the best fudgy brownies rich enough for any bakery case. Now that your kitchen smells delightfully of deep cocoa and toasted hazelnuts, I truly want to hear about it!
Did you get that crackly top? Are they as gooey as you hoped? Don’t be shy! Head down to the comments and tell me what you thought. A quick rating helps other bakers trust the process before they dive in. If you’re sharing on social media—and you absolutely should, because these are stunning—please tag me!
I love seeing your beautiful, perfectly sliced homemade chocolate squares come to life. It reminds me that Grandma Daisy’s focus on simple, honest ingredients keeps creating comfort in kitchens everywhere, no matter how busy life gets. If you’ve mastered this batch, maybe next time you can try diving into some of my other favorites, like these ultimate chocolate fix recipes I’ve collected over the years on my shared collection page.
Happy baking, friends. I’m genuinely grateful you chose to bake with me today!
PrintUltimate Fudgy Brown Butter Brownies with Shiny Crackly Tops
Make the best brownie recipe at home with this simple, one-bowl method. These brownies are ultra-fudgy, chewy, and feature a desirable shiny, crackly top, enhanced by the rich flavor of brown butter.
- Prep Time: 15 min
- Cook Time: 35 min
- Total Time: 50 min
- Yield: 16 squares 1x
- Category: Dessert
- Method: Baking
- Cuisine: American
- Diet: Vegetarian
Ingredients
- 1 cup (2 sticks) unsalted butter
- 1 1/4 cups granulated sugar
- 1 cup packed light brown sugar
- 4 large eggs
- 1 tablespoon vanilla extract
- 3/4 cup unsweetened cocoa powder
- 1/2 cup all-purpose flour
- 1 teaspoon salt
- 1/2 teaspoon baking powder
- 1 cup semi-sweet chocolate chips (optional)
Instructions
- Preheat your oven to 350°F (175°C). Line a 9×9 inch baking pan with parchment paper, leaving an overhang on two sides for easy removal.
- Melt the butter in a saucepan over medium heat. Continue cooking, swirling occasionally, until the butter foams, then develops brown bits at the bottom and smells nutty. This is brown butter. Remove from heat immediately.
- Pour the hot brown butter into a large mixing bowl. Whisk in the granulated sugar and brown sugar until combined. Let the mixture cool for 5 minutes.
- Whisk the eggs into the sugar mixture one at a time until fully incorporated. Whisk in the vanilla extract.
- In a separate small bowl, whisk together the cocoa powder, flour, salt, and baking powder.
- Gently fold the dry ingredients into the wet ingredients using a spatula until just combined. Do not overmix.
- If using, fold in the chocolate chips.
- Spread the batter evenly into the prepared baking pan.
- Bake for 30 to 35 minutes. For fudgy brownies, the center should still look slightly underdone when you remove the pan.
- Let the brownies cool completely in the pan on a wire rack before lifting them out using the parchment overhang. Cut into squares.
Notes
- Browning the butter is key to achieving a deep, gourmet flavor in these chocolate dessert bars.
- To get that shiny, crackly top, ensure your sugar and eggs are well whisked after adding the warm brown butter.
- For thicker brownies, use an 8×8 inch pan instead, but increase the baking time by 5-10 minutes.
Nutrition
- Serving Size: 1 square
- Calories: 280
- Sugar: 30
- Sodium: 150
- Fat: 16
- Saturated Fat: 10
- Unsaturated Fat: 6
- Trans Fat: 0
- Carbohydrates: 34
- Fiber: 2
- Protein: 4
- Cholesterol: 75