
Oh, the quest for the perfect baked sweet potato! It sounds so simple, right? Just pop a spud in the oven and wait. But if you’re like me, you’ve been disappointed by skins that are sticky and mushy, or insides that are just… sad. I’m Amelia, and my journey back to the kitchen started with trying to recapture the honest comfort food my grandmother, Daisy, used to make. She always taught me that simple ingredients, treated right, are the key. That’s why I’m sharing my ultimate method for baked sweet potatoes—we’re skipping the foil drama! This no-foil technique is my secret to achieving that incredibly fluffy interior everyone talks about. It’s simple, clean, and connects me right back to Daisy’s kitchen philosophy. If you love sides that wow the crowd, make sure you check out my recipe for her famous Sweet Potato Casserole, too!
- Why This Is the Best Baked Sweet Potato Method (No Foil Required)
- Gathering Ingredients for Perfect Baked Sweet Potatoes
- How to Bake Sweet Potatoes: Step-by-Step Instructions
- Expert Sweet Potato Cooking Tips for Perfect Baked Sweet Potatoes
- Serving Suggestions for Your Easy Baked Sweet Potato Side
- Storage and Sweet Potato Meal Prep for Oven Baked Sweet Potatoes
- Frequently Asked Questions About Baked Sweet Potatoes
- Nutritional Estimates for Baked Sweet Potatoes
- Share Your Perfect Baked Sweet Potatoes Experience
Why This Is the Best Baked Sweet Potato Method (No Foil Required)
You might be wondering why I skip the foil, especially when so many recipes swear by it. Honestly, foil steams the potato. It locks in moisture, yes, but it also stops the exterior from doing what it needs to do—get slightly crinkly and flavorful! We are aiming for that perfect contrast here: a wonderfully fluffy sweet potato interior contrasted by a slightly crackly, seasoned skin. This is hands-down the best baked sweet potato method because we let the dry heat of the oven work its magic.
Grandma Daisy used to laugh whenever she saw someone wrapping potatoes. “Heat needs to breathe, Amelia,” she’d say, insisting her oven baked sweet potatoes had to go directly onto the rack. That’s how you get that desirable caramelized skin sweet potato effect without resorting to broiling later. It just concentrates the natural sweetness right where you want it!
If speed is what you need, this method keeps things moving right along. No fussing around with wrapping four separate potatoes means less hands-on time for you. For a truly satisfying and healthy sweet potato option, this direct-heat approach yields the most results with the least effort.
Quick Baked Sweet Potato Timing Overview
I know your schedule is busy, so if you’re looking for a quick baked sweet potato, here’s the lowdown on timing. Prep is practically nothing—I get mine rubbed down and ready in about 5 minutes flat. The main event, the baking, is usually between 45 to 60 minutes, depending on how big those beauties are. That means your total time commitment, from the counter to the cutting board, is only about 55 minutes! That makes this a fantastic last-minute side dish when company shows up unexpectedly.
Gathering Ingredients for Perfect Baked Sweet Potatoes
One of the things I adore about this recipe is just how little you need to create such a stunning side. Seriously, grab your cutting board! We aren’t dealing with a long list of complicated things here; this is about letting a few quality items shine. Simplicity is my hallmark now, just like it was for Daisy back in her small kitchen.
For the foundation of the perfect texture, you will need:
- 4 medium sweet potatoes (I always look for ones that are about 8 to 10 ounces each so they bake evenly!)
- 1 tablespoon olive oil
- 1 teaspoon coarse sea salt
That’s it for the base! Notice how easy that is? You probably have all of this on hand right now. This simple trio is what guarantees those fluffy insides and slightly crisp skins. If you’re interested in other recipes that celebrate simple ingredients, you have to try my soft applesauce cookies—they use the same philosophy!
Sweet Potato Seasoning Ideas for Enhancement
While those three ingredients make amazing, straightforward baked sweet potatoes, sometimes you want to lean into that sweet, cozy comfort food vibe. That’s where the optional toppings come in handy! I love keeping a little batch of cinnamon butter ready for just these moments. These small additions really elevate the whole experience.
If you want to try my favorite flavor boosters, grab these:
- Optional Topping: 2 tablespoons cinnamon butter (just soften some butter and mix in cinnamon until it looks lovely)
- Optional Topping: 1 tablespoon pure maple syrup
Drizzling that maple syrup over the melty cinnamon butter is pure bliss. It’s one of my favorite sweet potato seasoning ideas, turning an ordinary side into something nearly gourmet!
How to Bake Sweet Potatoes: Step-by-Step Instructions
Alright, let’s get these beauties into the oven! This is the part where we set the stage for success, and honestly, if you follow these few steps, you’re practically guaranteed success with your oven baked sweet potatoes. First things first: crank that oven up to 400 degrees Fahrenheit and make sure that center rack is clear. We need good air flow here!
Next, take your potatoes and give them a really good scrub. Don’t skip washing—we leave the skin on, remember? Pat them bone dry with a paper towel. Then, grab a sharp fork, and this is important: pierce each sweet potato deeply about five or six times all over. This lets the steam escape, and trust me, it’s what keeps them from exploding on you. Oops! Don’t want that.
Now for the flavor layer. Rub every surface of the potato with that lovely olive oil, and then sprinkle generously with coarse sea salt. The oil helps the skin crisp up just right. Once they are oiled and salted, here’s the big move: place the baked sweet potatoes directly onto the center rack. No baking sheet, no foil shield! They need that direct heat to get that perfect texture we are aiming for. Bake them for about 45 to 60 minutes. You’ll know they’re done when the outside looks a little wrinkled and you can easily slide a knife or fork through the fattest part with zero resistance. If you’re looking for a simple sweet potato recipe, this is it!
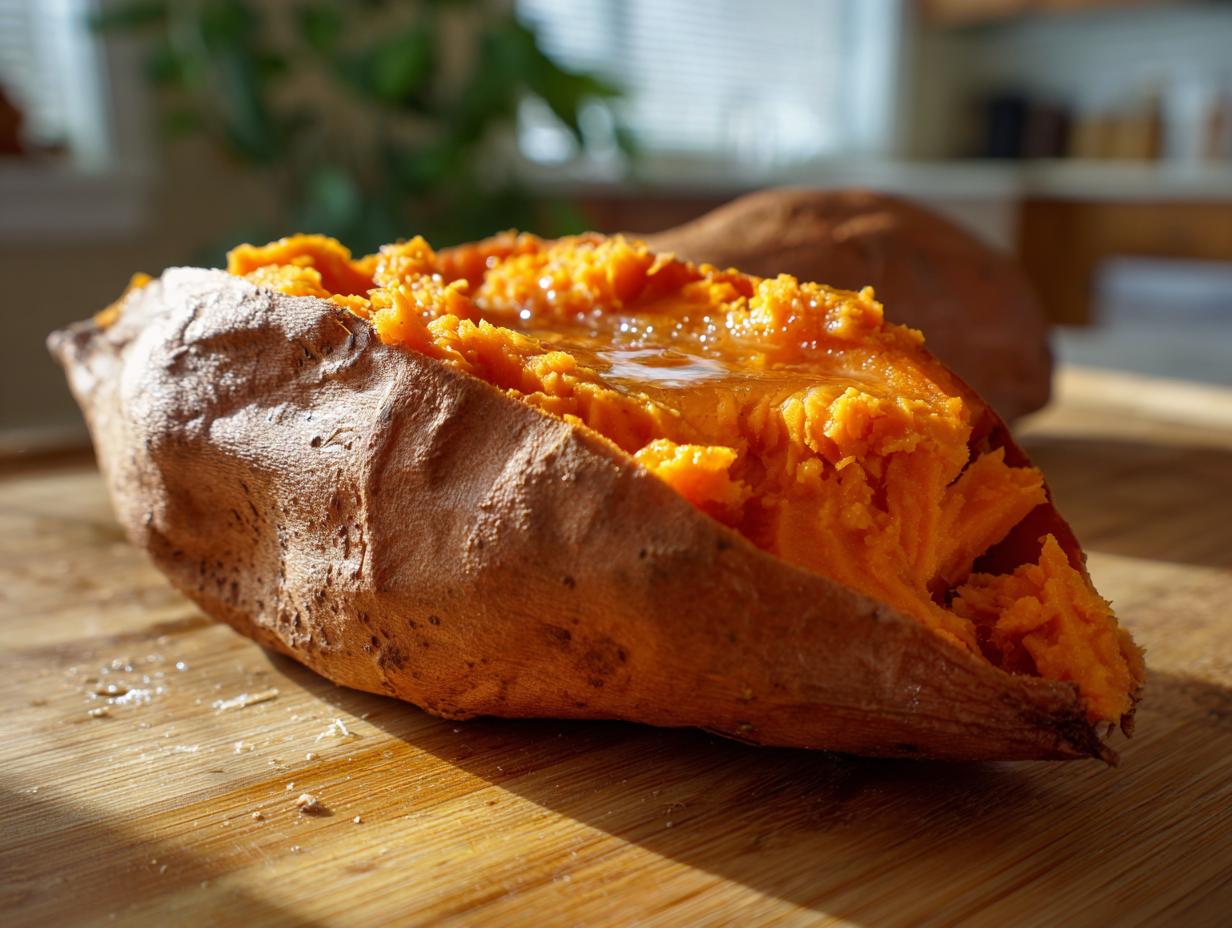
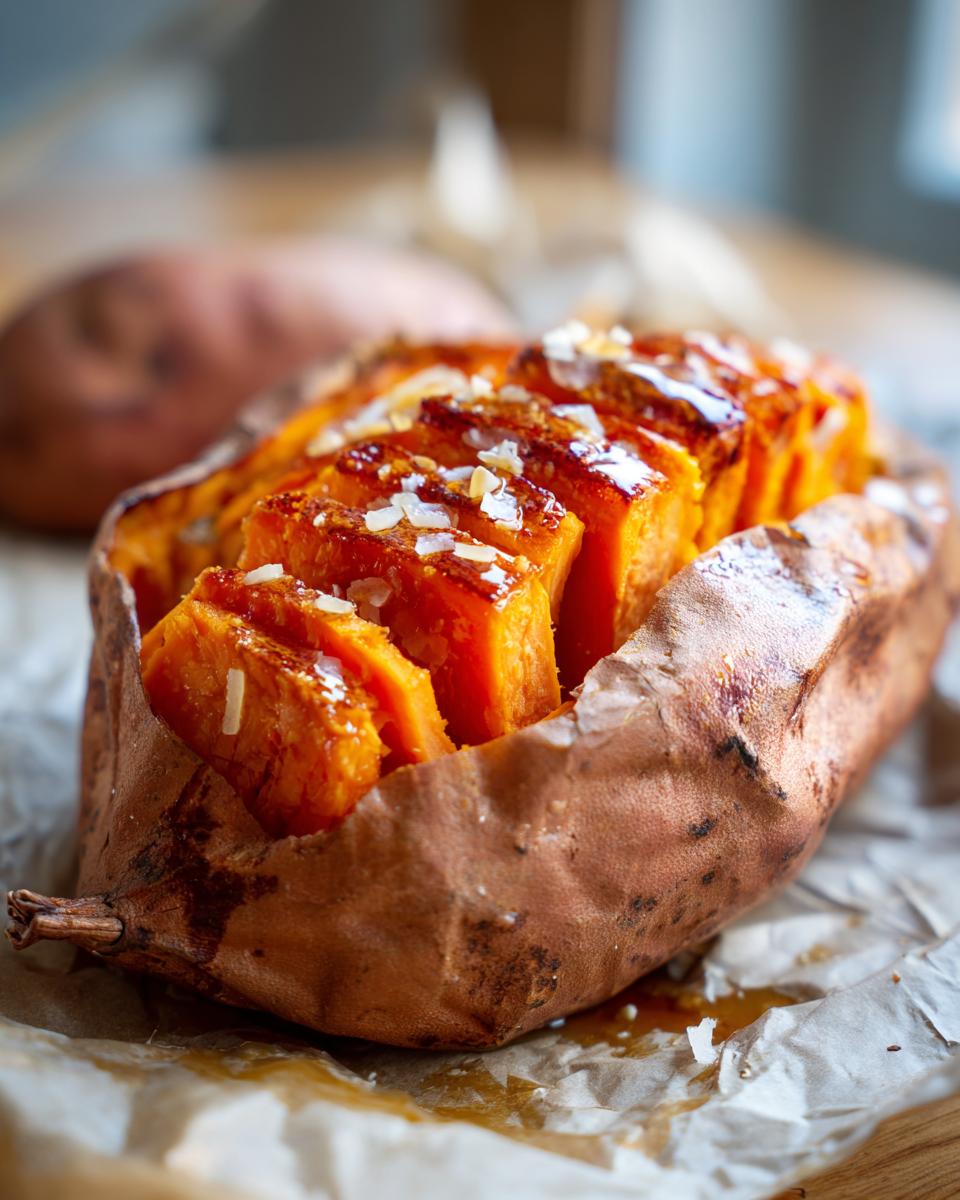
Achieving the Fluffy Sweet Potato Recipe Interior
Once they are tender and cooked through, pull them out (carefully, they’re hot!) and let them cool just long enough for you to touch them without burning yourself—about five minutes is usually enough. This is the moment of truth for that incredible texture!
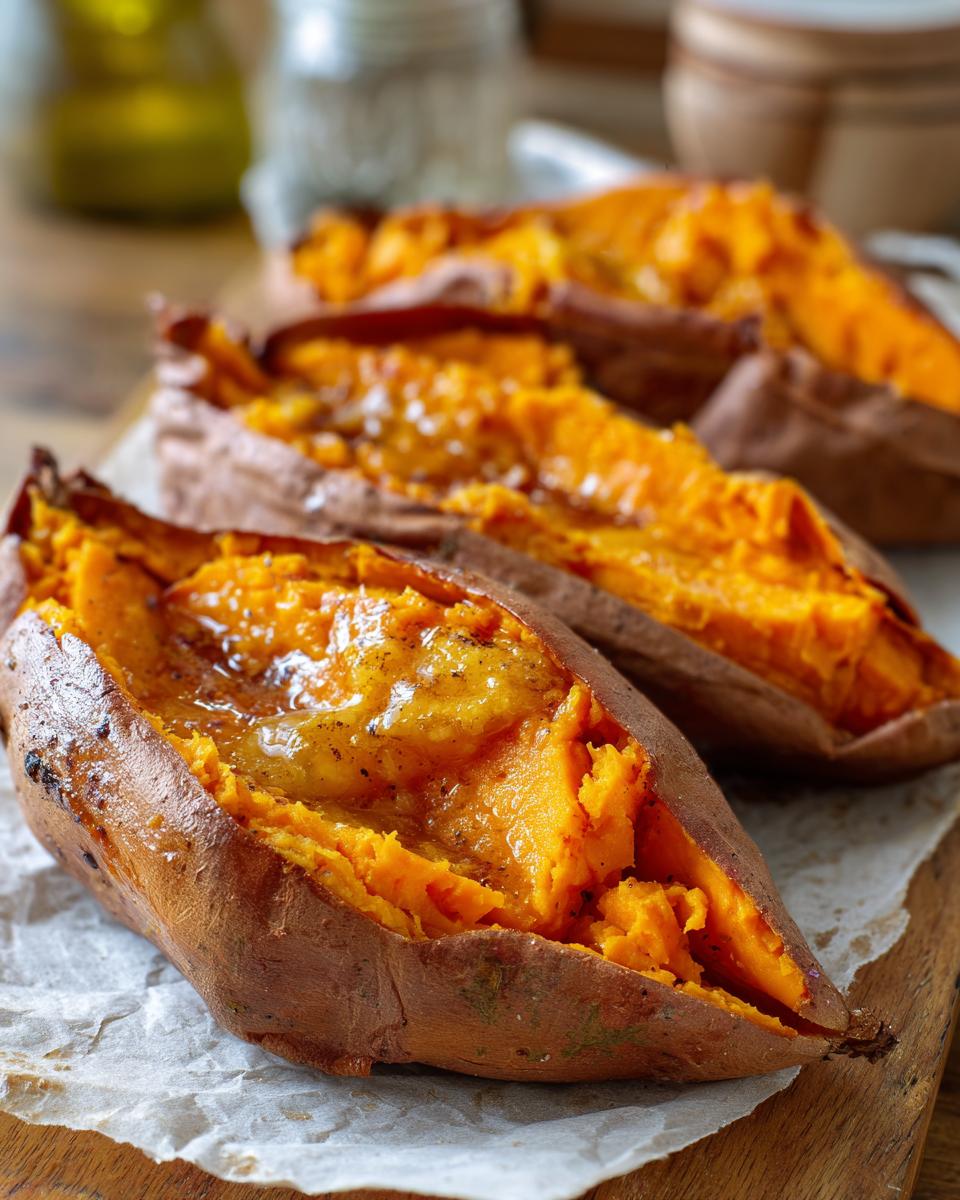
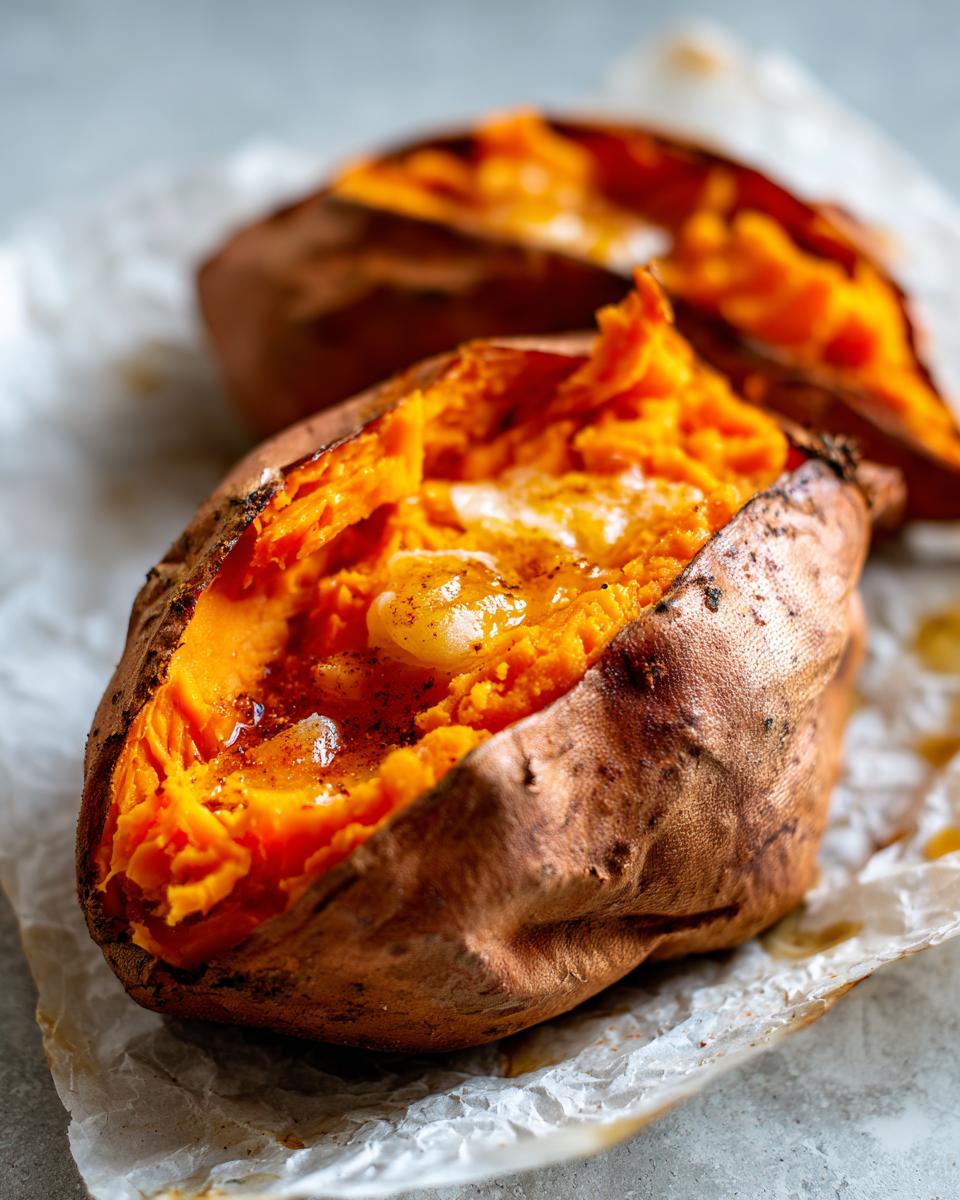
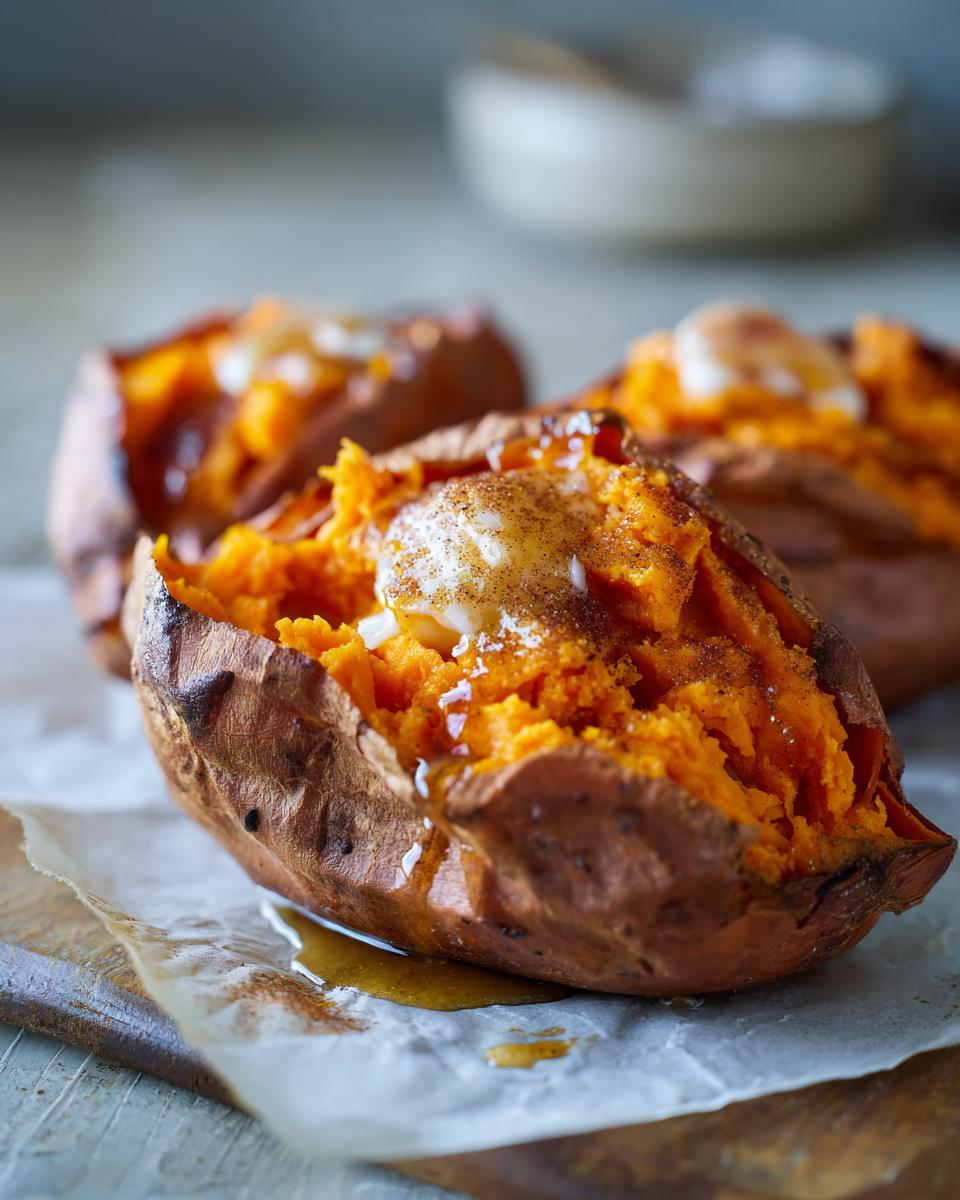
Take one potato and slice it right down the center lengthwise, but stop about half an inch from the bottom so it stays connected like a hinge. Don’t scoop it out yet! Instead, gently use your hands (or a towel if it’s too hot) and squeeze the sides toward the center. Watch that fluffy flesh puff up! It looks like magic, I promise. This little push maximizes the fluff for the ultimate fluffy sweet potato recipe experience. Top it immediately with that cinnamon butter we talked about, maybe a little drizzle of maple syrup if you’re feeling decadent, and enjoy right away. If you’re making savory potato dishes later, check out my chicken crust pizza recipe!
Expert Sweet Potato Cooking Tips for Perfect Baked Sweet Potatoes
Now that you know the basic steps for creating superior baked sweet potatoes, let me share a few little tricks I picked up over the years—these are the real-deal sweet potato cooking tips that stop the guesswork. The first thing Daisy drilled into me? Selection matters! Try to grab potatoes that are all roughly the same size. If you have one giant one next to a tiny one, they won’t finish at the same time, and then you’re stuck cutting one open while the other is still hard.
We already talked about avoiding foil because it makes them steamed, but if you want to push that skin crispiness just a tiny bit further—especially if you’re making this as a healthy baked vegetables side for a fancier dinner—try this: Once the timer hits the 40-minute mark, crank the heat up to 425 degrees Fahrenheit for the last 10 minutes. It gives the skin a final little blast to get extra savory and delicious.
And remember, these potatoes are sturdy! If you’re planning for weeknight dinners, baking them through so they are just tender (but not totally mushy) is perfect for storage. They hold up wonderfully for meal prep, which is seriously a life-saver on busy days.
Serving Suggestions for Your Easy Baked Sweet Potato Side
I think one of the best compliments for this easy baked sweet potato side is how versatile it is! You can treat it as a straightforward, delicious companion to something hearty, like my Greek Lemon Garlic Chicken or a nice roast pork tenderloin. The fluffy texture pairs beautifully when you just halve it and let the steam rise.
But honestly, these potatoes deserve to be the star sometimes! They make a fantastic light sweet potato dinner side or lunch all on their own. People often use this base to make richer dishes, like those famous twice baked sweet potatoes, but you don’t have to go that far to make it special.
Transforming Baked Sweet Potatoes into Loaded Meals
If you want to turn one of these fluffy beauties into a full meal, think toppings! You can go sweet and cozy with more cinnamon butter, or you can pivot straight into savory territory. Pour on some black beans, a dollop of sour cream, some fresh avocado, or even toss some leftover pulled pork on top. That simple base means you can customize it endlessly—giving you loads of loaded baked sweet potato ideas without having to bake anything twice!
Storage and Sweet Potato Meal Prep for Oven Baked Sweet Potatoes
Do you ever bake too many? Me too! Saving these gems for later is so easy, and it makes future dinners a breeze. Since we perfected these oven baked sweet potatoes without all that fussy foil, they store beautifully. For basic sweet potato meal prep, just let the whole potatoes cool down completely after baking. Don’t slice them open yet!
Once they are room temperature, pop them into an airtight container or a zip-top bag. They stay happy in the fridge for about four days. Then, when you need a quick baked sweet potato, you have options!
Reheating is simple. For the best texture, use the oven at 350 degrees until warmed through—that usually takes about 15 minutes. If you’re starving right now, the microwave totally works, but just watch carefully so they don’t get rubbery. Planning ahead like this means you have a healthy side ready to go anytime. Check out my guide for veggie lentil salad meal prep for other make-ahead ideas!
If you’re looking for another great recipe reference for keeping your baked potatoes perfect, this guide on baked sweet potato recipes is fantastic for reinforcing texture!
Frequently Asked Questions About Baked Sweet Potatoes
It’s so normal to have a few lingering questions when you are trying a new foundational recipe like this! I know I did when I first started doing a simple sweet potato recipe this way. Cooking is all about trial and error, but I gathered the questions I get asked most often about achieving perfect oven baked sweet potatoes.
Can I use foil for these baked sweet potatoes?
This is probably the number one question! My firm answer is no, if you want that fluffy interior and slightly crispy skin. When you wrap them in foil, you essentially create a little steam tent, and that cooks the potato very differently—more like microwaving than true baking. For the absolute best texture that makes this a fluffy sweet potato recipe, you must place them directly on the oven rack at 400°F. It makes all the difference!
How do I know for sure when my sweet potatoes are done?
Don’t trust the clock completely! While 45 to 60 minutes works for average baked sweet potatoes, the size varies too much for strict timers. You have two great checks. First, look at the outside; the skin should be slightly wrinkled and look taut. Second, and most importantly, poke it deep into the thickest part. If it slides in with absolutely no resistance, they are done! If you feel any stiffness at all, they need another five minutes. That gentle resistance test is key for avoiding undercooked centers.
Are these considered healthy baked vegetables?
Absolutely, yes! The base ingredients—sweet potatoes, olive oil, and salt—are inherently nutritious. Sweet potatoes are packed with fiber and vitamins, making this one of the best healthy baked vegetables you can serve. As long as you skip the super sugary toppings, this stays firmly in the healthy column. If you’re looking for more nutritious but still satisfying meals, you really ought to peek at my healthy breakfast ideas.
Can I bake these ahead for meal prep?
Yes, you certainly can! I love baking a big batch on Sunday so I have quick sides ready for the week. You just want to bake them until they are *just* tender—don’t overcook them, or they get too soft when you reheat them. Cool them completely, store them whole in an airtight container, as I explained in the meal prep section. For more make-ahead strategies, I learned a lot from this guide on how to bake sweet potatoes.
Nutritional Estimates for Baked Sweet Potatoes
Now, I know some of us watch what we eat, and that’s totally fine! It’s important to know what you’re fueling your body with, especially when you are prioritizing healthy sweet potato options. This is what I love about keeping things simple—the nutrition stays clean!
Below, I’ve listed the approximate nutritional breakdown for one single serving of these baked sweet potatoes. Please remember this is just an estimate based on the base recipe—we aren’t adding in spoonfuls of that decadent cinnamon butter or maple syrup here, so these numbers reflect the potato, oil, and salt only. If you load them up, the counts will obviously be higher, but this gives you a great starting point for planning your meals!
Here are the general figures:
- Serving Size: 1 potato
- Calories: Around 200
- Fat: About 5 grams
- Carbohydrates: 38 grams
- Fiber: 6 grams (See? So good for you!)
- Protein: 3 grams
It’s a wonderfully balanced, naturally sweet, and filling side dish that fits perfectly into almost any healthy eating plan. Knowing the facts just makes enjoying this healthy baked vegetables side even sweeter. If you want more ideas that fit into a balanced plan, you should take a look at my healthy lunch ideas collection!
Share Your Perfect Baked Sweet Potatoes Experience
Oh, doesn’t that just sound cozy? I really hope you’re heading into your kitchen right now to try this straightforward method for the best baked sweet potatoes you’ve ever had. Honestly, there is nothing better than smelling that hint of baking spice and root vegetable aroma filling the house when you know dinner is going to be comforting and healthy.
This recipe is just the beginning, though. The way you top it is what makes it *yours*! I’d absolutely love to hear what you end up doing once you cut into that beautifully fluffy center. Did you stick with my simple suggestion of cinnamon butter and maple syrup? Or did you get adventurous and explore some of those gourmet topping ideas?
Please, if you make these, drop down into the comments below and let me know how they turned out for you. Tell me if the no-foil technique gave you the texture you were dreaming of! And if you have a second, leaving a rating tells me (and other new cooks!) what you thought. Hearing from you brings me right back to being in Grandma Daisy’s kitchen, sharing a plate of food. Happy baking, truly! If you have any direct questions or feedback, you can always reach out through my contact page as well.
PrintThe Ultimate Fluffy Baked Sweet Potato: Perfect Texture Every Time (No Foil Method)

Learn the straightforward method for baking sweet potatoes to achieve perfectly tender, fluffy interiors and slightly caramelized skins without using aluminum foil. This is the best baked sweet potato method for a simple, healthy side dish.
- Prep Time: 5 min
- Cook Time: 50 min
- Total Time: 55 min
- Yield: 4 servings 1x
- Category: Side Dish
- Method: Baking
- Cuisine: American
- Diet: Vegetarian
Ingredients
- 4 medium sweet potatoes (about 8–10 ounces each)
- 1 tablespoon olive oil
- 1 teaspoon coarse sea salt
- Optional Topping: 2 tablespoons cinnamon butter (softened butter mixed with cinnamon)
- Optional Topping: 1 tablespoon pure maple syrup
Instructions
- Preheat your oven to 400 degrees Fahrenheit. Place an oven rack in the center position.
- Scrub the sweet potatoes well under running water to remove any dirt. Pat them completely dry with a paper towel.
- Pierce each sweet potato deeply 5 to 6 times all over using a sharp fork. This allows steam to escape and prevents bursting.
- Rub the entire surface of each sweet potato with olive oil. Sprinkle evenly with coarse sea salt.
- Place the prepared sweet potatoes directly onto the center oven rack. Do not use a baking sheet or foil. Baking directly on the rack allows air to circulate, which helps crisp the skin.
- Bake for 45 to 60 minutes. The exact time depends on the size of your potatoes. Start checking at 45 minutes.
- The sweet potatoes are done when the skin is slightly wrinkled and firm, and you can easily pierce the thickest part with a knife or fork with no resistance. The interior should feel soft when squeezed gently (use a towel or oven mitt).
- Remove the potatoes from the oven. Let them cool for 5 minutes.
- To serve, slice each potato lengthwise down the center, being careful not to cut all the way through the bottom. Gently squeeze the ends toward the middle to fluff the interior flesh.
- Top immediately with cinnamon butter and a drizzle of maple syrup, if using. Serve this easy baked sweet potato side warm.
Notes
- For extra crispy skin, you can increase the oven temperature to 425 degrees Fahrenheit for the last 10 minutes of cooking.
- This no-foil technique promotes better flavor and texture compared to wrapping them.
- If you plan for sweet potato meal prep, bake them until just tender, let them cool, and store them whole in the refrigerator for up to 4 days. Reheat in the oven or microwave.
Nutrition
- Serving Size: 1 potato
- Calories: 200
- Sugar: 10
- Sodium: 250
- Fat: 5
- Saturated Fat: 2
- Unsaturated Fat: 3
- Trans Fat: 0
- Carbohydrates: 38
- Fiber: 6
- Protein: 3
- Cholesterol: 0