
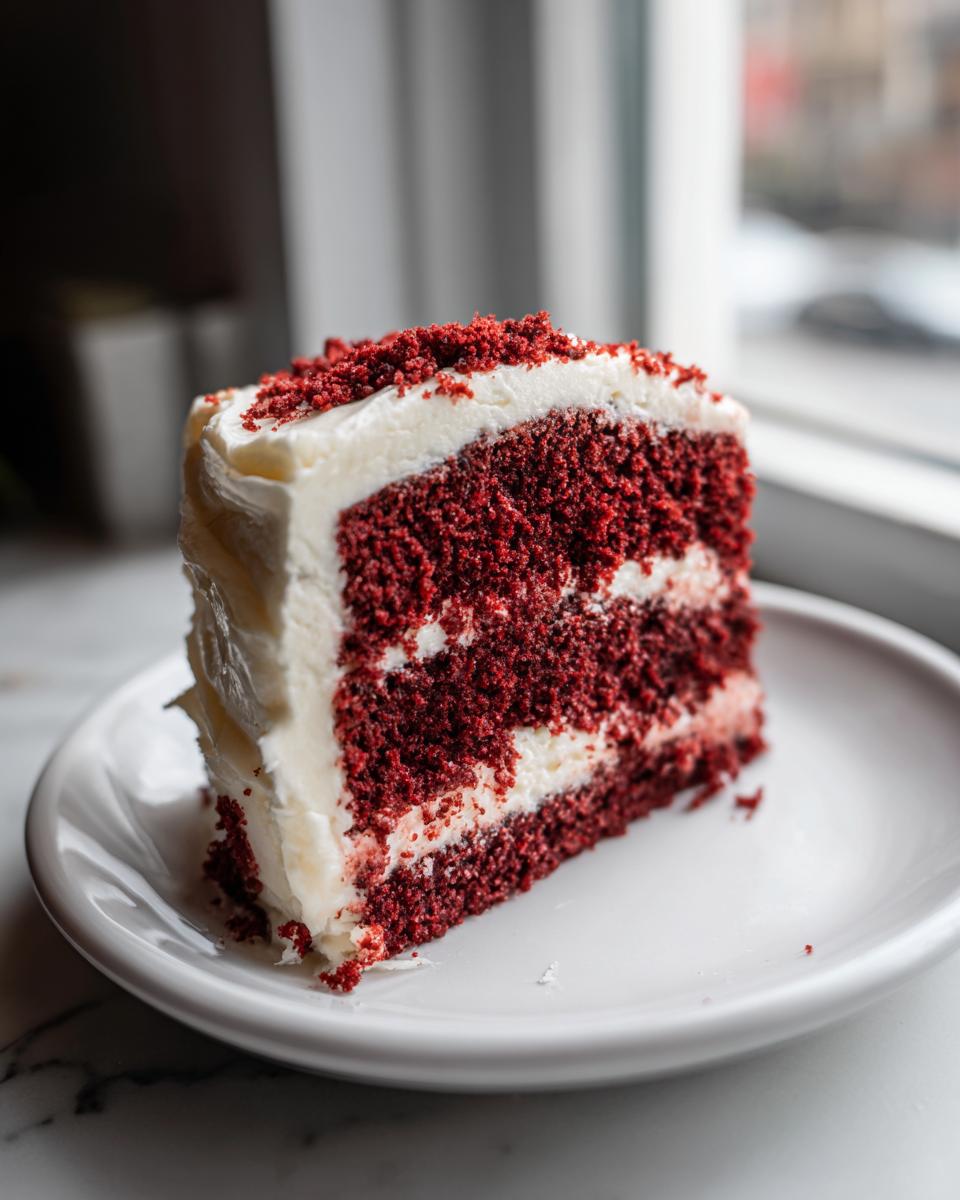
If you’re searching for that perfect, melt-in-your-mouth slice, stop right now! I’m sharing the result of years of chasing that dream texture: The Best, Ultra-Moist Southern Red Velvet Cake with Classic Cream Cheese Frosting. My Grandma Daisy always taught me that good food comes from simple, honest ingredients, and this classic red velvet cake honors that tradition perfectly. It’s deeply colored, unbelievably soft, and frankly, the only one I’ll ever serve for a celebration. Forget dry, crumbly versions; this recipe delivers a truly Decadent Crimson Cake that just sings with flavor. Trust me on this one; this feels like home.
- Why This Is The Best Red Velvet Cake Recipe You Will Ever Make
- Ingredients for Your Ultra-Moist Southern Red Velvet Cake
- How to Prepare the Best Red Velvet Cake From Scratch
- Red Velvet Tips and Tricks for a Perfect Red Cake for Celebrations
- Ingredient Notes and Substitutions for Your Red Velvet Cake
- Serving Suggestions for Your Classic Red Velvet Cake
- Storage and Reheating Instructions for Your Homemade Red Velvet Cake
- Frequently Asked Questions About This Red Velvet Cake Recipe
- Share Your Thoughts on This Party Cake Ideas Recipe
Why This Is The Best Red Velvet Cake Recipe You Will Ever Make
I know, I know—everyone calls theirs the best! But this recipe is different, and it’s because we aren’t cutting corners on technique or ingredients that make this cake so iconic. This isn’t just a chocolate cake with too much food dye tossed in. This is truly what a Southern Red Velvet Cake should be: tender, slightly tangy, and absolutely rich.
Here is exactly why this version beats out almost every other red velvet cake recipe out there:
- It uses oil instead of butter for the cake. Trust me, this is non-negotiable for the incredible moisture we are aiming for!
- The reaction between the buttermilk, vinegar, and baking soda gives us the lift we need without compromising the crumb density.
- We use a small, precise amount of cocoa powder which deepens the chocolate flavor just enough to complement the red without dulling the color.
Achieving That Signature Soft and Fluffy Cake Texture
The secret sauce for that legendary tenderness is leaning into the chemistry happening in the bowl! When you mix the buttermilk and vinegar together, you’re basically creating soured milk, which is fantastic for tenderizing flour proteins. Then, when that hits the baking soda, you get a beautiful, gentle fizz that keeps the crumb incredibly light.
Because we use vegetable oil, the fat stays liquid even when it cools, which is the key to keeping this a Velvety Layer Cake that never dries out. If you want a cake that feels like velvet against your tongue, oil over butter in the batter is a must!
Tips for a Deeply Colored Red Velvet Cake
Listen, no one wants a pale, pinkish cake. We want that deep, dramatic crimson color people expect from a proper red velvet cake. The biggest tip I can give you is to skip those cheap liquid food colorings that always run thin and weak. Seriously, invest in a high-quality gel coloring.
Gel drops are concentrated, so a little goes a long way toward that stunning hue. We use just enough to get that vibrant look, keeping the cocoa powder small so it doesn’t muddy up the color too much. A little bit of cocoa gives the complexity, and the gel gives you the visual punch!
Ingredients for Your Ultra-Moist Southern Red Velvet Cake
Getting the ingredients organized first is like setting your stage before the curtain goes up—totally necessary for a smooth show! I always lay everything out before I even grab a bowl. It keeps me from forgetting that one crucial step, like letting the buttermilk come to room temp. If you want that ultimate texture, make sure you check out our story about how we keep baking simple around here over on the About page.
For the Decadent Crimson Cake Layers
- 1 1/2 cups vegetable oil (this is what keeps it so moist!)
- 1 1/2 cups granulated sugar
- 2 large eggs, totally at room temperature
- 1 teaspoon vanilla extract
- 1 cup buttermilk, also at room temperature
- 1 tablespoon white vinegar
- 1 teaspoon baking soda
- 2 tablespoons red food coloring (only the good, high-quality gel kind!)
- 1 teaspoon unsweetened cocoa powder
- 2 1/2 cups all-purpose flour
- 1 teaspoon salt
- 1 teaspoon baking powder
For the Classic Cream Cheese Frosting Recipe
This frosting is the ultimate topper for the Best Red Velvet Cake. Make sure your cream cheese and butter are nice and soft!
- 8 ounces cream cheese, softened
- 1/2 cup (1 stick) unsalted butter, softened
- 3 cups powdered sugar, make sure you sift this!
- 1 teaspoon vanilla extract
How to Prepare the Best Red Velvet Cake From Scratch
Okay, let’s get baking! This is where the magic happens, and trust me, following the order exactly is key to getting that ultra-moist result we talked about. First thing first: get your oven humming at 350°F (175°C). Don’t put the pans in yet, but preheat it while you mix!
You want to prep your two 9-inch cake pans now—grease them well and dust them with a little flour. If you use the wrong size or skip this step, you risk sticking, and tearing up this beautiful red velvet cake when it comes out? Forget about it!
Mixing the Moist Red Velvet Cake Batter
We keep the wet and dry stuff separate until the very end, which is essential for that tender crumb. In one big bowl, whisk together your oil and sugar until they look happy, then beat in those eggs and the vanilla. In a separate small bowl, mix your buttermilk, vinegar, and all that vibrant red coloring until it looks like a fire truck!
Now, the dry stuff needs a good whisking too: flour, salt, baking powder, and that tiny bit of cocoa powder. Remember the rule: once you add those dry ingredients to the wet ones, you slow down. Mix only until you see almost no white streaks left. Seriously, stop! I mean it, don’t overmix, or you’ll ruin that soft texture we worked so hard for. Finally, gently fold in that bright red buttermilk mixture until everything is just combined into your rich batter.
Baking and Cooling the Velvety Layer Cake
Divide that glorious batter evenly between your prepared pans. Pop them into that hot oven for about 30 to 35 minutes. You’ll know they’re done when a wooden pick comes out clean. No wet batter clinging to it, just a few moist crumbs—that’s the sweet spot for this Old Fashioned Cake Recipe.
Let them chill out in the pans for about 10 minutes, just like my grandmother taught me. This lets the cake set up slightly before you attempt to flip them out onto a wire rack. They need to cool COMPLETELY. If you frost a warm layer, your beautiful frosting will just melt into a sticky, sweet puddle. Patience, friend!
Whipping Up the Superior Cream Cheese Frosting Recipe
While those cake layers are cooling down completely, let’s tackle the best part! Get your softened cream cheese and butter beating together until they are truly smooth—I mean no lumps whatsoever. If you have lumps here, your whole Cream Cheese Frosting Recipe is compromised!
Once those two are like silky pudding, start adding your sifted powdered sugar slowly, a cup at a time. Beat it well after each addition. Finish it off with vanilla, and beat it on medium-high until it’s light, fluffy, and looks utterly irresistible. This makes the perfect topping for your finished layers.
Red Velvet Tips and Tricks for a Perfect Red Cake for Celebrations
I want every single person who tries this red velvet cake recipe to have stunning results, especially when you’re making it for a big birthday or holiday. That’s why I put a few extra pointers right here to make sure you nail that perfect Southern style every single time. You really don’t need to stress about this cake; it’s actually super forgiving if you know these little insider secrets.
First, remember what I said about the color? That vibrant, almost shocking red hue we are aiming for? That comes down to using a high-quality gel coloring. Liquid coloring just won’t give you that luxurious depth needed for a truly Red Cake for Celebrations. Don’t be shy, but don’t drown the batter either—a little goes a very long way!
Next up, temperature control is everything for getting that fluffy texture. Your buttermilk and eggs MUST be at room temperature. If they are cold, they start messing with the oil and sugar emulsion we worked so hard to create in the beginning. Cold ingredients lead to a heavier cake, and we want soft and fluffy!
Also, if you’re in a pinch or just don’t have buttermilk, don’t panic! You can always make your own perfect substitute by adding a teaspoon of white vinegar or lemon juice into regular milk and letting it sit for about five minutes. It does the exact same job tenderizing the flour. Want to learn a bit more about the tradition behind mixing the cocoa and the red? I love this article explaining the history of the red velvet cake.
Ingredient Notes and Substitutions for Your Red Velvet Cake
Sometimes, you open the fridge to bake something amazing like this red velvet cake, and you realize you’re missing just one tiny thing! Don’t let that stop you from making this spectacular dessert. I’ve had to improvise many times in my city apartment kitchen, and I learned a few tricks to keep things rolling smoothly without sacrificing that signature richness.
The goal here is always maximum moisture and that stunning visual impact. We want that deep, gorgeous color without adding an entire bottle of dye, right? I always remind myself that just because we are swapping an ingredient doesn’t mean we need to compromise on the final texture of our Homemade Red Velvet Cake.
Buttermilk Alternatives and Color Intensity
If you run out of buttermilk—oops!—it’s totally fixable. Just take one cup of regular whole or 2% milk, add one tablespoon of white vinegar or fresh lemon juice to it, stir it once, and let it sit on the counter for about five minutes. It will curdle just enough to mimic buttermilk, and it works like a charm in this recipe! It gives you that necessary acid to interact with the baking soda, keeping the cake tender.
We already talked about color, but it bears repeating for this vital step. Since we only use a small amount of cocoa, the color has to carry the look. You absolutely need that high-quality gel coloring for that proper, rich look. Those concentrated gels bring you that fantastic Decadent Crimson Cake look without disrupting the batter consistency, which is so important for keeping this a Moist Red Velvet Cake Recipe.
Oh, and here’s one last little trick from the back of my notes! If you are looking to deepen that subtle chocolate flavor and enhance the moistness even more—and if you like a tiny hint of coffee depth—you can substitute about half of the buttermilk with strong, cooled brewed coffee. It sounds crazy, but it really makes the deep red pop and adds an extra layer of complexity that coffee always brings to chocolate flavors!
Serving Suggestions for Your Classic Red Velvet Cake
Now that you have this show-stopping red velvet cake ready, we need to make sure its presentation is just as amazing as the taste! Since this cake is rich and dramatic, it really shines best when kept simple but elegant. This isn’t the time to overwhelm it with too many competing flavors.
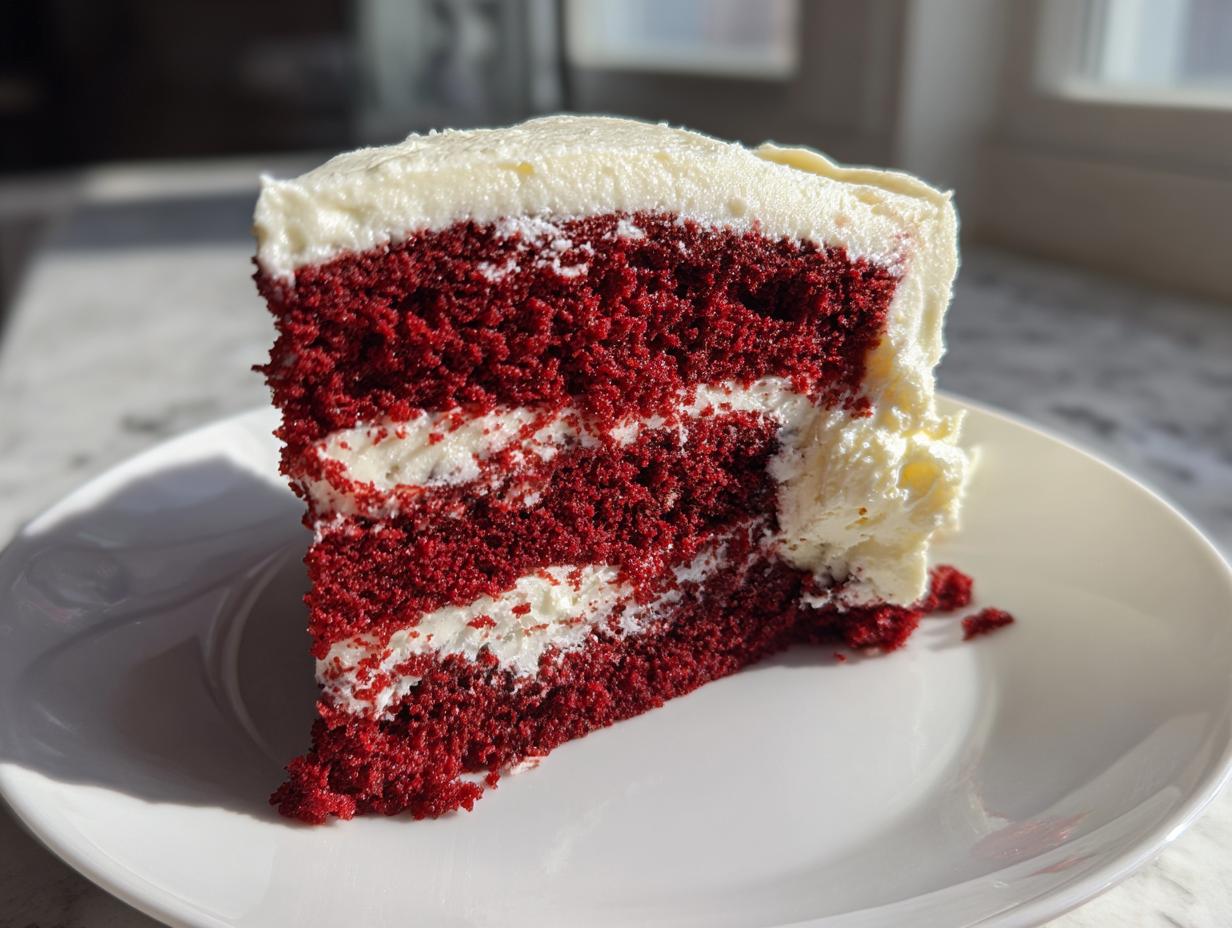
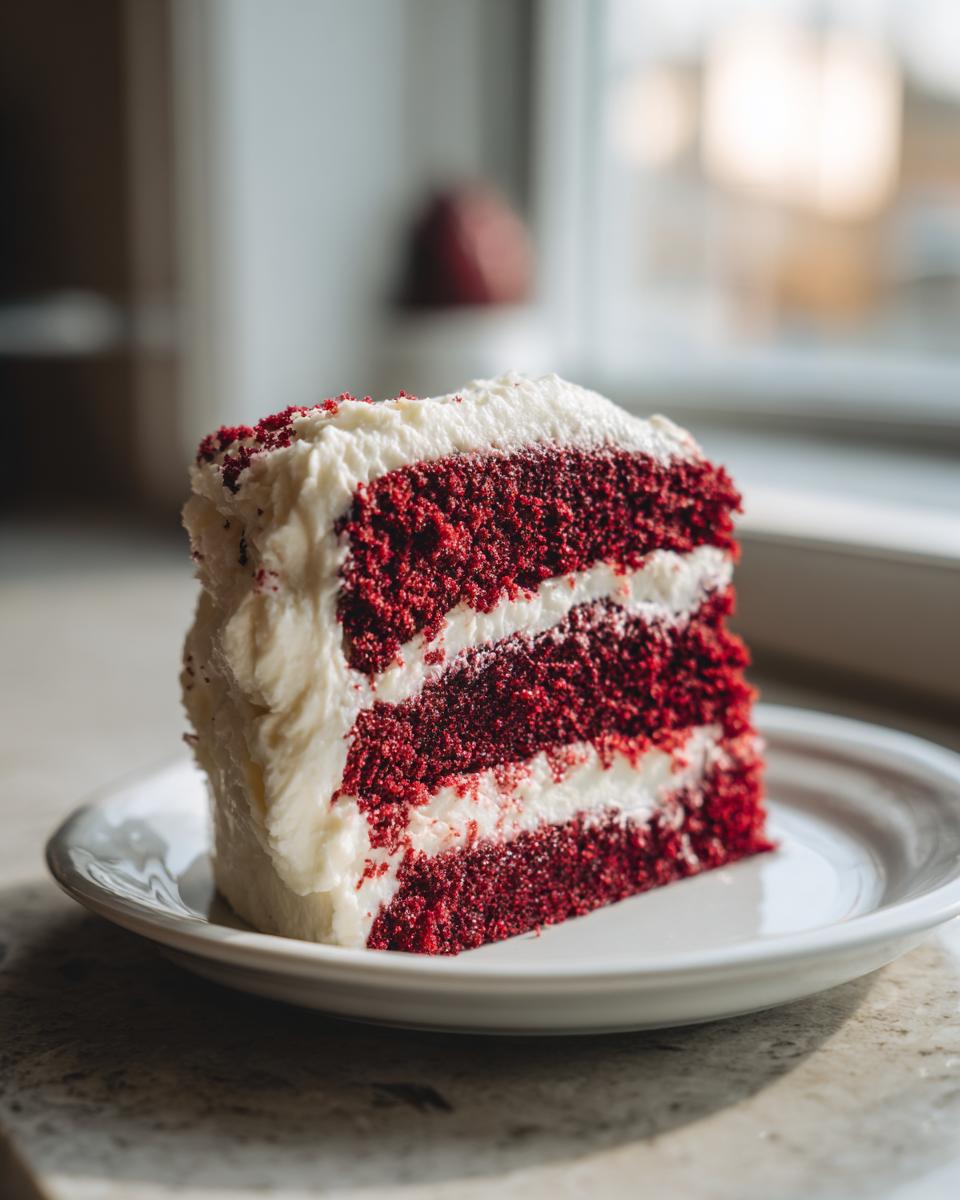
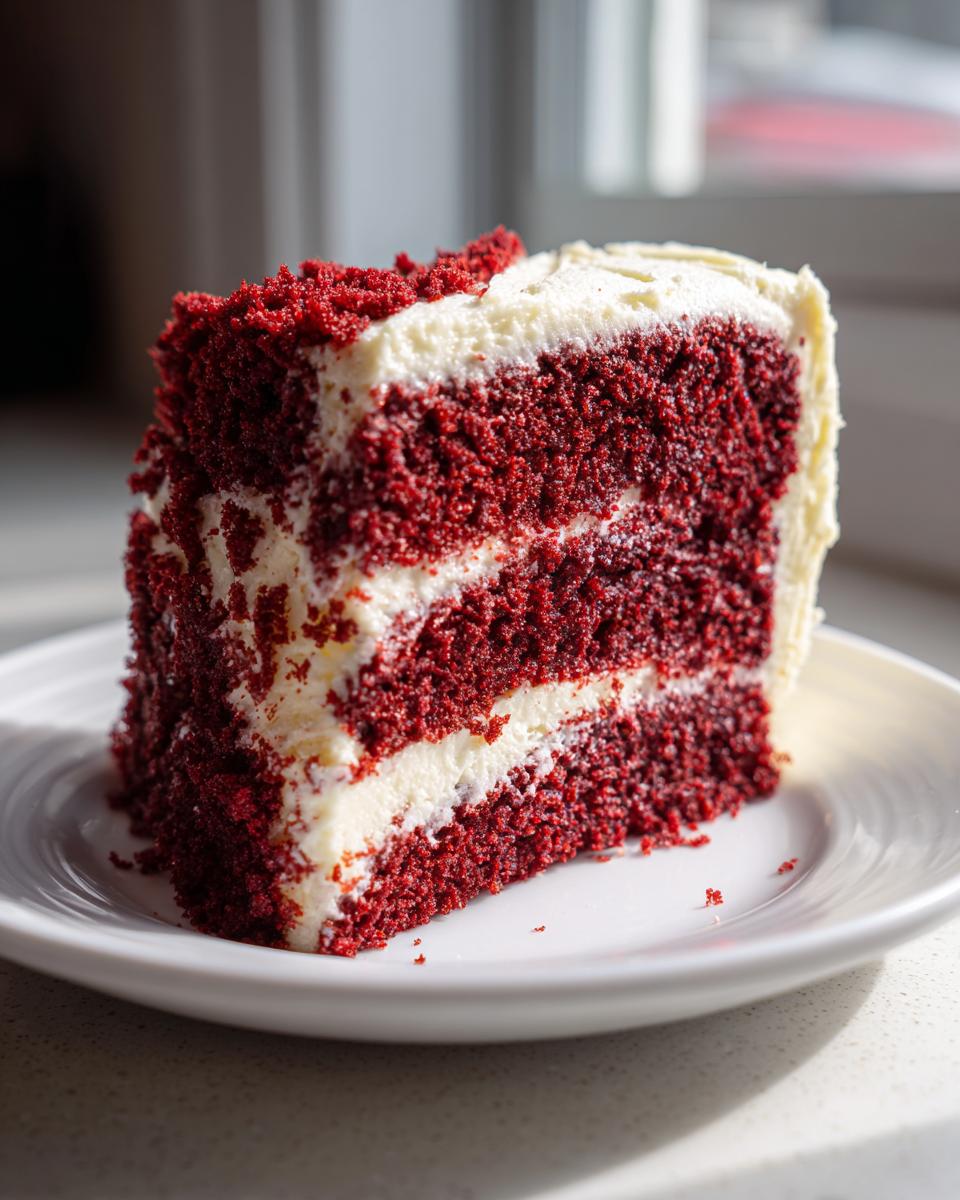
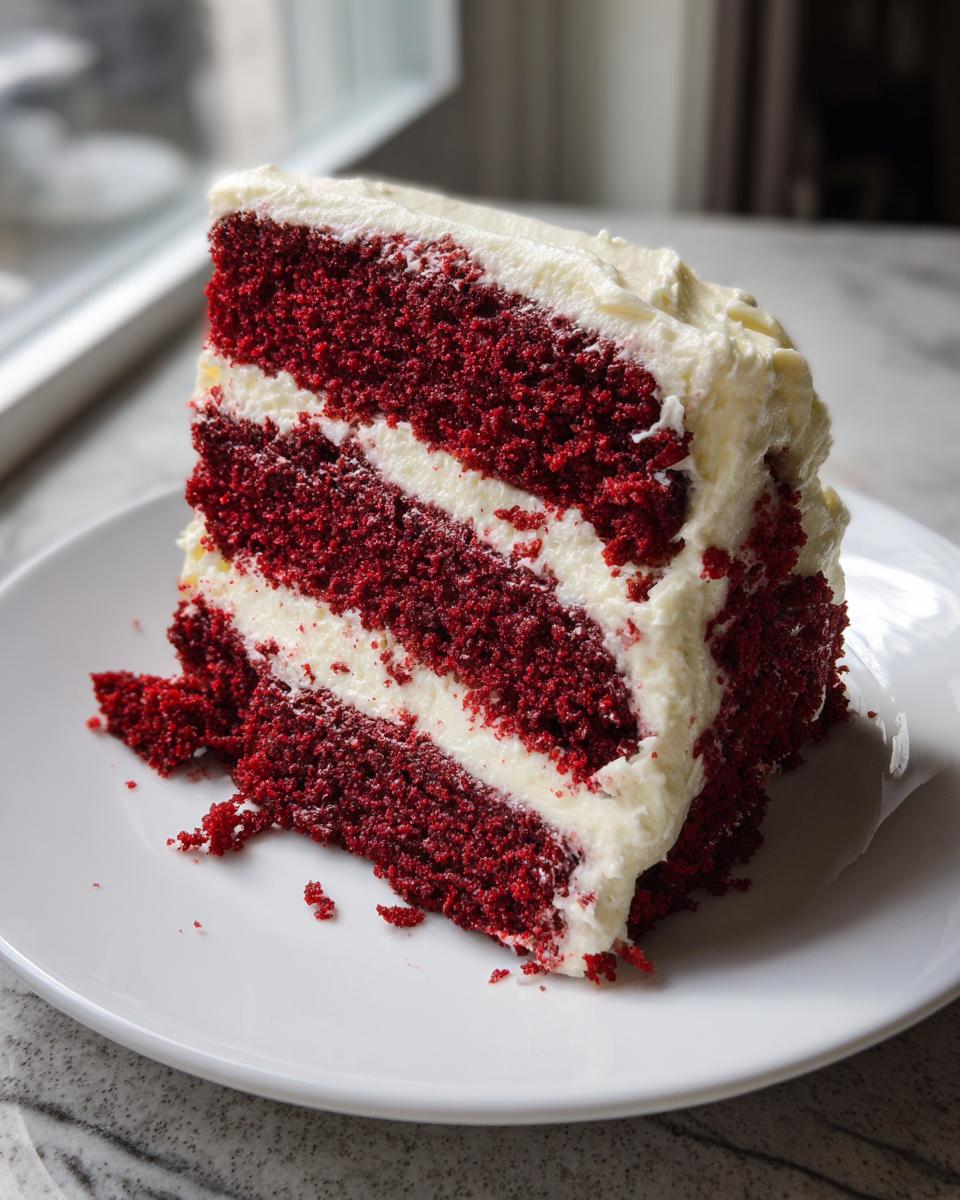
For birthdays, especially Valentine’s Day or anniversary celebrations, serving it as a stunning layer cake with that thick white frosting is perfection. Use a cake pedestal if you have one! That contrast between the deep crimson and the snowy white cream cheese frosting is classic beauty, making it look expensive even though we made it right here at home.
If you’re serving it as slices on plates, try topping each serving with just a few fresh raspberries or strawberries. The slight tartness of the berries cuts right through the richness of the cake and the frosting beautifully. You don’t need complicated sauces or anything! The cake stands on its own.
And don’t forget a simple dusting of cocoa powder or a few artful swirls of leftover frosting across the top plate if you aren’t stacking layers. It just gives it that final, professional touch. Honestly, once you slice into this Homemade Red Velvet Cake, everyone will forget about everything else anyway!
Storage and Reheating Instructions for Your Homemade Red Velvet Cake
Because that gorgeous Cream Cheese Frosting Recipe uses real cream cheese and butter, you absolutely must store any leftovers in the fridge. Cover the cake tightly with plastic wrap or put it in an airtight container. It keeps well for about three or four days, but I doubt it’ll last that long!
If it seems a little firm straight out of the cold, just let your slice sit on the counter for about 30 minutes before you dive in. That lets the cake soften right up again. It’s still wonderfully moist, but letting it warm up just a touch brings back that fresh-from-the-oven feel!
Frequently Asked Questions About This Red Velvet Cake Recipe
I get so many questions about this classic recipe, especially when folks are trying to achieve that deep color for their Party Cake Ideas. Here are the things I hear most often:
Why isn’t my Red Velvet Cake bright red?
If your cake looks pale or pinkish, nine times out of ten, it’s the food coloring! You absolutely need to use a high-quality gel coloring, not the thin liquid kind you find in the baking aisle. Gel coloring is concentrated, meaning you use less product but get a much deeper, more saturated color. It’s worth the small investment when you are going for that true Decadent Crimson Cake look!
Can I skip the vinegar in this Moist Red Velvet Cake Recipe?
Oh gosh, no! Don’t skip the vinegar or the baking soda! That vinegar reacts with the baking soda to create the fizz that lifts and tenderizes your batter. If you skip that acid, you end up with a dense, heavy cake instead of that beautiful Soft and Fluffy Cake we’re aiming for. It’s chemistry, folks!
Is this a true Southern Red Velvet Cake?
Yes, it certainly is rooted in Southern tradition! The use of buttermilk and oil is classic Southern technique for ensuring maximum moisture. While true historical versions had very little cocoa and relied on non-Dutched cocoa reacting with acid for color, today we incorporate a touch of cocoa for flavor and use coloring for the visual impact. It’s the very best of the Old Fashioned Cake Recipe updated for today’s baker.
If you have any other burning questions once you start baking, please don’t hesitate to reach out to me personally over on the contact page!
Share Your Thoughts on This Party Cake Ideas Recipe
Now that you have made the most beautiful, moist, and truly decadent red velvet cake, I really want to hear about it! This entire recipe is built on sharing simple, honest food that brings folks together, and hearing how it turned out for you means the world to me.
Did you get that perfect crimson color? Did your layers stay soft and velvety? Please drop a rating below! Stars are great, but I really cherish hearing the stories—what celebration did you use this amazing red velvet cake for? Was it a birthday surprise, or just a Tuesday that needed a little luxury?
Your feedback truly keeps the spirit of Grandma Daisy’s kitchen alive here. It helps me know that these simple, time-tested methods are still working beautifully in modern kitchens everywhere. If you have any thoughts on future party cake ideas or substitutions you tried, leave a comment!
Also, just a quick note: if you’re ever curious about how we handle all this wonderful online community stuff, you can always check out our commitment to your privacy policy right here. Happy baking, and please come back soon!
PrintThe Best Ultra-Moist Southern Red Velvet Cake with Classic Cream Cheese Frosting
Make a classic Southern Red Velvet Cake that is deeply colored, soft, and extremely moist. This recipe includes instructions for a superior, homemade cream cheese frosting, making it perfect for celebrations.
- Prep Time: 25 min
- Cook Time: 35 min
- Total Time: 60 min
- Yield: 12 servings 1x
- Category: Dessert
- Method: Baking
- Cuisine: American
- Diet: Vegetarian
Ingredients
- 1 1/2 cups vegetable oil
- 1 1/2 cups granulated sugar
- 2 large eggs
- 1 teaspoon vanilla extract
- 1 cup buttermilk, room temperature
- 1 tablespoon white vinegar
- 1 teaspoon baking soda
- 2 tablespoons red food coloring (high-quality liquid or gel)
- 1 teaspoon unsweetened cocoa powder
- 2 1/2 cups all-purpose flour
- 1 teaspoon salt
- 1 teaspoon baking powder
- 8 ounces cream cheese, softened
- 1/2 cup (1 stick) unsalted butter, softened
- 3 cups powdered sugar, sifted
- 1 teaspoon vanilla extract
Instructions
- Preheat your oven to 350°F (175°C). Grease and flour two 9-inch round cake pans.
- In a large bowl, whisk together the vegetable oil and granulated sugar until combined. Beat in the eggs one at a time, then stir in the vanilla extract.
- In a separate small bowl, combine the buttermilk, white vinegar, and red food coloring. Mix well.
- In another small bowl, whisk together the baking soda and cocoa powder. Add this mixture to the wet ingredients and mix until just combined.
- In a medium bowl, whisk together the flour, salt, and baking powder. Gradually add the dry ingredients to the wet ingredients, mixing on low speed until just incorporated. Do not overmix.
- Gently fold in the buttermilk mixture until the batter is smooth and uniformly red.
- Divide the batter evenly between the prepared cake pans. Bake for 30 to 35 minutes, or until a wooden pick inserted into the center comes out clean.
- Let the cakes cool in the pans for 10 minutes before inverting them onto a wire rack to cool completely.
- Prepare the frosting: In a large bowl, beat the softened cream cheese and butter together until smooth and creamy.
- Gradually add the sifted powdered sugar, beating until fully incorporated. Stir in the vanilla extract until the frosting is light and fluffy.
- Once the cakes are completely cool, frost and stack the layers.
Notes
- For the deepest crimson color, use a high-quality gel food coloring.
- Buttermilk and eggs should be at room temperature to help the cake texture stay soft.
- Do not overmix the batter after adding the flour; this keeps the cake velvety and soft.
- For a slight tang that balances the sweetness, use a small amount of strong brewed coffee instead of some of the buttermilk, if desired.
Nutrition
- Serving Size: 1 slice
- Calories: 450
- Sugar: 55g
- Sodium: 350mg
- Fat: 24g
- Saturated Fat: 10g
- Unsaturated Fat: 14g
- Trans Fat: 0g
- Carbohydrates: 60g
- Fiber: 1g
- Protein: 5g
- Cholesterol: 55mg